Overview (7 min)
Completion requirements
01 Getting Started
This tutorial provides a brief overview of generating your documents from Titan Web.
02 Auto PDF
This feature lets users download a PDF copy of the information on the screen. To enable this feature:
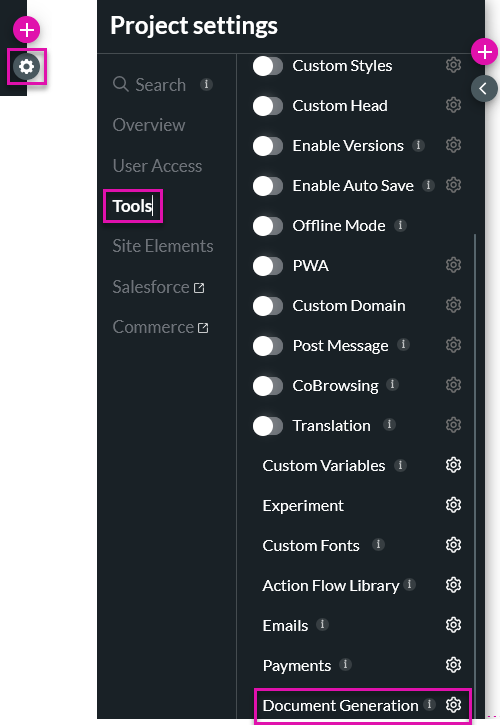
1. Select the Project Settings gear icon.
2. Click the Tools tab and select Document Generation.
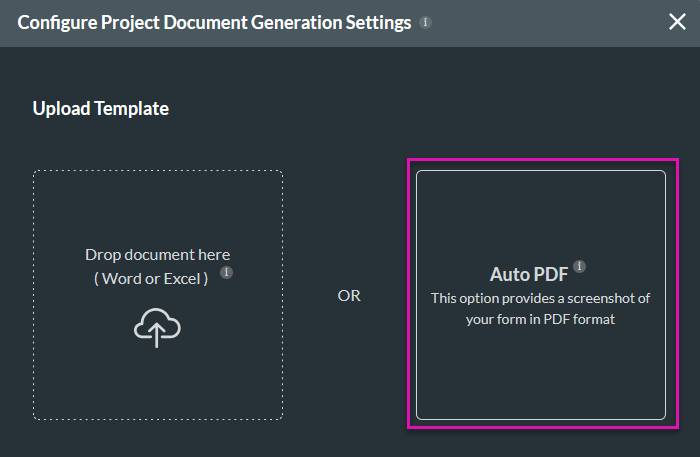
3. Select Auto PDF.
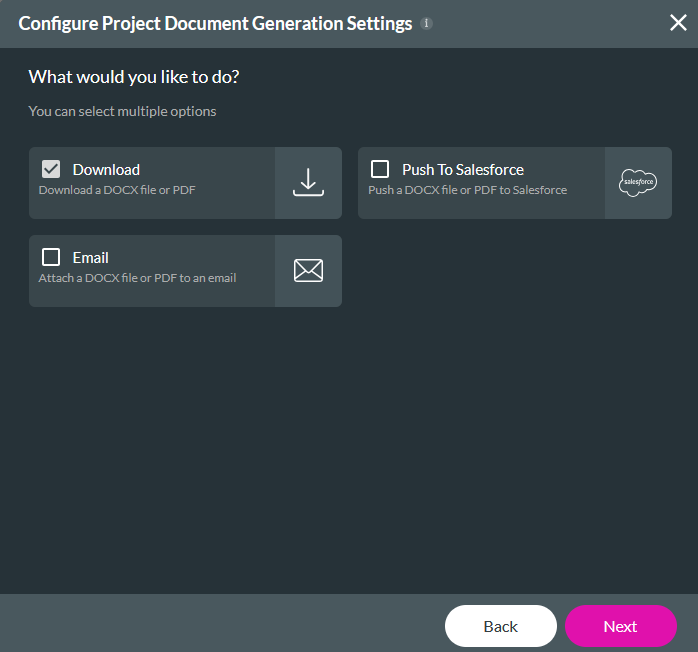
4. Select Download and click Next.
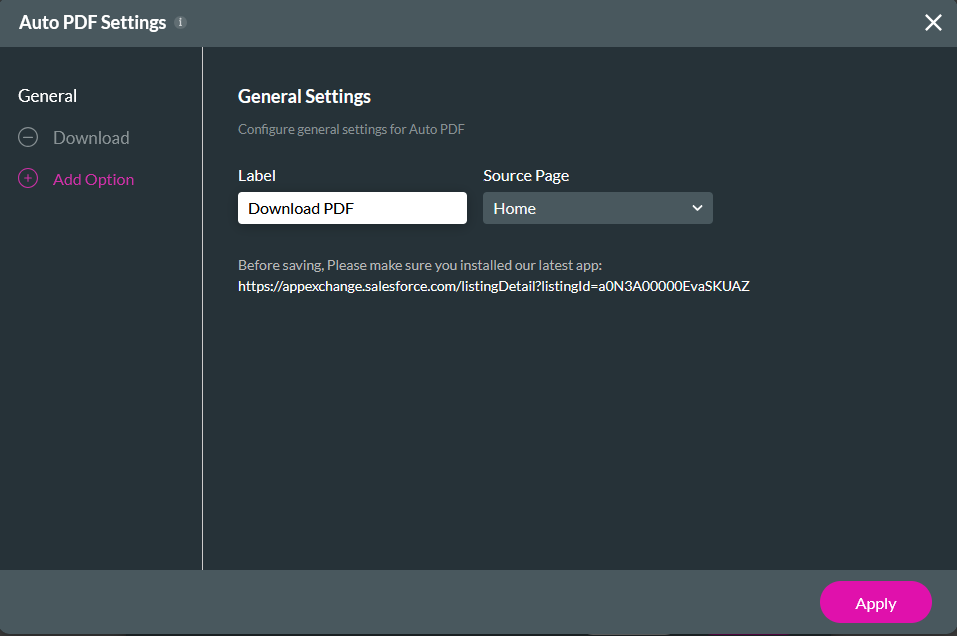
5. Add a Label to your PDF. Labeling your document is essential to differentiate it from other documents, and if you need to reference it later.
6. Use the Source Page dropdown to select the corresponding Titan Web Page from which the document will be generated. You can have only one auto PDF per project page. Click Apply.
1. Select the Project Settings gear icon.
2. Click the Tools tab and select Document Generation.

3. Select Auto PDF.

4. Select Download and click Next.

5. Add a Label to your PDF. Labeling your document is essential to differentiate it from other documents, and if you need to reference it later.
6. Use the Source Page dropdown to select the corresponding Titan Web Page from which the document will be generated. You can have only one auto PDF per project page. Click Apply.

03 Invoking the Action
1. Select the button and click the Interactivity icon from the menu. The On Click Action window opens.

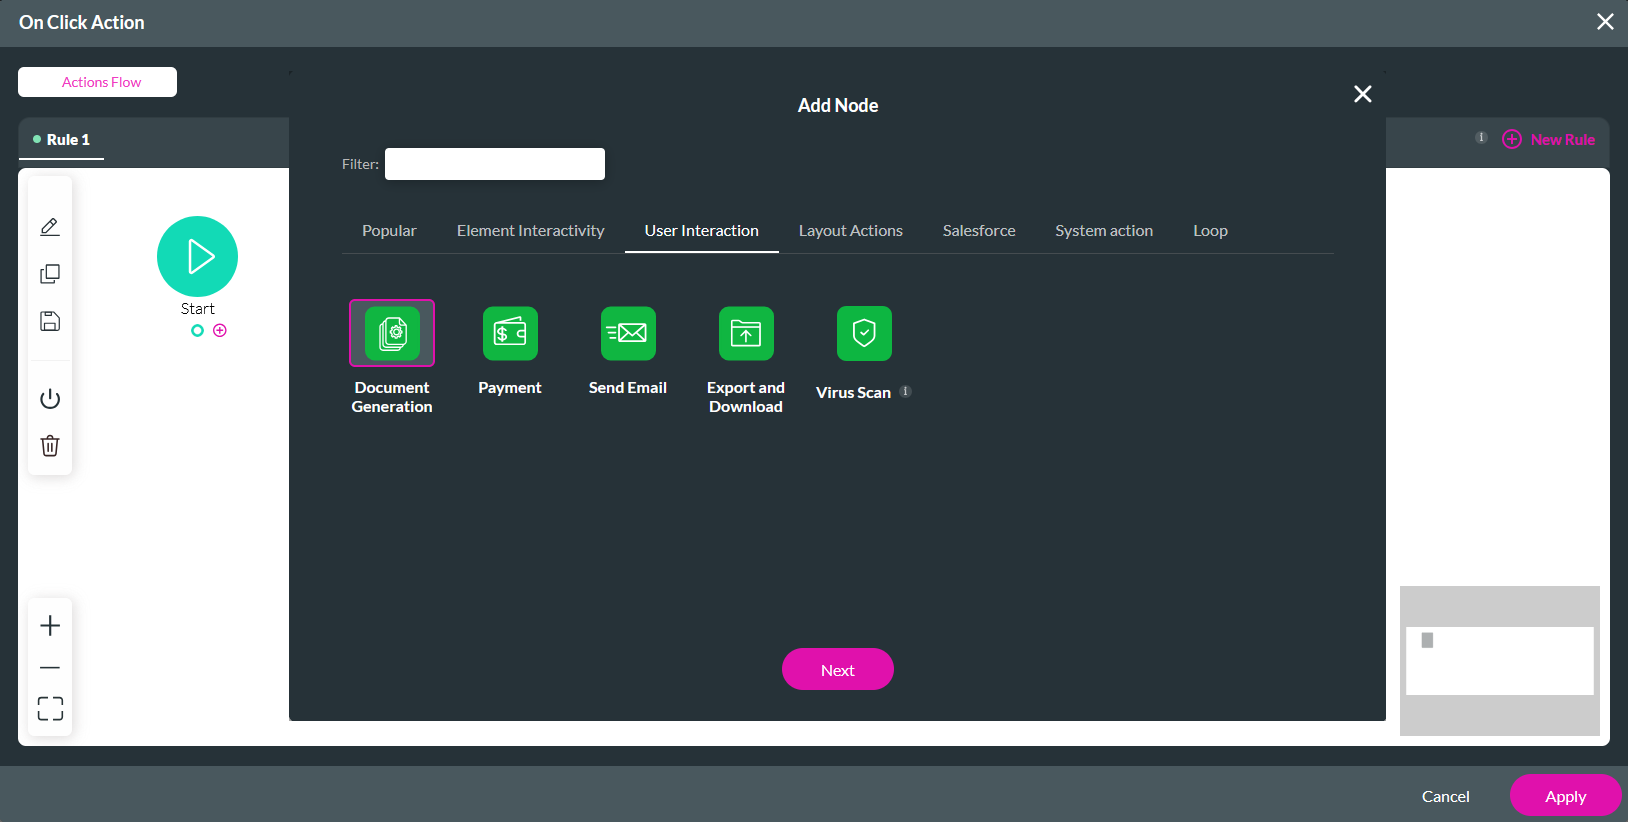
2. Click the Start + icon, select Document Generation as the node, and click Next.
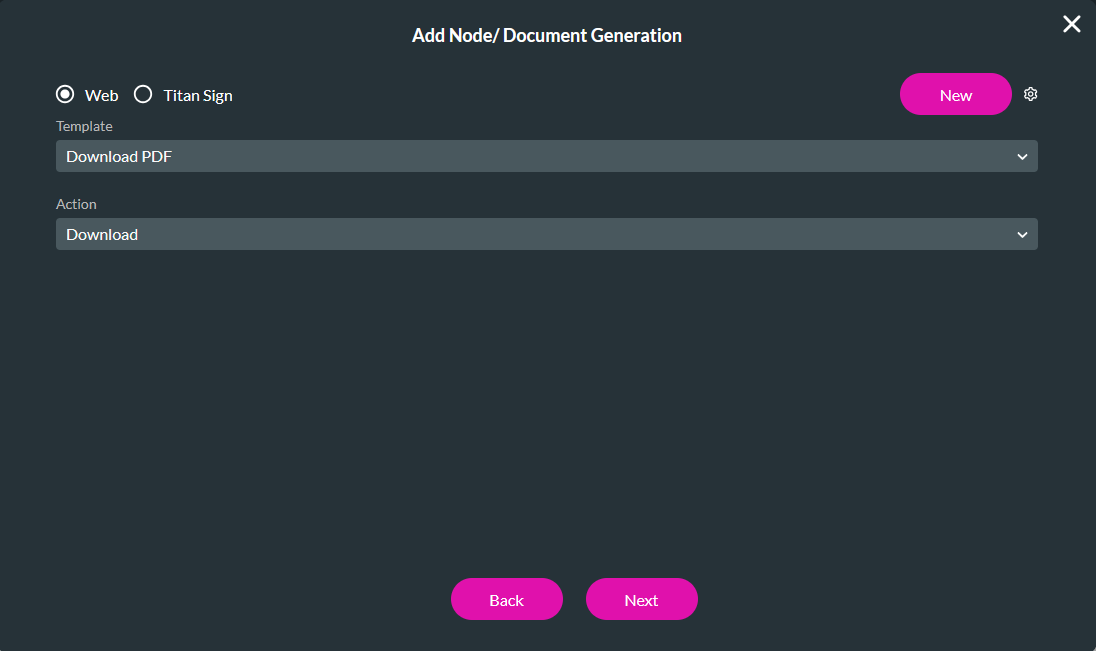
3. Select the Template you created and choose Download as the Action. Click Next.
4. Add a Tag name and click Insert.
When the user clicks the button, a PDF copy of the home page downloads. You can configure additional nodes to run after the document has downloaded, such as a message.
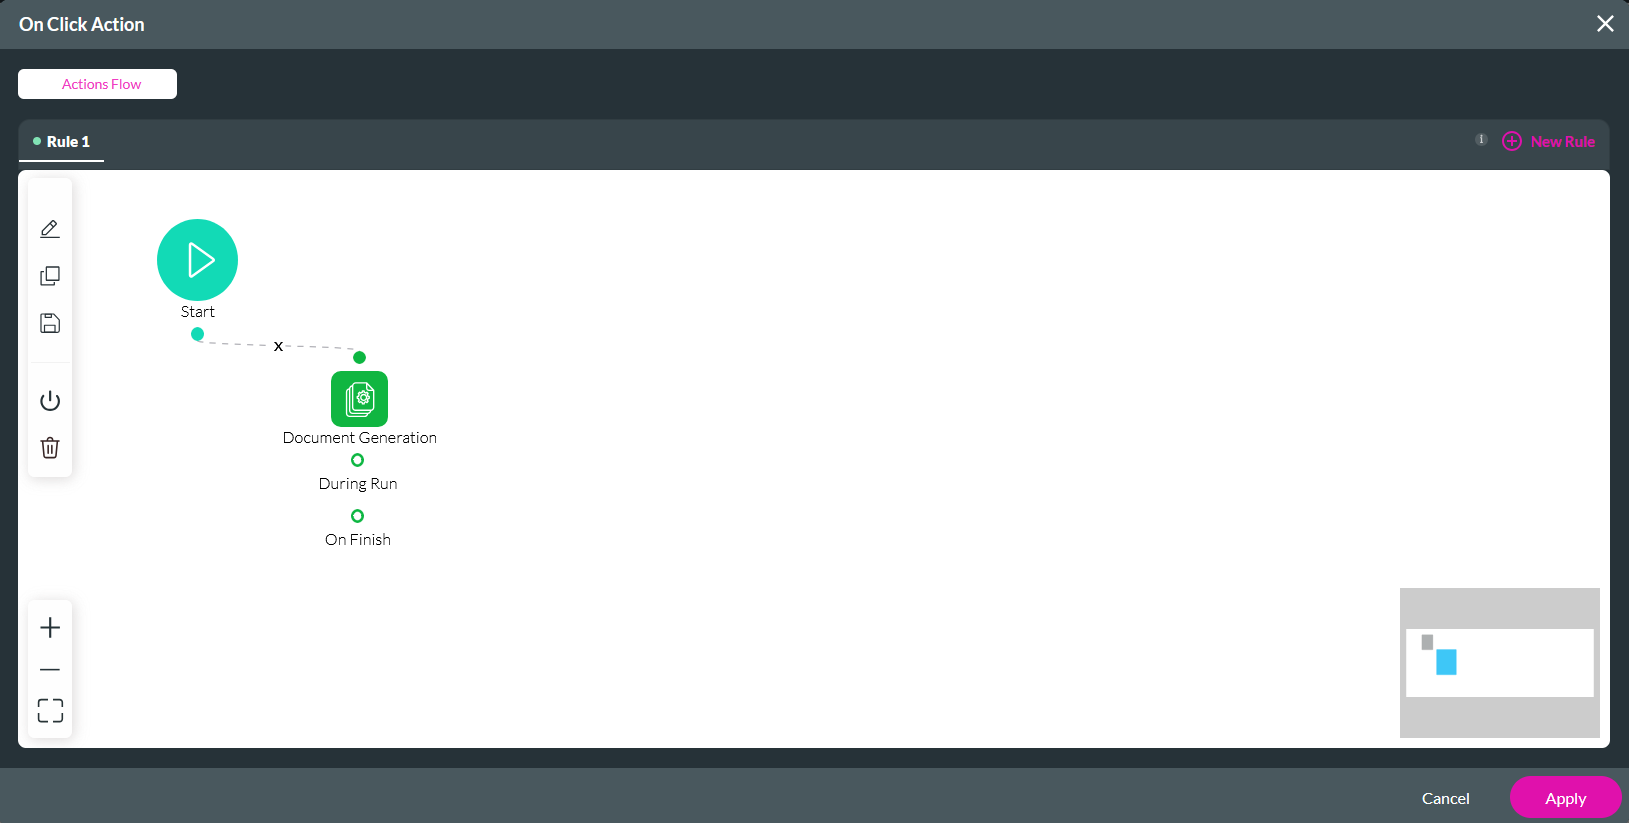

2. Click the Start + icon, select Document Generation as the node, and click Next.

3. Select the Template you created and choose Download as the Action. Click Next.

4. Add a Tag name and click Insert.
When the user clicks the button, a PDF copy of the home page downloads. You can configure additional nodes to run after the document has downloaded, such as a message.

04 Dynamic Documents
Any Word or Excel document that contains a dynamic field. Dynamic fields are form fields that change based on user input. Instead of displaying all possible fields simultaneously, they appear, disappear, or update depending on the User's selection. They can also pull data from your Salesforce CRM database based on user input.
1. Select the Project Settings gear icon.
2. Click the Tools tab and select Document Generation.

3. Drag your document into the upload space.
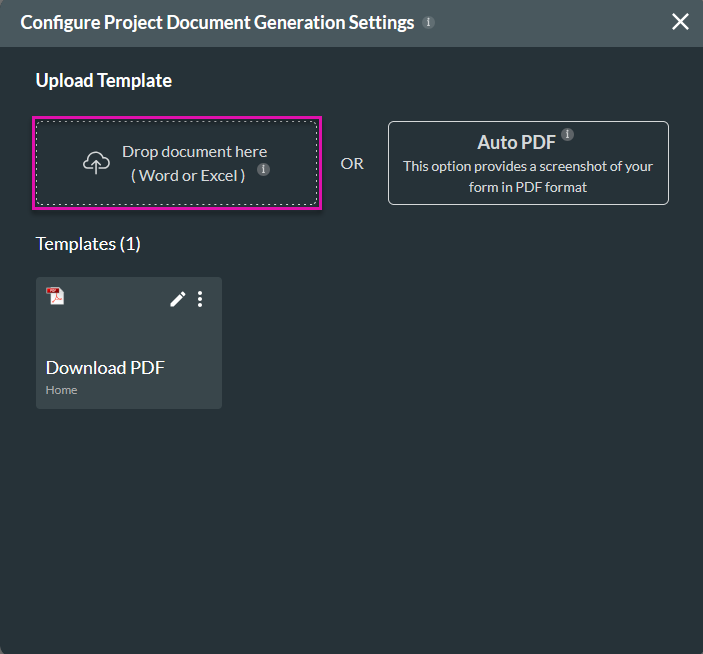
4. Select the Actions you want the User to perform on your document and click Next.
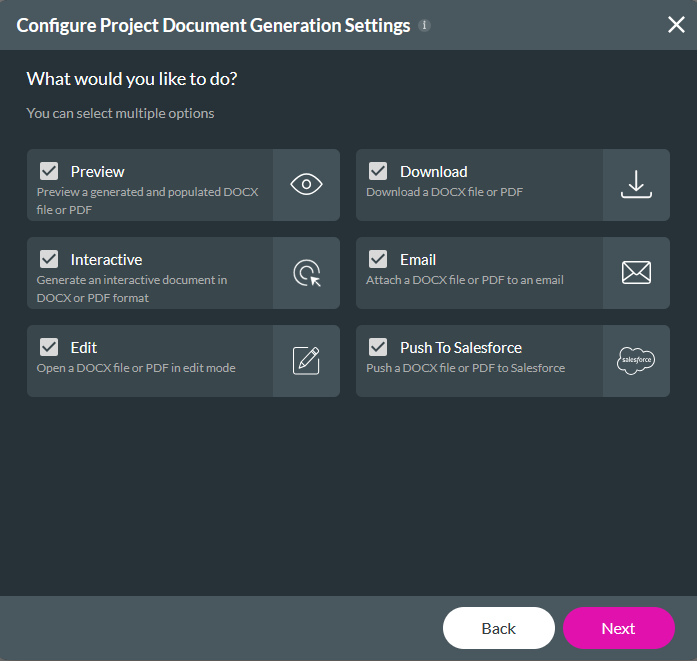
These documents allow different variations of templates. They are appropriate for use when a simple page screenshot is not enough.
Once you have completed the setup for the required actions, you must assign each action to a button so the User can trigger the flow.
1. Select the Project Settings gear icon.
2. Click the Tools tab and select Document Generation.

3. Drag your document into the upload space.

4. Select the Actions you want the User to perform on your document and click Next.

These documents allow different variations of templates. They are appropriate for use when a simple page screenshot is not enough.
Once you have completed the setup for the required actions, you must assign each action to a button so the User can trigger the flow.