Auto PDF (12 min)
Completion requirements
01 Getting Started
This tutorial covers how to configure Auto PDF for your Titan Web projects. This means you can save and download webpages as PDFs, upload them to Salesforce, or send them as email attachments.
02 Document Generation
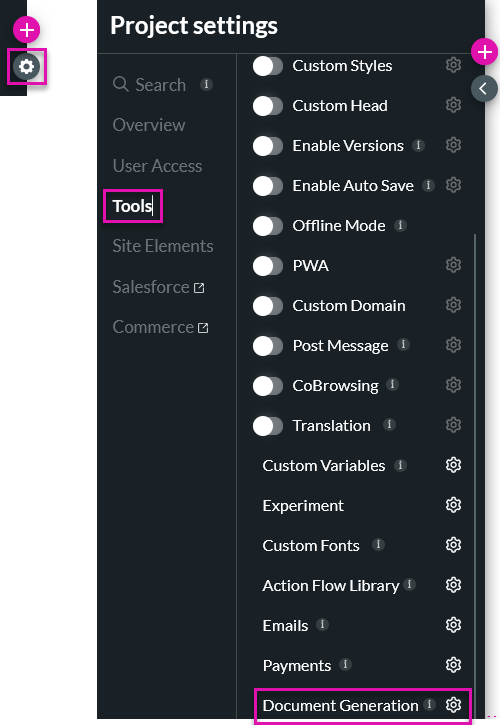
1. Select the Project Settings gear icon.
2. Click the Tools tab and select Document Generation.
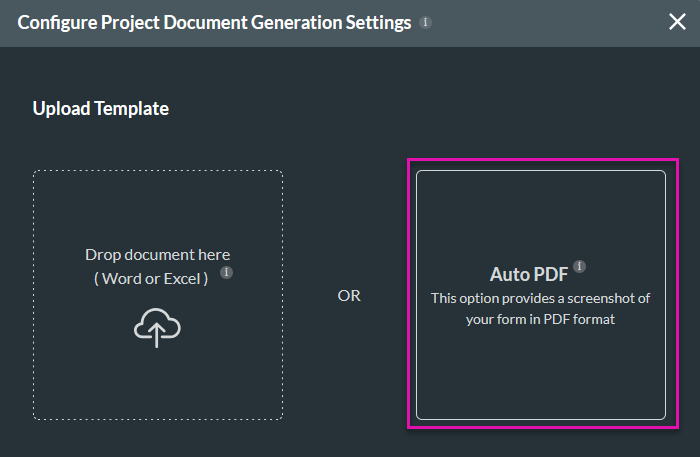
3. Select Auto PDF.
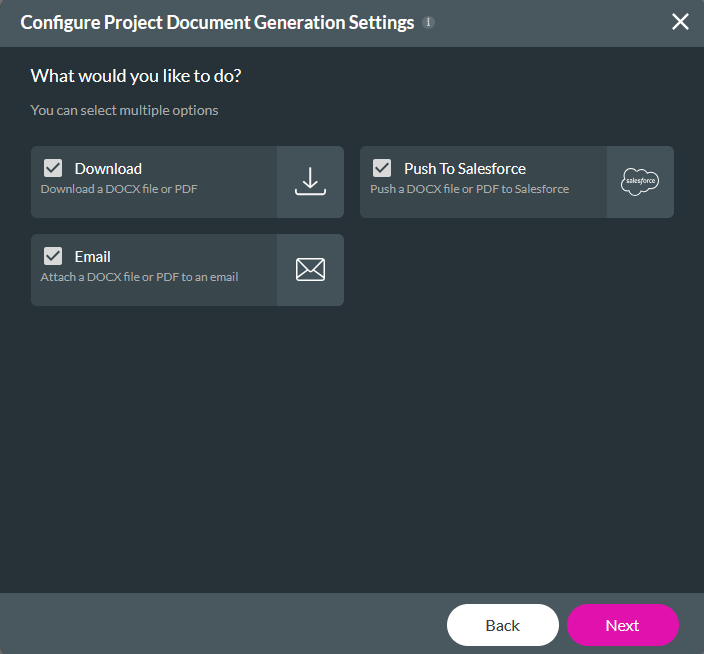
4. Enable the options for the processes you need to run and click Next. For this tutorial, we will be demonstrating all the possibilities.
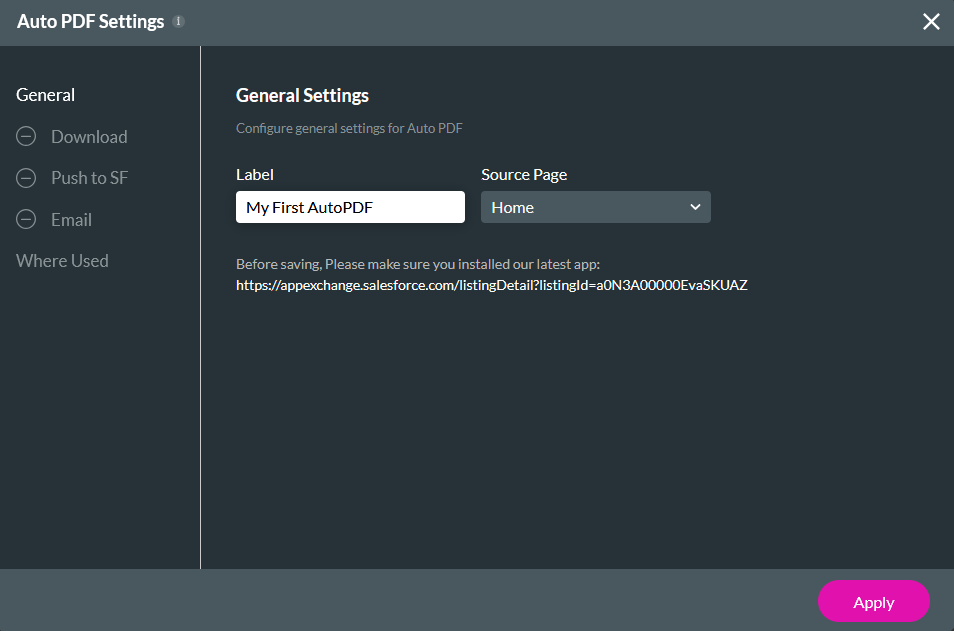
5. Add a Label to your PDF. Labeling your document is essential to differentiate it from other documents, and if you need to reference it later.
6. Use the Source Page dropdown to select the corresponding Titan Web Page from which the document will be generated. You can have only one auto PDF per project page.
7. Select the Download option.
2. Click the Tools tab and select Document Generation.

3. Select Auto PDF.

4. Enable the options for the processes you need to run and click Next. For this tutorial, we will be demonstrating all the possibilities.

5. Add a Label to your PDF. Labeling your document is essential to differentiate it from other documents, and if you need to reference it later.
6. Use the Source Page dropdown to select the corresponding Titan Web Page from which the document will be generated. You can have only one auto PDF per project page.

7. Select the Download option.
03 Download
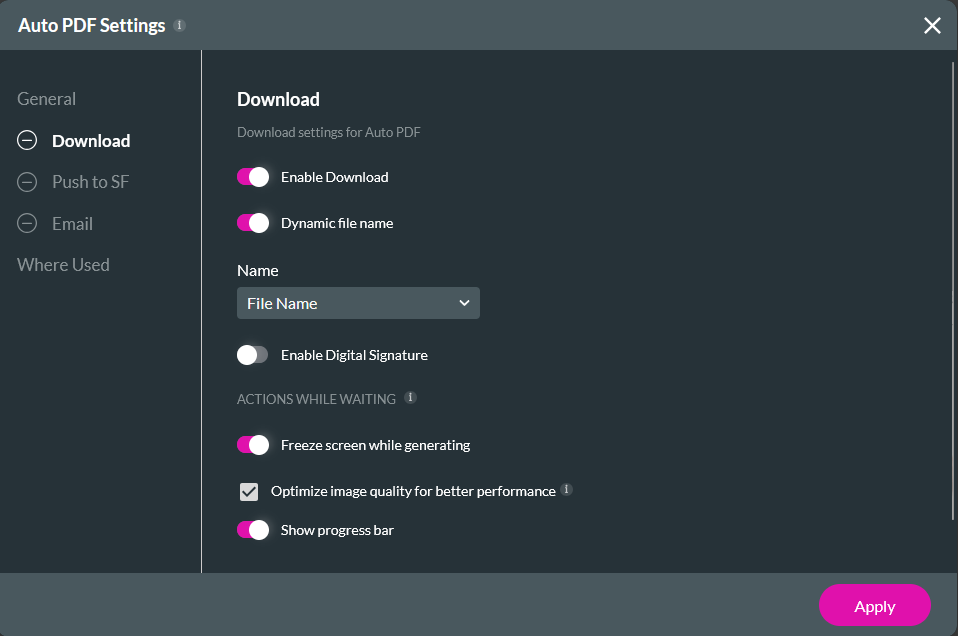
1. Ensure that the Enable Download toggle switch is on.
2. You can add a static file name or enable the Dynamic File Name toggle switch to configure a dynamic file name.
3. Turn the Enable Digital Signature toggle switch if your PDF requires signatures.
4. Under Actions While Waiting, you can choose how your project displays while downloading the document.

04 Push to Salesforce
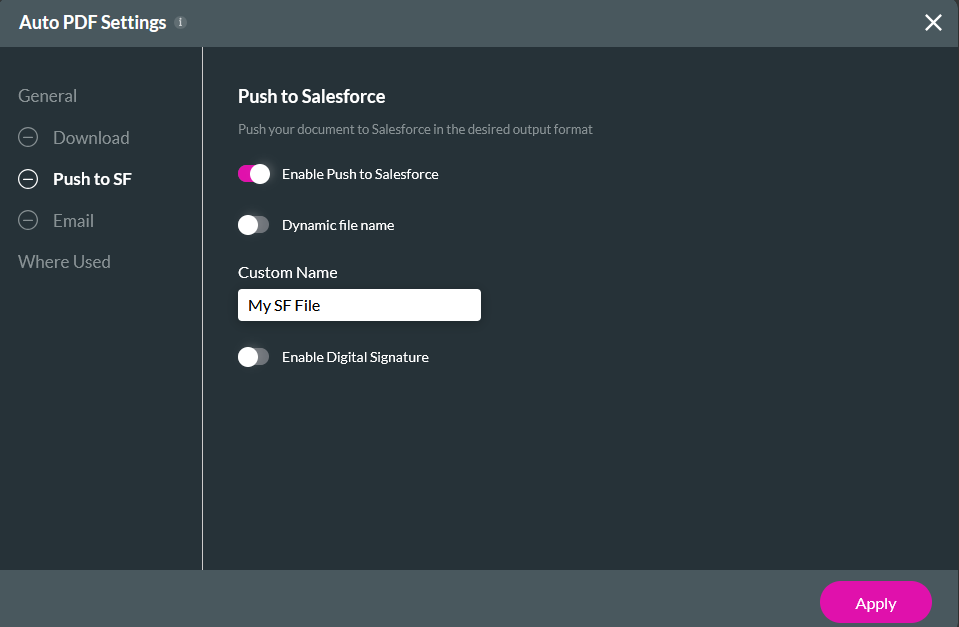
1. Ensure the Enable Push to Salesforce toggle switch is on.
2. Configure a Custom Name. You can choose between a static or dynamic file name.
3. Turn the Enable Digital Signature toggle switch if your PDF requires signatures.
2. Configure a Custom Name. You can choose between a static or dynamic file name.
3. Turn the Enable Digital Signature toggle switch if your PDF requires signatures.

05 Email
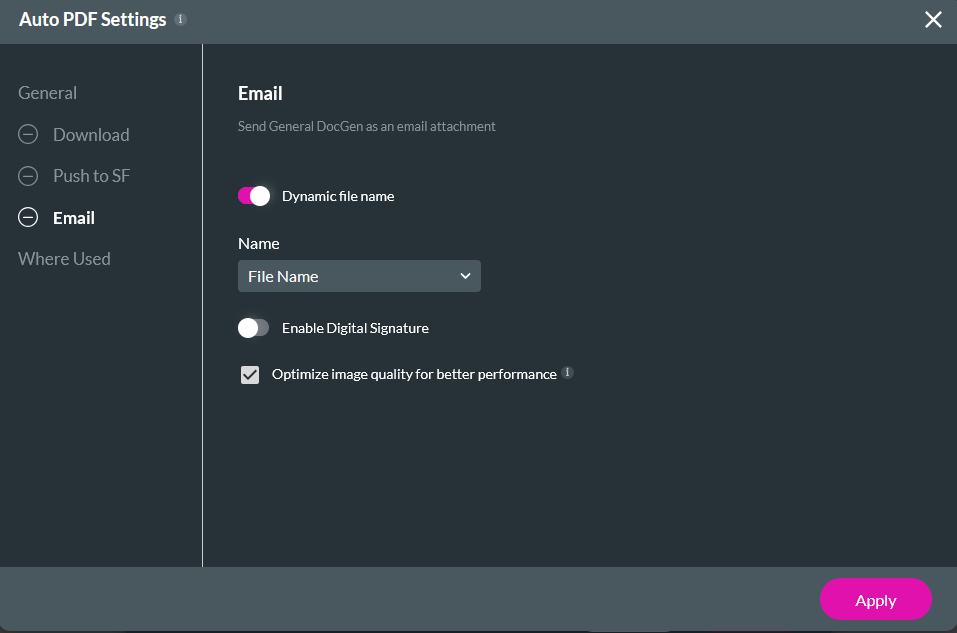
1. Configure a Custom Name. You can choose between a static or dynamic file name.
2. Turn the Enable Digital Signature toggle switch if your PDF requires signatures.
3. Enable the optimized image quality if required. Click Apply.
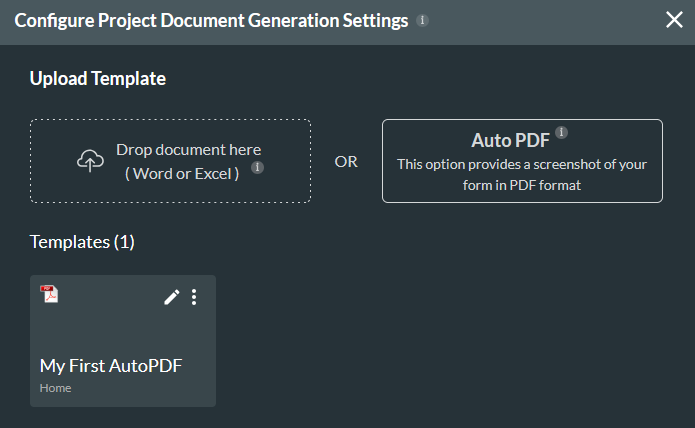
Your template now displays in the document generation settings window.
2. Turn the Enable Digital Signature toggle switch if your PDF requires signatures.
3. Enable the optimized image quality if required. Click Apply.

Your template now displays in the document generation settings window.

06 Download Button Trigger
1. Select the button and click the Interactivity icon from the menu. The On Click Action window opens.

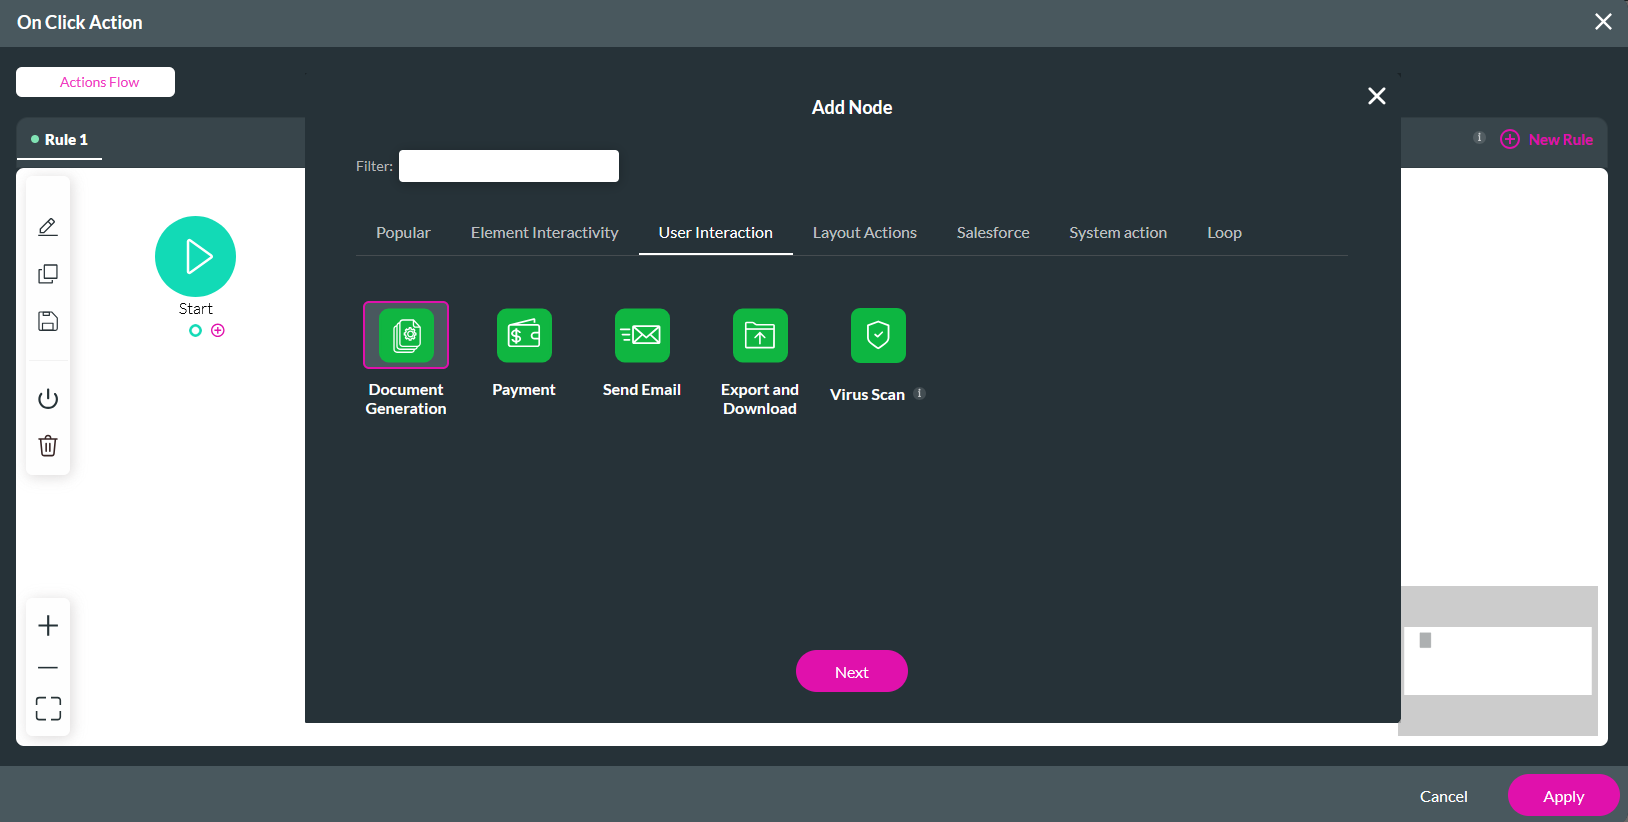
2. Click the Start + icon, select Document Generation as the node, and click Next.
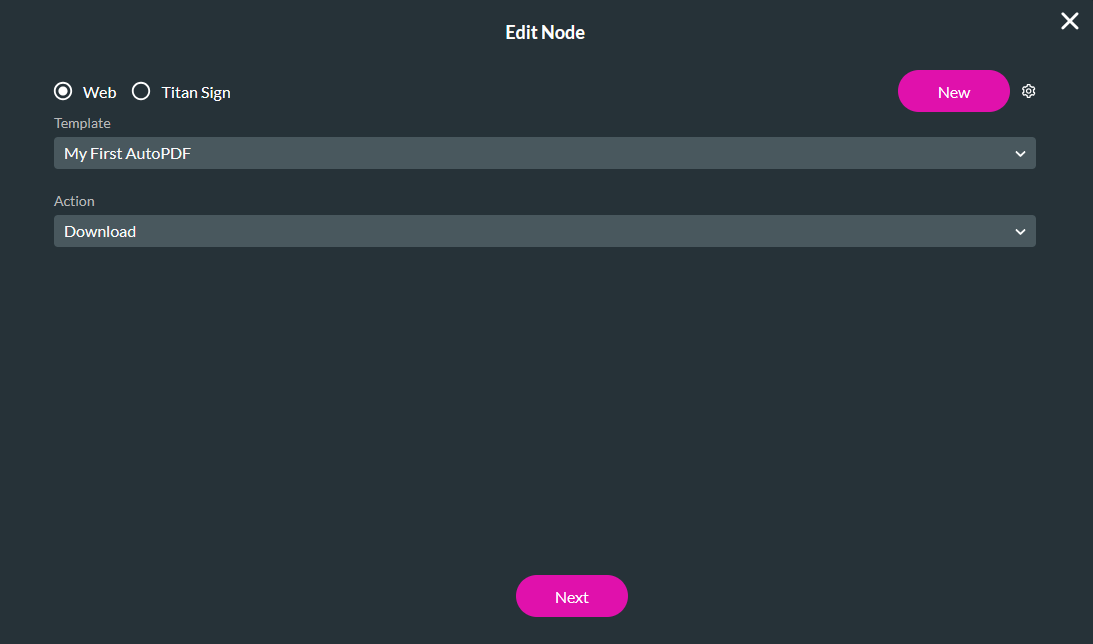
3. Select the AutoPDF as the template and the action as Download. Click Next.
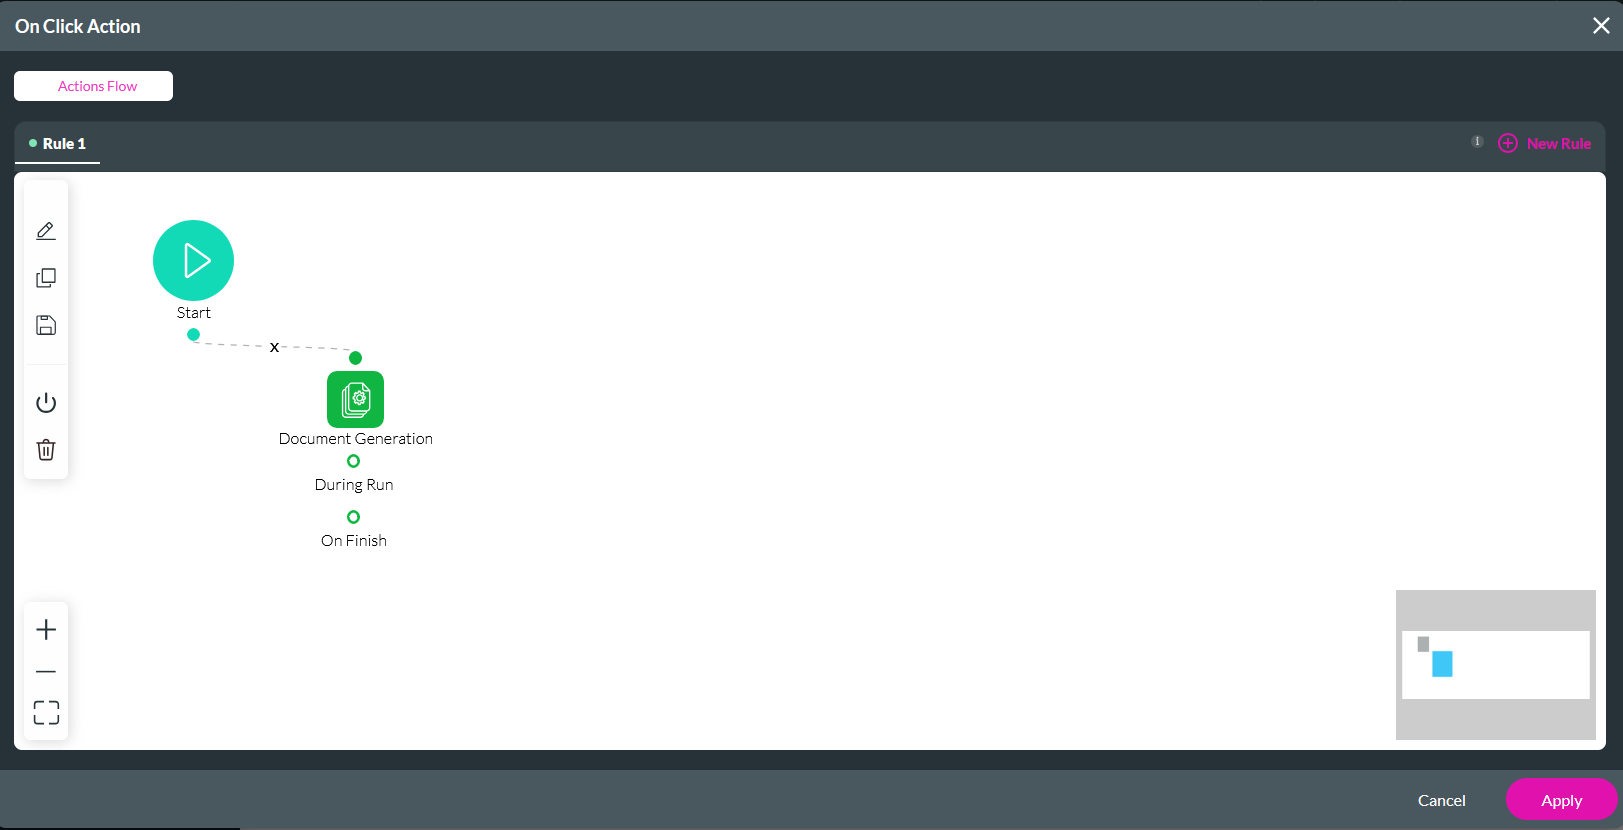
4. Enter a tag name and click Insert.
When clicking the button, the user will download a PDF of the project page.

2. Click the Start + icon, select Document Generation as the node, and click Next.

3. Select the AutoPDF as the template and the action as Download. Click Next.

4. Enter a tag name and click Insert.
When clicking the button, the user will download a PDF of the project page.

07 Salesforce Action Trigger
1. Select the button and click the Interactivity icon from the menu. The On Click Action window opens.

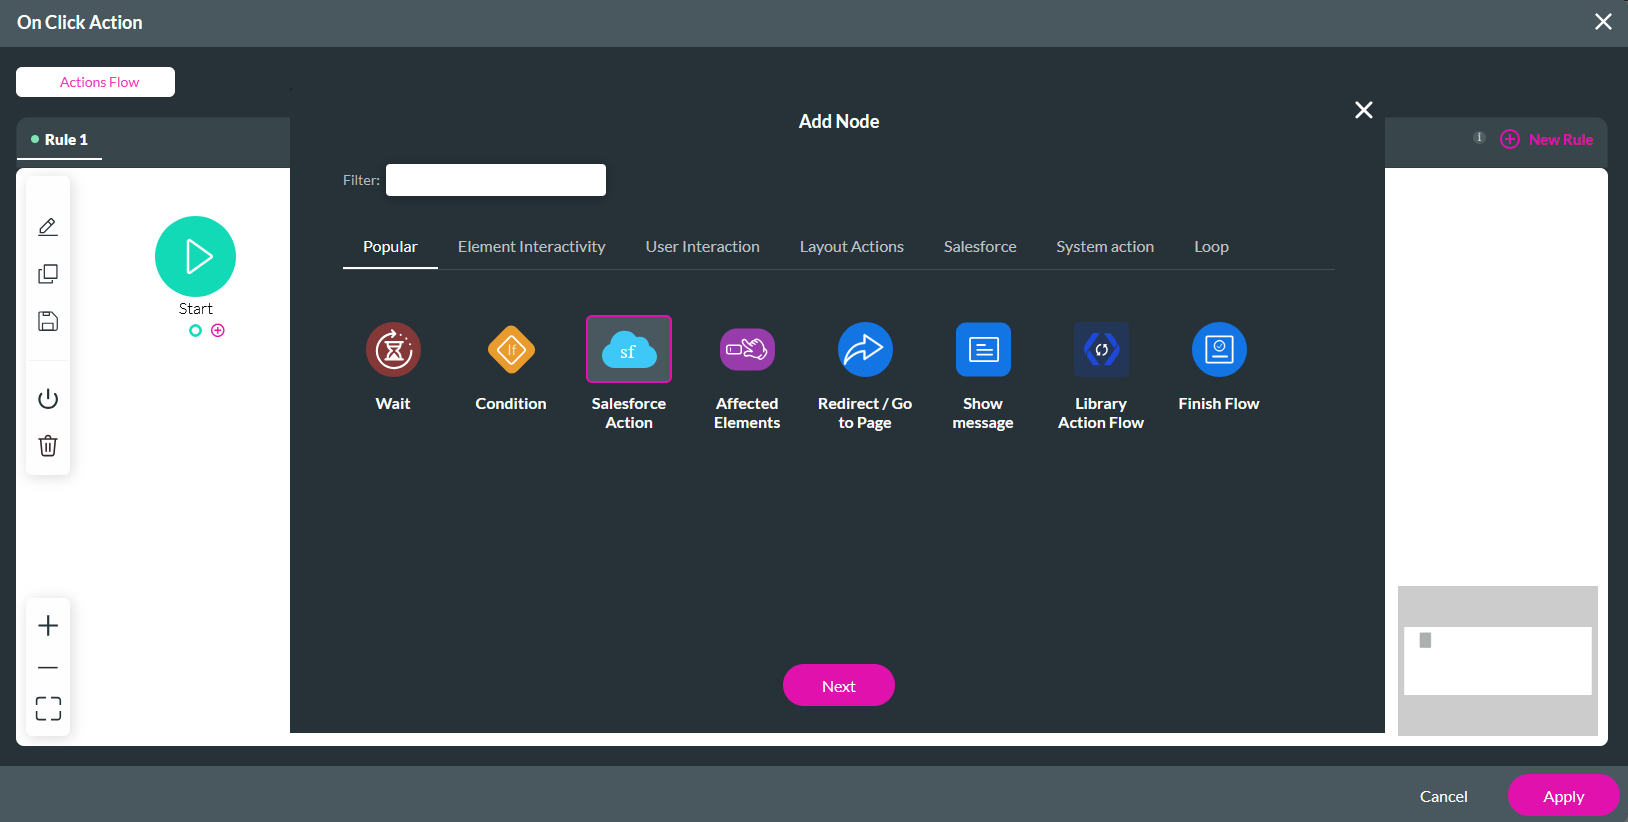
2. Click the Start + icon, select Salesforce Action as the node, and click Next.
3. Click the Salesforce Integration button.
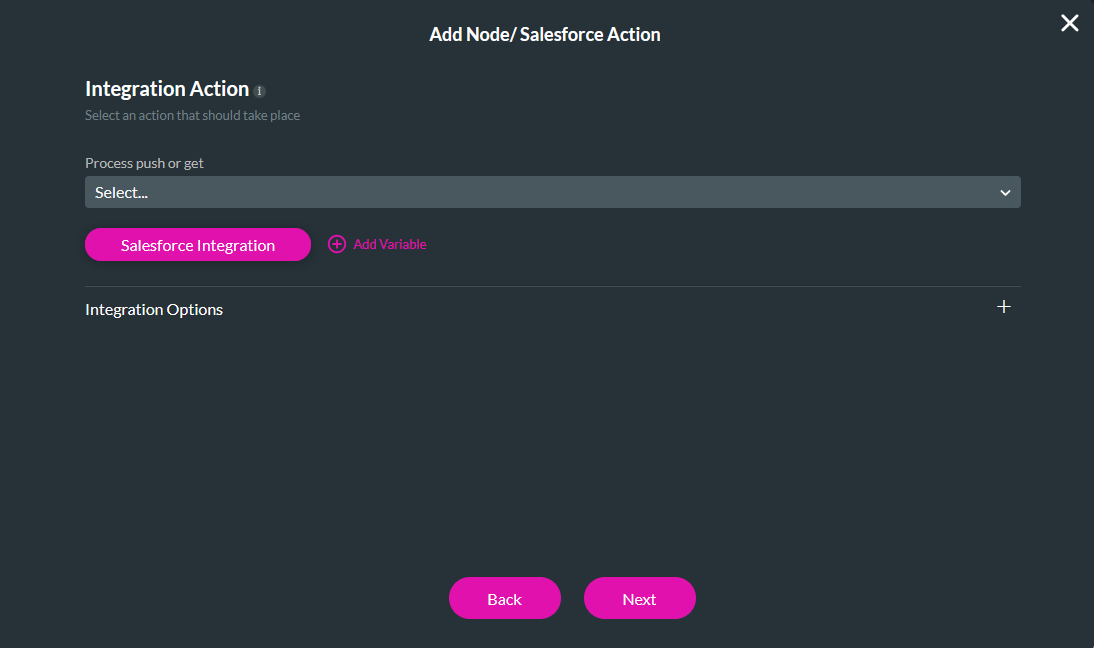
4. Select the Push tab and click Create New.
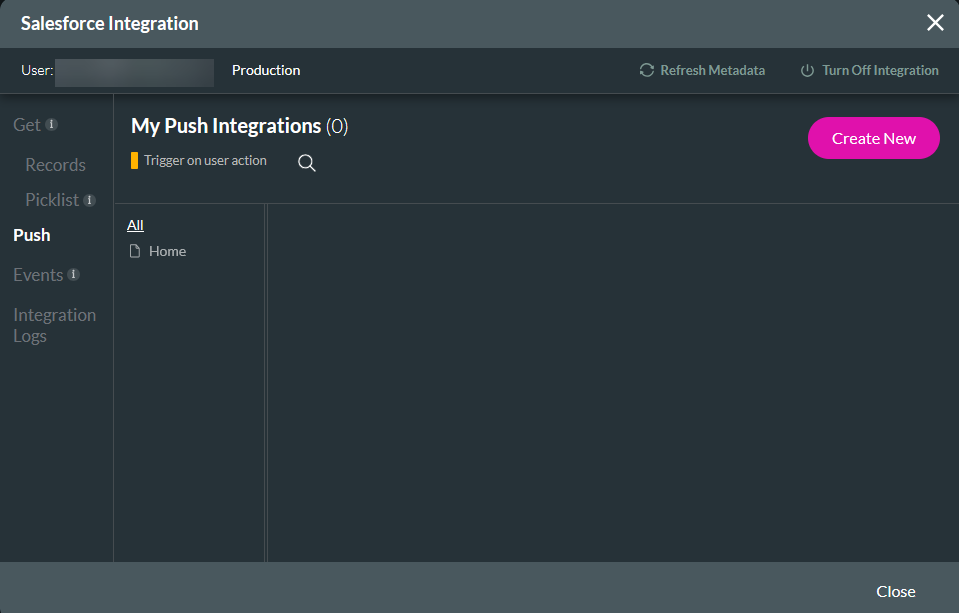
5. In the Object Settings tab, choose Content Version as the Object in Salesforce, Create as the Action, and add a description.
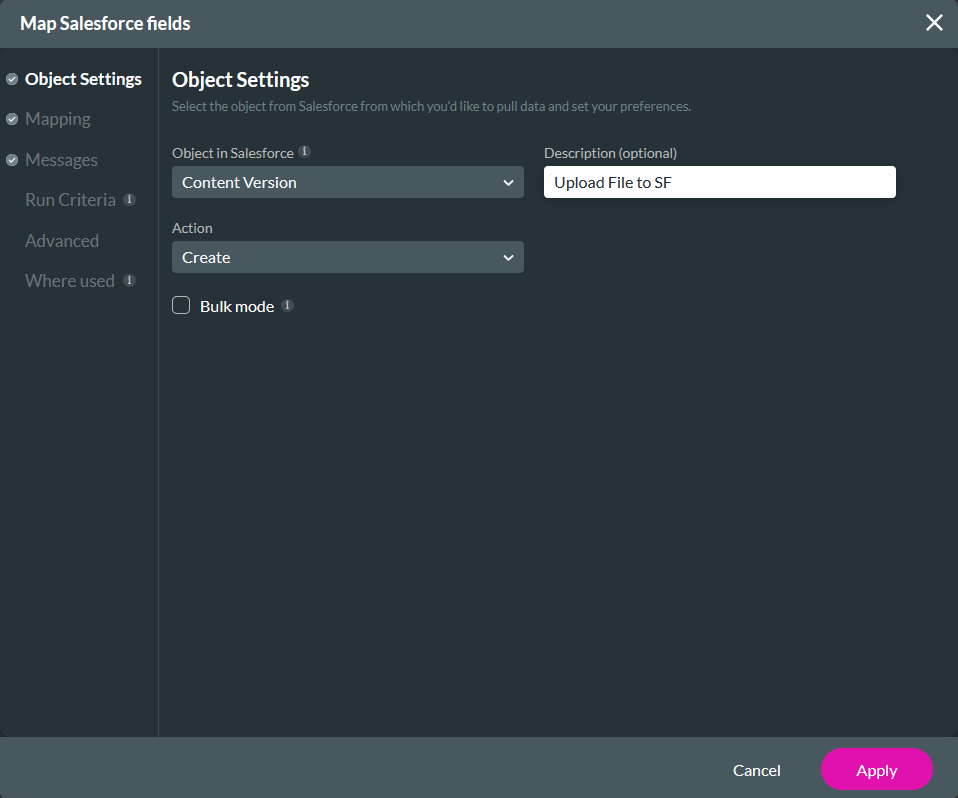
6. In the Mapping tab, configure the AutoPDF as Version Data and a Title for your document. For this example, we chose a custom Title. Click Apply and Close.
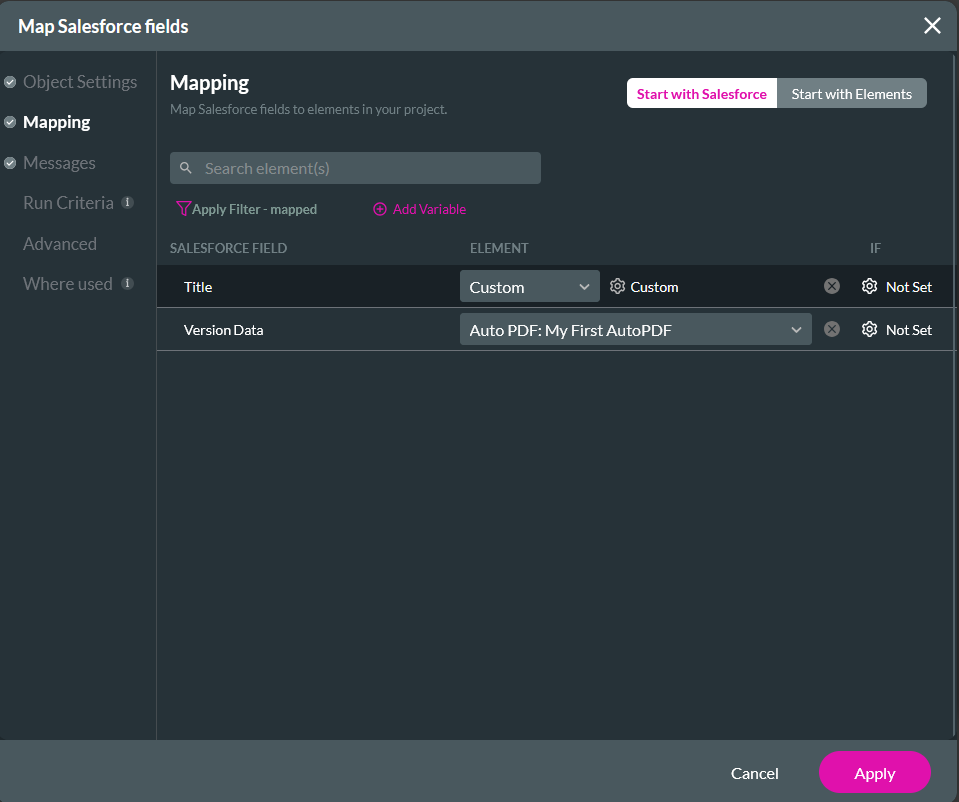
7. Use the dropdown to select the configured Push action and click Next.
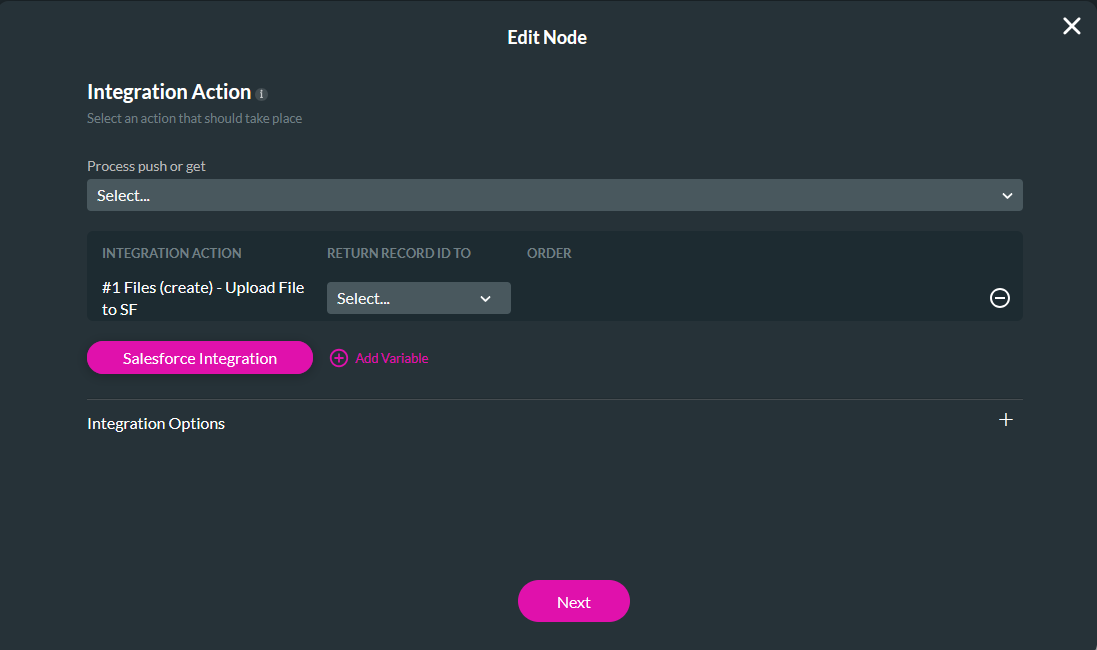
8. Enter a tag name and click Insert.
The PDF will be pushed to your Salesforce when the button is clicked.
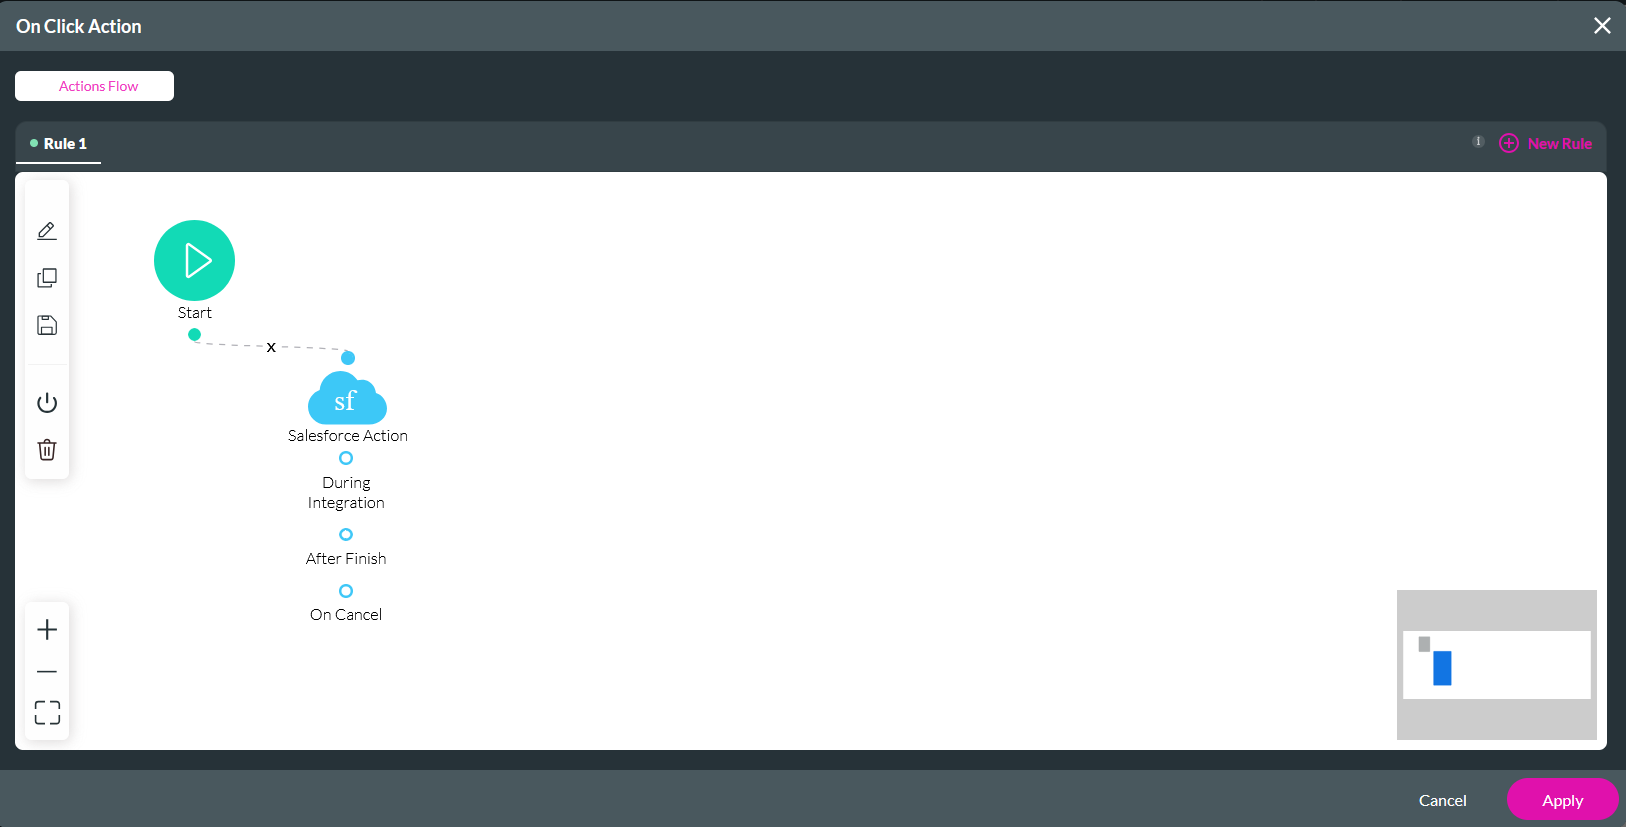

2. Click the Start + icon, select Salesforce Action as the node, and click Next.

3. Click the Salesforce Integration button.

4. Select the Push tab and click Create New.

5. In the Object Settings tab, choose Content Version as the Object in Salesforce, Create as the Action, and add a description.

6. In the Mapping tab, configure the AutoPDF as Version Data and a Title for your document. For this example, we chose a custom Title. Click Apply and Close.

7. Use the dropdown to select the configured Push action and click Next.

8. Enter a tag name and click Insert.
The PDF will be pushed to your Salesforce when the button is clicked.

08 Email Trigger
1. Select the button and click the Interactivity icon from the menu. The On Click Action window opens.

2. Click the Start + icon, select Send Email as the node, and click Next.
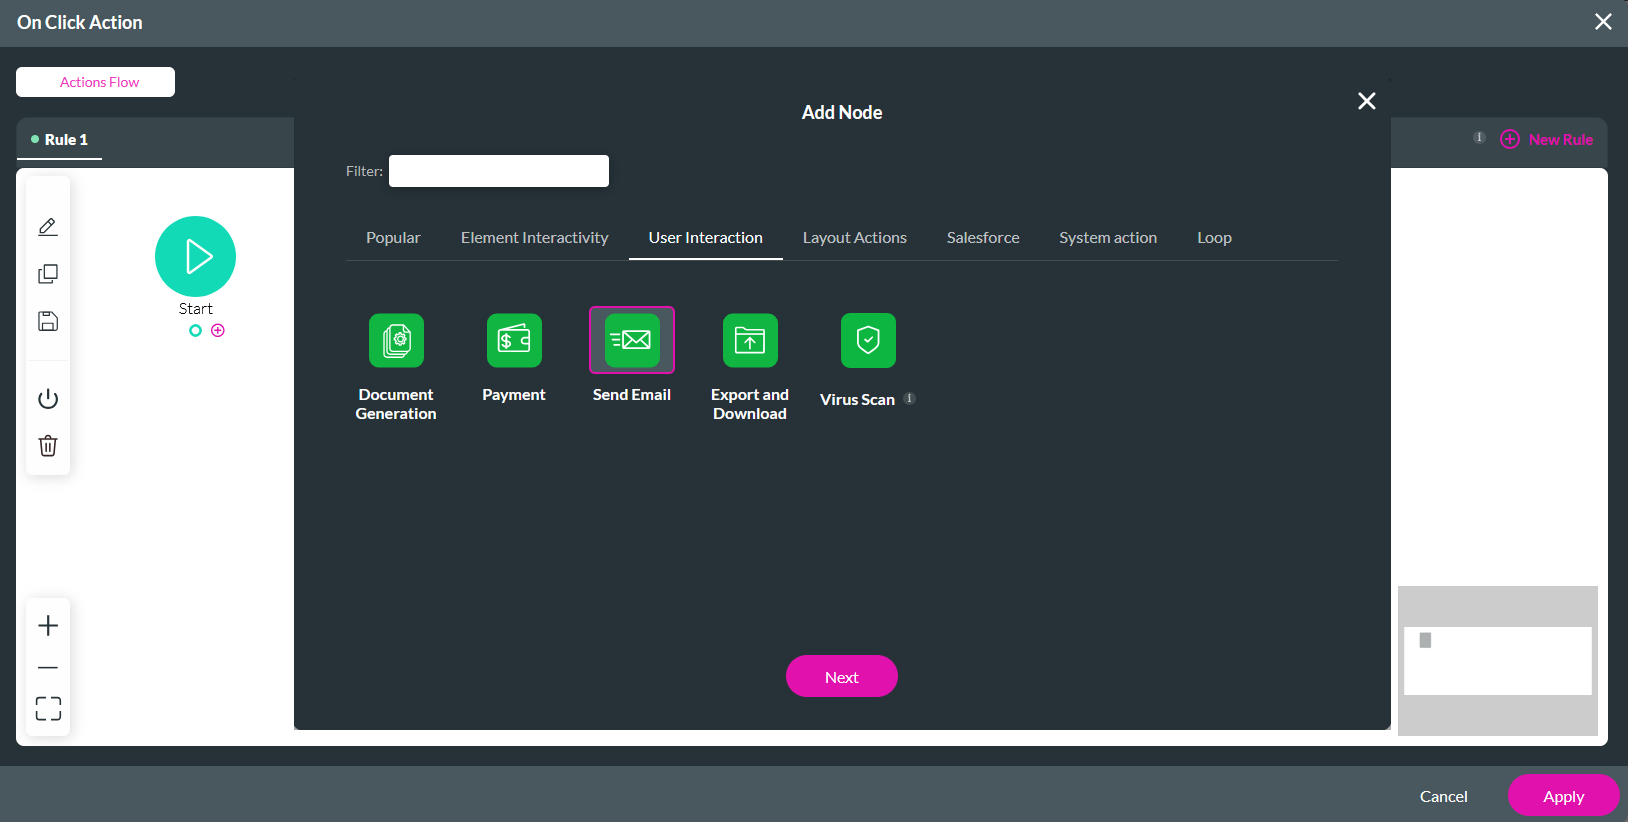
3. Edit an existing template or set up a new one. For this example, we are using an existing template.
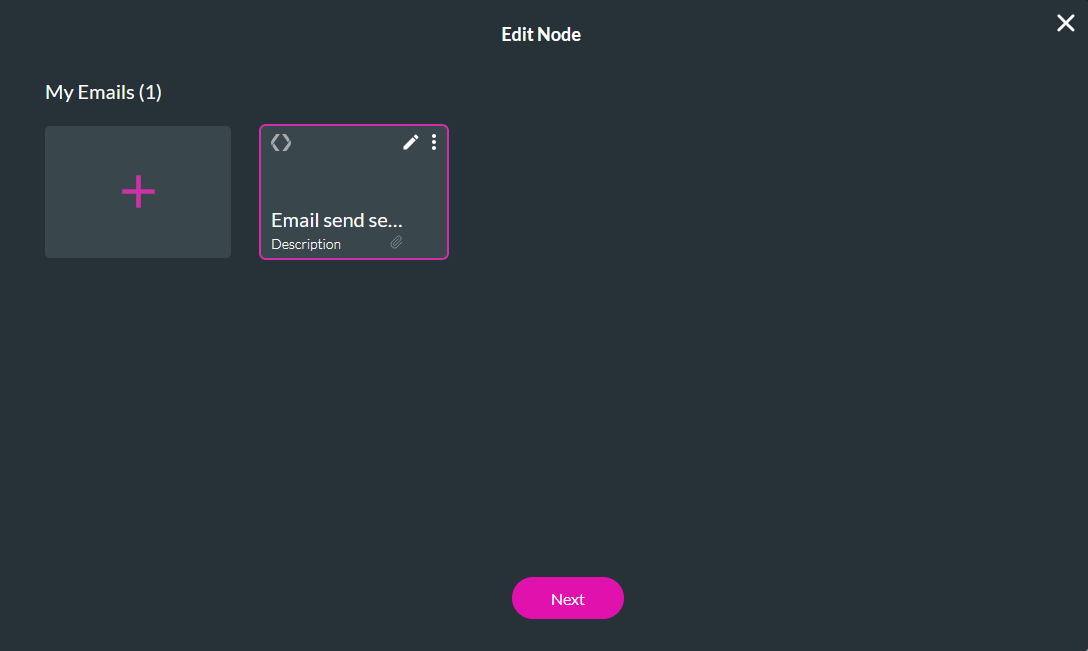
4. Configure your Recipients, Send Via, and Content, and click Next.
5. In the Attachments step, select the AutoPDF.
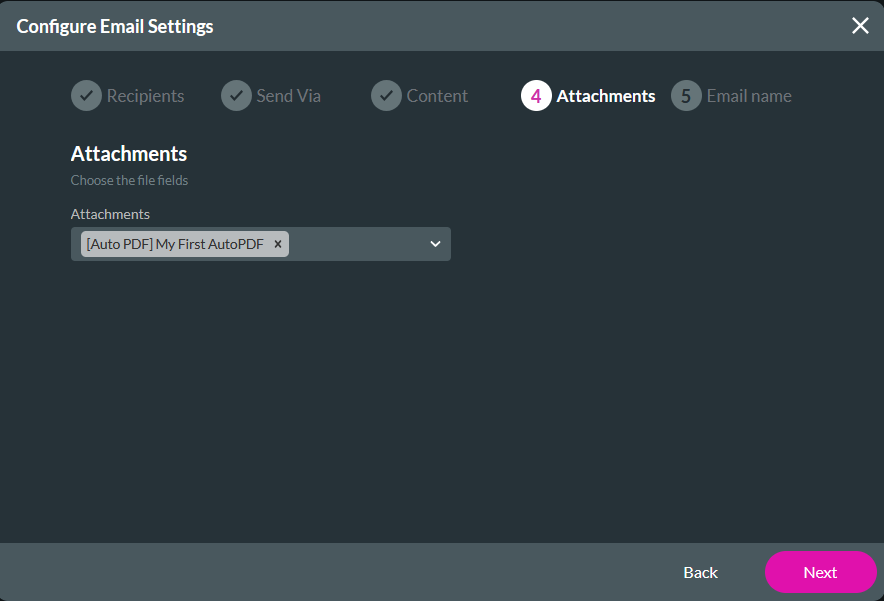
6. Configure your email name and click Apply.
7. Select your email and click Next.

8. Enter a tag name and click Insert.
When the button is clicked, the PDF will sent as an attachment to an email.
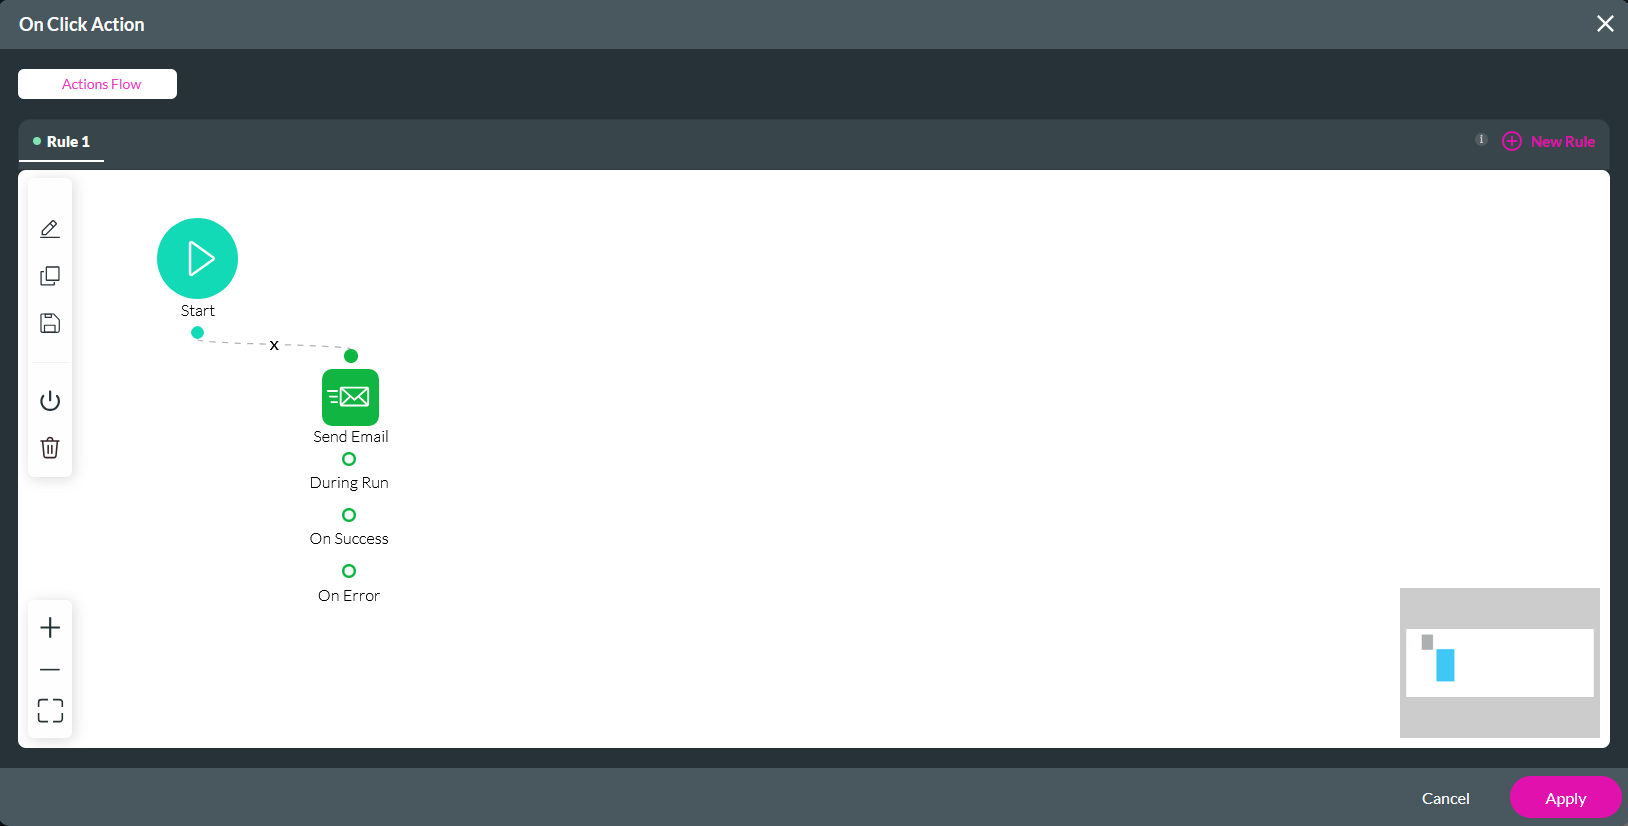

2. Click the Start + icon, select Send Email as the node, and click Next.

3. Edit an existing template or set up a new one. For this example, we are using an existing template.

4. Configure your Recipients, Send Via, and Content, and click Next.
5. In the Attachments step, select the AutoPDF.

6. Configure your email name and click Apply.
7. Select your email and click Next.

8. Enter a tag name and click Insert.
When the button is clicked, the PDF will sent as an attachment to an email.
