Dynamic Template - Web Fields/Merge Fields (11 min)
Completion requirements
01 Getting Started
This tutorial covers how to use web fields in a dynamic template and when to use fields from a web project vs regular merge fields from Salesforce in your Titan projects.
02 Pull Salesforce Data into Your Document
You can pull user information from Salesforce to populate your document. Ensure you have signed into the Titan plugin in your document.
1. Click the Insert/Edit field button.

2. Select the Object that contains the information you want to pull- for example, Contact.
3. Insert a comment.
4. Select the Field that corresponds to your form and click Insert.
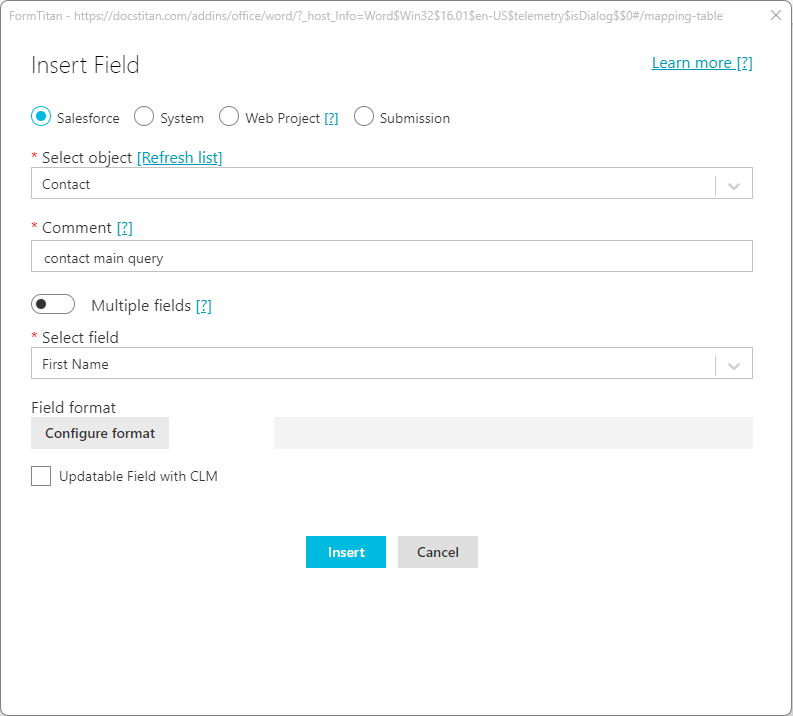
Repeat these steps for any field in your document.
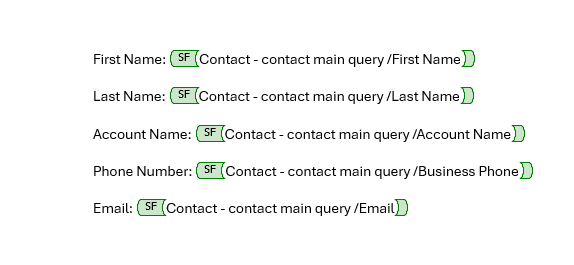
1. Click the Insert/Edit field button.

2. Select the Object that contains the information you want to pull- for example, Contact.
3. Insert a comment.
4. Select the Field that corresponds to your form and click Insert.

Repeat these steps for any field in your document.

03 Pulling Project Data into Your Form
To pull data the user enters into your form, complete the following steps:
1. Click the Insert/Edit field button.

2. Select the Web Project radio button.
3. Choose the project that contains the field you want to reference.
4. Select the page that contains the field.
5. Select the Field and click Insert.
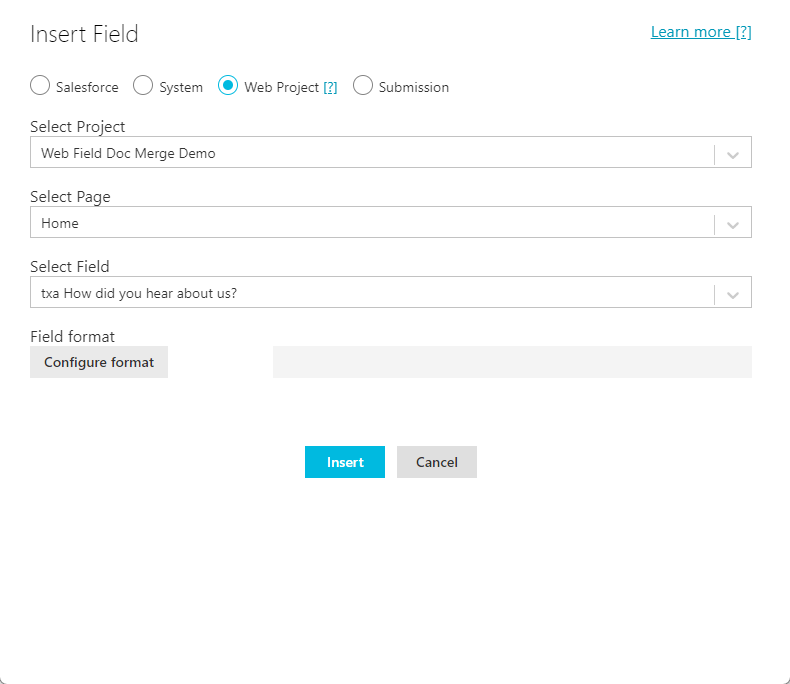
These steps can be repeated for any field in your document.

Things to note: When inserting fields from a specific project, you can only use the template for the corresponding Titan project.
To name your template:
1. Click Publish to New Form.
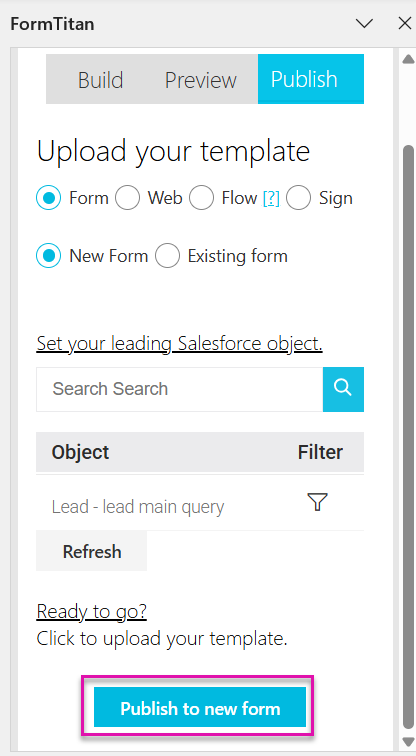
2. Enter your Form Name and click publish.
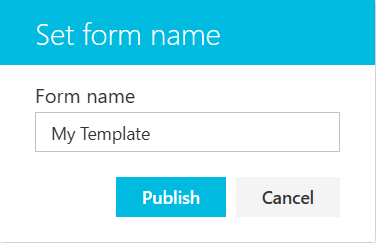
Ensure that you publish the template to the corresponding Titan project.

1. Click the Insert/Edit field button.

2. Select the Web Project radio button.
3. Choose the project that contains the field you want to reference.
4. Select the page that contains the field.
5. Select the Field and click Insert.

These steps can be repeated for any field in your document.

Things to note: When inserting fields from a specific project, you can only use the template for the corresponding Titan project.
To name your template:
1. Click Publish to New Form.

2. Enter your Form Name and click publish.

Ensure that you publish the template to the corresponding Titan project.

04 Accessing Your Published Templates
1. Select the Project Settings gear icon.
2. Click the Tools tab and select Document Generation.
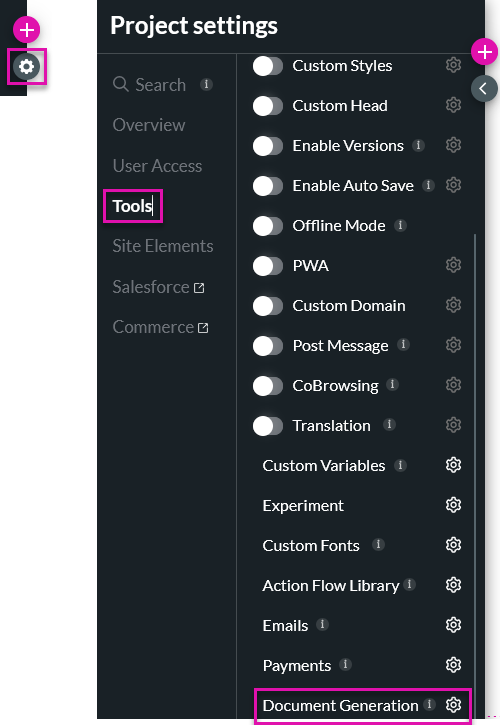
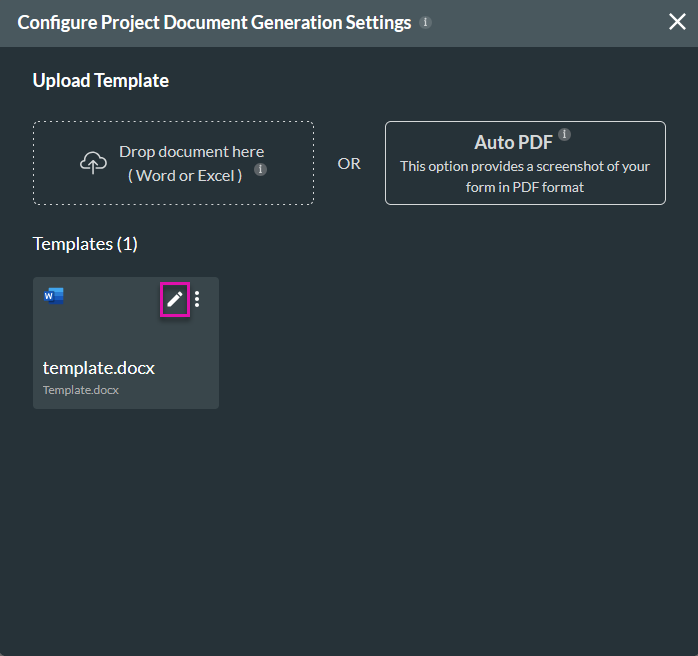
Your uploaded document will be available.
3. Click the edit icon.
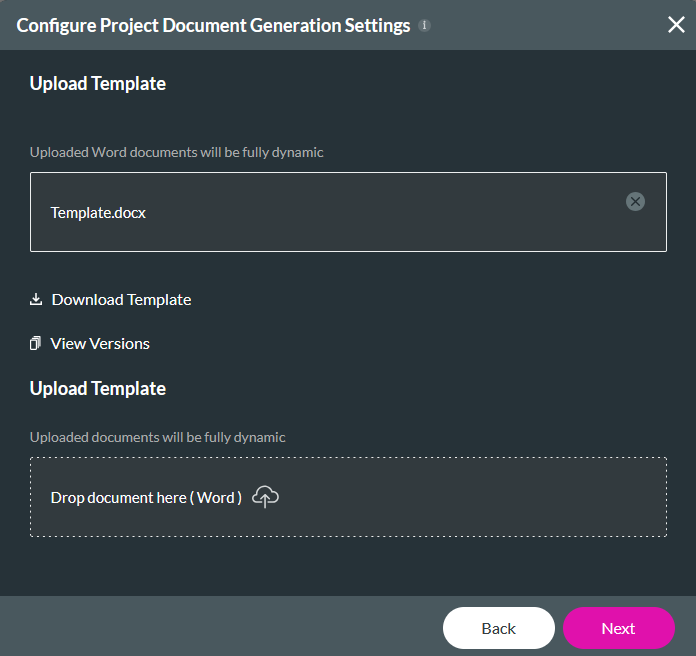
4. Click Next if you are happy with your template at the current version, or upload a new one.
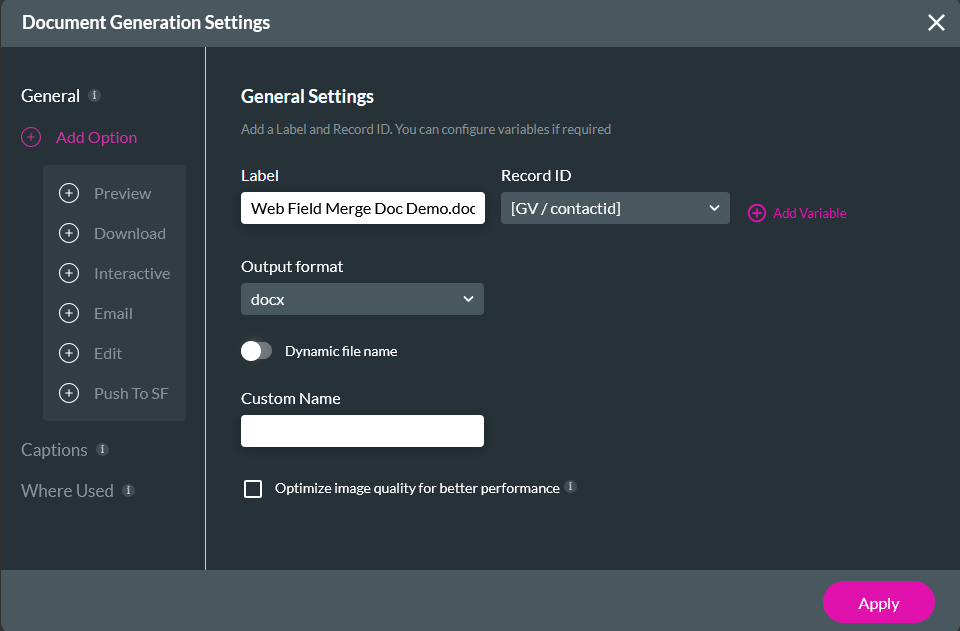
5. Add a Label name and select a RecordID.
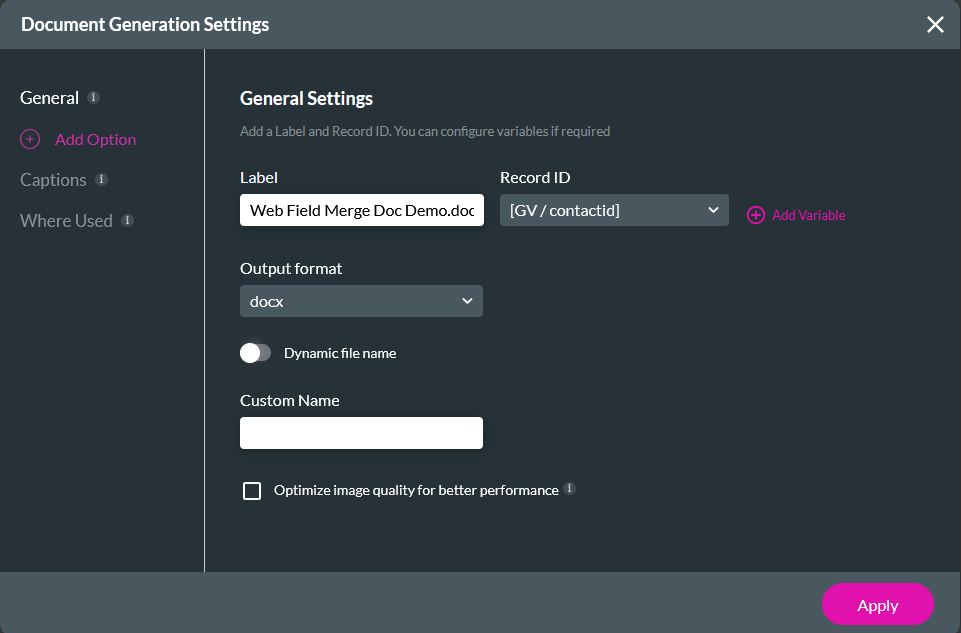
6. Expand the Options menu to configure various document options, for example, preview. Click Apply.
2. Click the Tools tab and select Document Generation.

Your uploaded document will be available.
3. Click the edit icon.

4. Click Next if you are happy with your template at the current version, or upload a new one.

5. Add a Label name and select a RecordID.

6. Expand the Options menu to configure various document options, for example, preview. Click Apply.

05 Invoking the Document Generation Action
1. Select the button and click the interactivity icon. The On Click Action window opens.

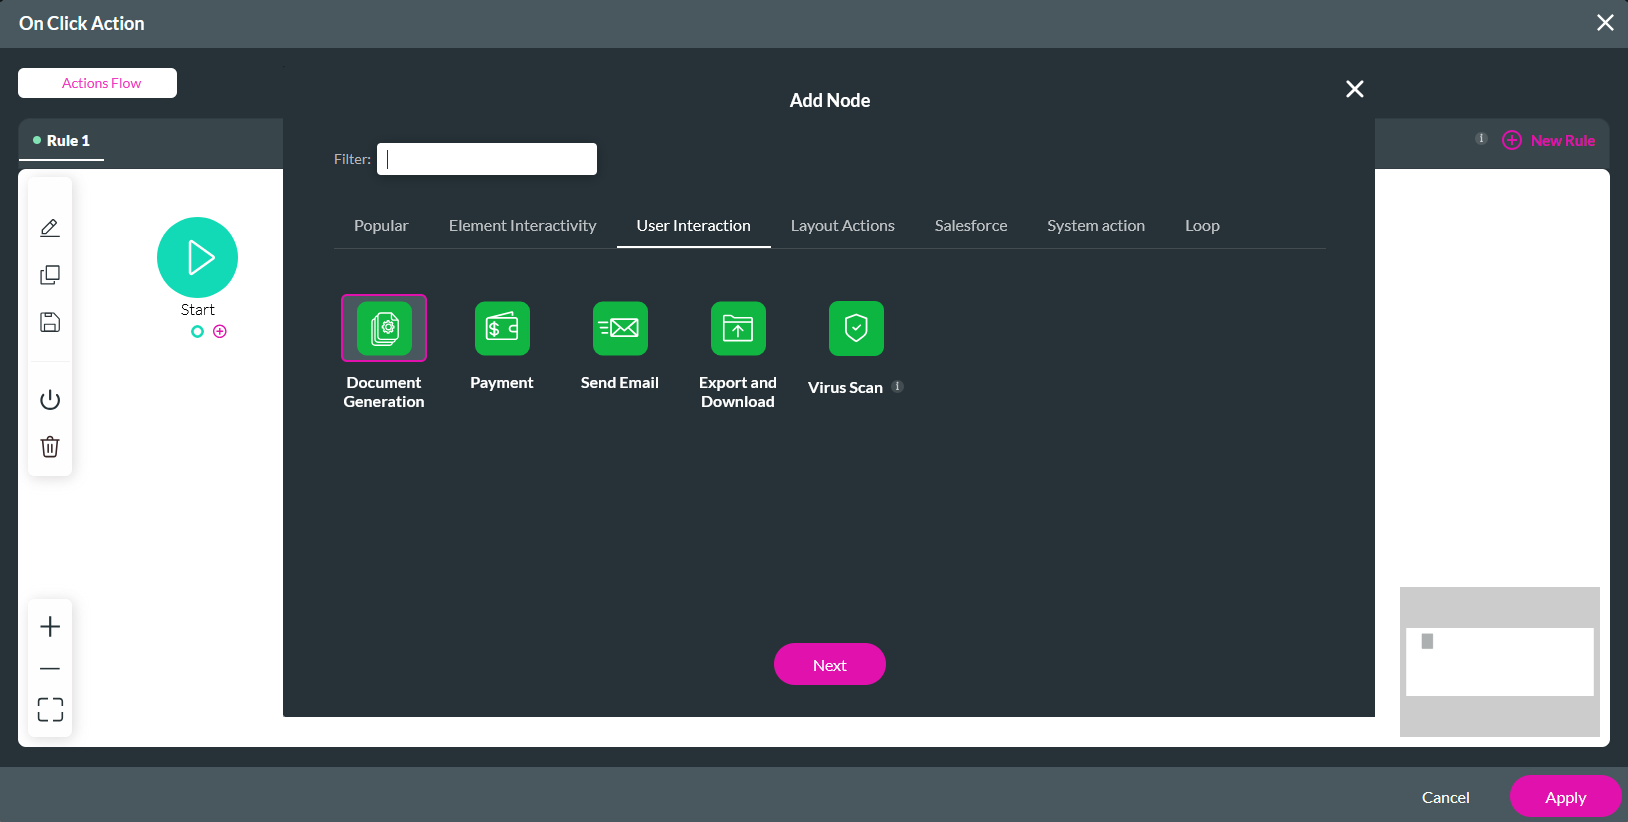
2. Select the Start + icon, select Document Generation as the node, and click Next.
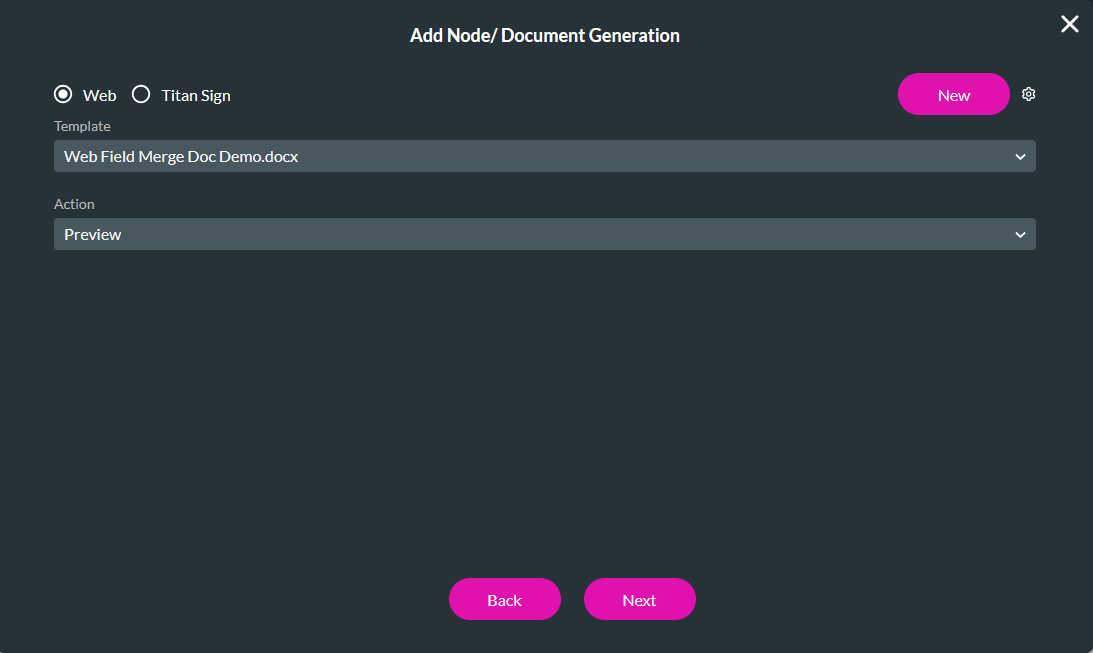
3. Select the Template and choose the Action. Click Next.
4. Enter a Tag name and click Insert.
When the user completes your web project and clicks the submit button, Titan will generate a preview of the document and display it to the user.
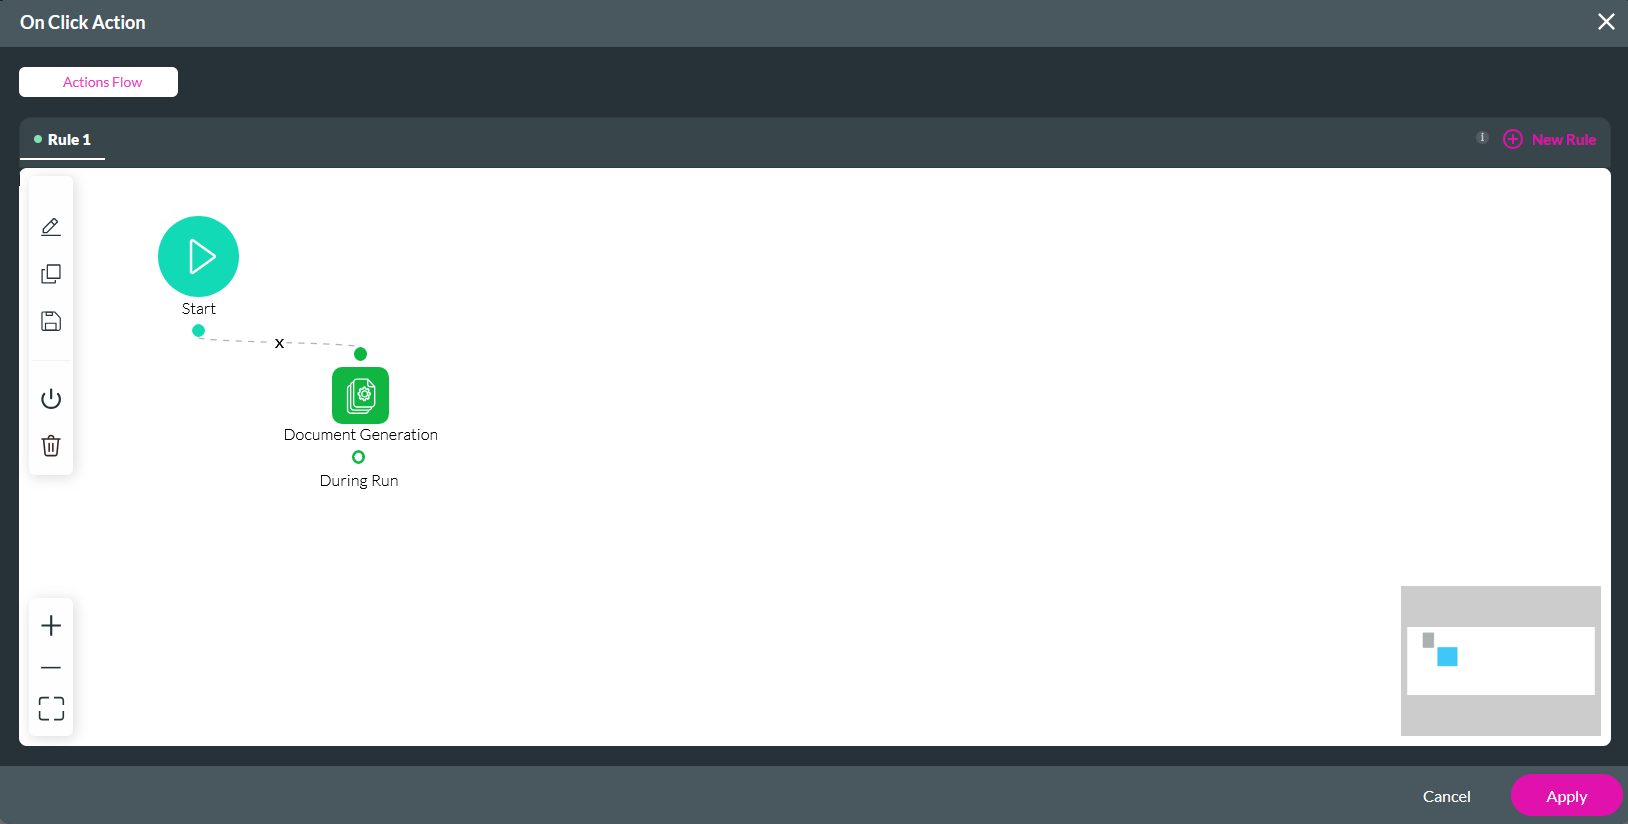

2. Select the Start + icon, select Document Generation as the node, and click Next.

3. Select the Template and choose the Action. Click Next.

4. Enter a Tag name and click Insert.
When the user completes your web project and clicks the submit button, Titan will generate a preview of the document and display it to the user.
