01 Getting Started
This tutorial covers the advanced features of Push integration.
For demonstrative purposes, a simple form, including a button, was created. A push was configured to create a Salesforce contact with the information provided.
02 Advanced Tab
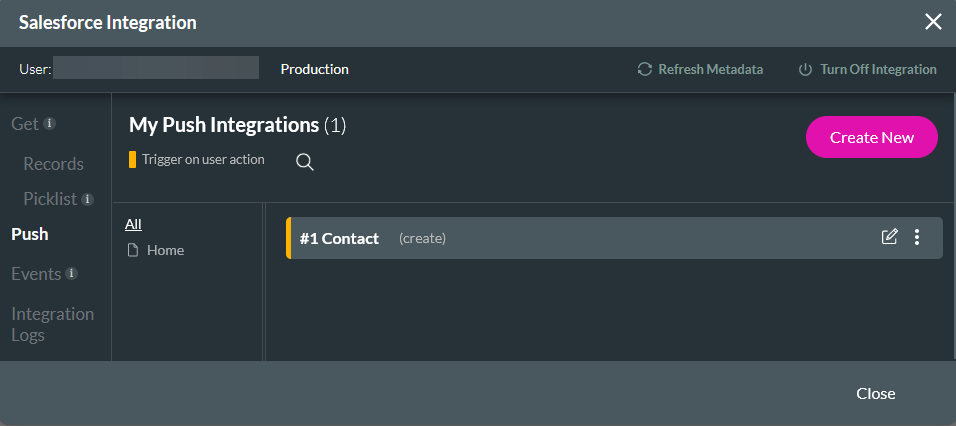
1. Navigate to the Salesforce Integration window.
2. Select Create New under the Push tab or click on an existing push.

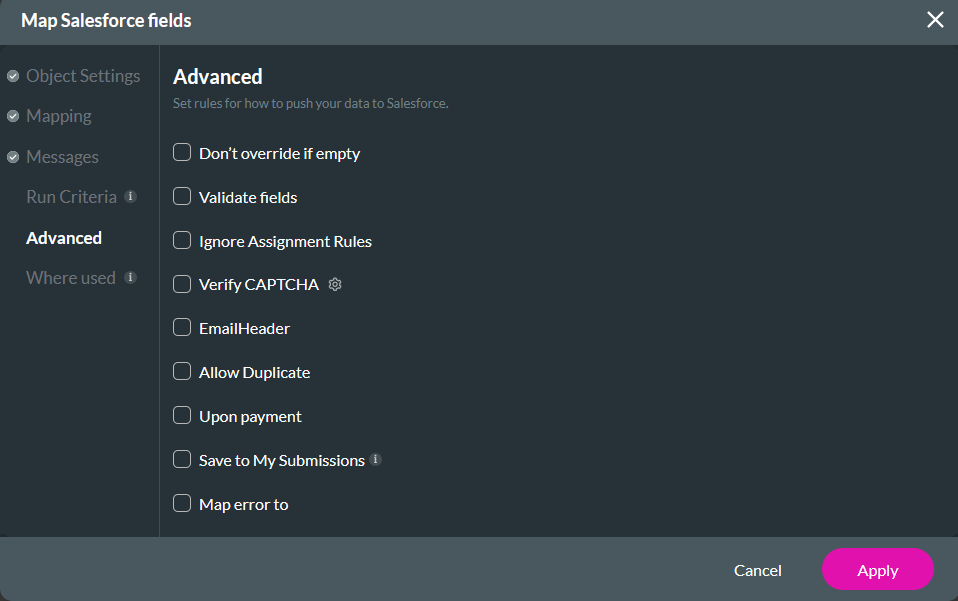
3. Click the Advanced tab.

03 Verify CAPTCHA
This feature allows you to verify users before they access your form to ensure no malicious actor can engage with your Salesforce data. CAPTCHA uses a key from Google to ensure your integration is secure. For more information, check out our CAPTCHA lesson. 04 Upon Payment
This option is useful if you have a payment integration in your project. You can push data to Salesforce upon completion of the payment. For more information, check out our Salesforce Push for Successful Payment lesson.
05 Save to My Submissions
You can save your data to the Titan Package object called My Submission. This will save data to a JSON even if the Salesforce integration is unsuccessful. Check out our Saving Salesforce Pushes to My Submissions in Titan Web lesson for more information.
06 Don’t Override if Empty
This feature ensures that if a user completes a form with empty fields, those empty fields will not override existing data in Salesforce. For example, if the first name field is empty in the form, the existing first name in Salesforce will remain as is.
07 Allow Duplicate
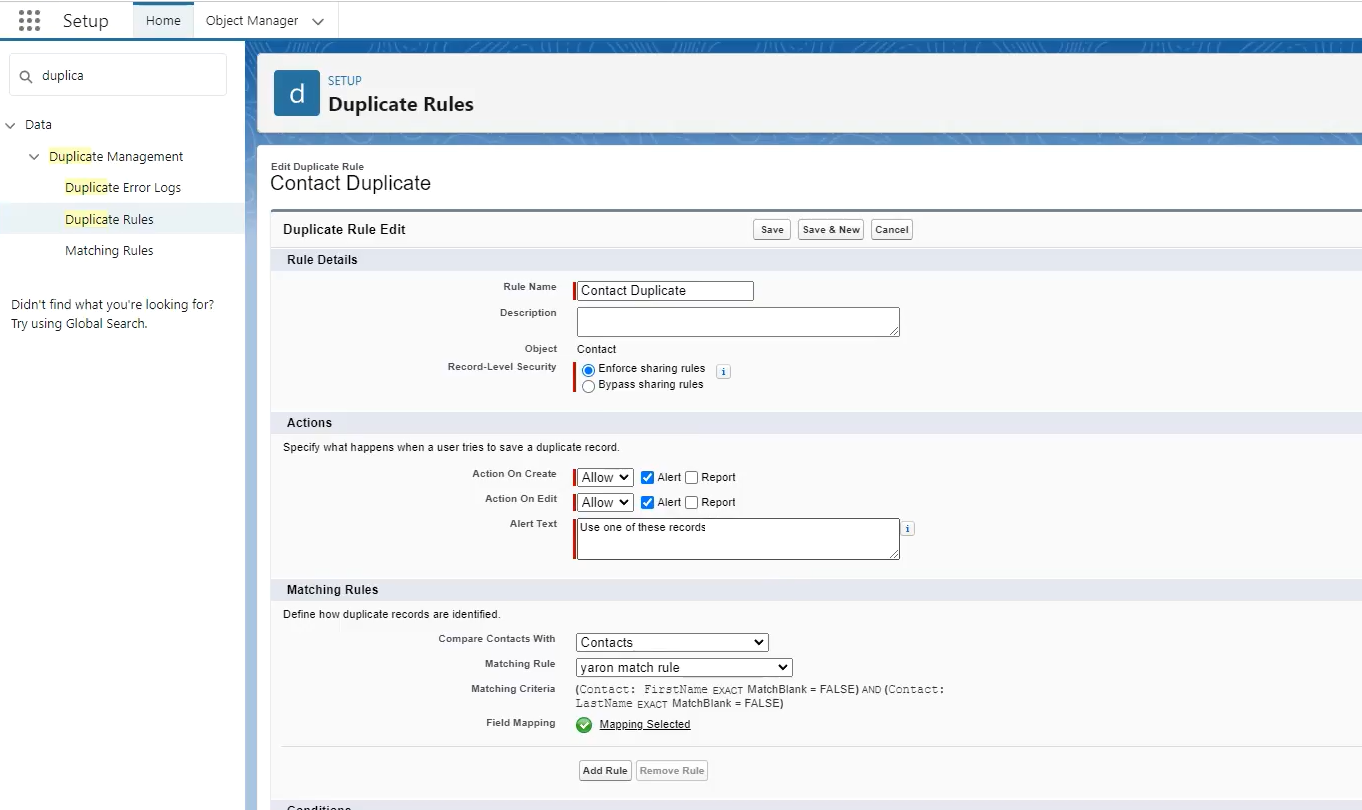
Before using this feature, ensure your Duplicate Rules in Salesforce are set to Allow. This feature will allow you to create duplicate entries in Salesforce.

08 Map Error To
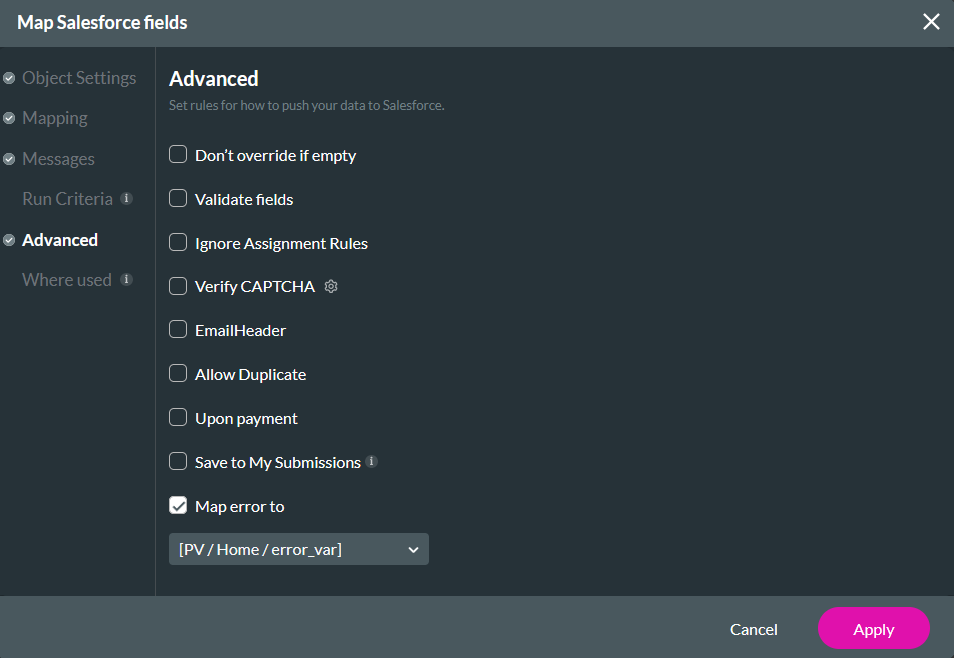
This feature allows you to map any errors returned from Salesforce to a variable. Before using this feature, you must create a static variable in your project. When you enable the Map error to checkbox, use the dropdown to select the variable the error will be mapped to.

09 Got Feedback?
Additional Resources


