CAPTCHA (3:30 min)
Completion requirements
01 Getting Started
This tutorial covers how to set up Google Captcha for your Titan projects. Google Captcha can be verified for Salesforce pushes and upon login for SmartV.
02 Configuring CAPTCHA
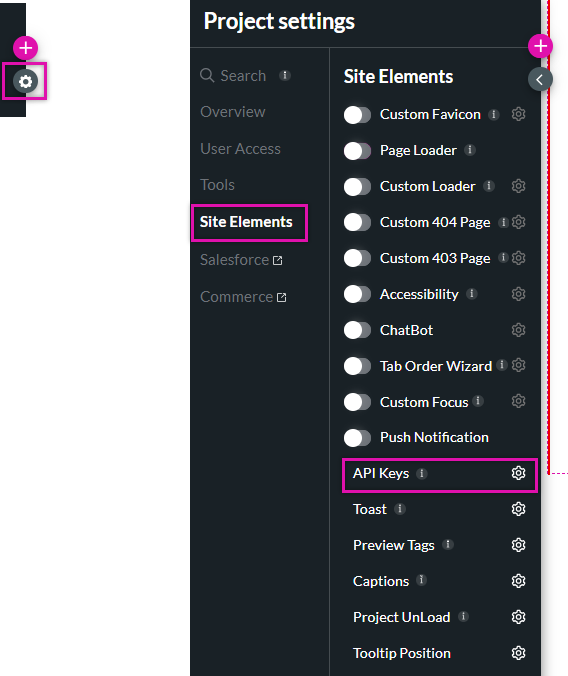
1. Navigate to Project Settings and select the Site Elements tab.
2. Click the API Keys gear icon.
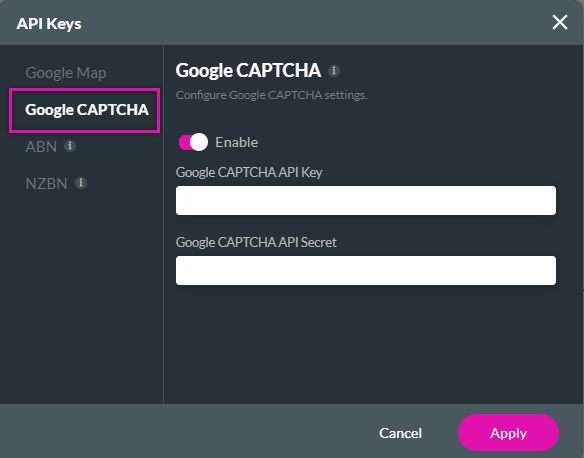
3. Select the Google CAPTCHA tab and turn on the Enable toggle switch.
4. Add your API key and API Secret, and click Apply.
2. Click the API Keys gear icon.

3. Select the Google CAPTCHA tab and turn on the Enable toggle switch.
4. Add your API key and API Secret, and click Apply.

03 Enable CAPTCHA for Salesforce Push
1. Navigate to Project Settings and select the Salesforce tab.
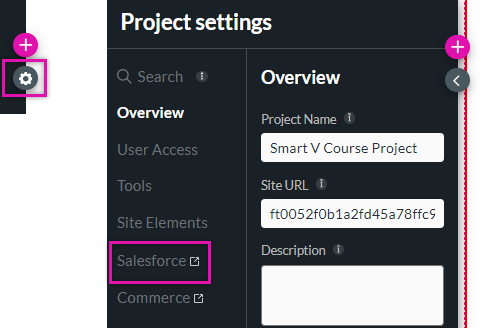
2. Select your created Push to open the Map Salesforce Fields window.
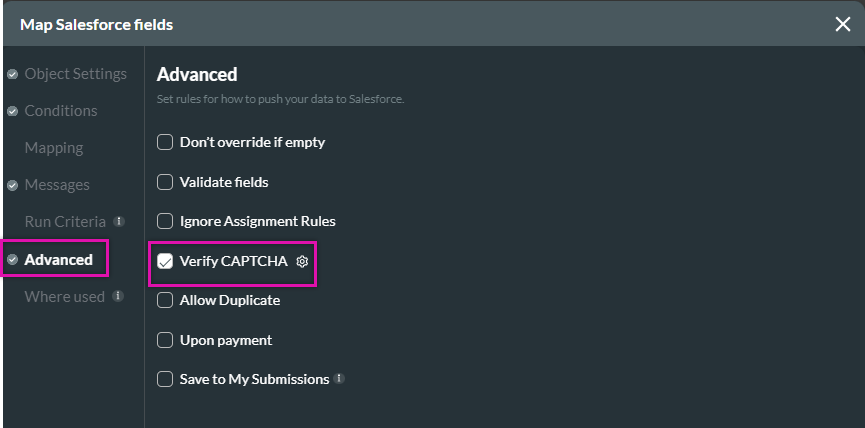
3. Click the Advanced tab and enable the Verify CAPTCHA feature. When the Push is triggered, it will ask the user to verify themselves using Captcha.

2. Select your created Push to open the Map Salesforce Fields window.
3. Click the Advanced tab and enable the Verify CAPTCHA feature. When the Push is triggered, it will ask the user to verify themselves using Captcha.

04 Enable CAPTCHA for SmartV
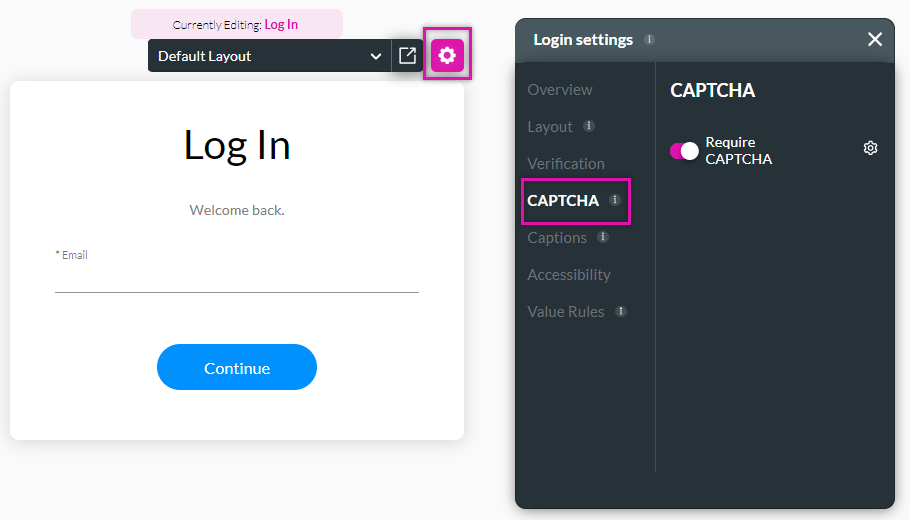
1. Navigate to your SmartV page and click the gear icon.
2. Select the CAPTCHA tab and enable the Require CAPTCHA toggle switch. If you haven't already entered the data, the API Key screen will open.
2. Select the CAPTCHA tab and enable the Require CAPTCHA toggle switch. If you haven't already entered the data, the API Key screen will open.
