Google Map and Address Finder (8 min)
Completion requirements
01 Getting Started
This tutorial covers the Google Maps features. Titan supports two Google Maps widgets: a map and an address finder.
02 Enable Google Map
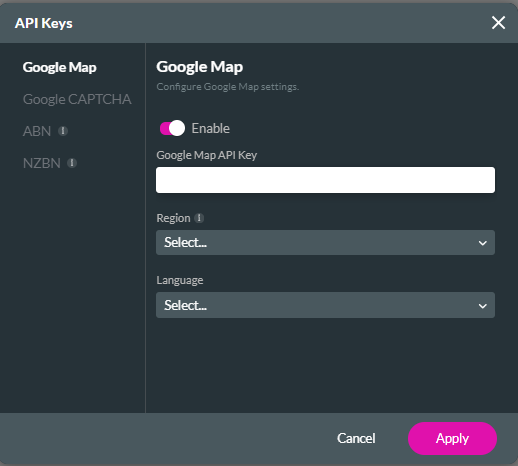
Before you can start using the Google Maps widgets, you must enter an API key to determine Google connectivity.
1. Navigate to Project Settings and select the Site Elements tab.
2. Click the API Keys gear icon.
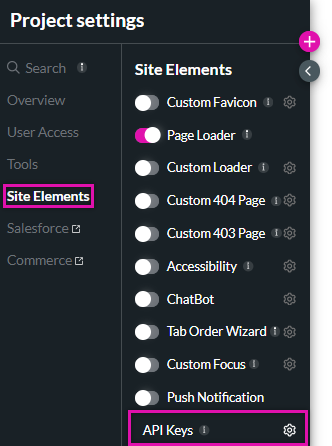
3. Under Google Maps, turn on the Enable toggle switch and fill in the rest of the details. The Region information is related to your API key and will not limit your map functionality.
1. Navigate to Project Settings and select the Site Elements tab.
2. Click the API Keys gear icon.
3. Under Google Maps, turn on the Enable toggle switch and fill in the rest of the details. The Region information is related to your API key and will not limit your map functionality.
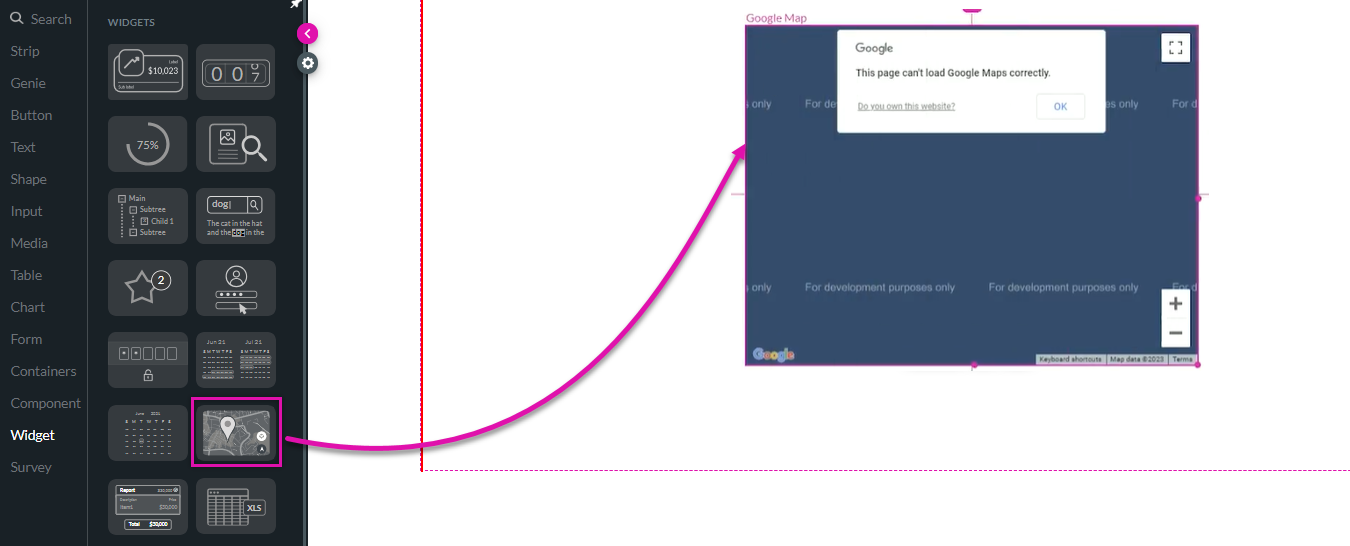
03 Adding Google Maps
You can now add the Google Map widget to your canvas. Using the element settings, you can configure how users interact with your map.
04 Google Map Settings
Content
In the Content tab, you can choose how the map is displayed to the users. This includes creating a Marker that will be used as the center of your map and an action to execute once the user clicks on the Marker.
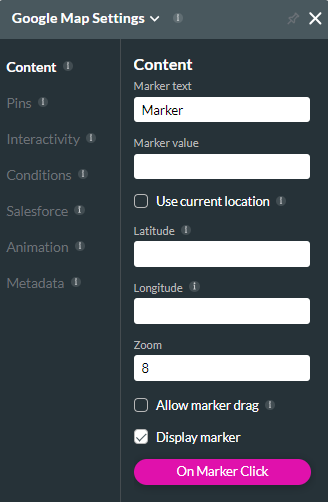
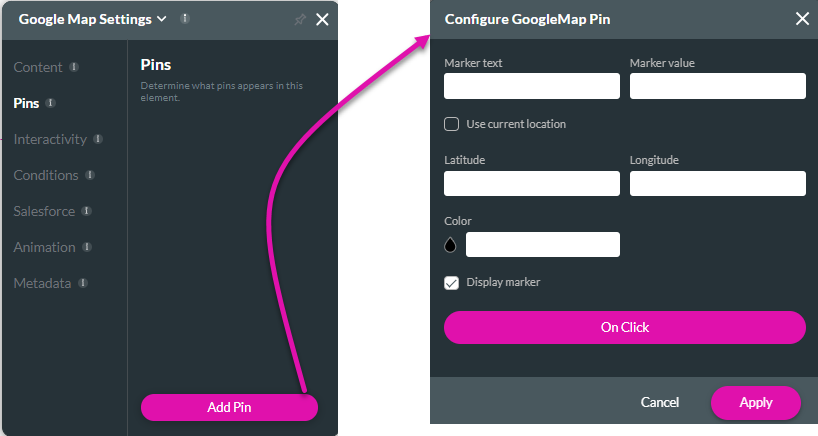
Although you can only have one Marker per map, you may have many Pins.
Click Add Pin and fill in the data in the Configure GoogleMap Pin fields to add your new Pin. Using the On Click button, you can also configure an action to run every time a user clicks on a pin.
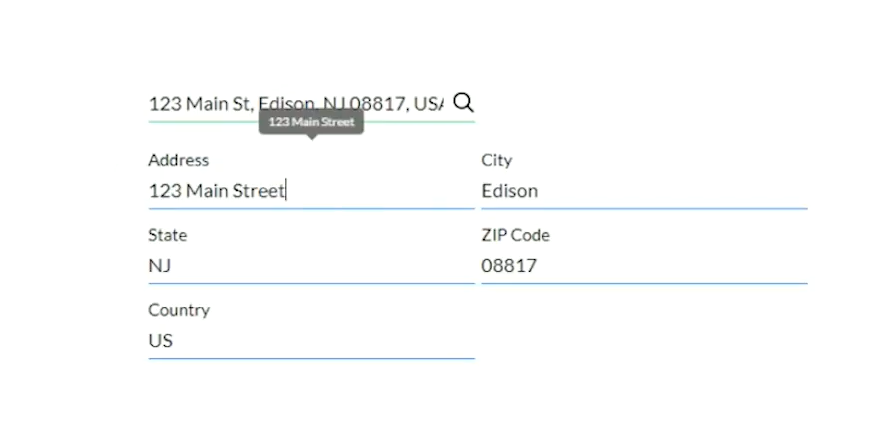
05 Address Finder
The Address Finder widget allows users to find an address anywhere. You can choose from Static or Dynamic Values, enabling users to select from a defined list in Salesforce.

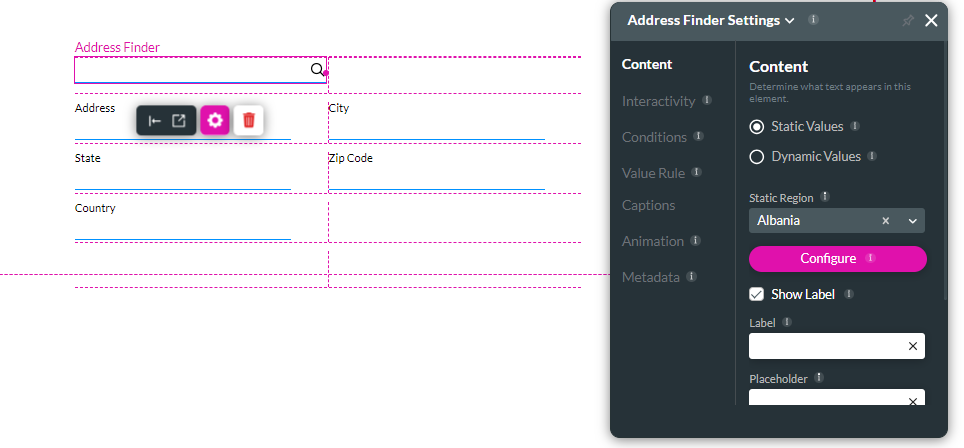
Click Configure to map the Address Finder parts to your project’s fields.
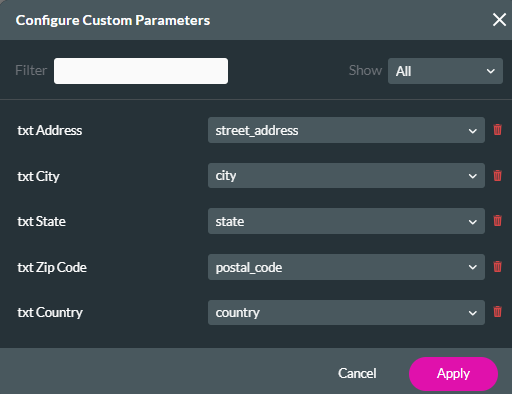
Possible results are displayed when a user types an address in the Address Finder element. Once the requested address is selected, the corresponding form fields will be populated based on our previous mapping.