Page Variables (12 min)
Completion requirements
01 Getting Started
This tutorial covers adding page variables, including:
- Page variables overview.
- Adding page varibales.
- Usage examples.
02 Overview
Page variables store data that is not visible to end users. They are used when the variable applies only to a specific page and cannot be accessed by other project pages. Once the user leaves the page, data from the page variable is lost.
03 Adding Page Variables
1. Expand the Pages dropdown.
2. Click the kebab menu next to the page where you want to add the variable.
3. Click Configure Actions.
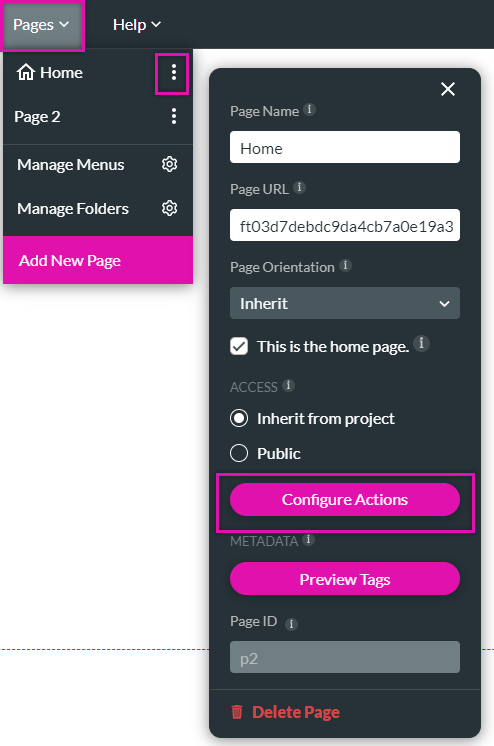
Any variables you create will apply to this page only.
System variables are values set at the operating system level and can be accessed by various programs and processes running on the system. They provide information about the system's environment and configuration.
Note: You cannot assign a value to a system variable.
Static Variables affect elements from Salesforce, project elements, or other variables. You can set a specific value for static values.
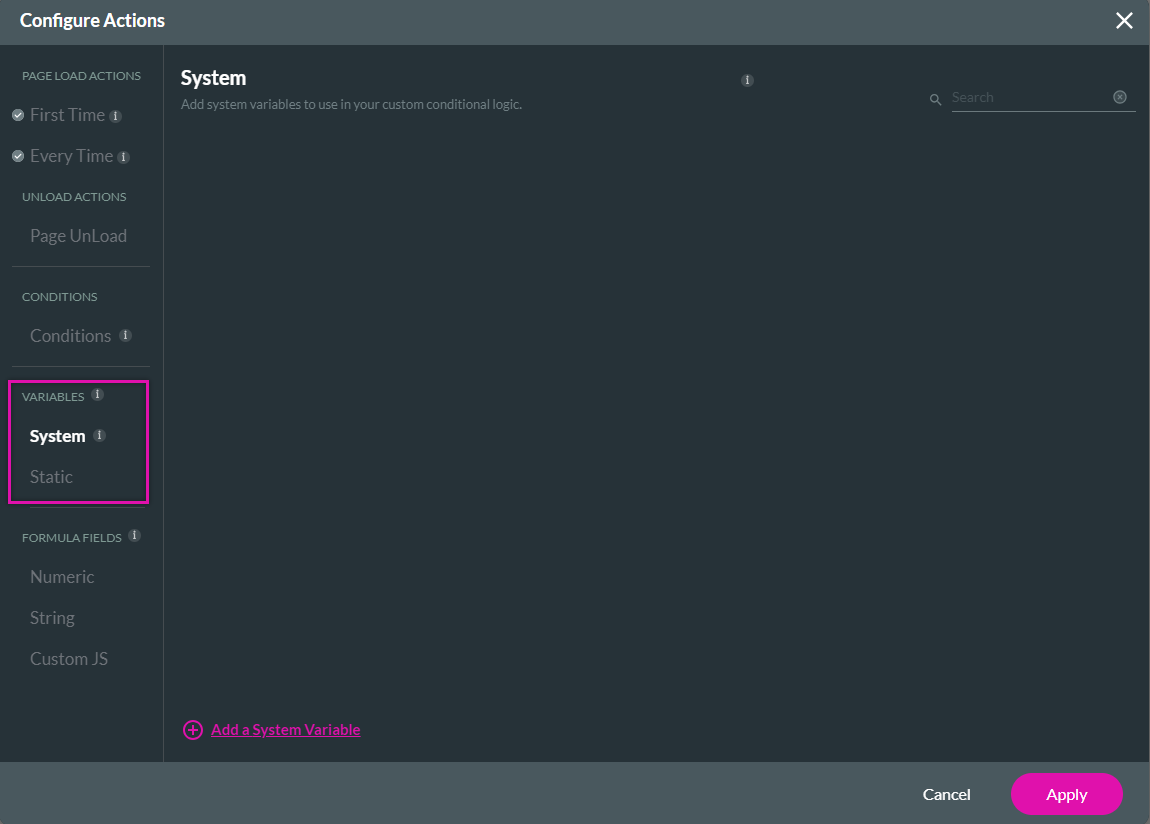
When using variables for a Salesforce push or get, PV represents the Page Variables.
2. Click the kebab menu next to the page where you want to add the variable.
3. Click Configure Actions.
Any variables you create will apply to this page only.
System variables are values set at the operating system level and can be accessed by various programs and processes running on the system. They provide information about the system's environment and configuration.
Note: You cannot assign a value to a system variable.
Static Variables affect elements from Salesforce, project elements, or other variables. You can set a specific value for static values.
When using variables for a Salesforce push or get, PV represents the Page Variables.
04 Page Variable Use Case
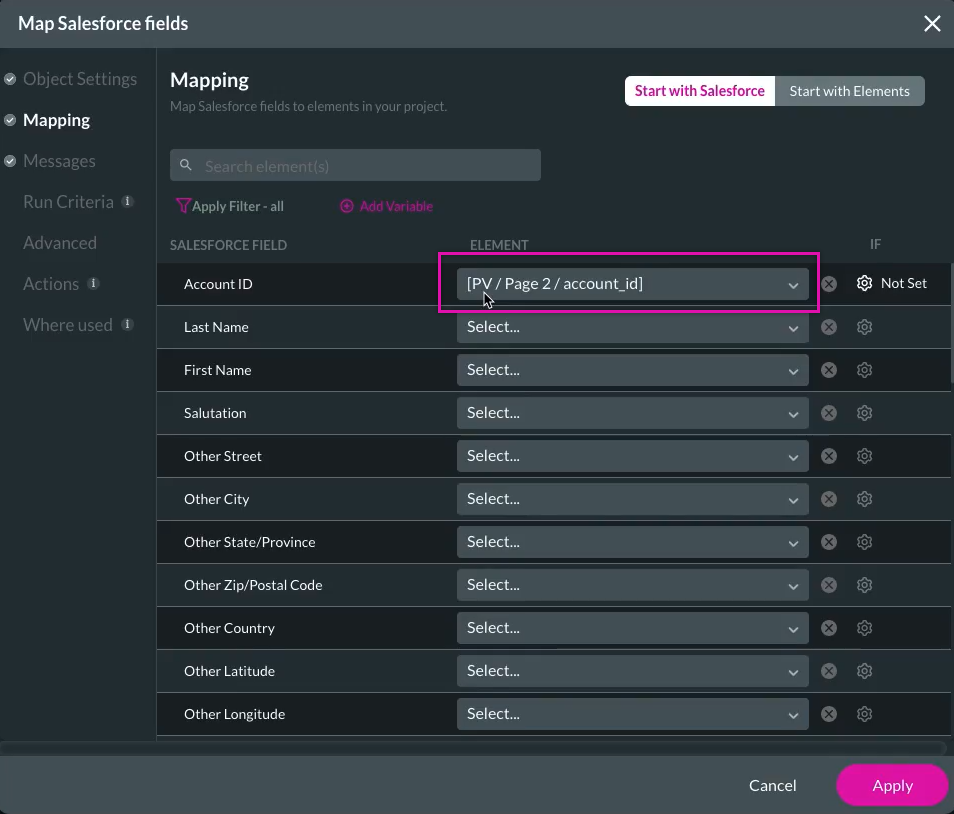
You can use a page variable to pass information from one page to another. For example, if you want users to be able to create a new contact, that will be saved to Salesforce.
The setup: A power table displaying account information was inserted into the first project page; if the user clicks the Create new contact option, they are redirected to a second page where they can enter their account information.
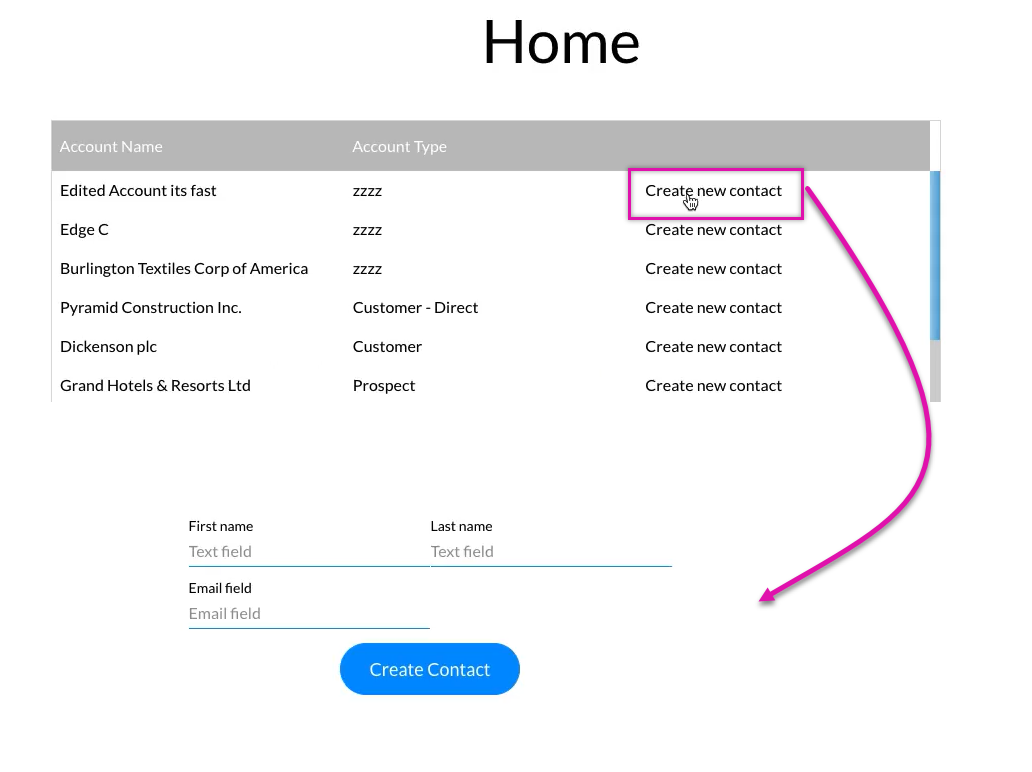
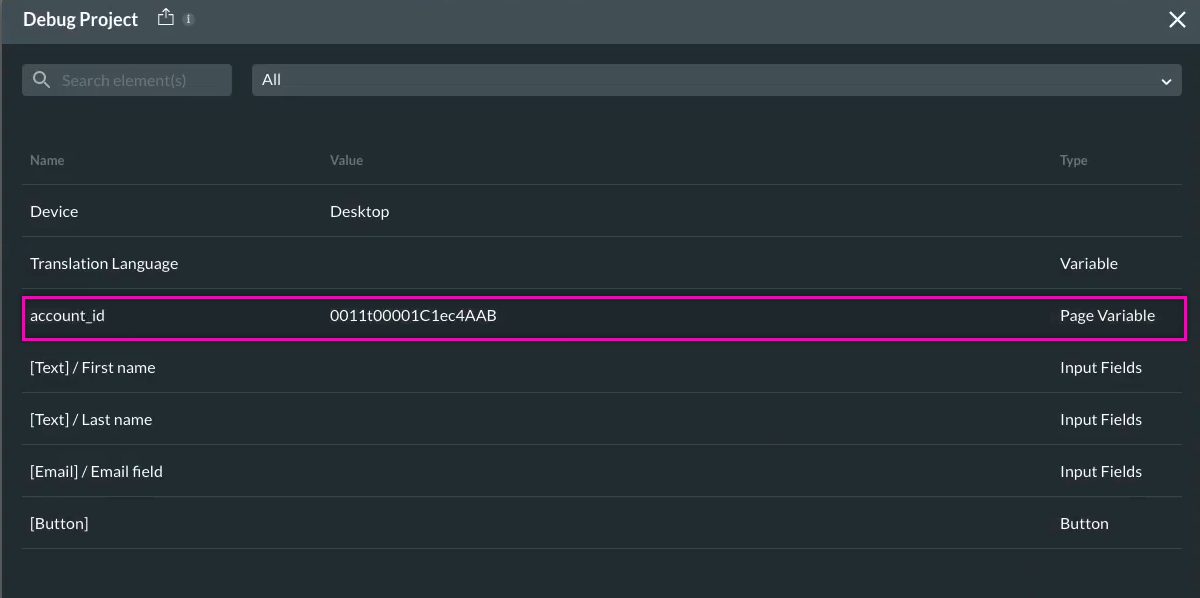
When checking the debug mode, you can see that the Account ID was successfully passed through. This means the details captured in the form will be saved to the associated Account ID.
The setup: A power table displaying account information was inserted into the first project page; if the user clicks the Create new contact option, they are redirected to a second page where they can enter their account information.
When checking the debug mode, you can see that the Account ID was successfully passed through. This means the details captured in the form will be saved to the associated Account ID.