Tables Overview and Comparison (9 min)
Completion requirements
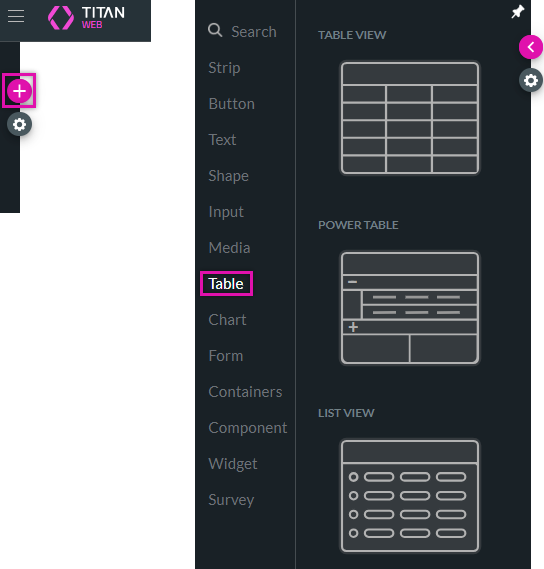
01 Getting Started
This tutorial covers each table available on Titan Web.
02 Differences between Tables
There are three different tables in Titan Web:
- List View
- Table View
- Power Table
| Tables | Read Salesforce Data | On-Click Actions | Column Types | Editing | Filtering | Card Mode (Mobile) | Sub-Component |
|---|---|---|---|---|---|---|---|
| Power Table | ✅ | ✅ | ✅ | ✅ | ✅ | ✅ | ✅ |
| Table View | ✅ |
✅ | ✅ | ||||
| List View | ✅ |
03 Adding a Table
1. Click the + icon and select the Table tab. Drag and drop the table element onto the canvas. The Insert Form window pops up.
04 List View Table
When you insert a List View table onto your project, the List Configuration screen pops up.
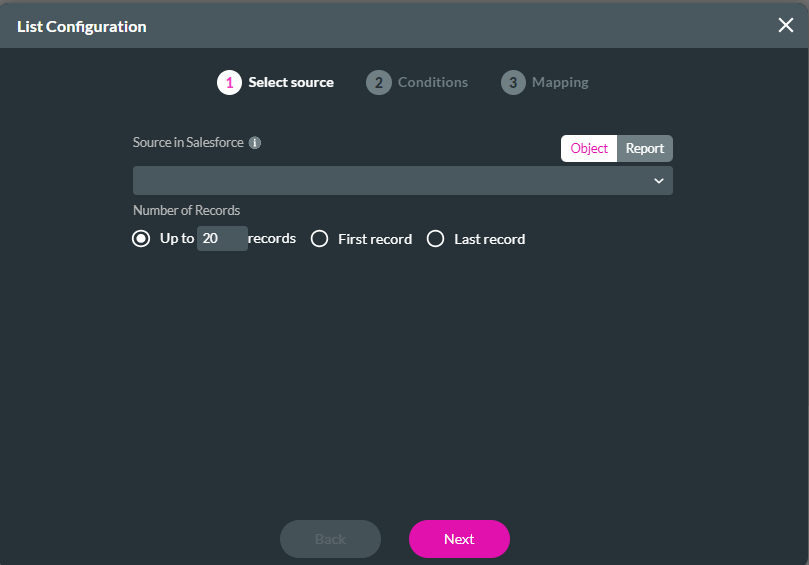
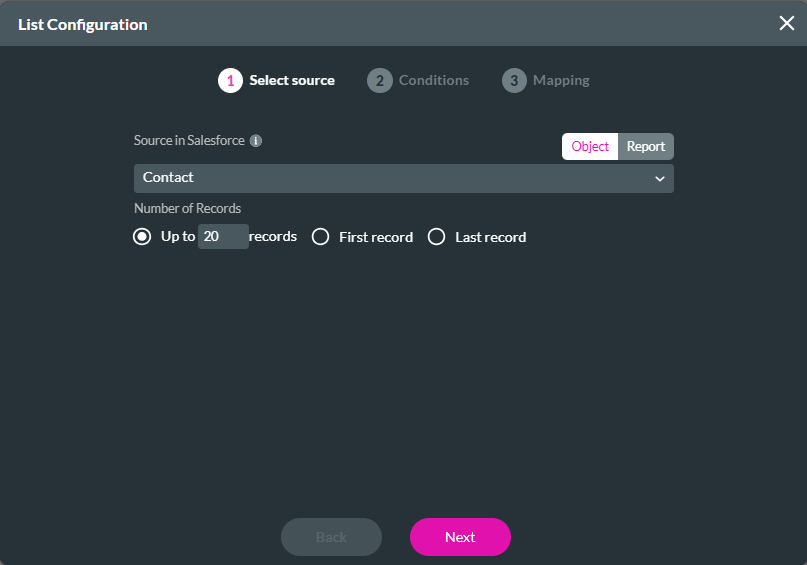
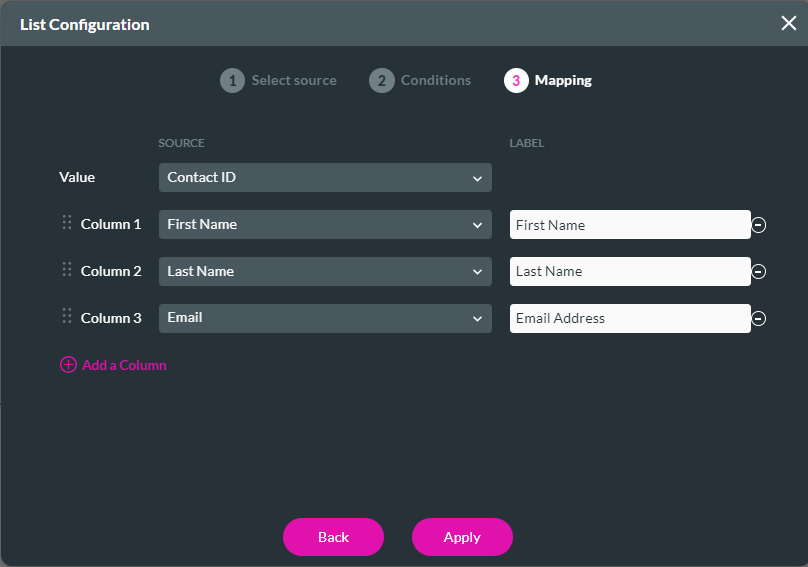
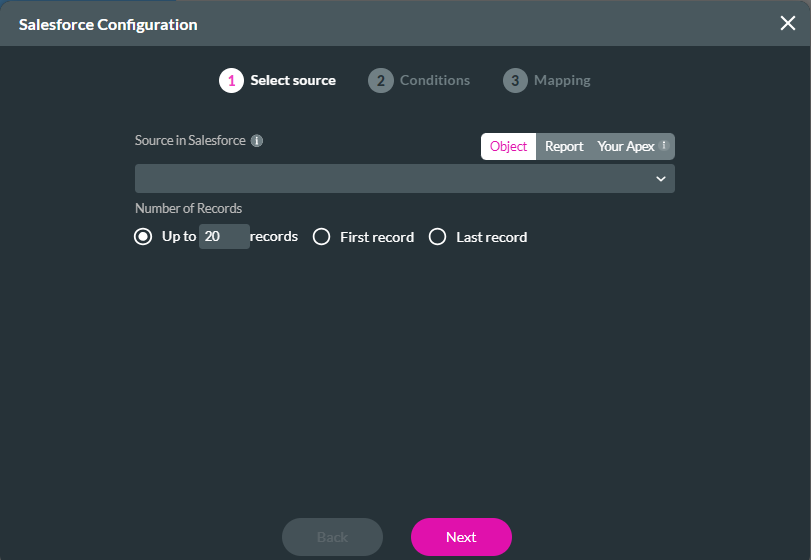
1. Use the Source in Salesforce drop-down to select which object data will populate your table, such as a contact. You can choose a Salesforce object or a report. Click Next.
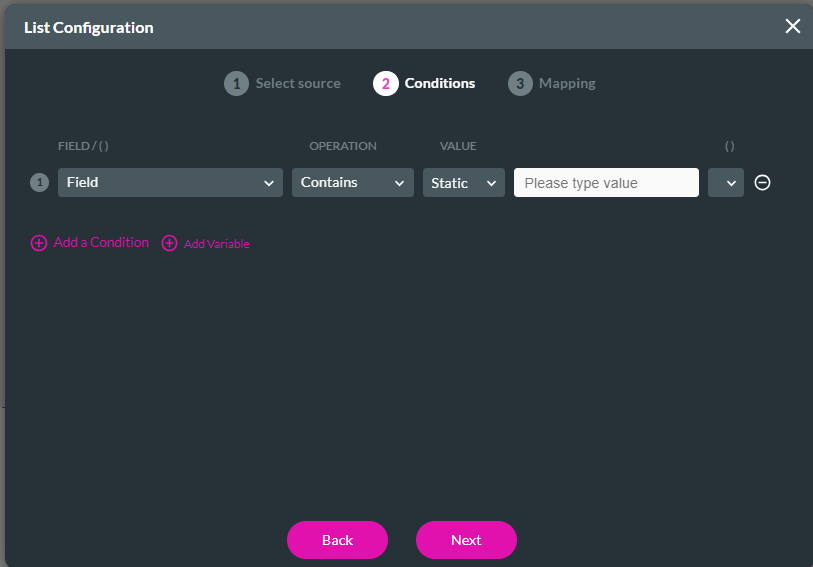
2. Use the drop-downs in the Conditions step to configure the specific data to pull. This will be linked to your previous selection. For example, conditions can be created to determine which contacts should be displayed in the table. Click Next.
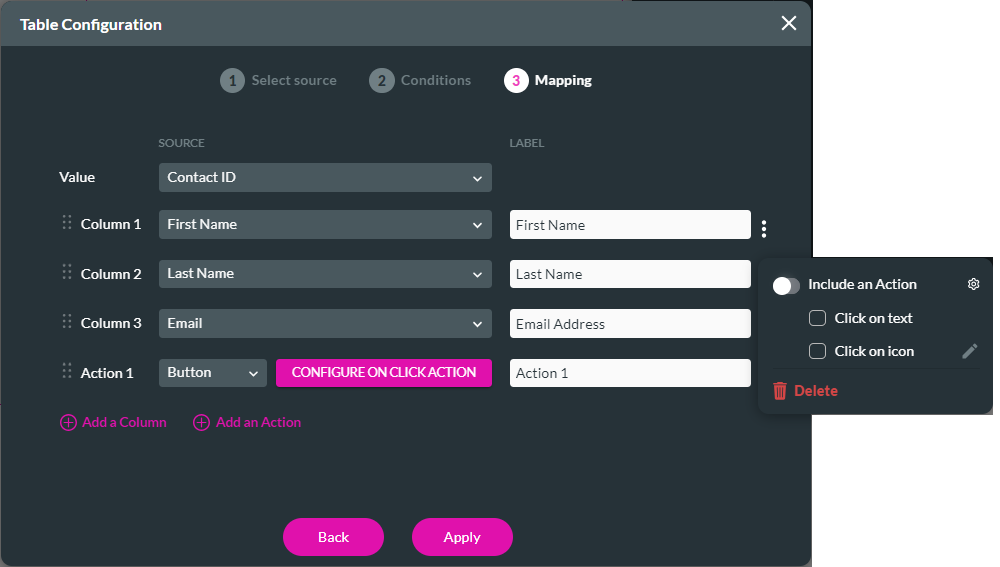
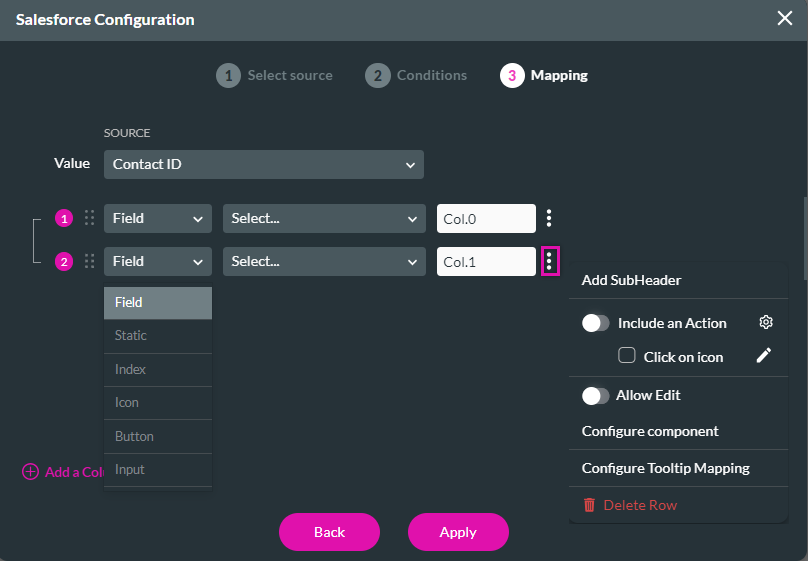
3. Map a Salesforce source to a table column by using the mapping drop-downs. Click Apply.
The table is inserted into your project.
4. Click on the table gear icon to display the List Settings.
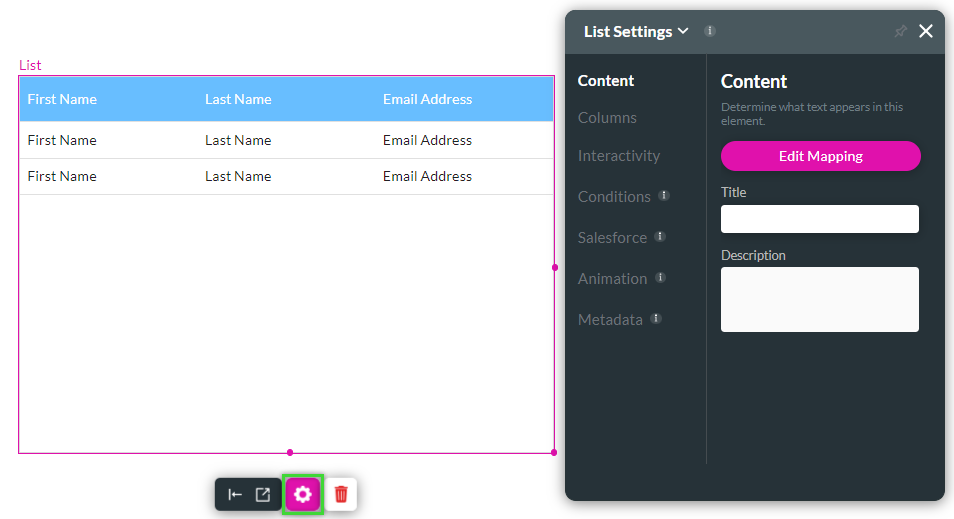
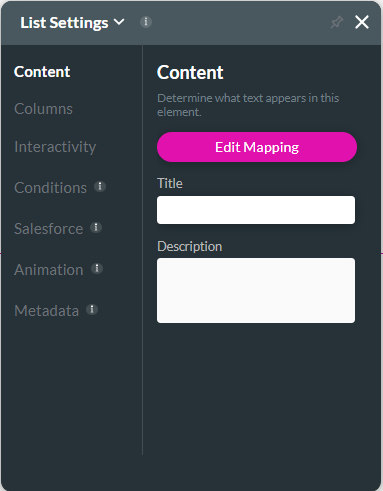
Under the Content tab, you can:
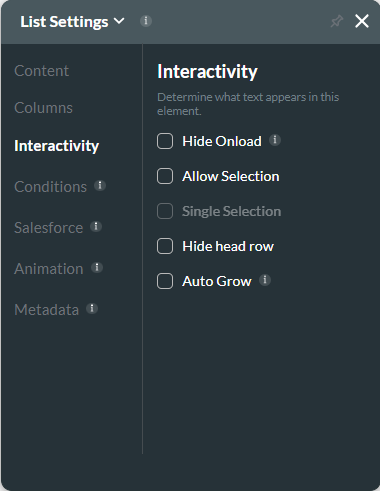
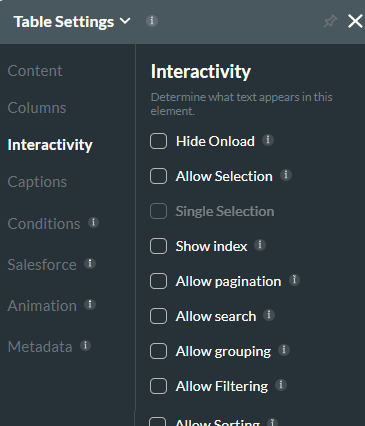
Under the Interactivity tab, you can:
1. Use the Source in Salesforce drop-down to select which object data will populate your table, such as a contact. You can choose a Salesforce object or a report. Click Next.
2. Use the drop-downs in the Conditions step to configure the specific data to pull. This will be linked to your previous selection. For example, conditions can be created to determine which contacts should be displayed in the table. Click Next.
3. Map a Salesforce source to a table column by using the mapping drop-downs. Click Apply.
The table is inserted into your project.
4. Click on the table gear icon to display the List Settings.
Under the Content tab, you can:
- Edit the mapping for your table.
- Add a table title.
- Add a table description.
Under the Interactivity tab, you can:
- Hide Onload so the table does not display when the web page is loaded.
- Allow users to make selections.
- Allow users to make a single selection only.
- Hide the head row.
- Enable the auto-grow function.
05 Table View Table
To insert a Table View Table follow the same steps as the List View Table. The difference occurs in the Mapping step. You can add actions to the table. You can add actions to columns using the kebab menu or add action buttons and icons.
Navigate to the table settings and click the Interactivity tab. You can:
Navigate to the table settings and click the Interactivity tab. You can:
- Hide Onload so the table does not display when the web page is loaded.
- Allow users to make selections.
- Allow users to make a single selection only.
- Show the index to users.
- Allow pagination.
- Allow users to search in the table search.
- Allow grouping.
- Allow filtering.
- Allow sorting.
- Enable the summary row function.
06 Power Table
To insert a Power Table, follow the same steps as the List View Table. The main differences are:
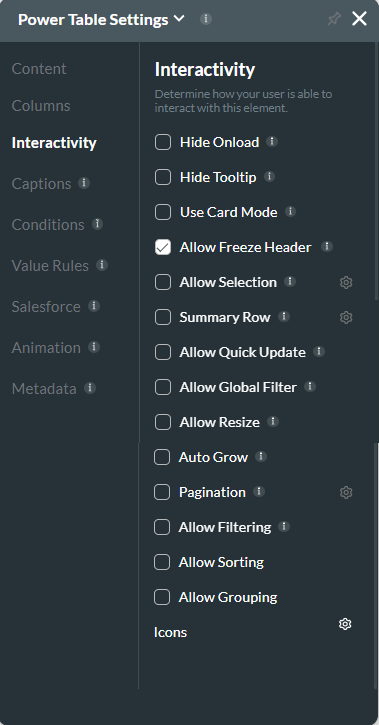
Navigate to the table settings and click the Interactivity tab. There are options not available for the other tables:
- Select source: You have the option to use an Apex in Salesforce.
- Mapping: You can add fields from the Salesforce record. You can also choose the type of field to insert into your table. Using the kebab menu, you can insert actions, include a subheader, allow editing, configure sub-components, and tooltip mapping.
Navigate to the table settings and click the Interactivity tab. There are options not available for the other tables:
- Hiding the table tooltip.
- Using card mode.
- Allow freeze header.
- Allow quick update.
- Allow Global Filter.
- Allow the user to resize.
- Updating icons.
07 The Takeaway
Power tables are the best option due to their powerful capabilities. The other tables can be used if your product requires a fast loading time.