Edit Options (9 min)
Completion requirements
01 Getting Started
This tutorial covers editing your power table, including:
- Inline editing.
- Quick update.
- API calls and interaction with Salesforce.
- Batch Complete and Batch Changed.
02 Enable Inline Editing
Insert a power table into your project. When configuring the Mapping:
1. Click on the Column kebab menu and enable the Allow Edit toggle switch.
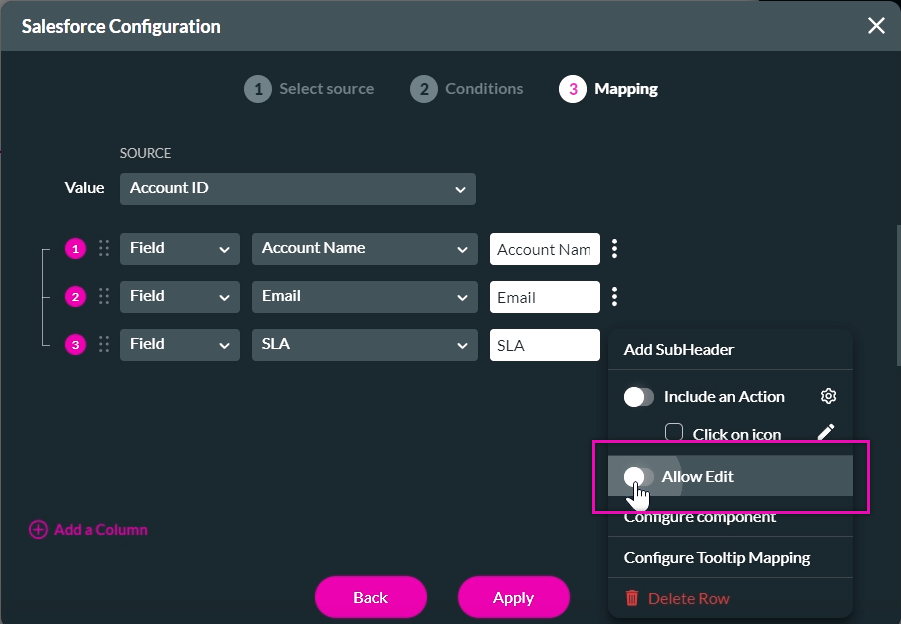
Once you have completed the configuration for your power table, save and preview the project. The edit icon displays when users hover over a column item (that has editing enabled).
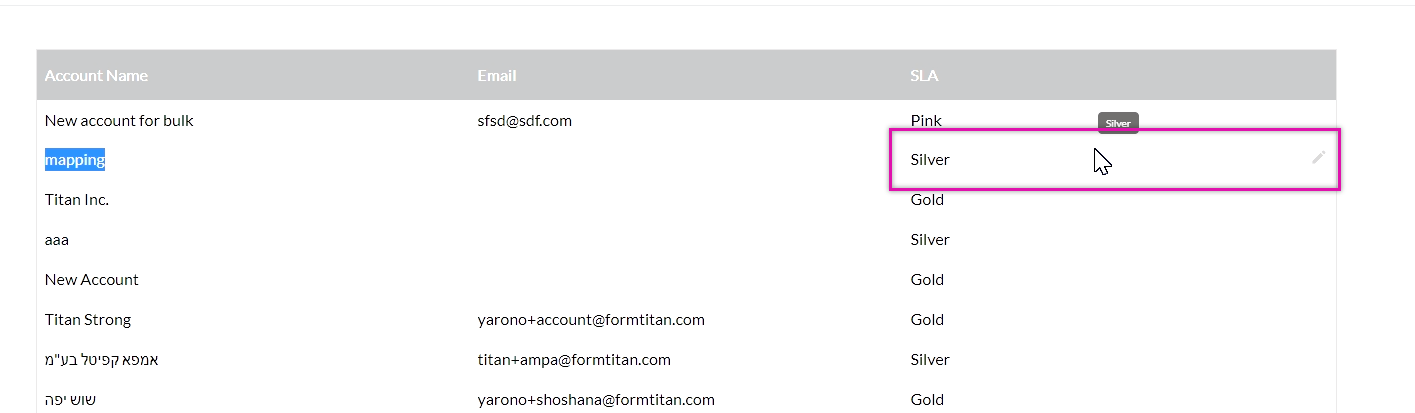
Users can click on the icon to make inline edits to the table. Any modifications made to the data in the table will be automatically updated to Salesforce in real-time and can be tracked in the Salesforce Integration Logs.

1. Click on the Column kebab menu and enable the Allow Edit toggle switch.
Once you have completed the configuration for your power table, save and preview the project. The edit icon displays when users hover over a column item (that has editing enabled).
Users can click on the icon to make inline edits to the table. Any modifications made to the data in the table will be automatically updated to Salesforce in real-time and can be tracked in the Salesforce Integration Logs.
03 Quick Update
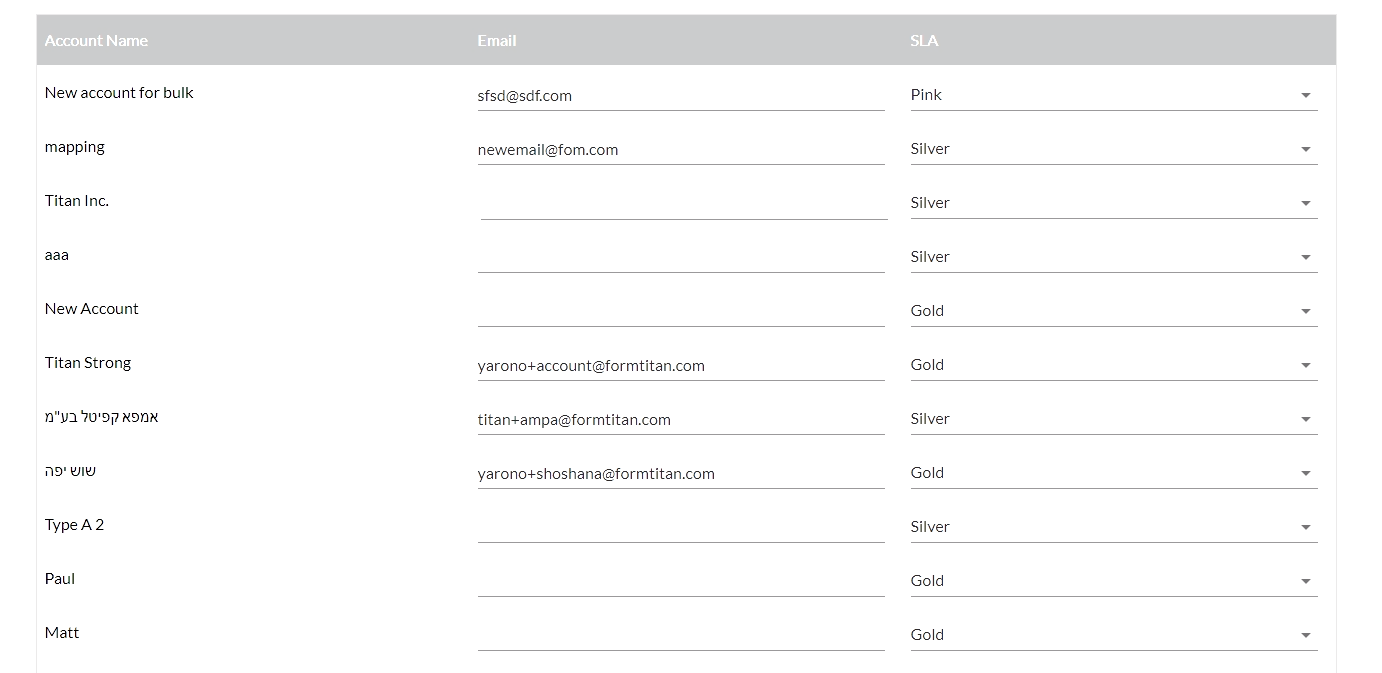
Quick edit allows users to easily change the table and push it to Salesforce together in one push.
To enable quick update:
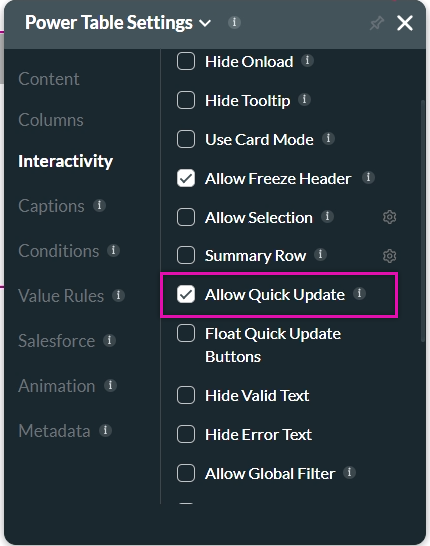
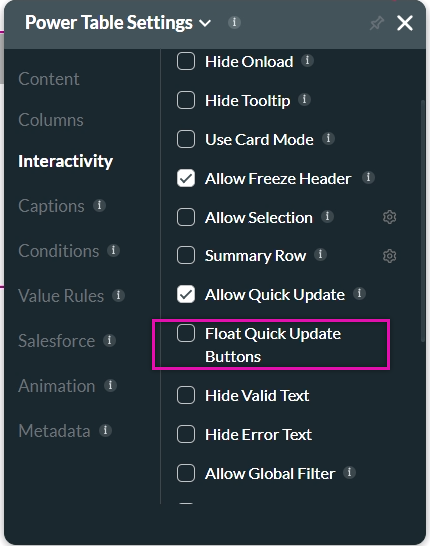
1. Navigate to the Power Table Settings and select the Interactivity tab.
2. Enable the Allow Quick Update function.
The submit and discard buttons are automatically added to the table and displayed centered on it.
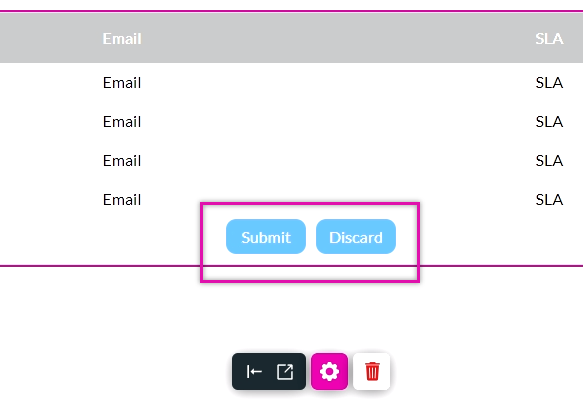
If your table is wide and requires users to scroll horizontally, the buttons will not always be visible. Enable the Float Quick Update Buttons function to ensure users can always interact with the buttons.
Save and preview your project. Users can edit inline directly without clicking the edit icon. The values entered will only be saved to Salesforce if the user clicks the submit button.
To enable quick update:
1. Navigate to the Power Table Settings and select the Interactivity tab.
2. Enable the Allow Quick Update function.
The submit and discard buttons are automatically added to the table and displayed centered on it.
If your table is wide and requires users to scroll horizontally, the buttons will not always be visible. Enable the Float Quick Update Buttons function to ensure users can always interact with the buttons.
Save and preview your project. Users can edit inline directly without clicking the edit icon. The values entered will only be saved to Salesforce if the user clicks the submit button.
04 API Calls and Interaction with Salesforce
Each time an in-line edit is made to data in the power table, the updated data is pushed to Salesforce. Each update will count as a separate API call.
When using Allow Quick Update, all updates are pushed to Salesforce in bulk, which means that many updates are completed in a single API call.
When using Allow Quick Update, all updates are pushed to Salesforce in bulk, which means that many updates are completed in a single API call.
05 Batch Complete and Batch Changed
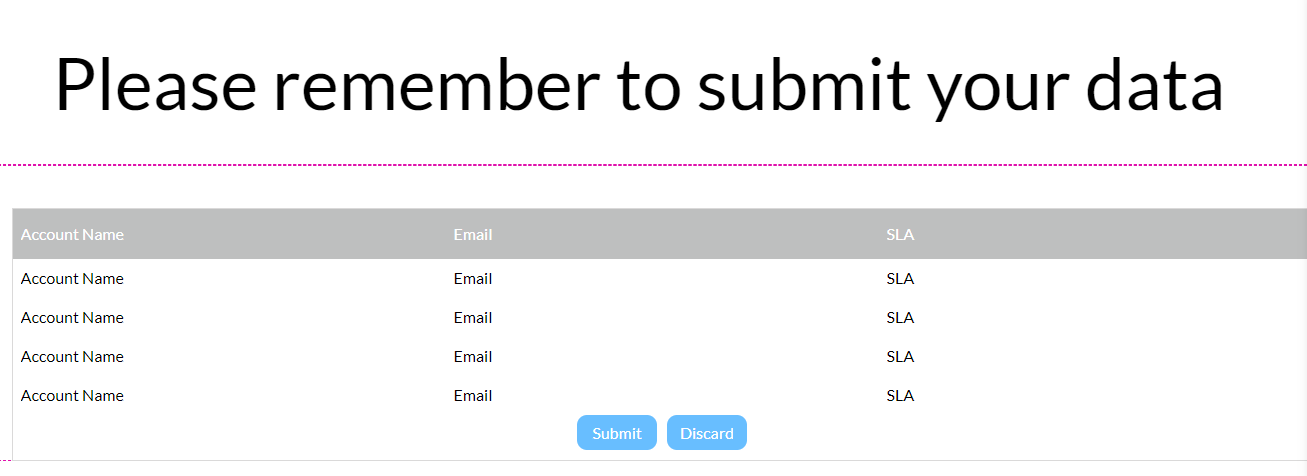
When users update data via Quick Update, it may not be clear that they need to click the Submit button to save their changes. This occurs when the table requires scrolling down to see the buttons.
This can be done by inserting text into your project to indicate to the user that they must submit any changes made.
Next, create a page-level condition on the power table/batch changes parameter.
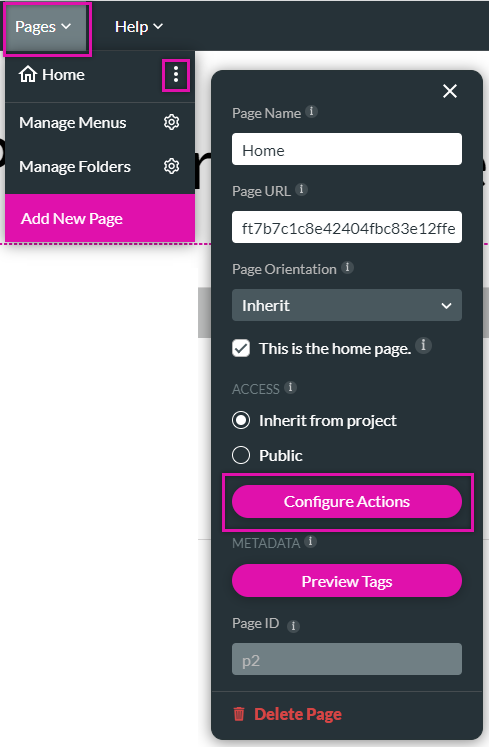
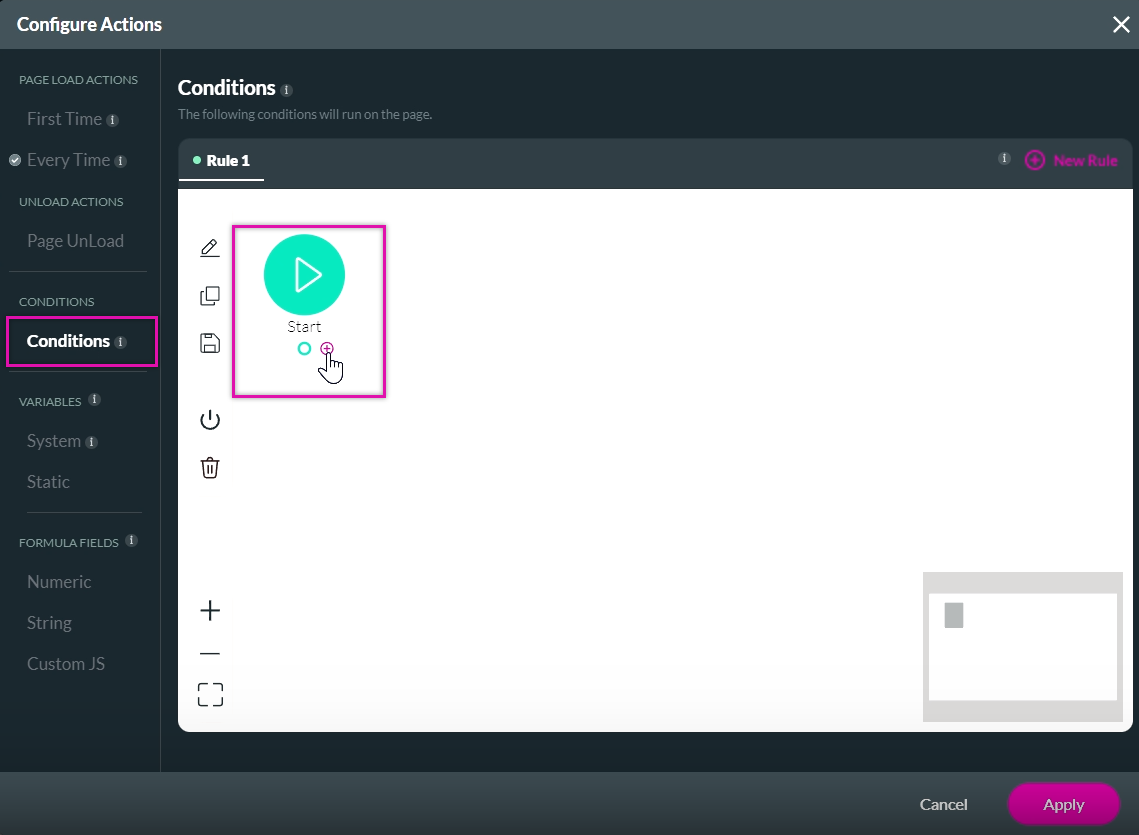
1. Expand the pages drop-down, select the page kebab menu, and click Configure Actions. The Configure Actions screen opens.
2. Click the Conditions tab and select the Start + icon. The Add Node screen opens.
3. Select Condition and click Next.
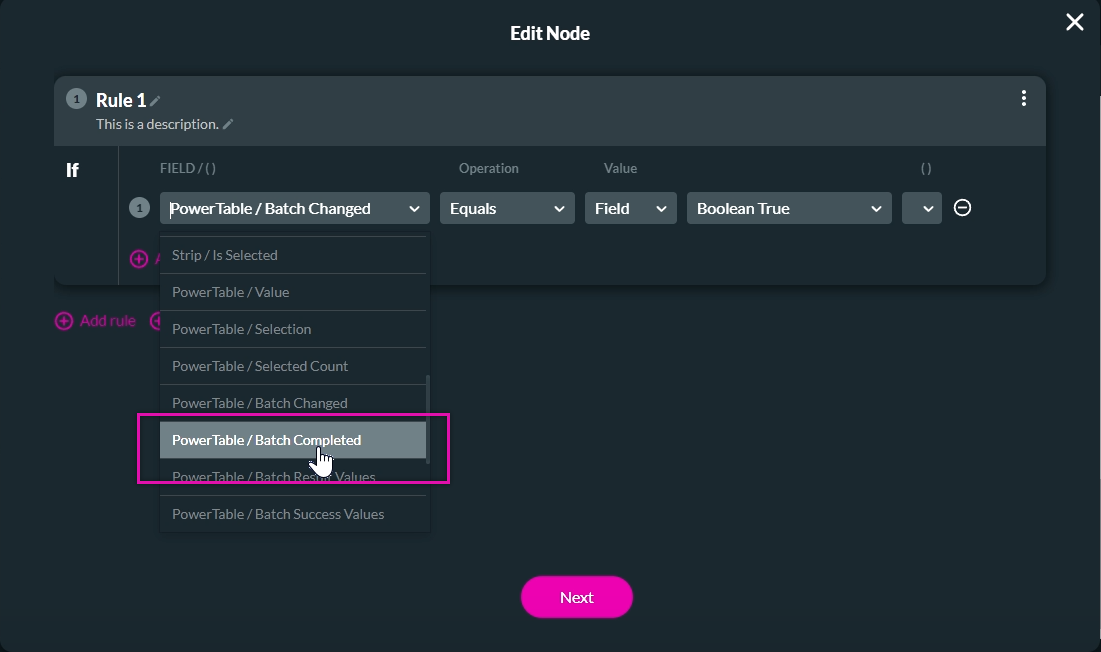
4. Configure the Batch Change to equal Boolean True and click Next.
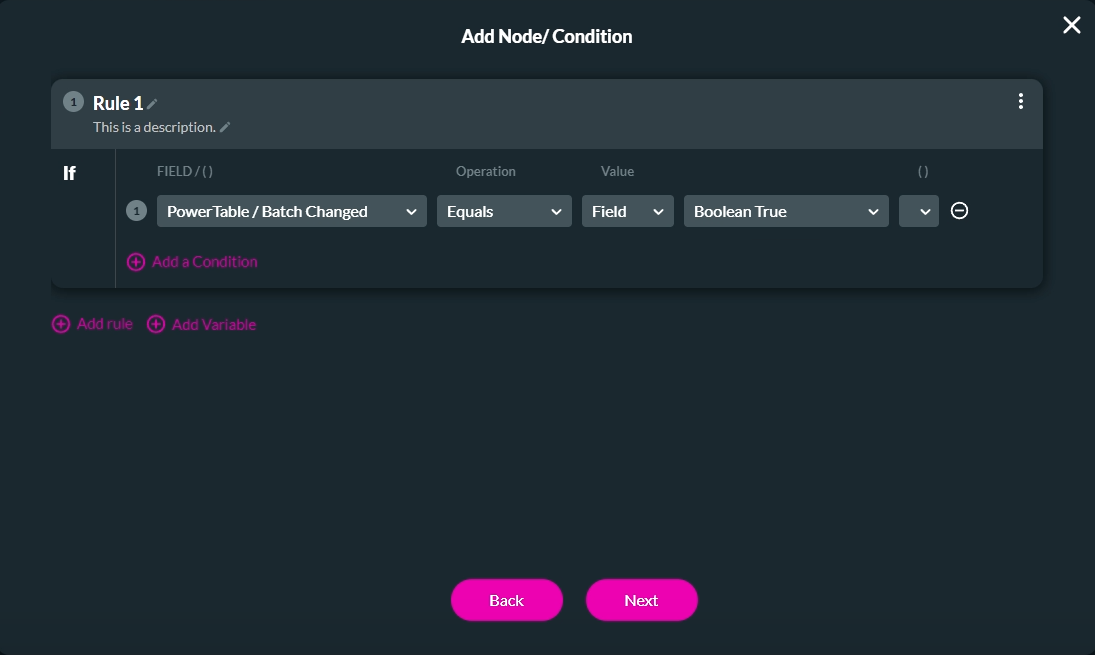
5. Add a Tag and click Insert.
6. Click the Then + icon. The Add Node screen opens.
7. Select Affected Elements and click Next.
8. Configure the Text to Show, click Apply, and click Next.
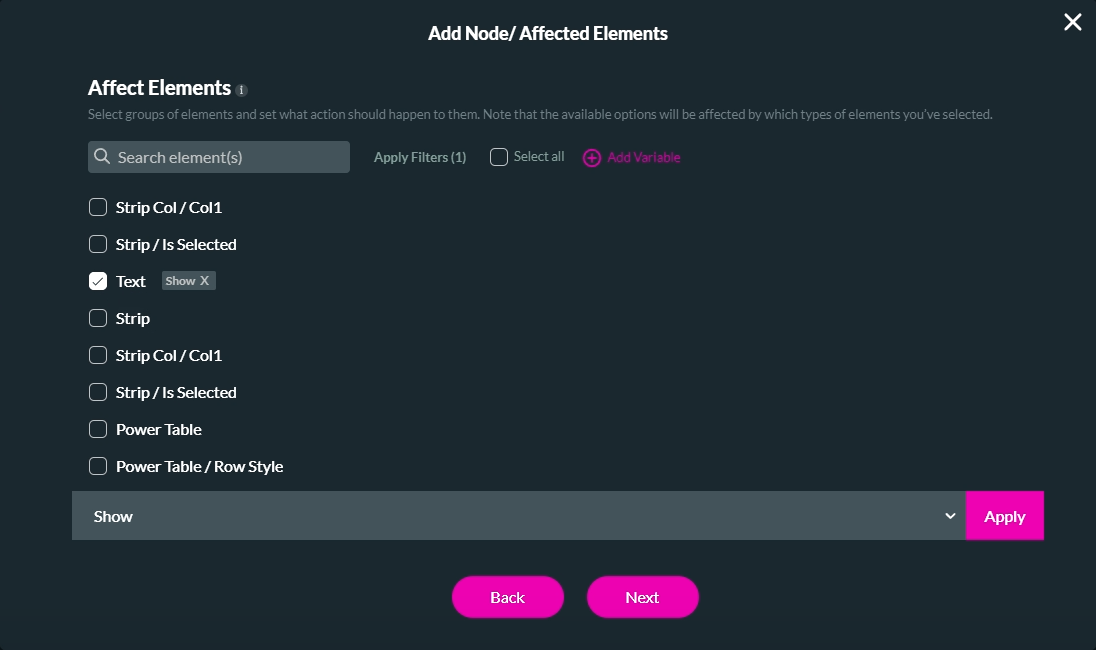
9. Add a Tag and click Insert.
The node is added to the screen.
10. Click on the Else + icon. The Add Node screen opens.
11. Select Affected Elements and click Next.
12. Configure the Text to Hide, click Apply, and click Next.
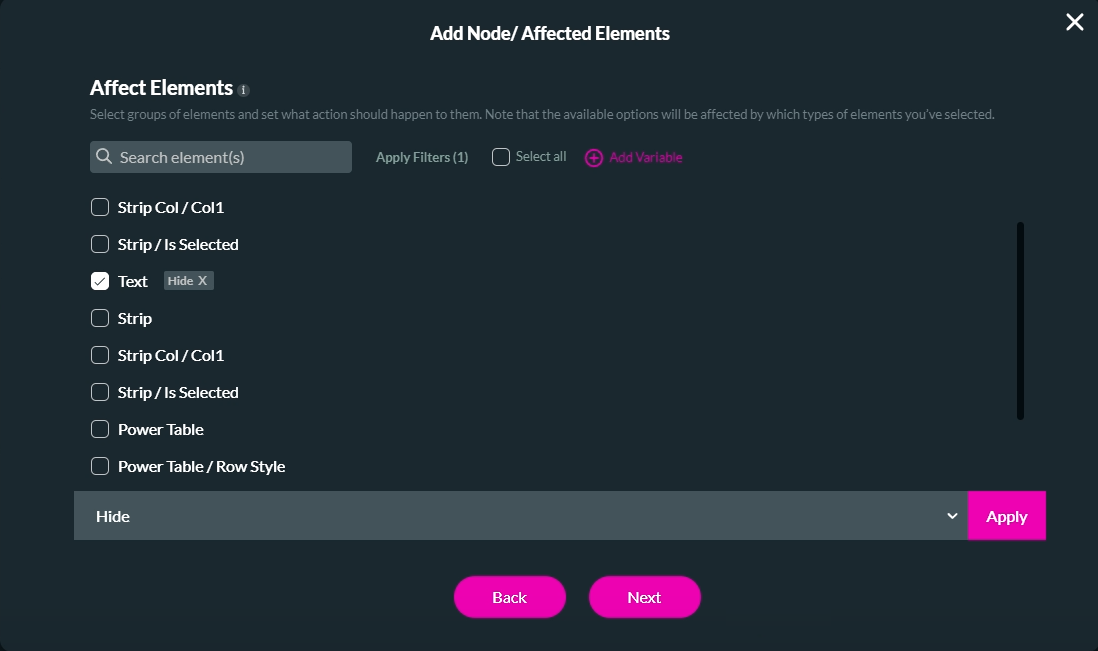
13. Add a Tag and click Insert.
The node is added to the screen.
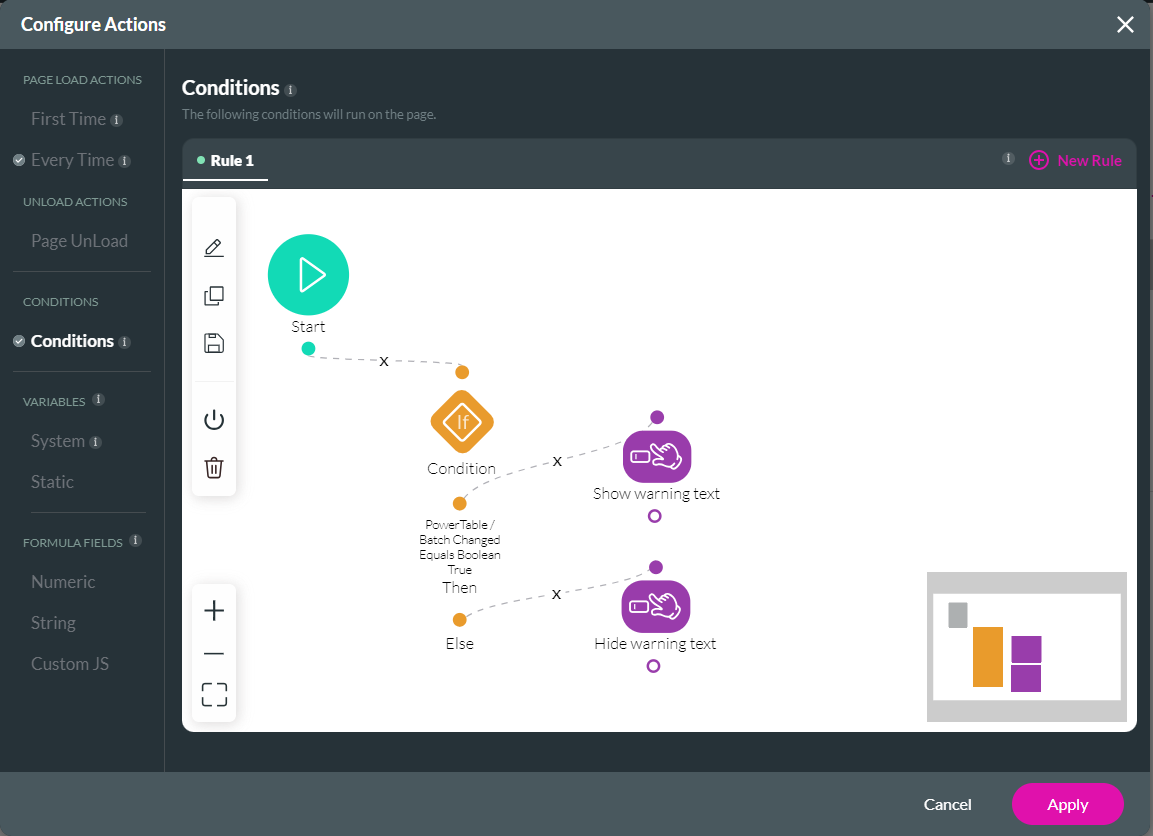
Save and preview. If no changes are made to the table, the text does not display, but if a user does make an edit, the text pops up to remind them to submit the changes.

You can also configure the Condition to reflect Batch Complete. This will run actions after the power table updates are made, and only run after the user clicks the submit button.
This can be done by inserting text into your project to indicate to the user that they must submit any changes made.
Next, create a page-level condition on the power table/batch changes parameter.
1. Expand the pages drop-down, select the page kebab menu, and click Configure Actions. The Configure Actions screen opens.
2. Click the Conditions tab and select the Start + icon. The Add Node screen opens.
3. Select Condition and click Next.
4. Configure the Batch Change to equal Boolean True and click Next.
5. Add a Tag and click Insert.
6. Click the Then + icon. The Add Node screen opens.
7. Select Affected Elements and click Next.
8. Configure the Text to Show, click Apply, and click Next.
9. Add a Tag and click Insert.
The node is added to the screen.
10. Click on the Else + icon. The Add Node screen opens.
11. Select Affected Elements and click Next.
12. Configure the Text to Hide, click Apply, and click Next.
13. Add a Tag and click Insert.
The node is added to the screen.
Save and preview. If no changes are made to the table, the text does not display, but if a user does make an edit, the text pops up to remind them to submit the changes.
You can also configure the Condition to reflect Batch Complete. This will run actions after the power table updates are made, and only run after the user clicks the submit button.