Custom Get (8 min)
Completion requirements
01 Getting Started
This tutorial covers running custom Gets for your power tables, including:
- How a Salesforce Get is triggered.
- Triggering the Get from a Lookup Field.
- Triggering the Get from a Dropdown Field.
02 How a Salesforce Get is Triggered
Insert a power table into your project. Save and Preview. Your power table will populate on load.
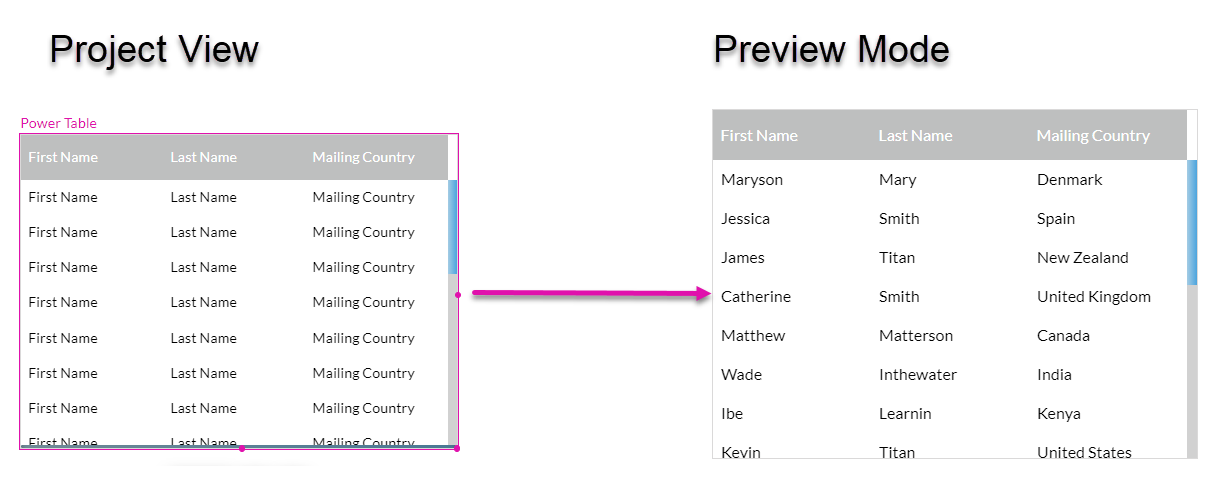
When you insert a Power Table into your project, a page action is created to run a Salesforce get.
To view this action:
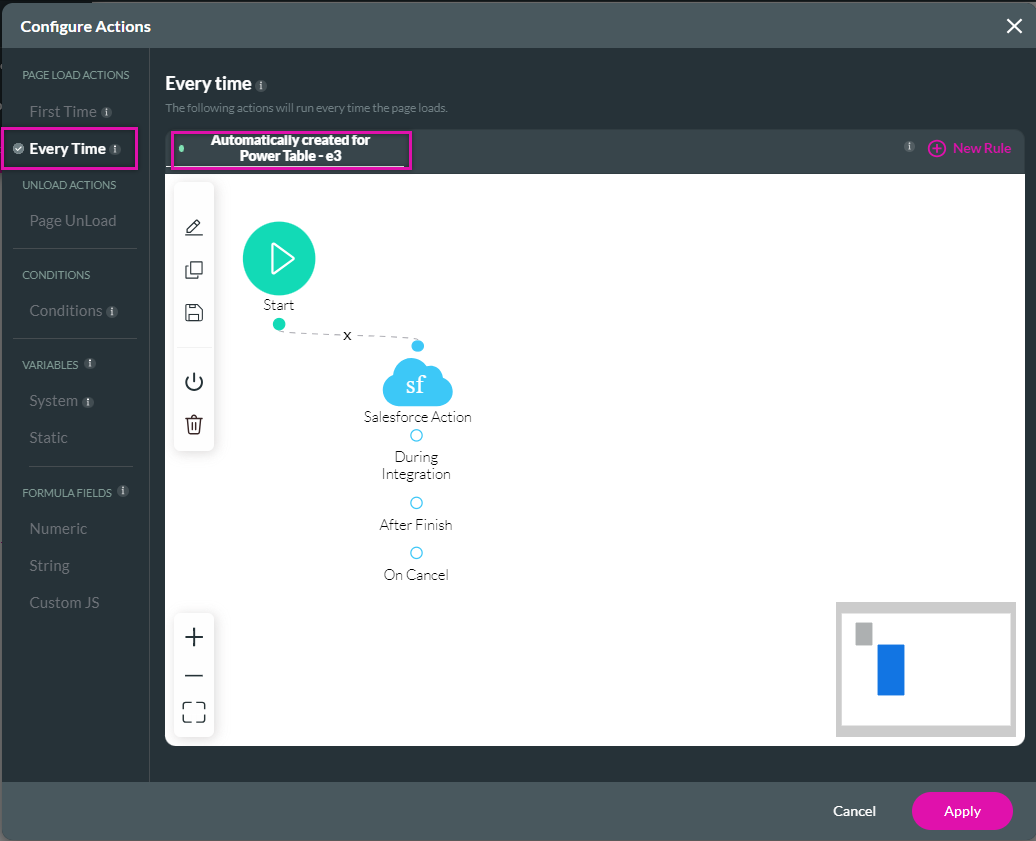
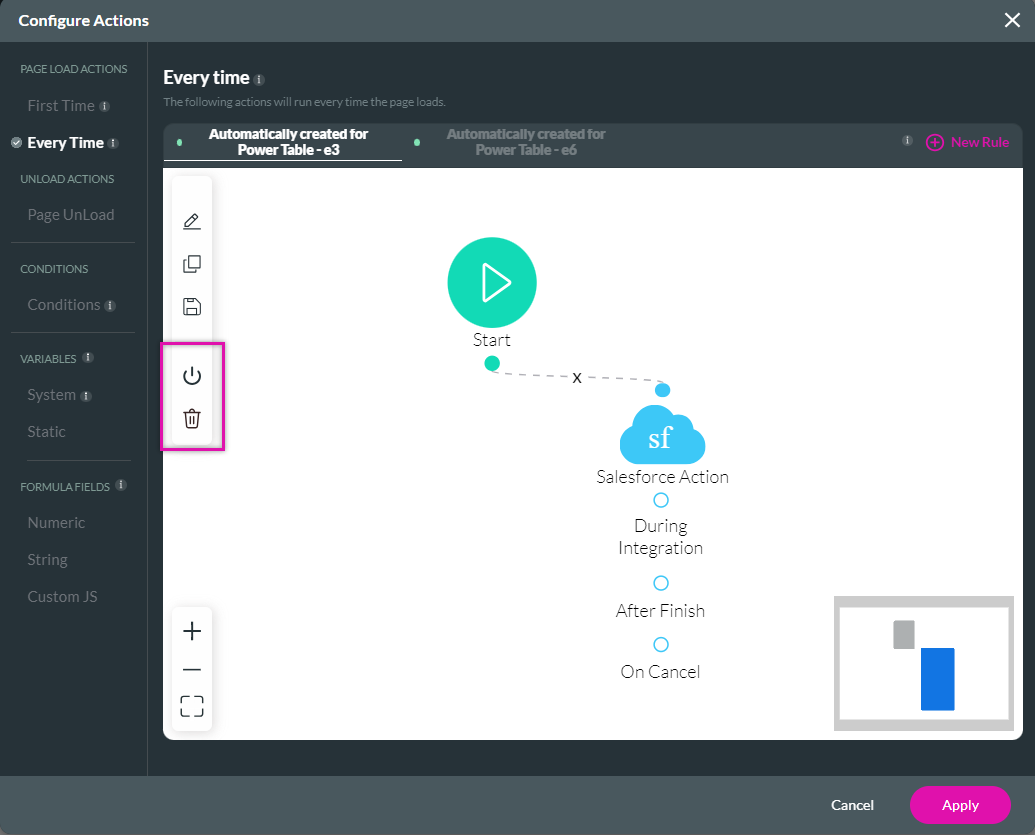
1. Open the Pages dropdown. Select the page kebab menu and click the Configure Actions button. The Configure Actions screen opens.

2. Click the Every Time tab. The action flow that runs automatically, creating a get that populates the power table, is displayed.
When you insert a Power Table into your project, a page action is created to run a Salesforce get.
To view this action:
1. Open the Pages dropdown. Select the page kebab menu and click the Configure Actions button. The Configure Actions screen opens.
2. Click the Every Time tab. The action flow that runs automatically, creating a get that populates the power table, is displayed.
03 Triggering the Get from a Lookup Field
You can configure a lookup field that affects the content in the power table. For example, the account chosen in the lookup field will get the contacts associated with that account in the power table.
1. Add a lookup field to your project.
2. Click the project Settings Gear Icon and select the Salesforce tab. The Salesforce Integration screen opens.
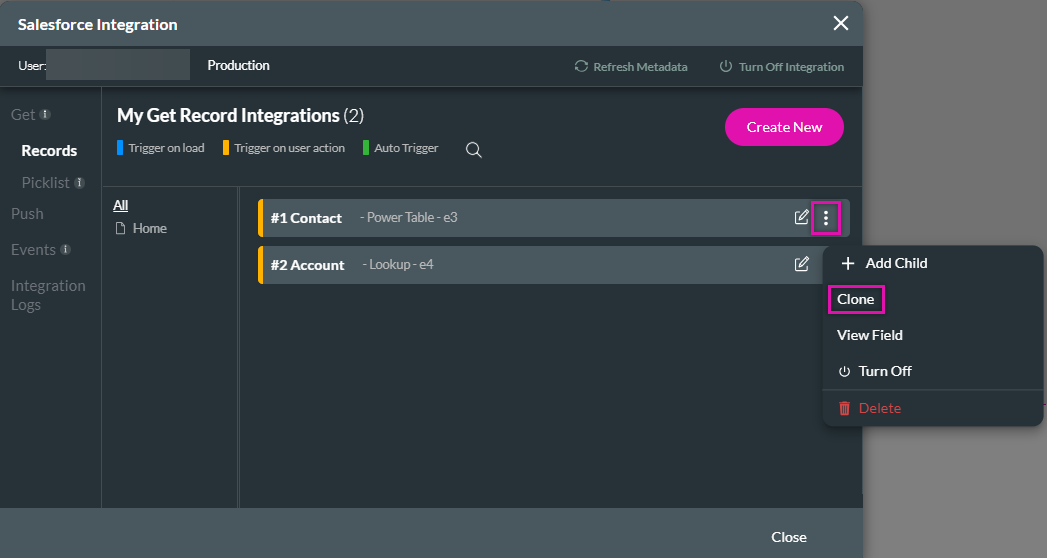
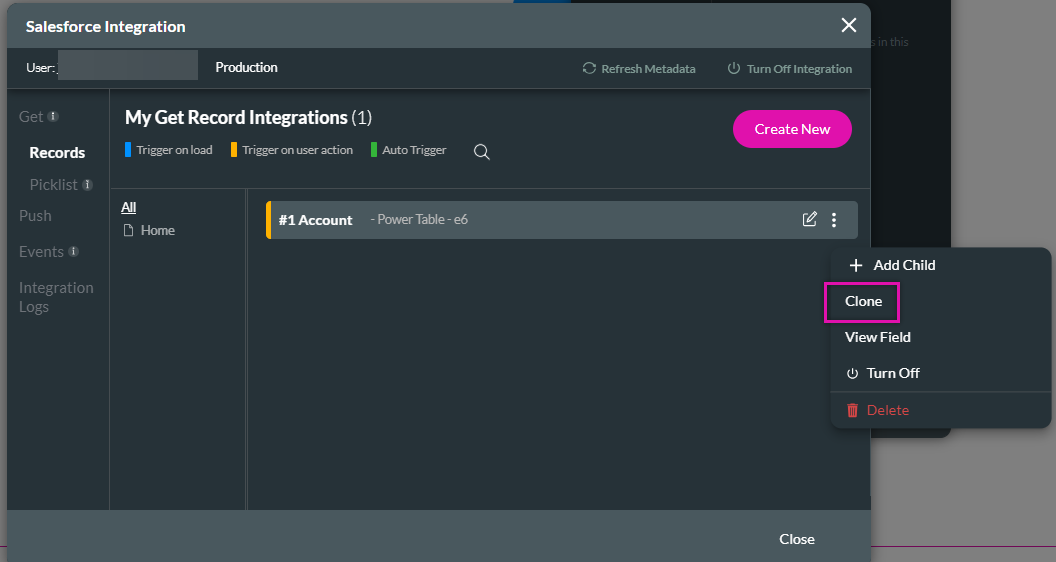
3. Click on the Power Table, get the kebab icon, and select Clone from the sub-menu. This will duplicate the get.
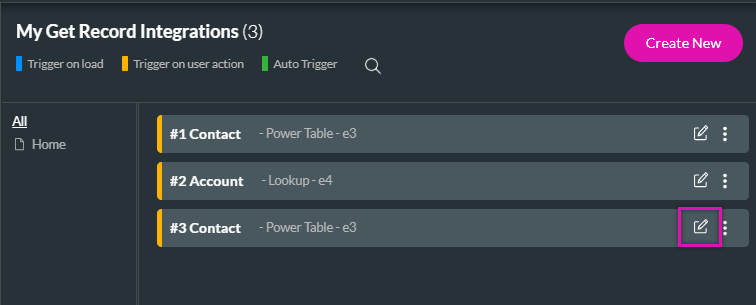
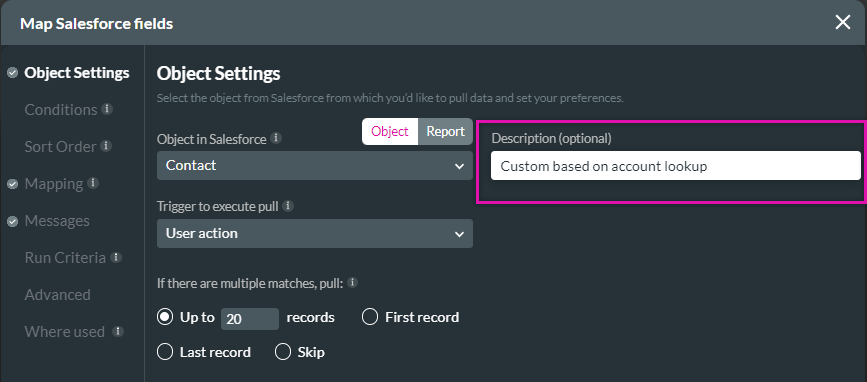
4. Click on the cloned get’s edit icon. The Map Salesforce Fields screen opens.
5. Add a new description to tell the difference between the original and cloned get.
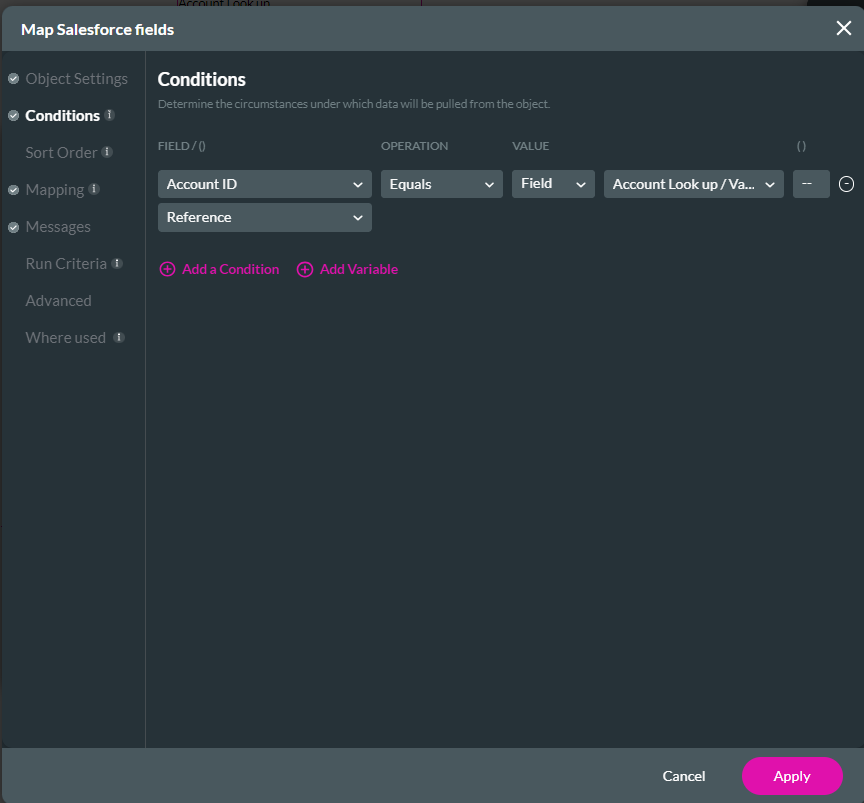
6. Click the Conditions tab. Use the dropdowns to configure the condition. For example, the Account ID must equal the account lookup field value. Click Apply and Close.
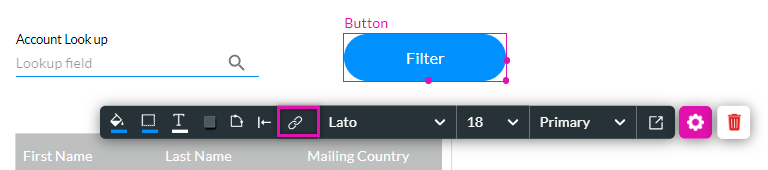
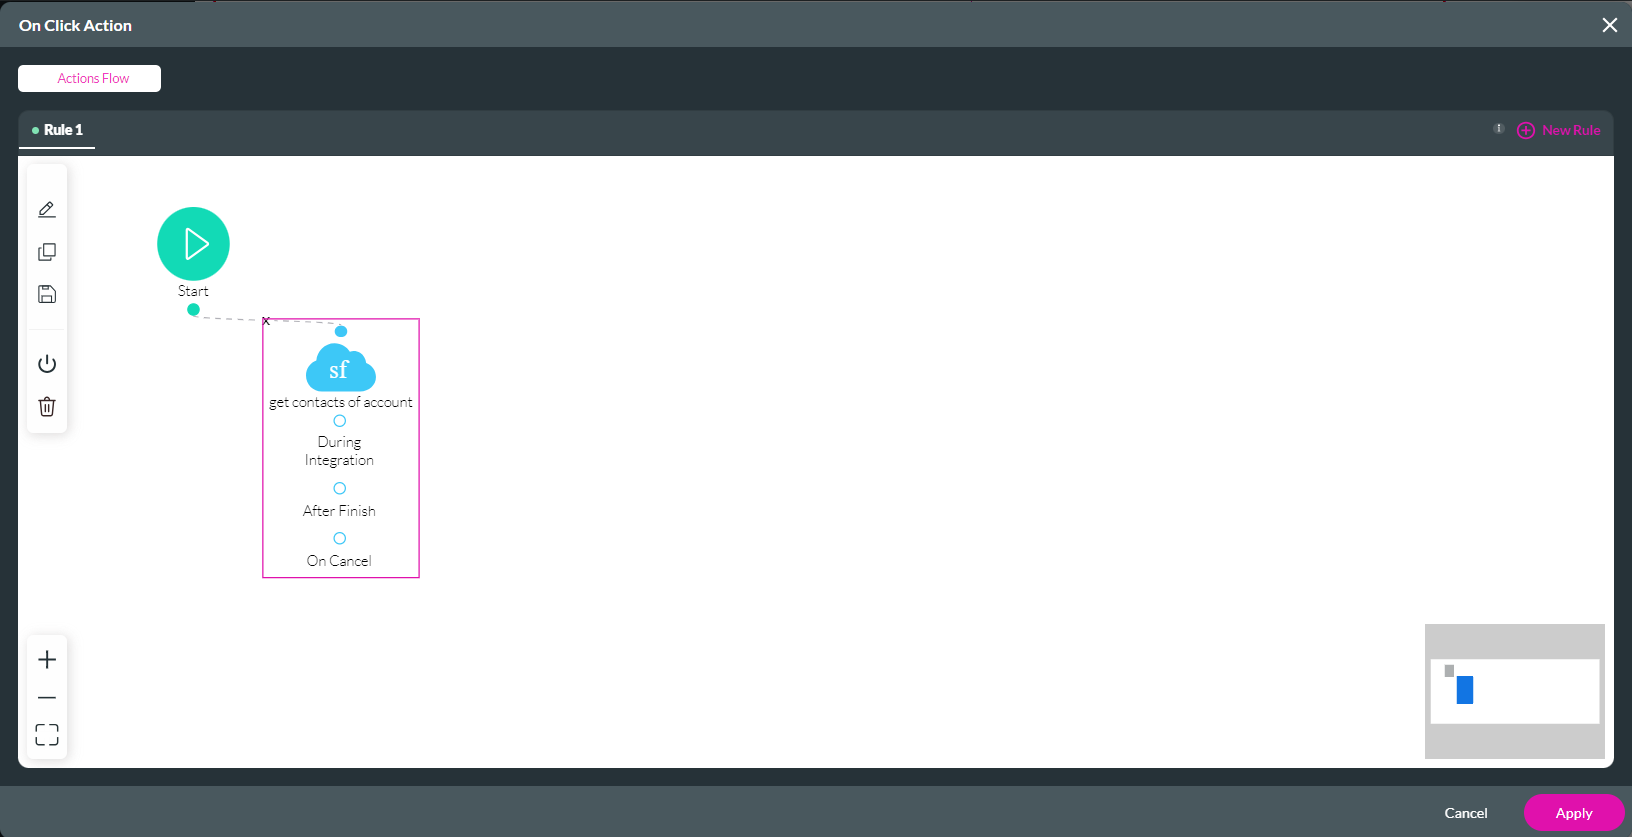
7. Add a button to your project. This will trigger the lookup get. Click on the button link icon. The On Click Action screen opens.
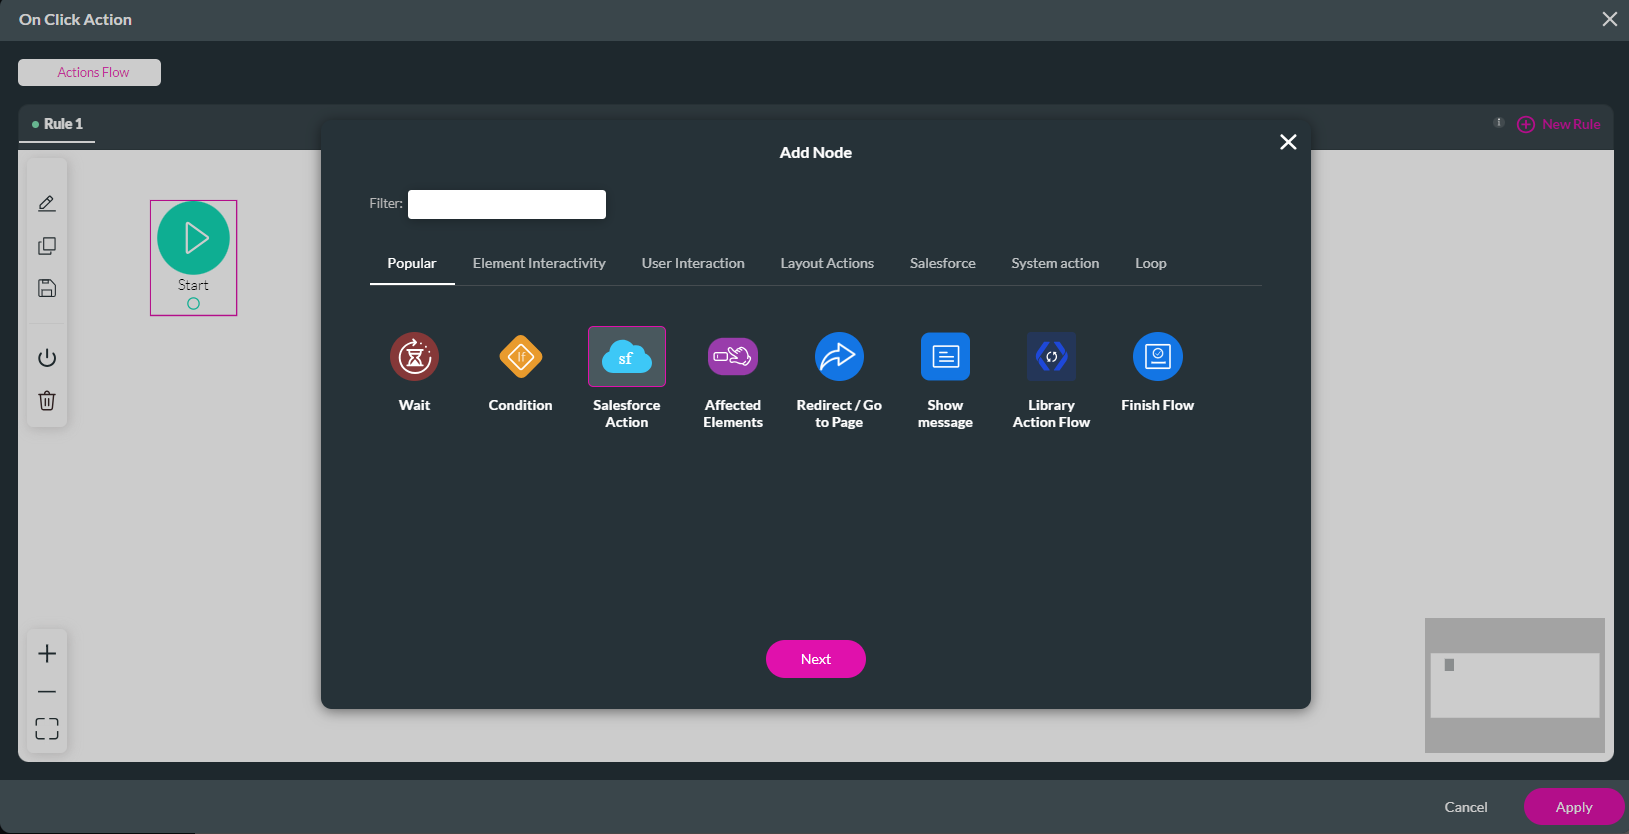
8. Click the Start + icon. The Add Node screen opens. Select Salesforce Action and click Next.
9. Use the dropdown to select the get created for the lookup and click Next.
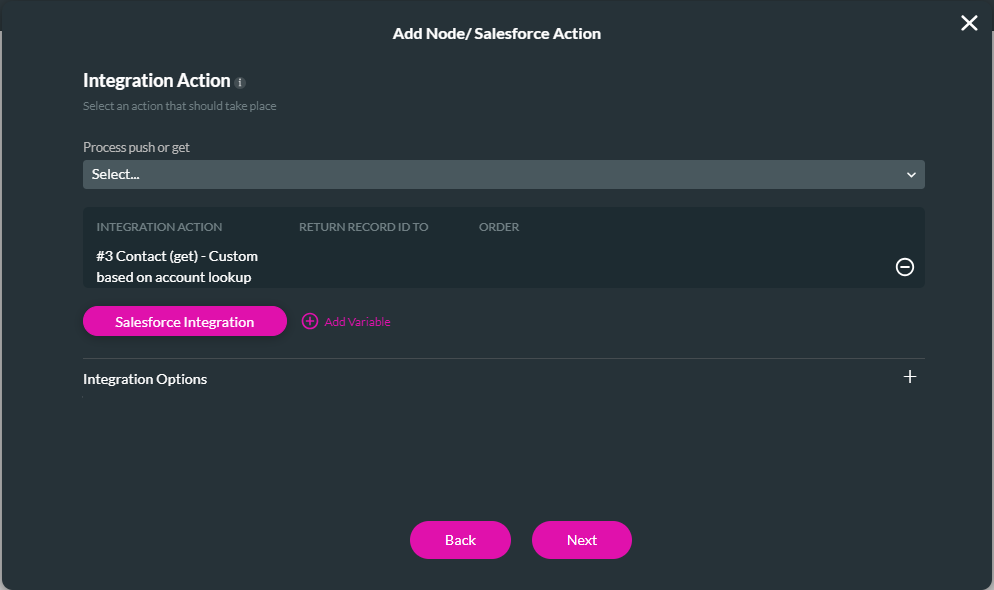
10. Add a Tag and click Insert. The node is added to the screen.
11. Click Apply.
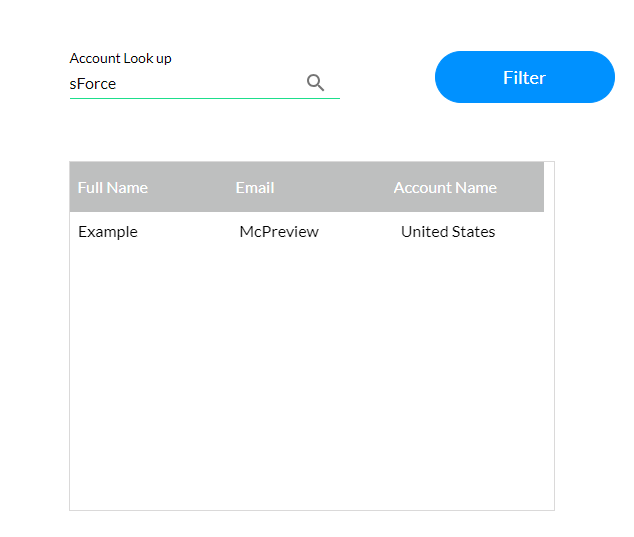
When you search for an account name and click the button, you can save and preview the information. A new list of contacts will then be displayed.
1. Add a lookup field to your project.
2. Click the project Settings Gear Icon and select the Salesforce tab. The Salesforce Integration screen opens.
3. Click on the Power Table, get the kebab icon, and select Clone from the sub-menu. This will duplicate the get.
4. Click on the cloned get’s edit icon. The Map Salesforce Fields screen opens.
5. Add a new description to tell the difference between the original and cloned get.
6. Click the Conditions tab. Use the dropdowns to configure the condition. For example, the Account ID must equal the account lookup field value. Click Apply and Close.
7. Add a button to your project. This will trigger the lookup get. Click on the button link icon. The On Click Action screen opens.
8. Click the Start + icon. The Add Node screen opens. Select Salesforce Action and click Next.
9. Use the dropdown to select the get created for the lookup and click Next.
10. Add a Tag and click Insert. The node is added to the screen.
11. Click Apply.
When you search for an account name and click the button, you can save and preview the information. A new list of contacts will then be displayed.
04 Triggering the Get from a Dropdown Field
For these next steps, the table and look-up, including the Salesforce get, were deleted. A new power table was inserted to display the account name and SLA. The table Get will be triggered with a dropdown.
1. Add a dropdown to your project. Select the dropdown gear icon. The element settings menu opens.
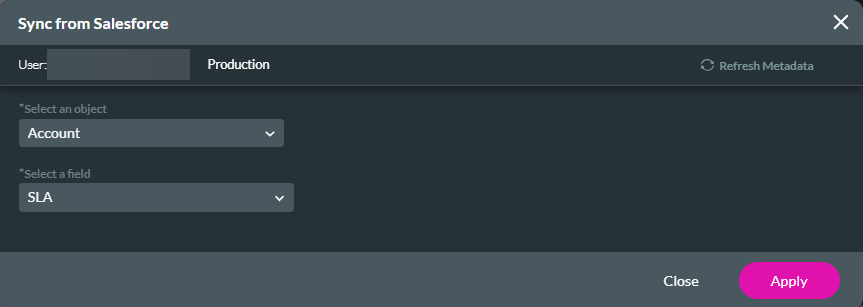
2. Select the Dynamic Values radio button and click the Sync from Salesforce. The Sync from Salesforce window opens.
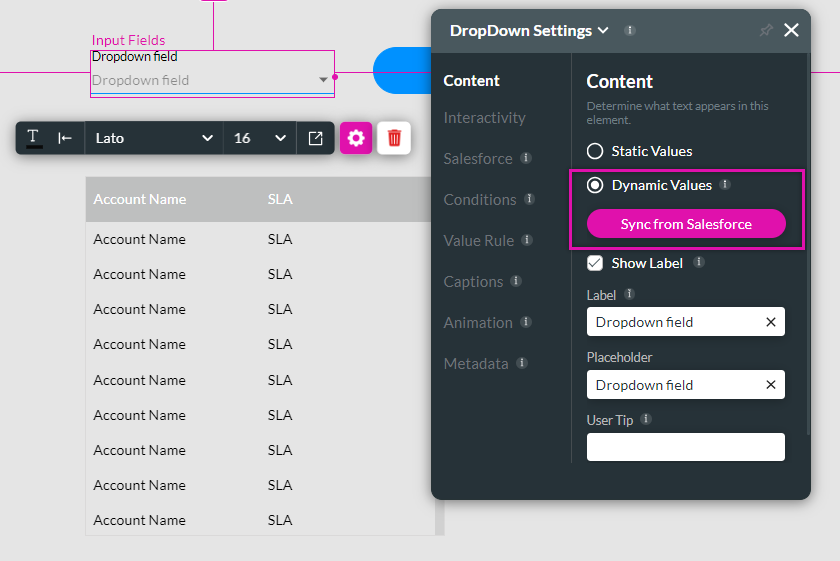
3. Use the dropdowns to configure the Salesforce object and field that will populate the dropdown field—for example, account and account SLA. Click Apply.
4. Navigate to the Salesforce Integration screen. Clone the power table Get.
5. Click on the Cloned get edit icon. The Map Salesforce field opens.
6. Add a new description to tell the difference between the original and cloned get.
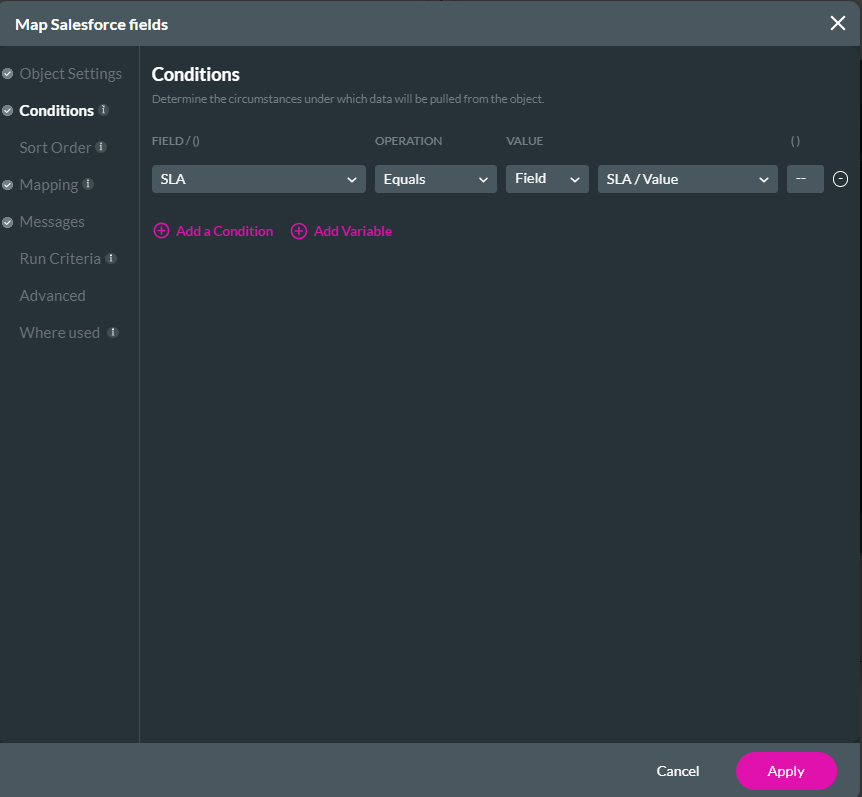
7. Click the Conditions tab and configure the condition that the SLA field must equal the SLA Value. Click Apply and Close.
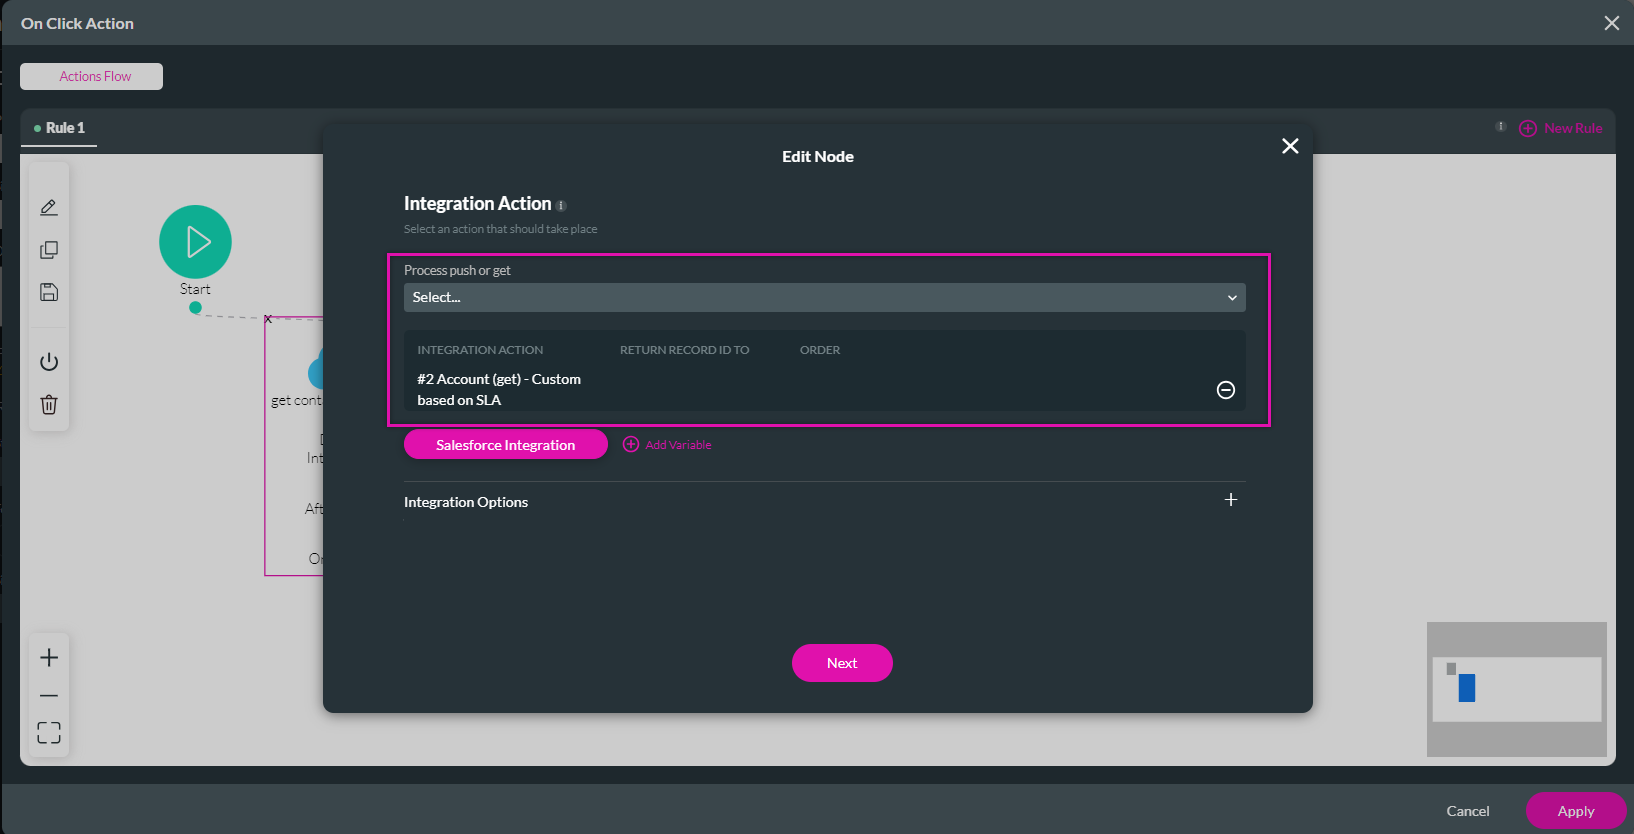
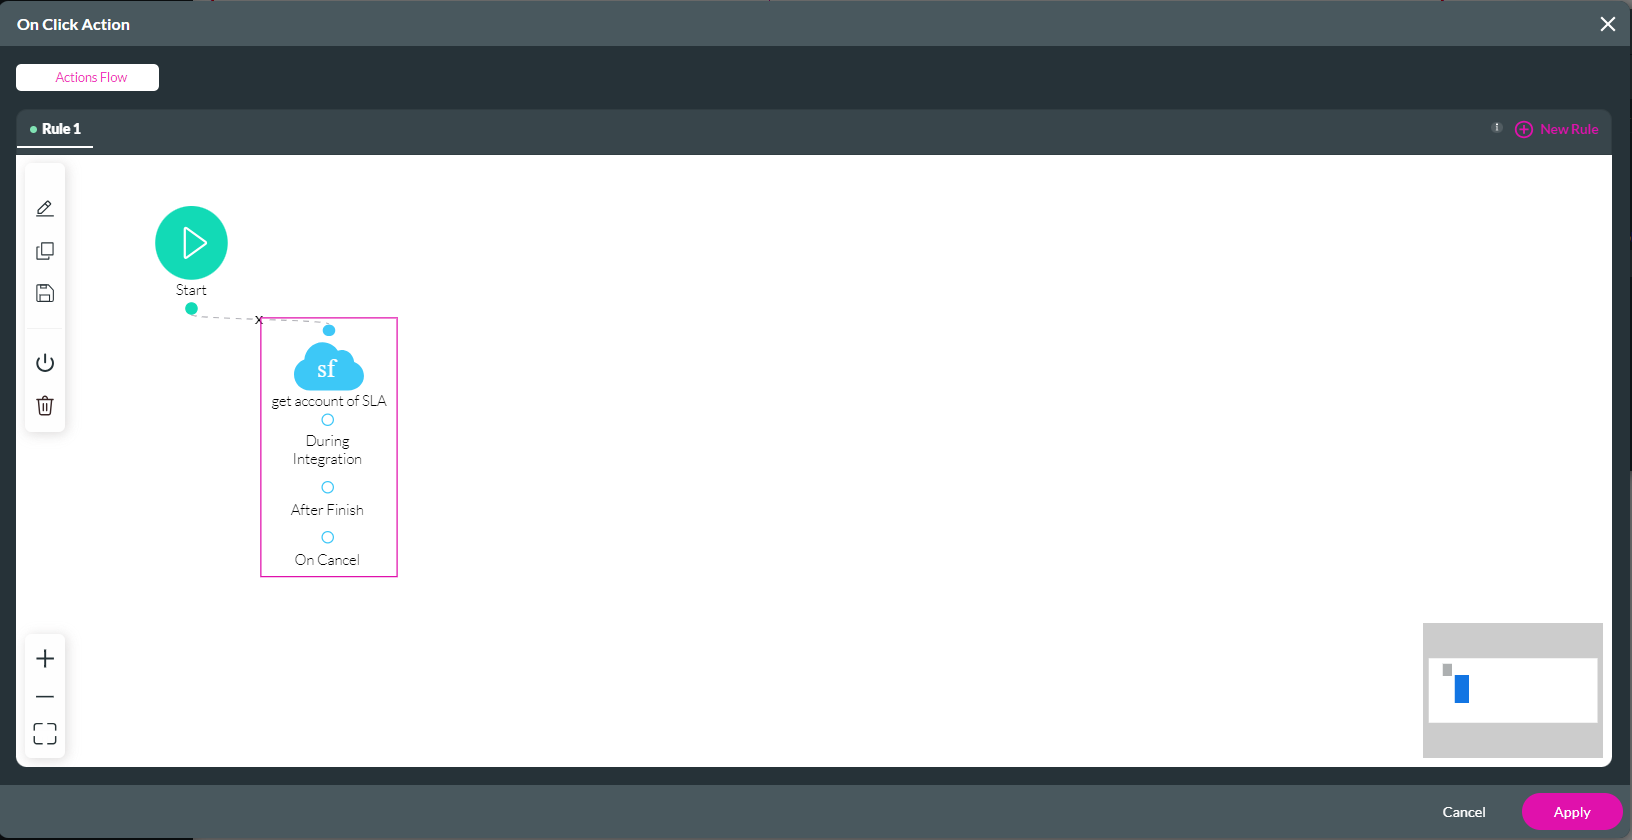
8. Click the button link icon. The On click action screen opens. The previously configured Get is displayed. Double-click on the SalesforceAction node to make edits. The Integration Action screen opens. Use the dropdown to select the new Get. Click Next.
9. Edit the Tag to match the new get and click Save. The node is updated.
10. Click Apply.
Note: Each time a power table is created. The action is stored in the every-time page actions. It is best practice to delete or turn off the actions you no longer need to save on loading time.
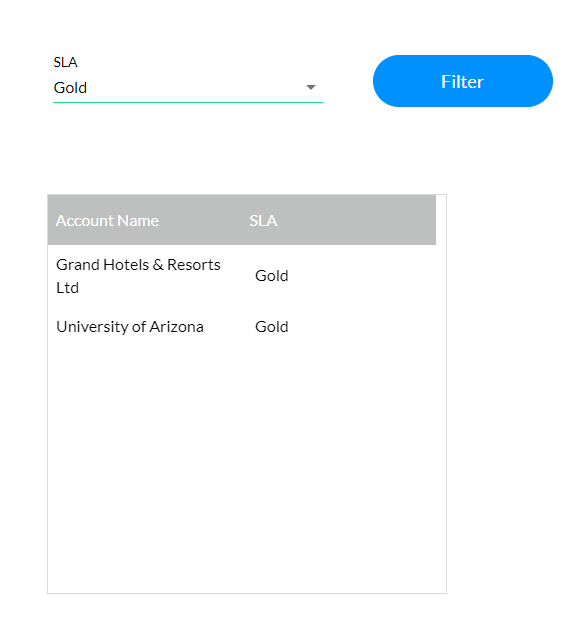
Save and preview. Use the dropdown to select the SLA and click the filter button (note that although the button has been labeled 'filter,' it does not complete a filter function). Only accounts with that SLA are displayed.
1. Add a dropdown to your project. Select the dropdown gear icon. The element settings menu opens.
2. Select the Dynamic Values radio button and click the Sync from Salesforce. The Sync from Salesforce window opens.
3. Use the dropdowns to configure the Salesforce object and field that will populate the dropdown field—for example, account and account SLA. Click Apply.
4. Navigate to the Salesforce Integration screen. Clone the power table Get.
5. Click on the Cloned get edit icon. The Map Salesforce field opens.
6. Add a new description to tell the difference between the original and cloned get.
7. Click the Conditions tab and configure the condition that the SLA field must equal the SLA Value. Click Apply and Close.
8. Click the button link icon. The On click action screen opens. The previously configured Get is displayed. Double-click on the SalesforceAction node to make edits. The Integration Action screen opens. Use the dropdown to select the new Get. Click Next.
9. Edit the Tag to match the new get and click Save. The node is updated.
10. Click Apply.
Note: Each time a power table is created. The action is stored in the every-time page actions. It is best practice to delete or turn off the actions you no longer need to save on loading time.
Save and preview. Use the dropdown to select the SLA and click the filter button (note that although the button has been labeled 'filter,' it does not complete a filter function). Only accounts with that SLA are displayed.