Conditions (9 min)
Completion requirements
01 Getting Started
This tutorial covers power table conditions.
02 Adding a Condition to a Table
When creating a condition for a power table, the condition will apply across every row. This means that if your table has many rows, the condition will run on each row, which can slow your project down.
We recommend that you create conditions for your table only if you are syncing a small amount of data to display in your Power Table.
We recommend that you create conditions for your table only if you are syncing a small amount of data to display in your Power Table.
03 Adding a Condition Outside the Power Table
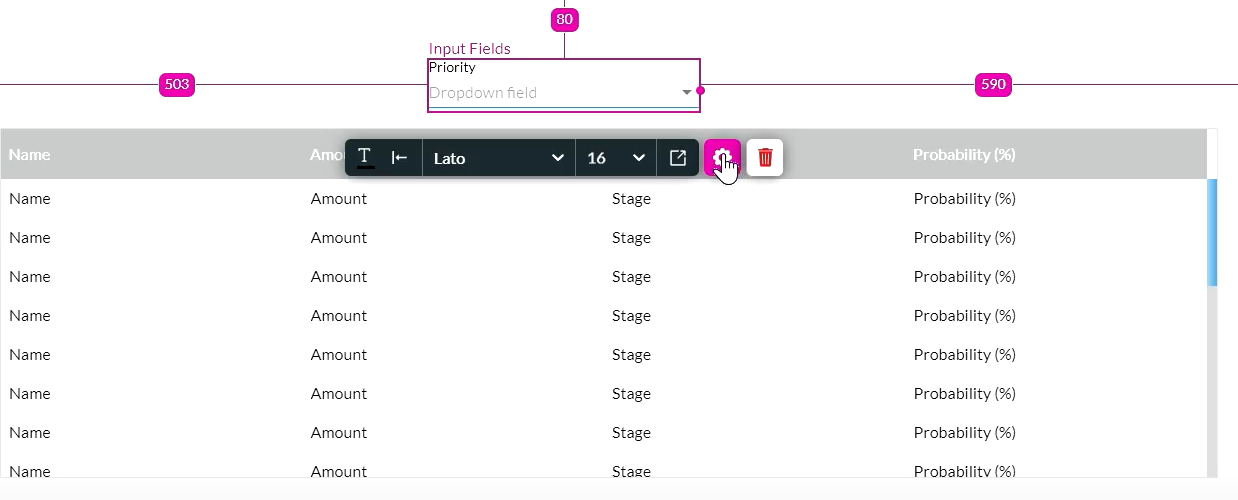
For this example, a power table has been configured, and an element was inserted outside of the power table.
1. Click on the outside element gear. The element settings screen opens.
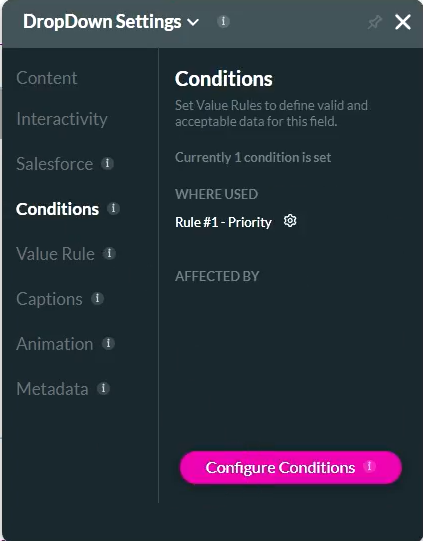
2. Select the Conditions tab and click the Configure Conditions button. The Set Conditions screen opens.
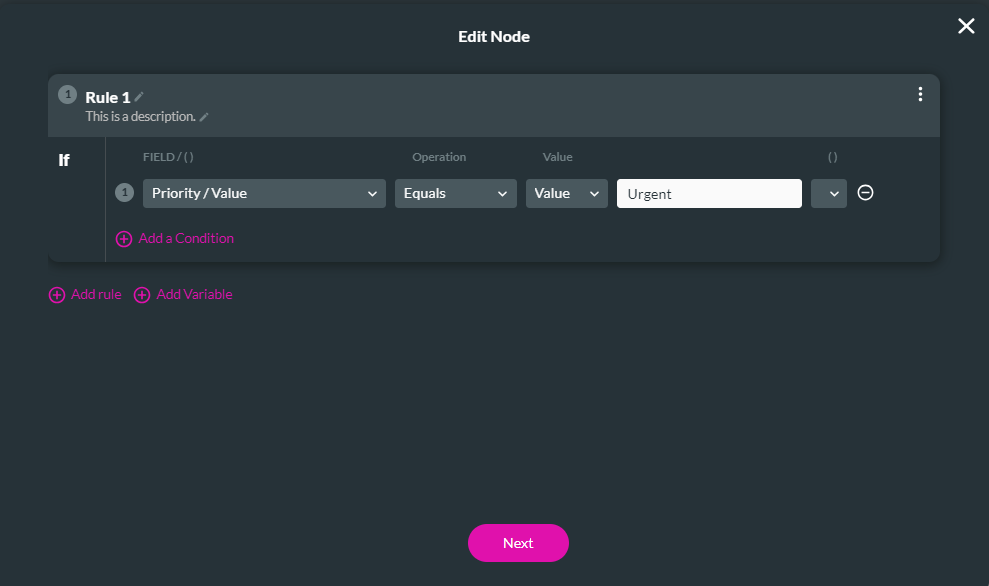
3. Double-click on the condition. The Edit Mode screen opens. This condition will relate to the priority level. For example, if the priority equals urgent. Click Next.
4. Add a Tag and Click Save.
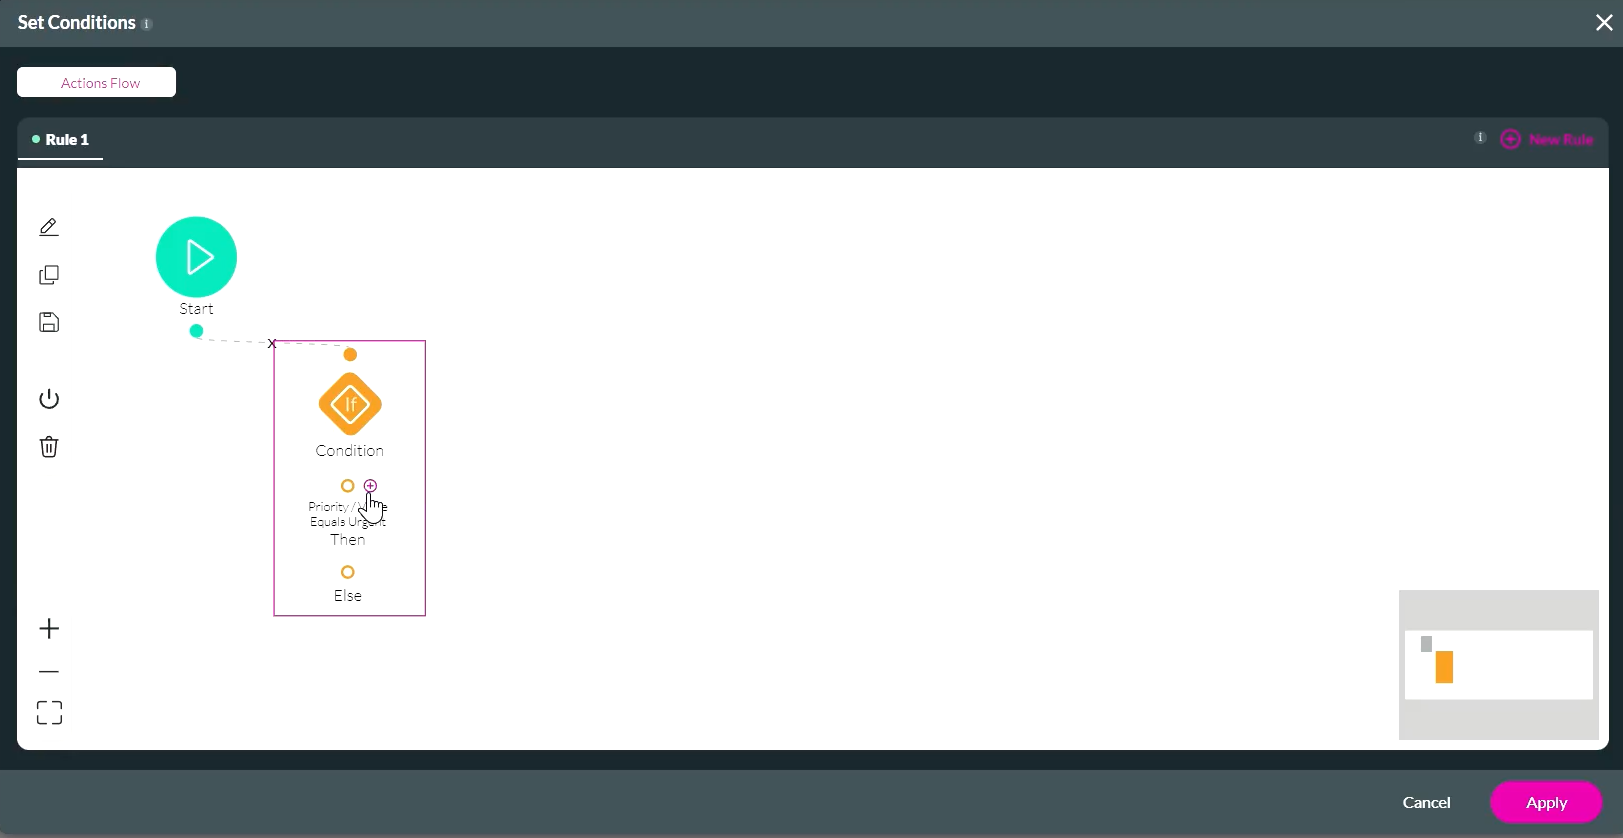
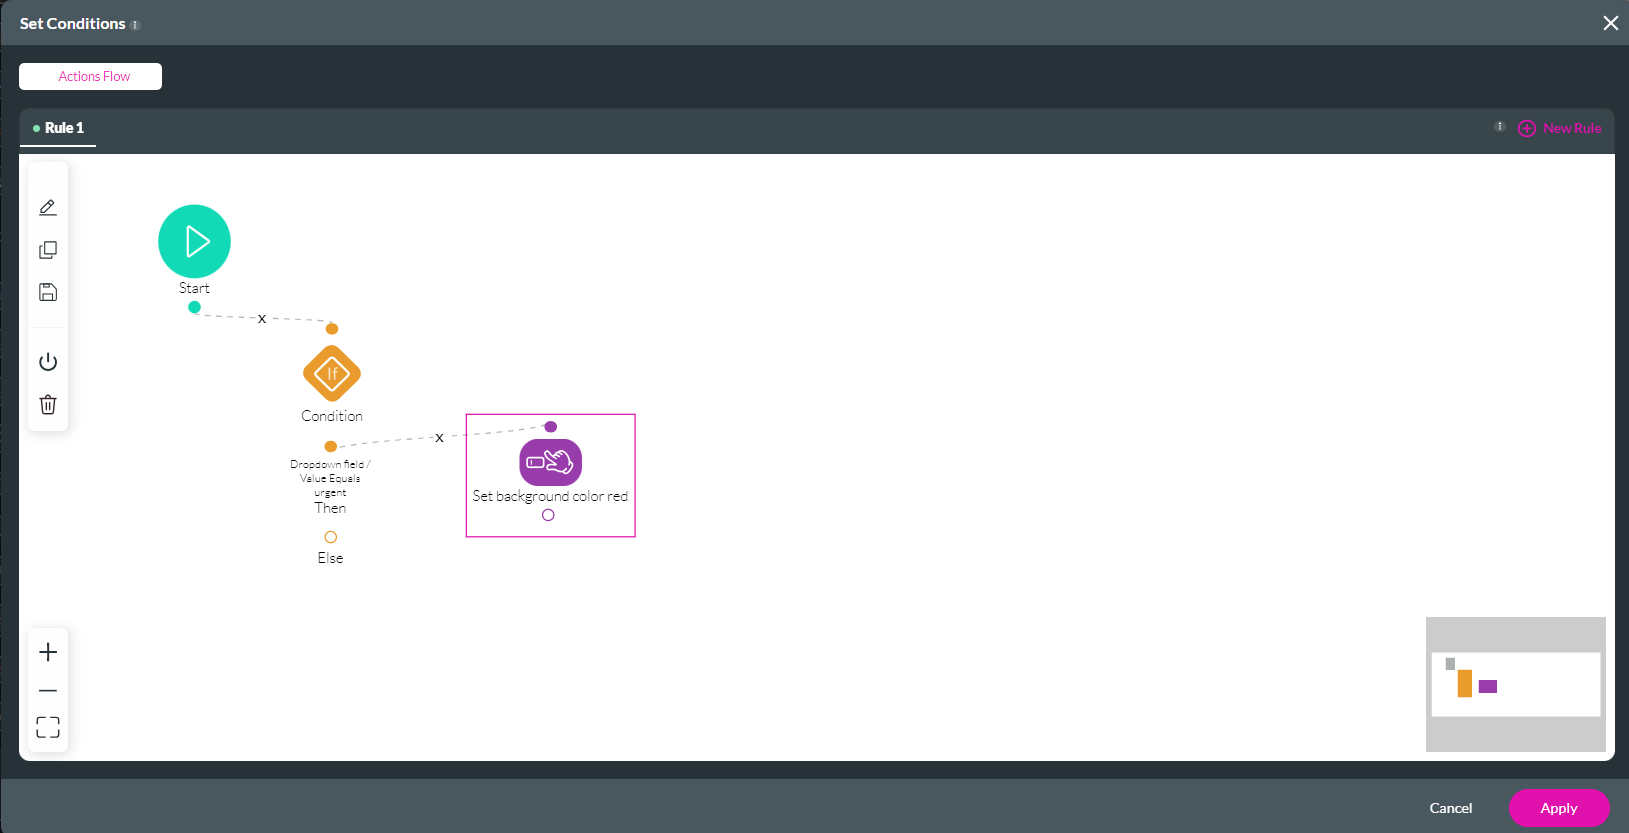
5. Click on the Then + icon. The Add Node screen opens.
6. Select Affected Elements and click Next.
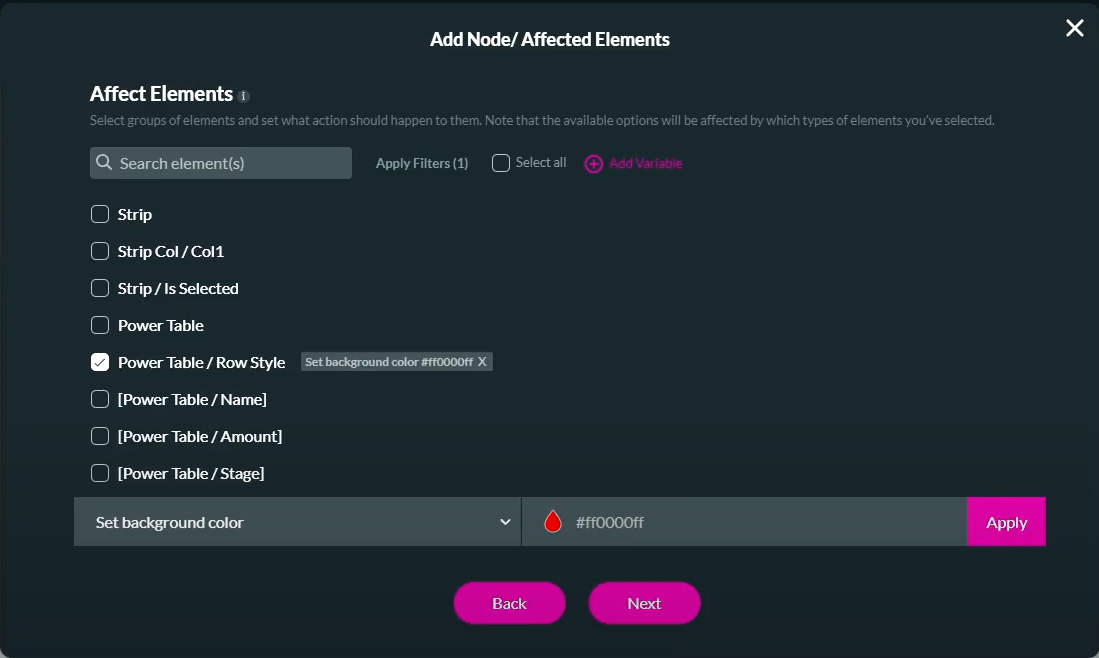
7. Let's configure the table to change color depending on the priority. Select the Power Table/Row Style from the Affected Elements list.
8. Choose 'Set Background Color' from the drop-down menu. Select the table's color and click Apply. Click Next.
9. Add a Tag and Click Insert.
The Affect Element node is added to the screen.
10. Click Apply.
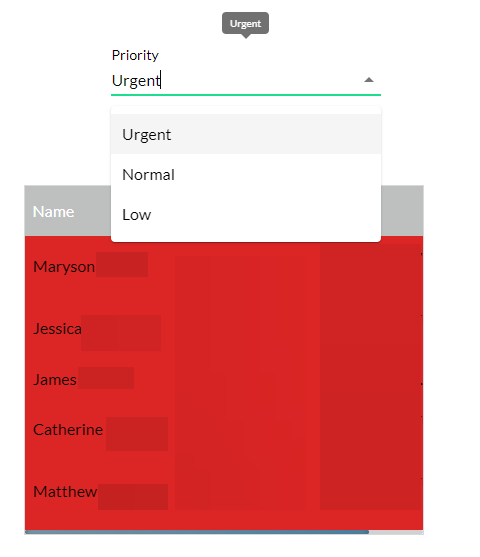
Save and Preview. When the priority is set to urgent, all rows change to red.
1. Click on the outside element gear. The element settings screen opens.
2. Select the Conditions tab and click the Configure Conditions button. The Set Conditions screen opens.
3. Double-click on the condition. The Edit Mode screen opens. This condition will relate to the priority level. For example, if the priority equals urgent. Click Next.
4. Add a Tag and Click Save.
5. Click on the Then + icon. The Add Node screen opens.
6. Select Affected Elements and click Next.
7. Let's configure the table to change color depending on the priority. Select the Power Table/Row Style from the Affected Elements list.
8. Choose 'Set Background Color' from the drop-down menu. Select the table's color and click Apply. Click Next.
9. Add a Tag and Click Insert.
The Affect Element node is added to the screen.
10. Click Apply.
Save and Preview. When the priority is set to urgent, all rows change to red.
04 Affecting Certain Rows
You can insert a condition that affects specific rows of the power table.
1. Navigate to the Power Table settings. Select the Conditions tab.
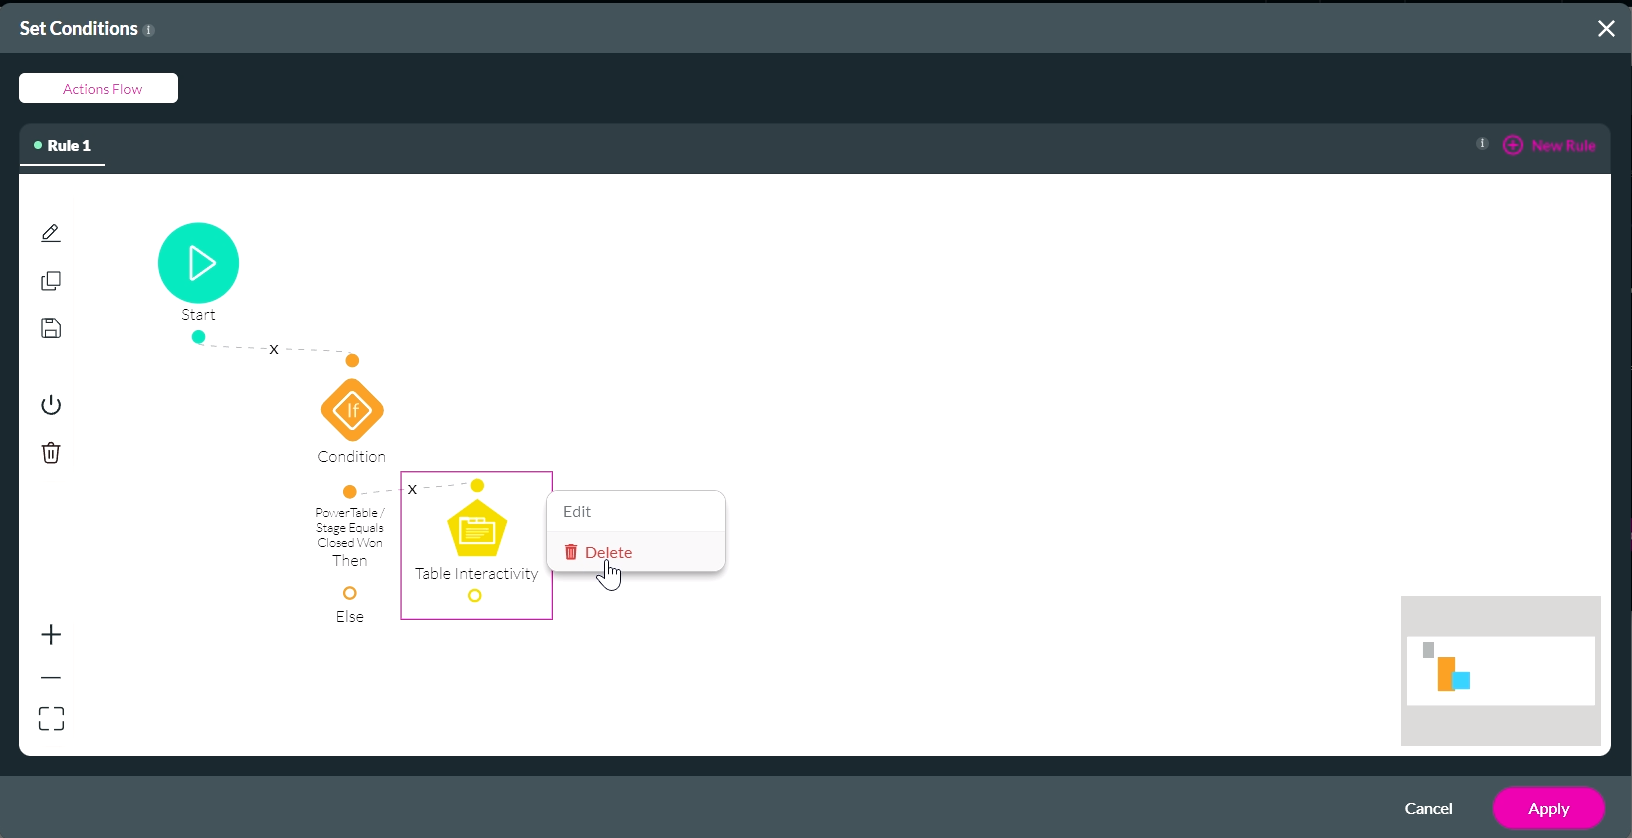
2. Click the Configure Conditions button. The Set Conditions screen opens.
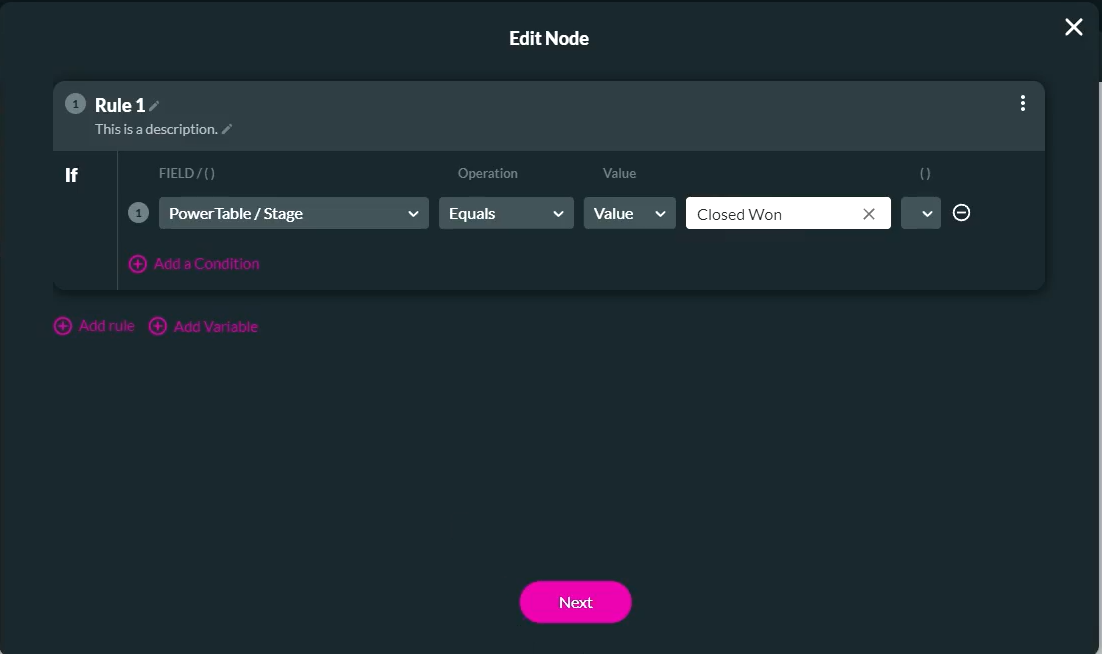
3. Double-click on the Conditions node. Configure a condition that will only affect certain rows in your table, such as if the stage is marked as Closed Won. Click Next.
4. Add a Tag and click Save.
5. Click on the Then + icon. The Add Node screen opens.
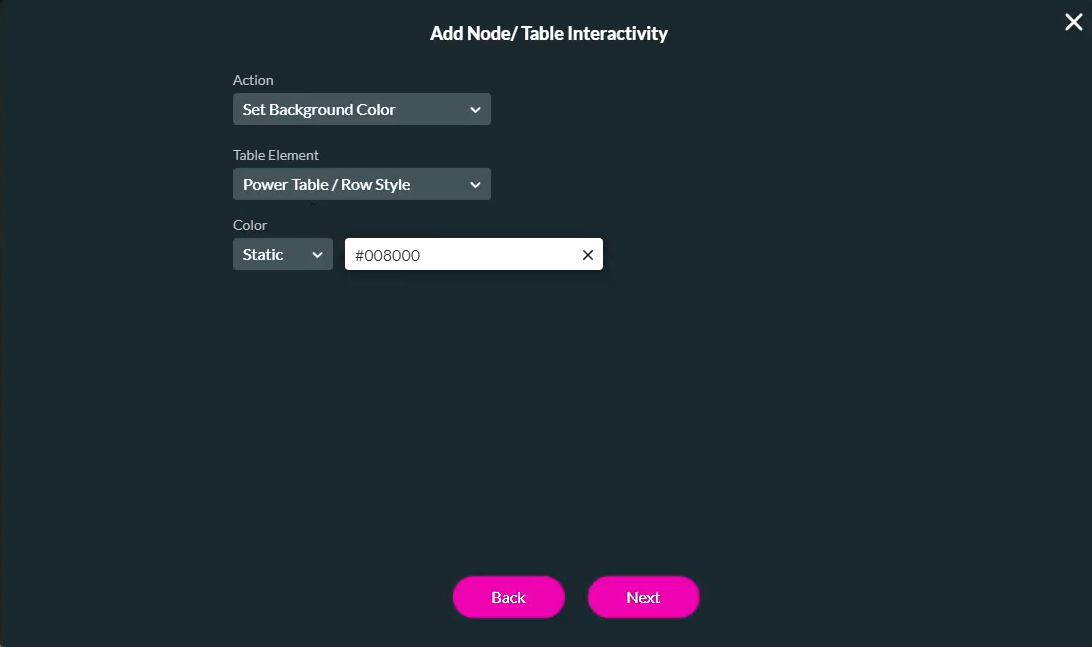
6. Select Table Interactivity and click Next.
7. Use the drop-downs to configure how the table should be affected and the specific table element, for example, the background color of the rows. Click Next.
8. Add a Tag and click Insert.
The Table Interactivity node is added to the screen.
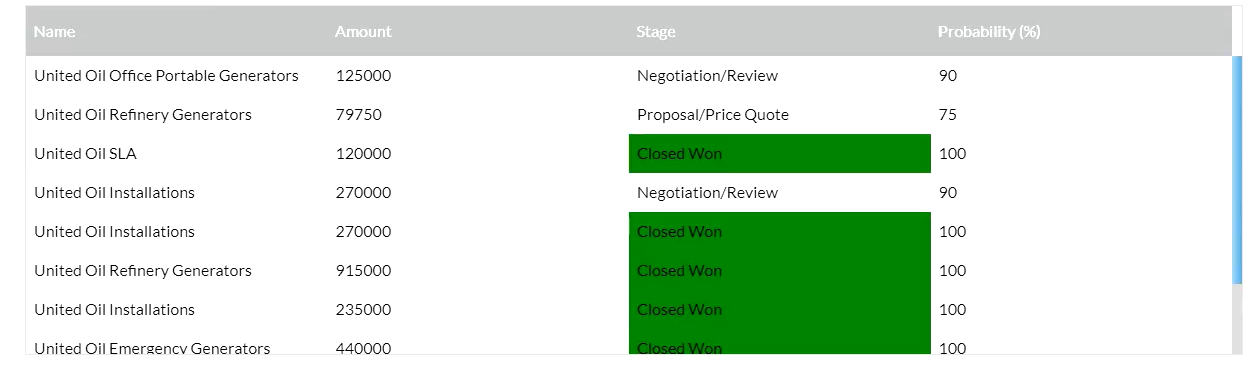
9. Click Apply. Save and Preview.
Only the rows that match the condition criteria will have the background color changed.

1. Navigate to the Power Table settings. Select the Conditions tab.
2. Click the Configure Conditions button. The Set Conditions screen opens.
3. Double-click on the Conditions node. Configure a condition that will only affect certain rows in your table, such as if the stage is marked as Closed Won. Click Next.
4. Add a Tag and click Save.
5. Click on the Then + icon. The Add Node screen opens.
6. Select Table Interactivity and click Next.
7. Use the drop-downs to configure how the table should be affected and the specific table element, for example, the background color of the rows. Click Next.
8. Add a Tag and click Insert.
The Table Interactivity node is added to the screen.
9. Click Apply. Save and Preview.
Only the rows that match the condition criteria will have the background color changed.
05 Affecting Certain Components
When configuring the table interactivity, you can choose specific components of the Power tab. For example, the color should be applied only to the table's stage.
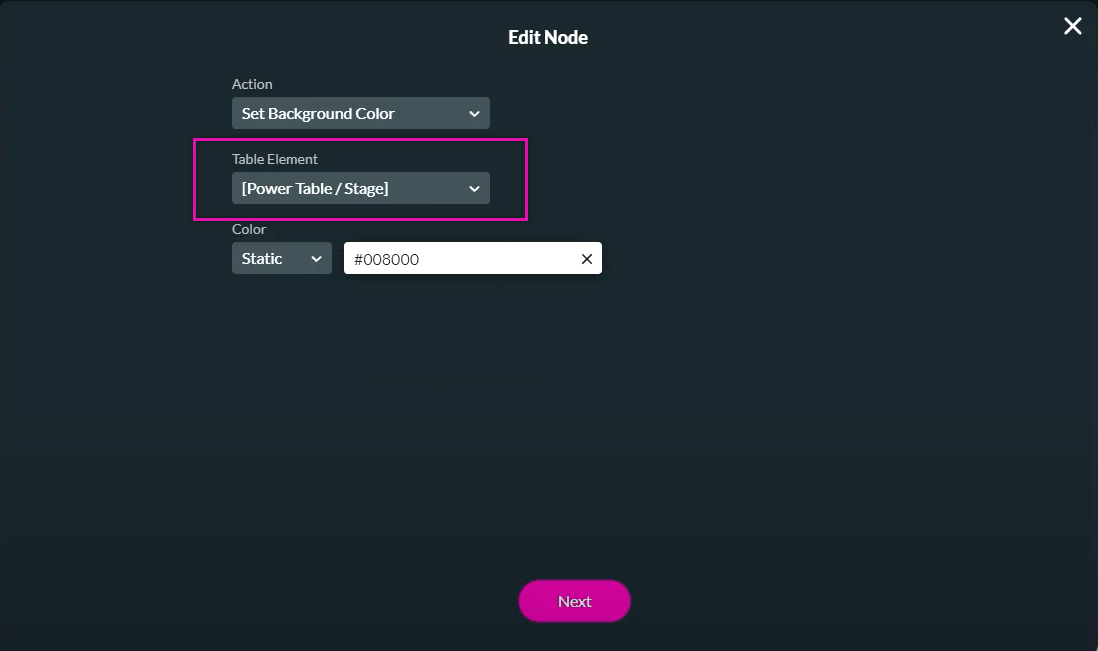
Instead of the whole row being affected, only the specific table element displays the color.
Instead of the whole row being affected, only the specific table element displays the color.
06 Hide and Show Columns
You can choose to hide table elements depending on other table data.
For the below steps, the previously configured condition for the table will be edited.
1. Select the Conditions tab in the Power Table settings menu and click Configure Conditions. The Set Conditions screen opens. Delete the existing Table Interactivity node.
2. Double-click the Then + icon. The Add Node Screen opens.
3. Select Affected Elements and click Next.
4. Choose the element from the list and select the action to apply. For example, the probability must be hidden. Click Next.
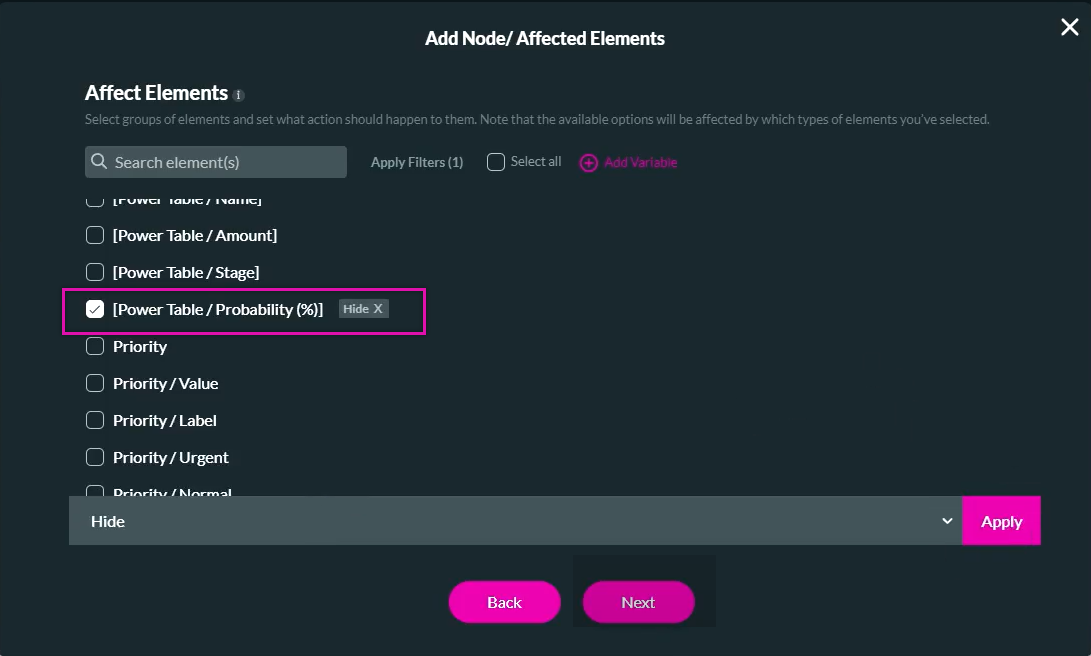
5. Add a Tag and click Insert.
6. Click the Else + icon. The Add Node screen opens.
7. Select Affect Elements and click Next.
8. Choose the element from the list and select the action to apply. For example, the probability must be shown. Click Next.
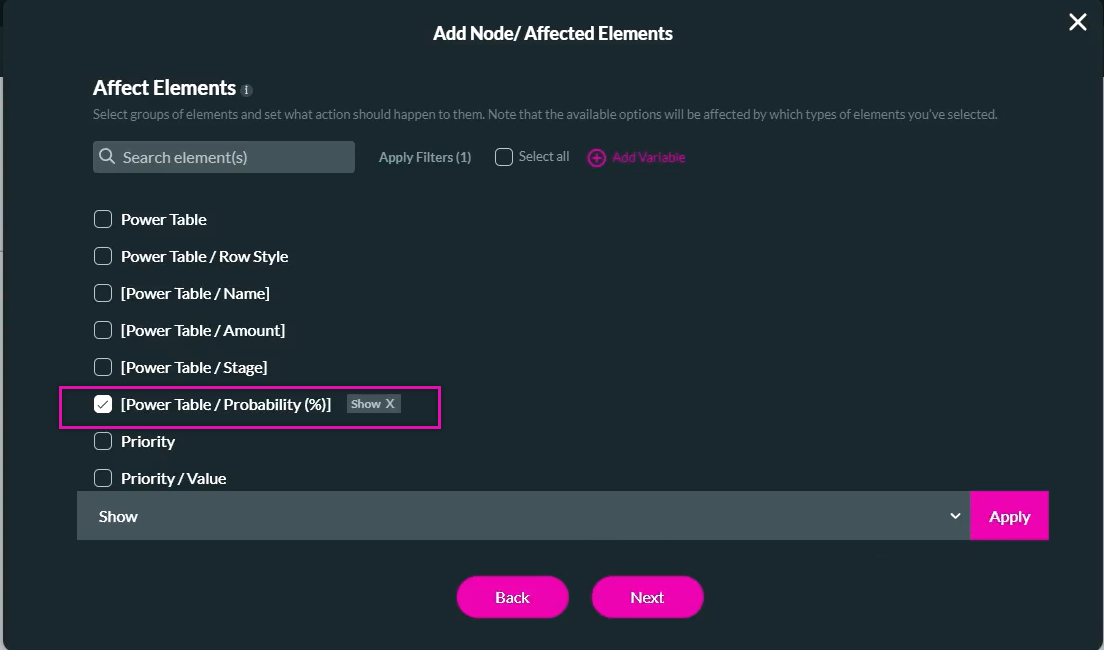
9. Add a Tag and click Insert.
The Node is added to the screen.
10. Click Apply.
Save and Preview. The probability values for the Closed Won stage are not displayed.
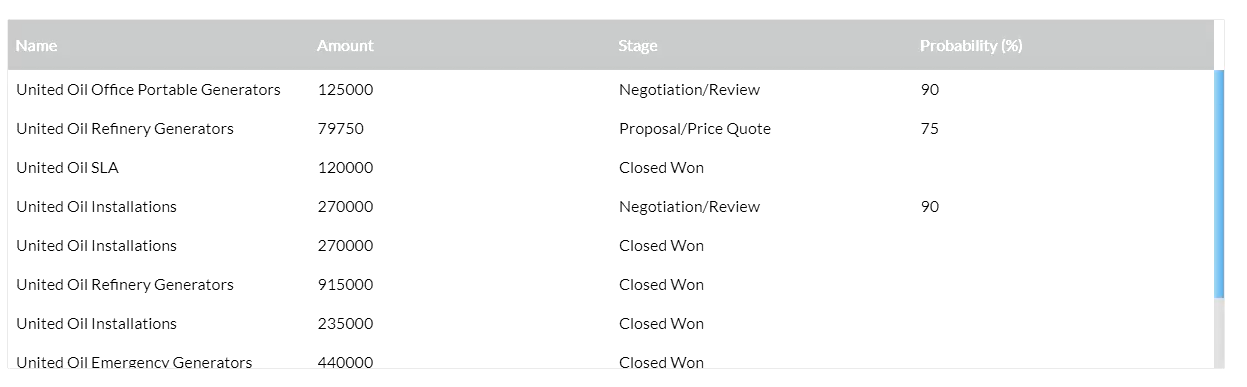
If you allow your users to edit the power table, the condition will update the table in real-time.
For the below steps, the previously configured condition for the table will be edited.
1. Select the Conditions tab in the Power Table settings menu and click Configure Conditions. The Set Conditions screen opens. Delete the existing Table Interactivity node.
2. Double-click the Then + icon. The Add Node Screen opens.
3. Select Affected Elements and click Next.
4. Choose the element from the list and select the action to apply. For example, the probability must be hidden. Click Next.
5. Add a Tag and click Insert.
6. Click the Else + icon. The Add Node screen opens.
7. Select Affect Elements and click Next.
8. Choose the element from the list and select the action to apply. For example, the probability must be shown. Click Next.
9. Add a Tag and click Insert.
The Node is added to the screen.
10. Click Apply.
Save and Preview. The probability values for the Closed Won stage are not displayed.
If you allow your users to edit the power table, the condition will update the table in real-time.