Table Actions (13 min)
Completion requirements
01 Getting Started
In this lesson, you will learn how to run actions on Power Tables. We will look at various actions on the Power Table's column, icon, or button. We will also explain how to update a record in Salesforce and how to use a modal to show more details on a record than the Power Table.
02 Configure and Trigger Actions
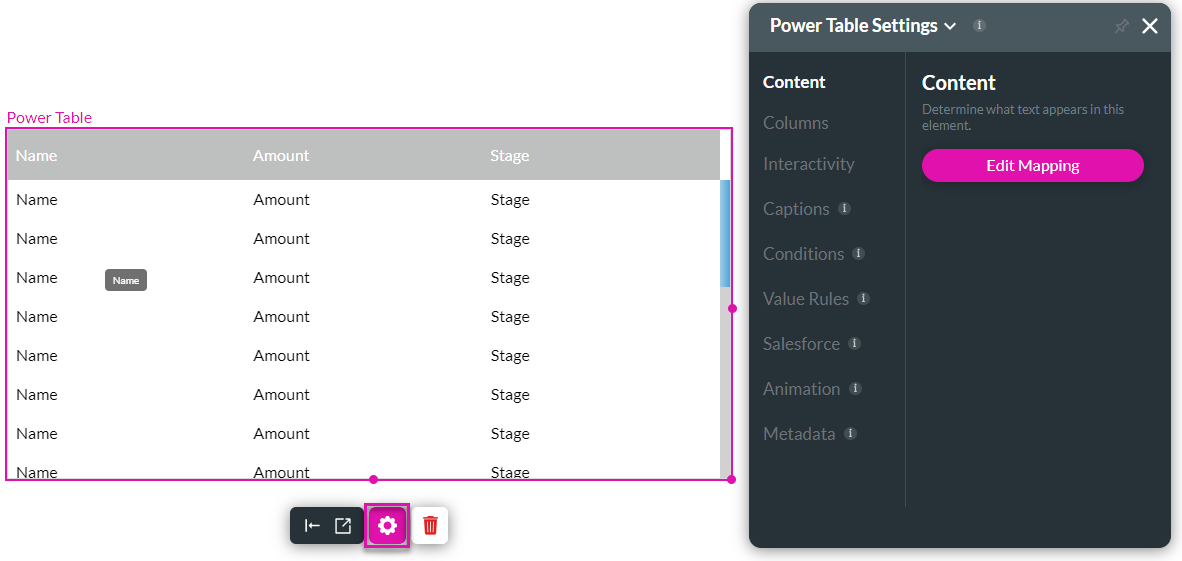
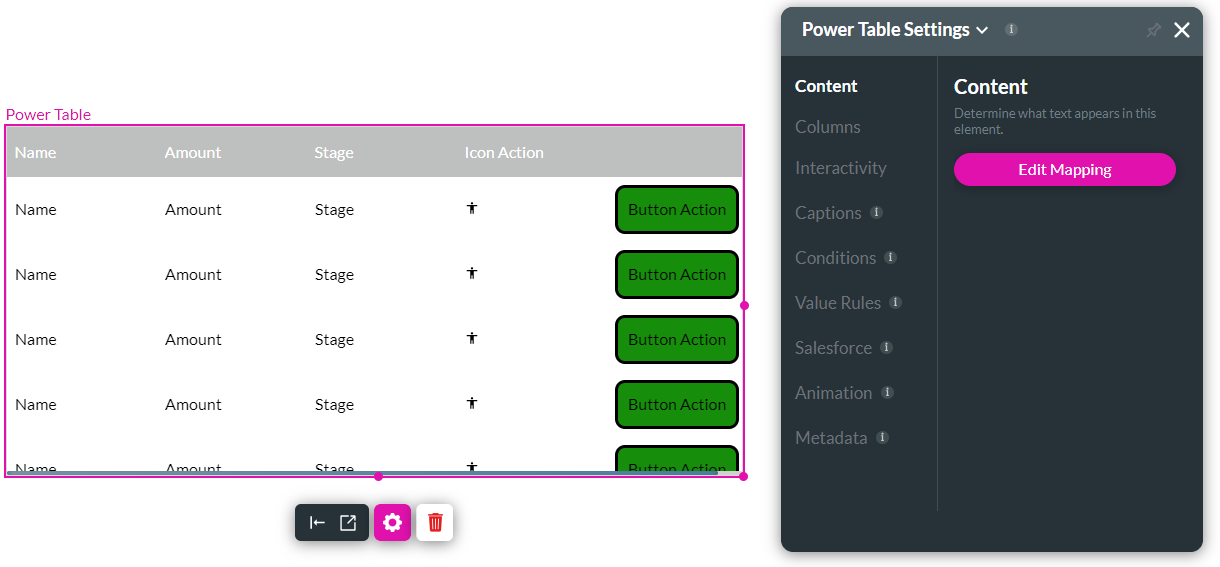
In this example, we created a Power Table with the Opportunity object in Salesforce as the source. We added the following columns:
- Name
- Amount
- Stage
03 Add an Action in a Column
We configured an action on the Name column.
1. Select the power table and click the Gear icon to open the Settings screen.
2. Click the Edit Mapping button.
3. Click the Kebab icon next to the Name column.
4. Use the toggle switch to enable the Include an Action option. The action will run when you click on the text in the column, or you can add an icon next to each name.
5. Click the icon checkbox to add an icon to the column.
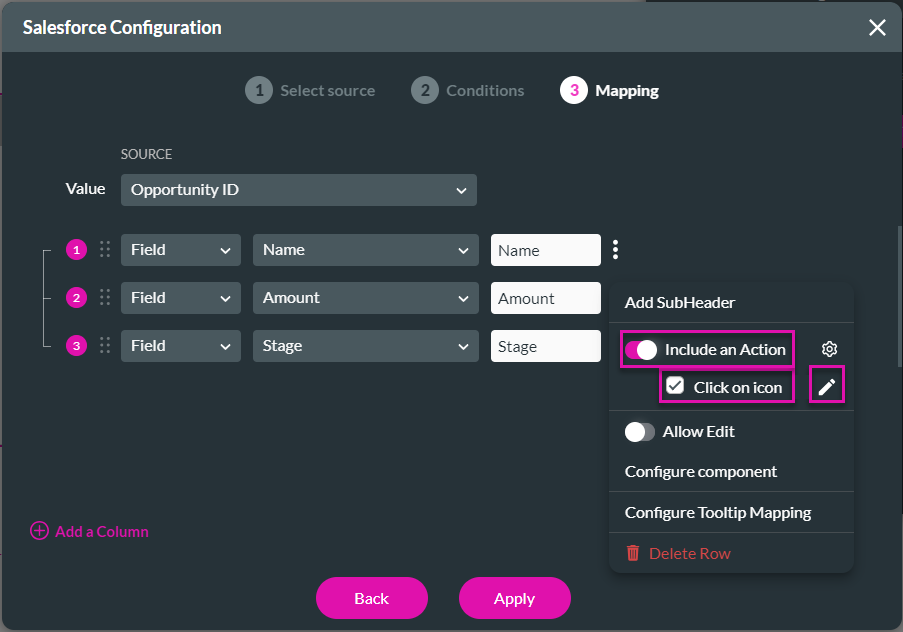
6. Click the Edit icon and select an icon from the Select Icon screen.
7. Click the Apply button.

8. Click the Include an Action Gear icon.
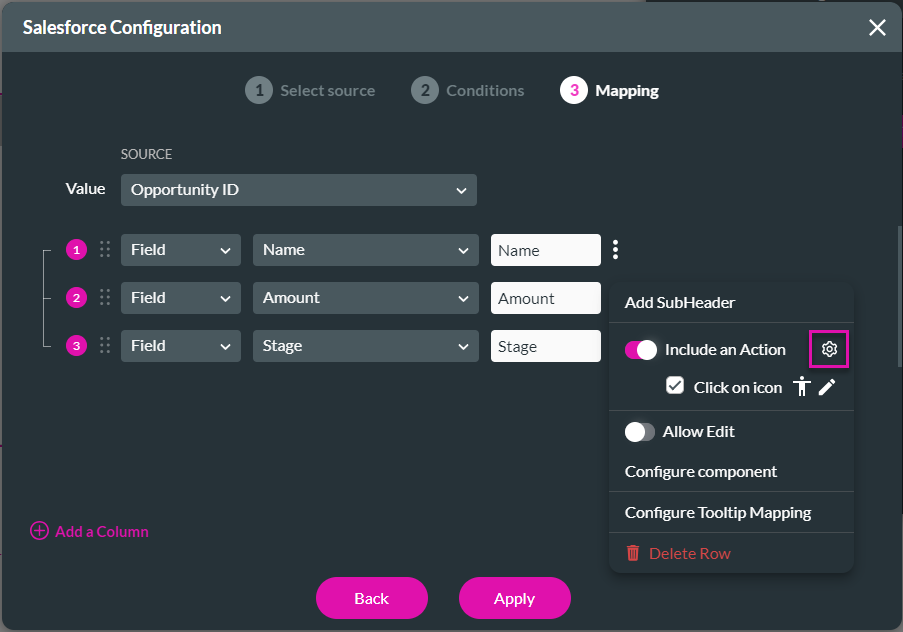
9. Click the + icon next to the Start node.
10. Under Layout Actions, click the Show Toast and Next button.

11. Use the Add element drop-down list and click the PowerTable/Name option.
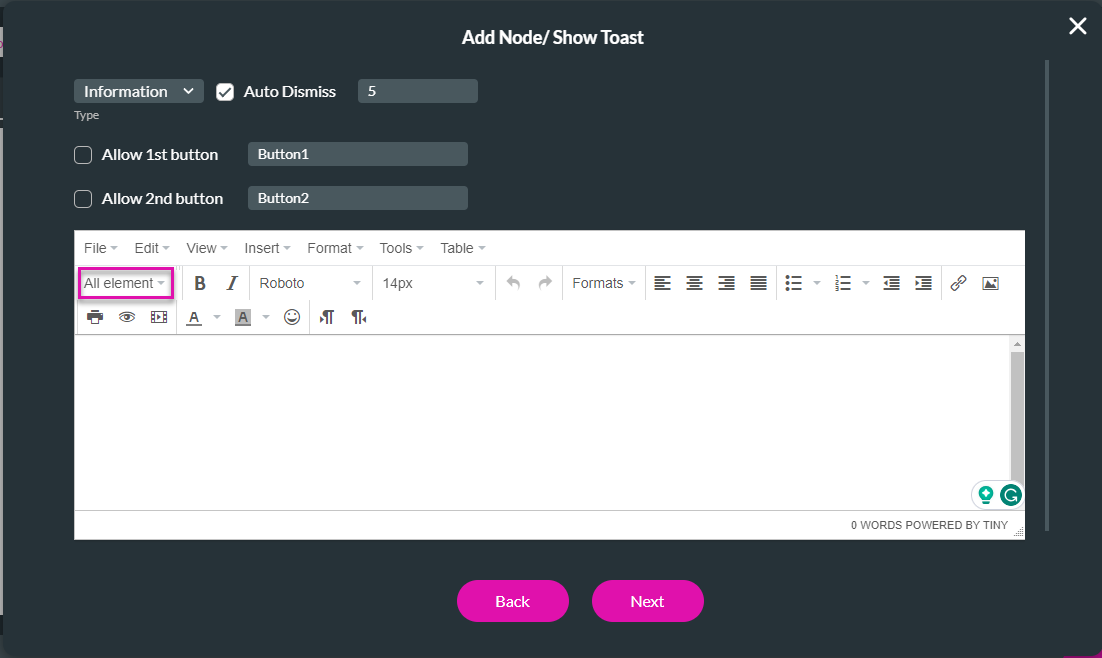
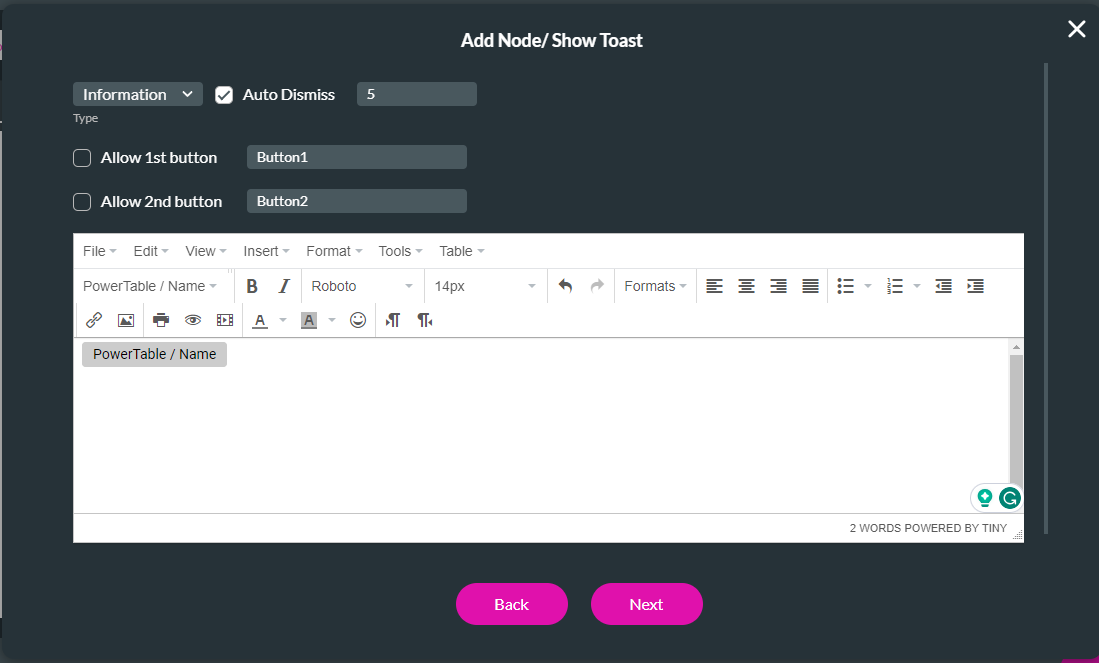
12. Click the Next button and add a tag if necessary.
13. Click the Insert button. The Show Toast node is added.
14. Click the Apply button on the On Click Action screen.
15. Click the Apply button on the Salesforce Configuration screen.
16. Save and preview the project.
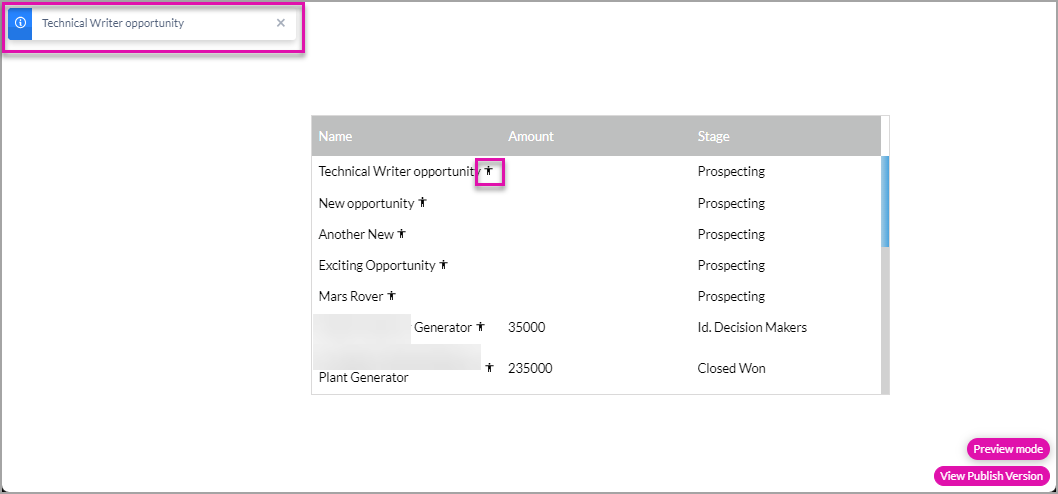
When the icon is clicked, the opportunity's name appears at the top left of the page.
We deactivated this On Click Action for the rest of the lesson.
1. Select the power table and click the Gear icon to open the Settings screen.
2. Click the Edit Mapping button.
3. Click the Kebab icon next to the Name column.
4. Use the toggle switch to enable the Include an Action option. The action will run when you click on the text in the column, or you can add an icon next to each name.
5. Click the icon checkbox to add an icon to the column.
6. Click the Edit icon and select an icon from the Select Icon screen.
7. Click the Apply button.
8. Click the Include an Action Gear icon.
9. Click the + icon next to the Start node.
10. Under Layout Actions, click the Show Toast and Next button.
11. Use the Add element drop-down list and click the PowerTable/Name option.
12. Click the Next button and add a tag if necessary.
13. Click the Insert button. The Show Toast node is added.
14. Click the Apply button on the On Click Action screen.
15. Click the Apply button on the Salesforce Configuration screen.
16. Save and preview the project.
When the icon is clicked, the opportunity's name appears at the top left of the page.
We deactivated this On Click Action for the rest of the lesson.
04 Add an Action to an Icon
You can add an action in a column by adding an icon.
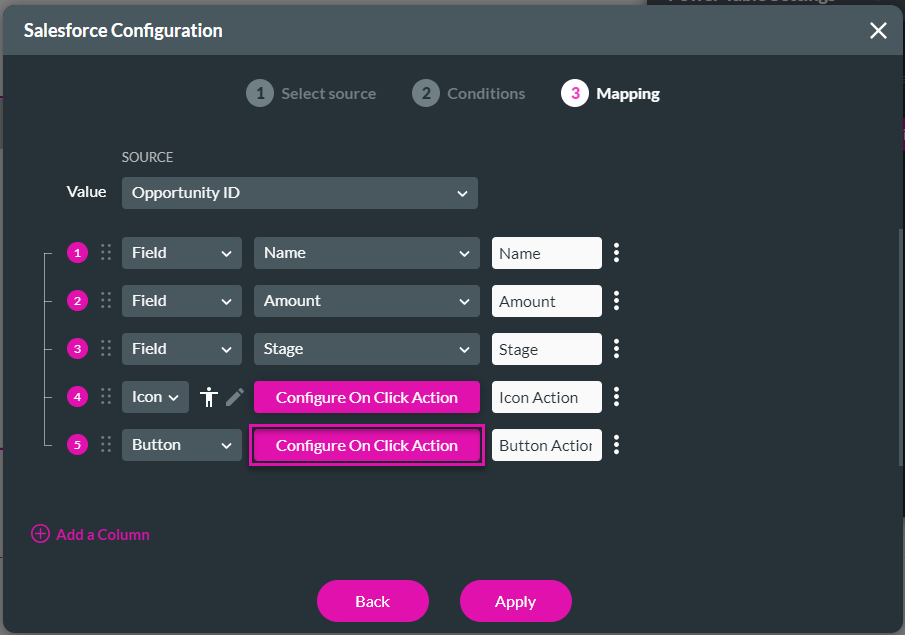
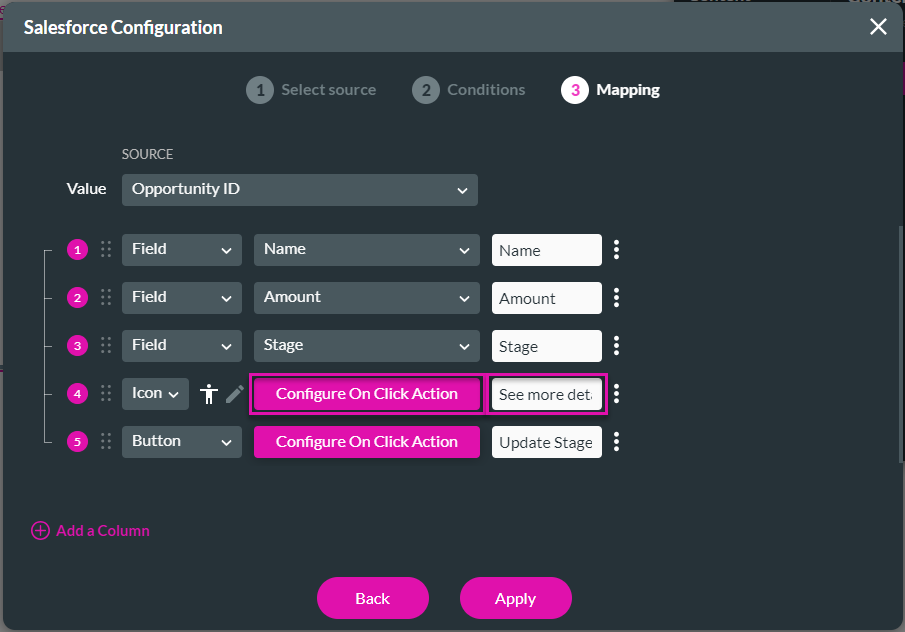
1. On the Salesforce Configuration screen, add a column if necessary.
2. Select the Icon option from the drop-down list.
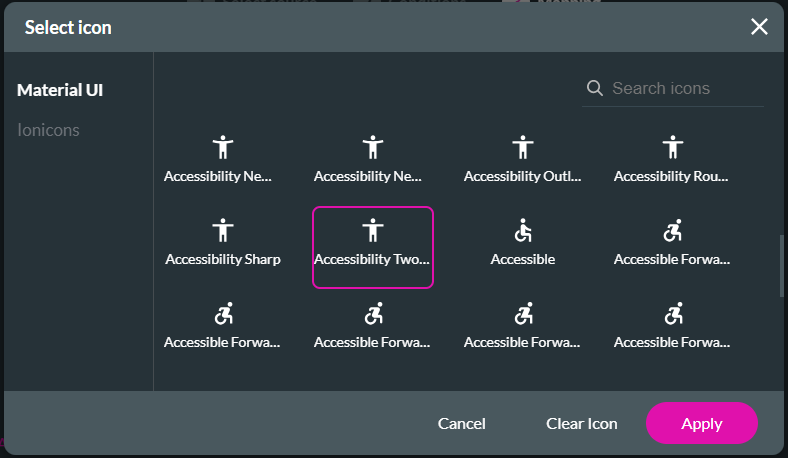
3. Select the Edit icon to add an icon. The Select Icon screen opens.
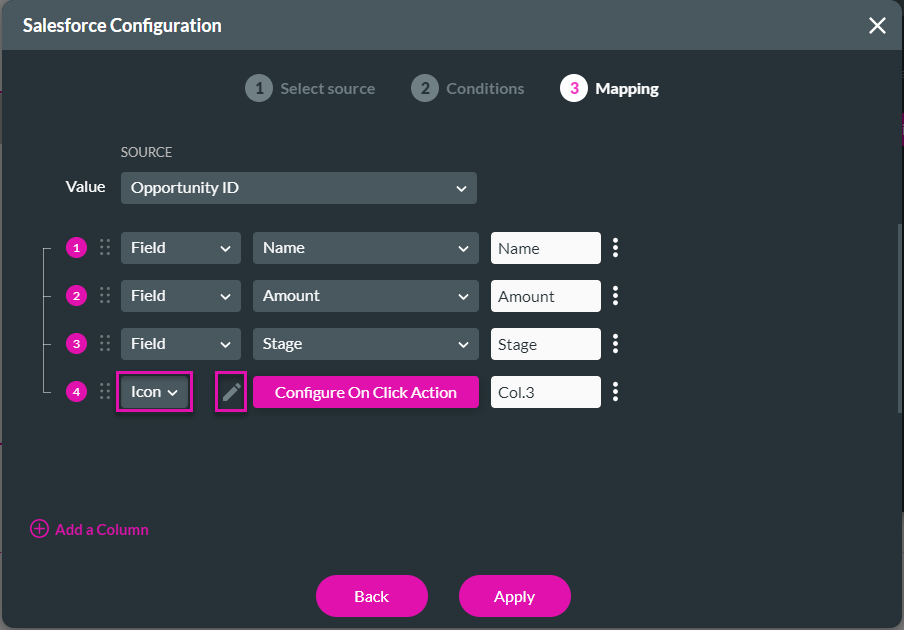
4. Select an icon and click the Apply button.
5. Add a header name in the field and click the Configure On Click Action button.

Here, you follow the same procedure for an on-click action as described above. We will give a further explanation later.
1. On the Salesforce Configuration screen, add a column if necessary.
2. Select the Icon option from the drop-down list.
3. Select the Edit icon to add an icon. The Select Icon screen opens.
4. Select an icon and click the Apply button.
5. Add a header name in the field and click the Configure On Click Action button.
Here, you follow the same procedure for an on-click action as described above. We will give a further explanation later.
05 Add an Action on a Button
You can add an action in a column by adding a button.
1. On the Salesforce Configuration screen, add a column if necessary.
2. Select the Button option from the drop-down list.
3. Add a header name in the field and click the Configure On Click Action button.

4. Here, you follow the same procedure for an on-click action described above. We will explain this further later.
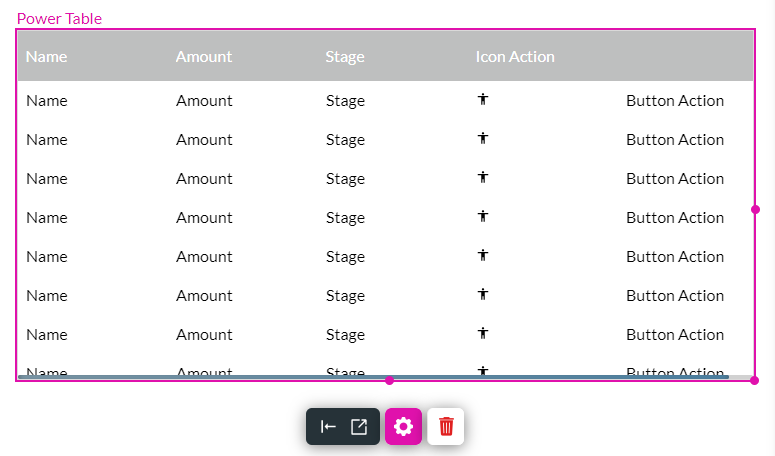
Unlike the Icon column, the Button column doesn't have a header. The button's name is added to the button in the column.
1. On the Salesforce Configuration screen, add a column if necessary.
2. Select the Button option from the drop-down list.
3. Add a header name in the field and click the Configure On Click Action button.
4. Here, you follow the same procedure for an on-click action described above. We will explain this further later.
Unlike the Icon column, the Button column doesn't have a header. The button's name is added to the button in the column.
06 Style the Button
You can style the button to create a personal look and feel.
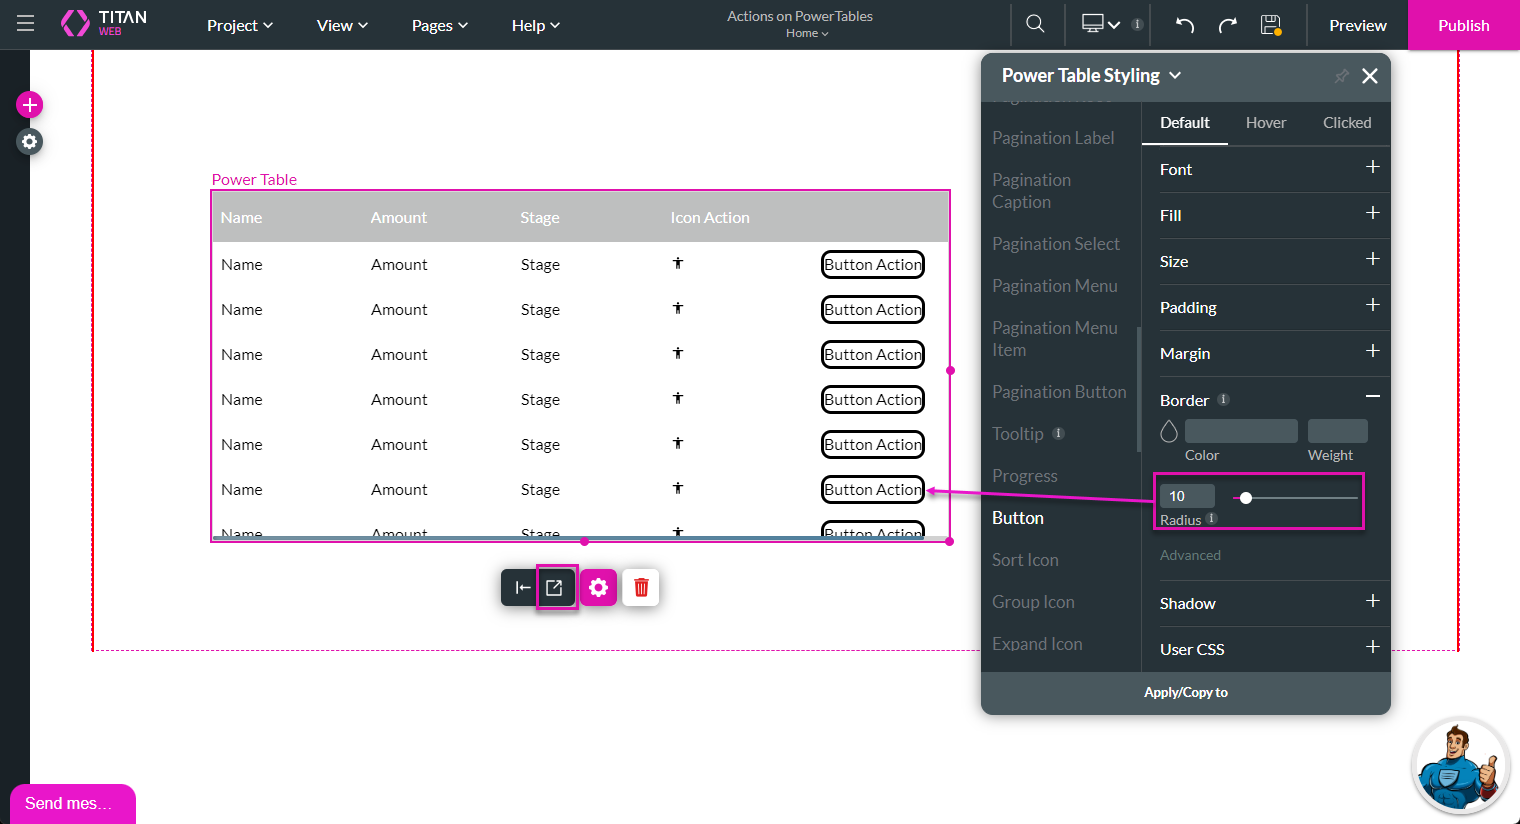
1. Select the power table and click the styling icon.
2. Click the Button option and click the Border option.
3. Drag the radius slider to add a border to the button.
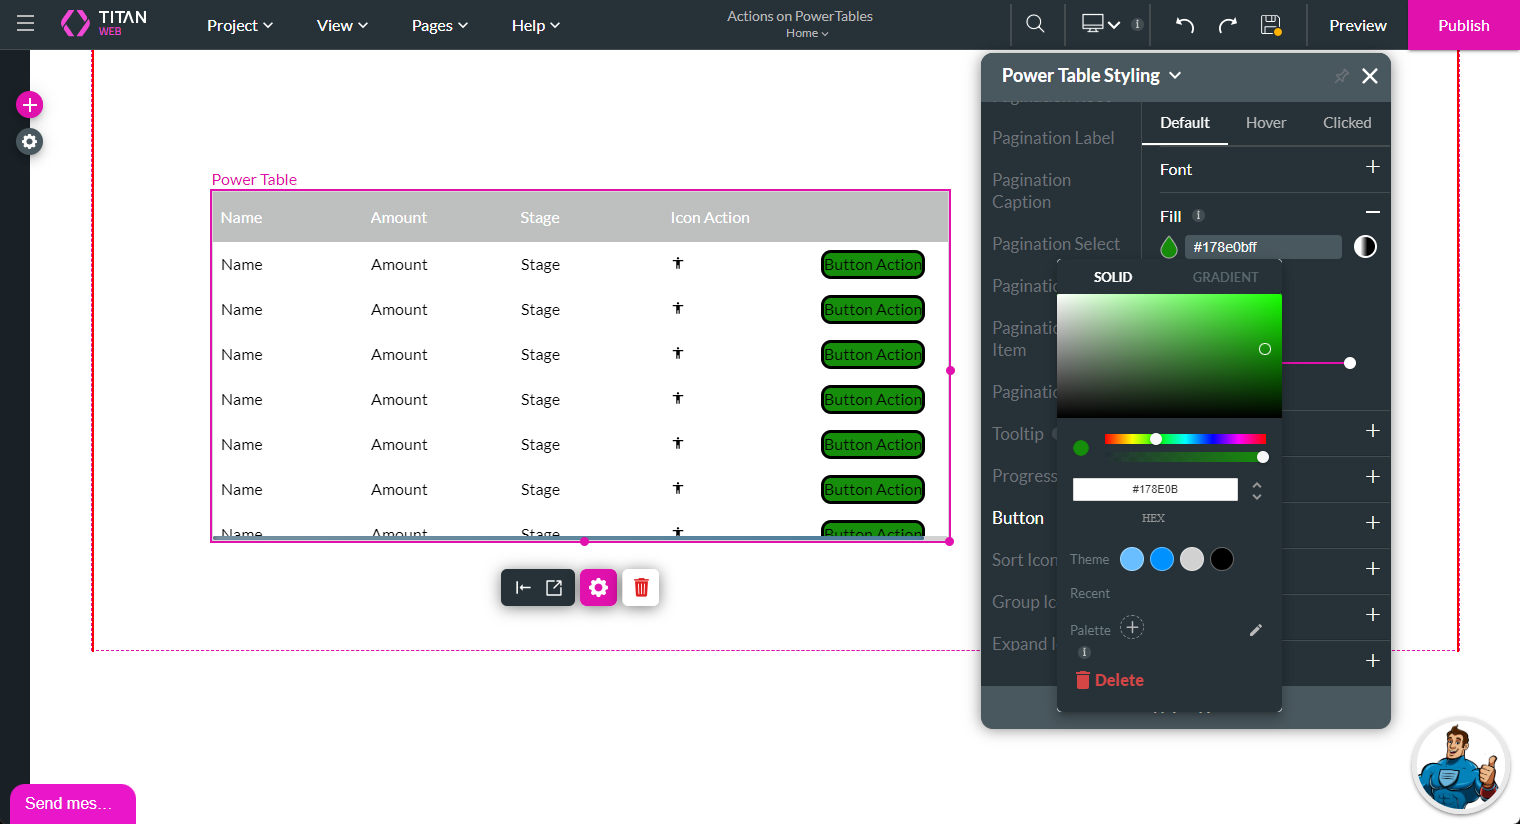
4. Click the Fill option.
5. Use the color palette to select a color.
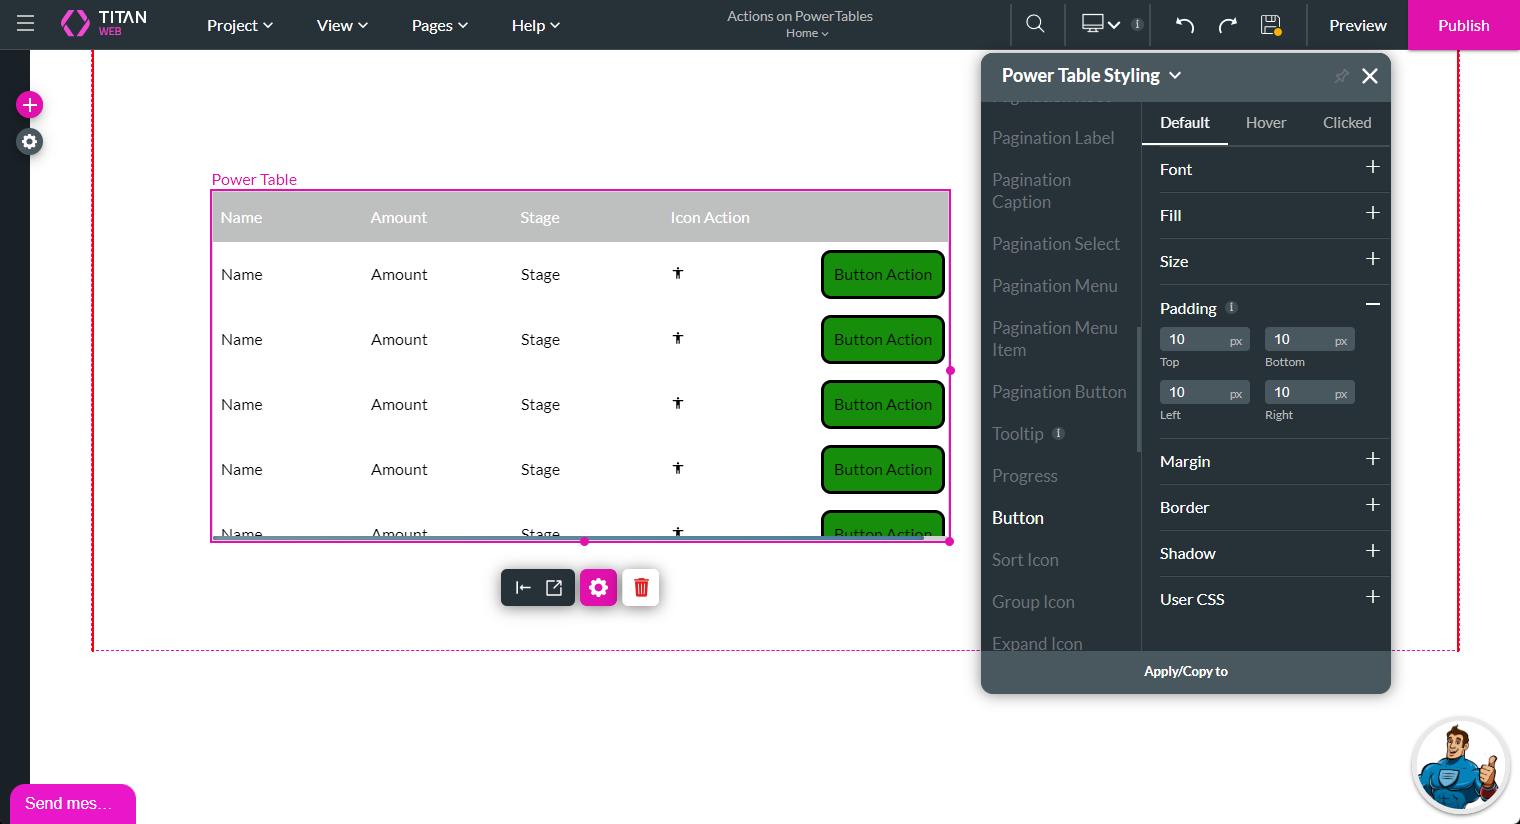
6. Click the Padding option.
7. Type values in the Top, Bottom, Left, and Right fields.
1. Select the power table and click the styling icon.
2. Click the Button option and click the Border option.
3. Drag the radius slider to add a border to the button.
4. Click the Fill option.
5. Use the color palette to select a color.
6. Click the Padding option.
7. Type values in the Top, Bottom, Left, and Right fields.
07 Run Different Actions
Titan can recognize which row is clicked and what the values of that row are.
08 Update the Opportunities in Salesforce
We will show you how to set an action that updates the Opportunity in Salesforce when the Button is clicked.
1. Select the power table and click the Gear icon.
2. Click the Edit Mapping button.

3. Click the Configure On Click Action button next to the Button.
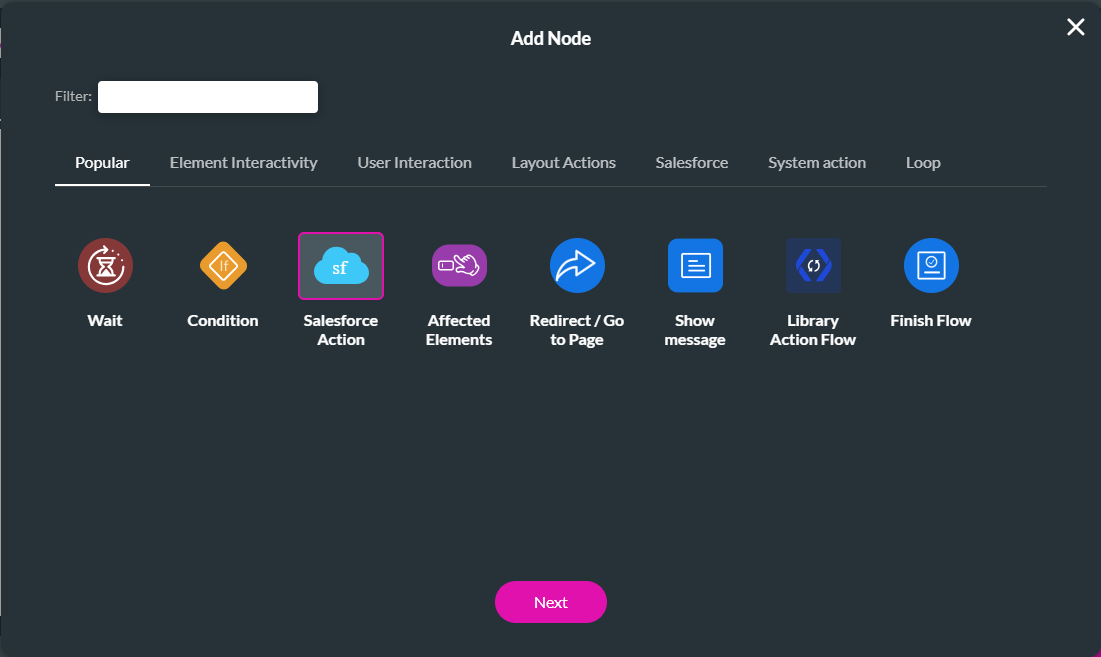
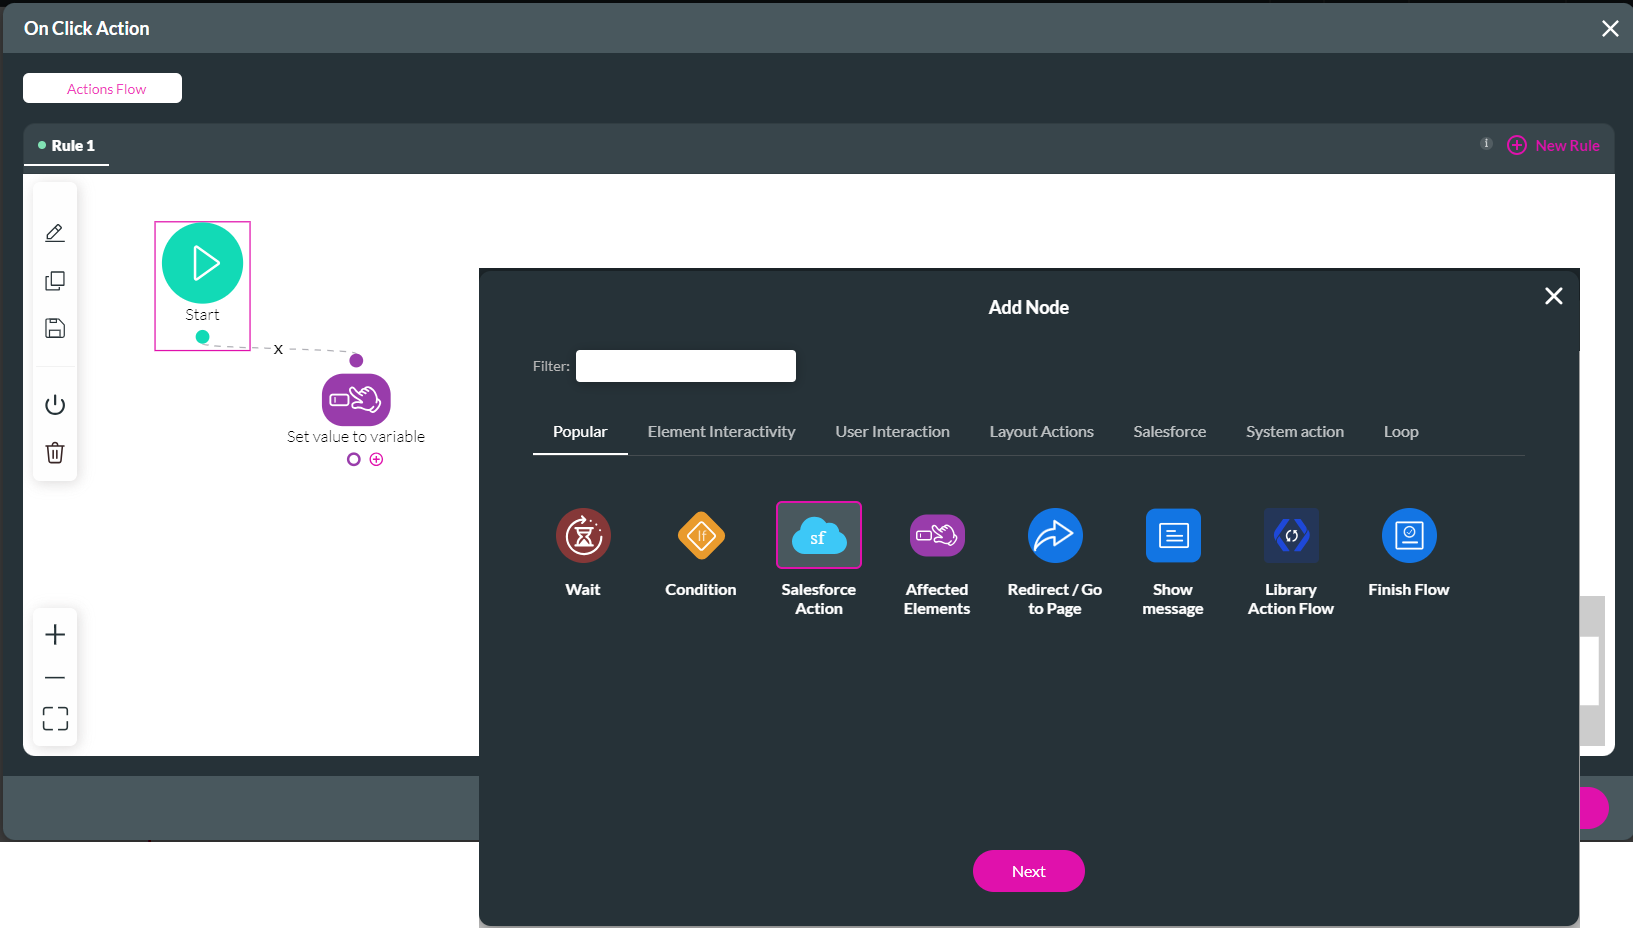
4. Click the + icon next to the Start node and click the Salesforce Action option.
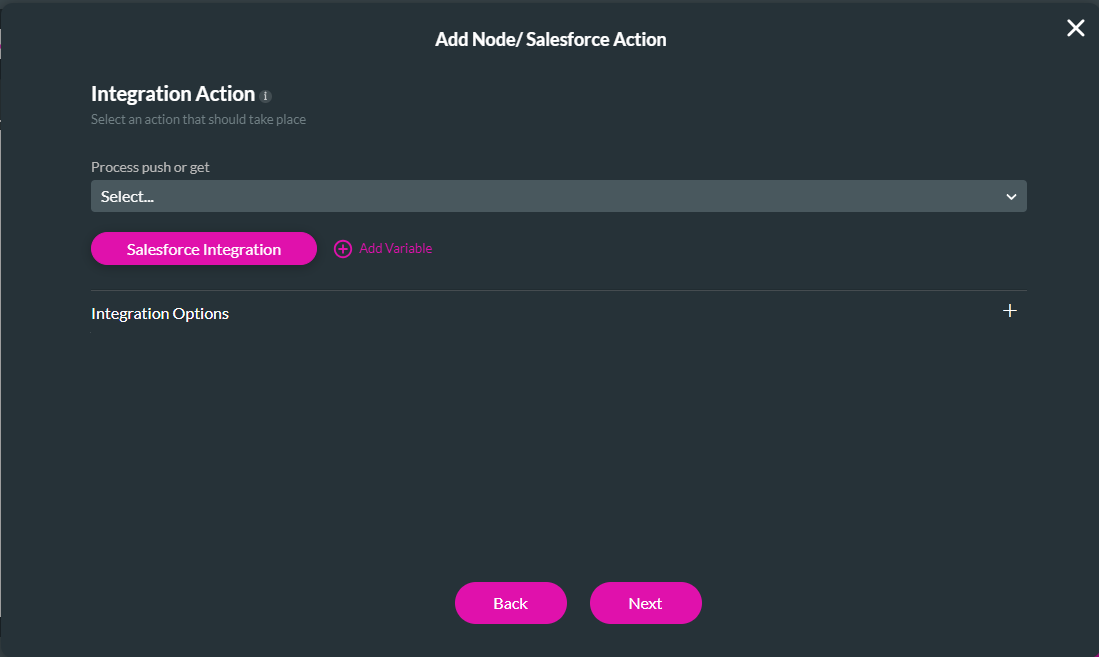
5. Click the Next Button.
6. Click the Salesforce Integration button.
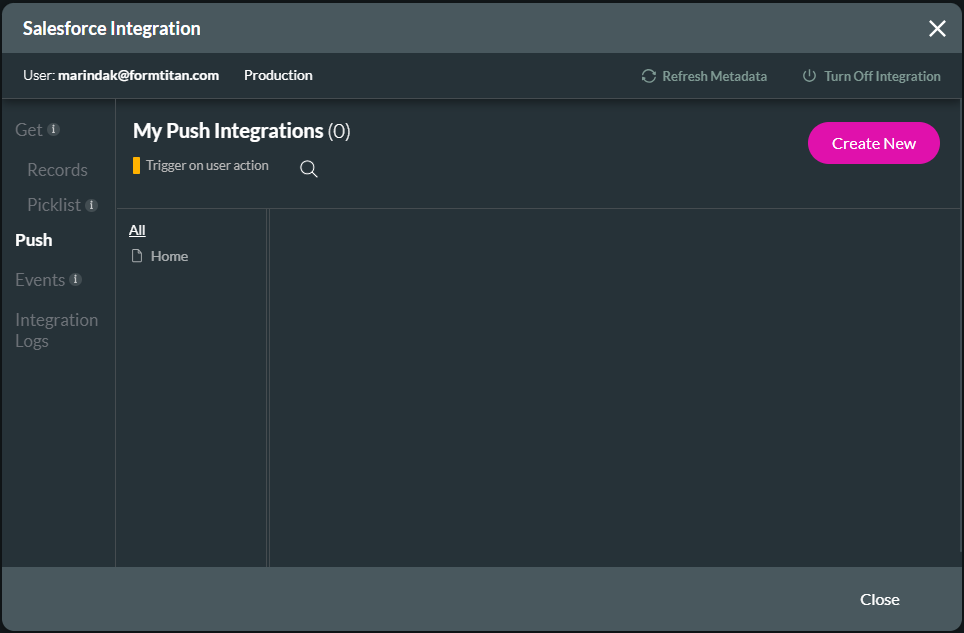
7. Click the Push option and click the Create New Button.
8. Use the drop-down list to select the Object in Salesforce. We selected the Opportunity in this example.
9. Use the drop-down list to select the Action, for instance, Update.
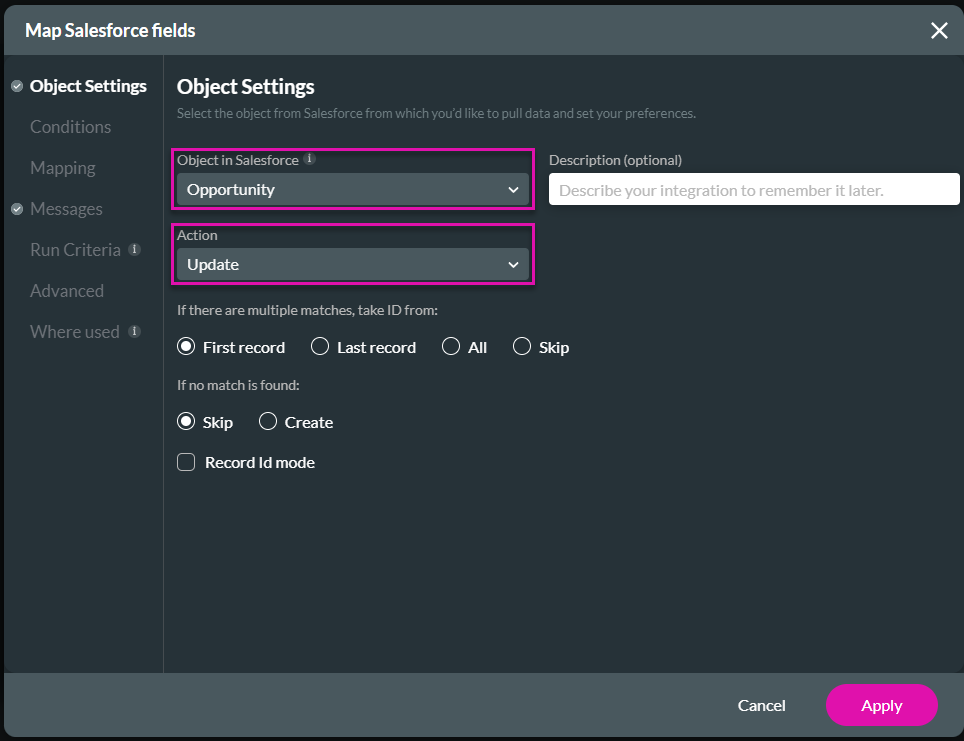
10. Configure the condition:
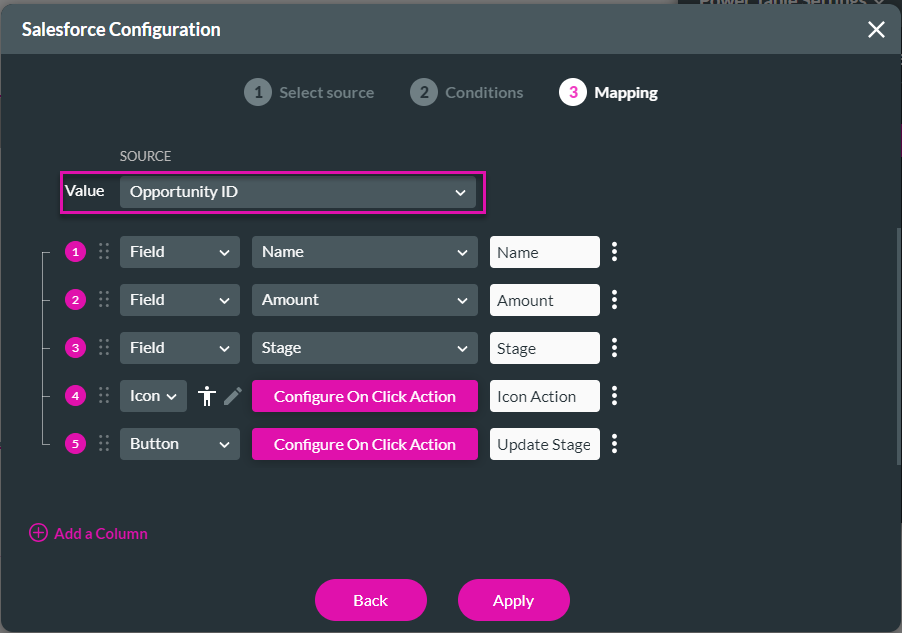
Note: The value (opportunity ID) that was used in the condition comes from here:
11. Configure the mapping:
13. Click the Close Button on the Salesforce Integrations screen.
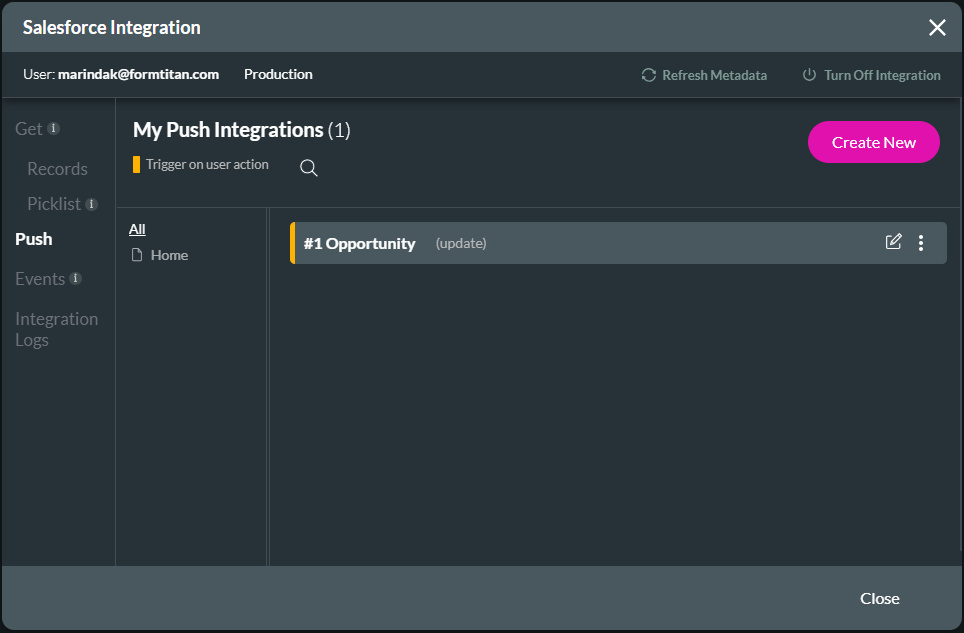
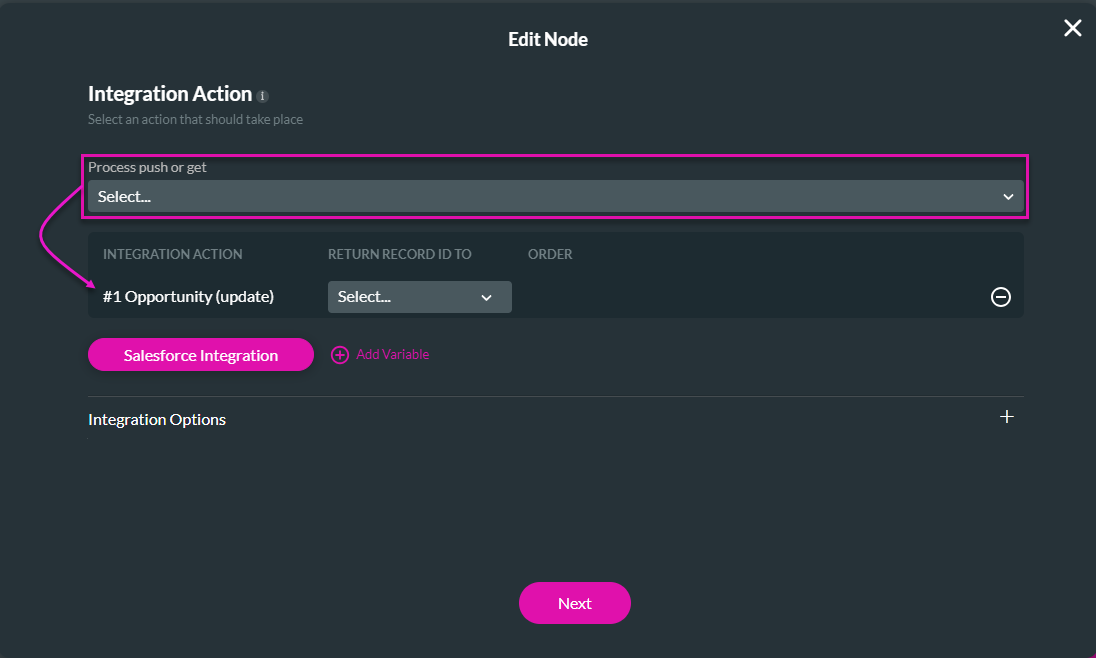
14. Select the Push to update the Opportunity using the drop-down list.
15. Click the Next Button.
16. Add a tag if necessary and click the Insert button.

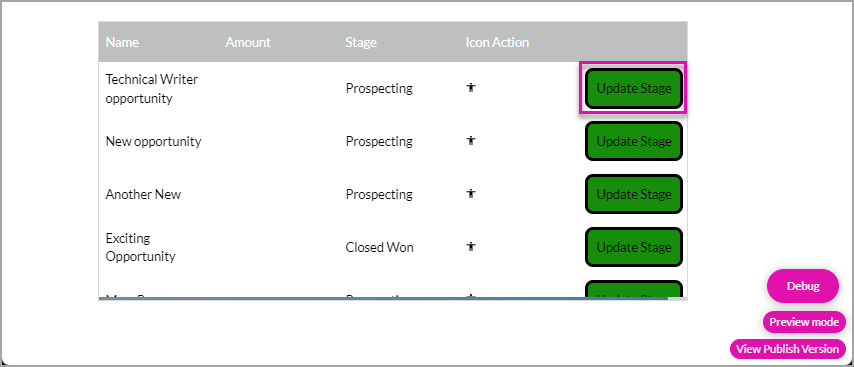
17. Click the Apply Button. In this example, the Button's name was changed to "Update Stage."

18. Click the Apply Button.
19. Open the Project Settings, and under Tools, use the toggle switch to turn on Debug Mode.
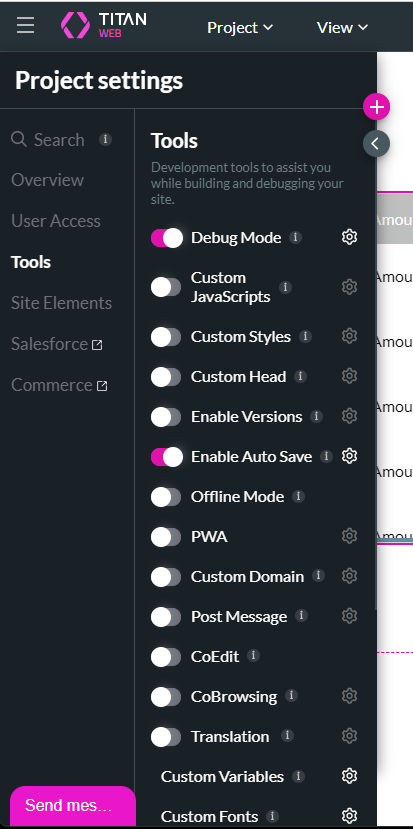
20. Save and preview the project.
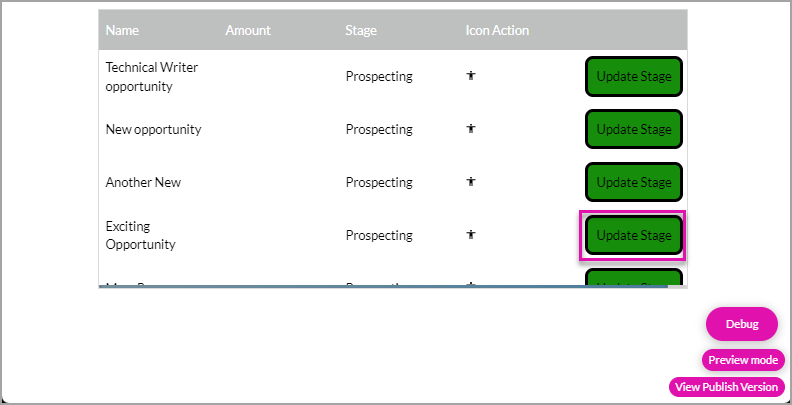
21. Click the Debug button. The values (opportunity IDs) in the power table are shown.
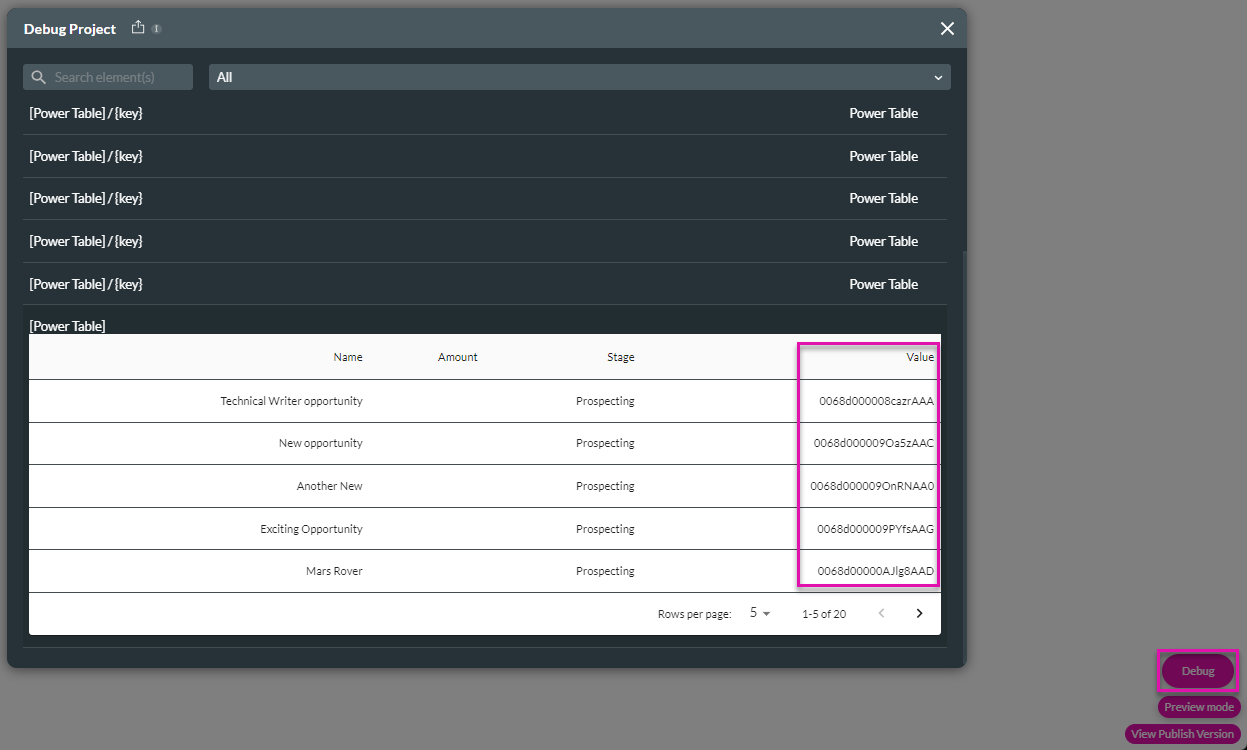
If the Button on the power table is clicked, the Salesforce record is updated.
1. Select the power table and click the Gear icon.
2. Click the Edit Mapping button.
3. Click the Configure On Click Action button next to the Button.
4. Click the + icon next to the Start node and click the Salesforce Action option.
5. Click the Next Button.
6. Click the Salesforce Integration button.
7. Click the Push option and click the Create New Button.
8. Use the drop-down list to select the Object in Salesforce. We selected the Opportunity in this example.
9. Use the drop-down list to select the Action, for instance, Update.
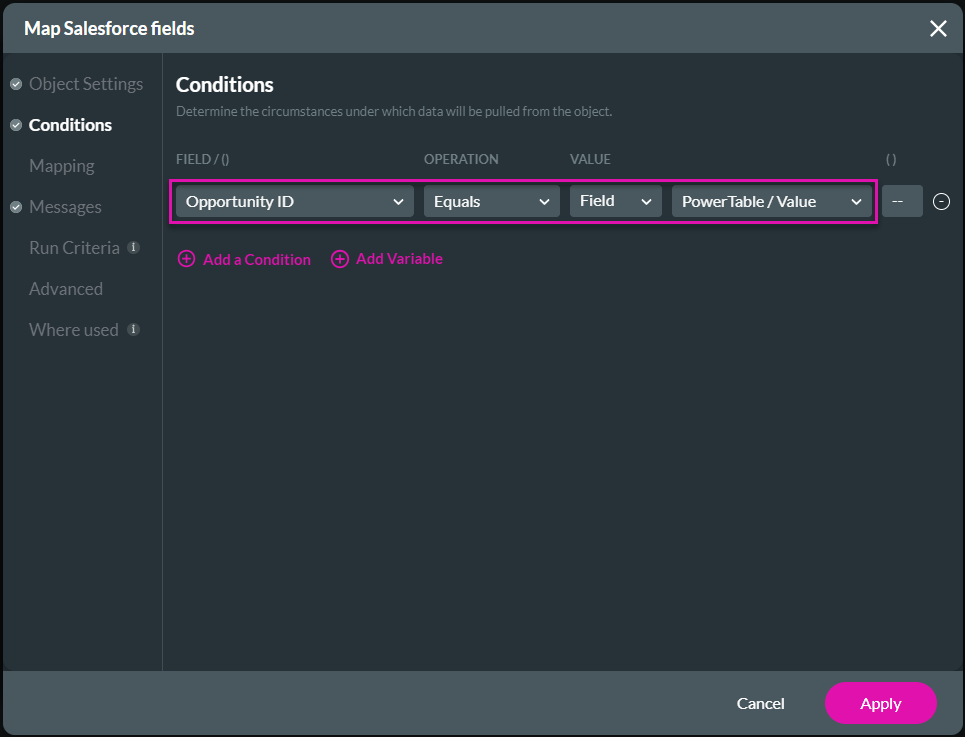
10. Configure the condition:
- OpportunityID Equal Fields PowerTable/Value
- This will update the specific Opportunity where the ID equals the value in the selected row in the power table.
Note: The value (opportunity ID) that was used in the condition comes from here:
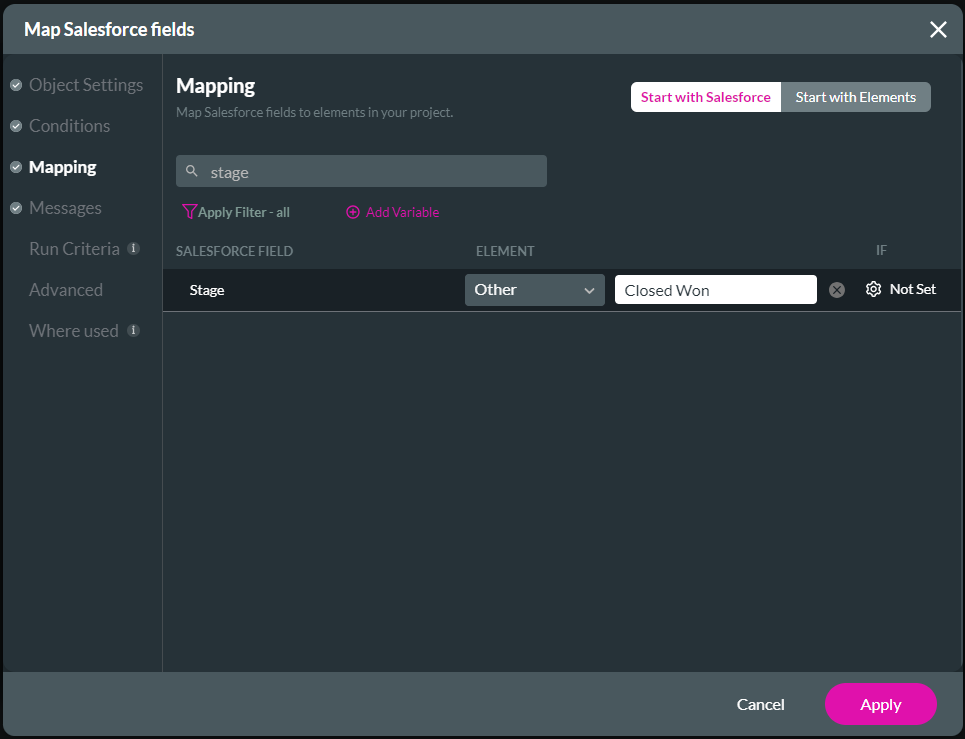
11. Configure the mapping:
- Stage Other Closed Won.
- The stage will be changed to Closed Won when the Button is clicked.
13. Click the Close Button on the Salesforce Integrations screen.
14. Select the Push to update the Opportunity using the drop-down list.
15. Click the Next Button.
16. Add a tag if necessary and click the Insert button.
17. Click the Apply Button. In this example, the Button's name was changed to "Update Stage."
18. Click the Apply Button.
19. Open the Project Settings, and under Tools, use the toggle switch to turn on Debug Mode.
20. Save and preview the project.
21. Click the Debug button. The values (opportunity IDs) in the power table are shown.
If the Button on the power table is clicked, the Salesforce record is updated.
09 View the Updated Opportunity on Titan Web
1. Open the Project Settings and click the Salesforce option.
2. Click the Integration Logs option. The updated record is shown.
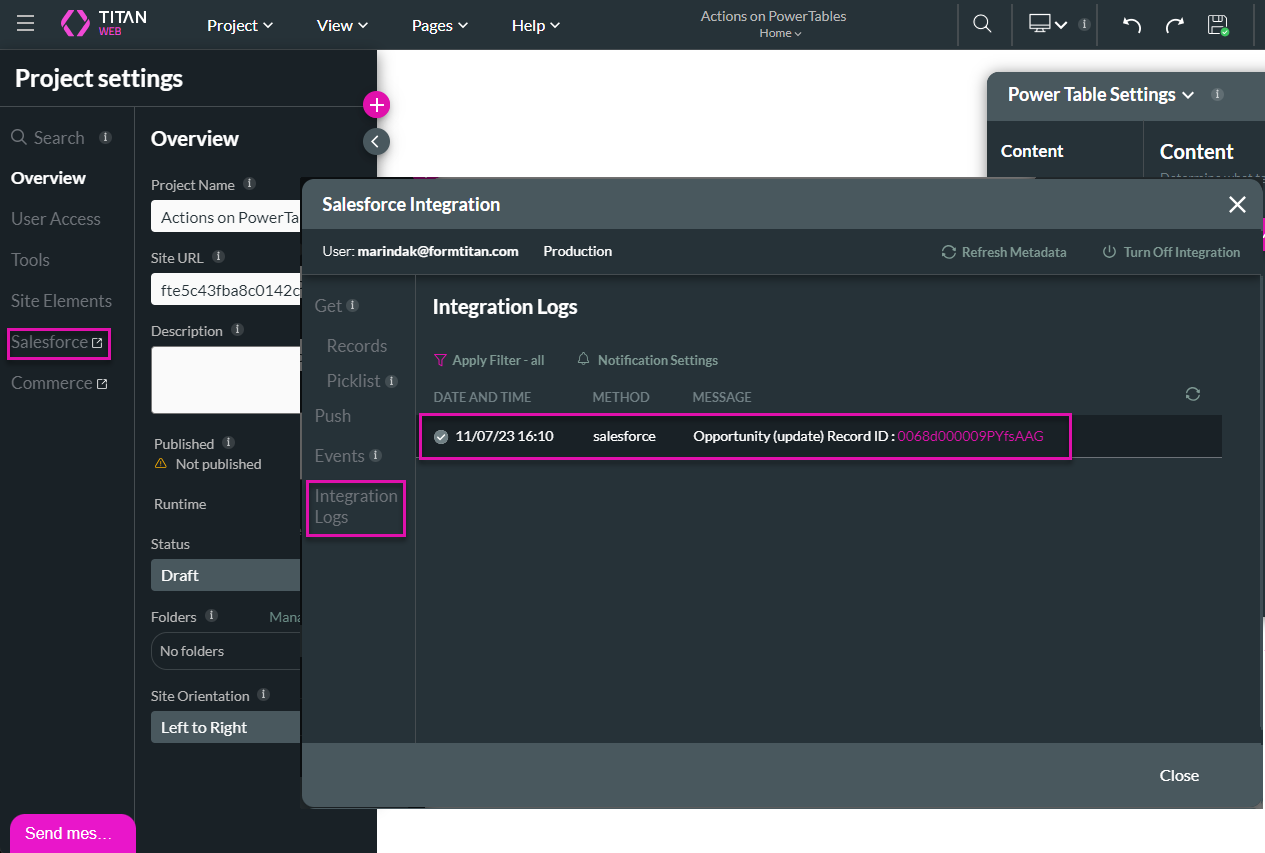
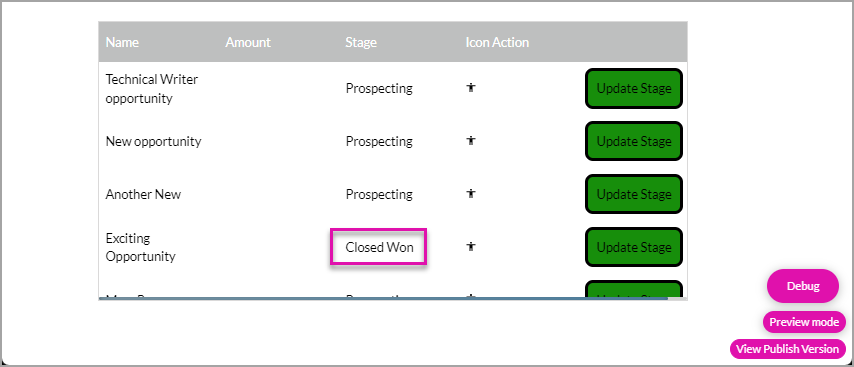
3. Click the record ID to open the record in Salesforce. The stage was updated to Closed Won.

4. Refresh the webpage. The stage is updated here as well.
2. Click the Integration Logs option. The updated record is shown.
3. Click the record ID to open the record in Salesforce. The stage was updated to Closed Won.
4. Refresh the webpage. The stage is updated here as well.
10 Add an Update Action to the Power Table
You can add an action to update the power table after the Salesforce record is updated.
1. Select the power table and click the Gear icon.
2. Click the Edit Mapping button.
3. Click the Configure On Click Action button next to the Button.

4. Double-click the Salesforce Action node.
5. Use the drop-down list to select the Opportunity Power Table Get.
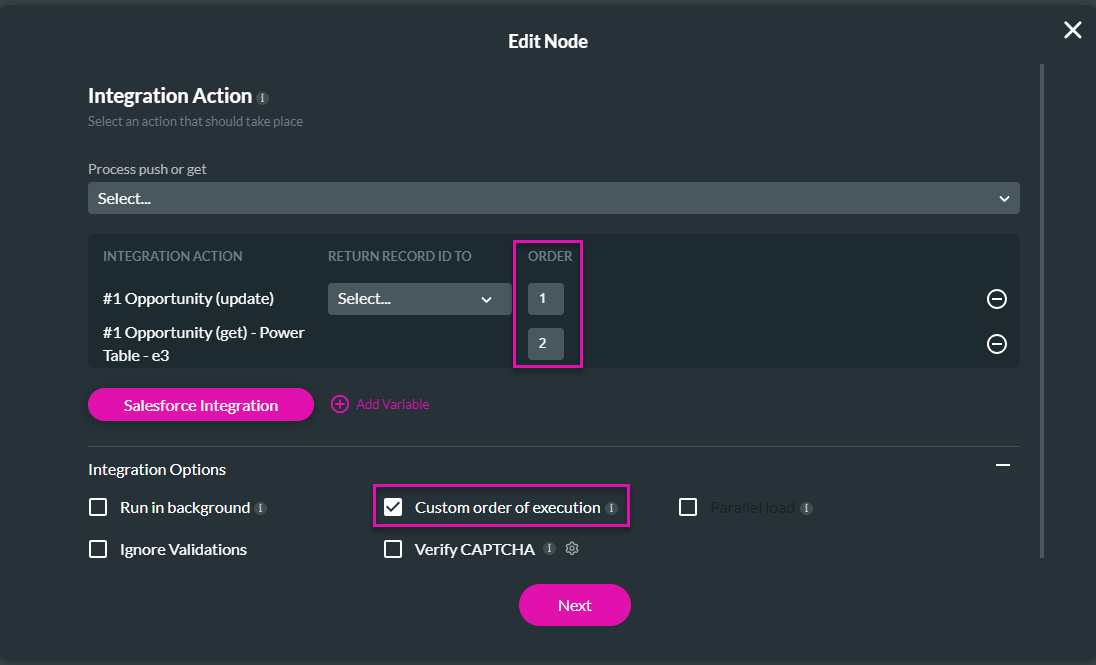
6. Expand the Integration options.
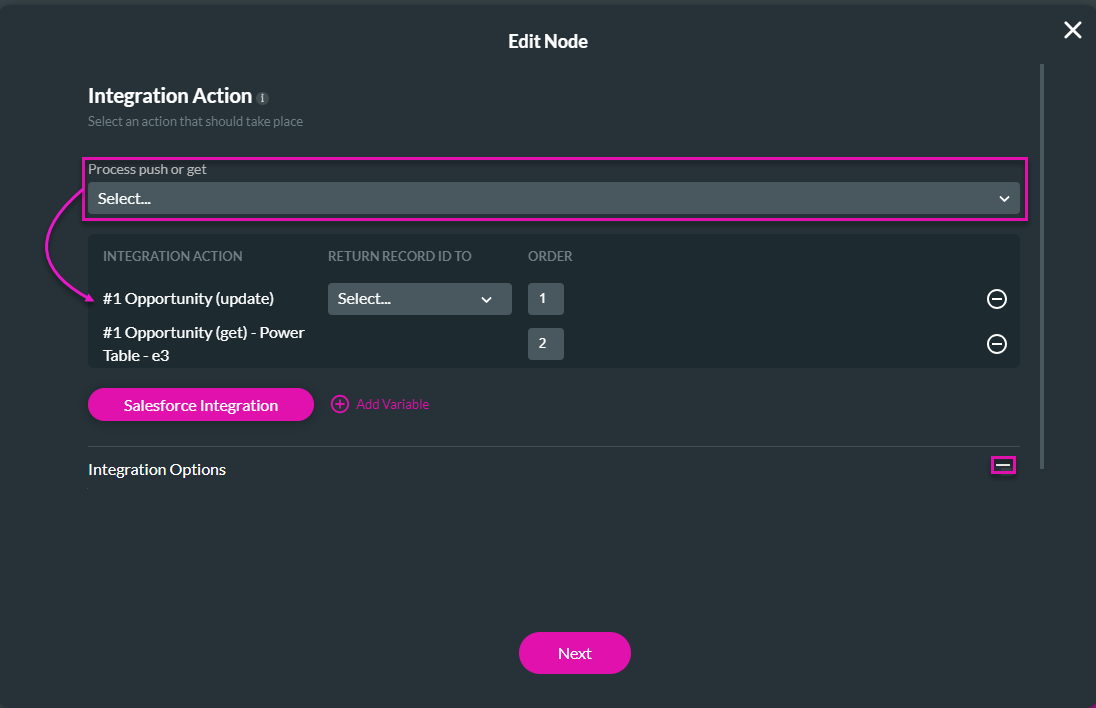
7. Click the Custom Order of Execution checkbox.
8. Type 1 next to the Opportunity (update) Get, and two next to the Opportunity (get) Power Table Get.
9. Click the Next and Save buttons.
10. Click the Apply Button on the On Click Action screen.
11. Click the Apply Button on the Salesforce Configuration screen.
12. Save and preview the project.
13. Click the Update Stage button.
The page is refreshed automatically.
1. Select the power table and click the Gear icon.
2. Click the Edit Mapping button.
3. Click the Configure On Click Action button next to the Button.
4. Double-click the Salesforce Action node.
5. Use the drop-down list to select the Opportunity Power Table Get.
6. Expand the Integration options.
7. Click the Custom Order of Execution checkbox.
8. Type 1 next to the Opportunity (update) Get, and two next to the Opportunity (get) Power Table Get.
- The Opportunity will be updated, and the power table will be refreshed with the new data immediately.
9. Click the Next and Save buttons.
10. Click the Apply Button on the On Click Action screen.
11. Click the Apply Button on the Salesforce Configuration screen.
12. Save and preview the project.
13. Click the Update Stage button.
The page is refreshed automatically.
11 Show More Details on a Modal
Using a modal, you can see more details on the record in a specific row. This is useful when you don't want to show all the details in the power table.
1. Add a modal and add a form.
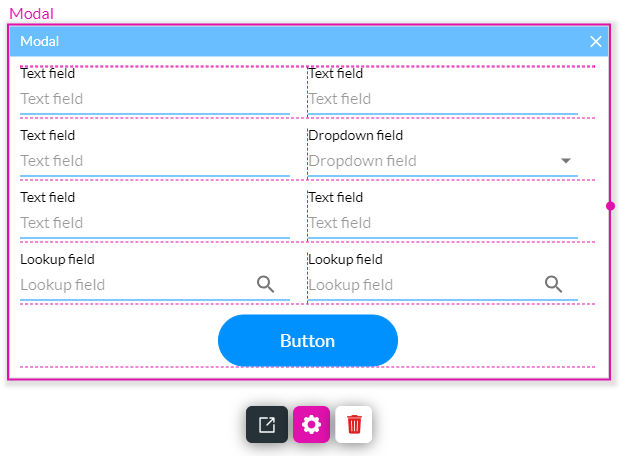
3. Change the labels as needed.
1. Add a modal and add a form.
- + icon > Containers > Modal
- + icon > Form > Form
- + icon > Input > Textarea
- + icon > Input > Textarea
- + icon > Input > Lookup field
- + icon > Input > Dropdown field
- + icon > Button > Primary button
3. Change the labels as needed.
12 Add a System Variable
You will need a system variable when configuring the Salesforce Get.
1. Click the Pages drop-down arrow.
2. Click the Kebab icon next to the Home page.
3. Click the Configure Actions button.
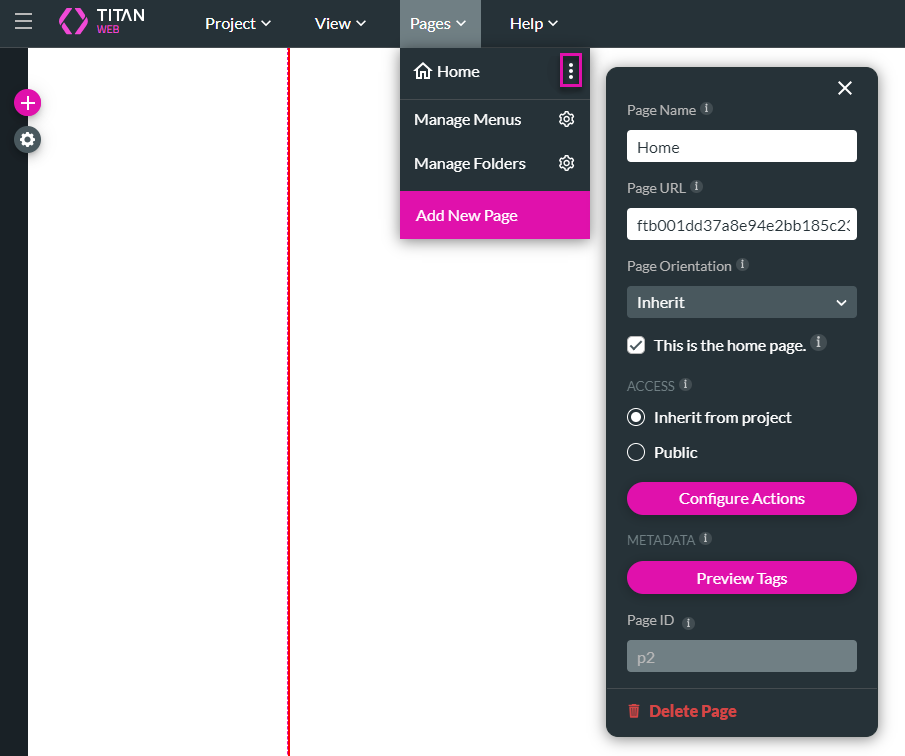
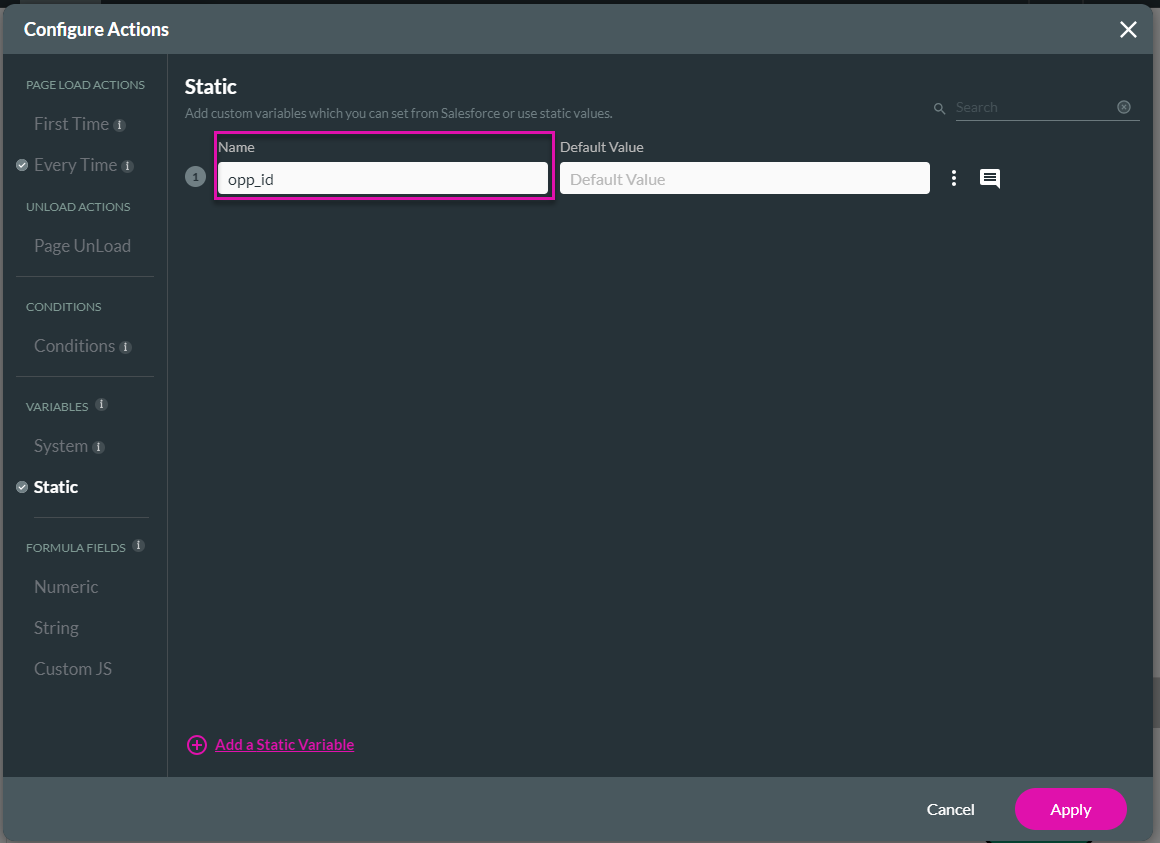
4. Click the Static option and add a static variable.
1. Click the Pages drop-down arrow.
2. Click the Kebab icon next to the Home page.
3. Click the Configure Actions button.
4. Click the Static option and add a static variable.
13 Configure a Salesforce Get
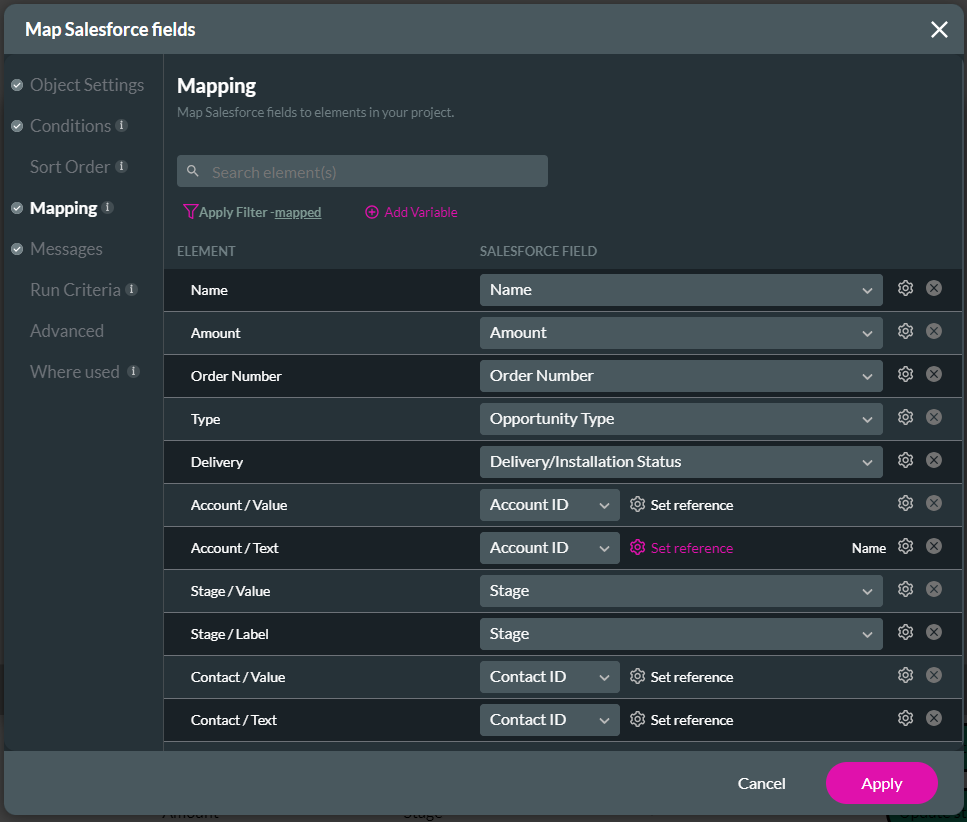
Configure the Salesforce Get to bring the details to the modal.
1. Open the Project Settings and click the Salesforce option.
2. Under Records, click the Create New button.
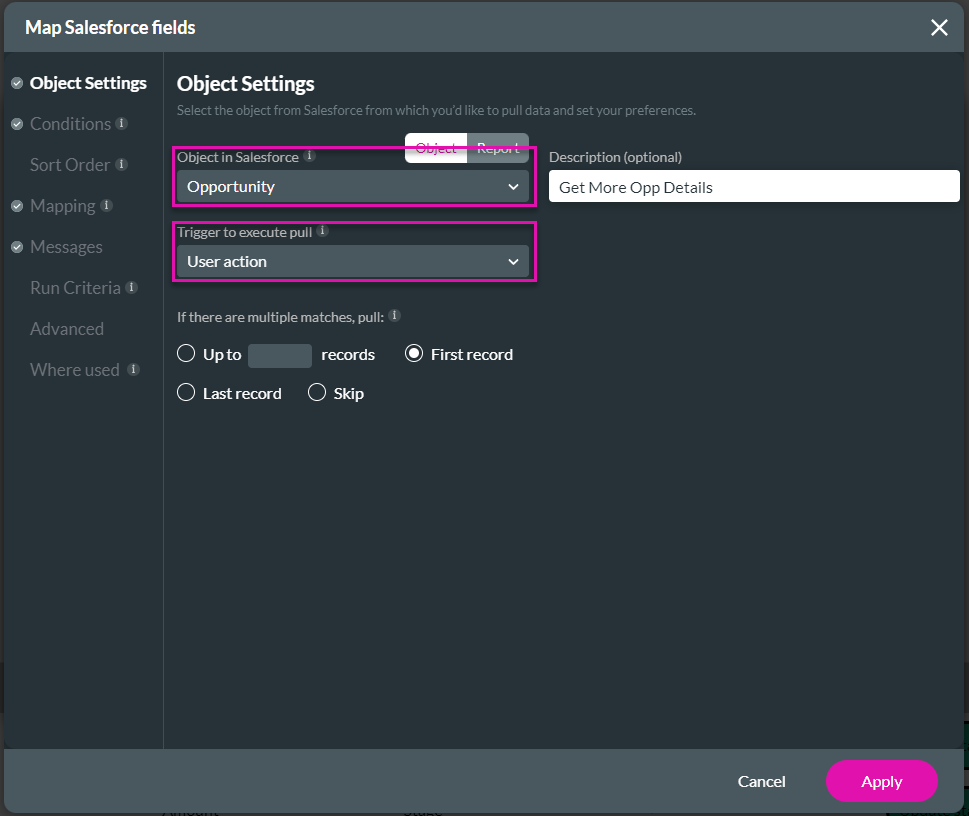
3. Select the Object from Salesforce from the drop-down list. We selected Opportunity.
4. Select the trigger to execute the pull from the drop-down list. We selected User action.
5. Click on Conditions and map the condition. You will use the variable added in the previous section here.
7. Click the Apply button.
8. Click the Close button on the Salesforce Integration screen.
9. Save the project.
1. Open the Project Settings and click the Salesforce option.
2. Under Records, click the Create New button.
3. Select the Object from Salesforce from the drop-down list. We selected Opportunity.
4. Select the trigger to execute the pull from the drop-down list. We selected User action.
5. Click on Conditions and map the condition. You will use the variable added in the previous section here.
- Opportunity ID Equals Field PV/Home/opp_id
- If Opportunity equals the variable, the modal will be populated with the details from Opportunity
7. Click the Apply button.
8. Click the Close button on the Salesforce Integration screen.
9. Save the project.
14 Pass the Value of the Variable
To populate the modal, pass the value from the selected row to the variable and trigger the Salesforce Get.
We added this action to the Icon.
1. Select the power table and click the Gear icon.
2. Click the Edit Mapping button.
3. Change the header name for the Icon.
4. Click the Configure On Click Action button next to the Icon.
We added this action to the Icon.
1. Select the power table and click the Gear icon.
2. Click the Edit Mapping button.
3. Change the header name for the Icon.
4. Click the Configure On Click Action button next to the Icon.
15 Add Affected Elements Node
Use the Affected Elements node to populate the variable.
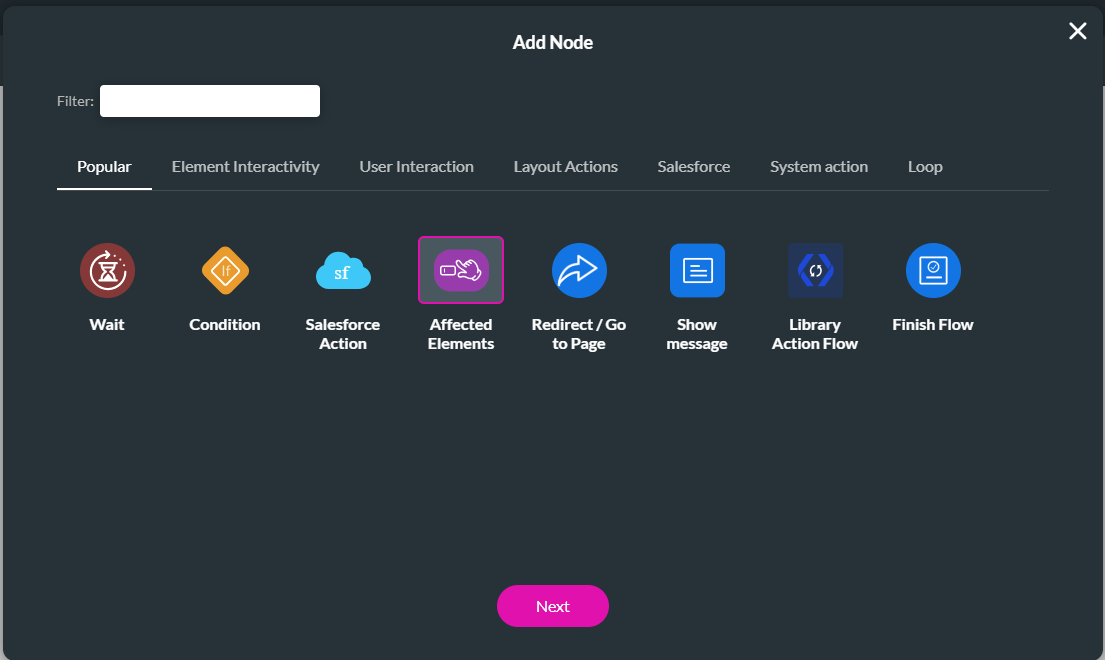
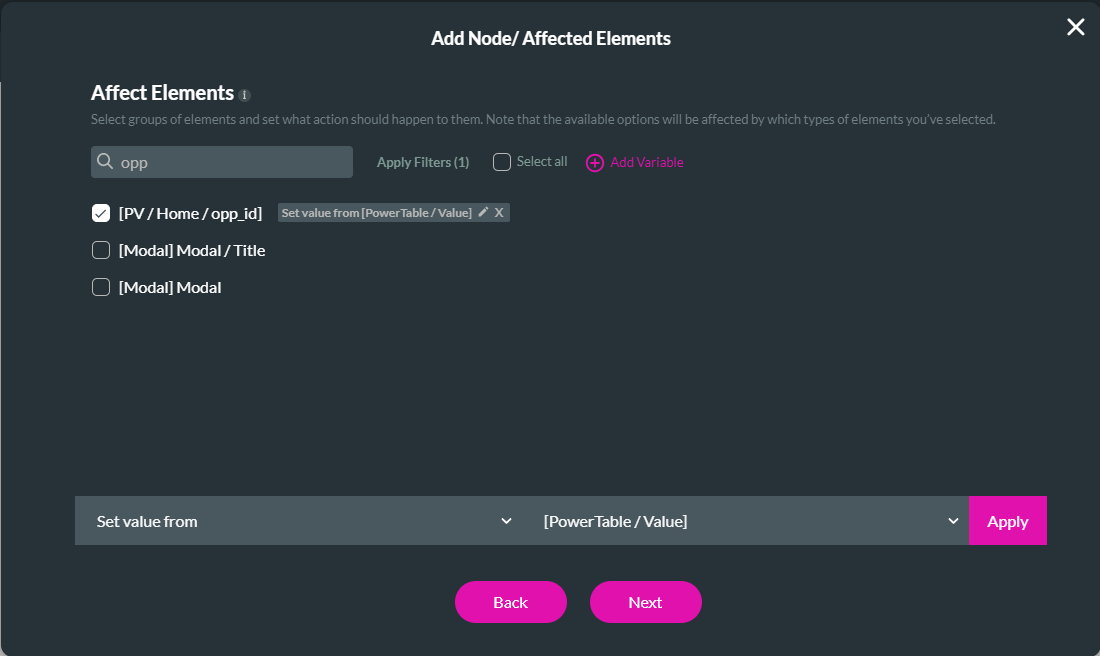
1. Click the + icon next to the Start node and click the Affected Elements option.
2. Click the Next button.
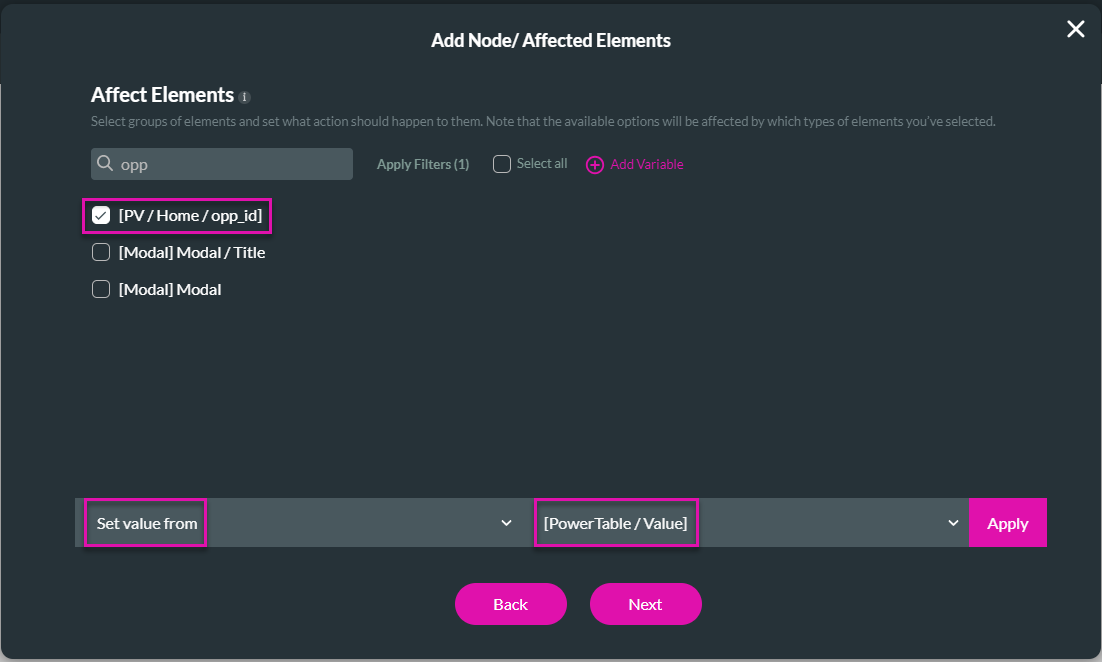
3. Find the variable and select the Set value from the Power Table Value.
5. Click the Next button.
6. Add a tag if necessary and click the Insert button.
1. Click the + icon next to the Start node and click the Affected Elements option.
2. Click the Next button.
3. Find the variable and select the Set value from the Power Table Value.
- The value from the selected row (the opportunity ID) will be used to set the variable.
5. Click the Next button.
6. Add a tag if necessary and click the Insert button.
16 Add a Salesforce Action Node
The Salesforce Get will populate the modal with more details about the opportunity.
1. Click the + icon of the Affected Elements node and click the Salesforce Action option.
2. Click the Next button.
3. Use the drop-down list to select the Salesforce Get.
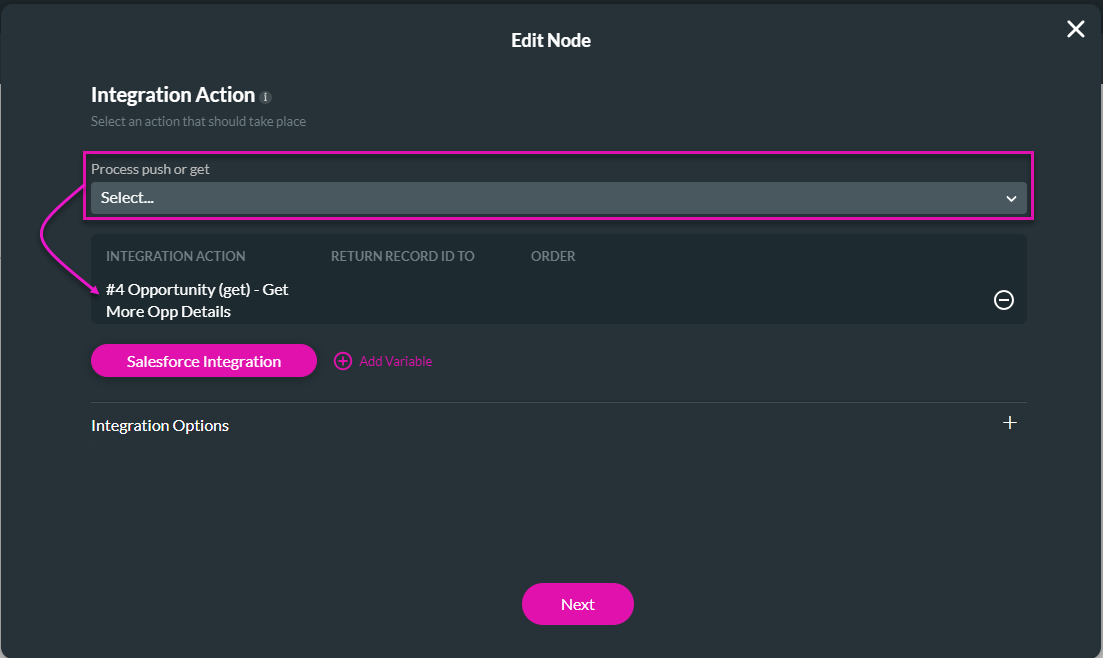
4. Click the Next button.
5. Add a tag if necessary and click the Insert button.
1. Click the + icon of the Affected Elements node and click the Salesforce Action option.
2. Click the Next button.
3. Use the drop-down list to select the Salesforce Get.
4. Click the Next button.
5. Add a tag if necessary and click the Insert button.
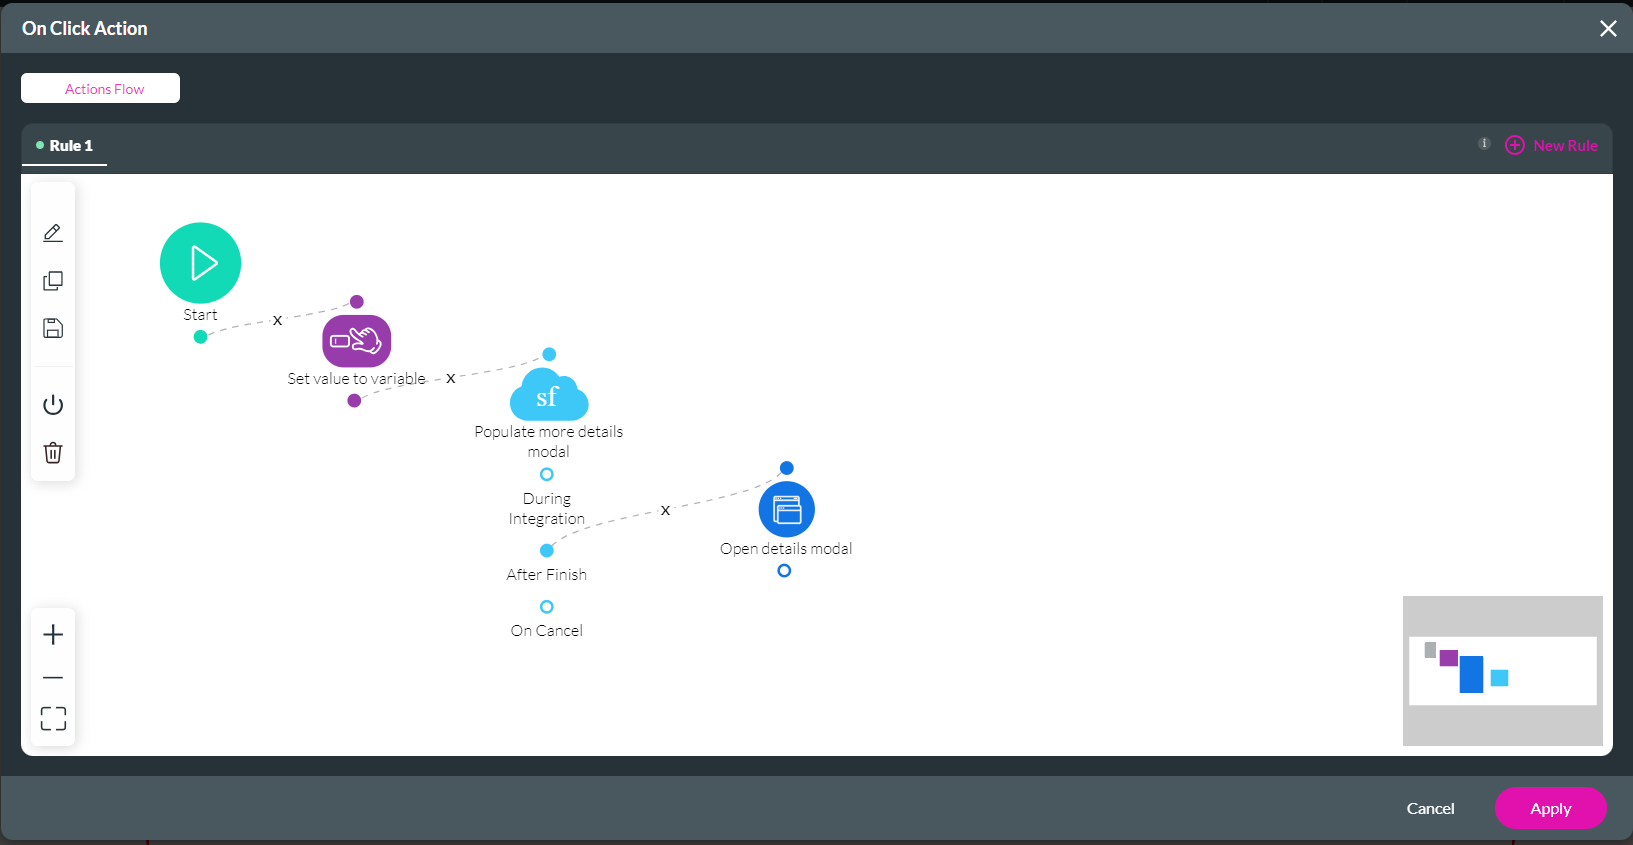
17 Add an After Finish Action
This action will ensure that the modal opens when the icon is clicked.
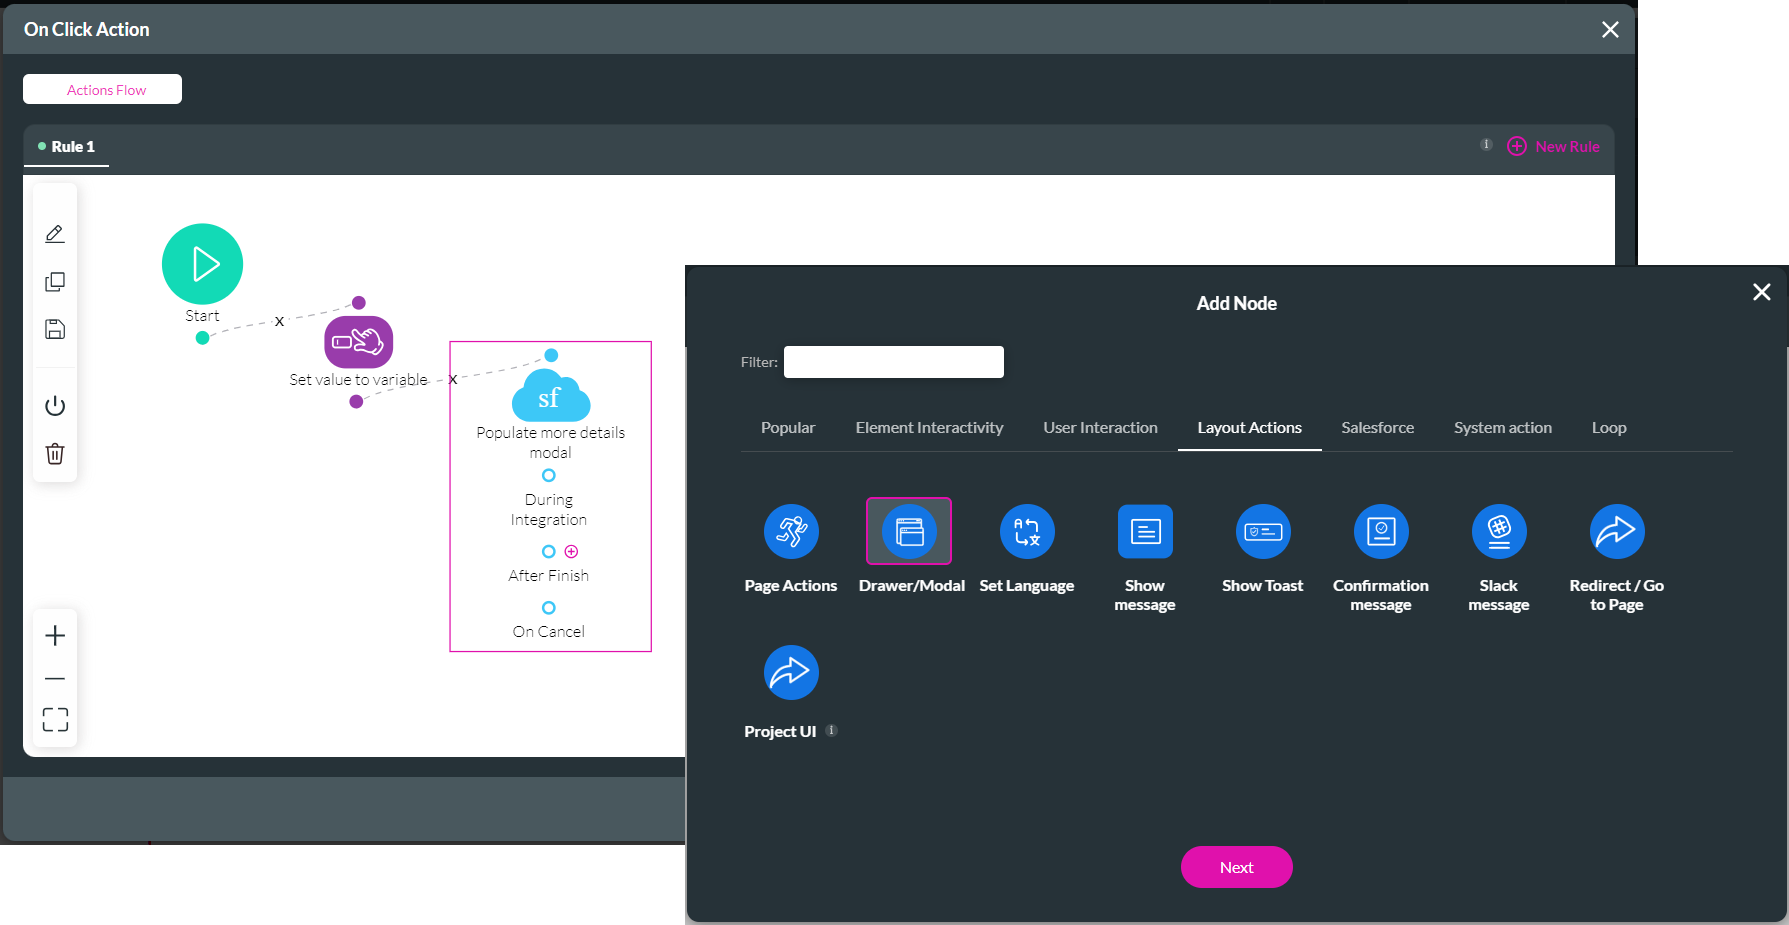
1. Click the + icon next to the After Finish action on the Salesforce modal.
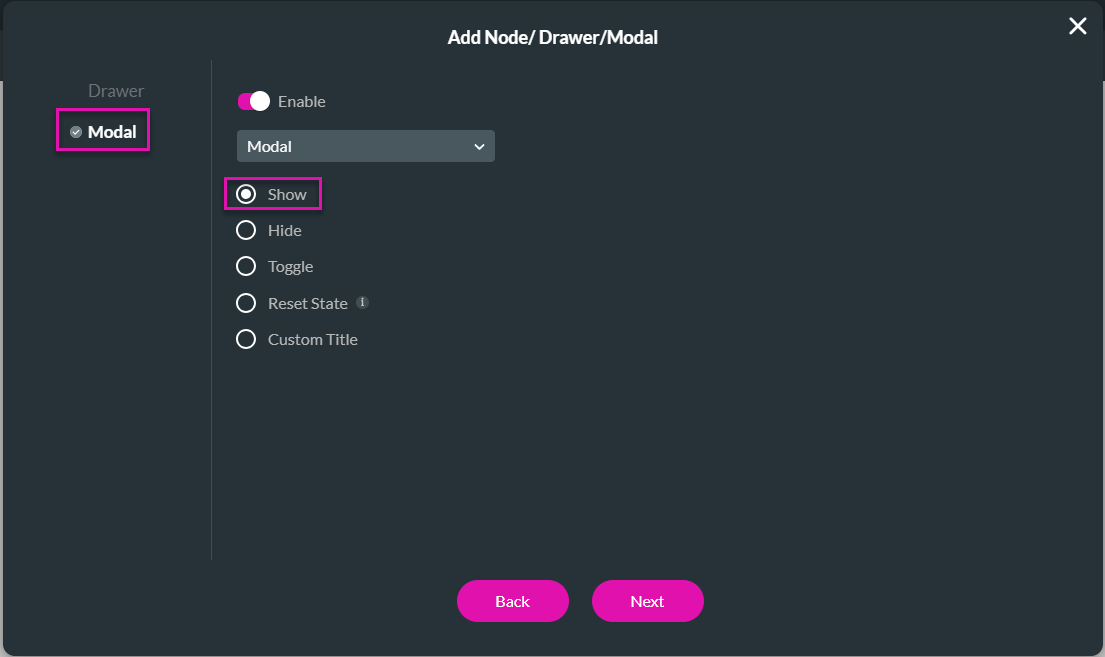
2. Under Layout Actions, click the Drawer/Modal option and the Next button.
3. Click the Modal option and use the toggle switch to enable the Modal.
4. Use the drop-down list to select the modal and click the Show radio button.
5. Click the Next button.
6. Add a tag if necessary and click the insert button.
7. Click the Apply button.
8. Click the Apply button on the Salesforce Integration screen.
9. Save and preview the project.
10. Click the icon next to a record.
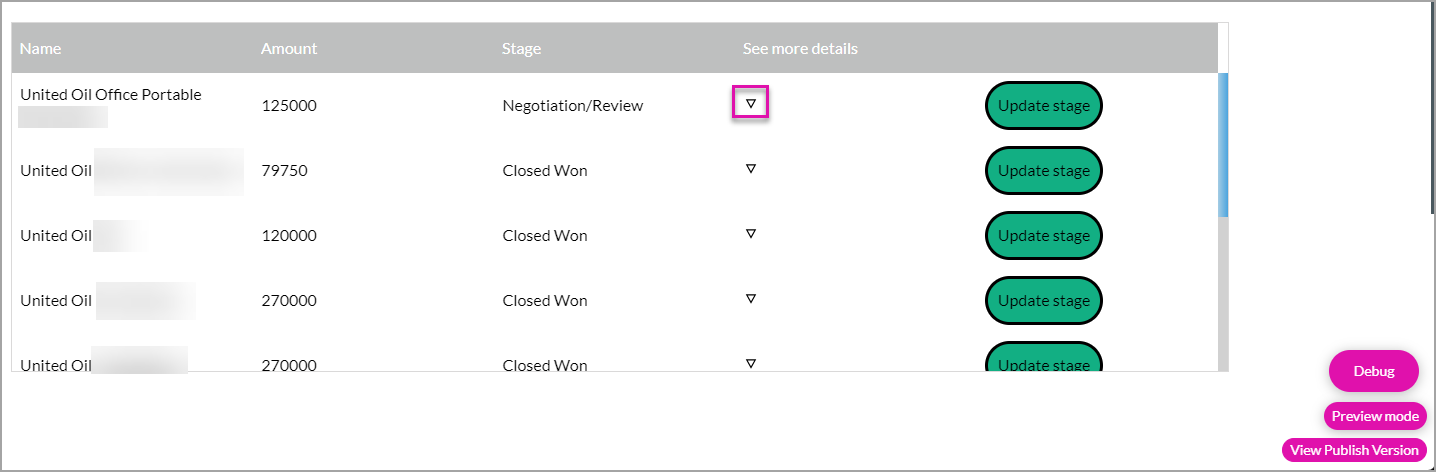
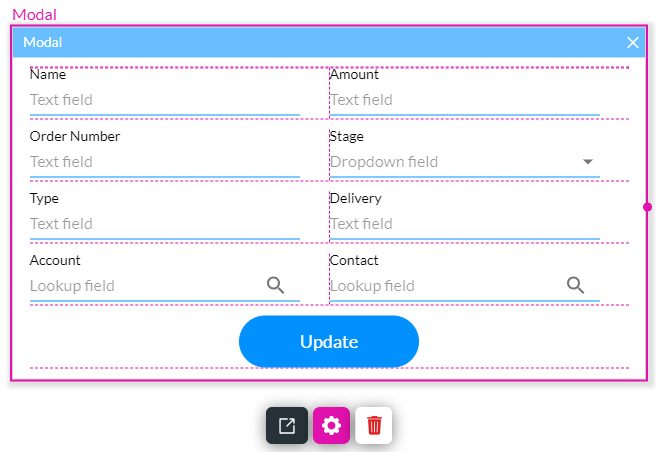
The modal opens and shows more details about the selected record.
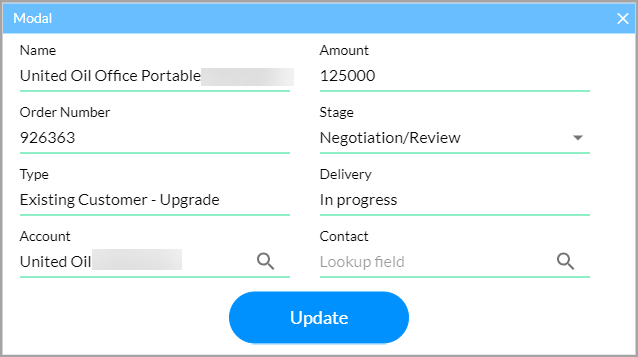
The Contact lookup field can be used to update the opportunity.
1. Click the + icon next to the After Finish action on the Salesforce modal.
2. Under Layout Actions, click the Drawer/Modal option and the Next button.
3. Click the Modal option and use the toggle switch to enable the Modal.
4. Use the drop-down list to select the modal and click the Show radio button.
5. Click the Next button.
6. Add a tag if necessary and click the insert button.
7. Click the Apply button.
8. Click the Apply button on the Salesforce Integration screen.
9. Save and preview the project.
10. Click the icon next to a record.
The modal opens and shows more details about the selected record.
The Contact lookup field can be used to update the opportunity.