Action Flow Table Interactivity (9 min)
Completion requirements
01 Getting Started
In this lesson, we look at table interactivity in action flows for power tables. We will focus on specific actions, such as allowing inline editing, expanding columns on the table, refreshing the table, and selecting rows. These actions can be triggered from any on-click action, condition, or page-level action.
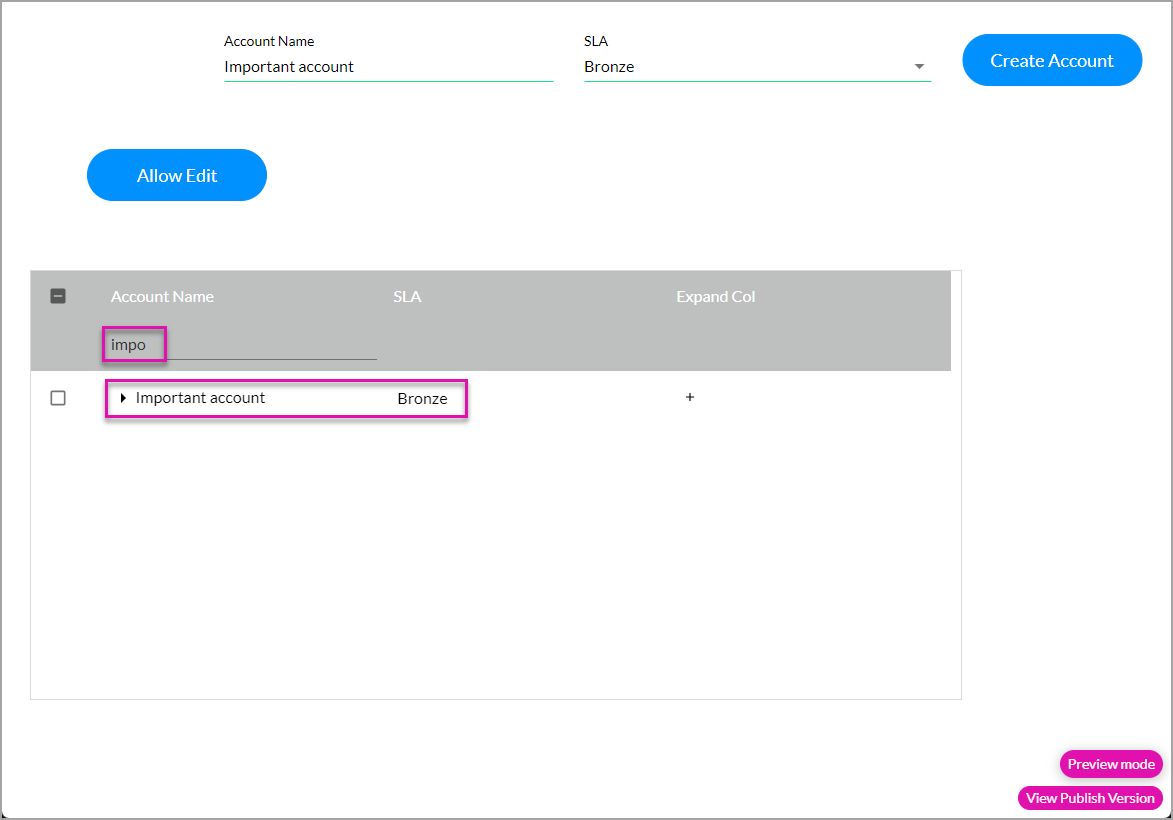
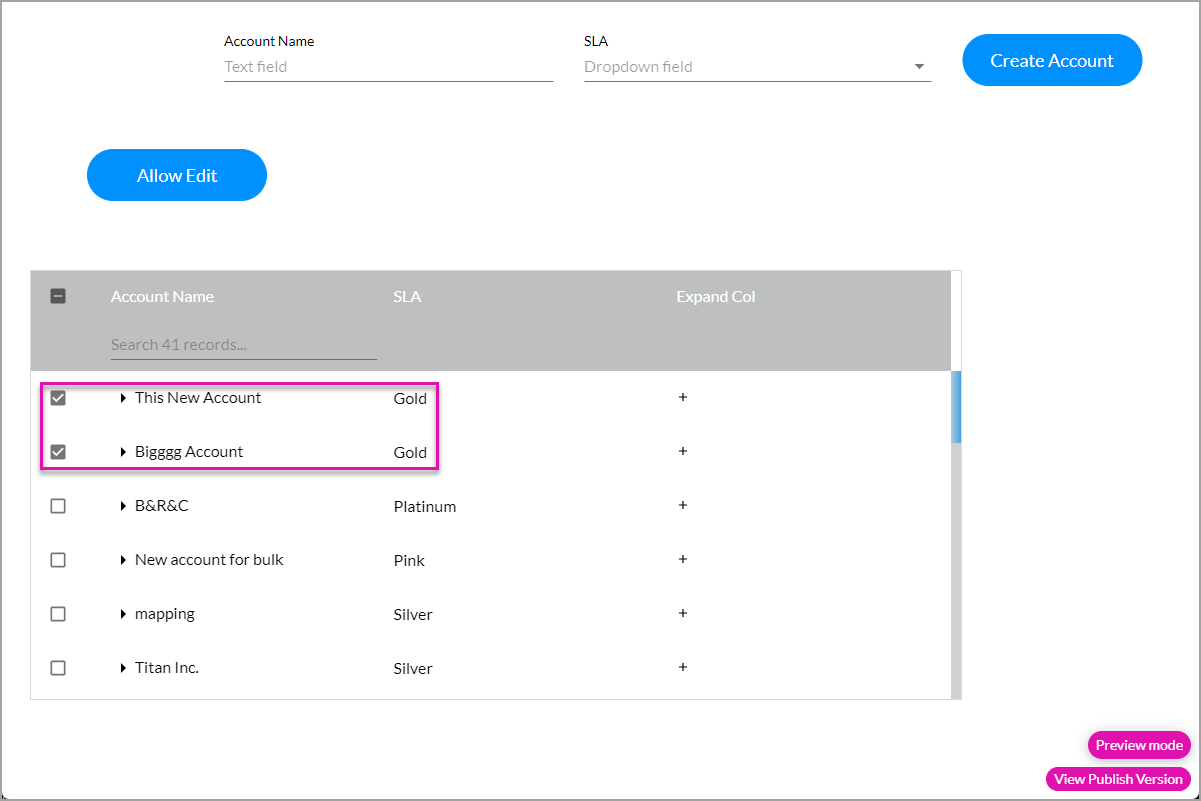
We have created the following project:
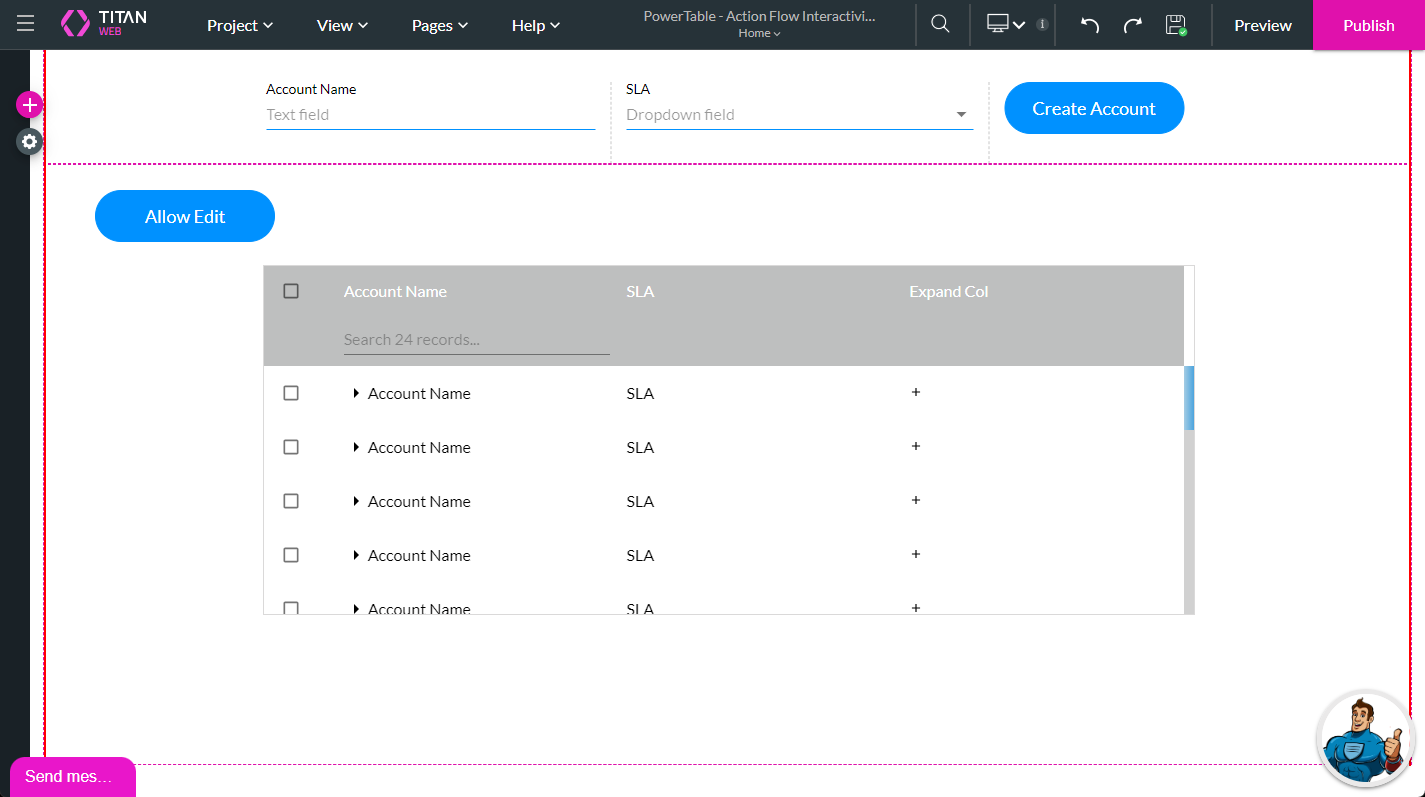
There is a text field for the Account Name and a drop-down list for the SLA. The button will create an account and push it to Salesforce. There is also a power table and an Allow Edit button. We will provide more information about the power table configuration later. The Allow Edit button is described below.
We have created the following project:
There is a text field for the Account Name and a drop-down list for the SLA. The button will create an account and push it to Salesforce. There is also a power table and an Allow Edit button. We will provide more information about the power table configuration later. The Allow Edit button is described below.
02 Allow Inline Edit
We configured the Allow Inline Edit on-click action on the button. This will allow users to edit fields in the table.
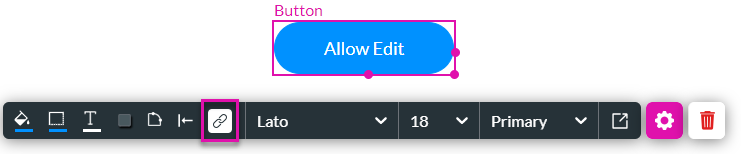
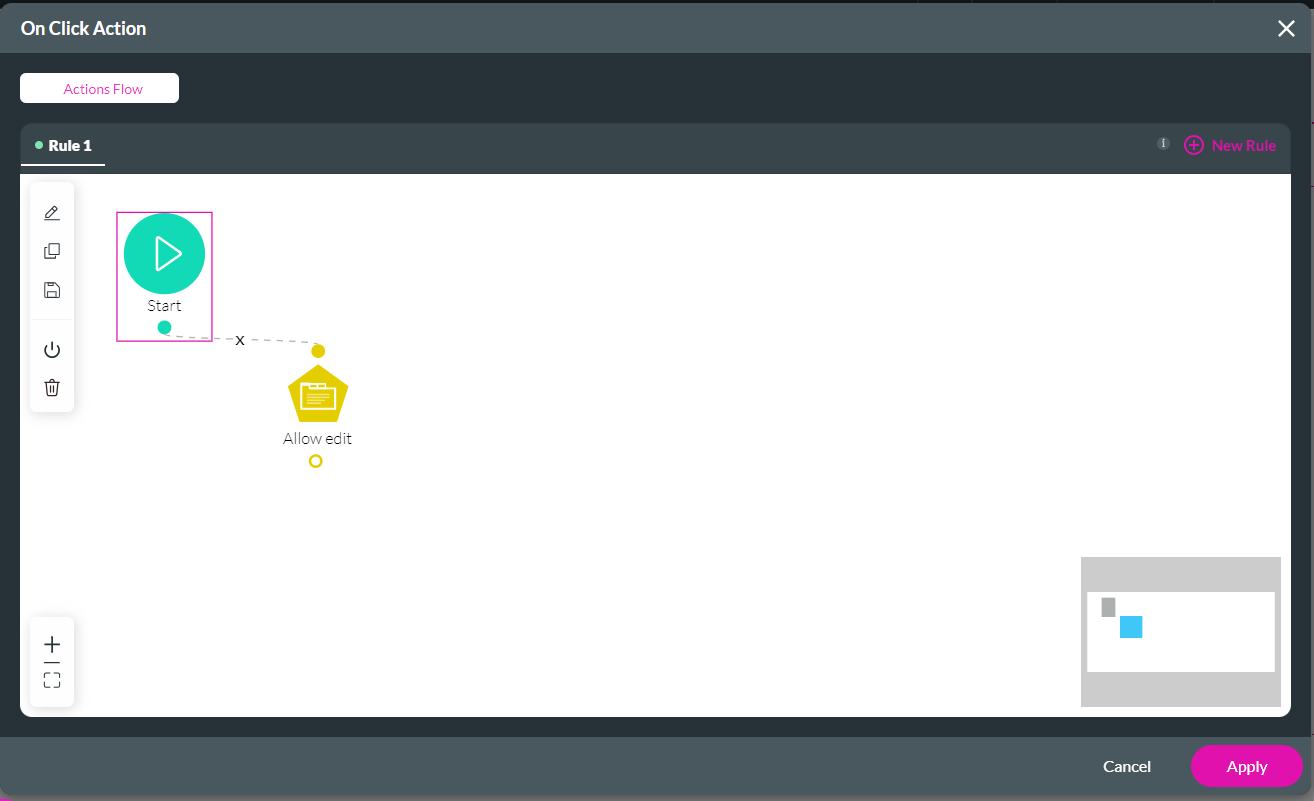
1. Click the Allow Edit button’s On Click Action icon.
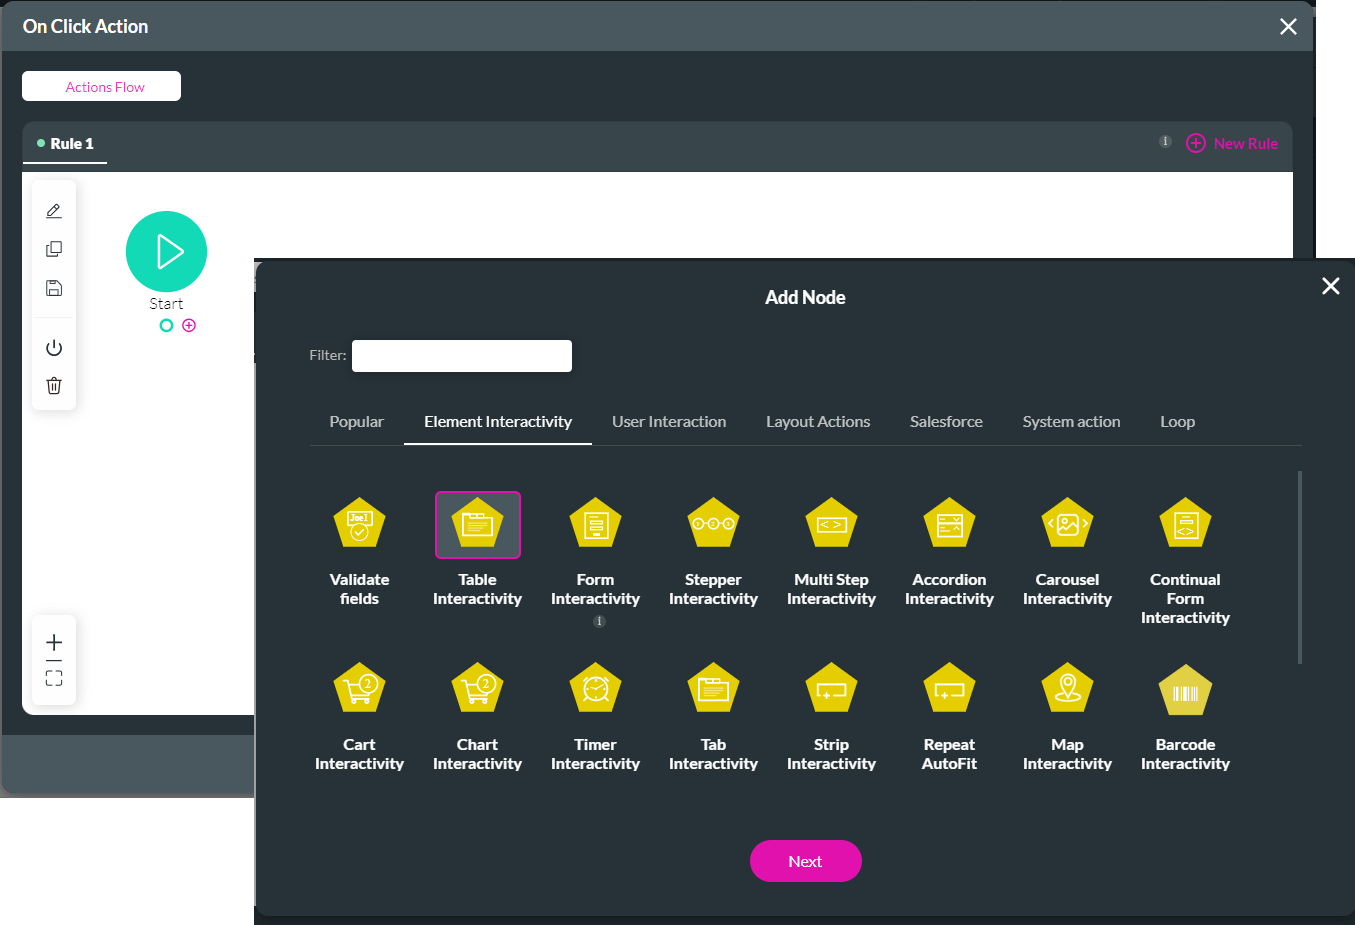
2. Click the + icon next to the Start node.
3. Under Element Interactivity, click the Table Interactivity option and the Next button.
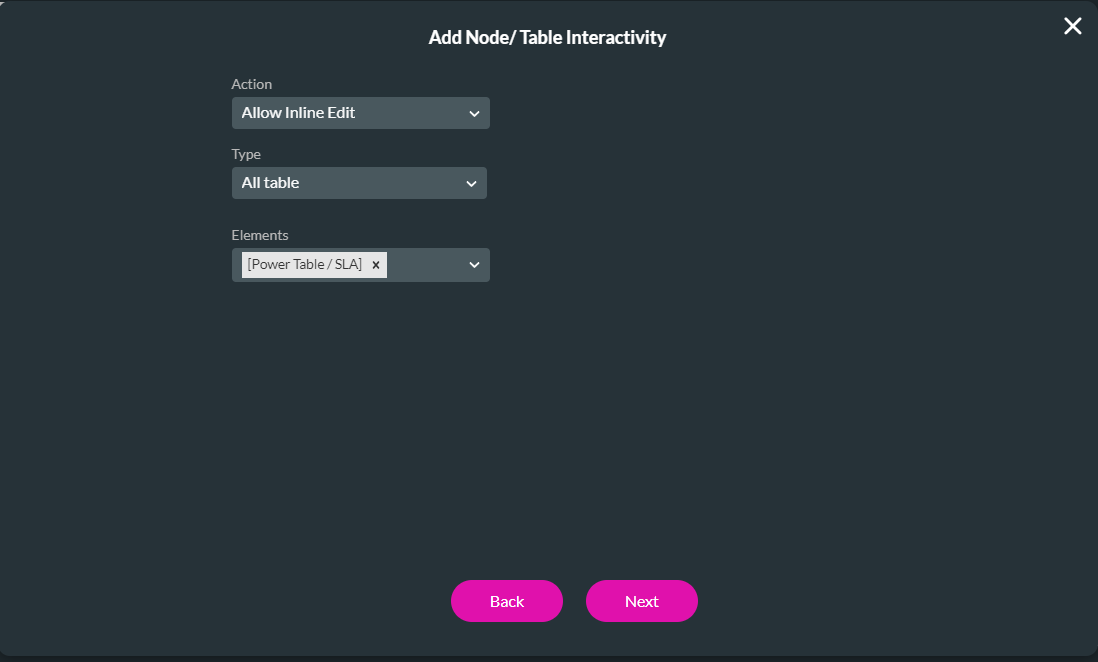
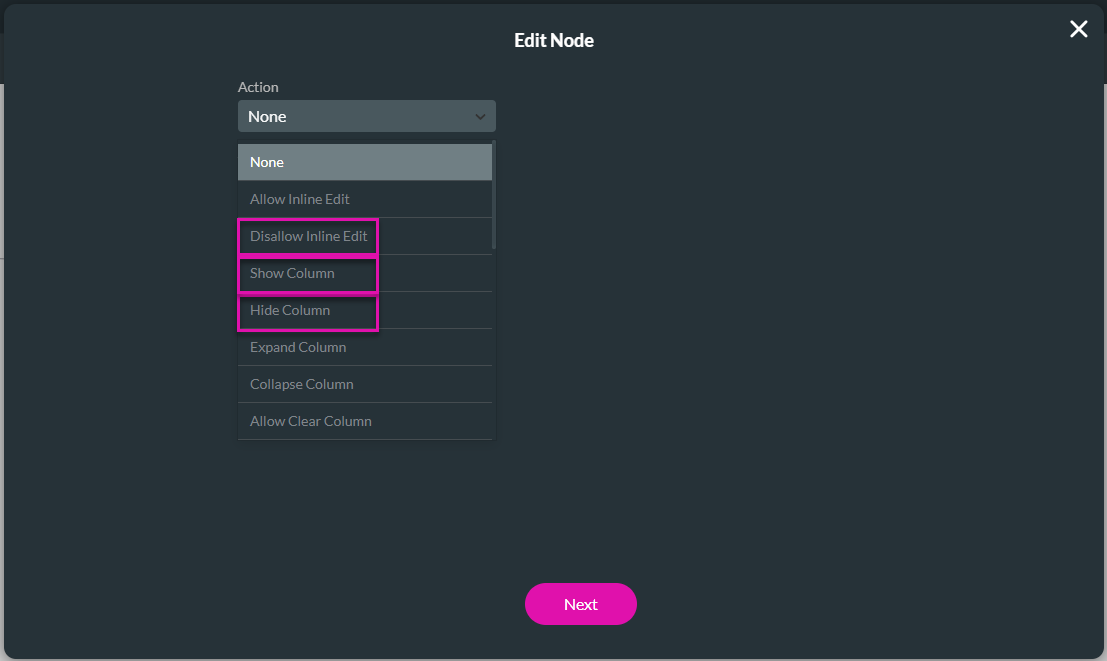
4. Use the drop-down list to select Allow Inline Edit. This will allow users to edit fields on the table.
5. Use the drop-down list to select the type. In this example, we selected the All table.
6. Use the drop-down list to select the element/s. We selected the Power Table/SLA option.
7. Click the Next button.
8. Add a tag if necessary and click the Insert button.
9. Click the Apply button.
10. Save and preview the project.
When hovering over the contents in the SLA column, there is no Edit icon, and the fields cannot be edited. If you click the Allow Edit button, an Edit icon can be seen in the column.
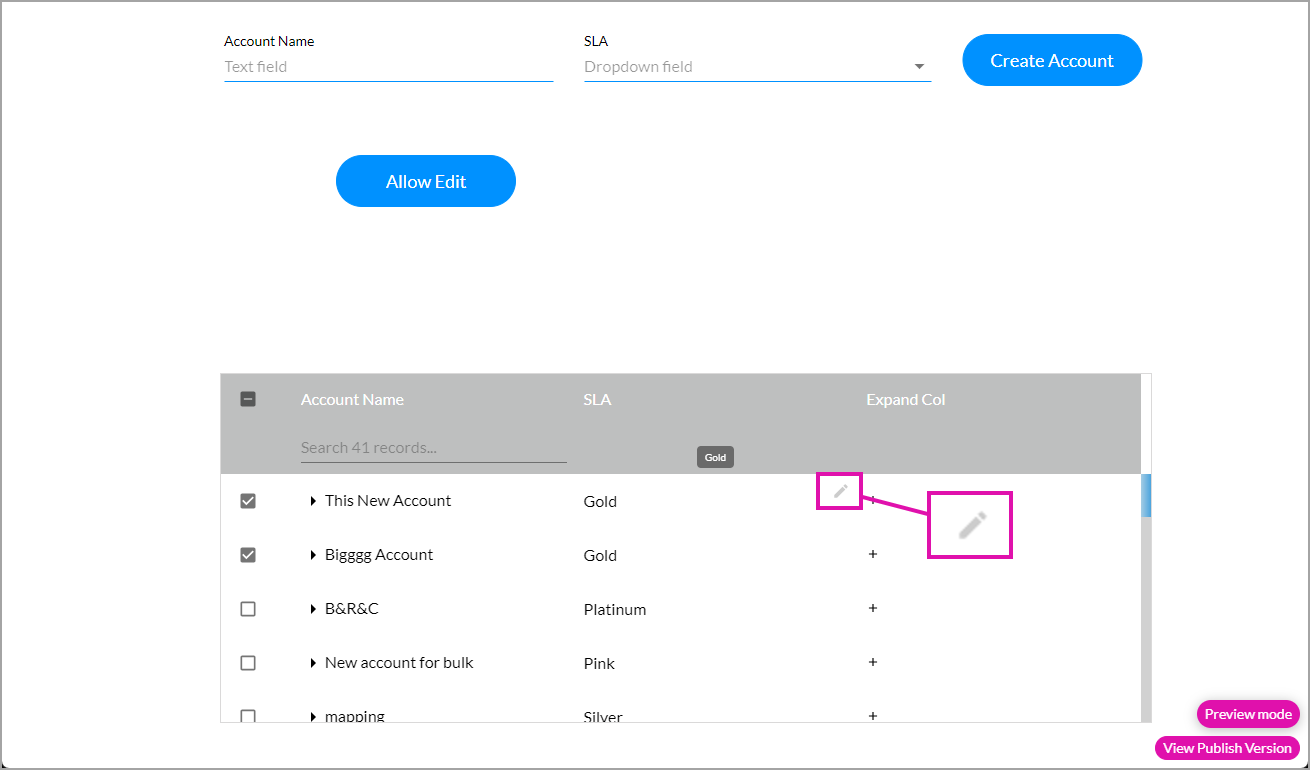
Clicking the Edit icon opens a drop-down list, and you can select another SLA.
You can also do the following:
1. Click the Allow Edit button’s On Click Action icon.
2. Click the + icon next to the Start node.
3. Under Element Interactivity, click the Table Interactivity option and the Next button.
4. Use the drop-down list to select Allow Inline Edit. This will allow users to edit fields on the table.
5. Use the drop-down list to select the type. In this example, we selected the All table.
6. Use the drop-down list to select the element/s. We selected the Power Table/SLA option.
7. Click the Next button.
8. Add a tag if necessary and click the Insert button.
9. Click the Apply button.
10. Save and preview the project.
When hovering over the contents in the SLA column, there is no Edit icon, and the fields cannot be edited. If you click the Allow Edit button, an Edit icon can be seen in the column.
Clicking the Edit icon opens a drop-down list, and you can select another SLA.
You can also do the following:
- Disallow Inline Edit
- Show Column
- Hide Column
03 Expand Columns
You can expand a column.
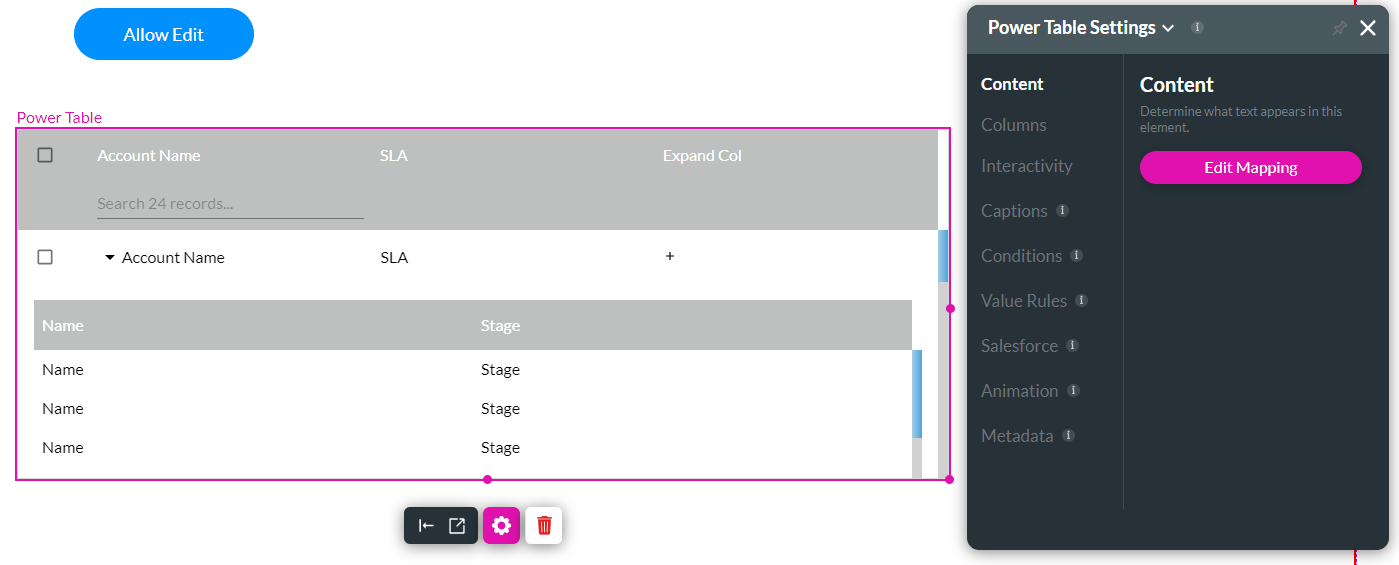
1. Select the power table and click the Gear icon to open the Settings screen.
2. Click the Edit Mapping button.
The following parameters have been configured:
The On Click Action table interactivity was configured as follows:
3. Save and preview the project.
4. Click the icon next to an account name. These icons are standard when the subcomponent is configured. The opportunities on the Account are shown in the expanded column.
You can also do the following:
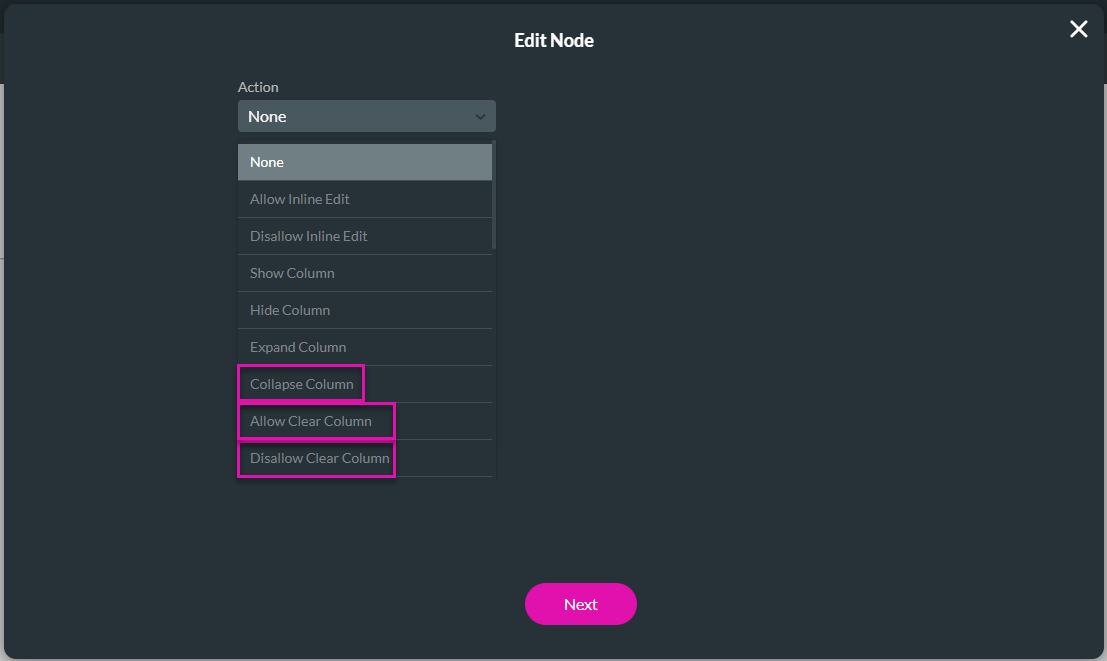
The Allow Clear Column and Disallow Clear Column are used with Allow Bulk Update and Disallow Bulk Updates. Allow Bulk Updates only works if you have selected Allow Inline Editing.
Note: The Actions listed may only be available for specific configs added to your power table.
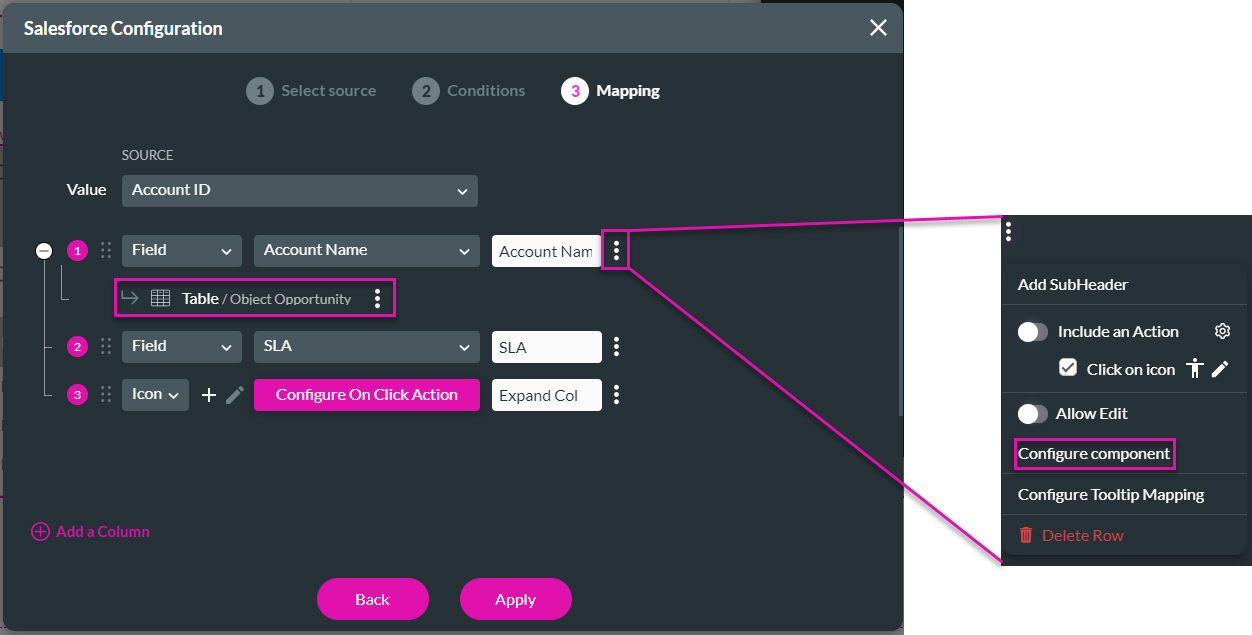
1. Select the power table and click the Gear icon to open the Settings screen.
2. Click the Edit Mapping button.
The following parameters have been configured:
- The Salesforce source is Account.
- The condition is as follows: SLA is not empty.
- Under the Account Name column, there is a subcomponent to show opportunities. The subcomponent was added by clicking the Kebab icon and selecting the Configure component option.
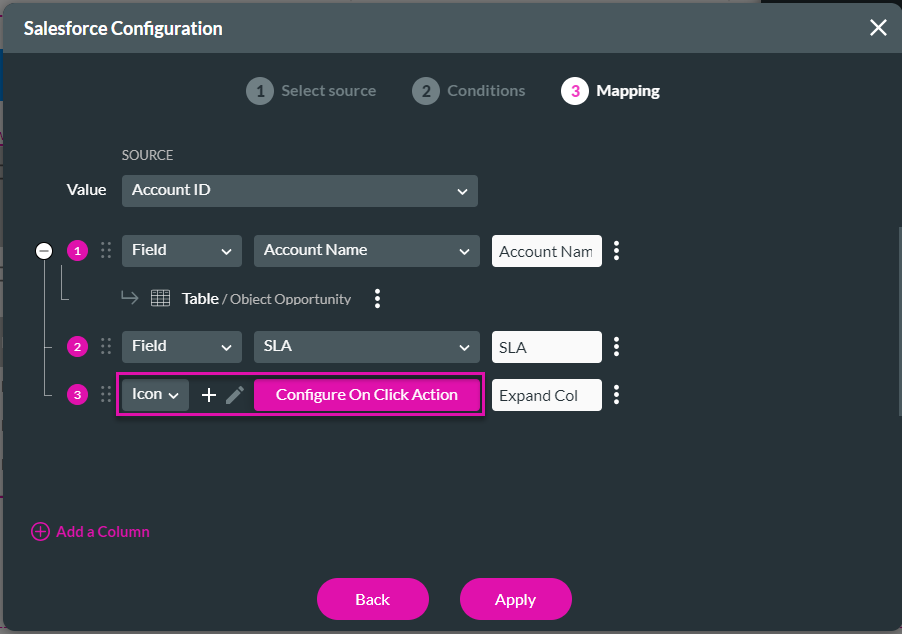
- An icon with an on-click action was configured.
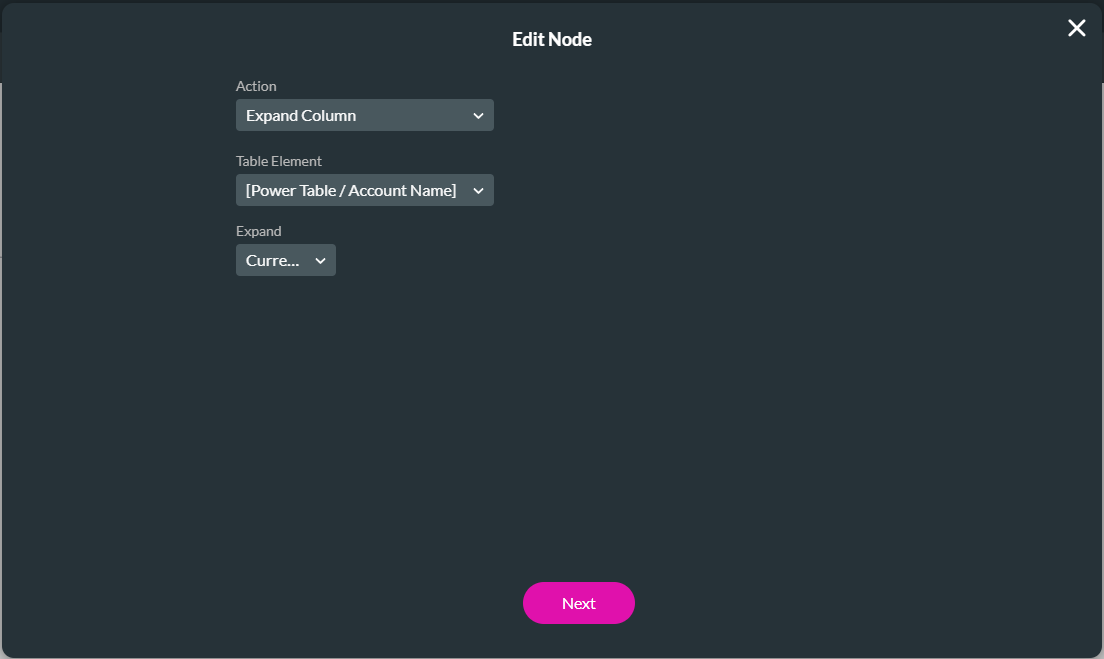
The On Click Action table interactivity was configured as follows:
- Expand the Column action on the Power Table/Account Name column’s Current Row.
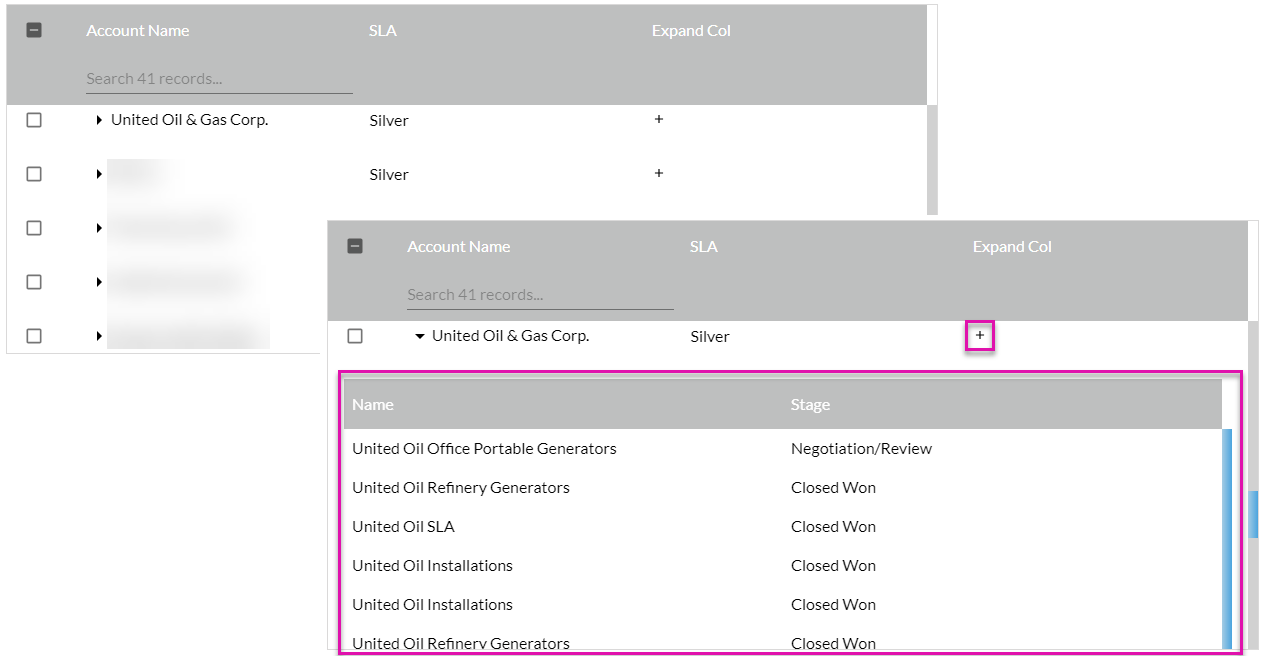
3. Save and preview the project.
4. Click the icon next to an account name. These icons are standard when the subcomponent is configured. The opportunities on the Account are shown in the expanded column.
You can also do the following:
- Collapse Column
- Allow Clear Column
- Disallow Clear Column
The Allow Clear Column and Disallow Clear Column are used with Allow Bulk Update and Disallow Bulk Updates. Allow Bulk Updates only works if you have selected Allow Inline Editing.
Note: The Actions listed may only be available for specific configs added to your power table.
04 Refresh Table
This is the option to use if you add an account and want the power table to update with this new account automatically.
1. Click the On Click Action icon on the Create Account button.

2. Add a Salesforce Create Account action.
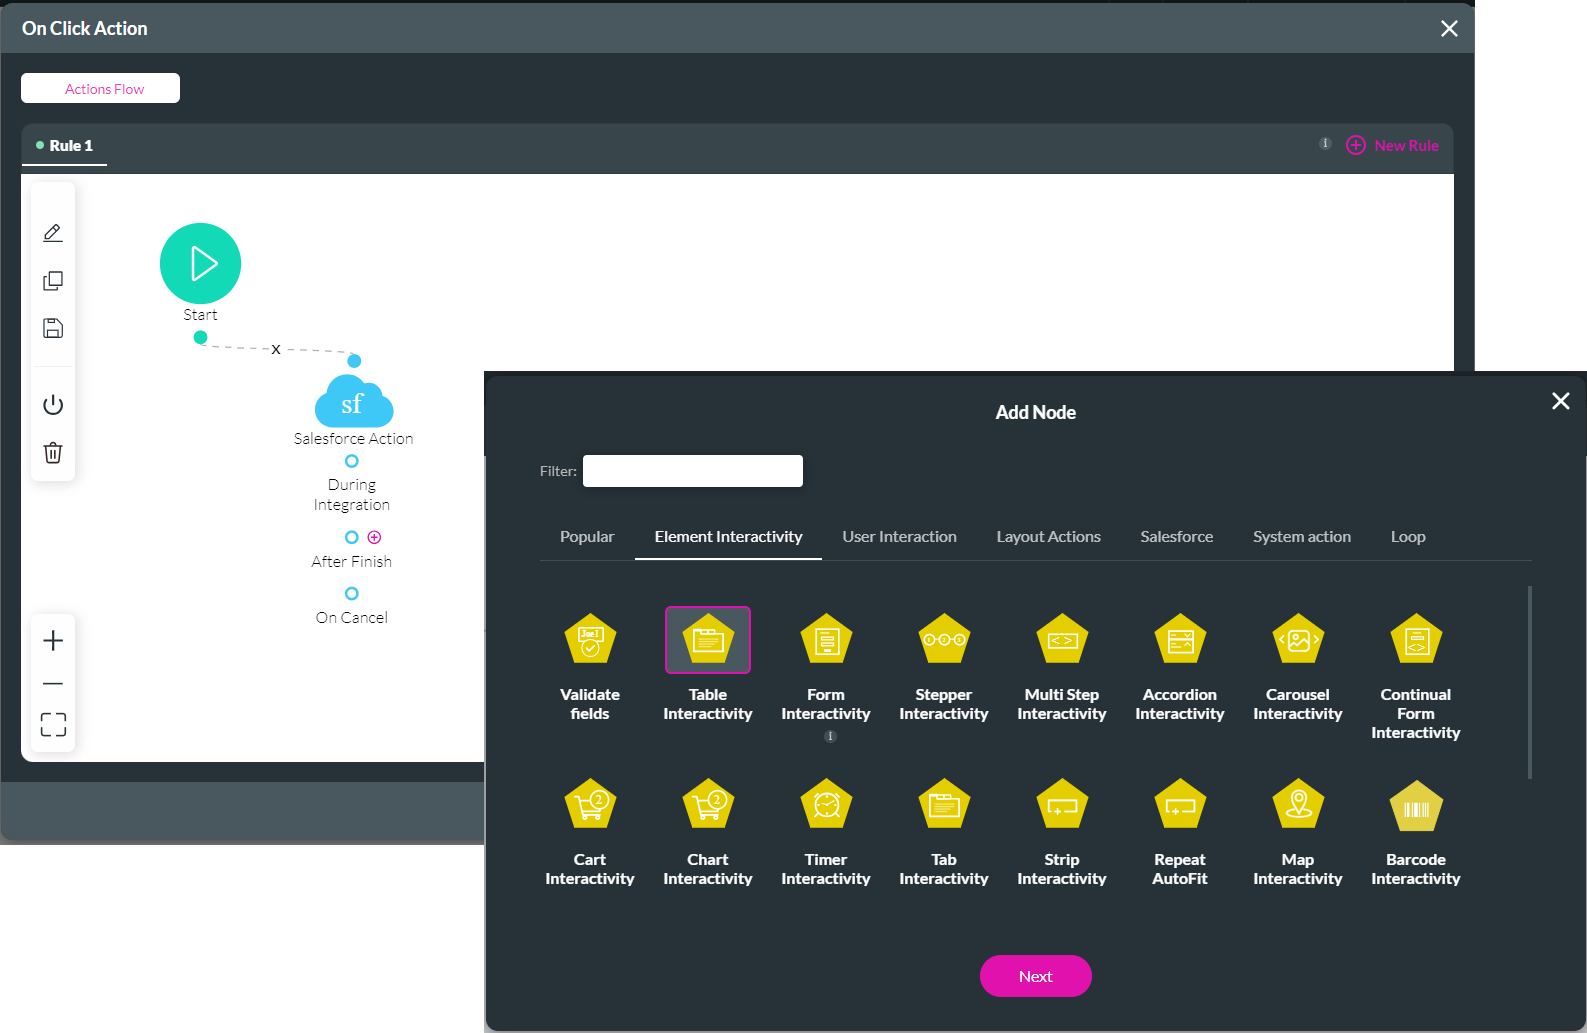
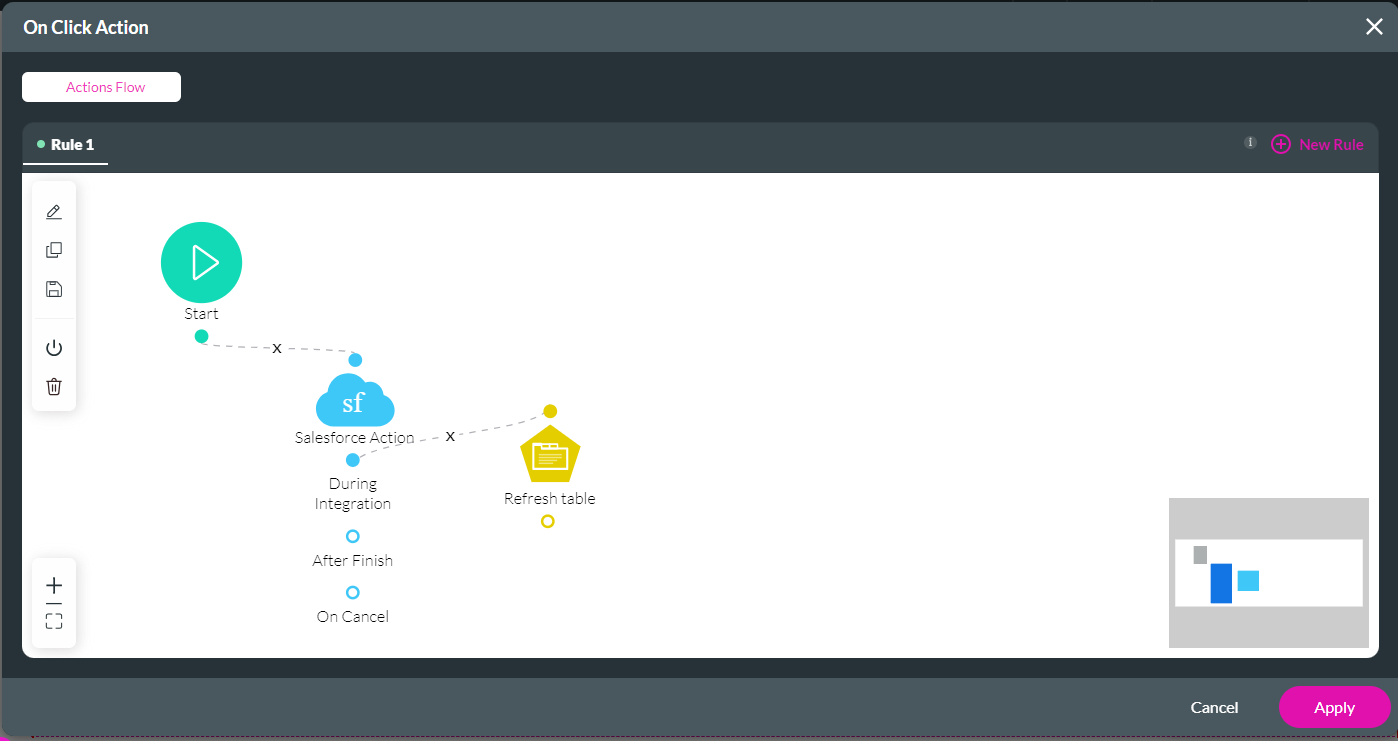
3. On the Salesforce Action node, click the + icon next to the After Finish action and click the Table Interactivity option under Element Interactivity.
4. Click the Next button.
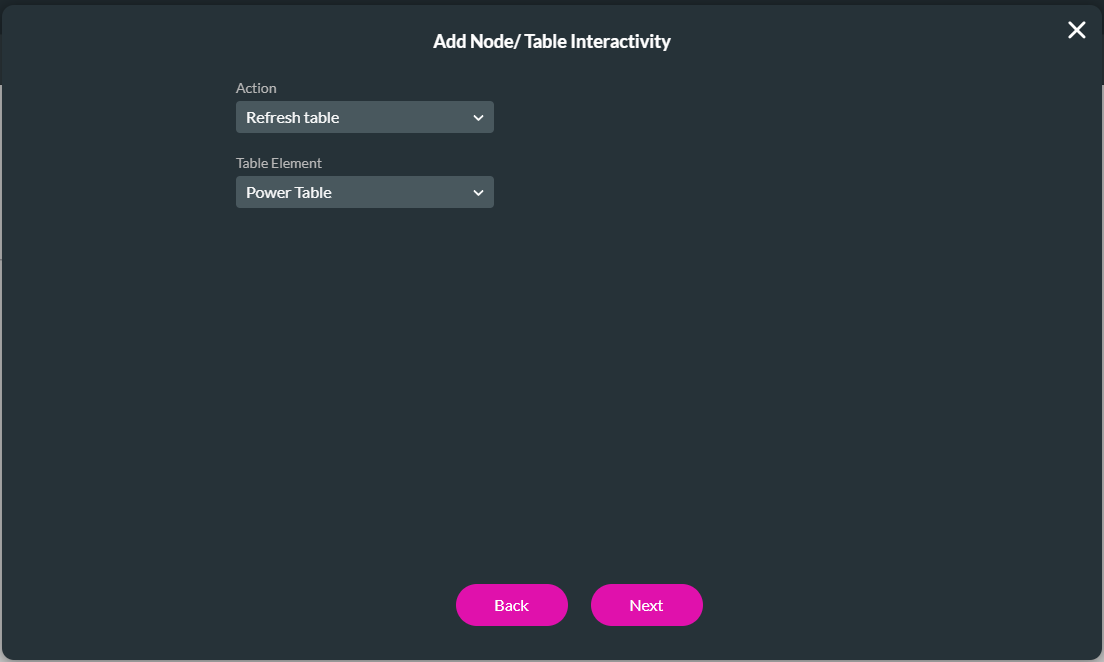
5. Use the drop-down option to select the Refresh Table action.
6. Use the drop-down option to select the Power Table element.
7. Click the Next button.
8. Add a tag if necessary and click the Insert button.
9. Click the Apply button.
10. Save and preview the project.
11. Create a new contact and click the Create Account button.
12. Search for the Account Name. The account was created, and the power table was updated automatically.
1. Click the On Click Action icon on the Create Account button.
2. Add a Salesforce Create Account action.
3. On the Salesforce Action node, click the + icon next to the After Finish action and click the Table Interactivity option under Element Interactivity.
4. Click the Next button.
5. Use the drop-down option to select the Refresh Table action.
6. Use the drop-down option to select the Power Table element.
7. Click the Next button.
8. Add a tag if necessary and click the Insert button.
9. Click the Apply button.
10. Save and preview the project.
11. Create a new contact and click the Create Account button.
12. Search for the Account Name. The account was created, and the power table was updated automatically.
05 Select Row
You can select a row with a condition.
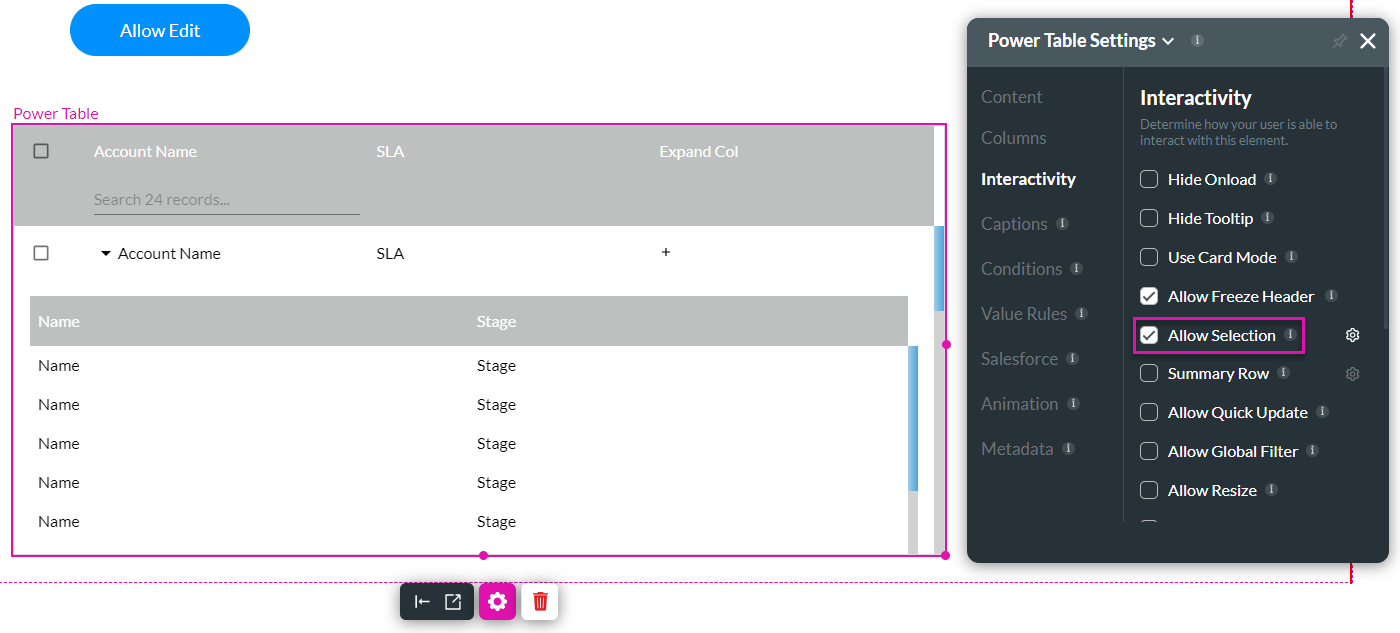
1. Select the power table and click the Gear icon to open the Settings screen.
2. Click Interactivity and ensure the Allow Selection checkbox is checked.
3. Click the Conditions option.
4. On the Conditions node, click the + icon next to Then and click Table Interactivity under Element Interactivity.
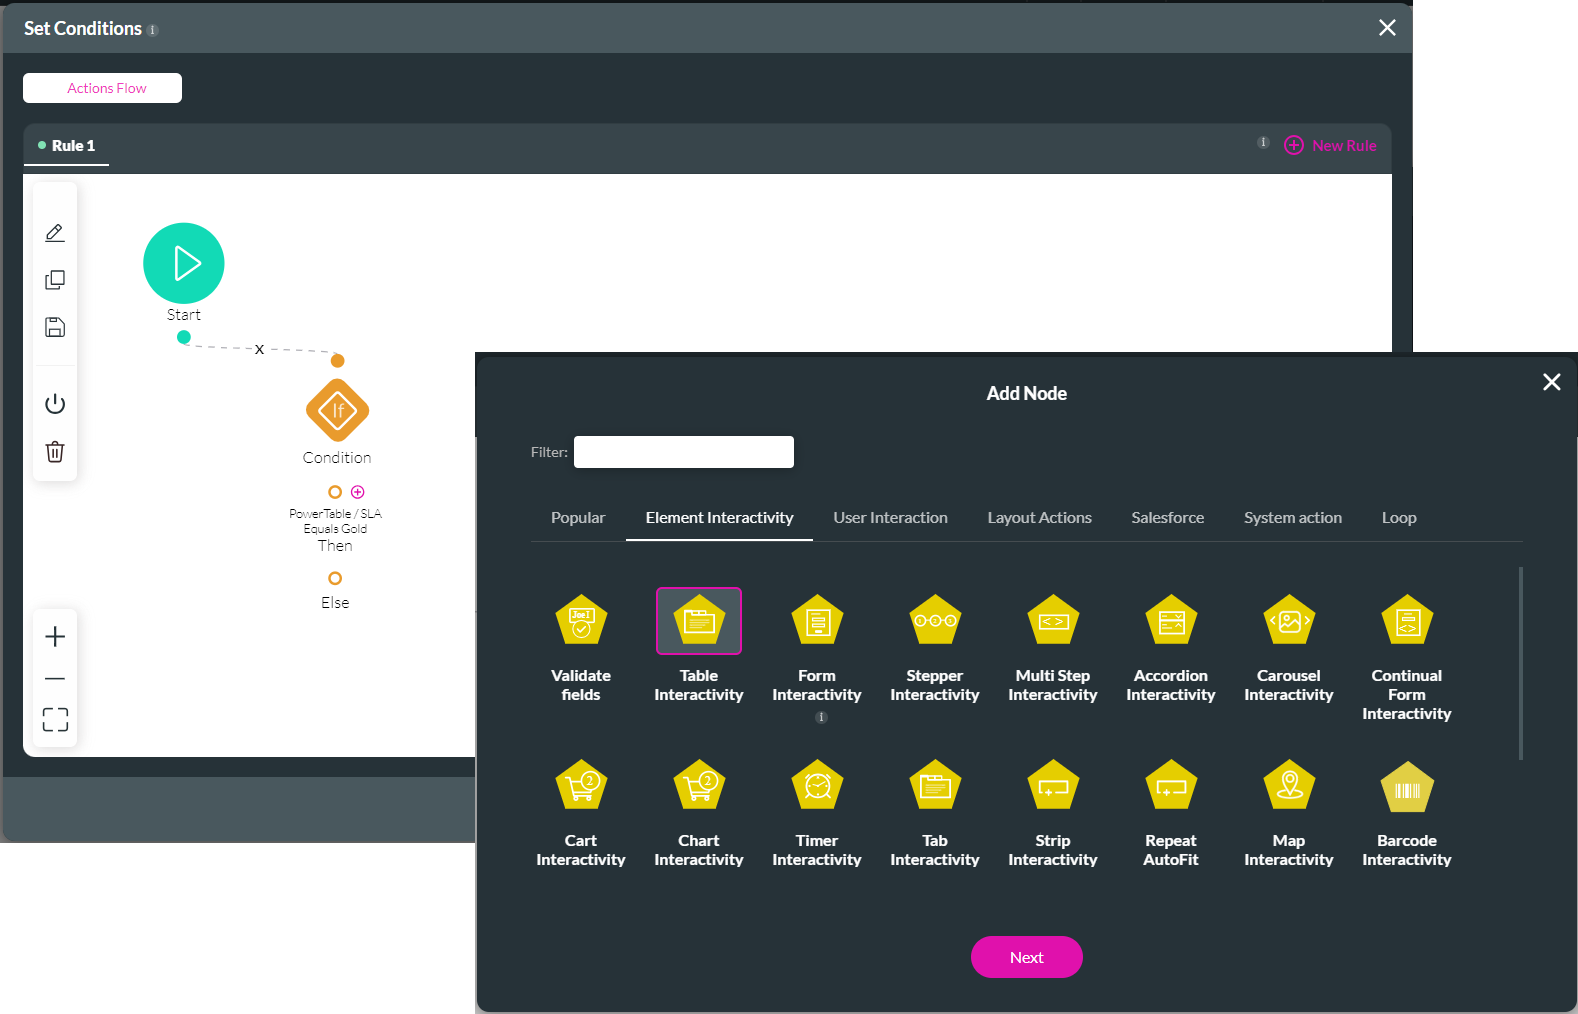
5. Use the drop-down option to select the Select Row action.
6. Use the drop-down option to select the Power Table element.
7. Click the Next button.
8. Add a tag if necessary and click the Insert button.
9. Click the Apply button.
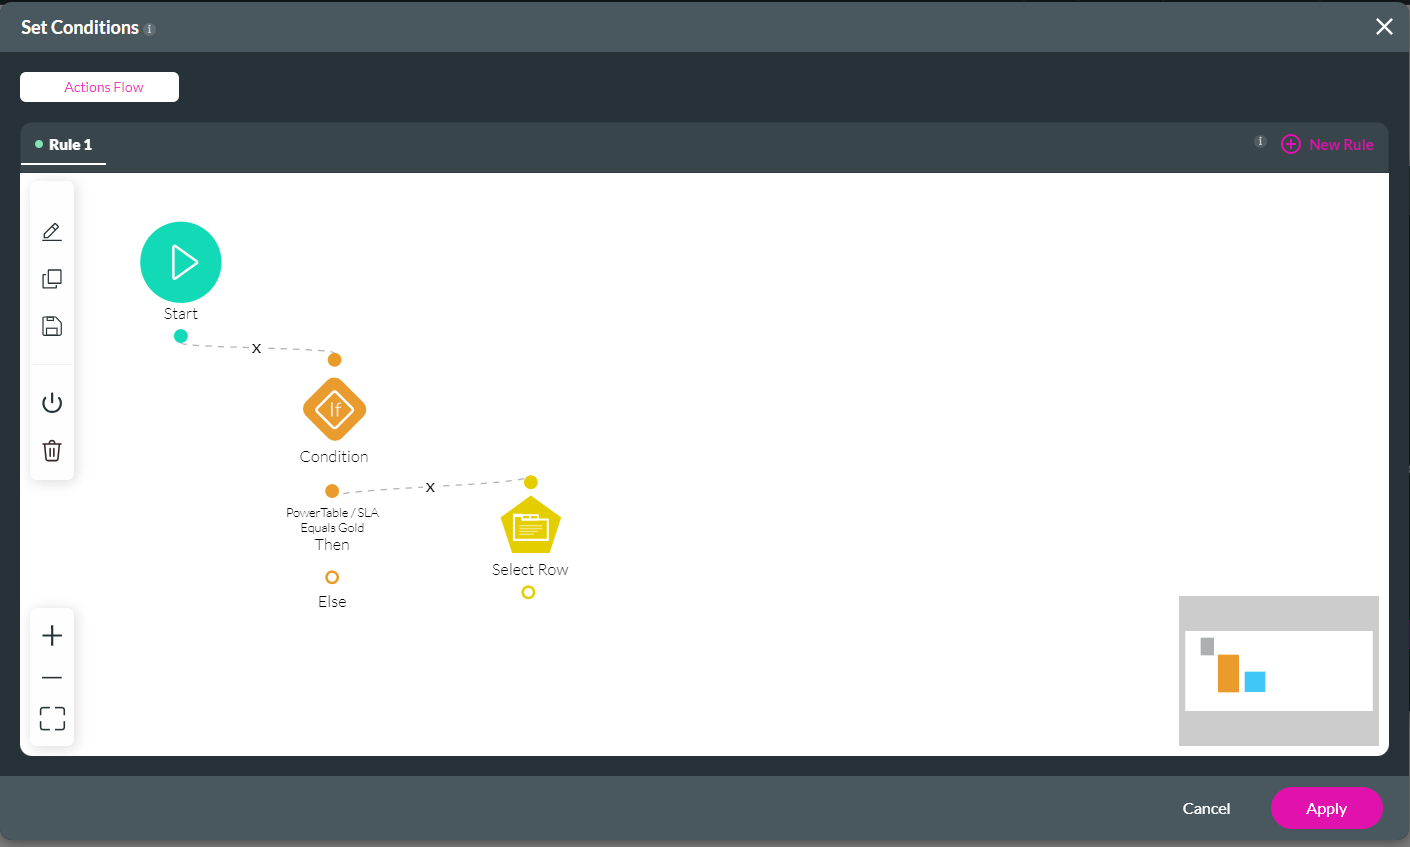
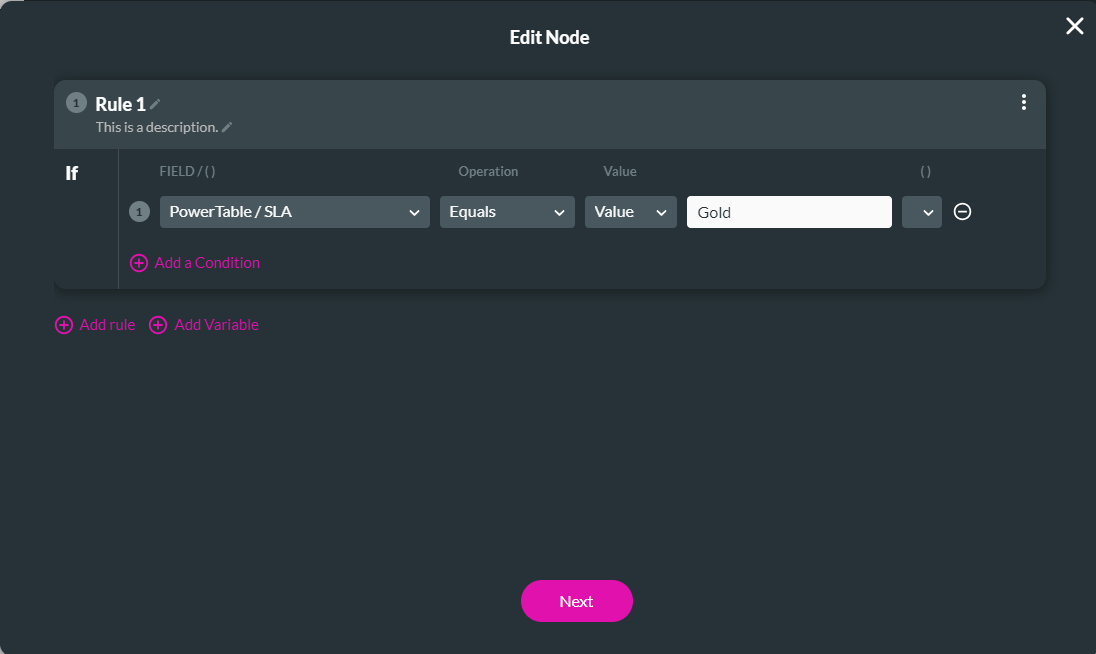
10. Double-click the Condition node and configure the rule:
12. Add a tag if necessary and click the Save button.
13. Save and preview the project.
The SLAs that are Gold have been selected automatically:
You can also do the following:
1. Select the power table and click the Gear icon to open the Settings screen.
2. Click Interactivity and ensure the Allow Selection checkbox is checked.
3. Click the Conditions option.
4. On the Conditions node, click the + icon next to Then and click Table Interactivity under Element Interactivity.
5. Use the drop-down option to select the Select Row action.
6. Use the drop-down option to select the Power Table element.
7. Click the Next button.
8. Add a tag if necessary and click the Insert button.
9. Click the Apply button.
10. Double-click the Condition node and configure the rule:
- Power Table/SLA equals Value Gold
12. Add a tag if necessary and click the Save button.
13. Save and preview the project.
The SLAs that are Gold have been selected automatically:
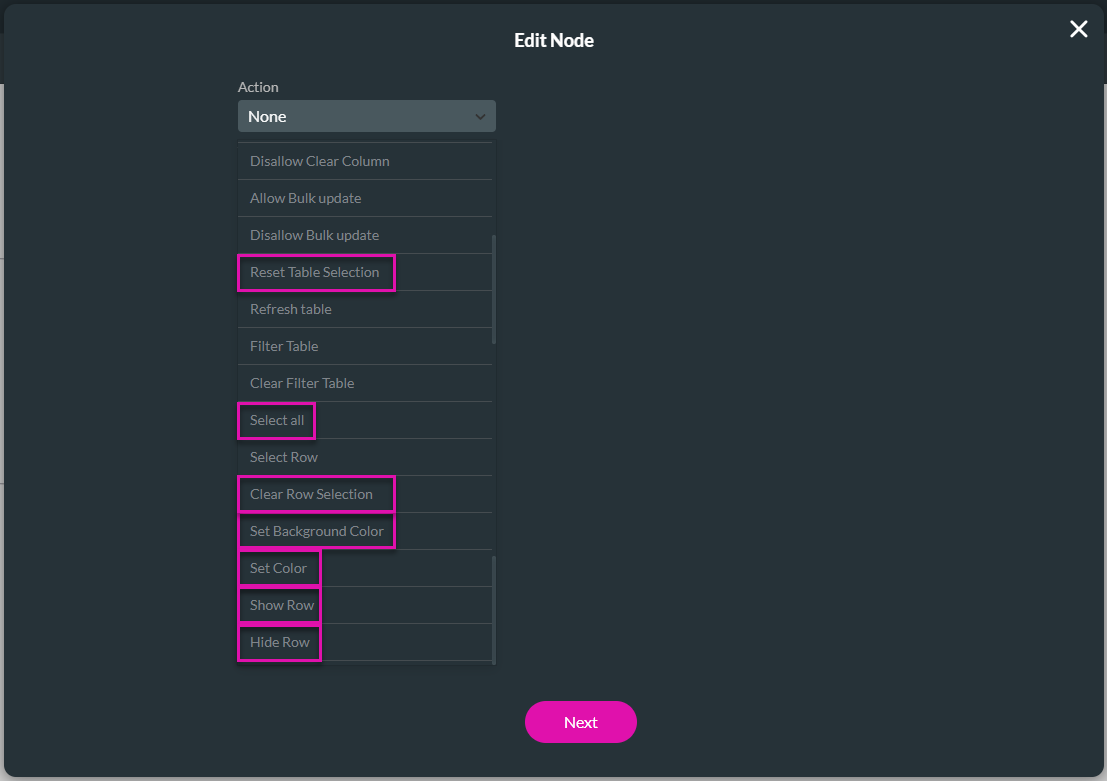
You can also do the following:
- Select All
- Clear Row Selection
- Reset Table Selection
- Set Background Color
- Set Color
- Show Row
- Hide Row