Third Party IDP (4:30 min)
Completion requirements
01 Getting Started
This tutorial covers setting up any third-party identity provider to log in with SSO.
02 Integration Settings
1. Navigate to the Settings page from your dashboard and click the integrations subtab.
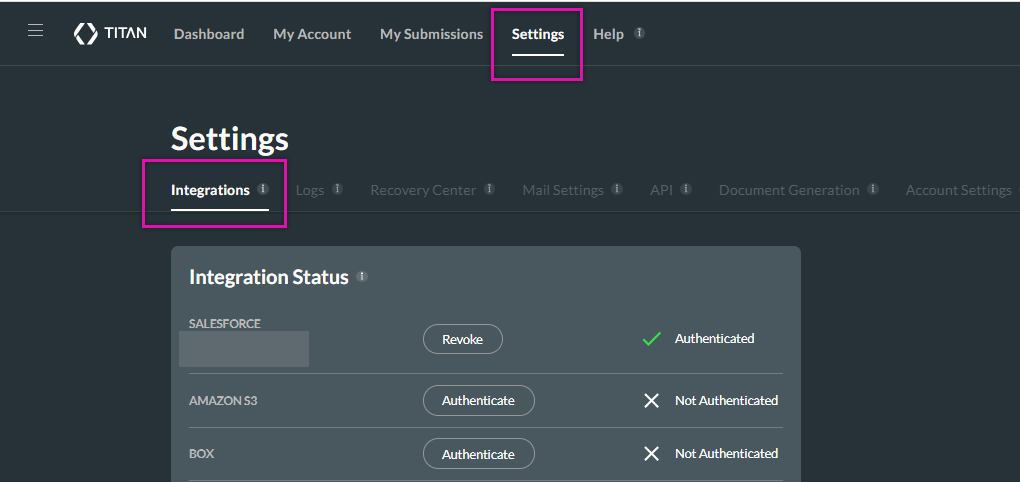
2. Scroll down until you find the SSO option and click the Authenticate button.

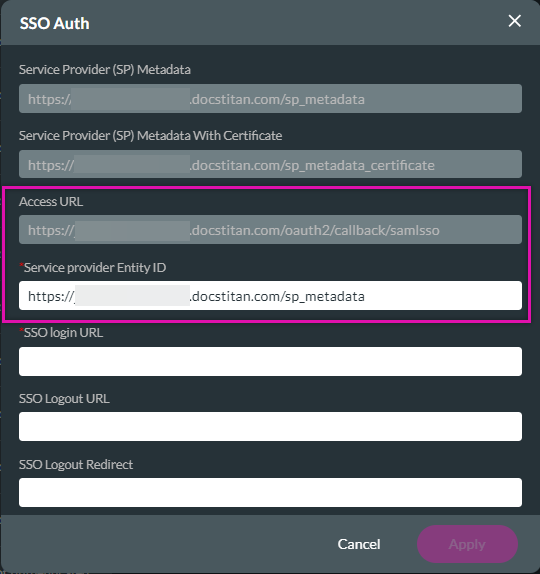
You will need your Access URL and the Service Provider Entity ID when setting up your IDP.
This SSO was set up with Google. Various online resources will show you how to do that. The result is an XML file that contains important information. You will need to open this document to retrieve the certificate and the URL.
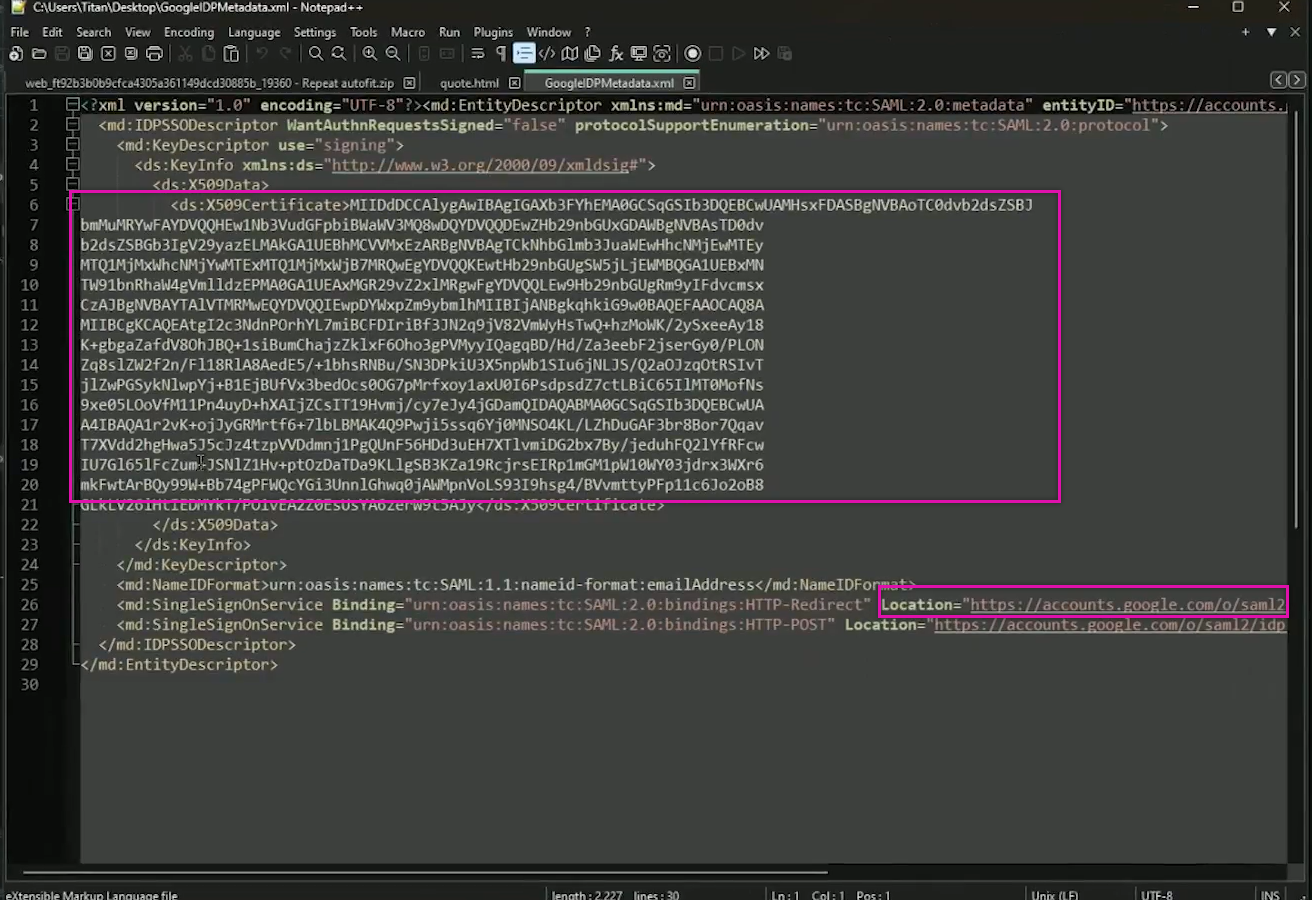
Copy these into the corresponding fields in your SSO Auth.
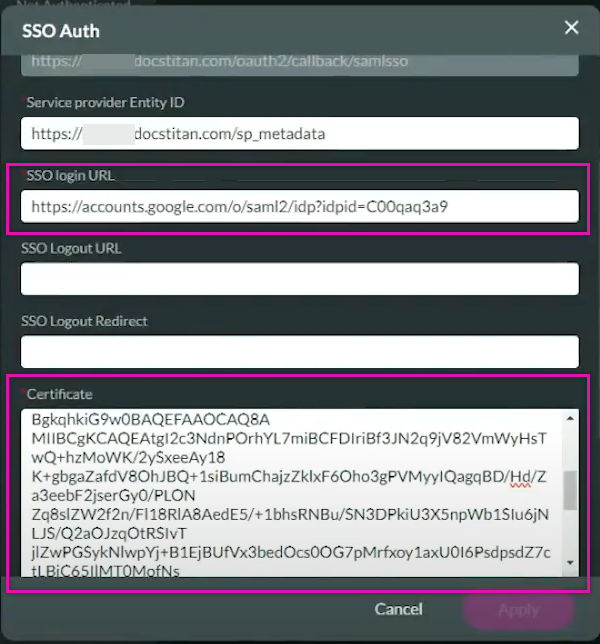
Scroll to the bottom of the window, click the Test button to test your configuration, and then click Apply. Once your configuration is completed, you can enable it in your project.
2. Scroll down until you find the SSO option and click the Authenticate button.
You will need your Access URL and the Service Provider Entity ID when setting up your IDP.
This SSO was set up with Google. Various online resources will show you how to do that. The result is an XML file that contains important information. You will need to open this document to retrieve the certificate and the URL.
Copy these into the corresponding fields in your SSO Auth.
Scroll to the bottom of the window, click the Test button to test your configuration, and then click Apply. Once your configuration is completed, you can enable it in your project.
03 Enable SSO
In your Titan project:
1. Navigate to the Project Settings and click the User Access tab.
2. Enable the SSO toggle switch and click the gear icon.

Using the Configure SSO dropdowns, you can pass values from Google back into your project.
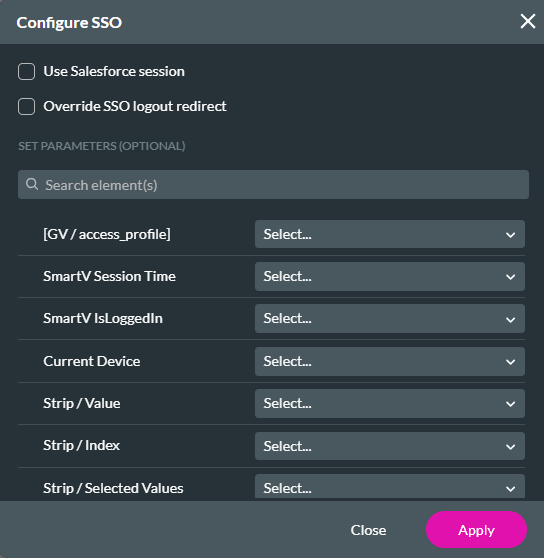
Once the project is published, the users will be asked to sign in with their IDP details before accessing your Titan project.
1. Navigate to the Project Settings and click the User Access tab.
2. Enable the SSO toggle switch and click the gear icon.
Using the Configure SSO dropdowns, you can pass values from Google back into your project.
Once the project is published, the users will be asked to sign in with their IDP details before accessing your Titan project.