Salesforce Community IDP (8 min)
Completion requirements
01 Getting Started
This tutorial covers setting up SSO so that Salesforce Community Users can log into your project.
02 Authenticate SSO
1. Navigate to the Settings tab and click the Integrations subtab.
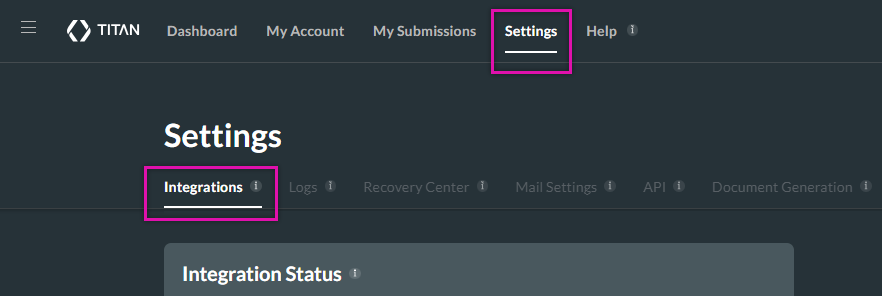
2. Scroll down to the SSO option and click Authenticate.
2. Scroll down to the SSO option and click Authenticate.

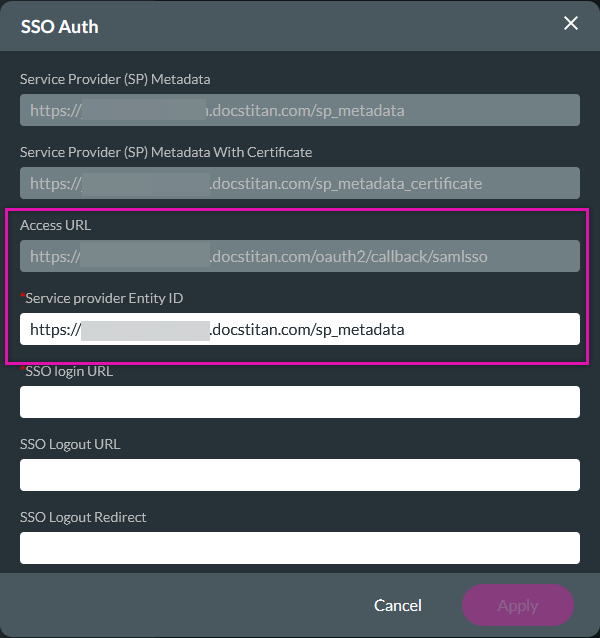
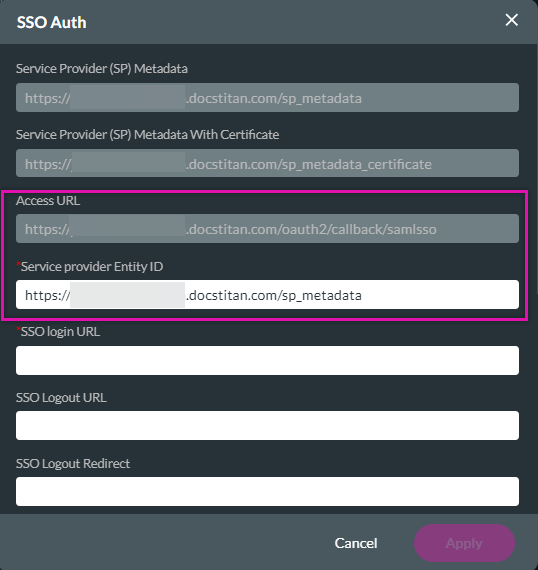
When completing the configuration in Salesforce, you will need two values in the SSO Auth window: Access URL and Service Provider Entity ID.
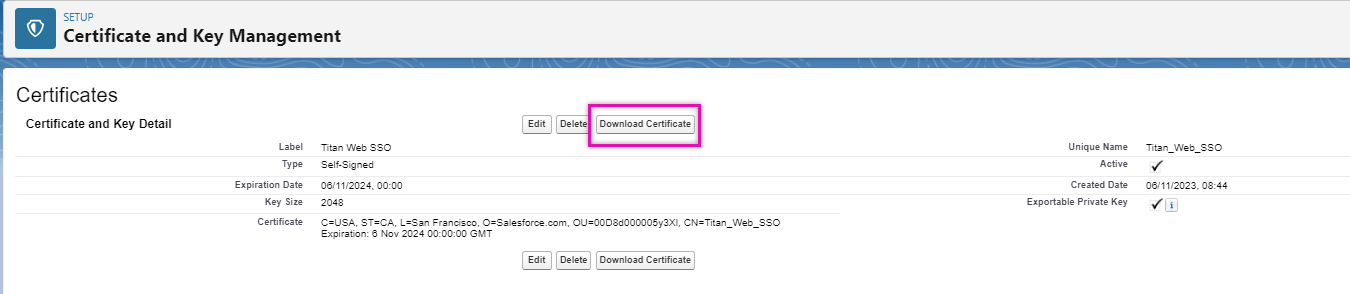
03 Create a Certificate
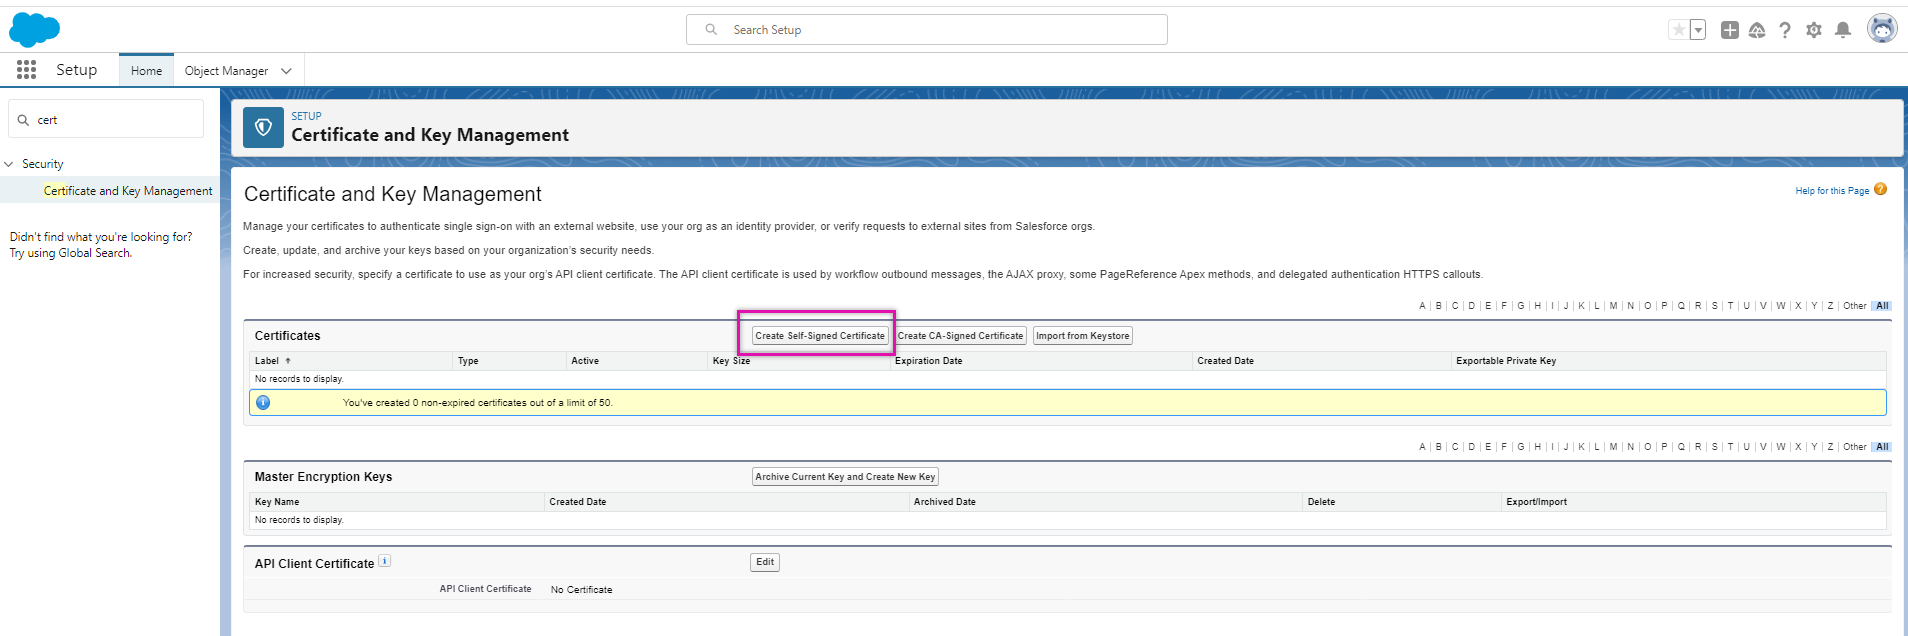
1. Navigate to your Salesforce Setup and search for Certificate and Key Management.
2. Click Create Self-Signed Certificate.
3. Add a Label to your SSO certificate and click Save.
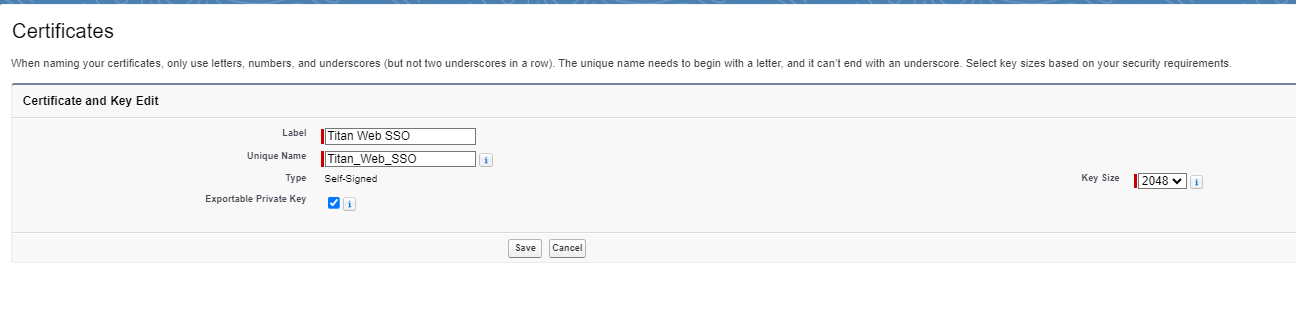
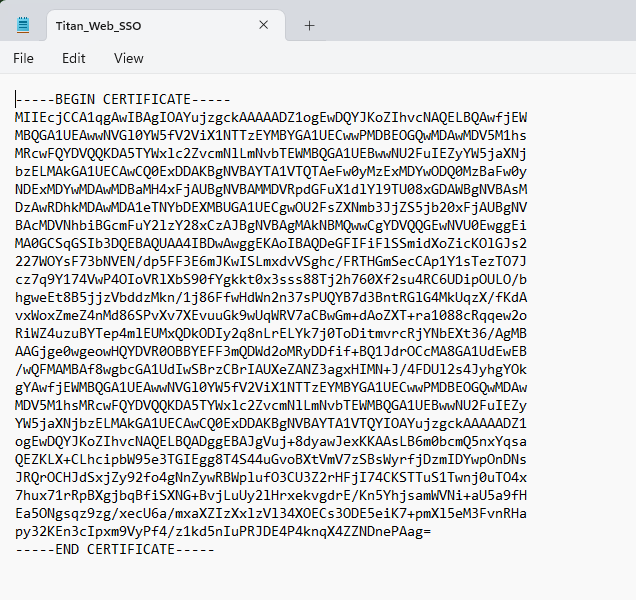
4. Download your certificate.
2. Click Create Self-Signed Certificate.
3. Add a Label to your SSO certificate and click Save.
4. Download your certificate.
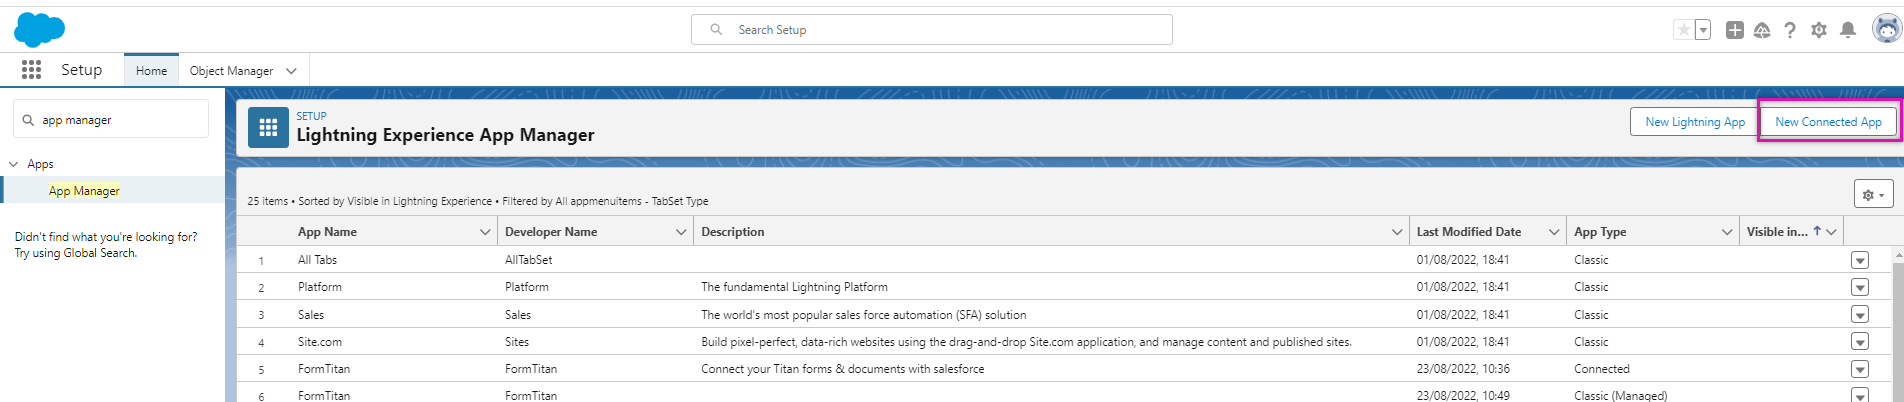
04 Create a Connected App
1. Search for App Manager and click New Connected App.
2. Provide a name for your App, add a Contact email address, and enable SAML.
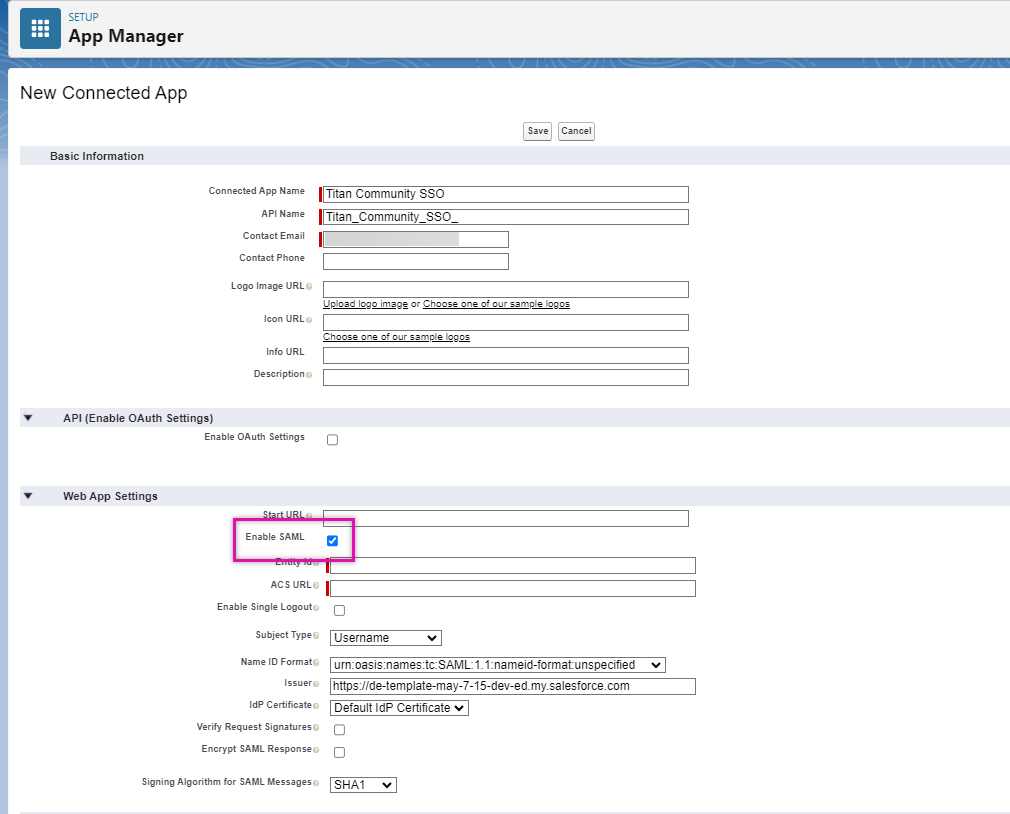
3. Navigate to your Titan Authentication window to copy the Access URL and Service Provider Entity ID into the corresponding Salesforce fields.
4. Paste the information into the corresponding fields in Salesforce.
5. Use the Name ID Format dropdown to select SAML 2.0 persistent or transient.
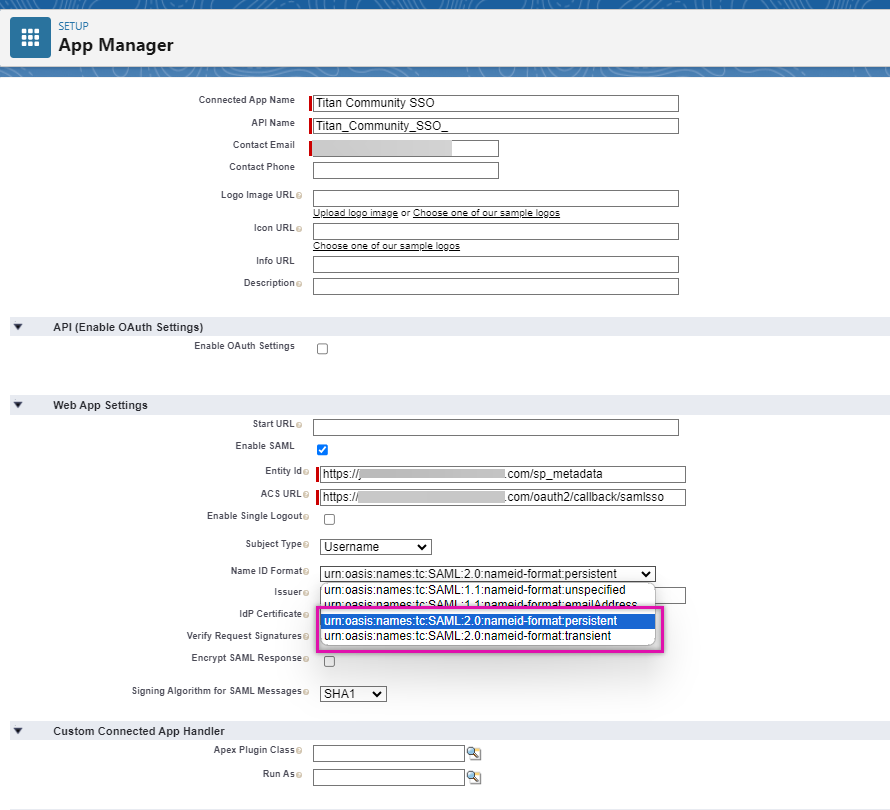
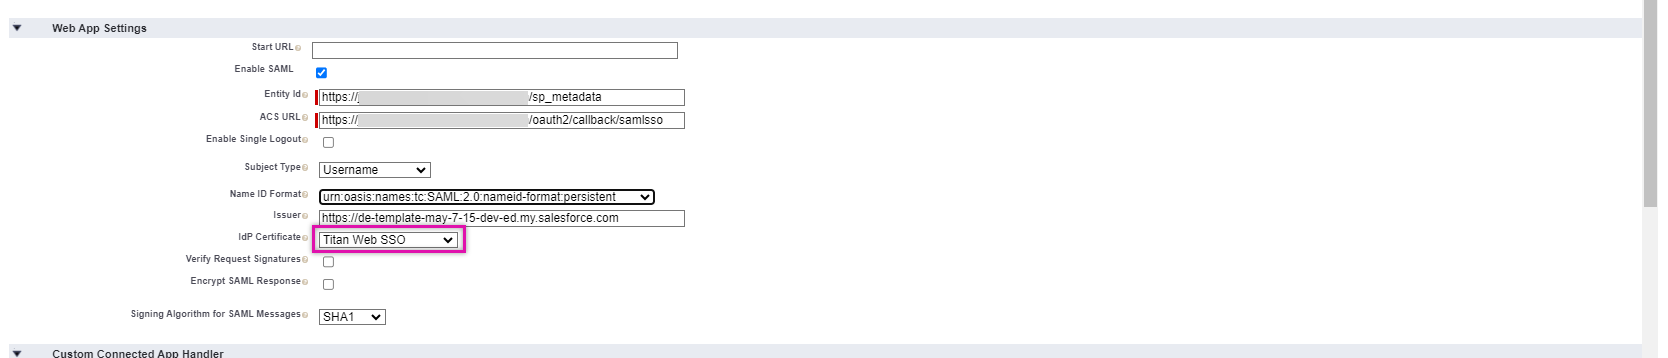
6. Use the IdP certificate dropdown to select the certificate you created and click Save.
2. Provide a name for your App, add a Contact email address, and enable SAML.
3. Navigate to your Titan Authentication window to copy the Access URL and Service Provider Entity ID into the corresponding Salesforce fields.
4. Paste the information into the corresponding fields in Salesforce.
5. Use the Name ID Format dropdown to select SAML 2.0 persistent or transient.
6. Use the IdP certificate dropdown to select the certificate you created and click Save.
05 Custom Attributes
1. Click the Custom Attributes New button.
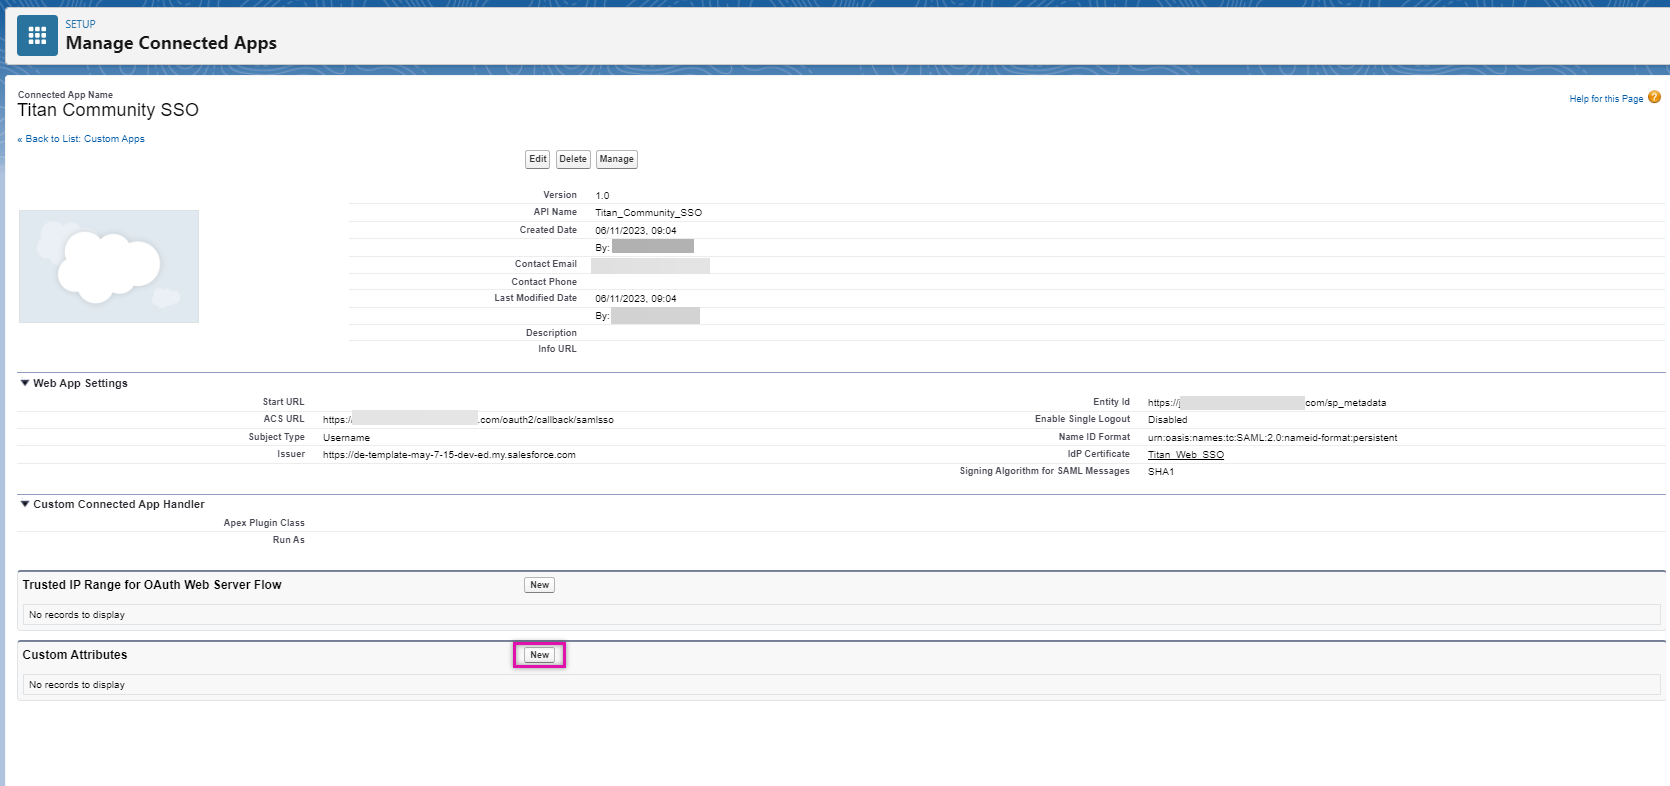
You can create any custom attribute you want to send back from your logged-in user to your Titan project—for example, the user’s email. Click Save once you have configured your attribute.

You can create any custom attribute you want to send back from your logged-in user to your Titan project—for example, the user’s email. Click Save once you have configured your attribute.
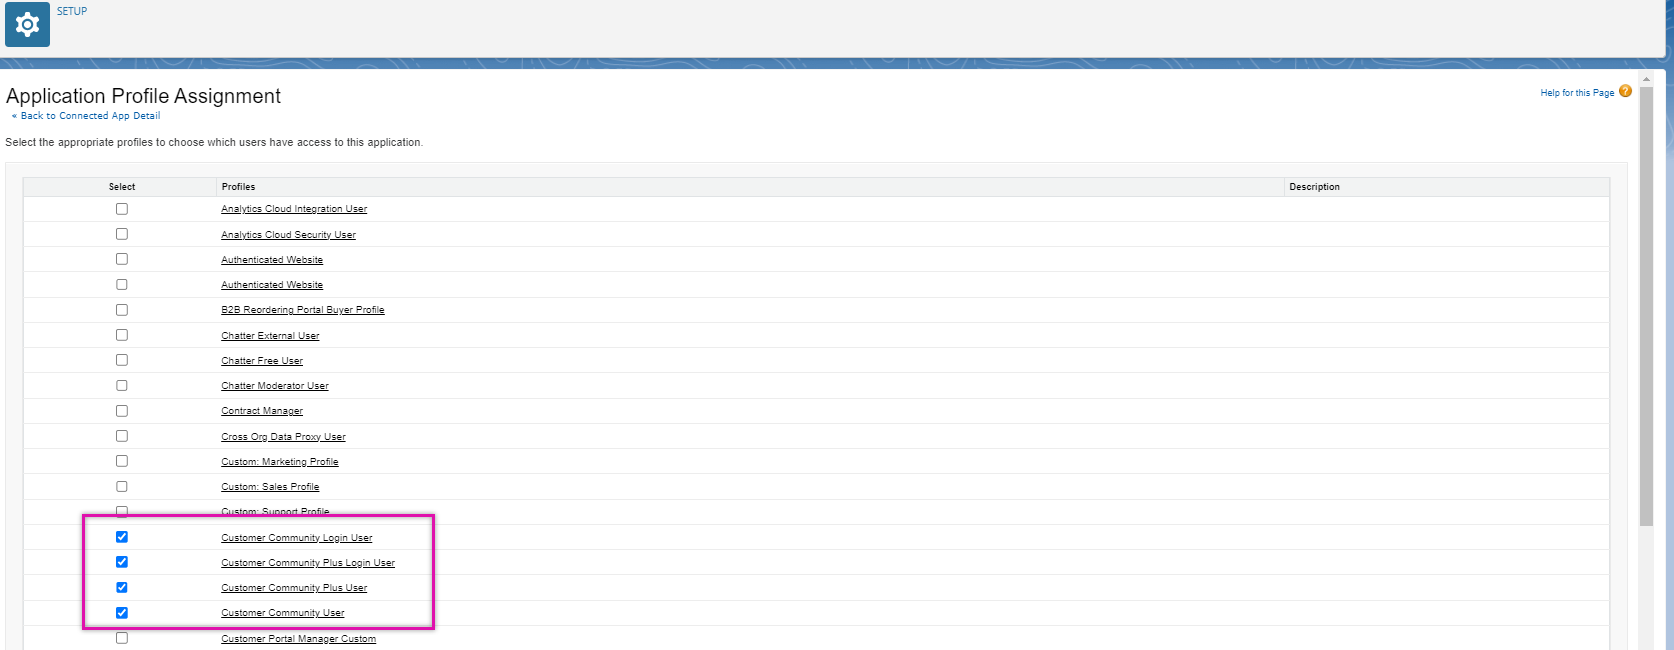
06 Manage Profiles
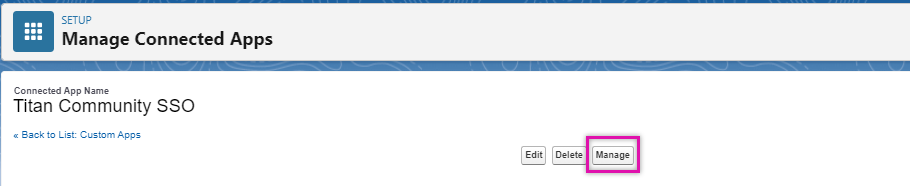
1. Navigate back to your App and click Manage.
2. Scroll down to Profiles and click Manage Profiles.

3. Select the applicable profiles that need access to your App and click Save. Any one of the selected profiles will have access to the project.
2. Scroll down to Profiles and click Manage Profiles.
3. Select the applicable profiles that need access to your App and click Save. Any one of the selected profiles will have access to the project.
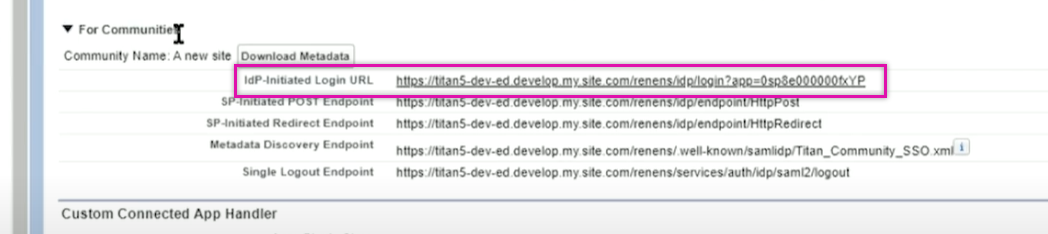
07 Configuring SSO in Titan
1. Expand the For Communities section and copy the IdP_Intititaed Login URL.
2. Paste it into the Titan SSO Auth SSO login URL field.
3. Copy the certificate details from your downloaded certificate and paste them into the corresponding Titan field. Test your SSO authentication, and click Apply.
2. Paste it into the Titan SSO Auth SSO login URL field.
3. Copy the certificate details from your downloaded certificate and paste them into the corresponding Titan field. Test your SSO authentication, and click Apply.
08 Enable SSO
1. Navigate to the Titan project you want to enable your SSO.
2. Open the Project Settings and select the User Access tab.
3. Enable the SSO toggle switch and select the gear icon.
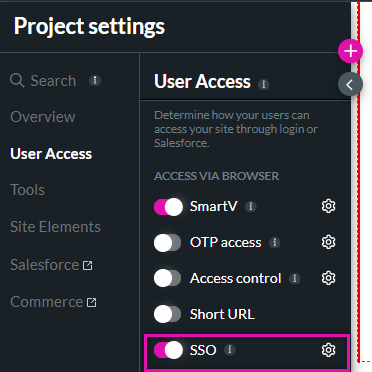
4. Use the dropdown to map any Salesforce values to your project fields. Enable the Use Salesforce session checkbox to perform actions as the logged-in user instead of the integration user.
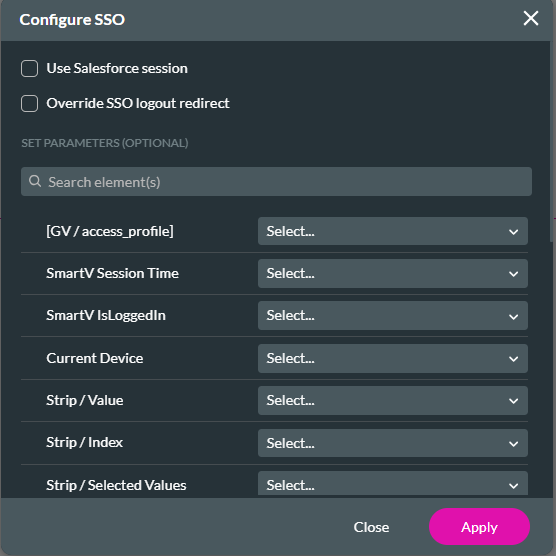
Once the project is published, users will need to log in as Salesforce community members before they can access your Titan project.
2. Open the Project Settings and select the User Access tab.
3. Enable the SSO toggle switch and select the gear icon.
4. Use the dropdown to map any Salesforce values to your project fields. Enable the Use Salesforce session checkbox to perform actions as the logged-in user instead of the integration user.
Once the project is published, users will need to log in as Salesforce community members before they can access your Titan project.