SmartV Pages (4:30 min)
Completion requirements
01 Getting Started
This tutorial covers Smart V pages, including:
- Changing the default layout.
- Applying custom styling.
02 SmartV Pages
Once you have configured SmartV, your project will automatically add a login page.
To navigate to this page:
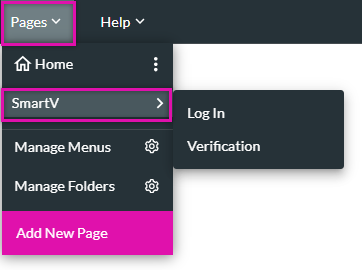
1. Expand the pages menu and hover over SmartV.
To navigate to this page:
1. Expand the pages menu and hover over SmartV.
2. Select the login page from the submenu.
The number of pages in the submenu depends on your SmartV configuration.
03 Changing the Default Layout
Your login page will automatically have the default layout applied. To change your layout:
1. Expand the layout dropdown and choose your new layout option.
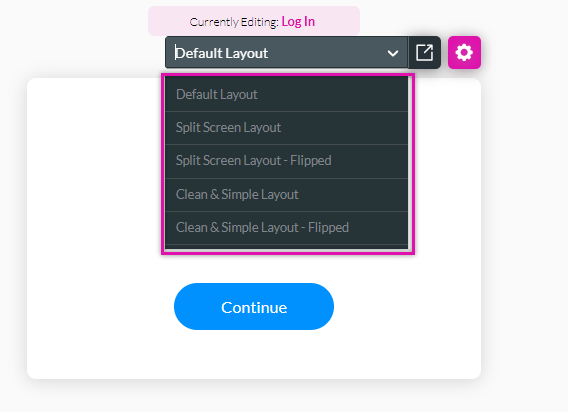
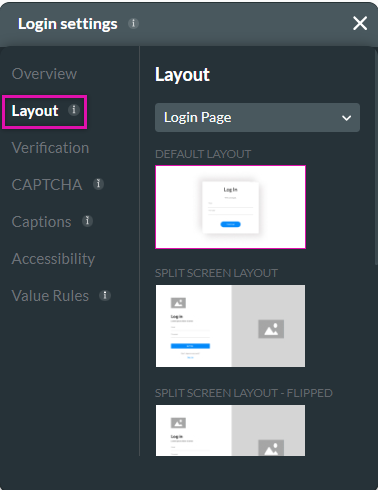
If you want to preview the layout before choosing one, navigate to the Login settings menu and select the gear icon next to the Layout dropdown.
Once the login settings menu is open, select the layout tab.
1. Expand the layout dropdown and choose your new layout option.
If you want to preview the layout before choosing one, navigate to the Login settings menu and select the gear icon next to the Layout dropdown.
Once the login settings menu is open, select the layout tab.
04 Applying Custom Styling
To apply custom styling to your SmartV pages:
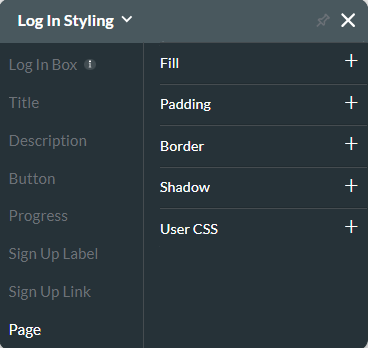
1. Click on the styling icon next to the Default Layout dropdown.

2. Use the styling menu options to create a unique look and feel for your Smart V pages.
Note: You cannot add elements to your Smart V page. You can only style the elements that have automatically been included.
1. Click on the styling icon next to the Default Layout dropdown.
2. Use the styling menu options to create a unique look and feel for your Smart V pages.
Note: You cannot add elements to your Smart V page. You can only style the elements that have automatically been included.