Access Control (8 min)
Completion requirements
01 Getting Started
This tutorial covers configuring access control for your web projects. This allows you to limit access to your project components.
02 The Setup
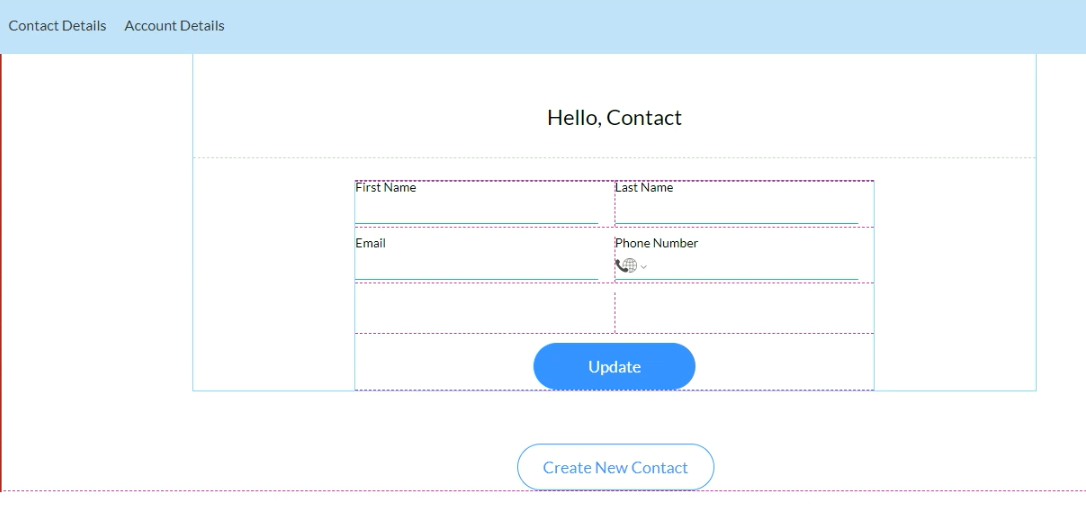
The project used for demonstrative purposes has two pages. The first page is where users can view their content details, create a new contact, or update their details. The second page is an account details page where users can view all contacts under their account and update the account name.
In Salesforce, we have a field called Account Role, which holds two values: regular contact and account manager. We will configure access control so that regular contacts can update their contact information but cannot create a new contact or see the Account Details page.
In Salesforce, we have a field called Account Role, which holds two values: regular contact and account manager. We will configure access control so that regular contacts can update their contact information but cannot create a new contact or see the Account Details page.
03 Adding Access Control Roles
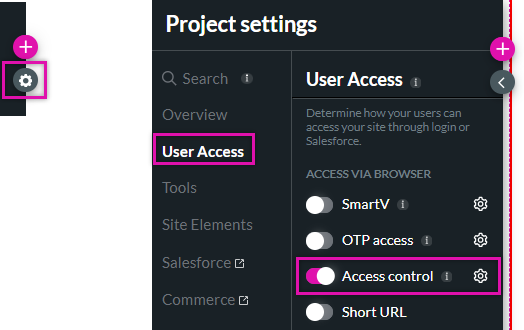
1. Navigate to the Project Settings and select the User Access Tab.
2. Enable the Access Control toggle switch and click the gear icon.
By default, the Access Control window has two roles: Guest User, which applies to any user not logged into the project, and Fallback Role, which is assigned to anyone who does not have a role assigned in Salesforce.
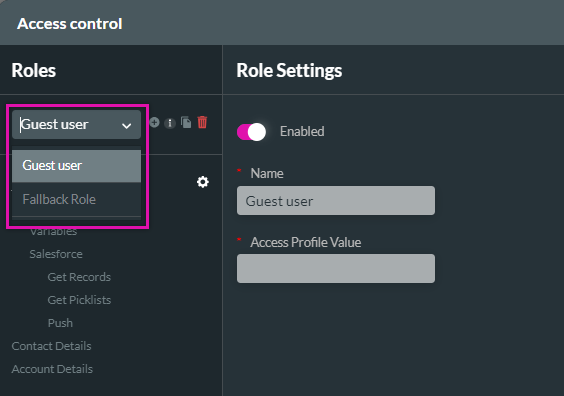
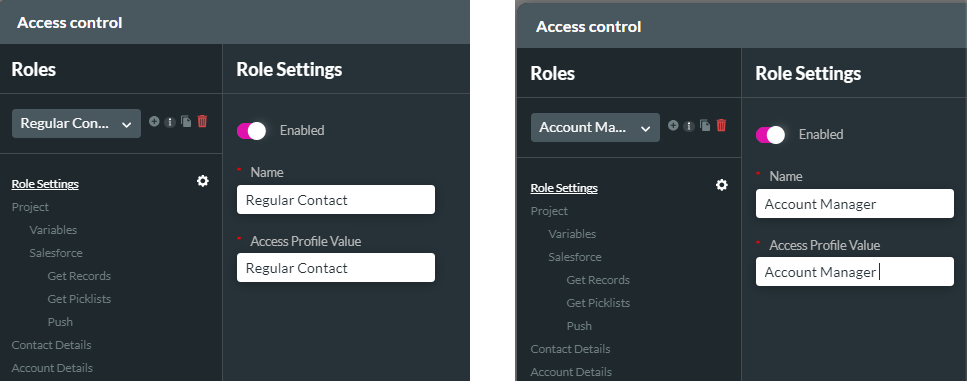
Click the + icon next to the Roles dropdown to create our two new roles.
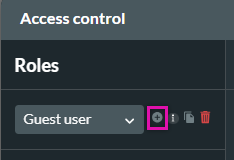
We added two roles that will be used to configure access: Regular Contact and Account Manager.
2. Enable the Access Control toggle switch and click the gear icon.
By default, the Access Control window has two roles: Guest User, which applies to any user not logged into the project, and Fallback Role, which is assigned to anyone who does not have a role assigned in Salesforce.
Click the + icon next to the Roles dropdown to create our two new roles.
We added two roles that will be used to configure access: Regular Contact and Account Manager.
04 Configuring Access
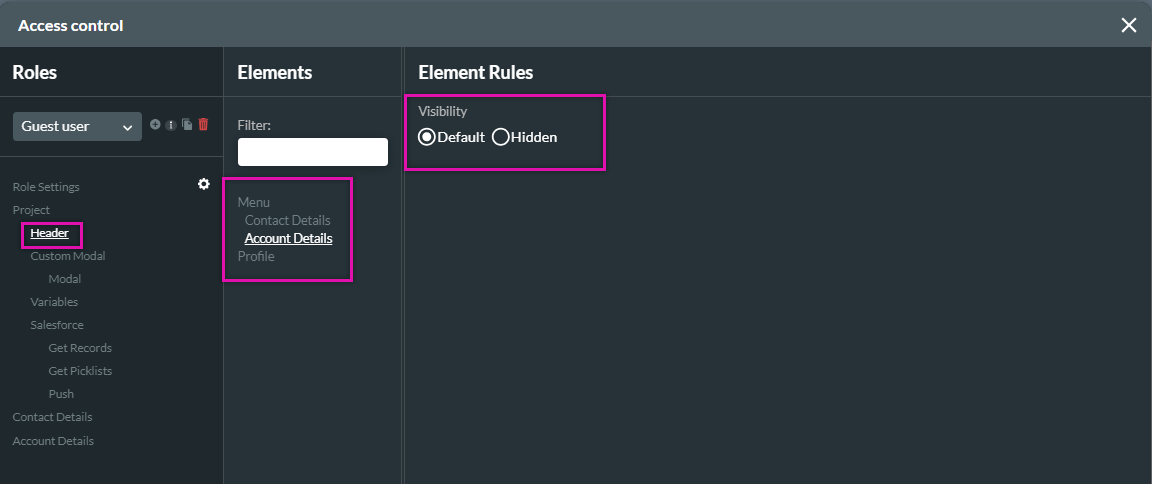
1. Use the Roles dropdown to select the role you want to configure access for.
2. Click on a project component on the left-hand menu. The elements menu will list the corresponding element items for a project component.
You can either configure the visibility of the entire project component or select the specific element within the component.
You can use the radio buttons to show the component or hide it from the user.
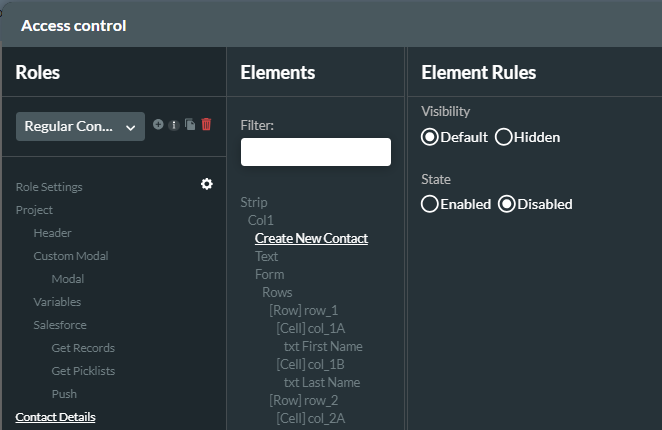
Depending on the component and element, you can choose from several other options. For example, we can show the Create New Contact button to a Regular Contact but turn it off so they cannot interact with it.
2. Click on a project component on the left-hand menu. The elements menu will list the corresponding element items for a project component.
You can either configure the visibility of the entire project component or select the specific element within the component.
You can use the radio buttons to show the component or hide it from the user.
Depending on the component and element, you can choose from several other options. For example, we can show the Create New Contact button to a Regular Contact but turn it off so they cannot interact with it.
05 Access Profile Variable
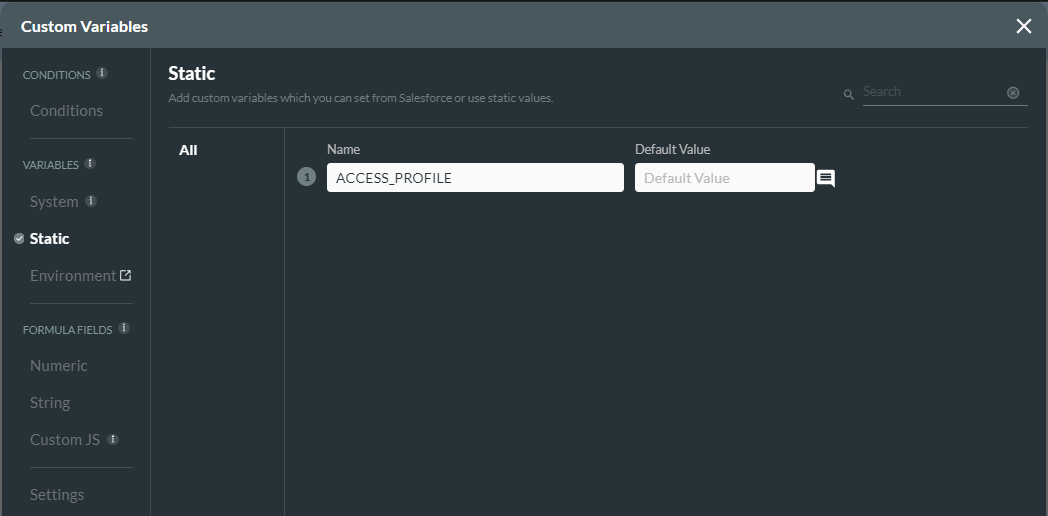
Upon enabling Access Control, Titan generates an Access_Profile variable automatically.
Once the Roles are configured, the next step is to map the Salesforce role to the Access Profile variable.
06 SmartV
1. Navigate to the SmartV configuration page. You can either navigate straight to the Parameters step if you have previously set up SmartV or complete your configuration.
2. Enable the Access Control toggle switch.
3. Use the field dropdown to select the Salesforce field. For this example, we chose the Account Role field.
This field will be mapped to the access profile variable.
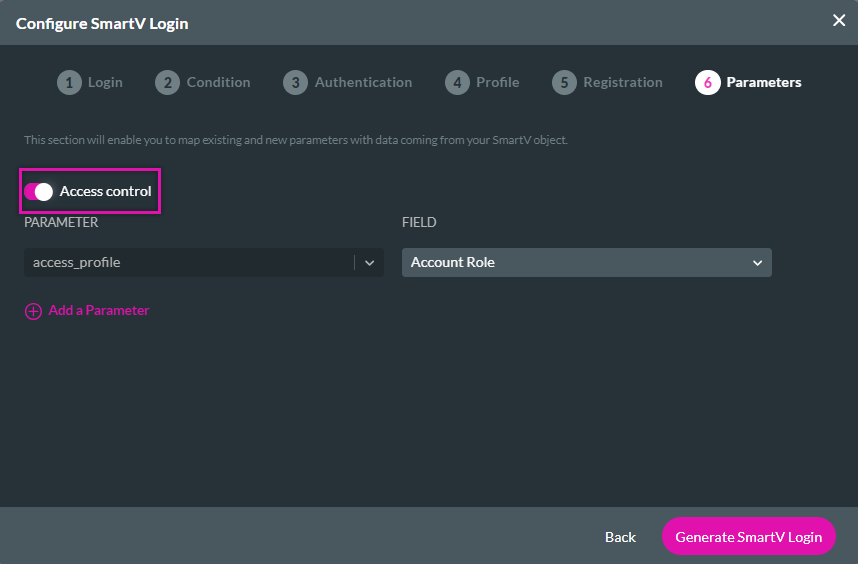
The role will be identified upon logging into the form, and the components the user sees directly correspond with the access you configured.
2. Enable the Access Control toggle switch.
3. Use the field dropdown to select the Salesforce field. For this example, we chose the Account Role field.
This field will be mapped to the access profile variable.
The role will be identified upon logging into the form, and the components the user sees directly correspond with the access you configured.