Advanced Mapping (9 min)
01 Getting Started
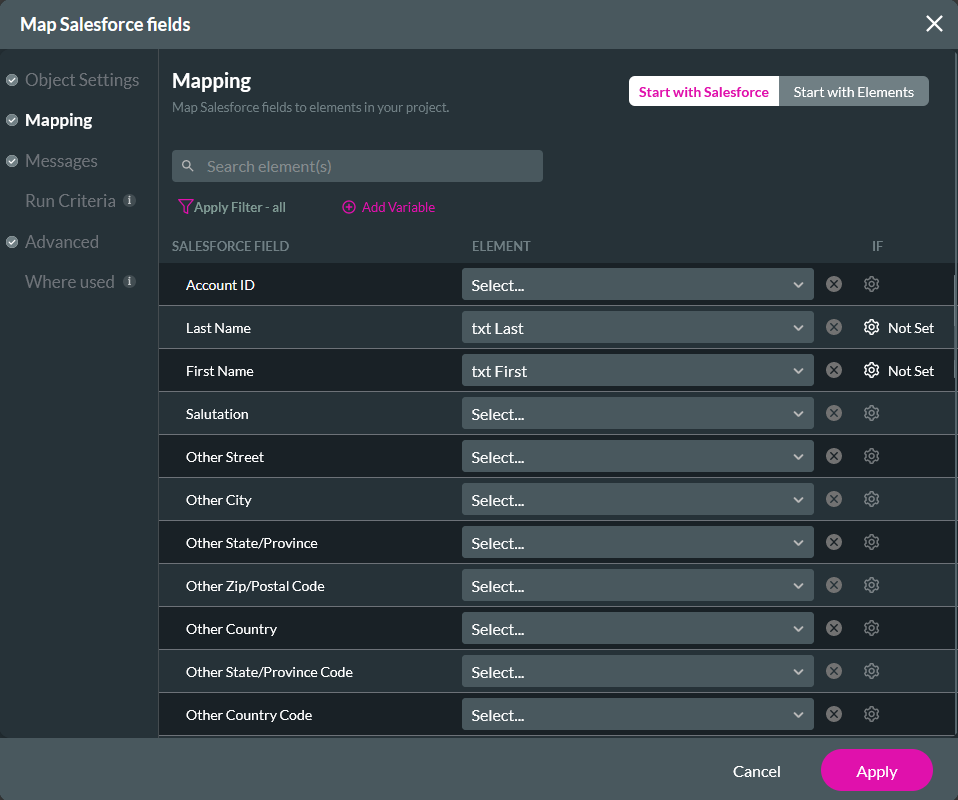
02 Mapping
1. Navigate to the Salesforce Integration window.
2. Select Create New under the Push tab or click on an existing push.
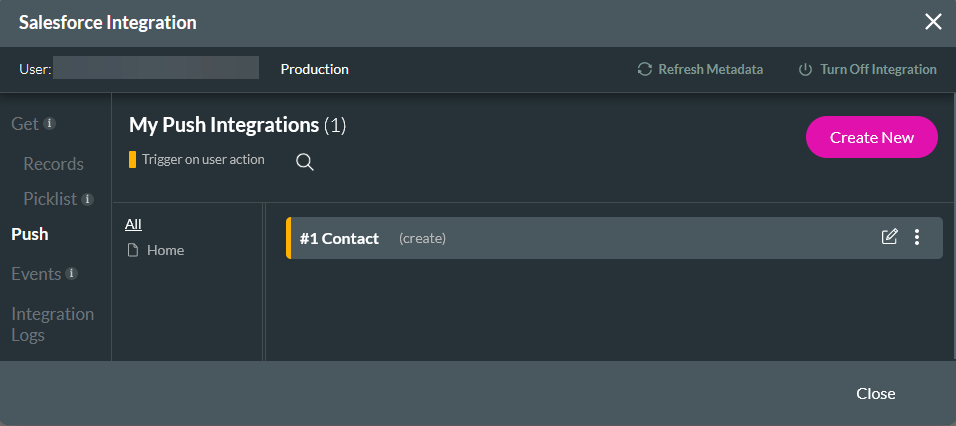
3. Click the Mapping tab.
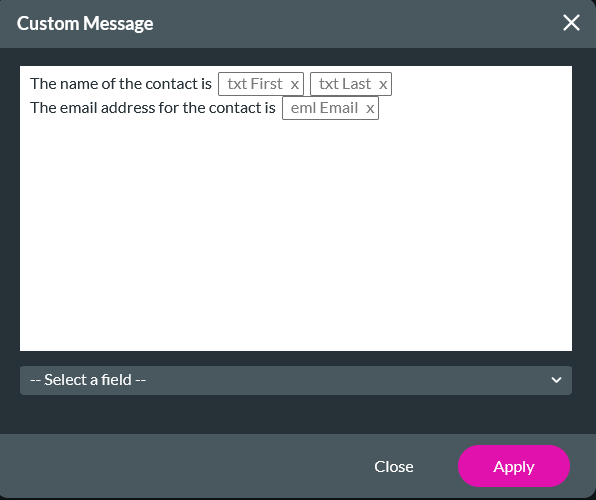
03 Custom Message
To create a custom mapping:
1. Use the dropdown to select Custom.
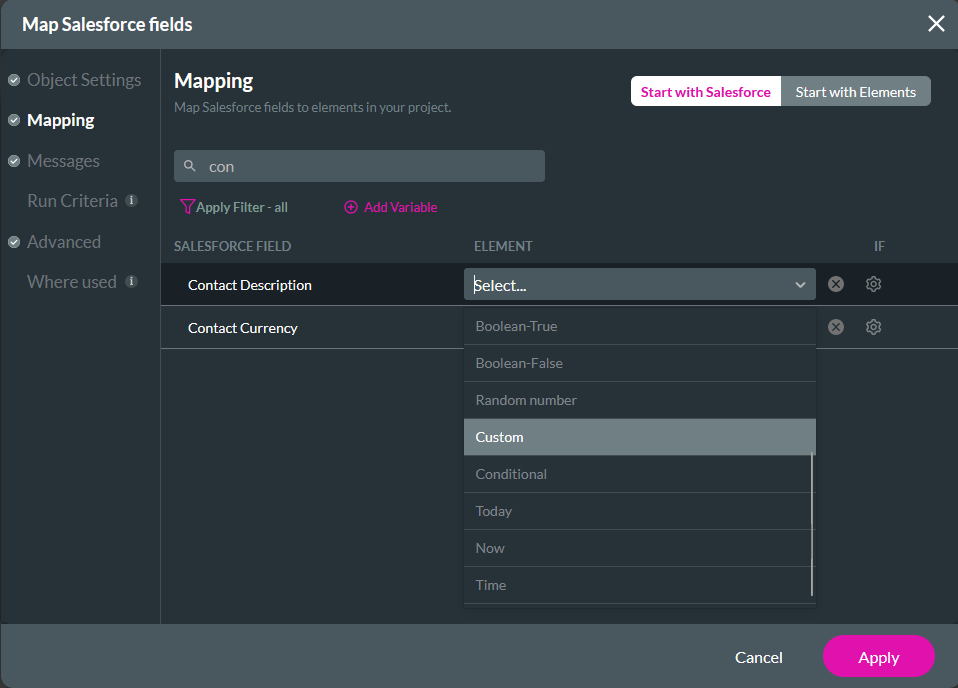
2. Select the gear icon to open the Custom Message window.
You can create a message with static and dynamic text using this window. Type in your message and use the dropdown to insert a field.
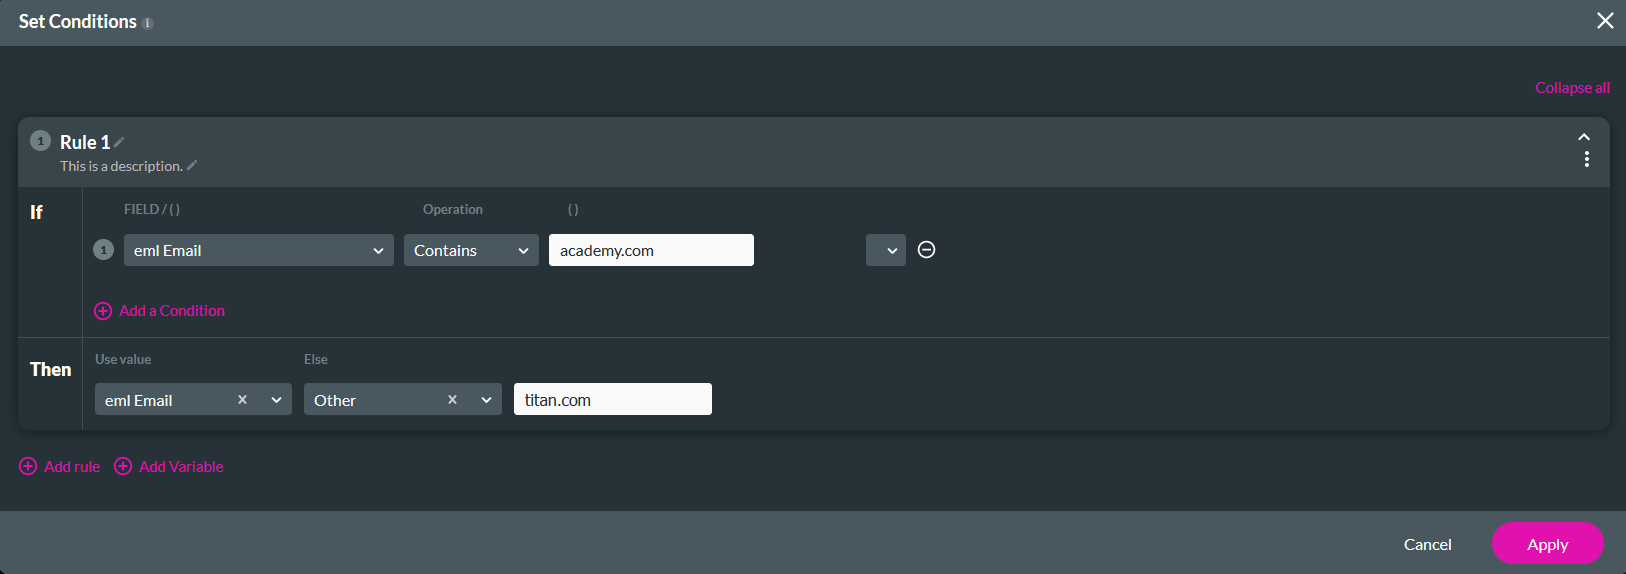
04 Conditions
To create a condition for your mapping:
1. Use the dropdown to select Conditional.
2. Select the gear Icon to open the Conditions window.
You can configure various condition rules that will apply to your element. Depending on whether the condition is met, this can conditionally push data to Salesforce.
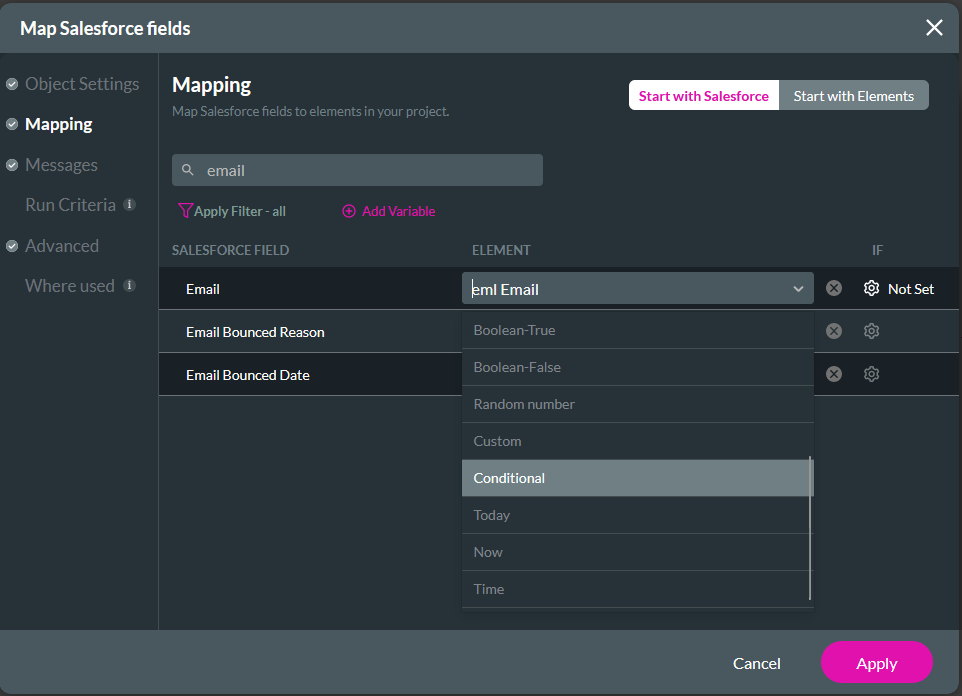
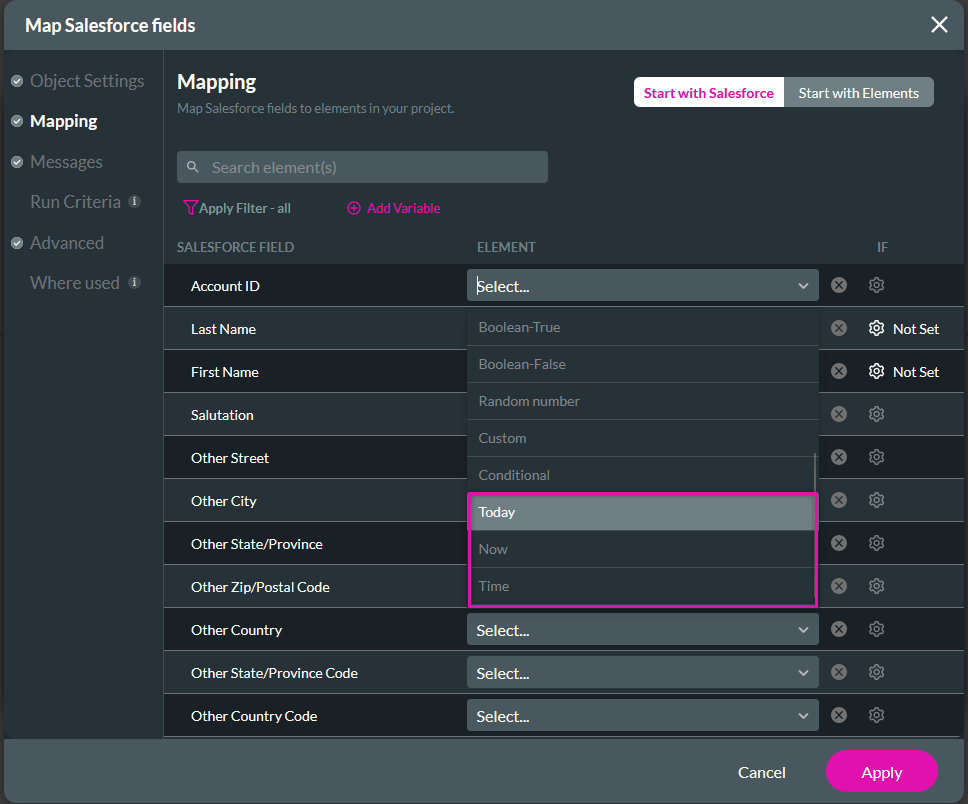
05 System Values
You can choose from a variety of system values to push to Salesforce. You can capture the time, date, or time and date the user invoked the push action.
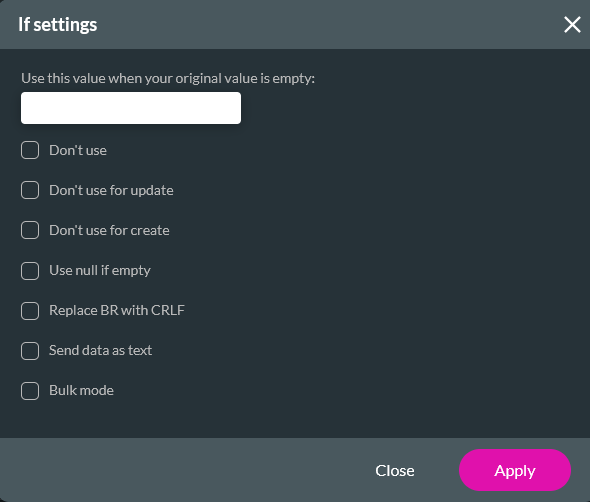
06 Set
You can further configure your mapping by selecting the Set/Not Set gear icon.
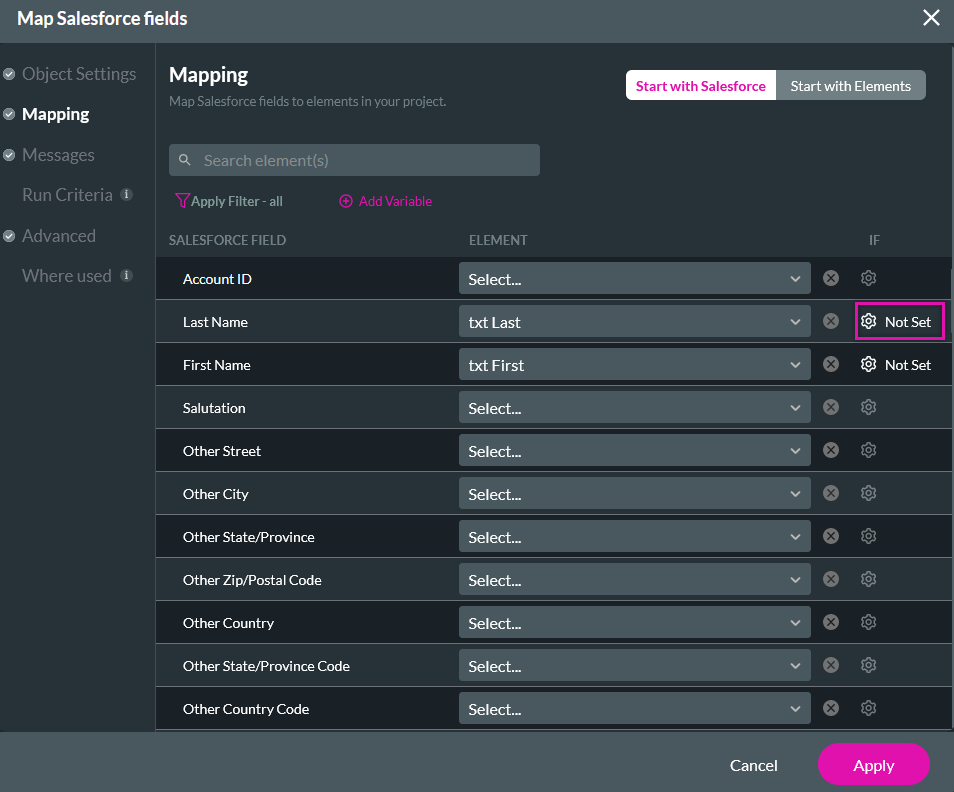
Several If Settings are available in this window. This can be used to set a value if the original value is empty. You can also use the options to decide when the value will be used.
You can also choose from formatting options to ensure the data is captured in Salesforce in the correct format.
Bulk mode is useful when sending more than one value to Salesforce.