Export (11 min)
Completion requirements
01 Getting Started
This tutorial covers how to export your Titan projects.
02 Export
1. Navigate to your Titan home page.
2. Click the kebab menu on the project you want to export and select Export. The Export Project window opens.
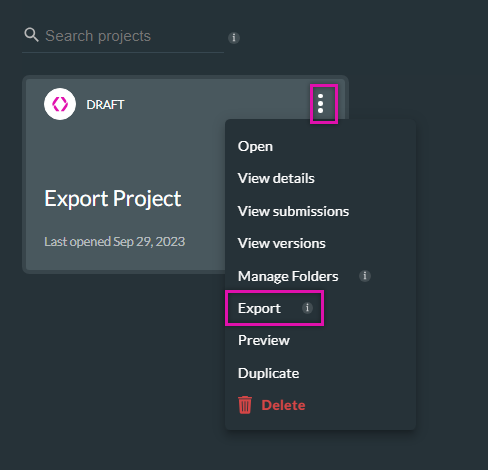
There are three export options to choose from:
2. Click the kebab menu on the project you want to export and select Export. The Export Project window opens.
There are three export options to choose from:
- Related Account—This is an account where you are a power user. For example, you can be a power user on a colleague's Account. This is the default option.
- Pin - This exports your project to a new Salesforce environment using the pin from another account. You do not need to be a power user on that Account; you only need the PIN.
- Download - This saves your project as a zip file.
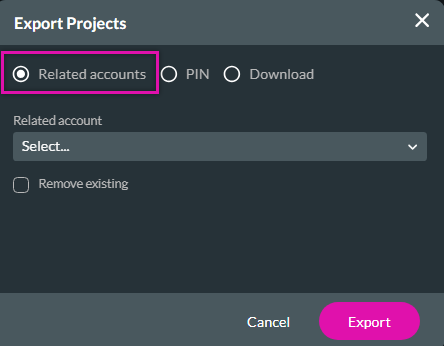
03 Related Account
1. Use the drop-down list to select the related account. This is an account where you are a power user.
2. Select the checkbox to remove the existing project from your projects. The project will be exported, and a new version will be created.
3. Click the Export button.
2. Select the checkbox to remove the existing project from your projects. The project will be exported, and a new version will be created.
3. Click the Export button.
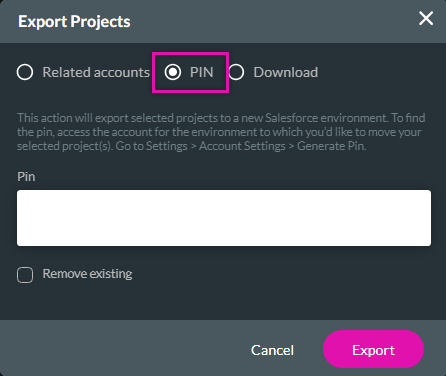
04 Pin
The PIN must be copied from the organization you want to push the project to and pasted into the account you want to send the project from.
1. Select the PIN radio button. To find the PIN, access the account for the environment where you would like to move your selected project.
2. Paste the PIN in the field.
3. Select the checkbox to remove the existing project from your projects. The project will be exported, and a new version will be created.
4. Click the Export button.
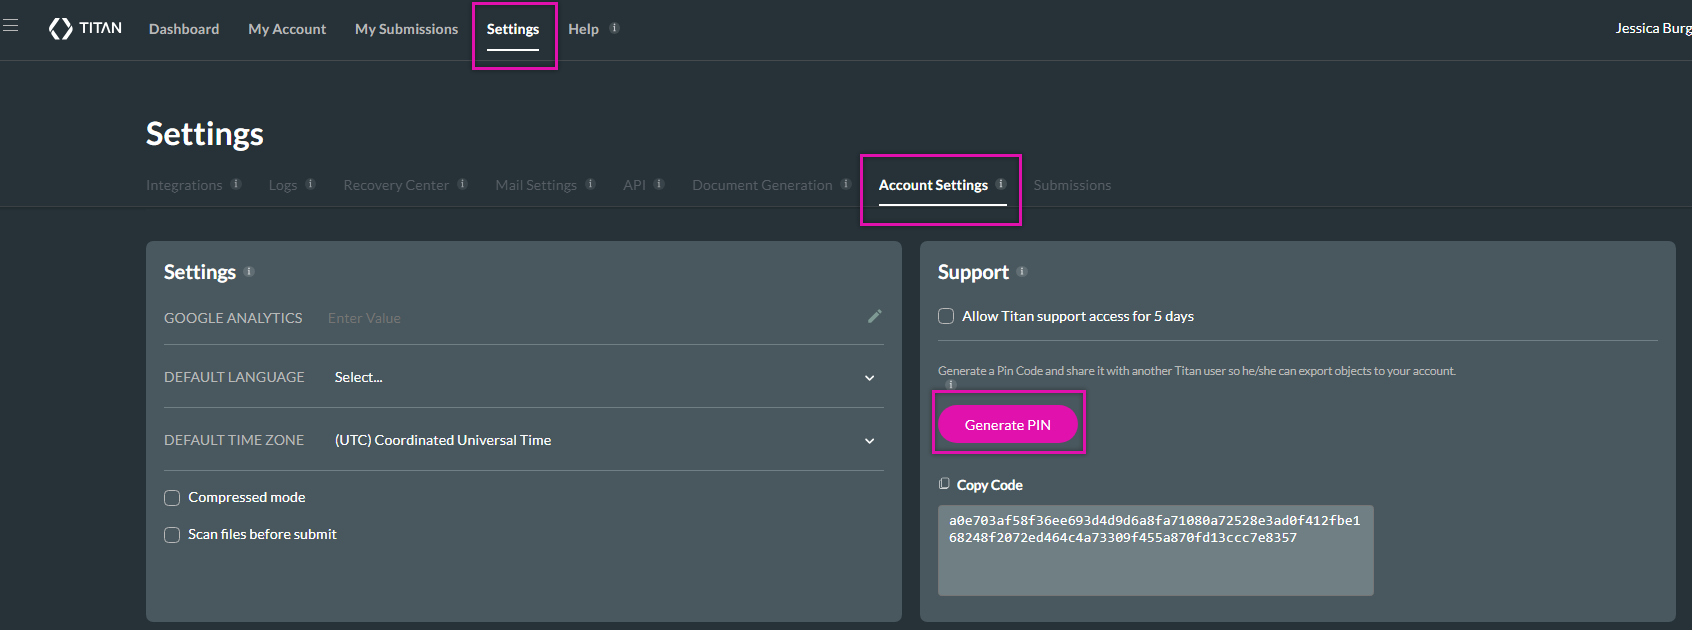
To retrieve a pin:
1. Navigate to the account settings page.
2. In the support section, click the generate pin button.
3. Copy the generated pin.
1. Select the PIN radio button. To find the PIN, access the account for the environment where you would like to move your selected project.
2. Paste the PIN in the field.
3. Select the checkbox to remove the existing project from your projects. The project will be exported, and a new version will be created.
4. Click the Export button.
To retrieve a pin:
1. Navigate to the account settings page.
2. In the support section, click the generate pin button.
3. Copy the generated pin.
05 Download
1. Select the Download radio button. The project is saved as a zip file.
2. Select the checkboxes if required:

2. Select the checkboxes if required:
- Include Project ID
- Include Project URL
- Include Project Name
06 Importing a Downloaded Project
1. In your Titan dashboard, select the kebab menu and click Import Project.
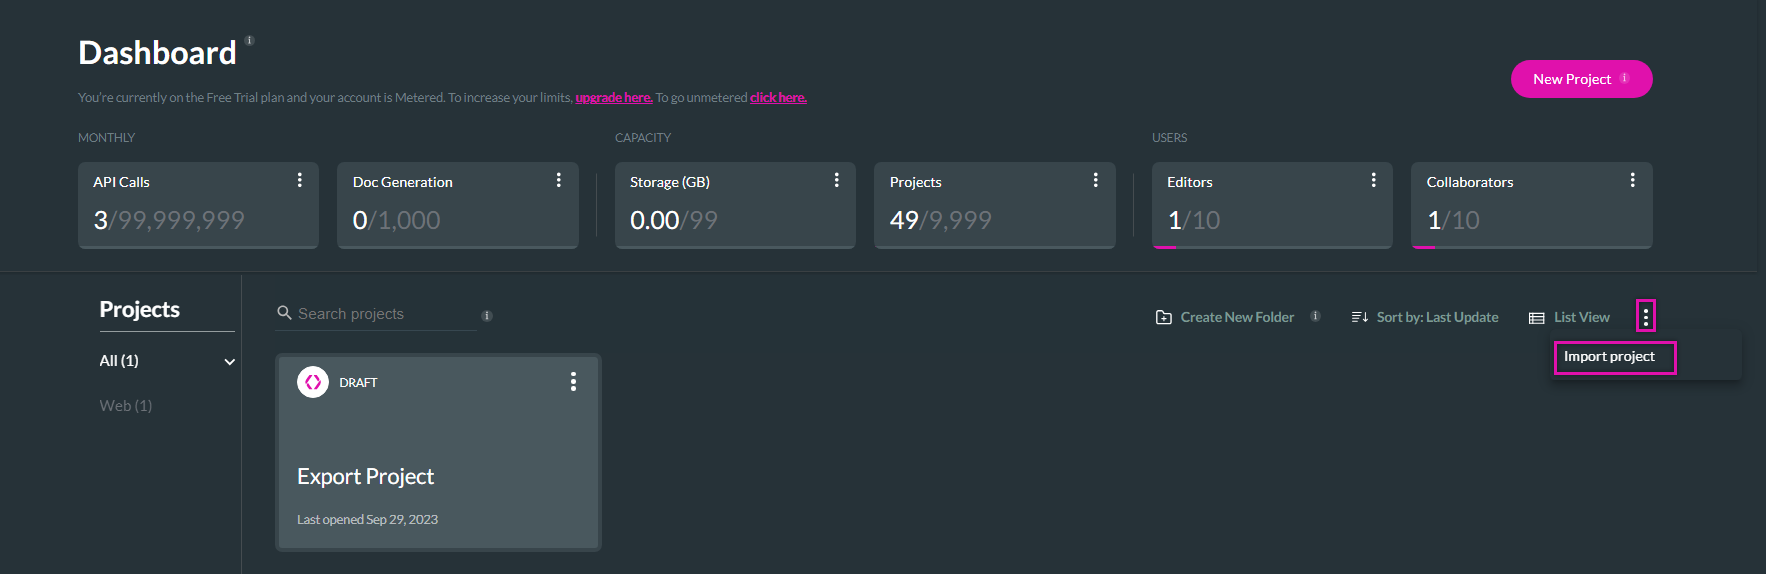
The file explorer window opens.
2. Browse to the file location, select your zip file, and click Open.
The file explorer window opens.
2. Browse to the file location, select your zip file, and click Open.
07 Dos and Don’ts
When moving a project from one environment to another, you need to ensure that your static content, such as a static variable, works correctly once the project has been exported.
If you have set up a redirect action that redirects a user from one project to another, both projects must be moved across for the redirect functionality to still work.
Any flow that has been configured will also need to be moved with the project.
If you have set up a redirect action that redirects a user from one project to another, both projects must be moved across for the redirect functionality to still work.
Any flow that has been configured will also need to be moved with the project.