Redirect and Parameter Passing (8 min)
Completion requirements
01 Getting Started
This tutorial covers how to redirect between internal pages and how to pass parameters between pages.
You can trigger a redirect from any action flow.
You can trigger a redirect from any action flow.
02 Using a Button to Redirect
1. Insert a button into your project and navigate to the On Click action screen.
2. Select the Start + icon. The Add Node screen opens.
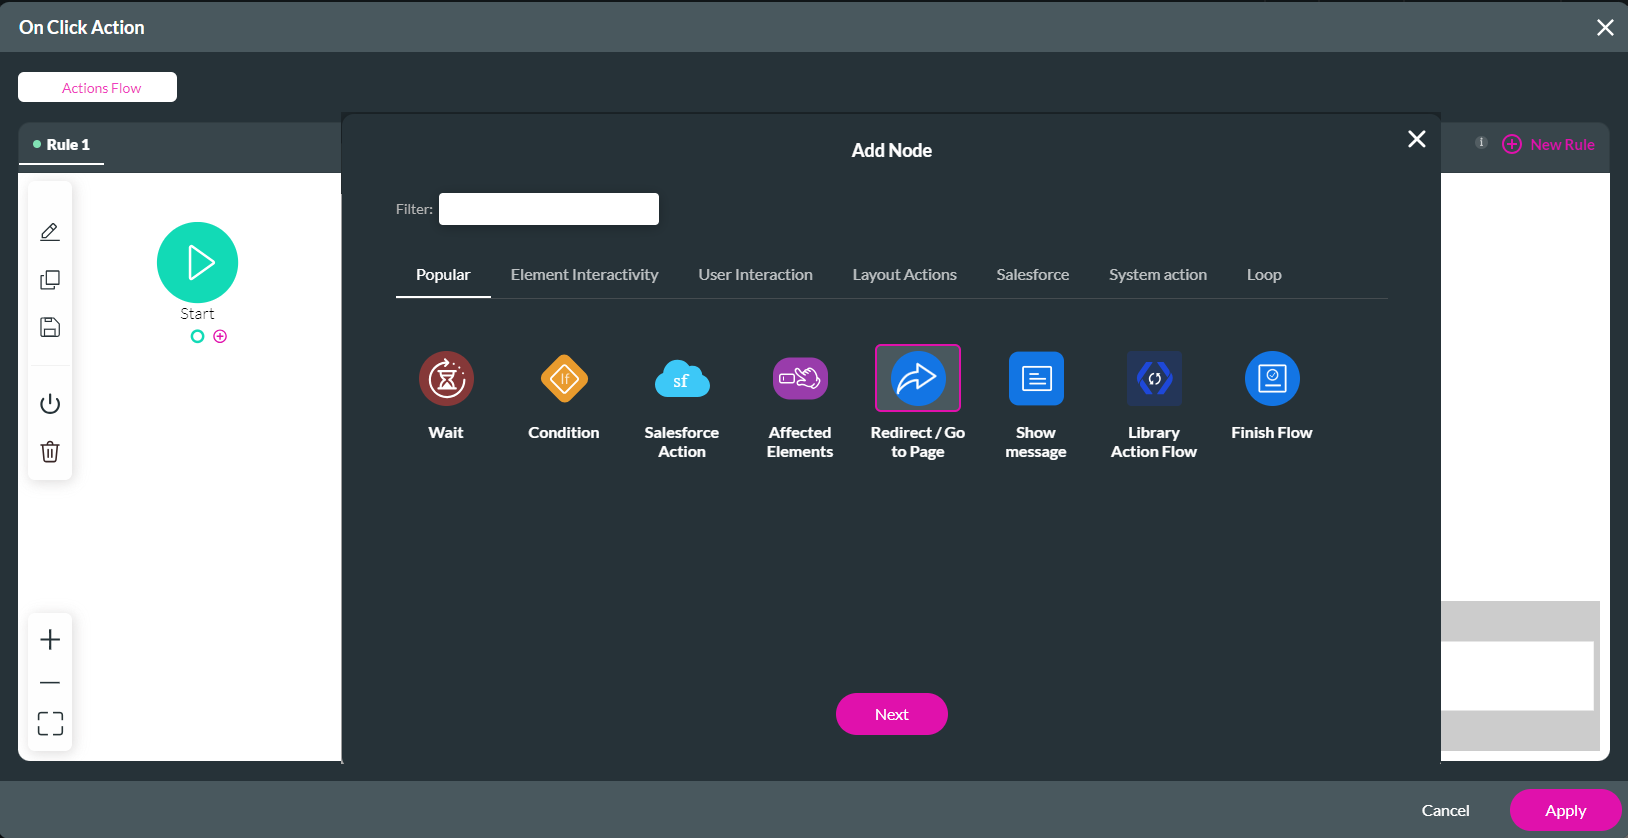
3. Choose Redirect/ Go to Page and click Next.
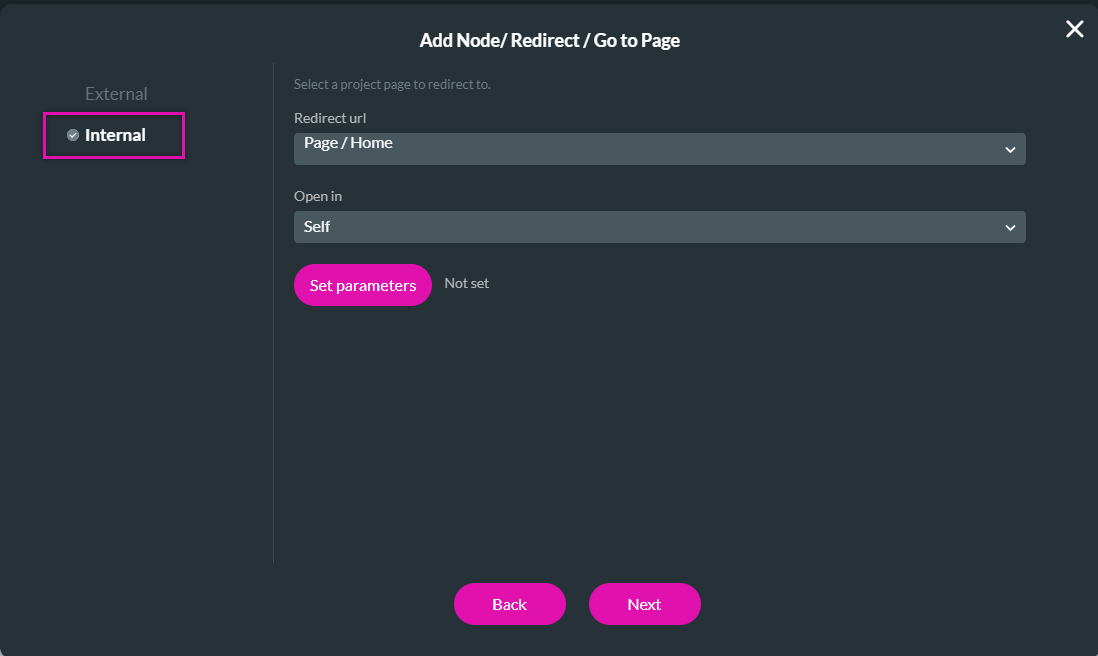
4. Click the Internal tab and use the dropdown to configure which page must open and how. Click Next.
5. Add a Tag and click Insert.
The Node is added to the screen.
6. Click Apply.
Save and preview. The redirect occurs when you click the button according to the Open In configuration.
2. Select the Start + icon. The Add Node screen opens.
3. Choose Redirect/ Go to Page and click Next.

4. Click the Internal tab and use the dropdown to configure which page must open and how. Click Next.
- Self - Redirects within the current page.
- Parent - This redirects users to the parent page component. For example, a modal is a child, and the home page is the parent.
- Blank - opens the page in a new tab.
- Modal - Displays the redirect page as a window over the current content. You can also configure redirects to occur within a modal. This can be achieved by setting a redirect page to display as a modal, with a redirect button configured within the modal.
- Top - This redirects to the top level within the same component. For example, modal two will redirect to modal 1.

5. Add a Tag and click Insert.
The Node is added to the screen.
6. Click Apply.
Save and preview. The redirect occurs when you click the button according to the Open In configuration.
03 Passing Parameters
- In Titan, web pages cannot access data from other pages. You can configure parameters to pass data in between pages.
To configure variables:
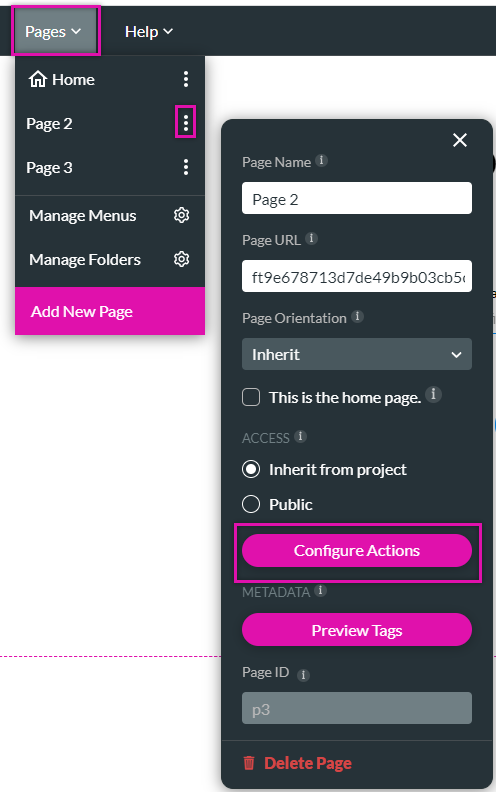
1. Expand the page dropdown, select the kebab menu, and click Configure Actions. The Configure Actions screen opens.
2. Select the Static Variables tab and create the following variable:
- fullname_pg2
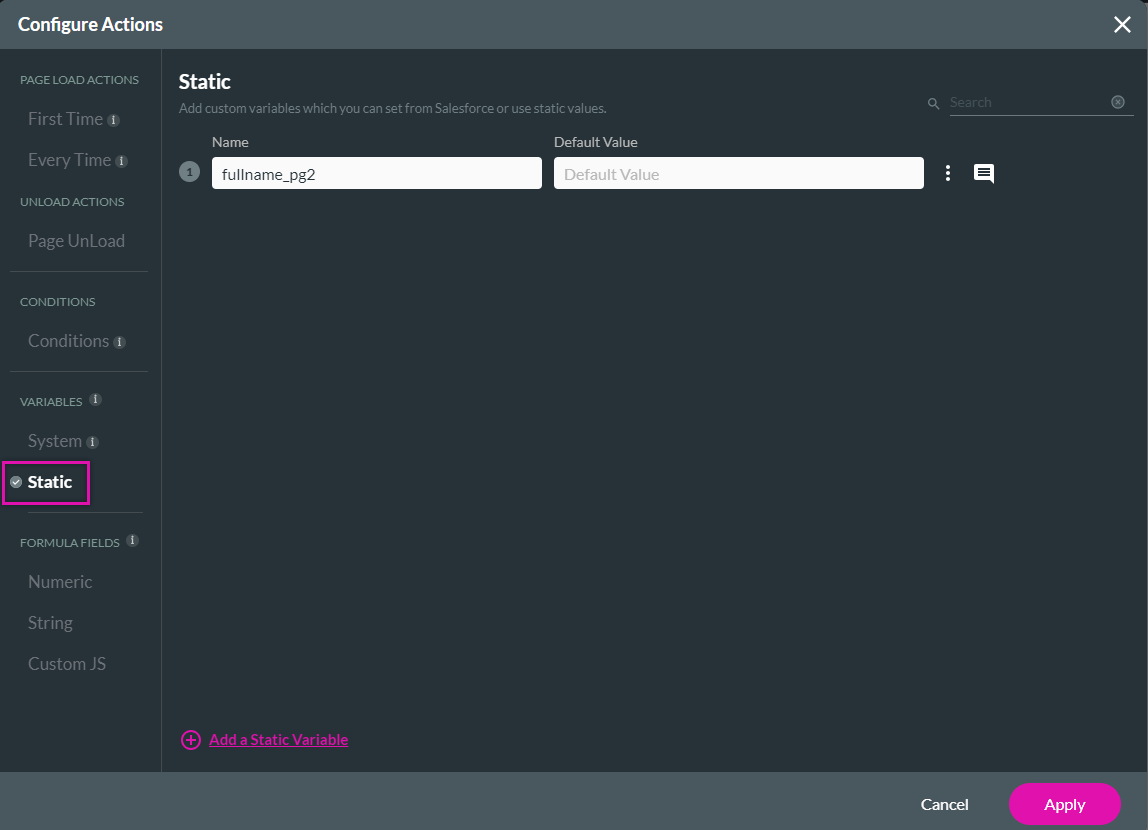
Go to the home page and navigate to the On Click action screen.
1. Select the Start + icon. The Add Node screen opens.
2. Choose Redirect/ Go to Page and click Next.

3. Click the Internal tab and use the dropdown to configure which page must open and how. For this example, page 2 will open in the current tab.
4. Click the Set Parameters button. The Configure Redirect Parameters screen opens.
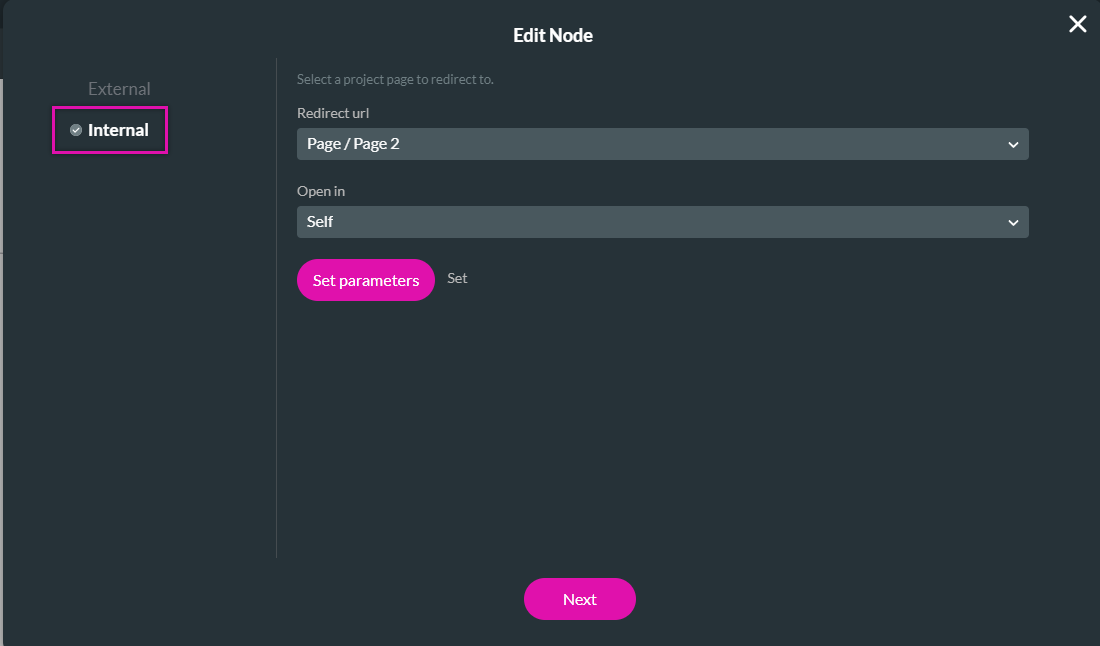
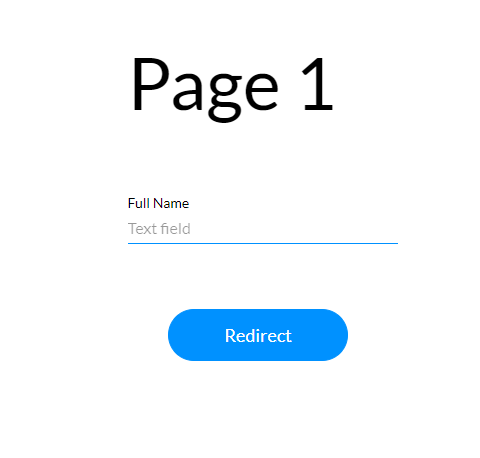
5. Use the dropdowns to configure the values for the static variable. For this example, the whole name field on page 1 will pass to page 2. Click Apply.
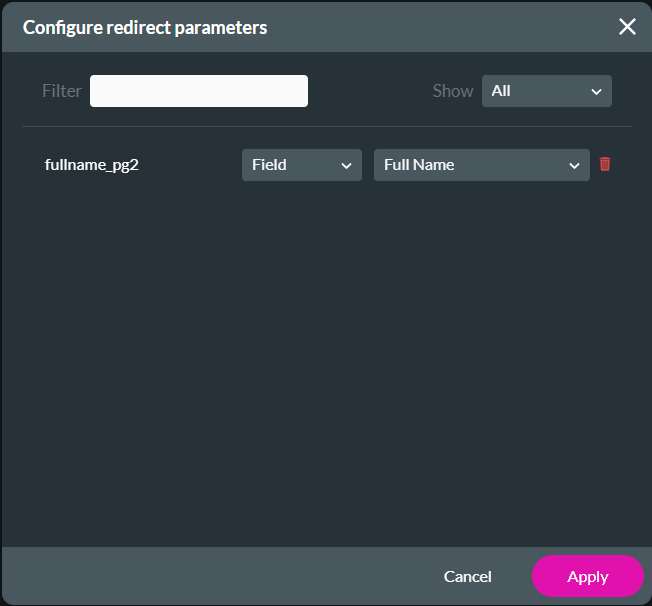
6. Click Next.
7. Add a tag and click Insert. The node is added to the screen.
8. Click Apply.
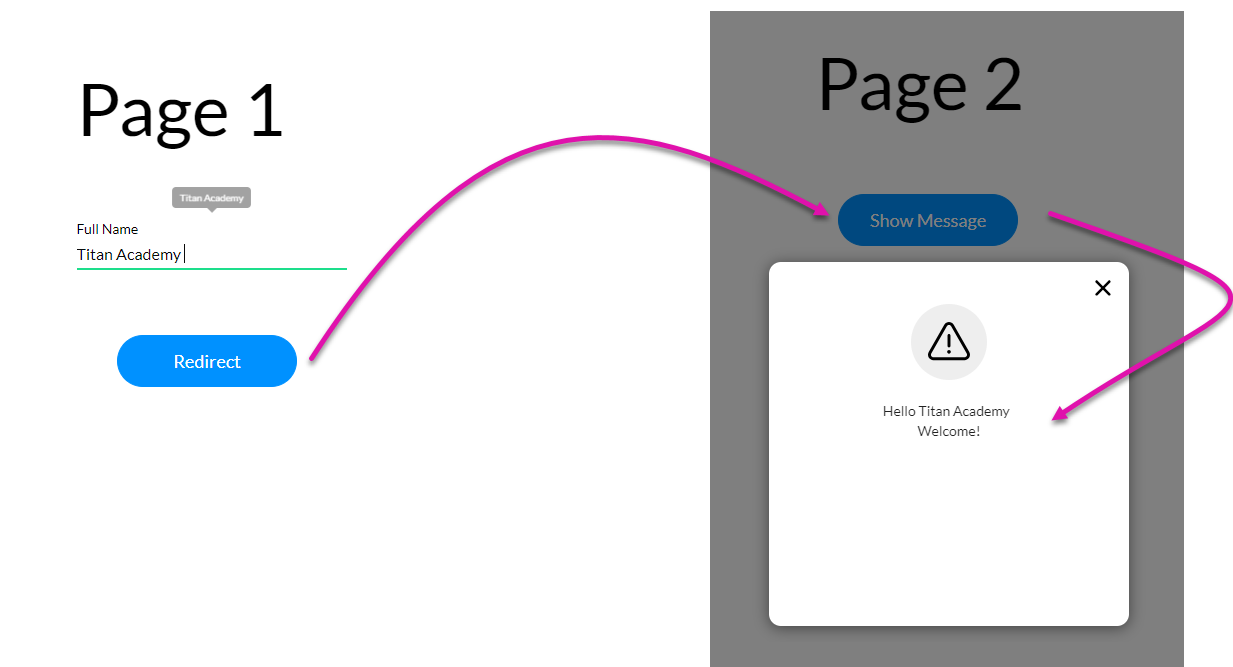
For the page 1 configuration:
- A redirect to page 2 action was configured for the button.
For the page 2 configuration:
- Two buttons were inserted;
- The first button has a show message actions configured. The message was configured to display the full name:
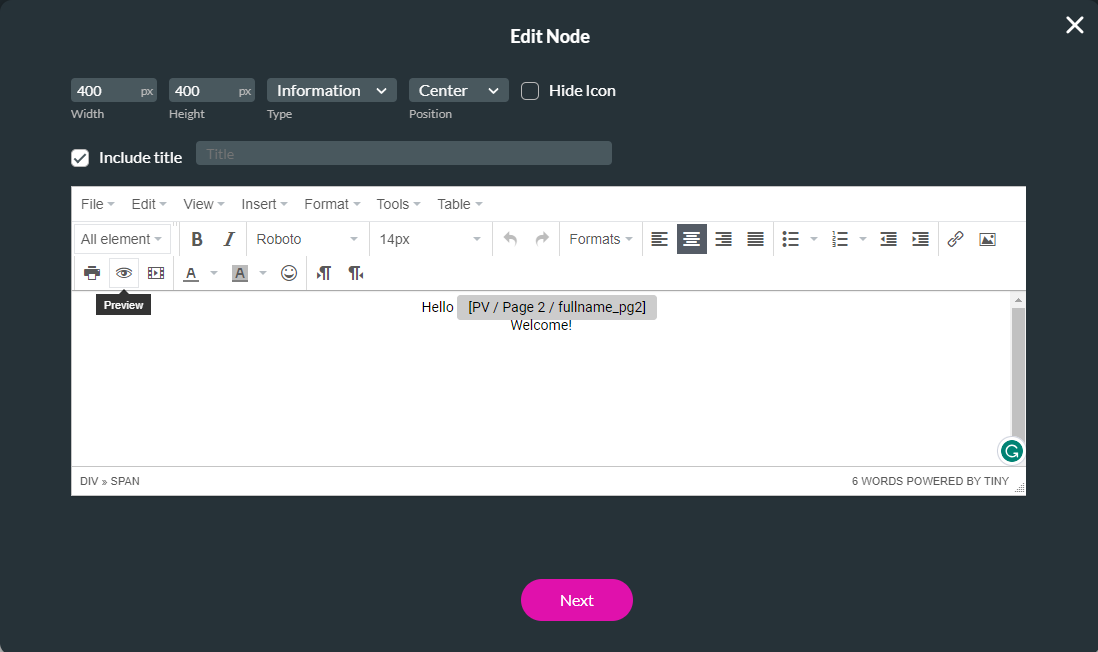
- The second button has a redirect to the page 3 action configured.
04 Triggering a Redirect based on a Condition
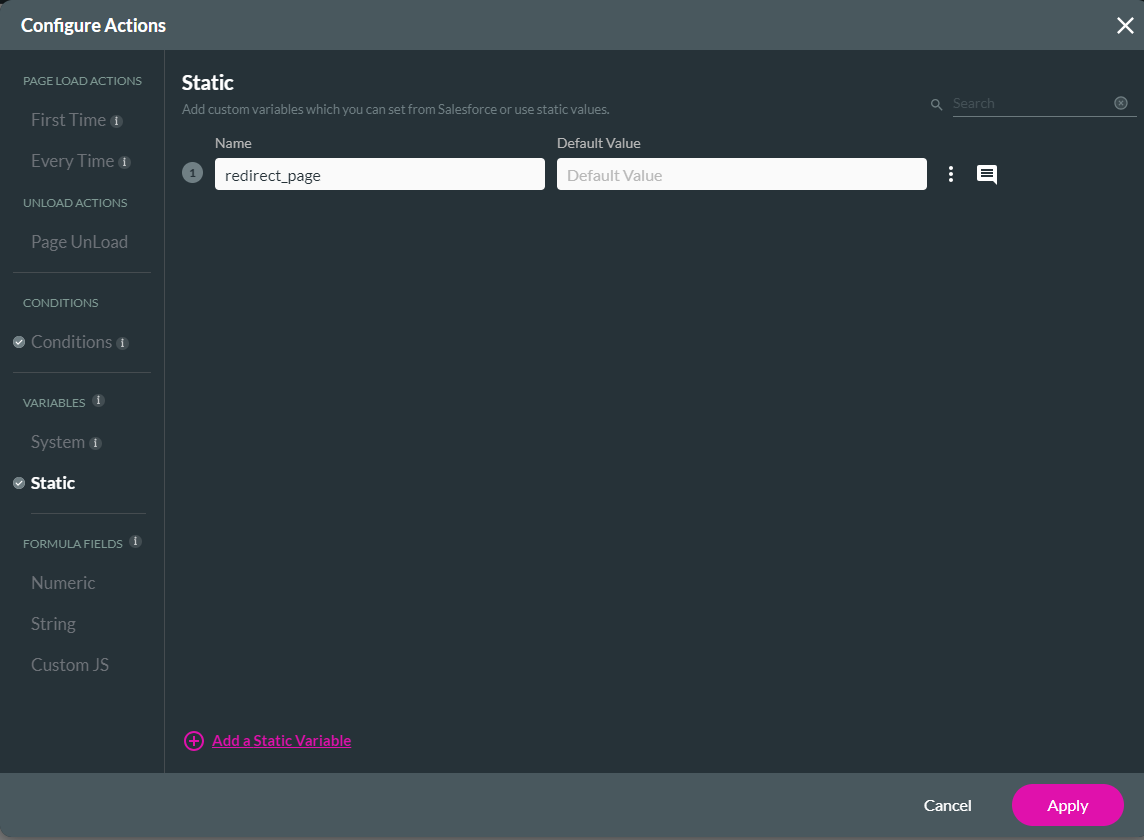
To demonstrate how to trigger a redirect using a condition. The following static variable was created on the home page:
Note: Ensure you have the URL copied, as we will paste this into the URL.
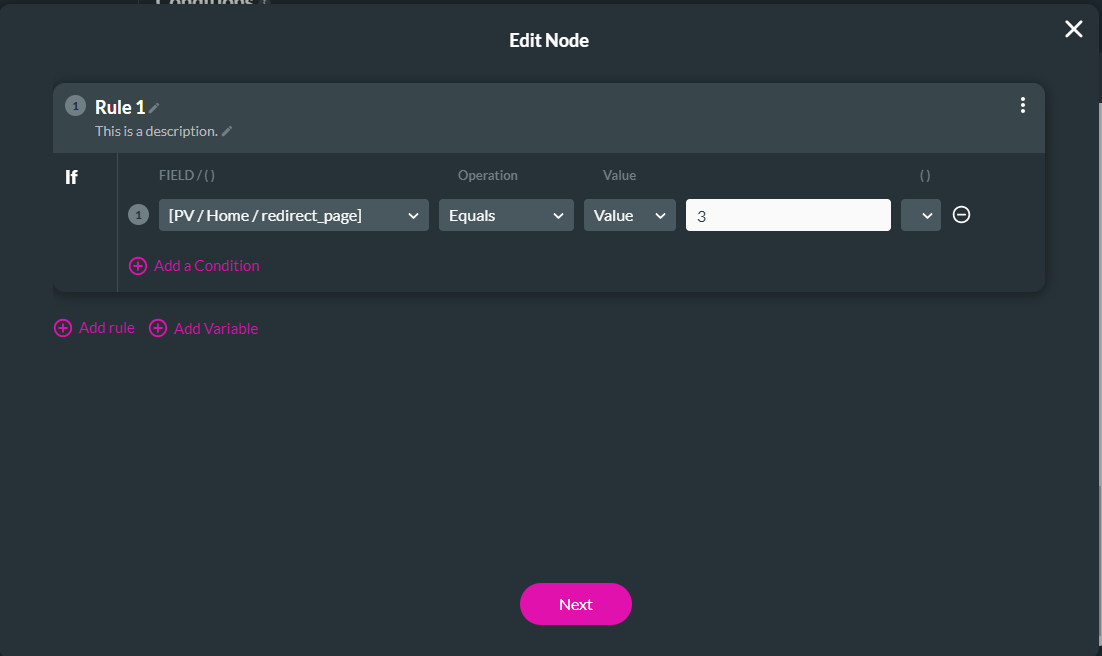
In the conditions tab, the following condition was configured:
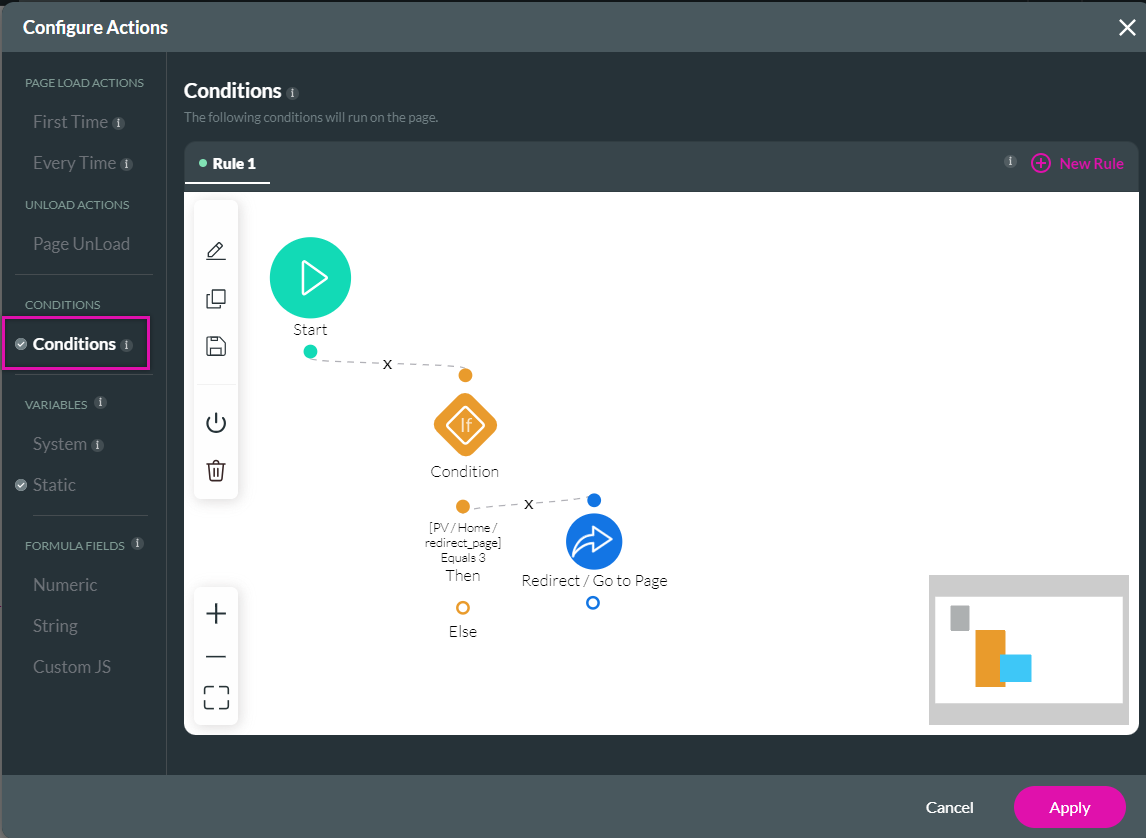
A redirect was assigned to the Then condition.
Save and preview. Paste the static variable into the URL and ensure the condition is met. According to the configuration, you will be redirected to page 3.

Note: Ensure you have the URL copied, as we will paste this into the URL.

In the conditions tab, the following condition was configured:

A redirect was assigned to the Then condition.

Save and preview. Paste the static variable into the URL and ensure the condition is met. According to the configuration, you will be redirected to page 3.
