Page Menus (7 mins)
Completion requirements
01 Getting Started
This tutorial covers how to add page or header menus to your projects, including:
- Adding a header.
- Navigating pages on the header.
- Hiding and showing pages.
- Setting parameter values on redirect.
- Changing link names.
- Creating new pages from the site menu.
- Adding folders to the header.
- Conditionally hiding and showing pages.
02 Adding a Header
1. Expand the Pages dropdown and click Manage Menus. The Site Menus window opens.

2. Enable the Include a Header switch. A header is automatically added to your project.

All current pages in your project are automatically added to the header.
2. Enable the Include a Header switch. A header is automatically added to your project.
All current pages in your project are automatically added to the header.
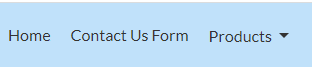
03 Navigating Pages on the Header
Click the heading titles in preview mode to navigate to a different page.
04 Hiding and Showing Pages
To hide pages from the header, click the eye icon without deleting them.

05 Setting Values on Redirect
To set values for the redirect:
1. Click on the page gear icon. The Edit Link screen opens.

2. In the Edit Link menu, you can:
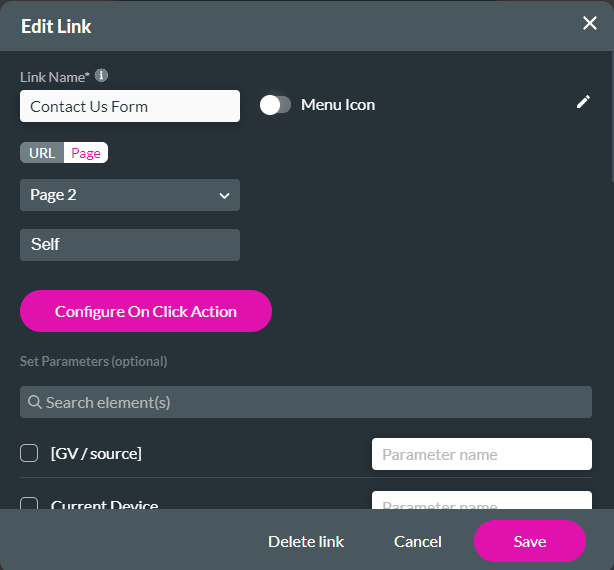
This allows us to set a value to a parameter while redirecting to a different page.
1. Click on the page gear icon. The Edit Link screen opens.
2. In the Edit Link menu, you can:
- Change the menu icon.
- Update the link name.
- Choose which page users are redirected to and how the page opens.
- Configure an on-click action.
- Set Parameters.
This allows us to set a value to a parameter while redirecting to a different page.
06 Changing Link Names
1. Navigate to the Edit Link screen.
2. Type in the new name of your page.
This will automatically update the header name in your project.

2. Type in the new name of your page.
This will automatically update the header name in your project.
07 Creating New Pages
1. Click the Add menu Item button.
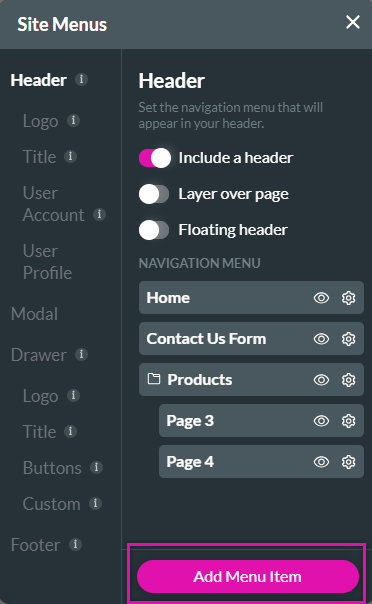
2. From the pop-up menu, you can create a new page, add a link, or add a folder.

2. From the pop-up menu, you can create a new page, add a link, or add a folder.
08 Adding Folders to the Header
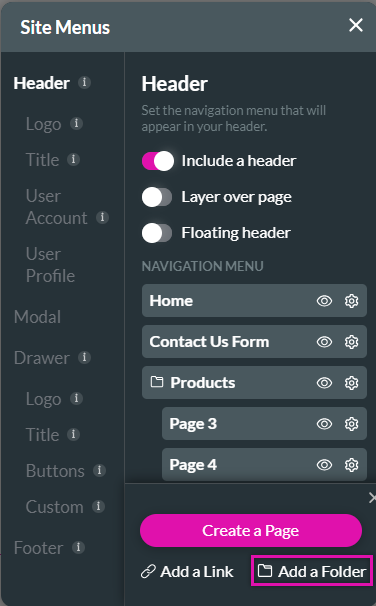
1. Navigate to the Site Menus screen and click Add Menu Item.
2. Click Add A Folder.
A folder is added to the Navigation Menu.
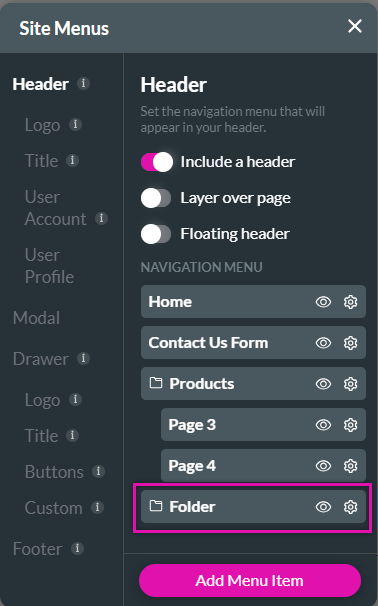
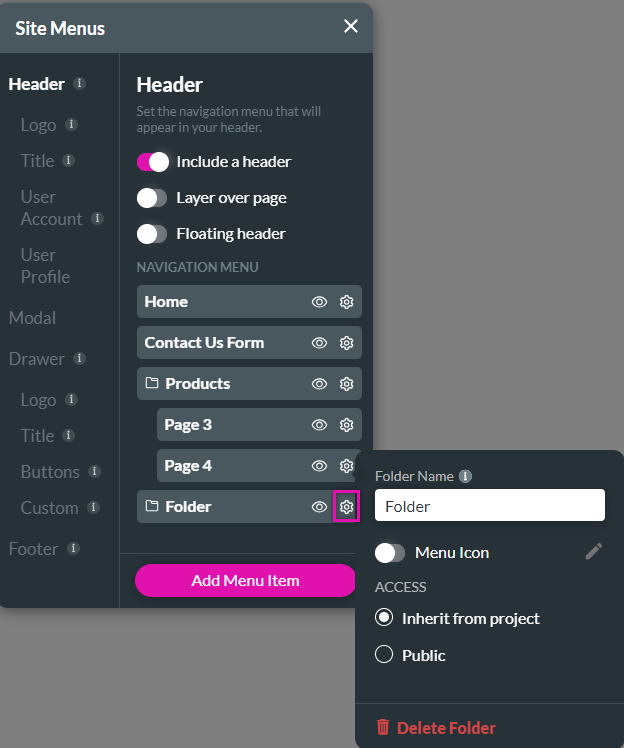
To rename the folder:
1. Click the gear icon and type in the new folder name.
To add pages to folders, drag and drop pages under the folder.
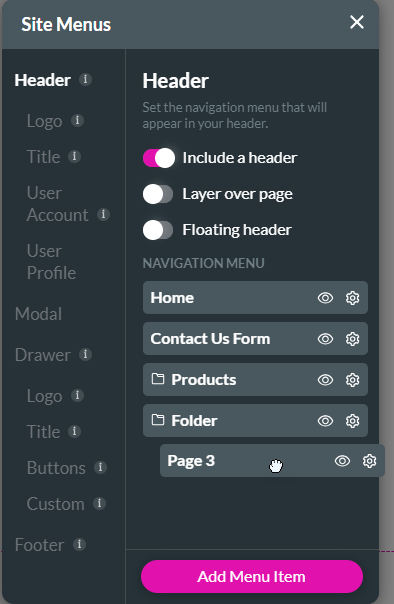
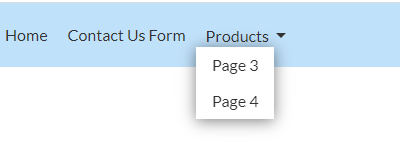
A sub-menu displays the pages when users click on the folder item in the navigation menu.
2. Click Add A Folder.
A folder is added to the Navigation Menu.
To rename the folder:
1. Click the gear icon and type in the new folder name.
To add pages to folders, drag and drop pages under the folder.
A sub-menu displays the pages when users click on the folder item in the navigation menu.
09 Conditionally Hiding and Showing Pages
For this example, we will set a global variable.
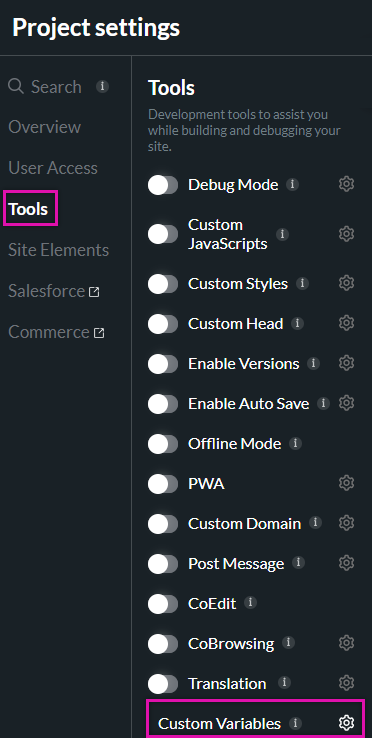
1. Open the project settings menu and click the tools tab.
2. Click the Custom Variables gear icon.
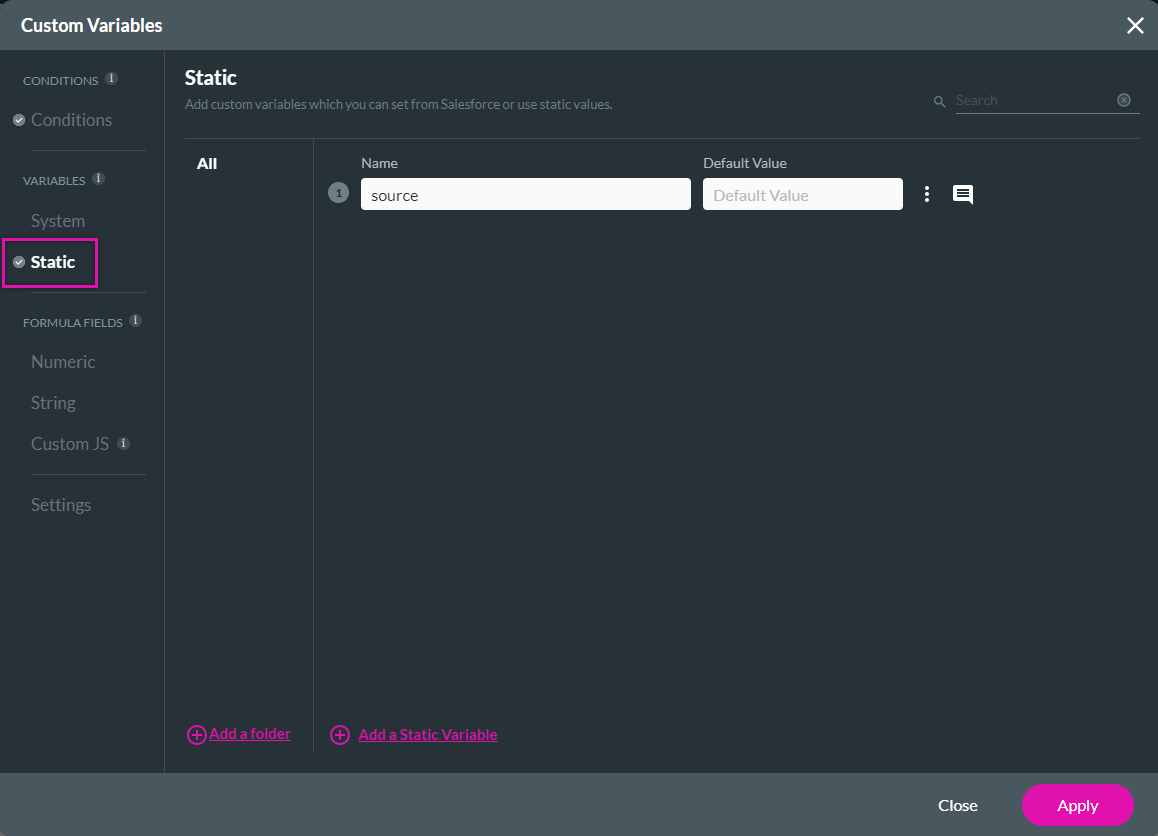
3. Click the Static tab on the Custom Variables screen and add the variable:
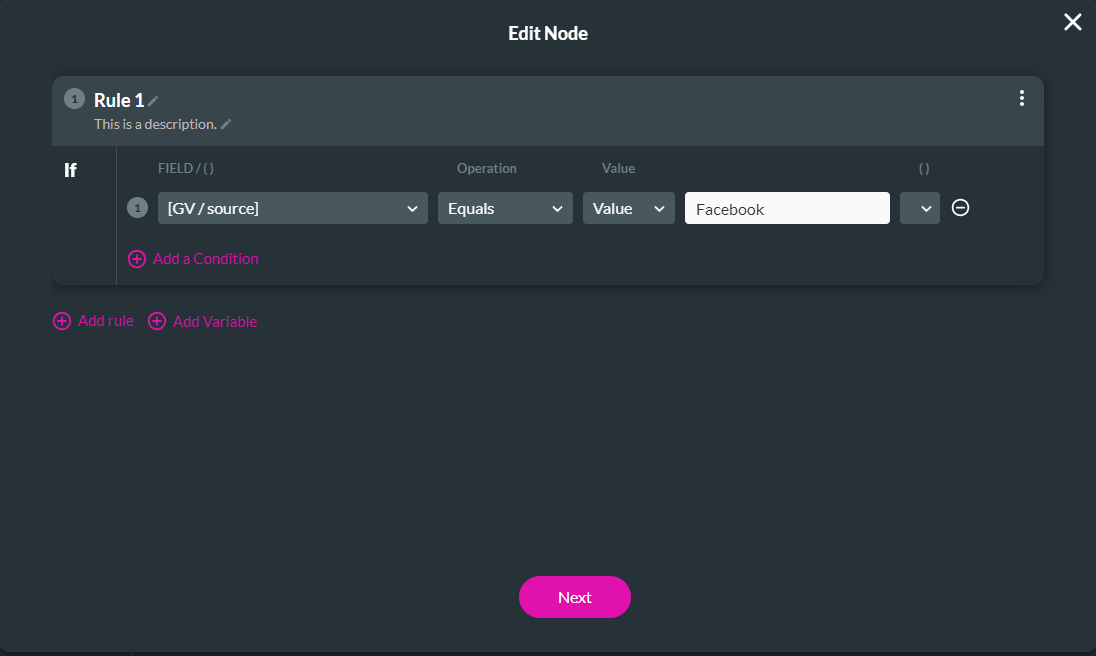
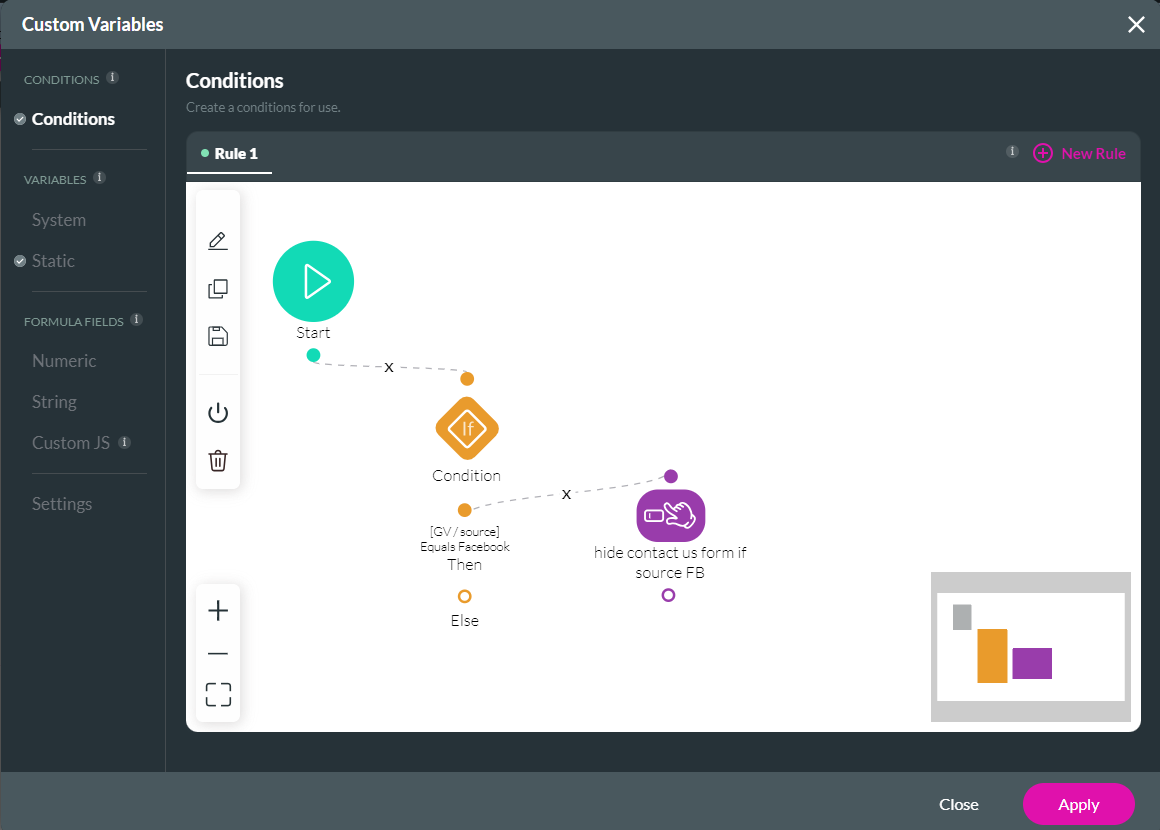
4. Click the Conditions tab and configure the following condition:
5. Click the Then + icon. The Add Node Screen Opens.
6. Select Affected Elements and click Next.
7. Ensure your filter is set to All.
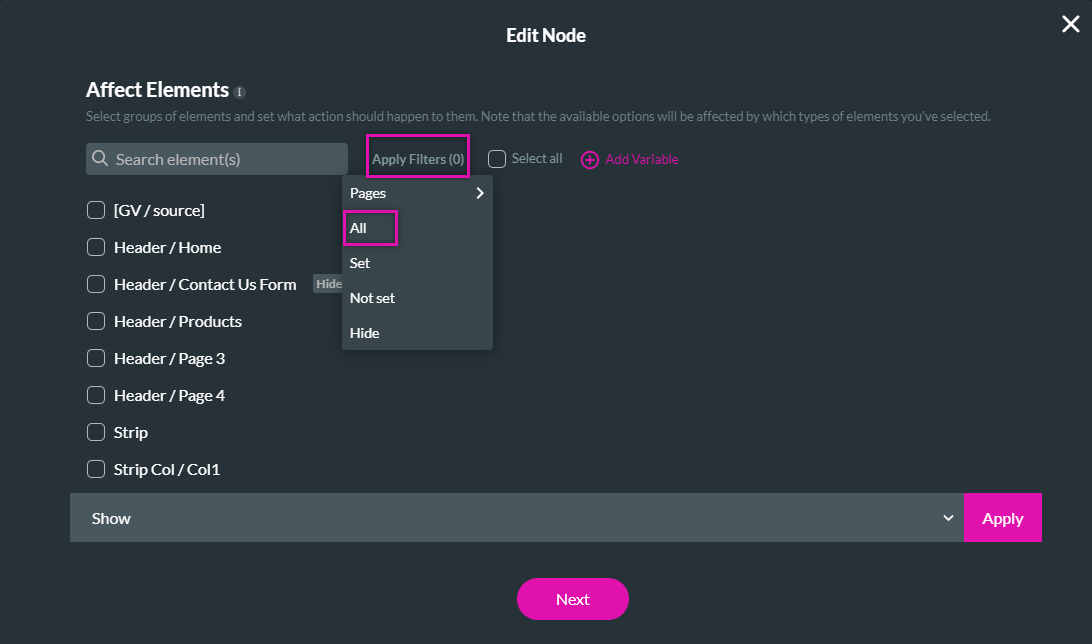
8. Choose which element you want to affect. For example, you could hide the Contact Us Form header. Click the element selection box, use the dropdown to configure the action, and click apply. Then click Next.

9. Add a tag and click Insert.
The node is added to the screen.
10. Click Apply.
Save and preview. The Contact Us form is displayed:
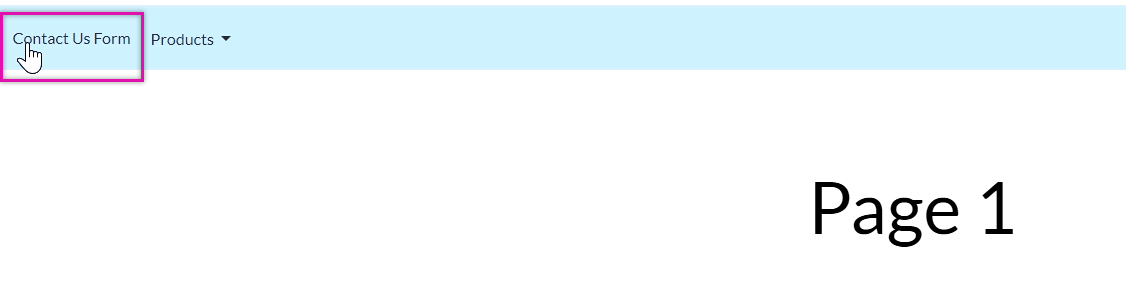
If we fulfill the specified condition, the Contact Us Form is hidden.
1. Open the project settings menu and click the tools tab.
2. Click the Custom Variables gear icon.
3. Click the Static tab on the Custom Variables screen and add the variable:
- For example, the source
4. Click the Conditions tab and configure the following condition:
5. Click the Then + icon. The Add Node Screen Opens.
6. Select Affected Elements and click Next.
7. Ensure your filter is set to All.
8. Choose which element you want to affect. For example, you could hide the Contact Us Form header. Click the element selection box, use the dropdown to configure the action, and click apply. Then click Next.
9. Add a tag and click Insert.
The node is added to the screen.
10. Click Apply.
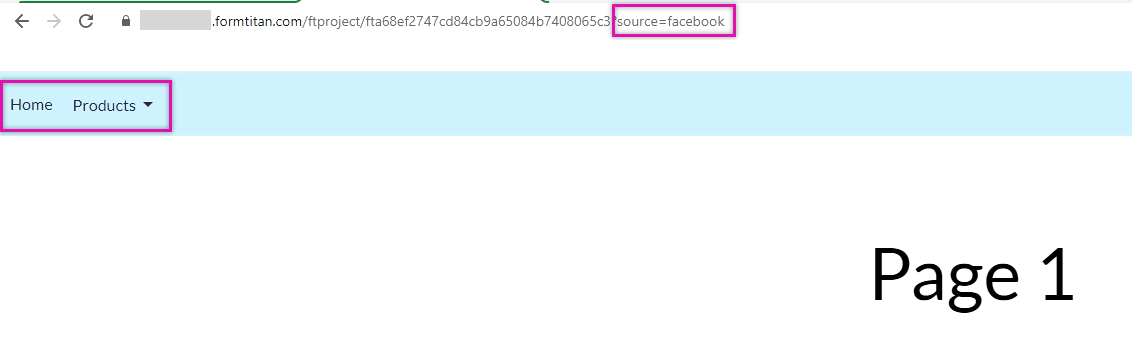
Save and preview. The Contact Us form is displayed:
If we fulfill the specified condition, the Contact Us Form is hidden.