Overview (10 min)
Completion requirements
01 Getting Started
In this lesson, we discuss what multi-step containers are and when to use them. We look at the differences between the different multi-step containers in Titan Web when to use which multi-step containers, and several key differences between the different multi-step containers.
Multi-step containers are designed to break down complex or lengthy information-gathering processes into smaller, more manageable steps. Instead of overwhelming users with a single long form, the process is divided into multiple stages or steps, each focusing on a specific set of inputs or questions.
The purpose of using multi-step containers is to enhance the user experience and improve the completion rates of forms or processes. Presenting information more digestibly reduces cognitive load, enhances clarity, and increases user engagement.
02 How to Add a Multi-Step Container
You can add different contents to each step of the container.
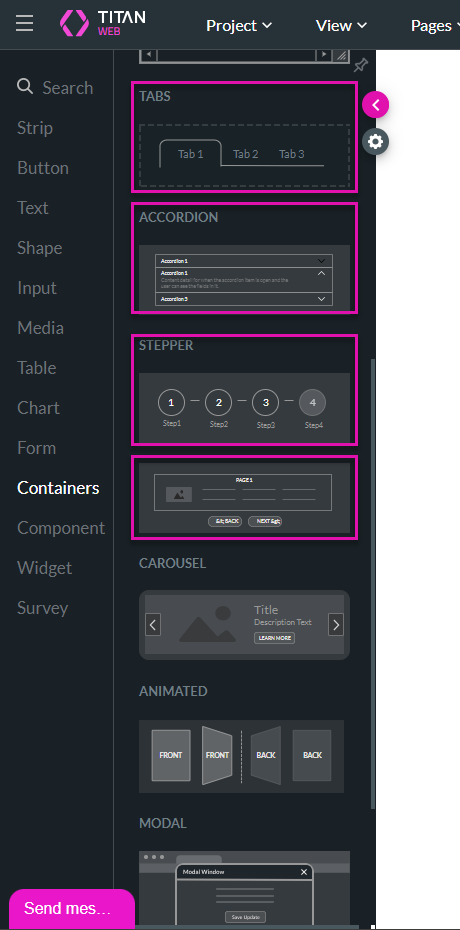
1. Browse to the Container option.
2. Scroll down and drag-and-drop the required multi-step containers to the canvas, for instance:
3. Add auto-fit containers or form elements to the multi-step containers for the best results.
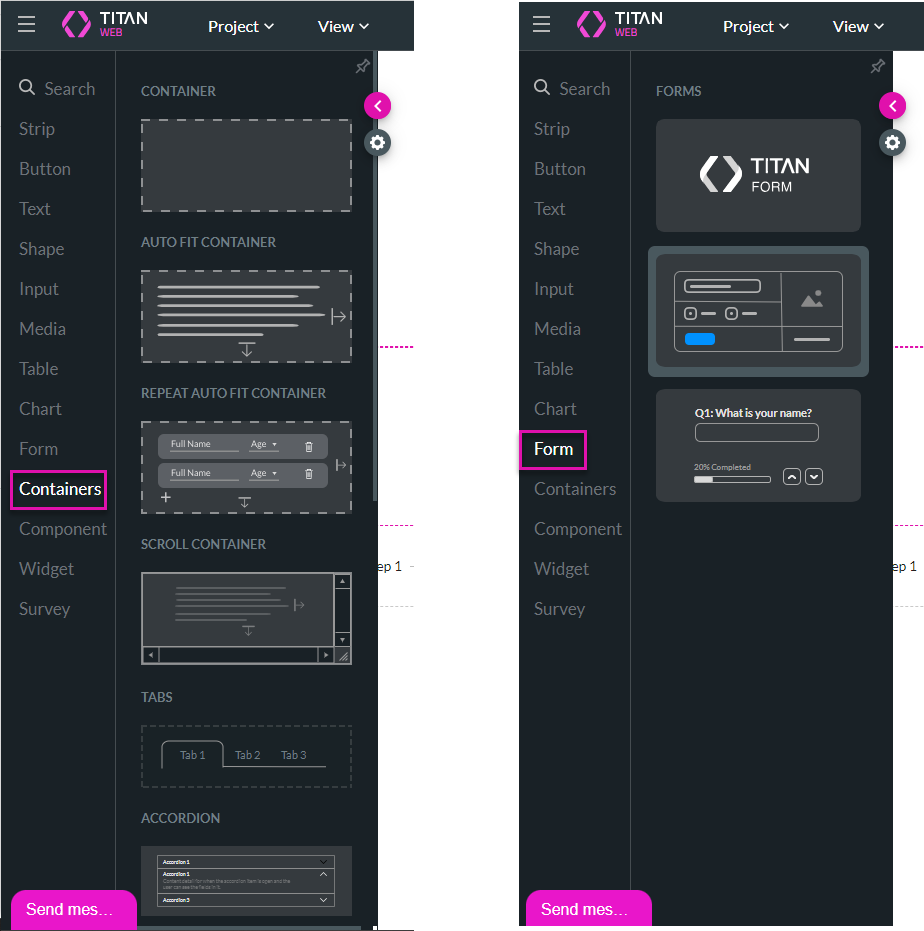
4. Add elements to the auto-fit containers or form elements.

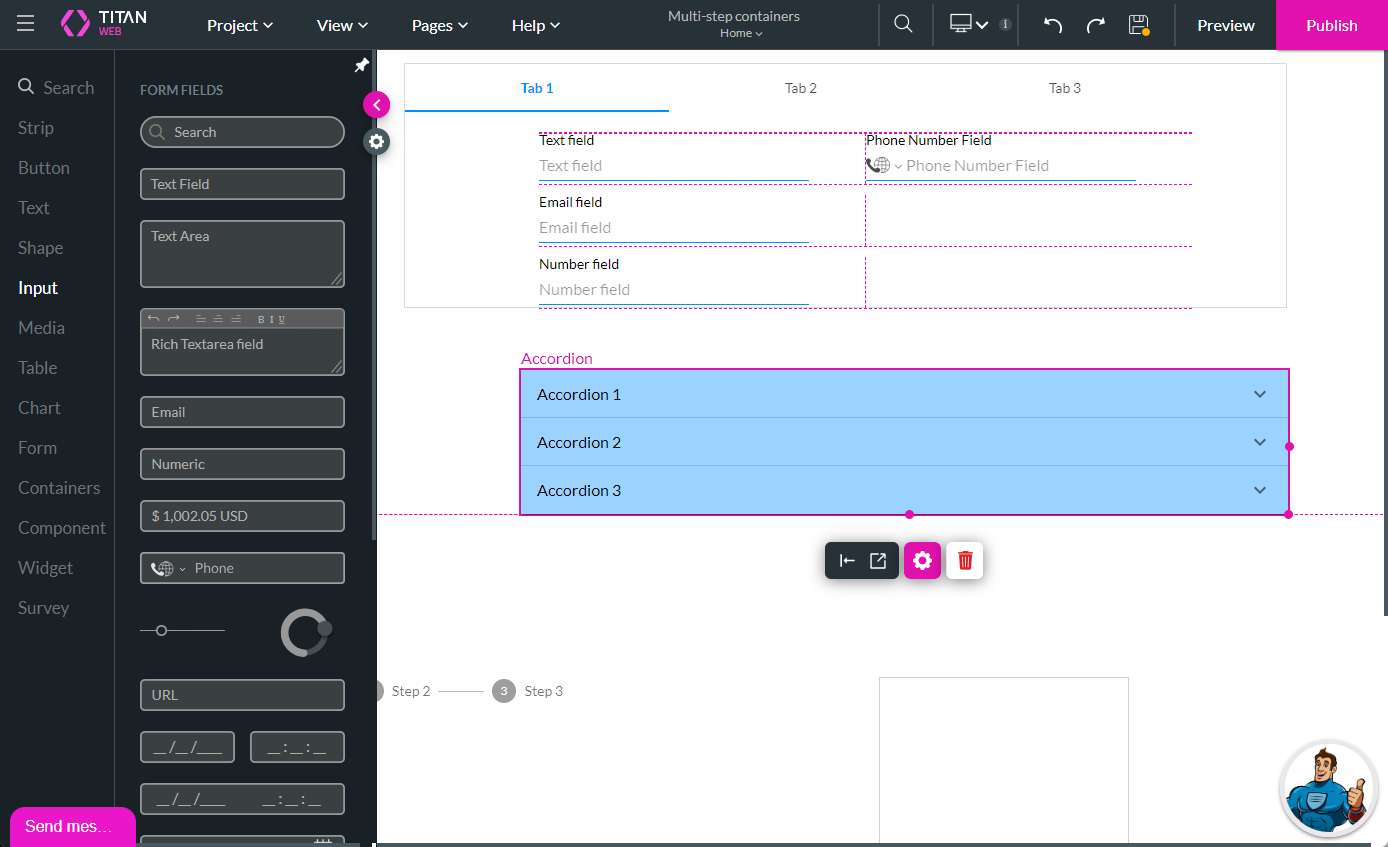
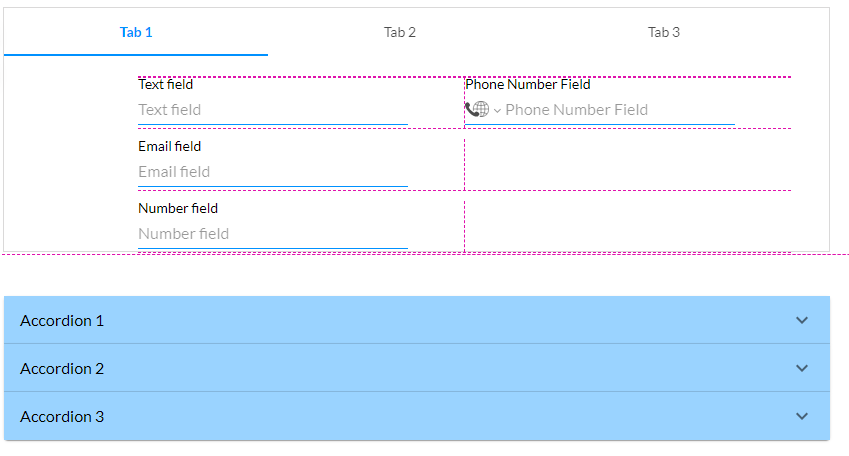
In this example, we added a form with input elements to Tab 1 …
… a file upload element to Tab 2 …

… and an interactive document to Tab 3.
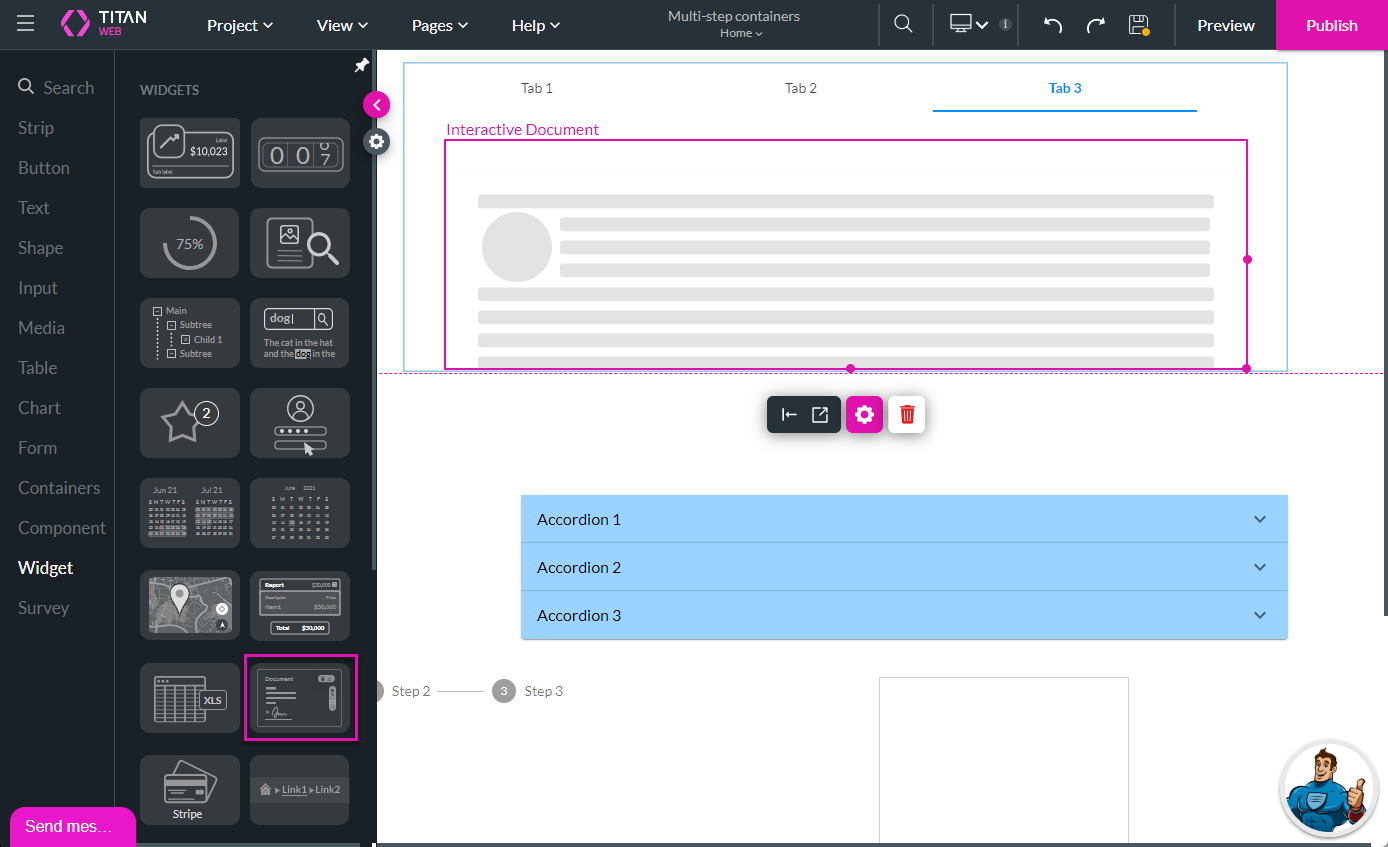
Each tab/step can have completely different elements for the end-user to interact with, making it easier for them to complete the steps in a process on a single web page.
1. Browse to the Container option.
2. Scroll down and drag-and-drop the required multi-step containers to the canvas, for instance:
- Tabs
- Accordion
- Stepper
- Multi-stepper
3. Add auto-fit containers or form elements to the multi-step containers for the best results.
4. Add elements to the auto-fit containers or form elements.
In this example, we added a form with input elements to Tab 1 …
… a file upload element to Tab 2 …
… and an interactive document to Tab 3.
Each tab/step can have completely different elements for the end-user to interact with, making it easier for them to complete the steps in a process on a single web page.
03 Add Steps to a Multi-Step Containter
- Add Static Values
- Remove Static Values
- Add Dynamic Values
04 Add Static Values
This process is the same for all the multi-step containers. You can create custom static values.
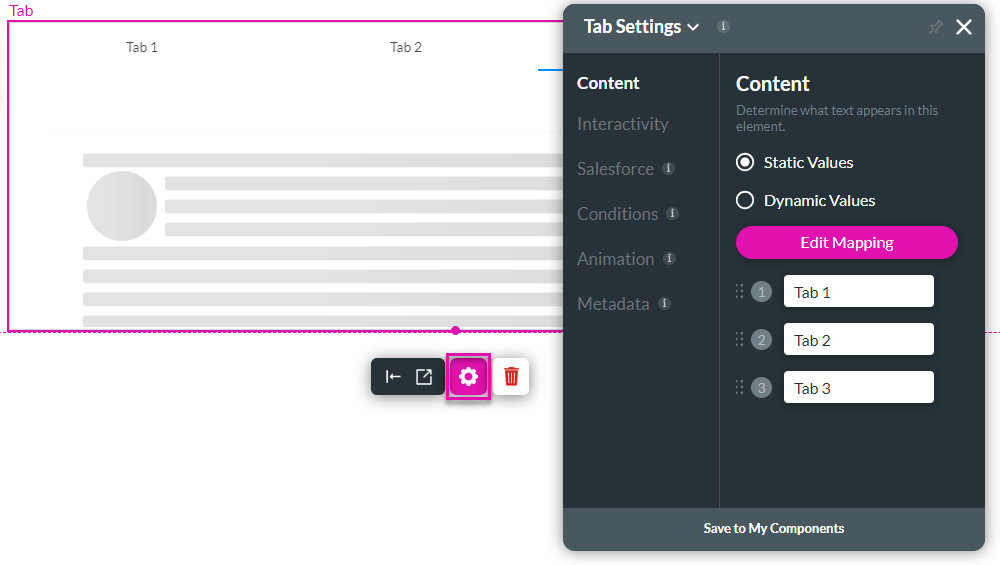
1. Select the multi-step container and click the Gear icon. The Settings screen opens.
2. Under Content, select the Static Values radio button and click the Edit Mapping button. The Configure Tabs screen opens.
3. Click the Add a Tab option to add more steps.
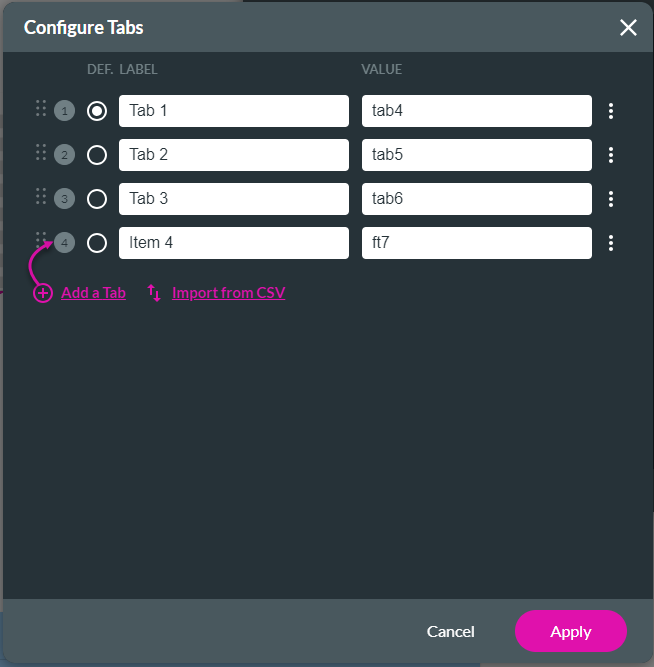
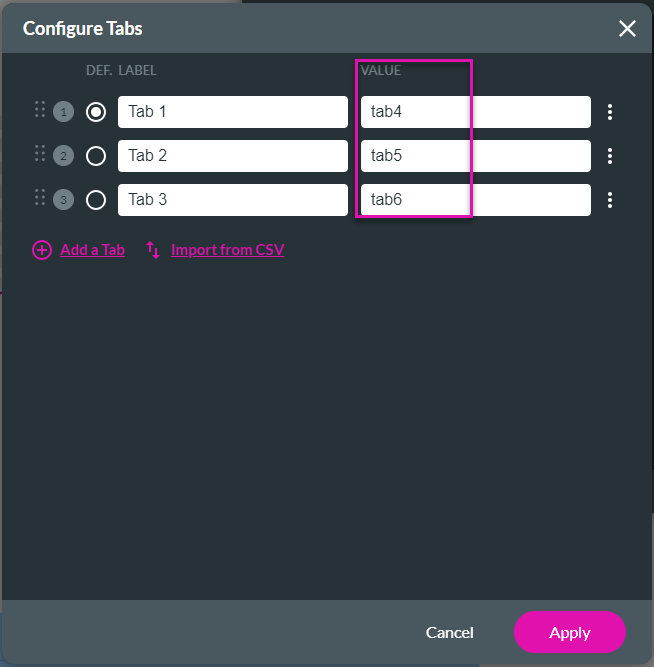
4. Complete the fields. Each step has a unique value, and you can configure conditional logic for a specific step based on that value.
1. Select the multi-step container and click the Gear icon. The Settings screen opens.
2. Under Content, select the Static Values radio button and click the Edit Mapping button. The Configure Tabs screen opens.
3. Click the Add a Tab option to add more steps.
4. Complete the fields. Each step has a unique value, and you can configure conditional logic for a specific step based on that value.
05 Remove Static Values
1. Select the multi-step container and click the Gear icon. The Settings screen opens.
2. Under Content, select the Static Values radio button and click the Edit Mapping button. The Configure Tabs screen opens.
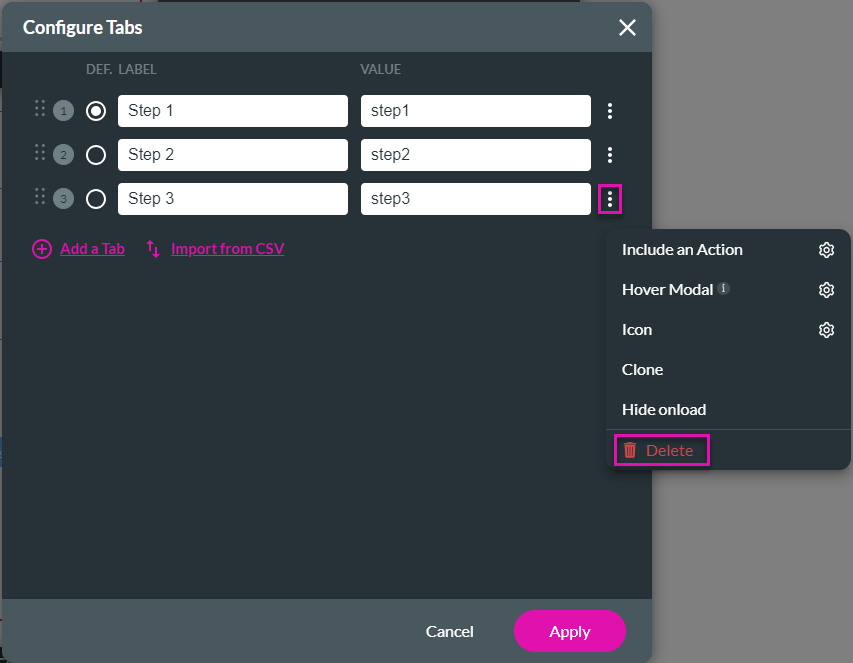
3. Click the Kebab icon next to the row you want to remove and click the Delete option.
2. Under Content, select the Static Values radio button and click the Edit Mapping button. The Configure Tabs screen opens.
3. Click the Kebab icon next to the row you want to remove and click the Delete option.
06 Add Dynamic Values
This process is the same for all the multi-step containers. You can get the values from Salesforce.
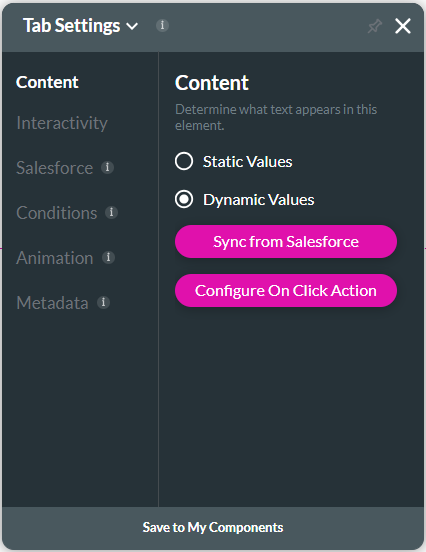
1. Select the multi-step container and click the Gear icon. The Settings screen opens.
2. Click the Dynamic Values radio button and click the Sync from Salesforce button.
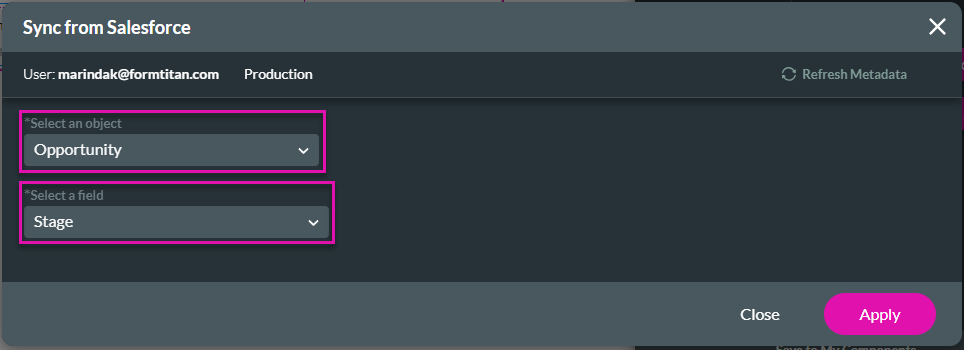
3. Use the drop-down lists to select the object and the field from Salesforce, such as the Stages on an Opportunity.
4. Click the Apply button.
1. Select the multi-step container and click the Gear icon. The Settings screen opens.
2. Click the Dynamic Values radio button and click the Sync from Salesforce button.
3. Use the drop-down lists to select the object and the field from Salesforce, such as the Stages on an Opportunity.
4. Click the Apply button.
07 Which Multi-Step Container Should You Use?
Tabs and accordion containers are for processes that are not linear. The user doesn't have to follow the process linearly.
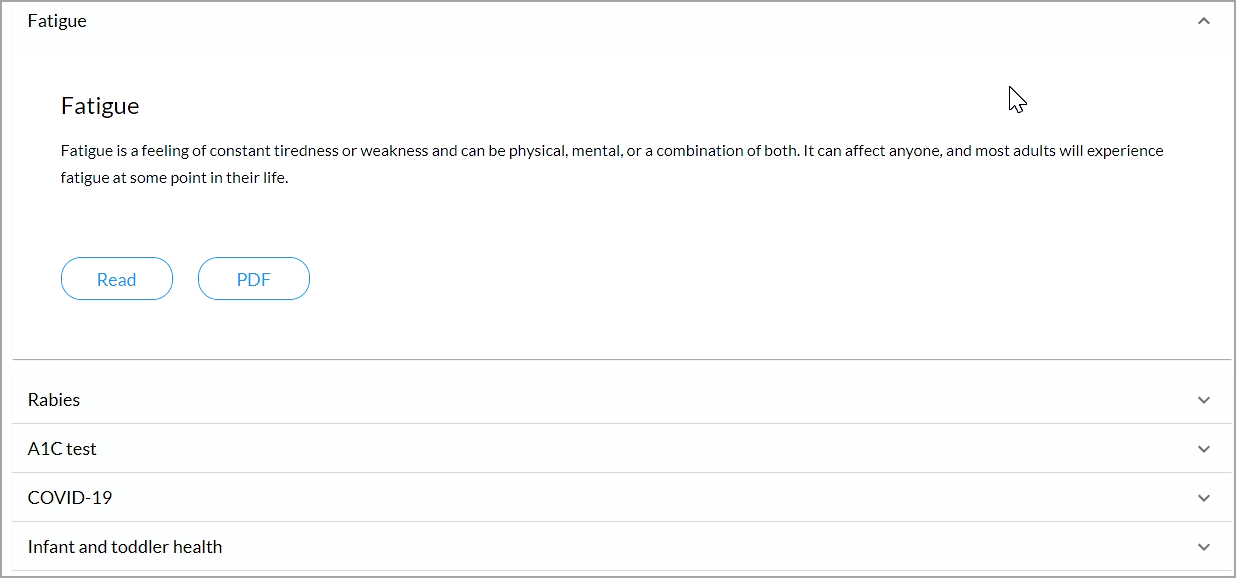
An accordion works well if you want to show different content, one option at a time.
There isn't any significant difference between the two multi-step containers; you can choose based on your UI/UX preference or business requirement.
Steppers and multi-step containers are typically used in linear processes, where the user must complete one step before proceeding to the next step.
Multi-step containers do not show the current step or the user's location in the process (unless you add a progress bar).

An example of where a stepper container was used is a scholarship application. The user has to complete the following steps:
The user can click on any option and in any order.
An accordion works well if you want to show different content, one option at a time.
There isn't any significant difference between the two multi-step containers; you can choose based on your UI/UX preference or business requirement.
Steppers and multi-step containers are typically used in linear processes, where the user must complete one step before proceeding to the next step.
Multi-step containers do not show the current step or the user's location in the process (unless you add a progress bar).
An example of where a stepper container was used is a scholarship application. The user has to complete the following steps:
- Start
- Head of household
- Address
- Questionnaire
- Student Information
- Income
- Household Members
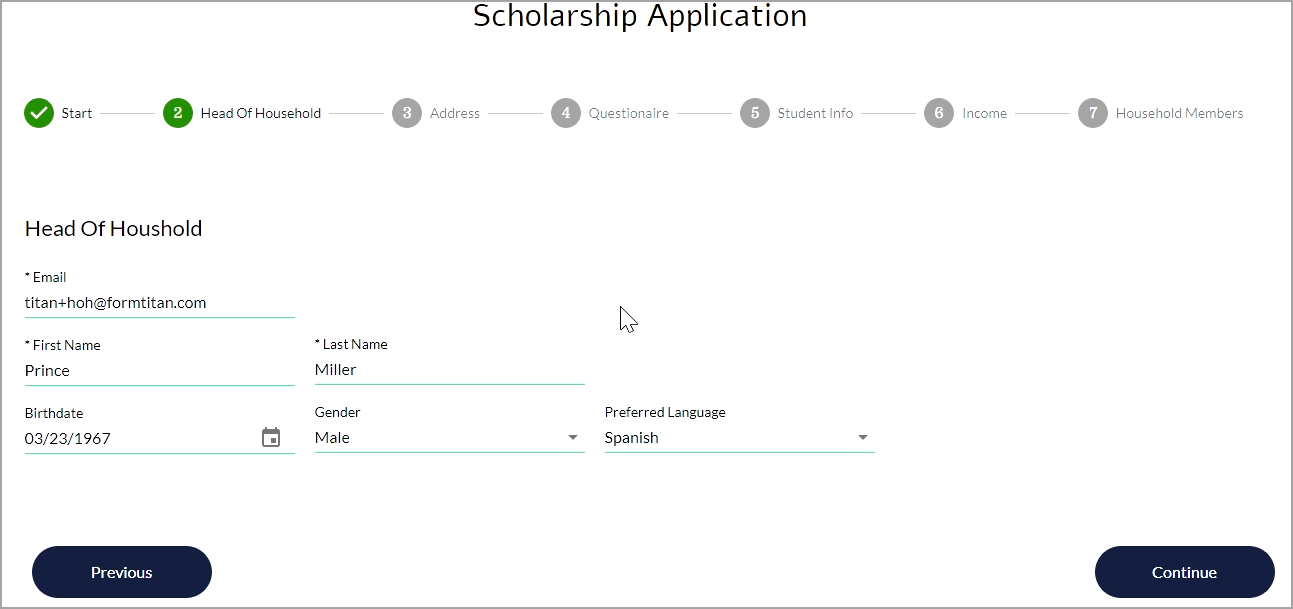
The user can click on any option and in any order.
08 Adding Mandatory Fields
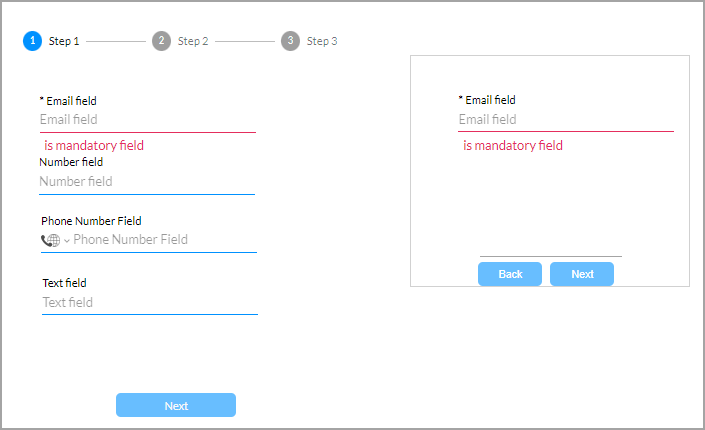
When you add mandatory field/s to a step, the user cannot continue to the next step without completing the mandatory field/s.
Note: This option is not available for the tab or accordion containers.
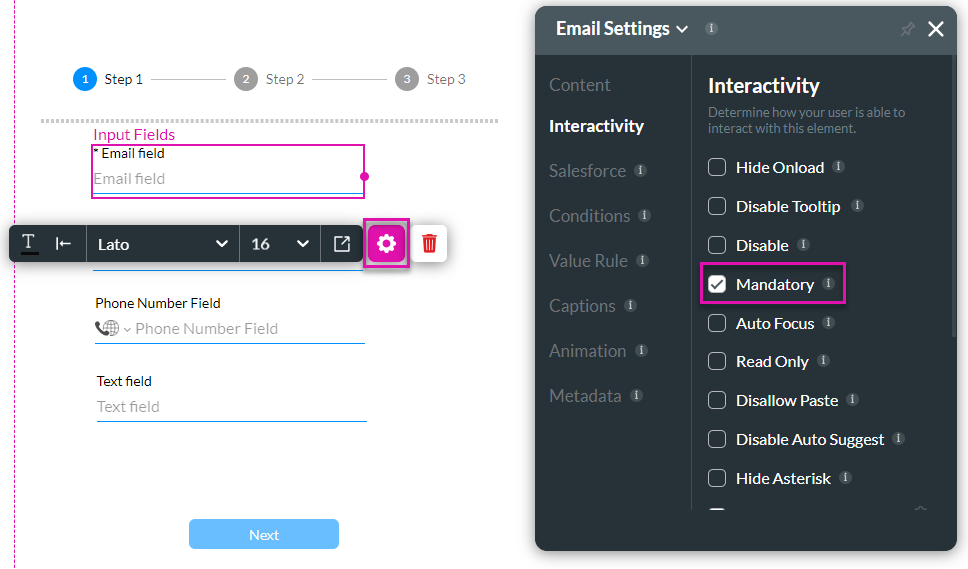
1. Select the element and click the Gear icon to open the Settings screen.
2. Under Interactivity, click the Mandatory checkbox.
3. Save and Preview the project.
If the user clicks the Next button but does not complete the mandatory field, a warning is displayed, and the user cannot proceed to the next step.
Note: This option is not available for the tab or accordion containers.
1. Select the element and click the Gear icon to open the Settings screen.
2. Under Interactivity, click the Mandatory checkbox.
3. Save and Preview the project.
If the user clicks the Next button but does not complete the mandatory field, a warning is displayed, and the user cannot proceed to the next step.
09 Changing Orientation
You can display the steps horizontally (default) or vertically.
1. Select the tab or stepper element and click the Gear icon to open the Settings screen.
2. Under Interactivity, click the Vertical checkbox. The tabs and steps are no longer displayed horizontally.
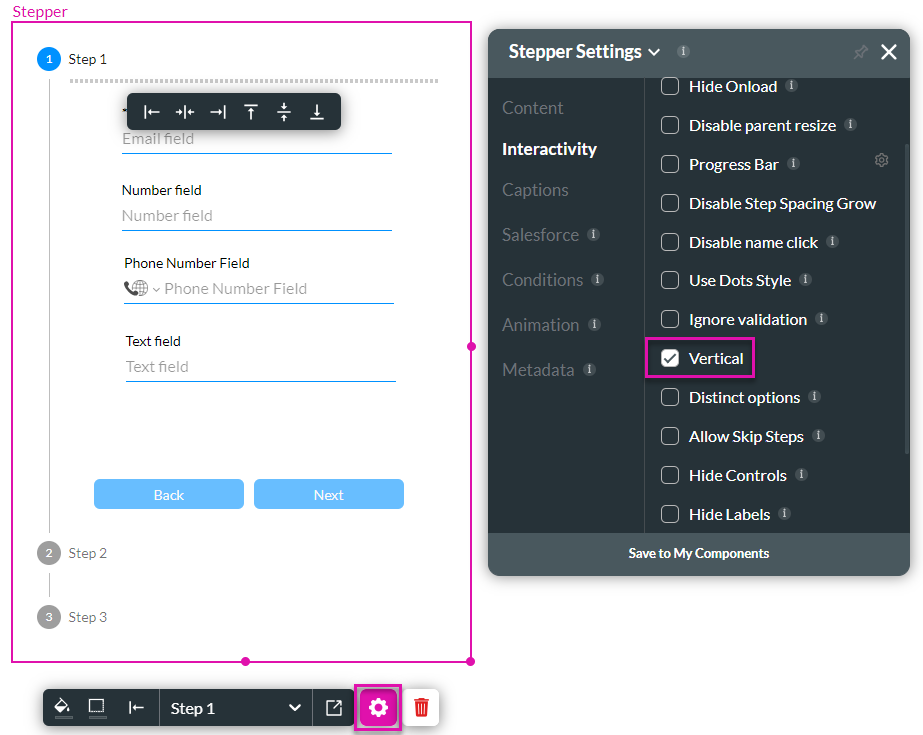
1. Select the tab or stepper element and click the Gear icon to open the Settings screen.
2. Under Interactivity, click the Vertical checkbox. The tabs and steps are no longer displayed horizontally.