Layout and Structure (8 min)
Completion requirements
01 Getting Started
This tutorial covers the structure and layout of the form element.
02 Insert a Form Element
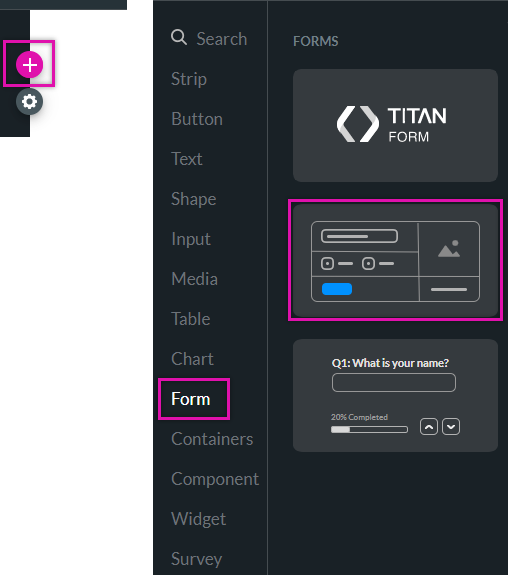
1. Click the + icon and select the Form tab. Drag and drop the form element onto the canvas. The Insert Form window pops up.
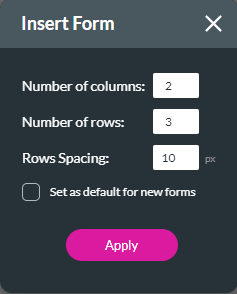
2. Use the fields to configure the number of columns, rows, and spacing between rows. You also have the option to use these settings as the default configuration for your form element.
2. Use the fields to configure the number of columns, rows, and spacing between rows. You also have the option to use these settings as the default configuration for your form element.
03 Adding Rows and Columns to Forms
You can also edit the form directly from the canvas to change the columns and rows.
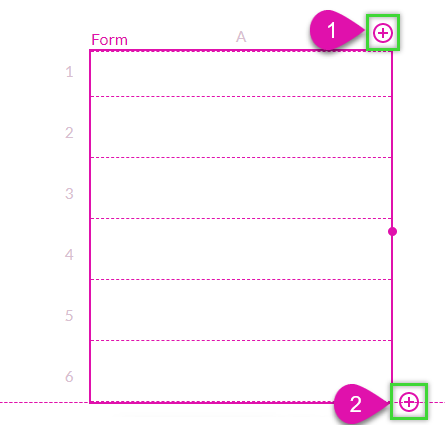
1. To add a column to your inserted form, click the + icon at the top. To add a row to the bottom of the form, click the + icon at the bottom.
2. To add a row in the middle of the form, hover over a row (while the form is selected) and click on the displayed kebab menu. You can choose to add rows before or after content from the sub-menu.
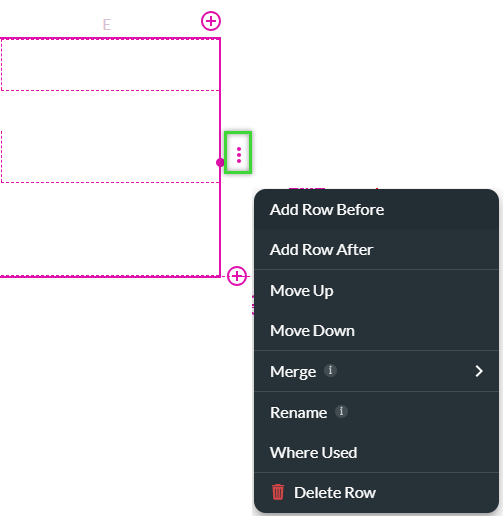
You can also delete rows; this deletes all content in the row.
1. To add a column to your inserted form, click the + icon at the top. To add a row to the bottom of the form, click the + icon at the bottom.
2. To add a row in the middle of the form, hover over a row (while the form is selected) and click on the displayed kebab menu. You can choose to add rows before or after content from the sub-menu.
You can also delete rows; this deletes all content in the row.
04 Merge Columns
You can choose to merge all content in a row.
1. Hover over the row you want to merge (while the form is selected) and click on the displayed kebab menu.
2. Select the merge option from the submenu and choose your merge option.
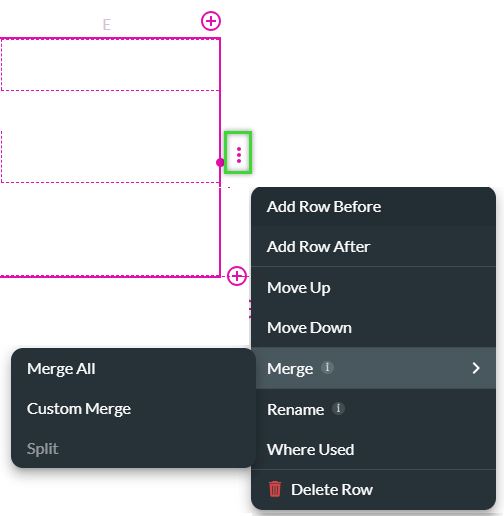
To merge all cells in that row into one cell, select Merge All. All cells from that row will be merged.
To customize your cells, select the Custom Merge option. The Merge Form Cells window opens. Use this window to group your cells. Click Apply.
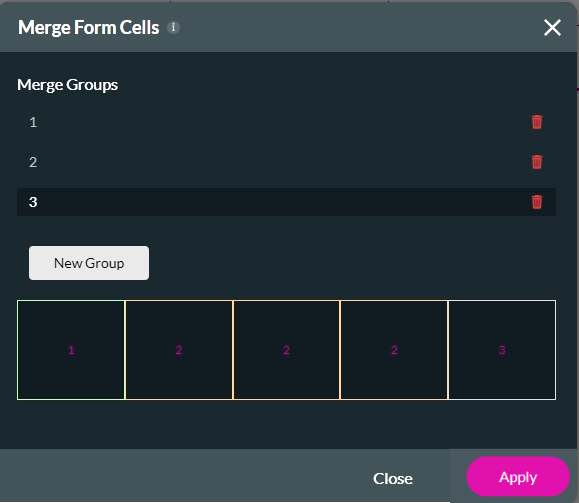
Custom merging is applied to your form.

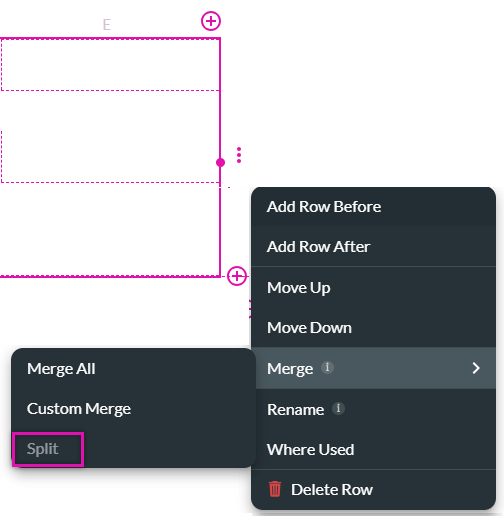
To undo merging. Select Split from the Merge sub-menu.
1. Hover over the row you want to merge (while the form is selected) and click on the displayed kebab menu.
2. Select the merge option from the submenu and choose your merge option.
To merge all cells in that row into one cell, select Merge All. All cells from that row will be merged.
To customize your cells, select the Custom Merge option. The Merge Form Cells window opens. Use this window to group your cells. Click Apply.
Custom merging is applied to your form.
To undo merging. Select Split from the Merge sub-menu.
05 Align and Space Elements
Aligning elements within Cells
1. Select the element and select the alignment icon.
2. Choose how the button should be aligned from the left, right, or centered options.
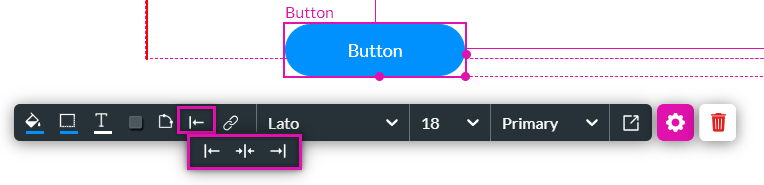
Note: you cannot drag the element to the new position. You must use the alignment options.
Adding Spacing
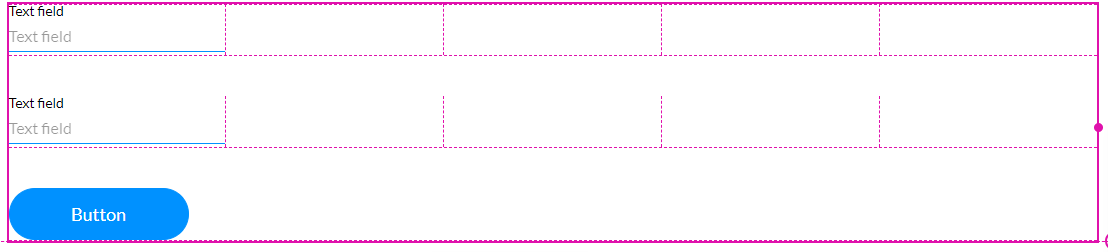
Without adding row spacing, elements inserted into a form can appear cramped.
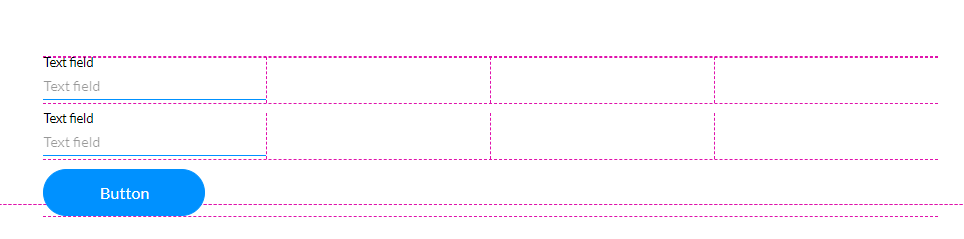
Add some padding between these elements to better space them out.
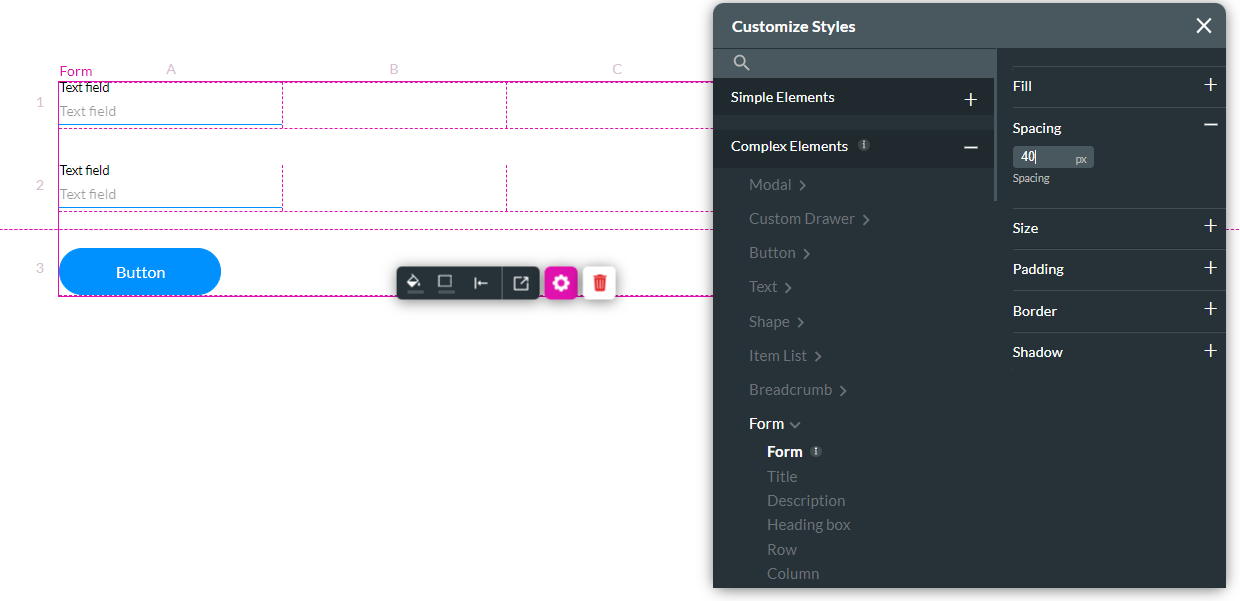
1. Click the Project drop-down, select Style, and click Configure from the sub-menu. The customize styles window opens.
2. Click the Spacing drop-down and insert row spacing. The spacing is automatically applied to the form element.
1. Select the element and select the alignment icon.
2. Choose how the button should be aligned from the left, right, or centered options.
Note: you cannot drag the element to the new position. You must use the alignment options.
Adding Spacing
Without adding row spacing, elements inserted into a form can appear cramped.
Add some padding between these elements to better space them out.
1. Click the Project drop-down, select Style, and click Configure from the sub-menu. The customize styles window opens.
2. Click the Spacing drop-down and insert row spacing. The spacing is automatically applied to the form element.
06 Name Rows
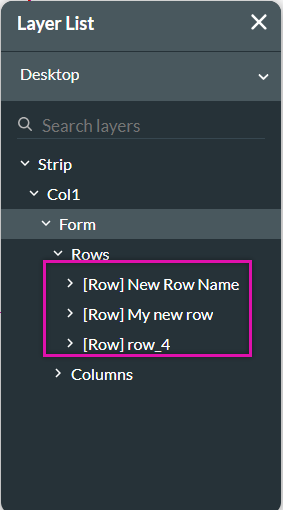
You can name each row of your form. This is important when writing conditions as it can help you easily track which row the condition is applied to.
1. To rename a row, hover over the row and click on the displayed kebab menu. Select the rename option. The Rename Row window opens.

2. Type in the new row name and click the check icon.

The row names will be reflected in the project layer list.
1. To rename a row, hover over the row and click on the displayed kebab menu. Select the rename option. The Rename Row window opens.
2. Type in the new row name and click the check icon.
The row names will be reflected in the project layer list.
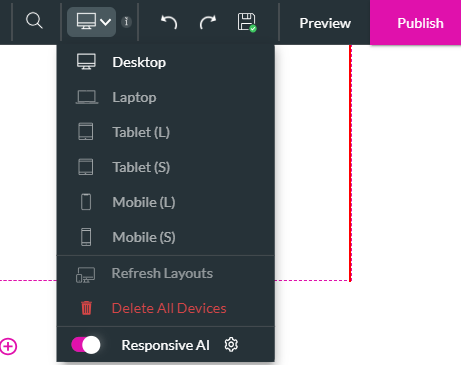
07 How the Form Displays on Different Devices
Devices with smaller screen real estate, such as mobile devices, sometimes don’t support multiple columns.
1. Click the device drop-down and select the Mobile (S) option to preview how the form will display on smaller screens.
The multiple columns and rows of the form have been formatted into a single column.
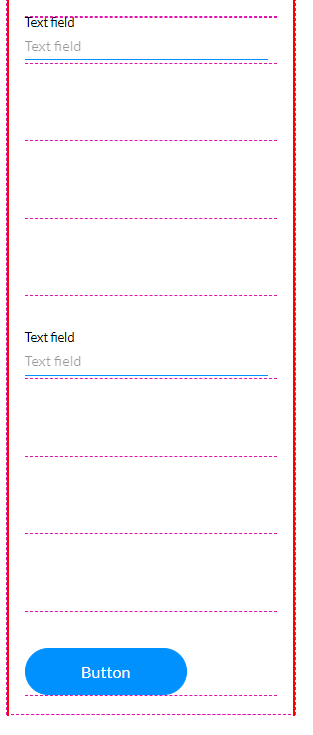
To display elements horizontally, you can use an autofit container. This will be covered in a later lesson.
1. Click the device drop-down and select the Mobile (S) option to preview how the form will display on smaller screens.
The multiple columns and rows of the form have been formatted into a single column.
To display elements horizontally, you can use an autofit container. This will be covered in a later lesson.