Date and Time Fields (8 min)
Completion requirements
01 Getting Started
This tutorial covers the date and time field elements.
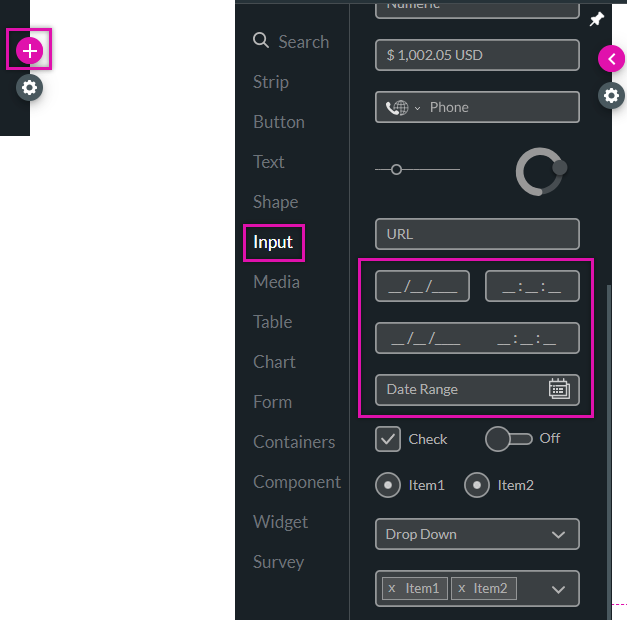
02 Finding the Date and Time Input Fields
1. Click the + icon to expand the element menu.
2. Click on the Input field.
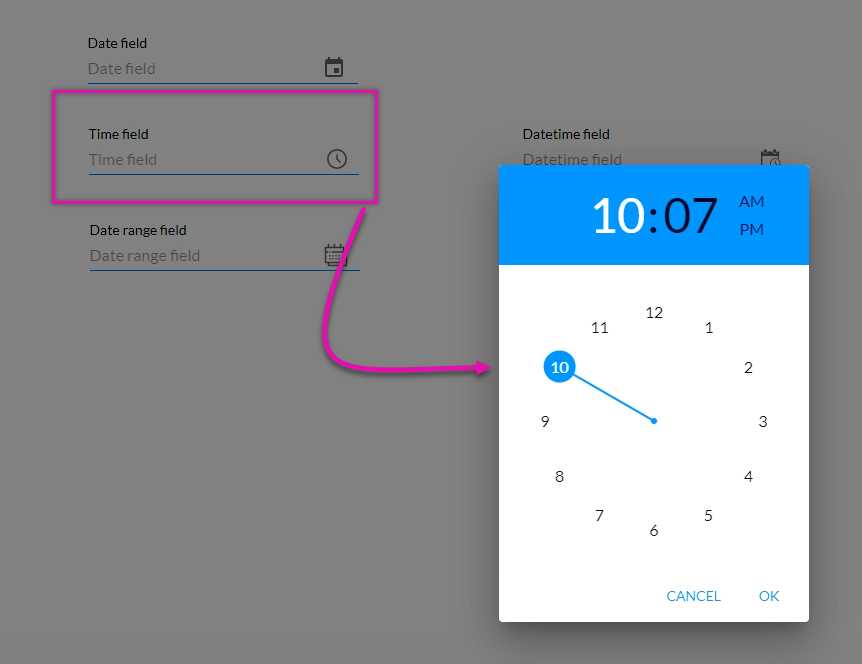
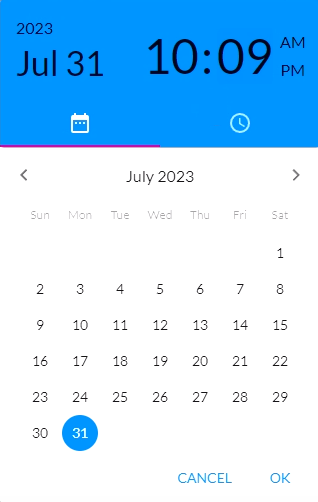
Each field has a picker or modal that displays when the user interacts with it. For example, a clock modal displays when inputting time:
2. Click on the Input field.
Each field has a picker or modal that displays when the user interacts with it. For example, a clock modal displays when inputting time:
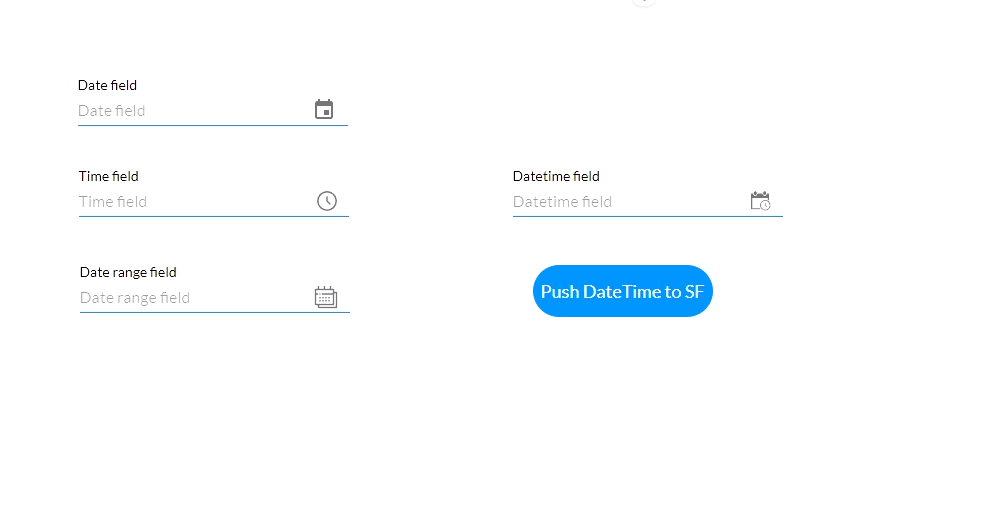
03 Pushing Date Fields to Salesforce
To demonstrate how the date and time field is captured in Salesforce:
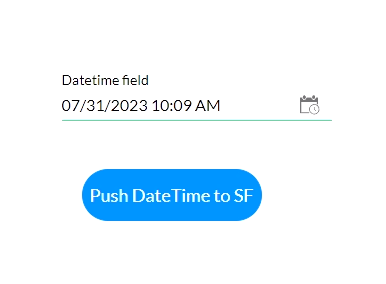
Save and Preview. Select the date and time field and provide an input.
Click the Debug button. The date and time captured reflect the input.
Navigate back to preview mode and click the configured button. This will push the captured data to Salesforce.
To view the captured data in Salesforce:
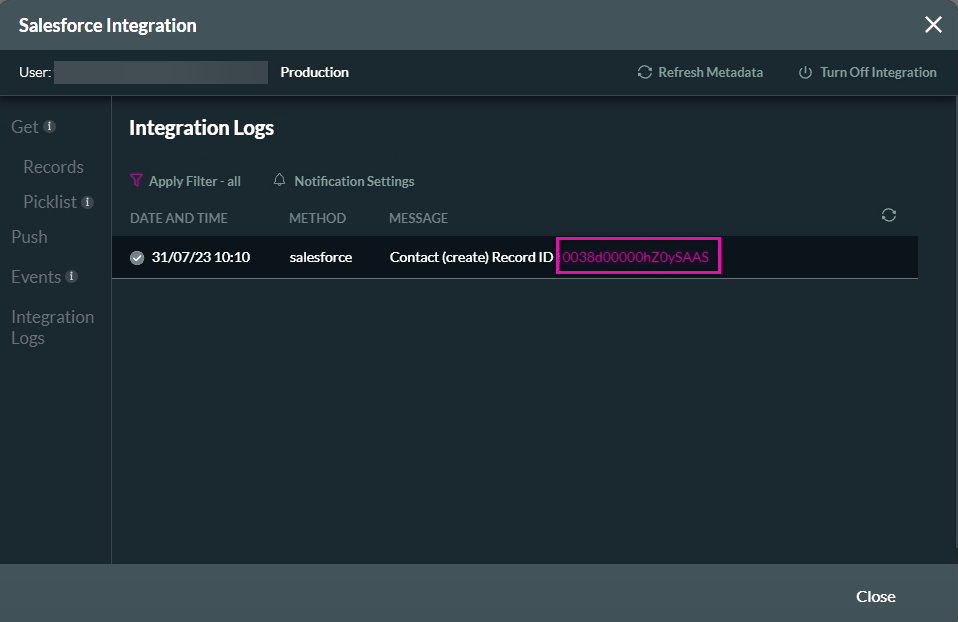
1. Click the pink hyperlink to the Salesforce integration logs screen. The Salesforce window opens.
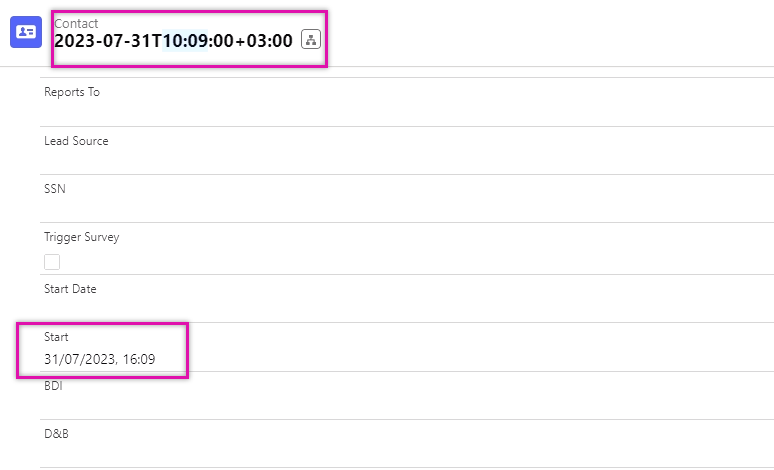
How the date and time are captured depends on your time zone settings.
- A date-time element was added to the canvas.
- A button was inserted into the project.
- A Salesforce push action was configured and assigned to the button.
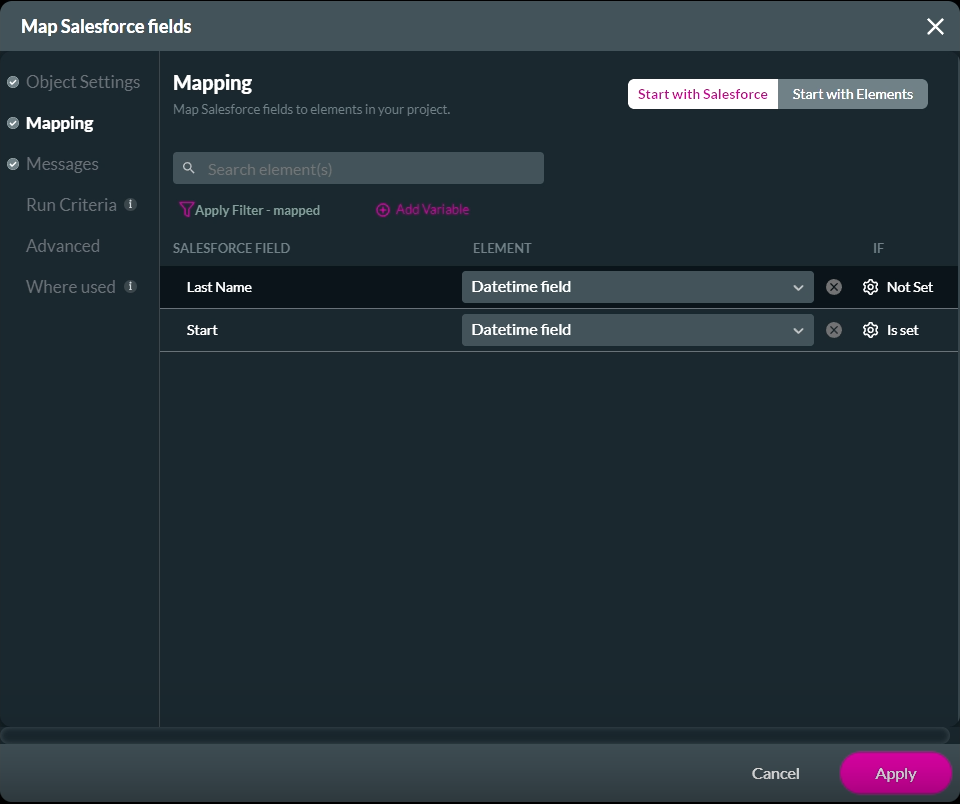
- The following mapping was configured:
- If the date/time field is mapped to a date/time Salesforce field, the universal time zone is pushed to Salesforce.
- If the date/time field is mapped to a text field, such as the last name, the data captured will reflect the user's time zone.
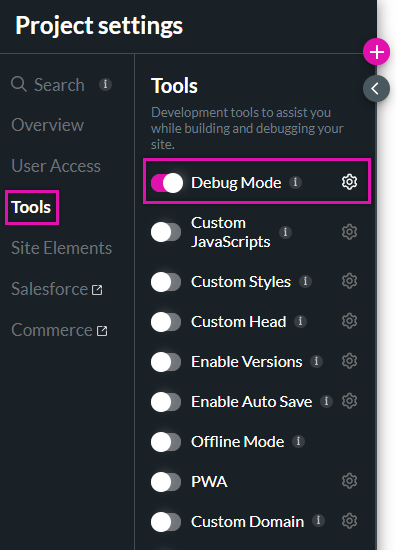
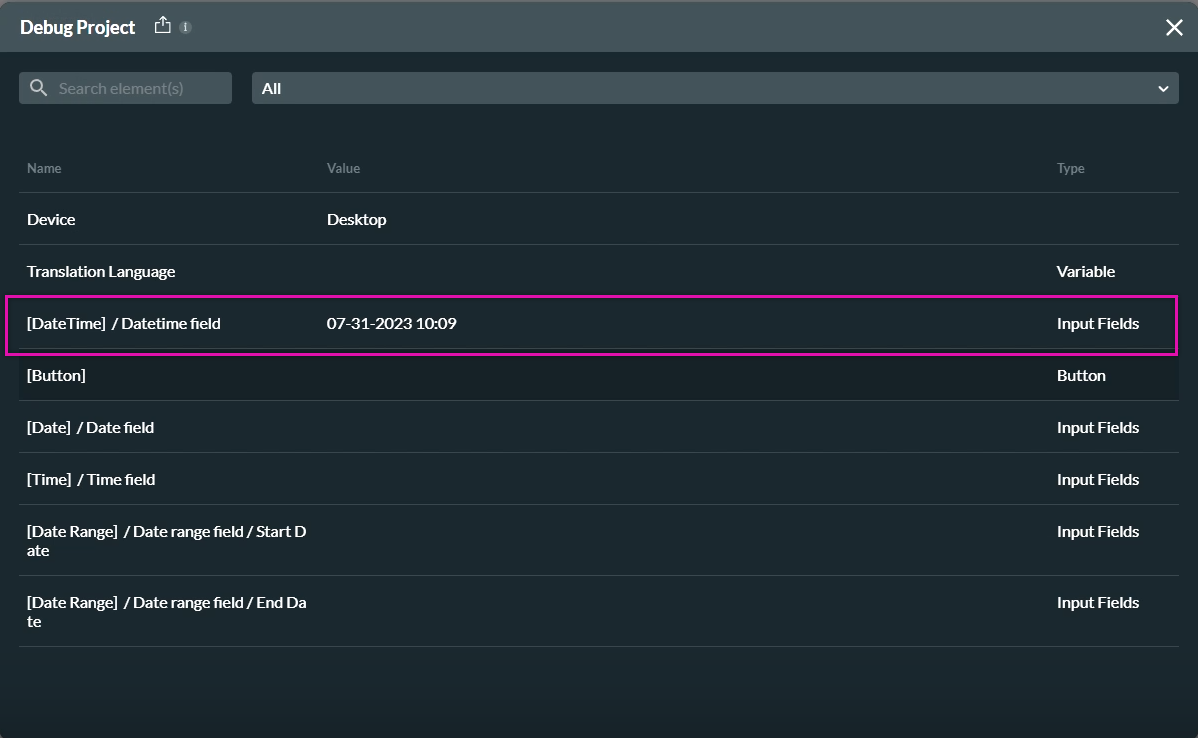
- Debug mode was enabled to demonstrate how the data is captured:
Save and Preview. Select the date and time field and provide an input.
Click the Debug button. The date and time captured reflect the input.
Navigate back to preview mode and click the configured button. This will push the captured data to Salesforce.
To view the captured data in Salesforce:
1. Click the pink hyperlink to the Salesforce integration logs screen. The Salesforce window opens.
How the date and time are captured depends on your time zone settings.
- The first date entry matches what the user provided.
- The second entry was adjusted to match the time zone selected in Salesforce.
04 Date Time Content Settings
We have used the DateTime input field as the example, as this element contains content options for both date and time elements.
- You can choose to configure the date and time format.
- Configure a default value.
- Enable the Use Current Date and Time function to automatically capture the user's current date and time.

05 Date Range Content Settings
When working with the date range field, you can:
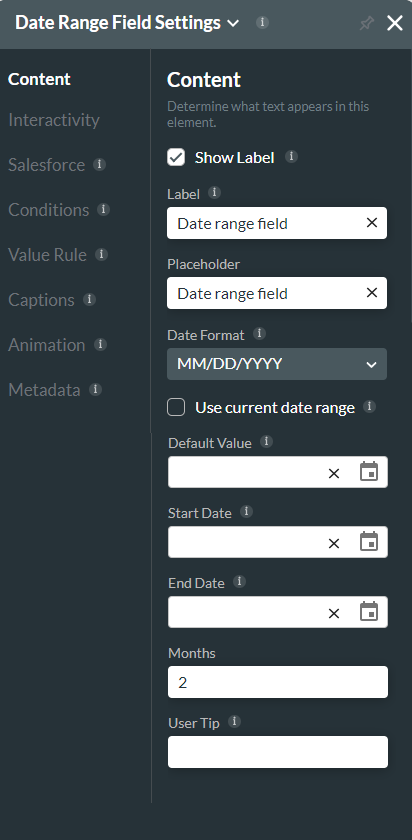
- Choose the date format.
- Choose whether the current date is automatically selected.
- Set a date value.
- Configure the start and end date of the range.
- Limit how many months users can choose from.
06 Interactivity Settings
You can set a default locale to display the calendar details in a specific locale.
1. Click on the Interactivity tab.
2. Use the Default Locale dropdown to select the country default.
To automatically display the user’s locale:
1. Enable the Auto Detect Locale feature.
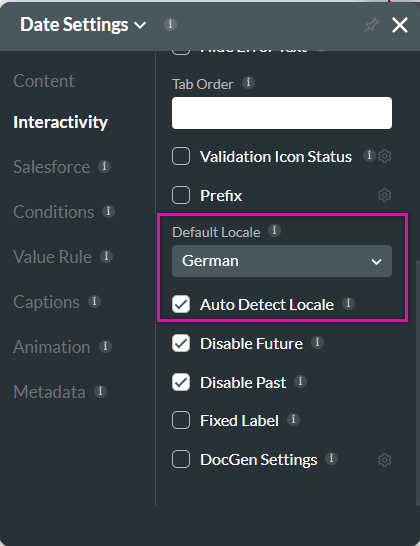
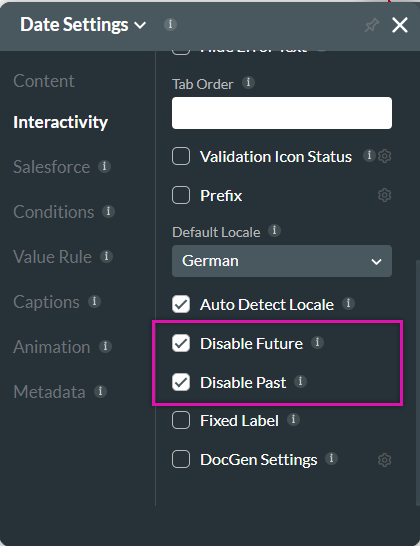
Users can scroll back and forth between calendar months when they input a date. You can restrict whether users can move through the months by using the Disable Future and Disable Past functions.
1. Click on the Interactivity tab.
2. Use the Default Locale dropdown to select the country default.
To automatically display the user’s locale:
1. Enable the Auto Detect Locale feature.
Users can scroll back and forth between calendar months when they input a date. You can restrict whether users can move through the months by using the Disable Future and Disable Past functions.