Basic Input Fields (10 min)
Completion requirements
01 Getting Started
In this lesson, we will examine some basic input fields in Titan Web and briefly overview their differences. We will then discuss in more detail the built-in validations on some fields, the formatting of the fields, and the field limits used to guide users.
02 The Set Up
For this project, we have added input fields as follows:
1. Click the + icon and click the Input option.
2. Drag and drop the elements on the canvas.
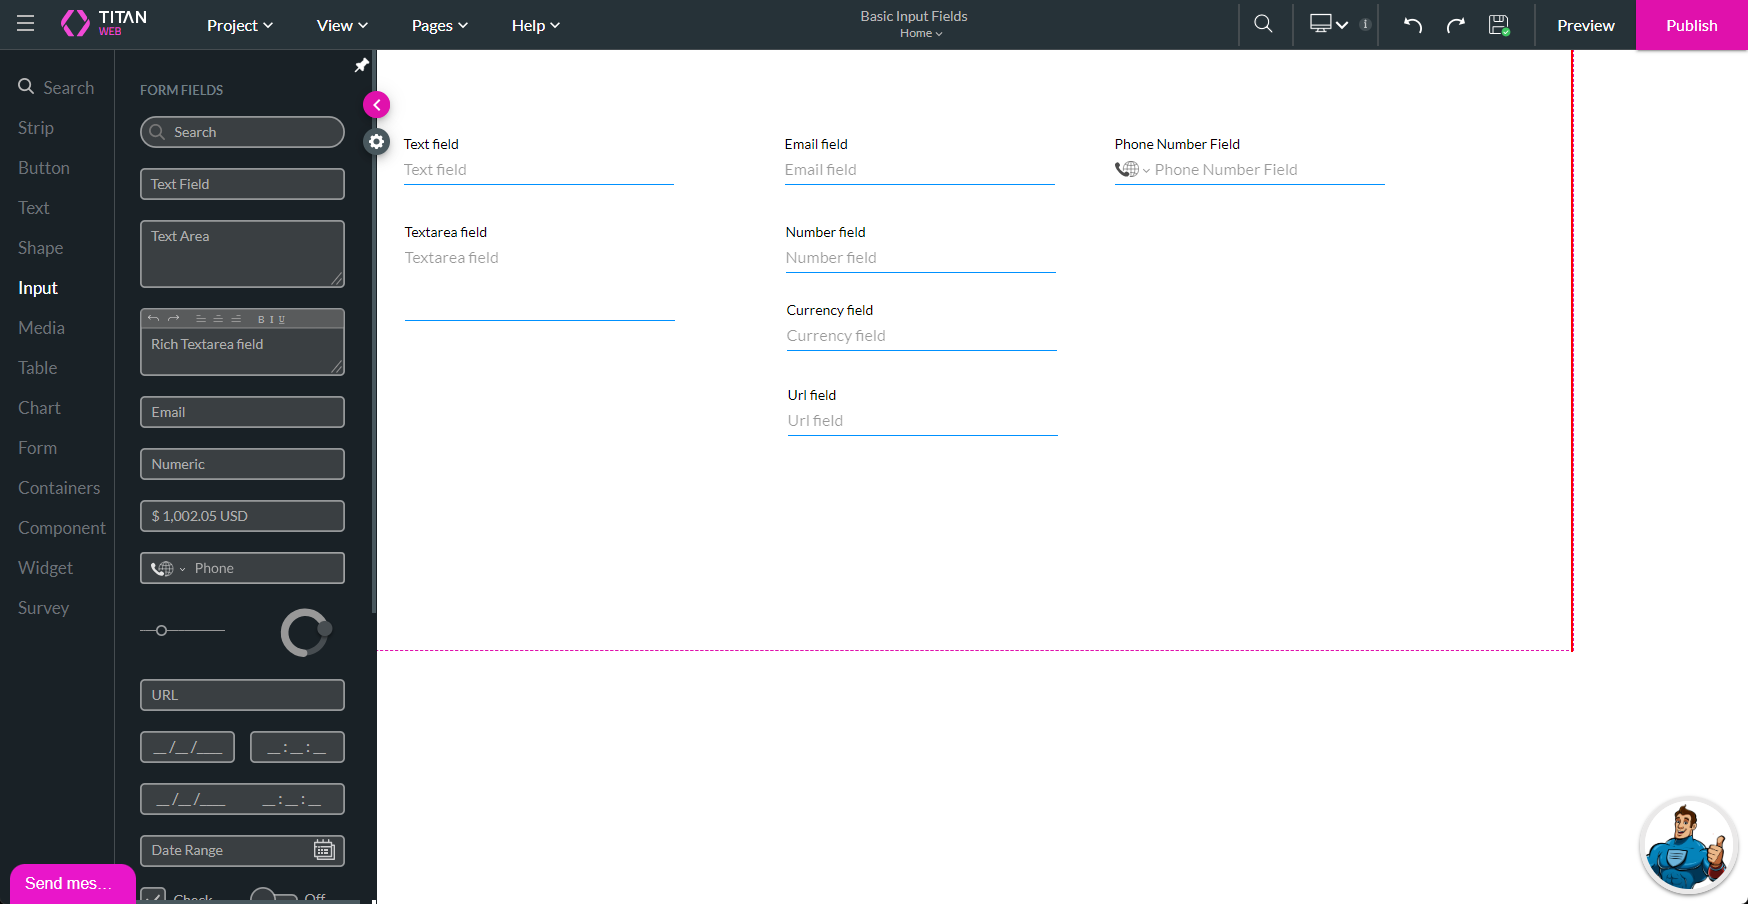
The main differences between these fields are the following:
Use different field types to ensure that the fields the end-user sees look different.
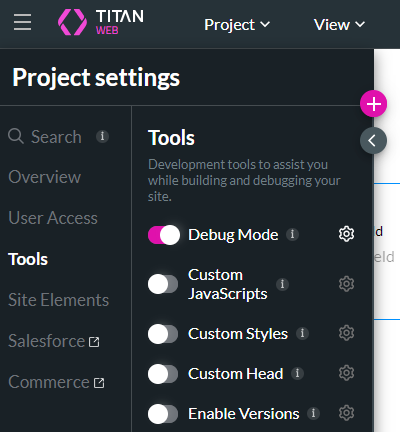
The Debug Mode is on.
1. Click the + icon and click the Input option.
2. Drag and drop the elements on the canvas.
The main differences between these fields are the following:
- Validations
- Formats
- Limitations for the end-user
Use different field types to ensure that the fields the end-user sees look different.
The Debug Mode is on.
03 Built-in Validations
1. Save and preview the project.
2. Start typing in the email field. A validation is shown if the input does not look like an email address. This is a built-in validation.
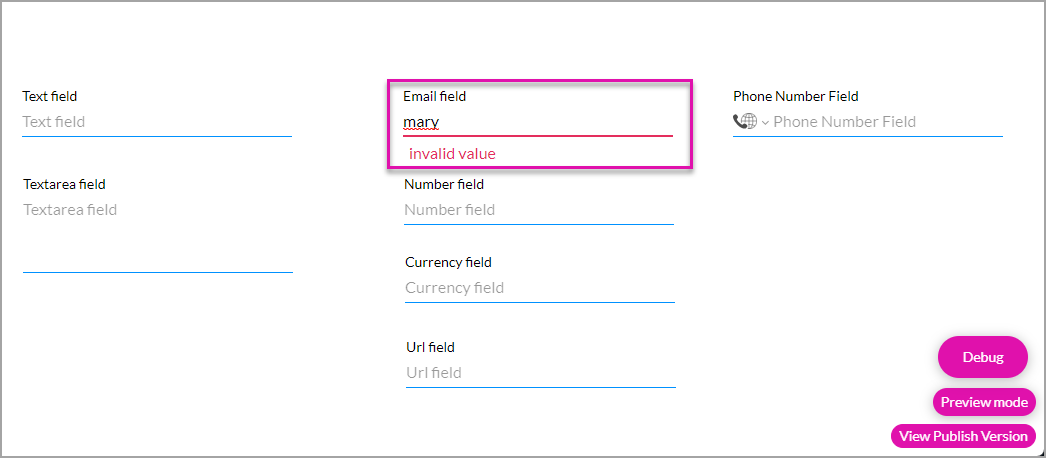
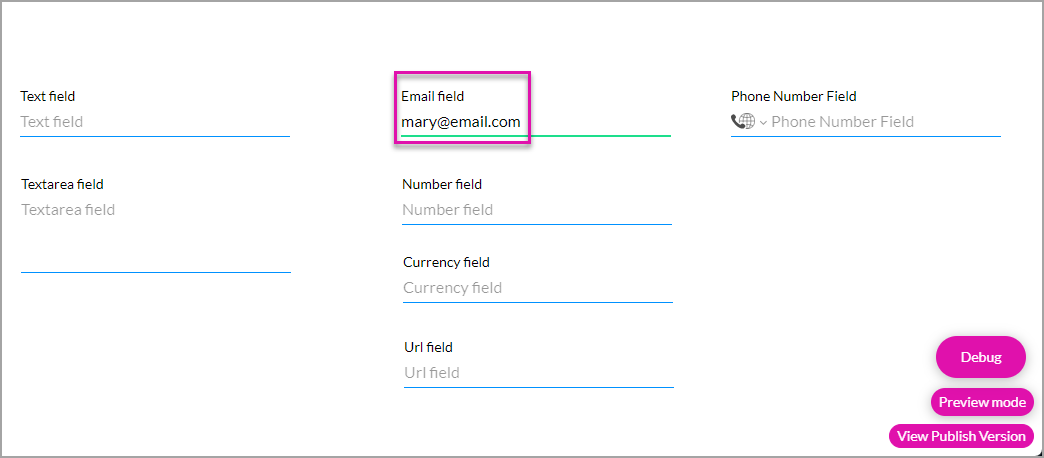
3. Type a valid email address that contains an @ sign and a full stop followed by at least one letter. The value is now accepted.
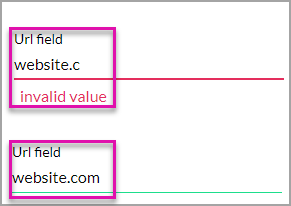
4. Type an incomplete website URL to see the validation.
5. Type a complete URL that contains a full stop followed by at least two letters, and you will see that the line changes from red to green as the input is now valid.
2. Start typing in the email field. A validation is shown if the input does not look like an email address. This is a built-in validation.
3. Type a valid email address that contains an @ sign and a full stop followed by at least one letter. The value is now accepted.
4. Type an incomplete website URL to see the validation.
5. Type a complete URL that contains a full stop followed by at least two letters, and you will see that the line changes from red to green as the input is now valid.
04 Formatting
Some fields have built-in formats that can be changed.
05 Select the Number Formatting
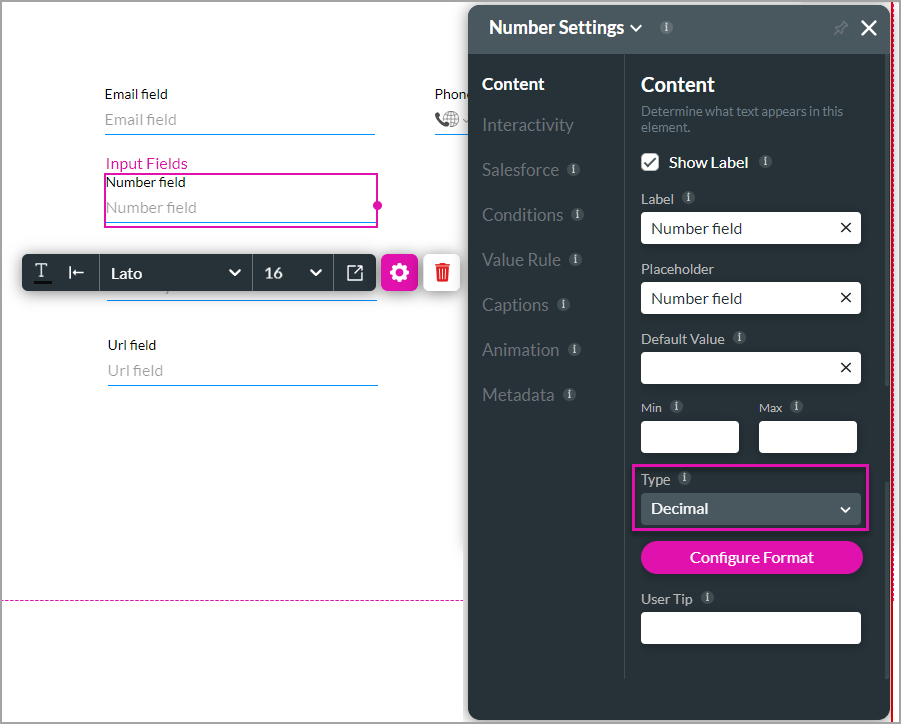
1. Select the number input field and click the Gear icon to open the Settings screen.
2. Scroll down to the Type drop-down list. The following options can be selected:
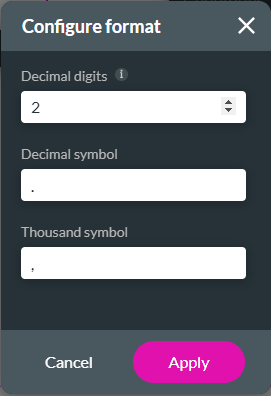
4. Use the Decimal digits drop-down list to select the number of digits after the decimal symbol. The default is 2.
5. Type the Decimal symbol in the field. The default is a full stop.
6. Type the thousand symbol in the field. The default is a comma.
7. Click the Apply button.
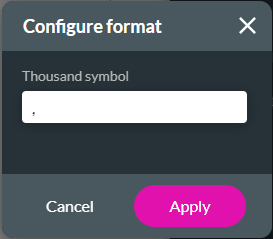
8. Select the Integer option and click the Configure Format button.
9. Type the thousand symbol in the field. The default is a comma.
10. Click the Apply button.
2. Scroll down to the Type drop-down list. The following options can be selected:
- Decimal (default option)
- Integer
4. Use the Decimal digits drop-down list to select the number of digits after the decimal symbol. The default is 2.
5. Type the Decimal symbol in the field. The default is a full stop.
6. Type the thousand symbol in the field. The default is a comma.
7. Click the Apply button.
8. Select the Integer option and click the Configure Format button.
9. Type the thousand symbol in the field. The default is a comma.
10. Click the Apply button.
06 Select the Currency Formatting
1. Select the currency input field and click the Gear icon to open the Settings screen.
2. Use the Format drop-down list to select an option. The following options are available:
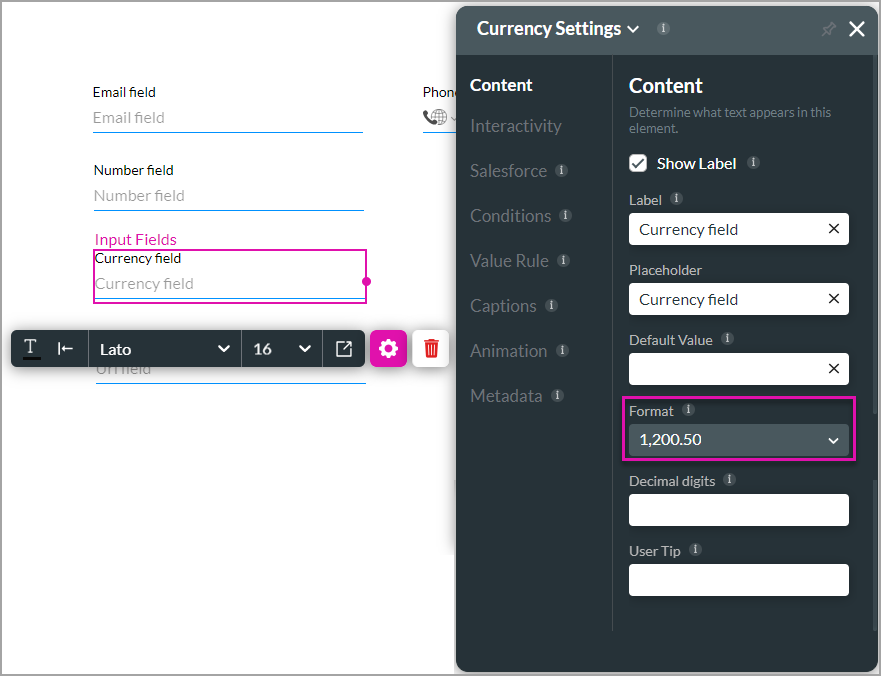
2. Use the Format drop-down list to select an option. The following options are available:
- 1,200.50
- 1.200,50
- 1 200.50
07 Limitations
The end-user is limited to a single line of text in the text element but can add multiple lines in the text area element.
Some input fields, such as the number and currency fields, are limited to numeric characters. An end-user cannot add letters or special characters to these fields.
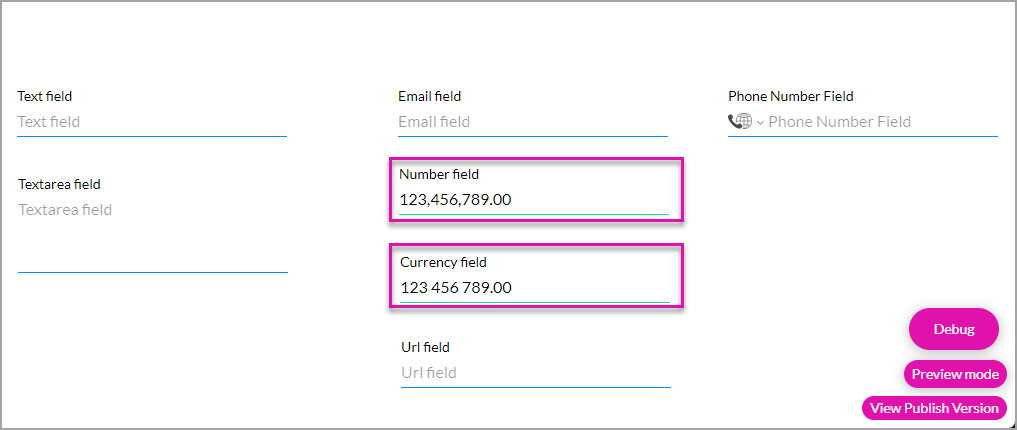
The numbers are displayed in the configured format.
Some input fields, such as the number and currency fields, are limited to numeric characters. An end-user cannot add letters or special characters to these fields.
The numbers are displayed in the configured format.
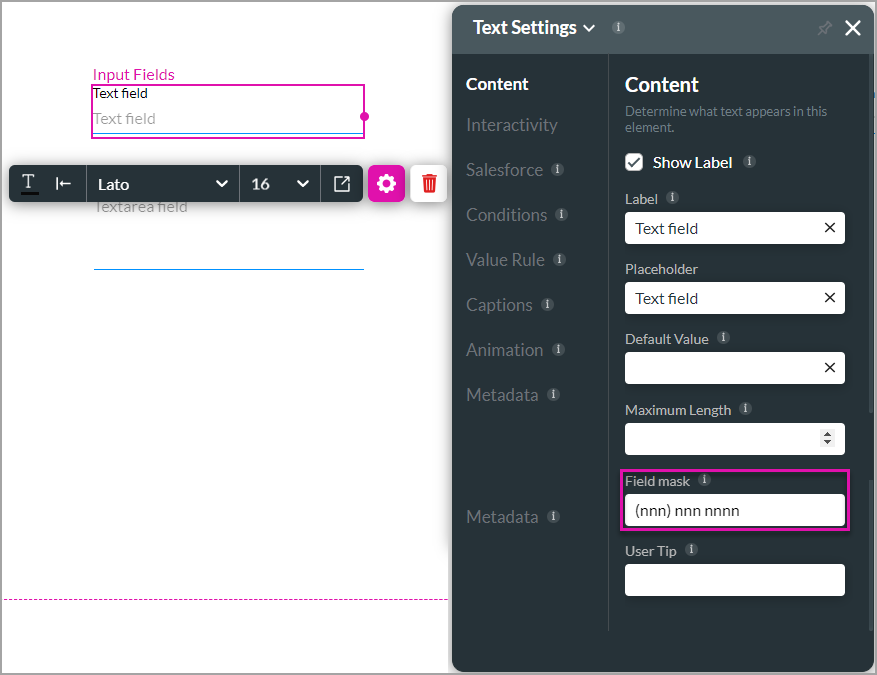
08 Use a Field Mask
The field mask can force formatting on an element.
1. Select the text field element and click the Gear icon to open the Settings screen.
2. Add a field mask to the field, for instance, (nnn) nnn-nnnn. The user can only add a numeric value in this format.
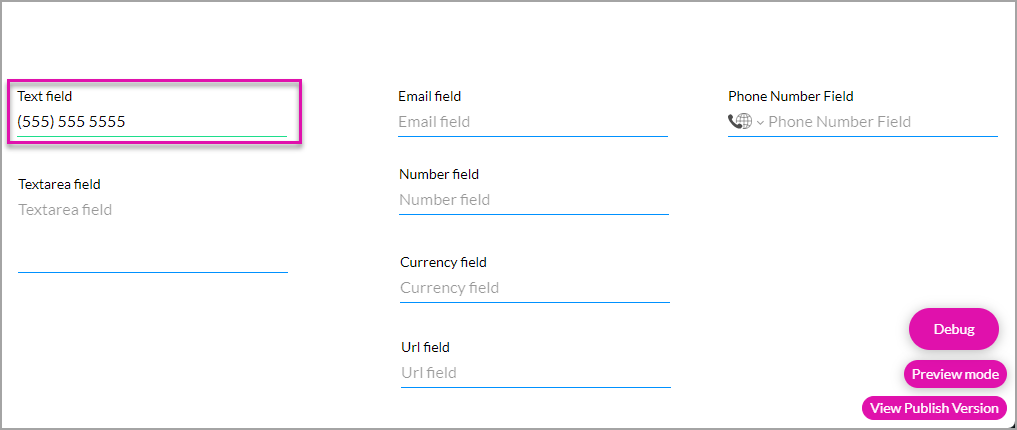
3. Save and preview the project.
The end-user cannot type letters, or special characters and numbers will be displayed in the format set up. Only ten numbers can be added in this example.
1. Select the text field element and click the Gear icon to open the Settings screen.
2. Add a field mask to the field, for instance, (nnn) nnn-nnnn. The user can only add a numeric value in this format.
3. Save and preview the project.
The end-user cannot type letters, or special characters and numbers will be displayed in the format set up. Only ten numbers can be added in this example.
09 Phone Field - Formats and Limitations
If you didn’t select a Default Country…
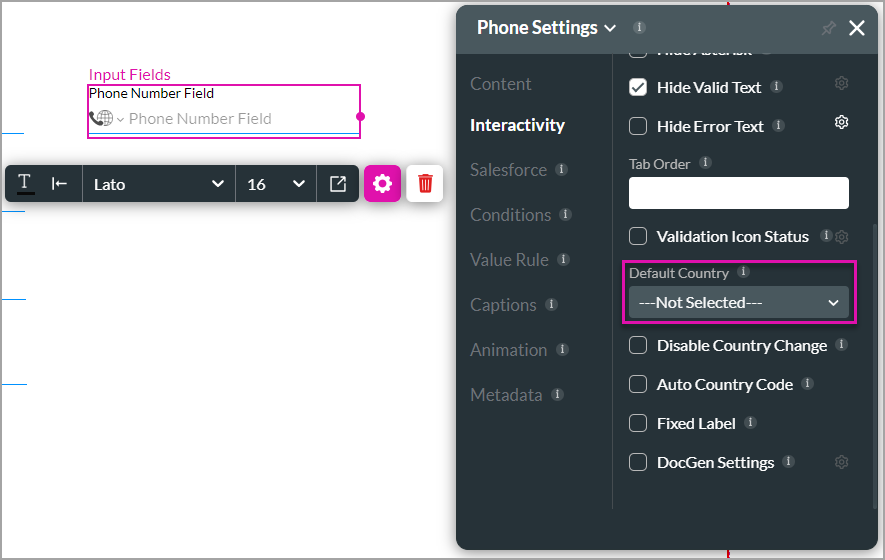
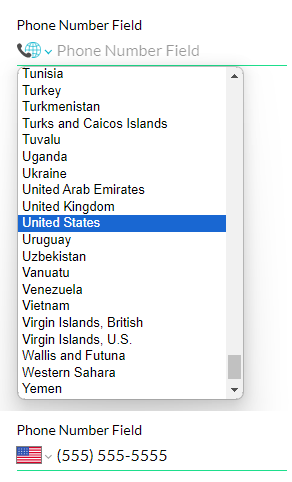
… the user can select a country from the drop-down list on the phone number element. In this example, the United States phone number formatting will be applied automatically, and the country code will be automatically added.
1. Click the Debug button on the webpage.
2. Scroll to the Phone Number Field to see its full value, including the country code.
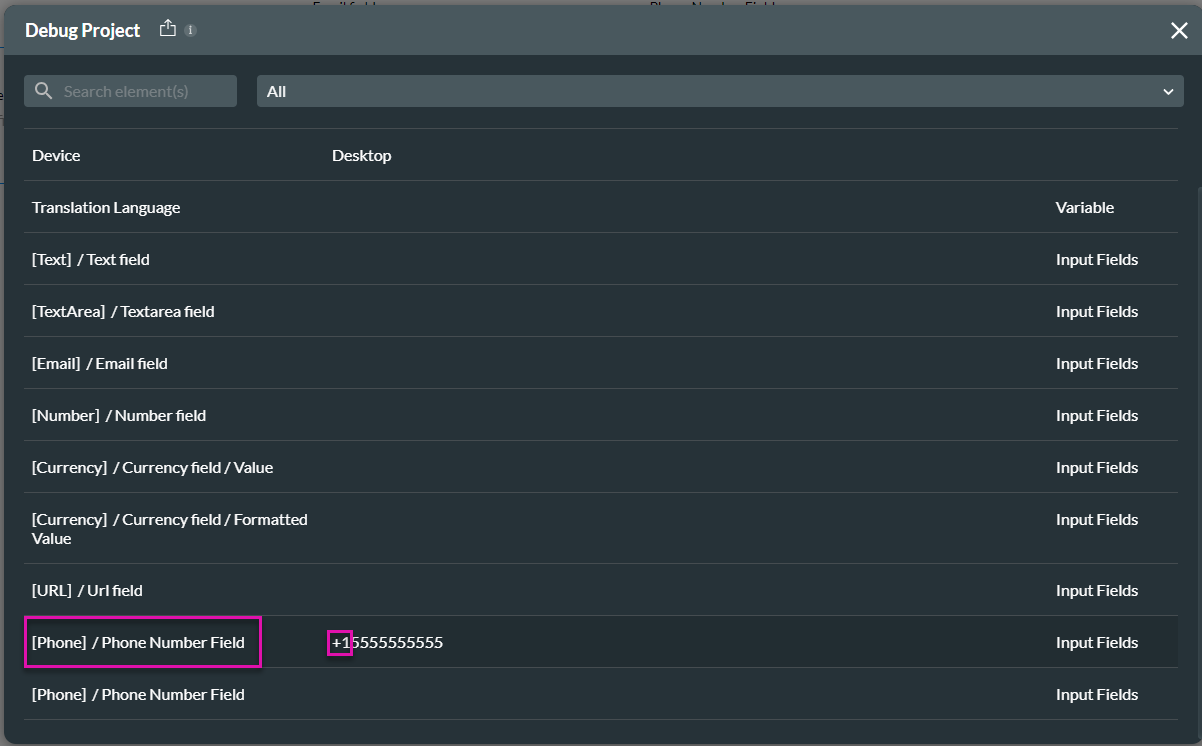
3. Close the Debug Project screen.
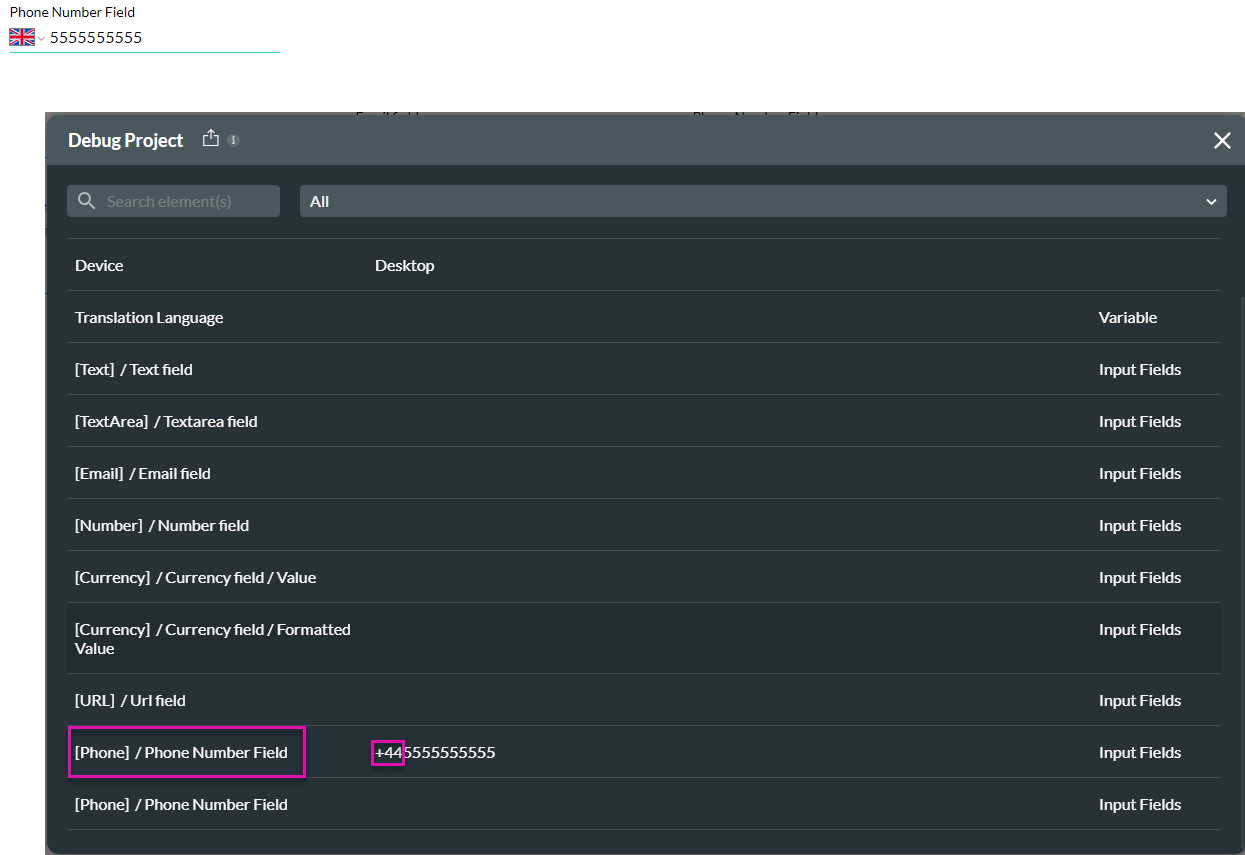
4. Use the drop-down list to change the country. The US formatting is no longer used.
5. Click the Debug button. You will see that the country code has changed.
6. Go back to the Titan Web project.
7. Use the following Interactivity options:
… the user can select a country from the drop-down list on the phone number element. In this example, the United States phone number formatting will be applied automatically, and the country code will be automatically added.
1. Click the Debug button on the webpage.
2. Scroll to the Phone Number Field to see its full value, including the country code.
3. Close the Debug Project screen.
4. Use the drop-down list to change the country. The US formatting is no longer used.
5. Click the Debug button. You will see that the country code has changed.
6. Go back to the Titan Web project.
7. Use the following Interactivity options:
- You can select a default country from the drop-down list. When the webpage opens, the default country will be shown.
- Click the Disable Country Change checkbox. The user will not be able to change the default country. In other words, the drop-down list will be disabled.
- Click the Auto Country Code to show the country according to the browser. The country code is added automatically.