Optimization (11 min)
Completion requirements
01 Getting Started
This tutorial covers optimization. This tutorial covers two optimizing areas:
- Retrieving data from Salesforce.
- Conditions set on projects.
02 Integrations that Occur during Onload
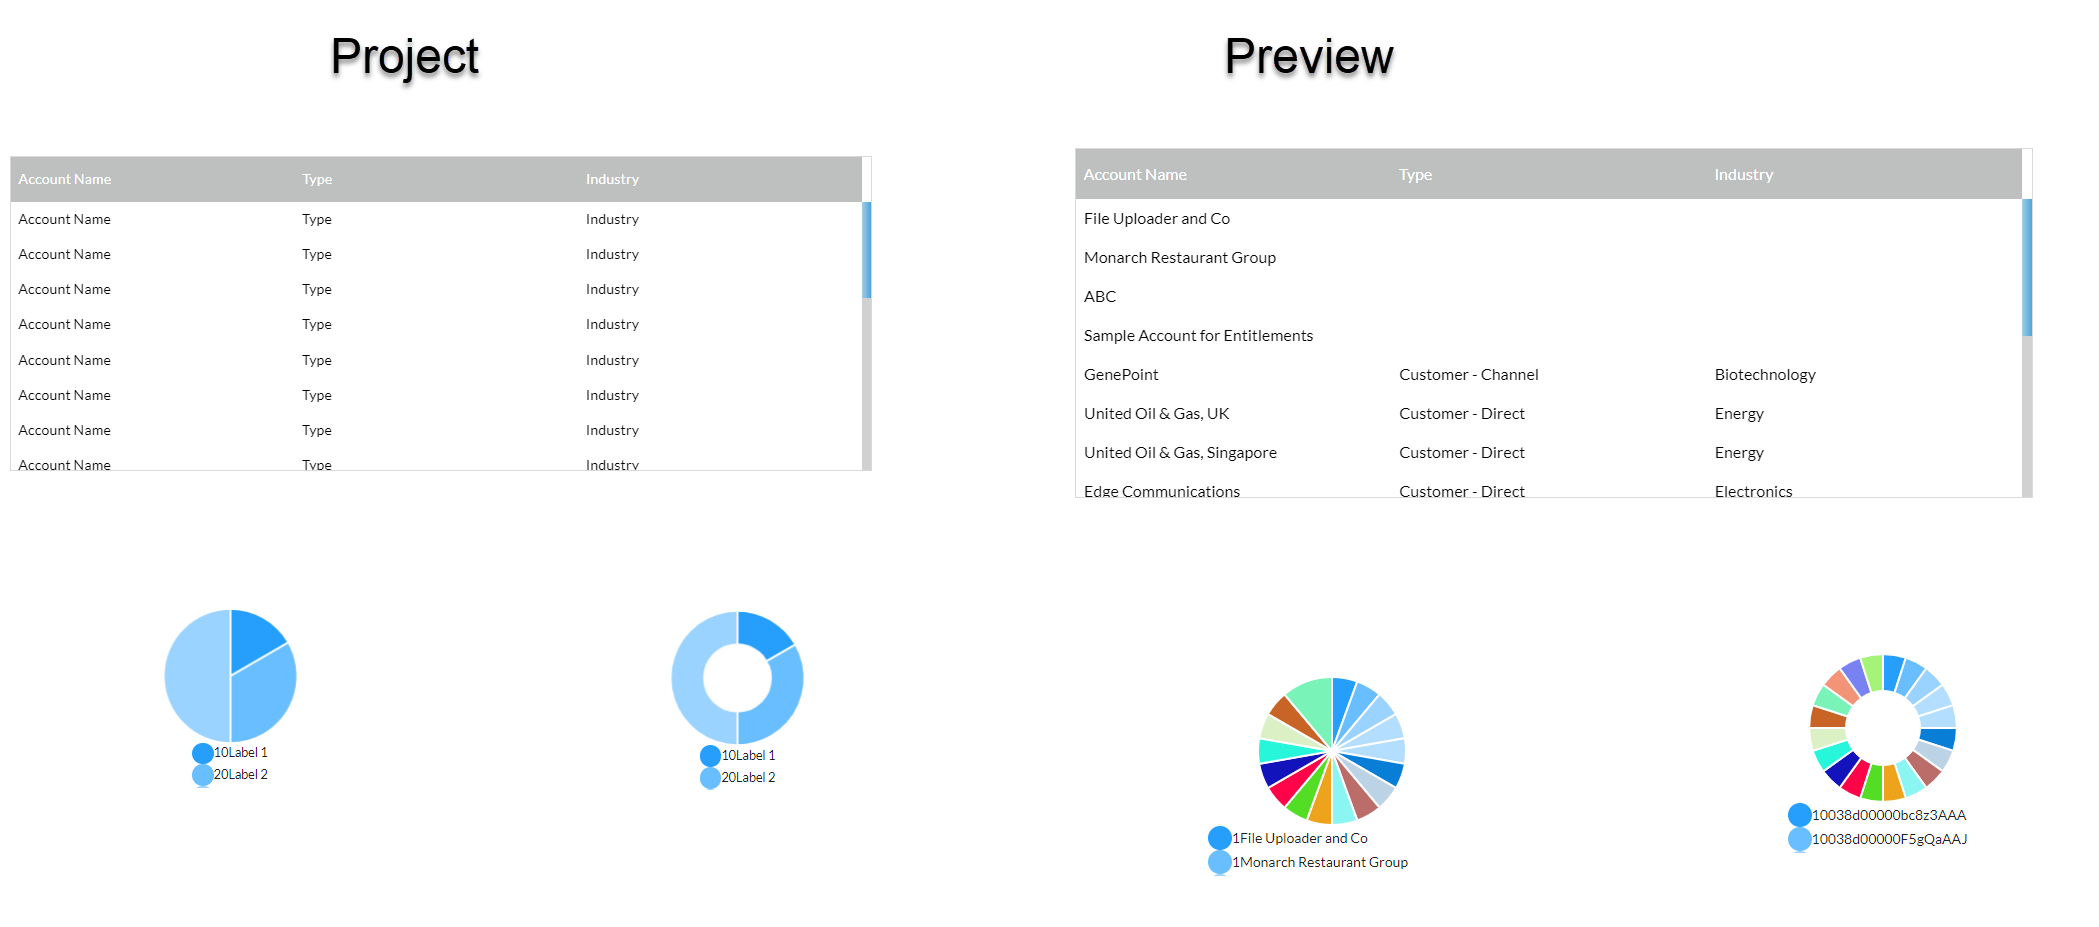
A power table and two charts were inserted into the project to demonstrate the loading.
Data is pulled from Salesforce to populate the table and charts when previewing the project.
When viewing the Network Console, there were three Salesforce mapping entries, one each of the screen elements.
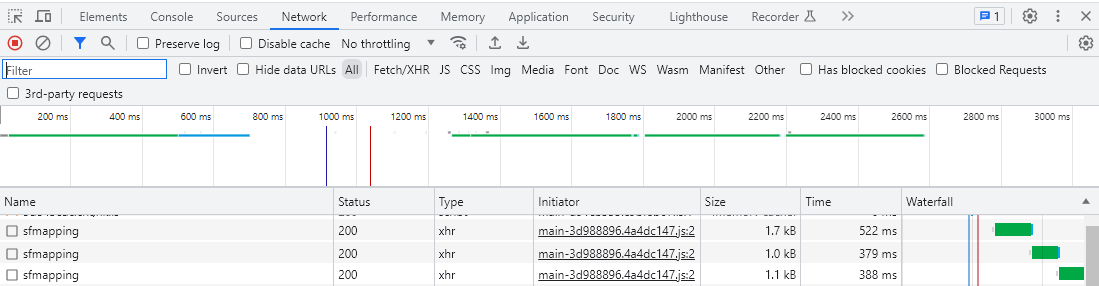
Data is pulled from Salesforce to populate the table and charts when previewing the project.
When viewing the Network Console, there were three Salesforce mapping entries, one each of the screen elements.
03 View the Gets
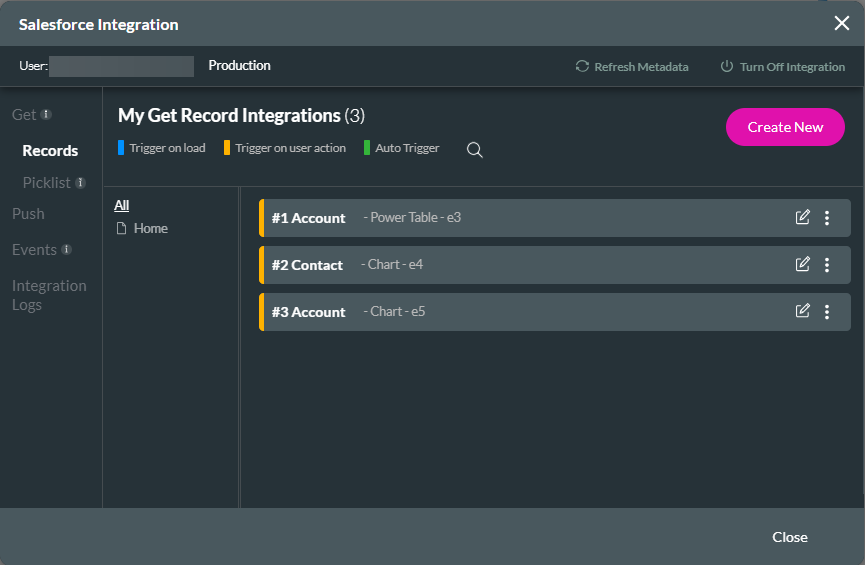
1. Click on the Project Settings gear icon and Click the Salesforce. The Salesforce Integration screen opens.

2. Click on the Records subtab to view the gets created.
2. Click on the Records subtab to view the gets created.
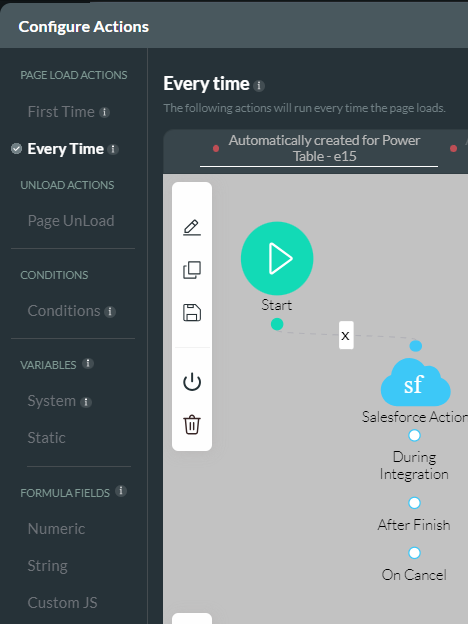
04 Navigate to the Configure Actions Screen
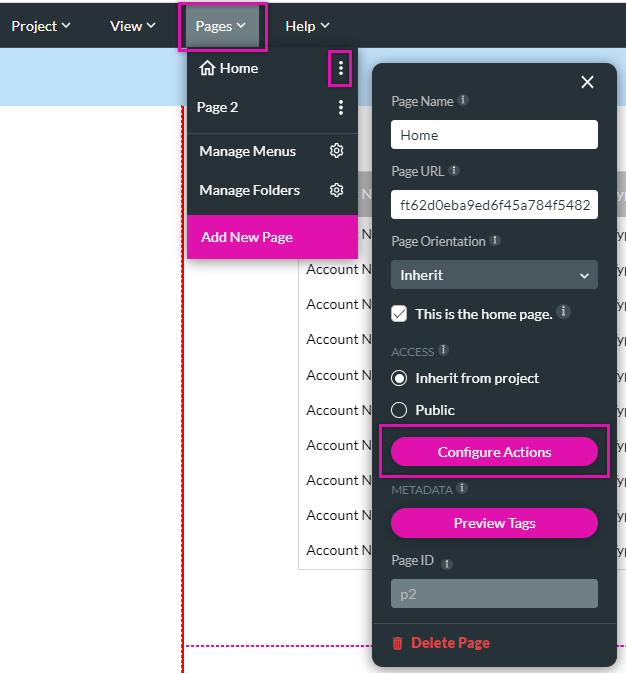
1. Click the pages drop-down in the top menu ribbon.
2. Click the kebab menu next to the page you want to review—the sub-menu displays.
3. Click the Configure Actions button. The Configure Actions Screen opens.

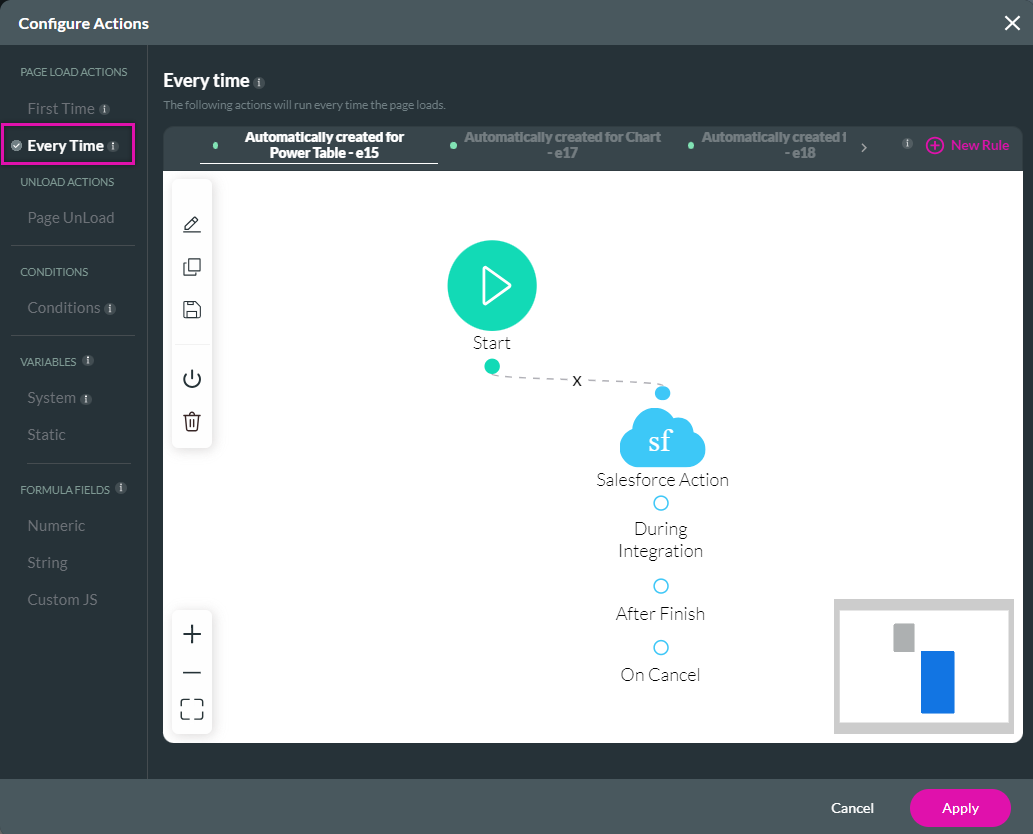
4. Click on the Every Time tab to review the actions that run every time the page loads.

Multiple gets running consecutively is not the best practice for your projects. This tutorial will cover how to configure the gets to run simultaneously.
2. Click the kebab menu next to the page you want to review—the sub-menu displays.
3. Click the Configure Actions button. The Configure Actions Screen opens.
4. Click on the Every Time tab to review the actions that run every time the page loads.
Multiple gets running consecutively is not the best practice for your projects. This tutorial will cover how to configure the gets to run simultaneously.
05 Turn Off Actions
You do not need to delete your actions to disable them.
1. In the left-hand menu, click the power icon.
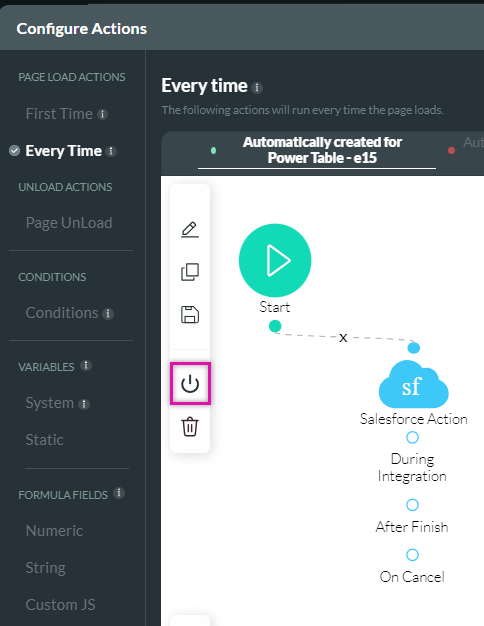
The action will now be greyed out, and the green icon at the top will turn red.
1. In the left-hand menu, click the power icon.
The action will now be greyed out, and the green icon at the top will turn red.
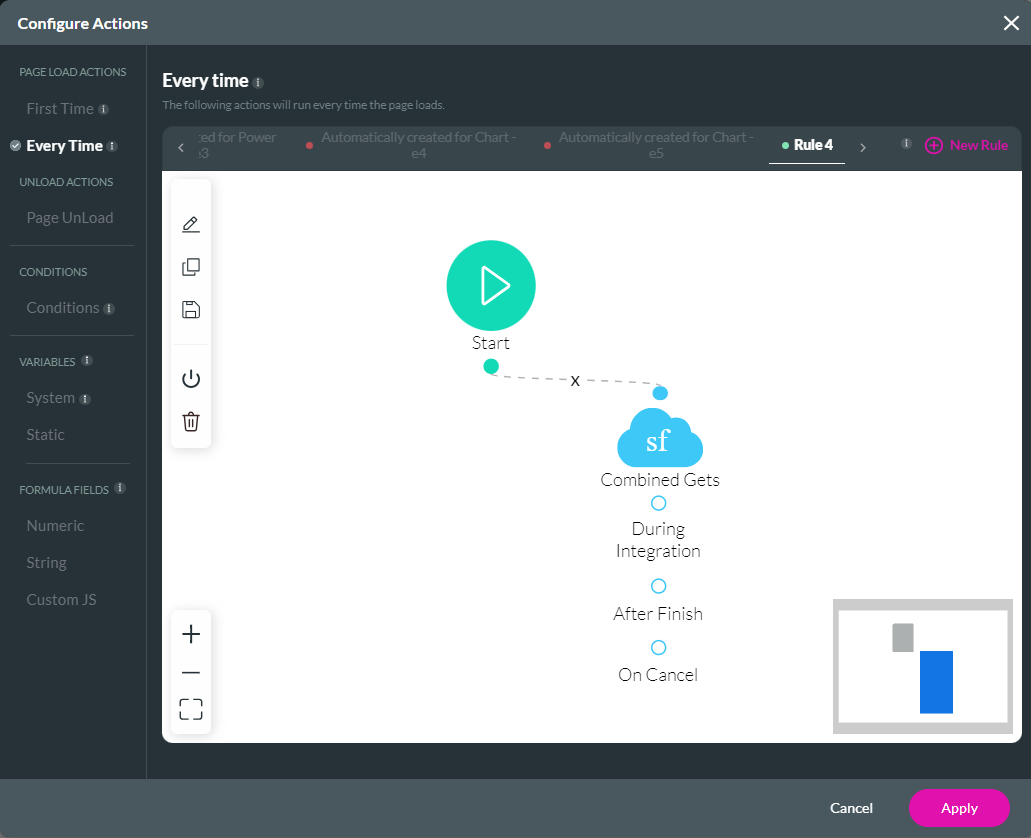
06 Combining Rules
Create a new rule to combine all the Salesforce Get actions into one.
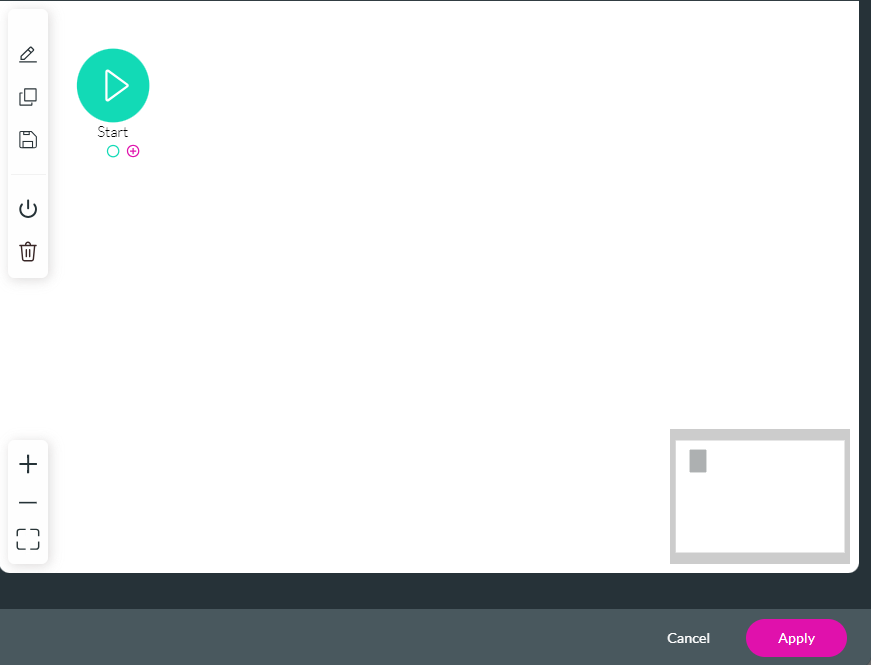
1. Click + New Rule.

A new tab is automatically added.

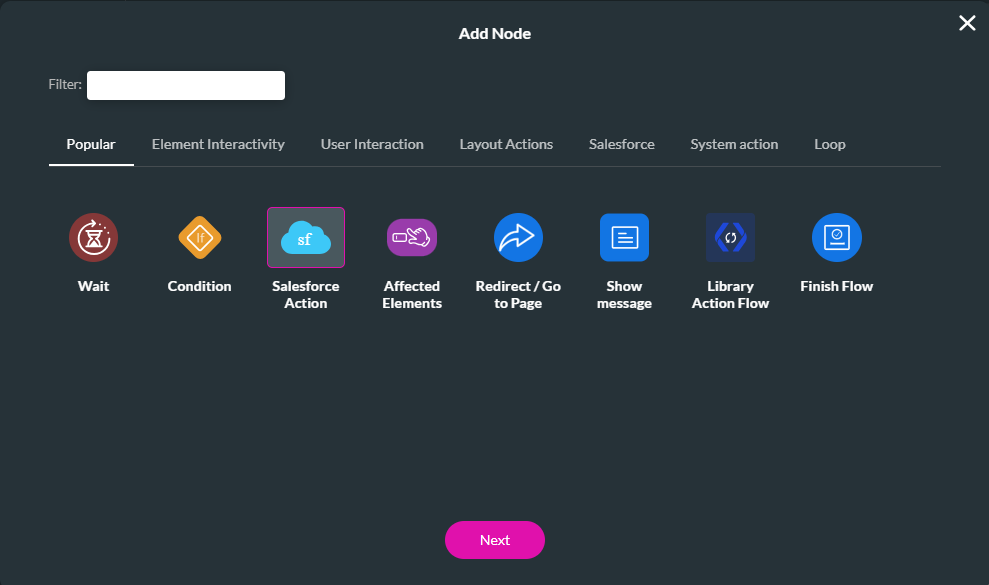
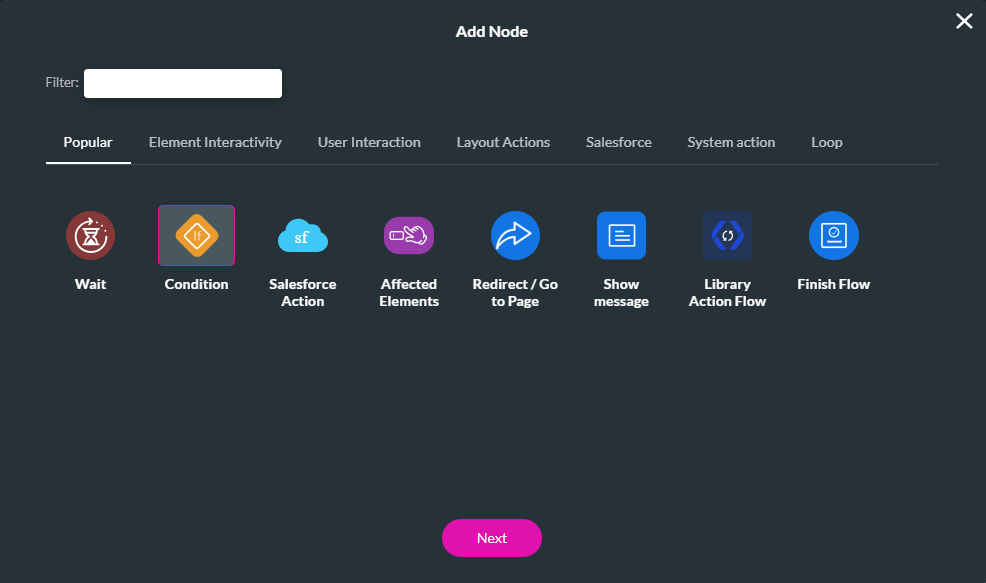
2. Click the start + icon. The Add Node Screen Opens.
3. Select the Salesforce Action option and click Next.
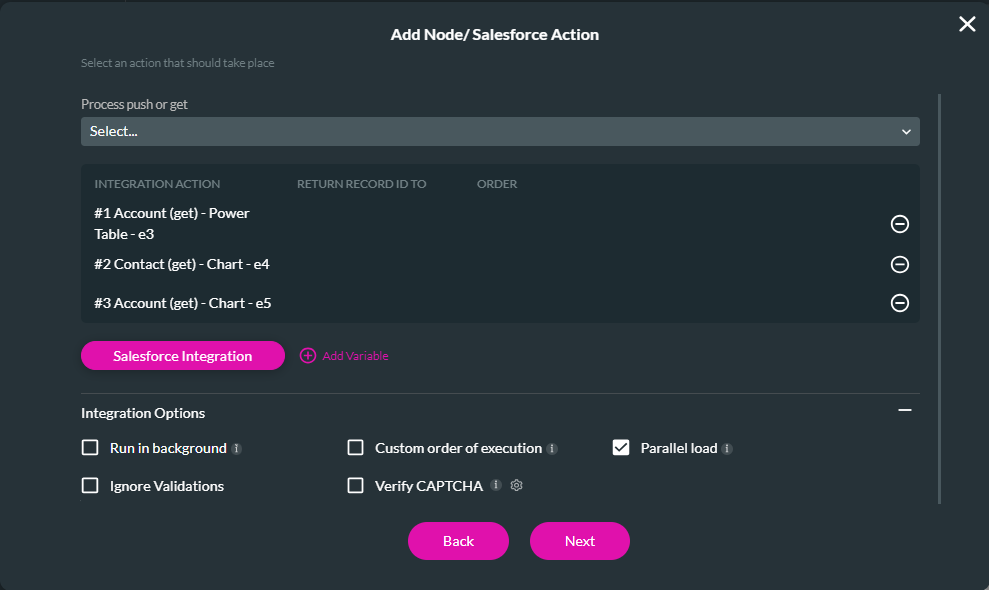
4. Using the dropdown, select all three gets. This will combine the Gets into one Salesforce Action.
5. Click the Integration Options dropdown and enable Parallel load to run the gets simultaneously. Combining the actions will improve loading time even if you do not allow parallel loading. Click Next.
6. Add a Tag for the Salesforce Action and click Insert.
The node is added to the screen.
7. Click Apply.
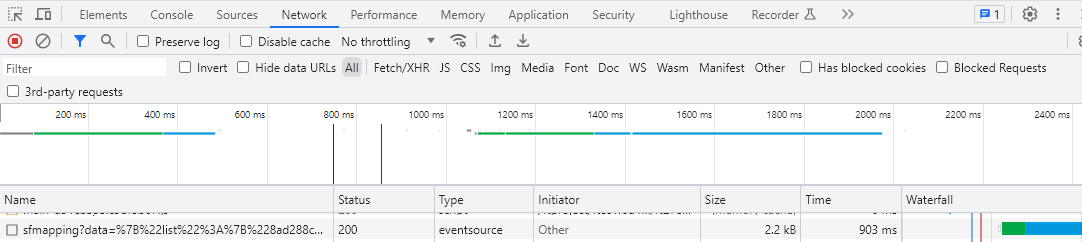
Save and Preview the project.
When viewing the network source, there is only one Salesforce mapping entry as they have been combined. This will reduce your page load time.
1. Click + New Rule.
A new tab is automatically added.
2. Click the start + icon. The Add Node Screen Opens.
3. Select the Salesforce Action option and click Next.
4. Using the dropdown, select all three gets. This will combine the Gets into one Salesforce Action.
5. Click the Integration Options dropdown and enable Parallel load to run the gets simultaneously. Combining the actions will improve loading time even if you do not allow parallel loading. Click Next.
6. Add a Tag for the Salesforce Action and click Insert.
The node is added to the screen.
7. Click Apply.
Save and Preview the project.
When viewing the network source, there is only one Salesforce mapping entry as they have been combined. This will reduce your page load time.
07 Using Conditions to Improve Optimization
You can set conditions to execute actions if the condition criteria are met. Conditions can be put on different levels: project, page, strip, and elements. It is essential to ensure that the conditions are set at the correct level so no unnecessary actions are running when they are not required.
08 Project Level Conditions
Setting a condition at the project level will execute whenever the user refreshes or navigates from one page to another.
The example below uses a global static variable and a Salesforce Get to demonstrate how a global condition affects loading time.
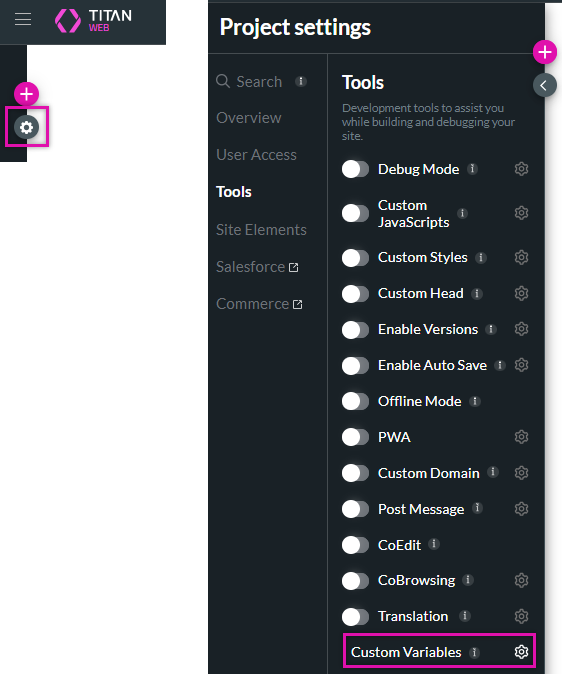
1. Click on the project settings gear icon and select the tools tab.
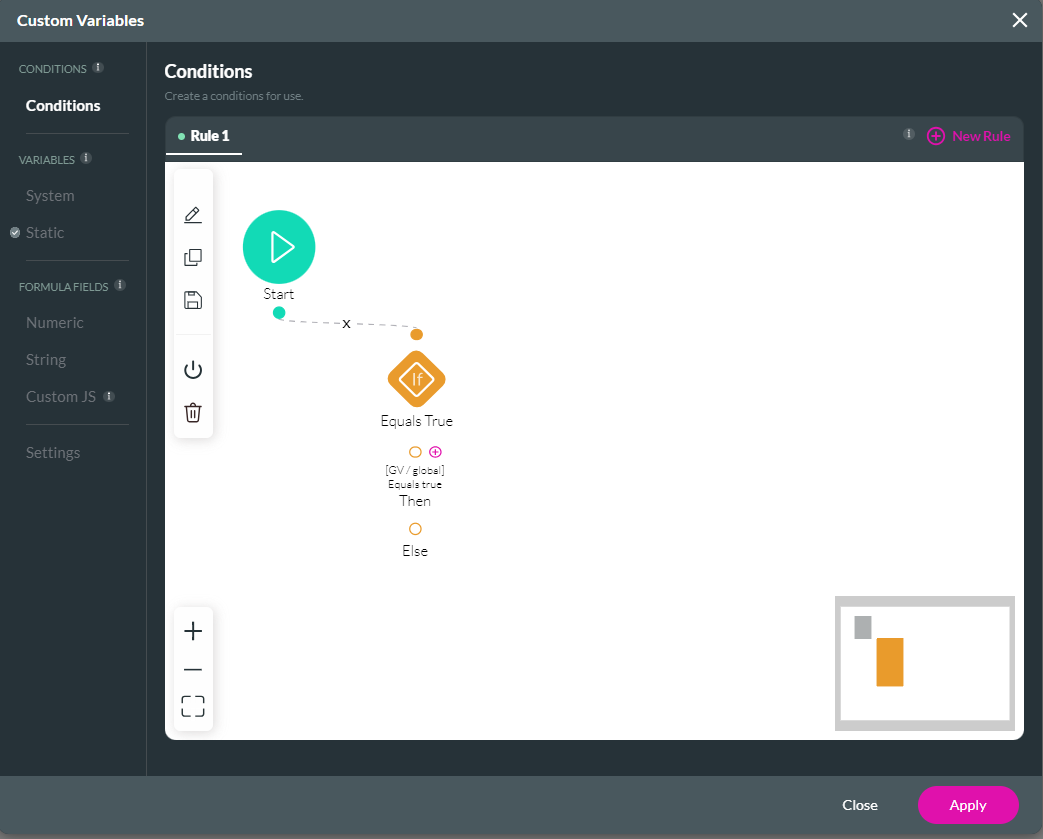
2. Click the Custom Variables gear icon. The Custom Variables screen opens.
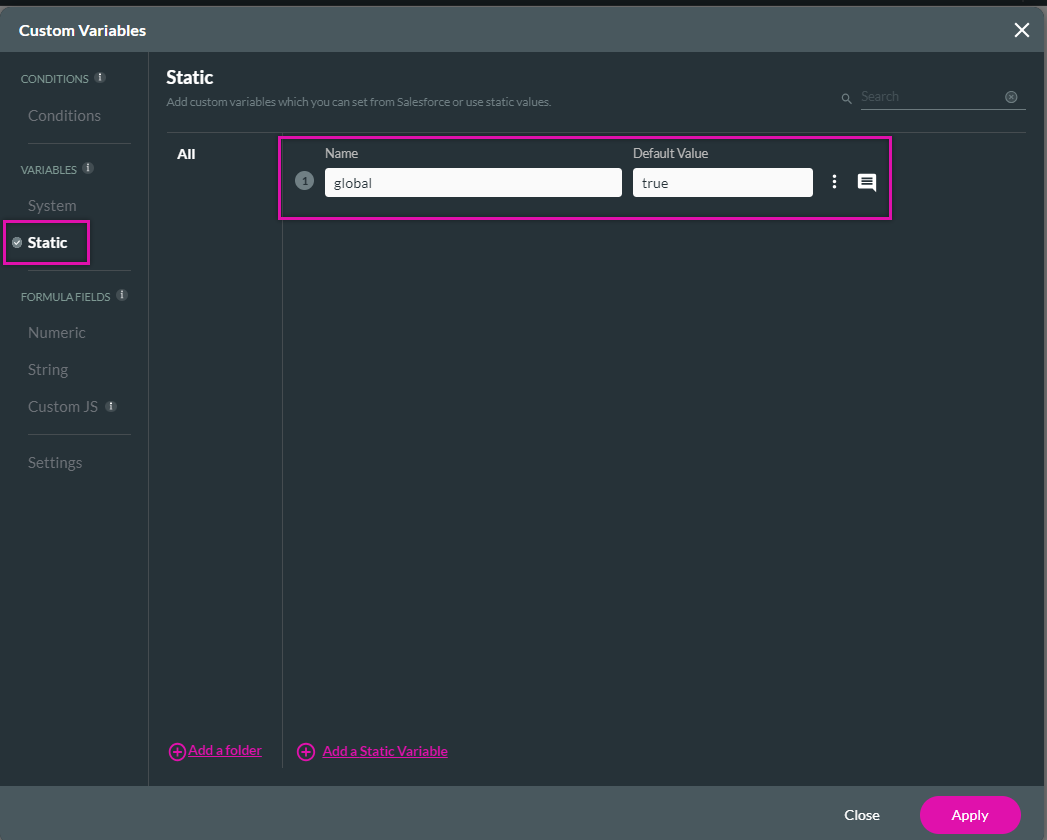
3. Click on the Static Variables tab and add a global variable, such as a default value of True.
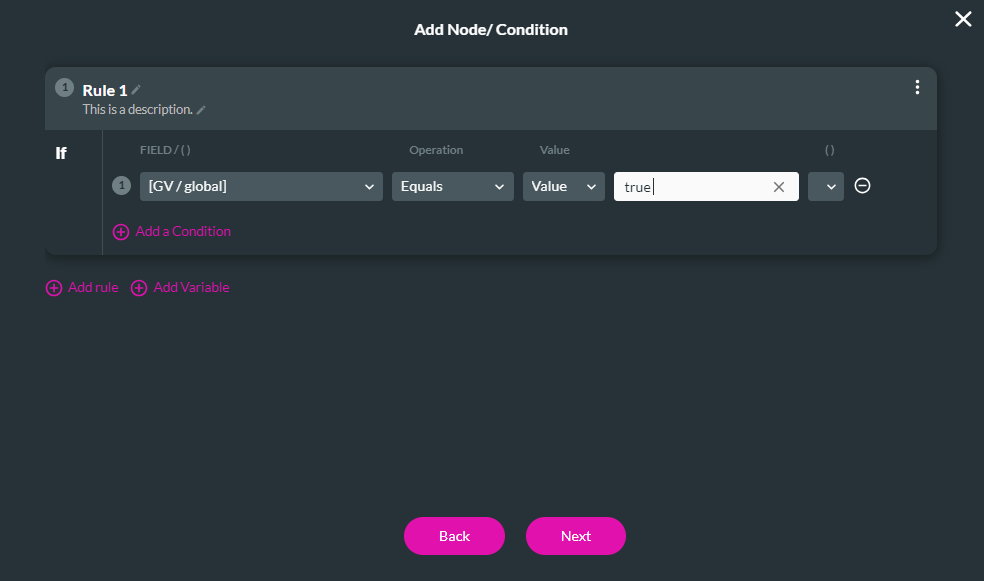
4. Select the Conditions Tab and click on the If Condition icon. The Edit Node screen opens.
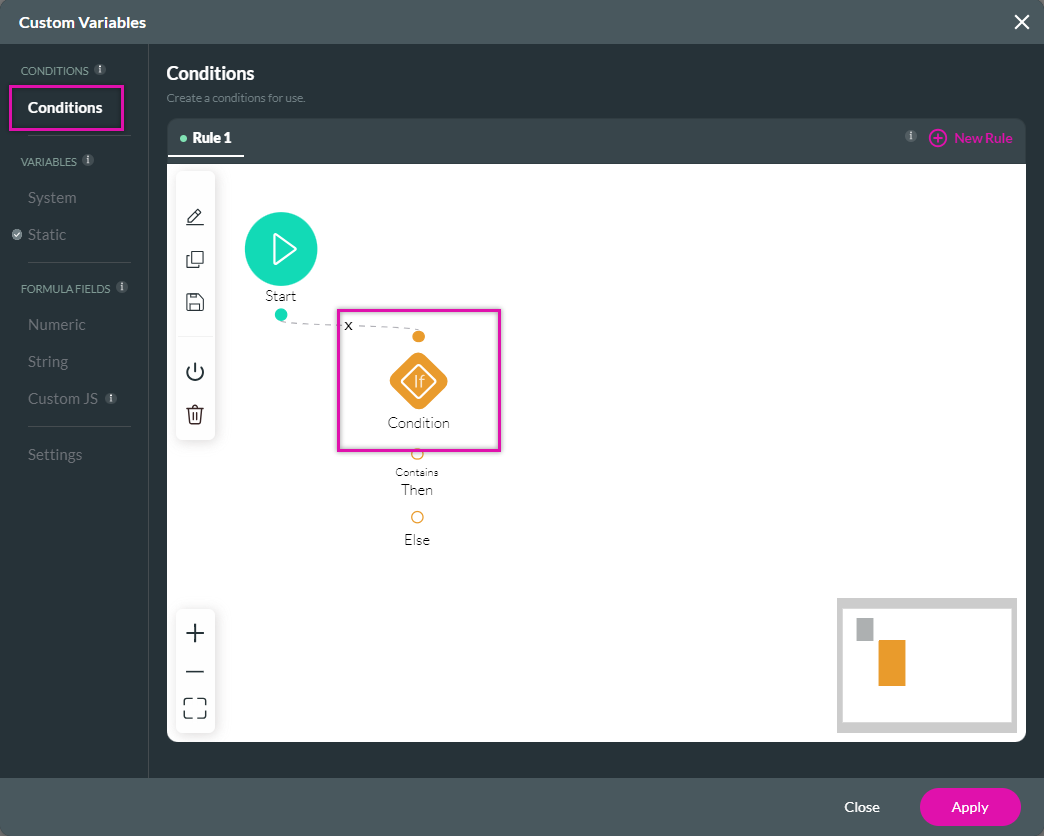
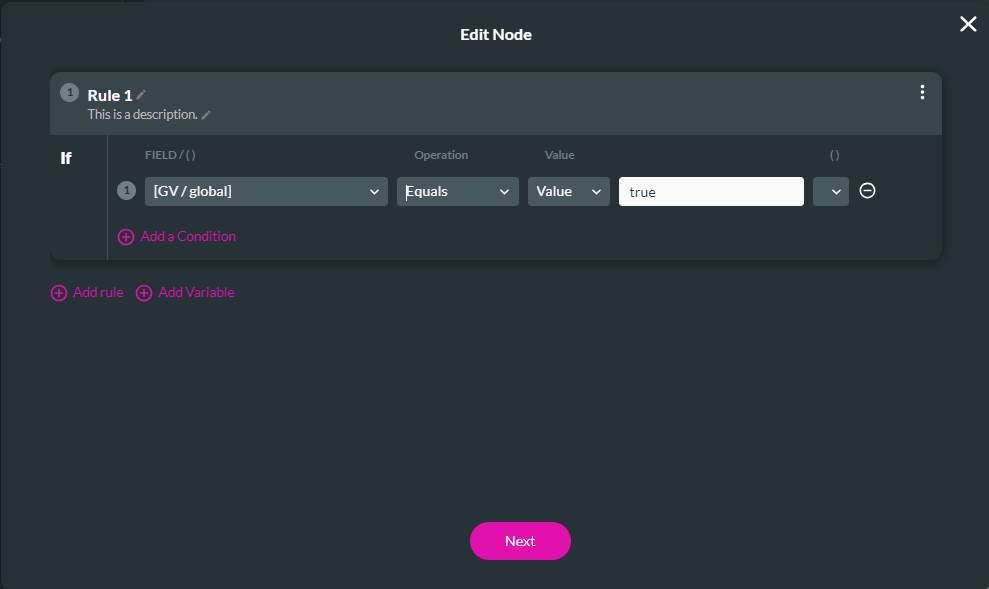
5. Configure the condition that the Global Variable equals True. Click Next.
6. Add a tag and click Insert.
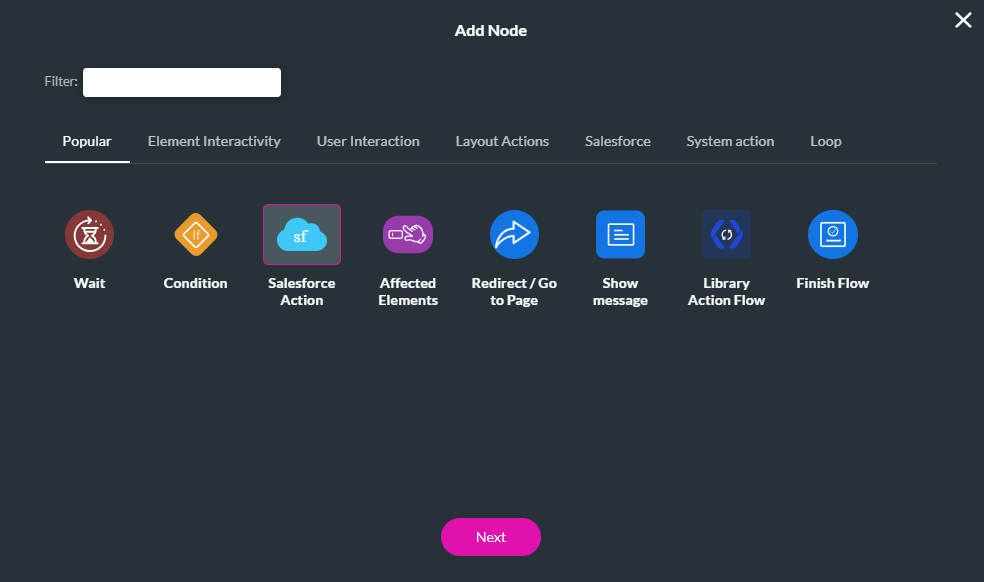
7. Click on the Then + icon. The Add Node screen opens.

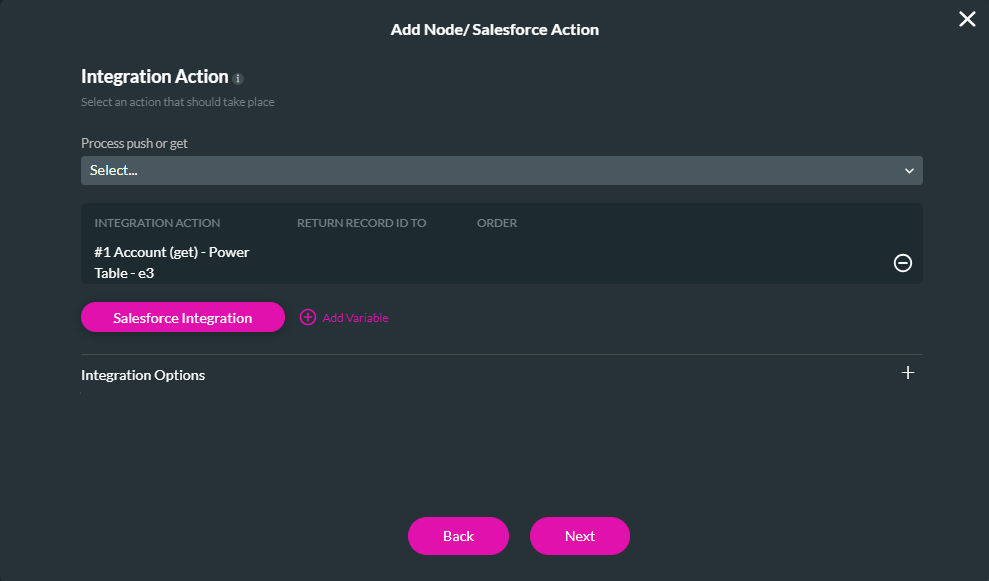
8. Select the Salesforce Action option and click Next.

9. Use the drop-down to select the process push or get. For example, the get that runs for the power table. Click Next.
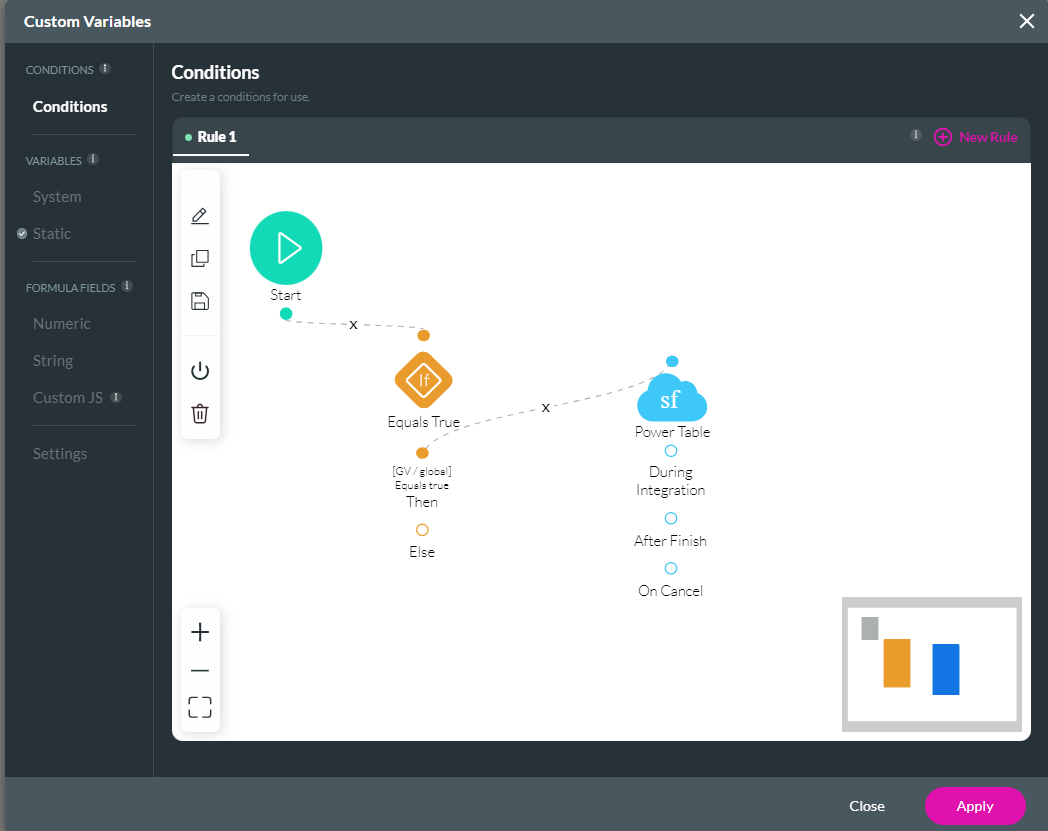
10. Add a tag and click Insert.
The node is added to the Conditions window. This condition will run anytime the page loads.
11. Click Apply.
Save and preview the project. Navigate to the second page of your project. When viewing the network source, the Salesforce Action ran on the second page despite the power table being on the first. This can waste resources and mean a longer page loading time.
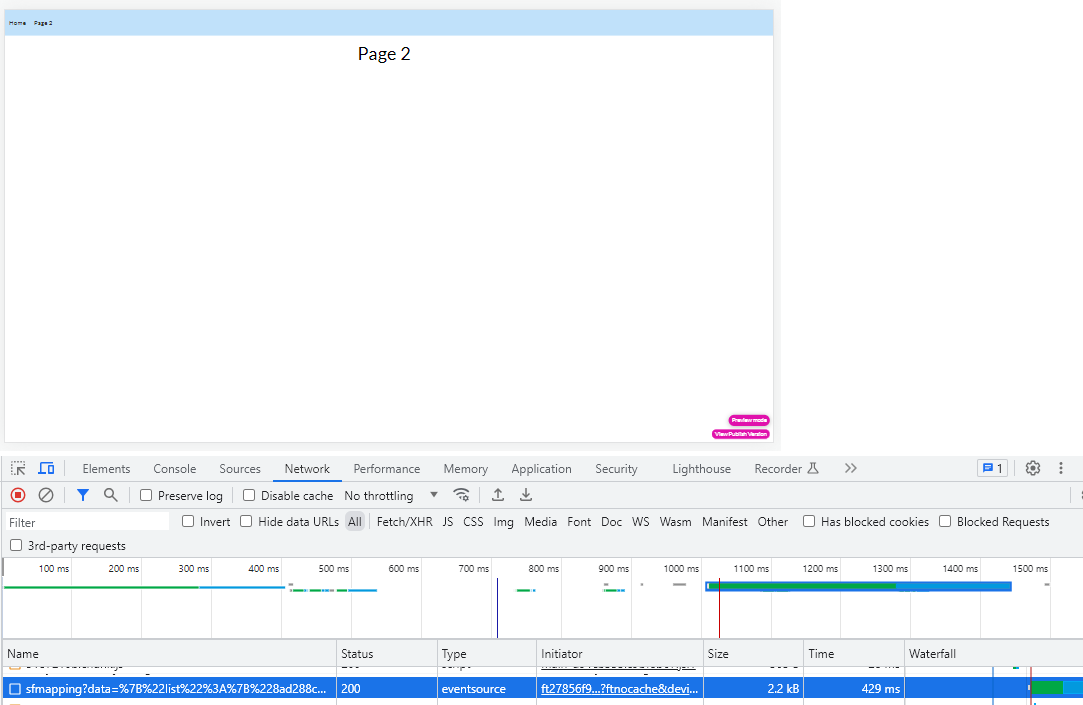
It is best practice only to use project-level conditions if you require an action to run every time a user reloads a page or navigates between pages. Note: This project-level condition was turned off before proceeding.
The example below uses a global static variable and a Salesforce Get to demonstrate how a global condition affects loading time.
1. Click on the project settings gear icon and select the tools tab.
2. Click the Custom Variables gear icon. The Custom Variables screen opens.
3. Click on the Static Variables tab and add a global variable, such as a default value of True.
4. Select the Conditions Tab and click on the If Condition icon. The Edit Node screen opens.
5. Configure the condition that the Global Variable equals True. Click Next.
6. Add a tag and click Insert.
7. Click on the Then + icon. The Add Node screen opens.
8. Select the Salesforce Action option and click Next.
9. Use the drop-down to select the process push or get. For example, the get that runs for the power table. Click Next.
10. Add a tag and click Insert.
The node is added to the Conditions window. This condition will run anytime the page loads.
11. Click Apply.
Save and preview the project. Navigate to the second page of your project. When viewing the network source, the Salesforce Action ran on the second page despite the power table being on the first. This can waste resources and mean a longer page loading time.
It is best practice only to use project-level conditions if you require an action to run every time a user reloads a page or navigates between pages. Note: This project-level condition was turned off before proceeding.
09 Page Level Conditions
Set conditions per page to ensure the action only runs if the user is currently on that page.
1. Click the pages drop-down in the top menu ribbon.
2. Click the kebab menu next to the page that requires the Condition—the sub-menu displays.
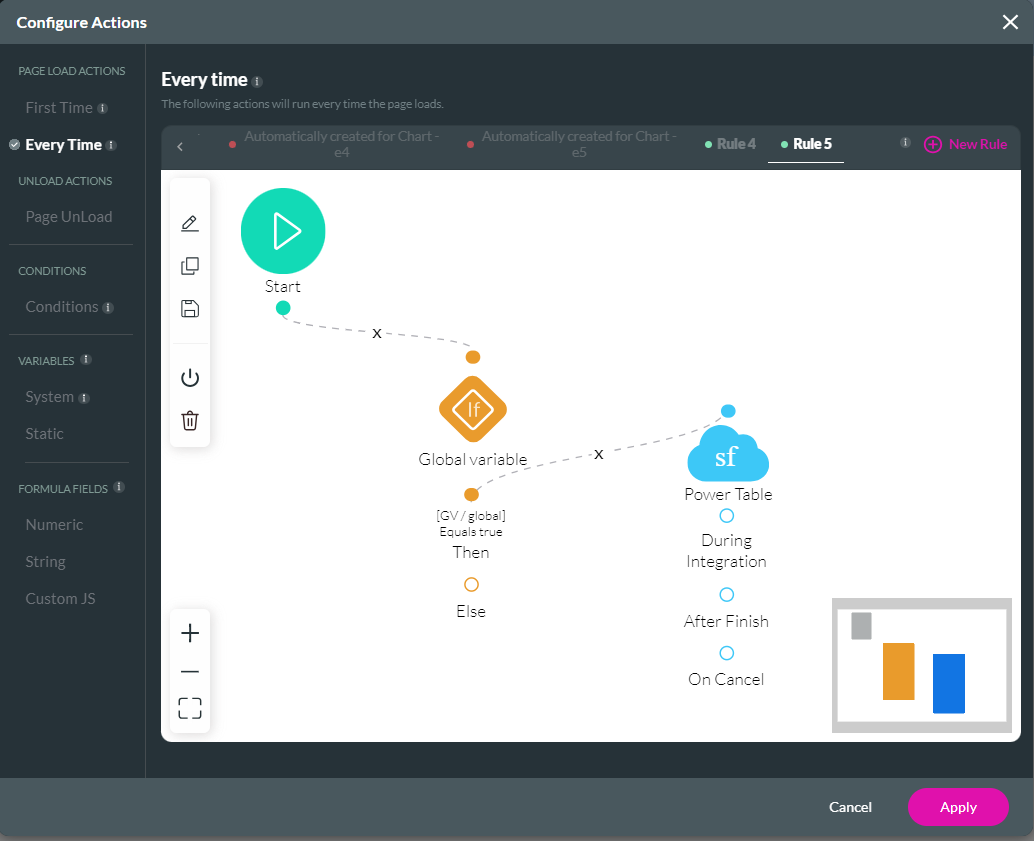
3. Click the Configure Actions button. The Configure Actions Screen opens.
4. Click the Every Time tab and click + New Rule.
5. Click the Start + icon. The Add Node screen opens.
6. Select Condition and click Next.
7. Configure the Condition that the Global Variable equals True. Click Next.
8. Add a tag and click Insert. The node is added.
9. Click the Then + icon. The Add Node screen opens.
10. Select the Salesforce Action option and click Next.
11. Use the drop-down to select the process push or get. For example, the get that runs for the power table. Click Next.

12. Add a tag and click Insert.
The node is added to the Conditions window. This Condition will run on the home page only.
13. Click Apply.
1. Click the pages drop-down in the top menu ribbon.
2. Click the kebab menu next to the page that requires the Condition—the sub-menu displays.
3. Click the Configure Actions button. The Configure Actions Screen opens.
4. Click the Every Time tab and click + New Rule.
5. Click the Start + icon. The Add Node screen opens.
6. Select Condition and click Next.
7. Configure the Condition that the Global Variable equals True. Click Next.
8. Add a tag and click Insert. The node is added.
9. Click the Then + icon. The Add Node screen opens.
10. Select the Salesforce Action option and click Next.
11. Use the drop-down to select the process push or get. For example, the get that runs for the power table. Click Next.
12. Add a tag and click Insert.
The node is added to the Conditions window. This Condition will run on the home page only.
13. Click Apply.
10 The Takeaway
Combining your Salesforce Actions can save your page's loading time. When setting conditions, they must be set at the correct level. This ensures that actions are only run when they are required.