Loop (19 min)
Completion requirements
01 Getting Started
This tutorial covers loops in action flows. The loop provides a way to loop over three main elements:
Loops should only be used if no other solution is available. They should not be run over many elements within a table or a repeated strip, as this will slow down your project.
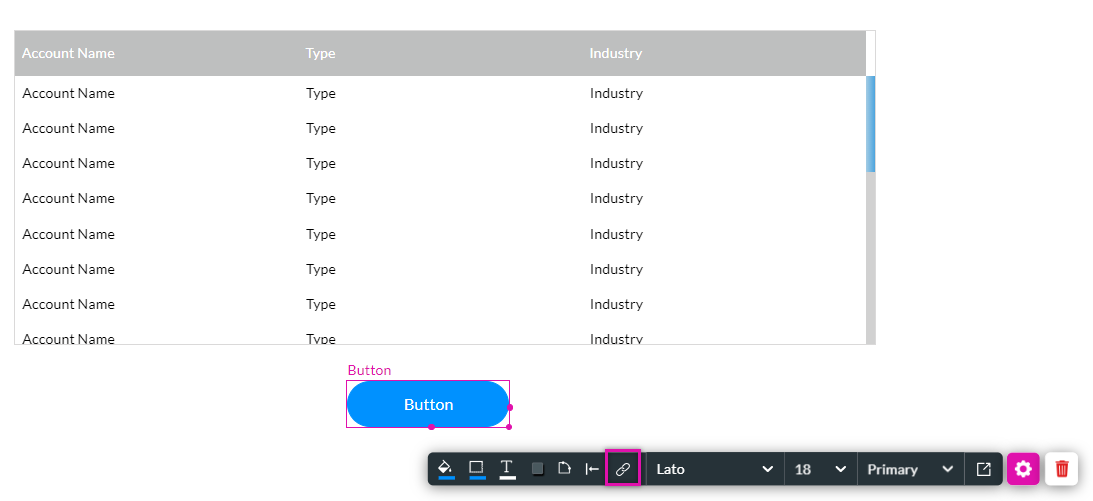
Power tables with buttons have been used for demonstrative purposes.
- Power Table
- Repeated Strip
- Variable
Loops should only be used if no other solution is available. They should not be run over many elements within a table or a repeated strip, as this will slow down your project.
Power tables with buttons have been used for demonstrative purposes.
02 Insert a Loop Toast
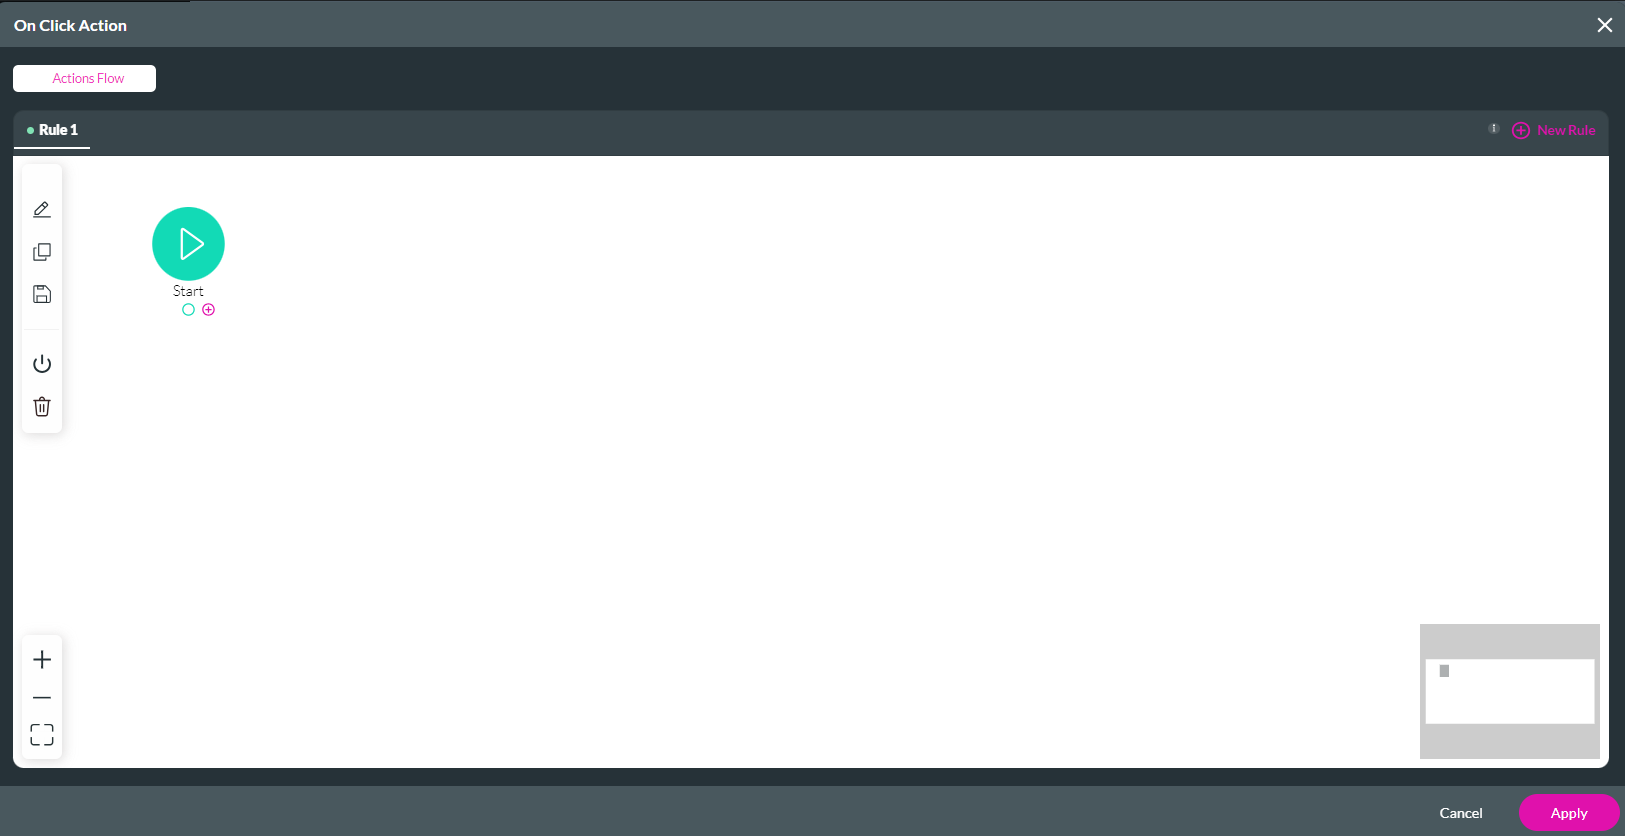
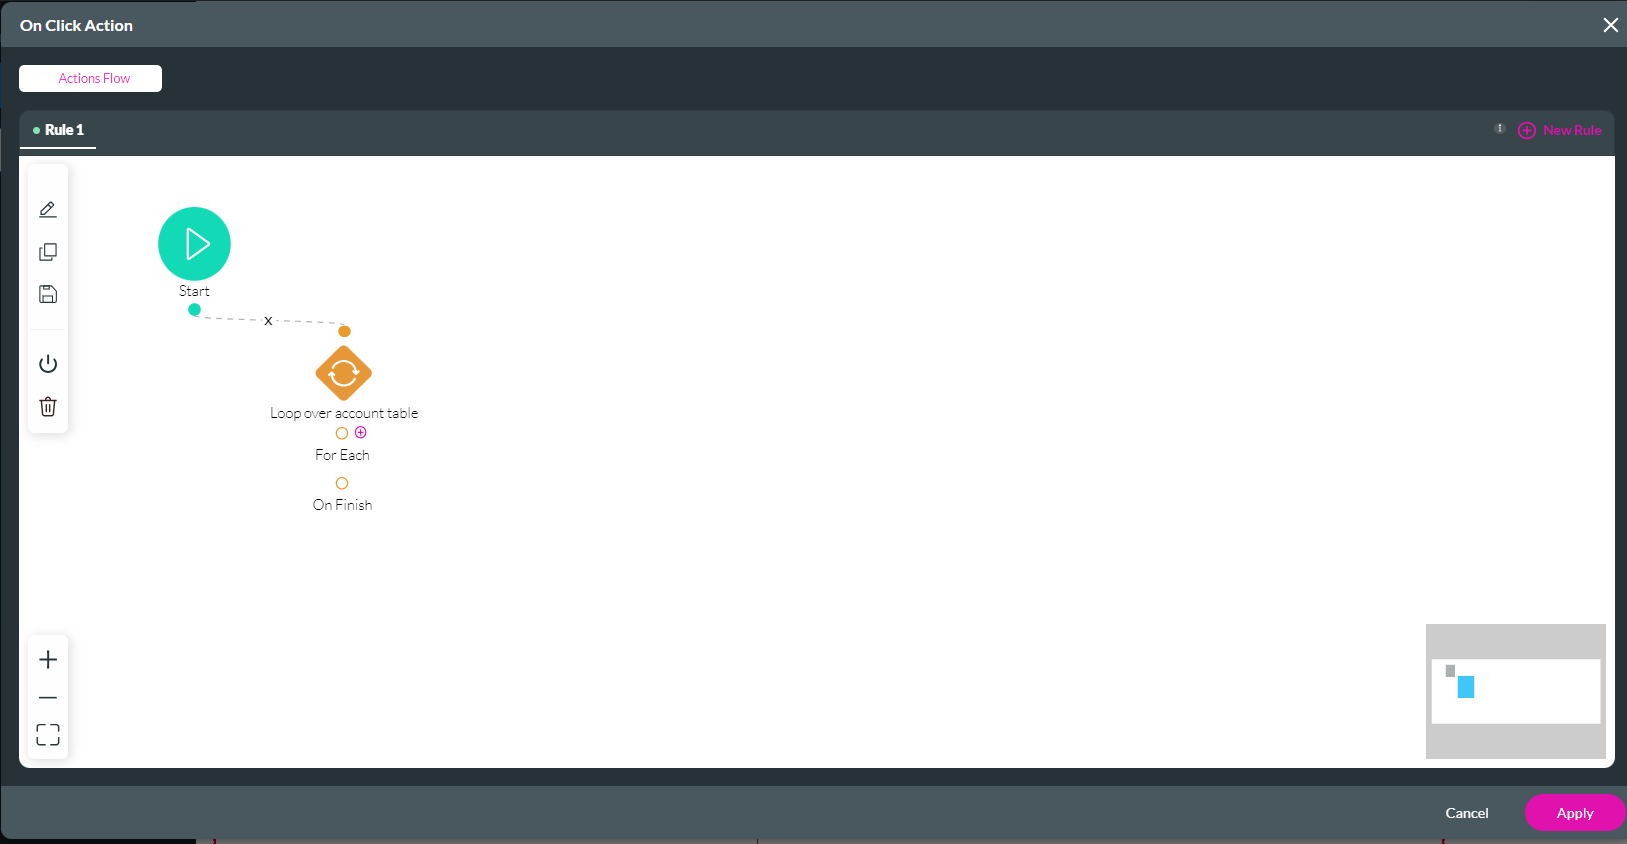
1. Click on the Button link icon. The On Click Action screen opens.
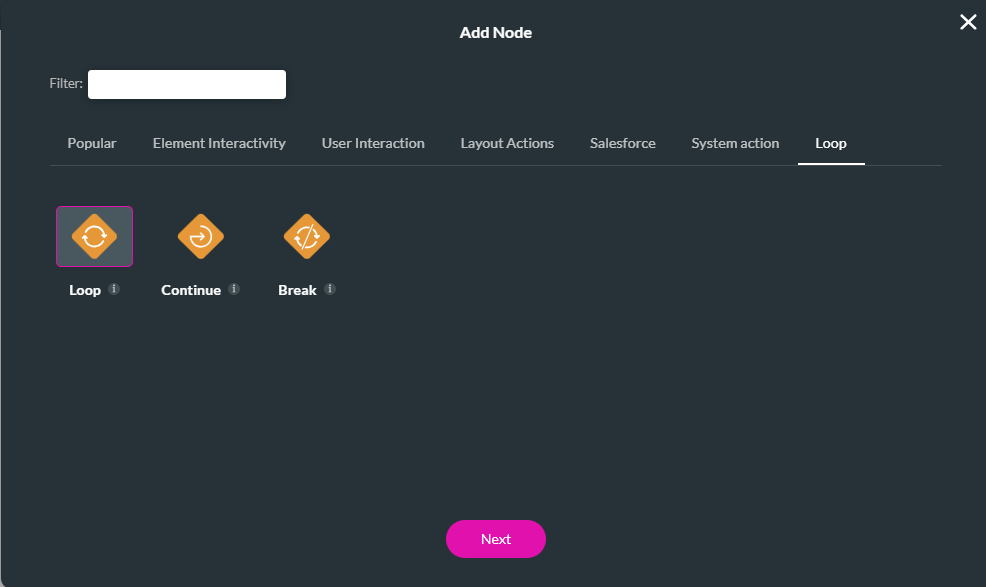
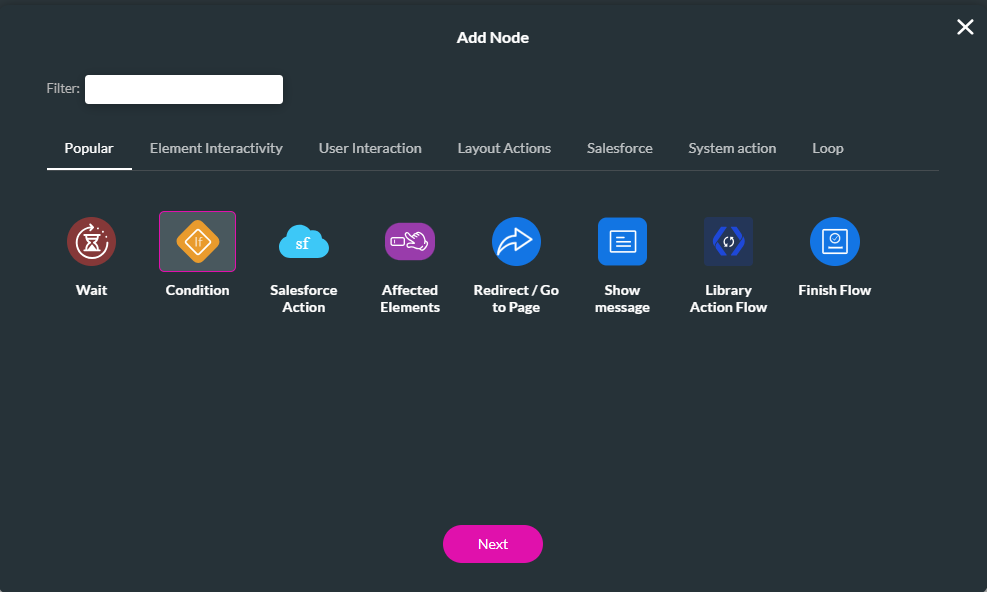
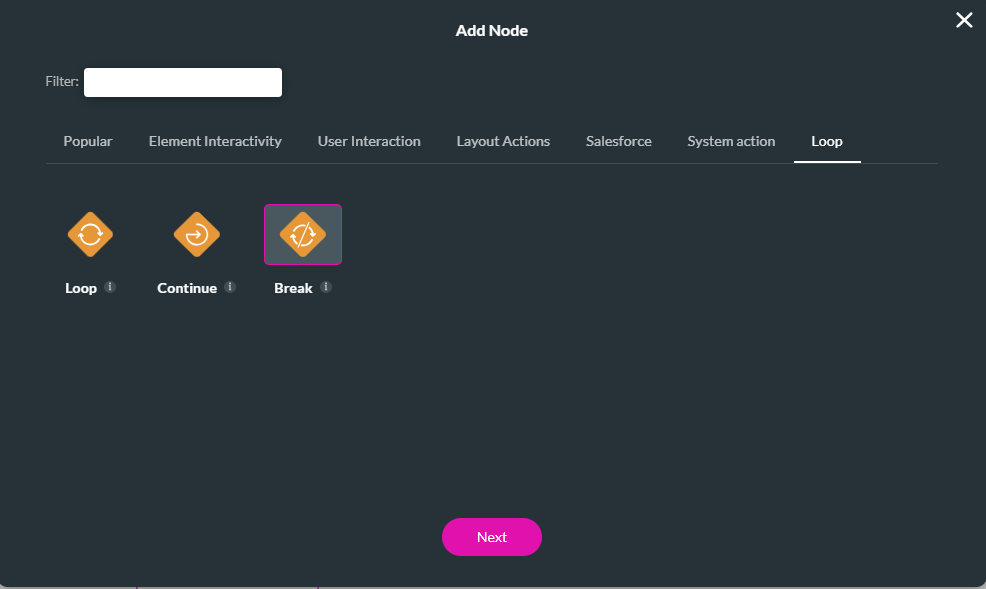
2. Click the Start + icon. The Add Node screen opens.
3. Select Loop and click Next.
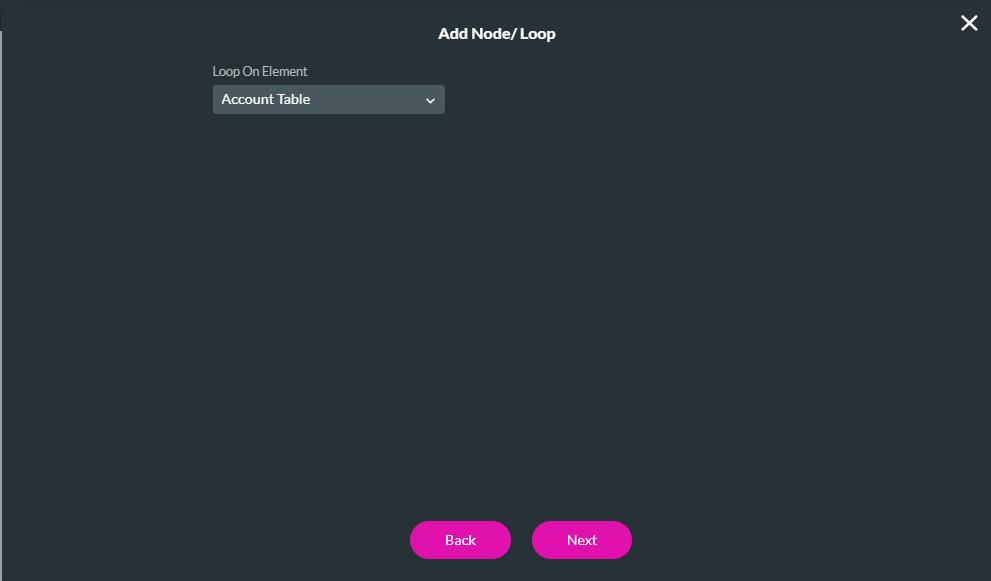
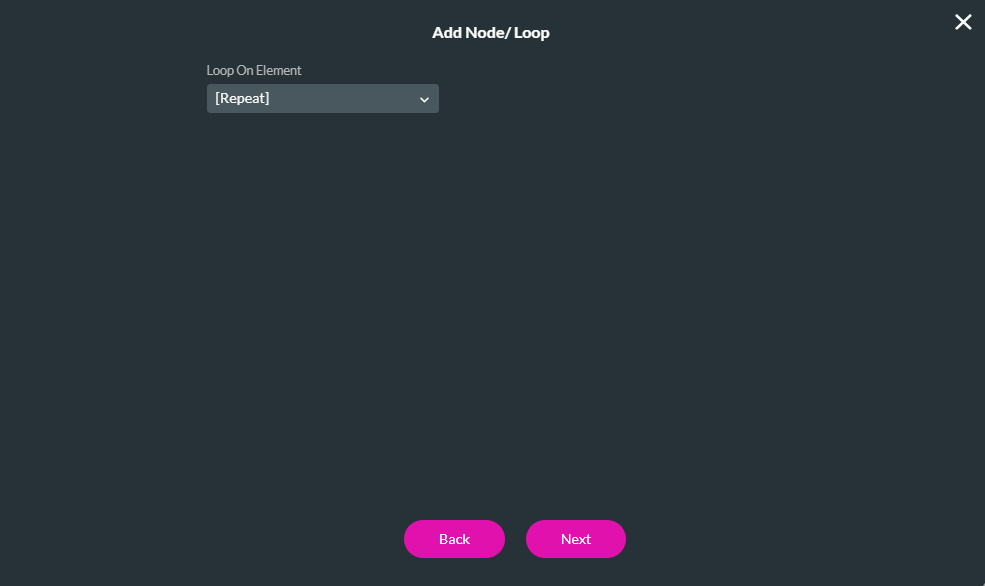
4. Use the drop-down to the element you want the Loop to apply—for example, the account table. Click Next.
5. Add a tag and click Insert.
The node is added to the screen.
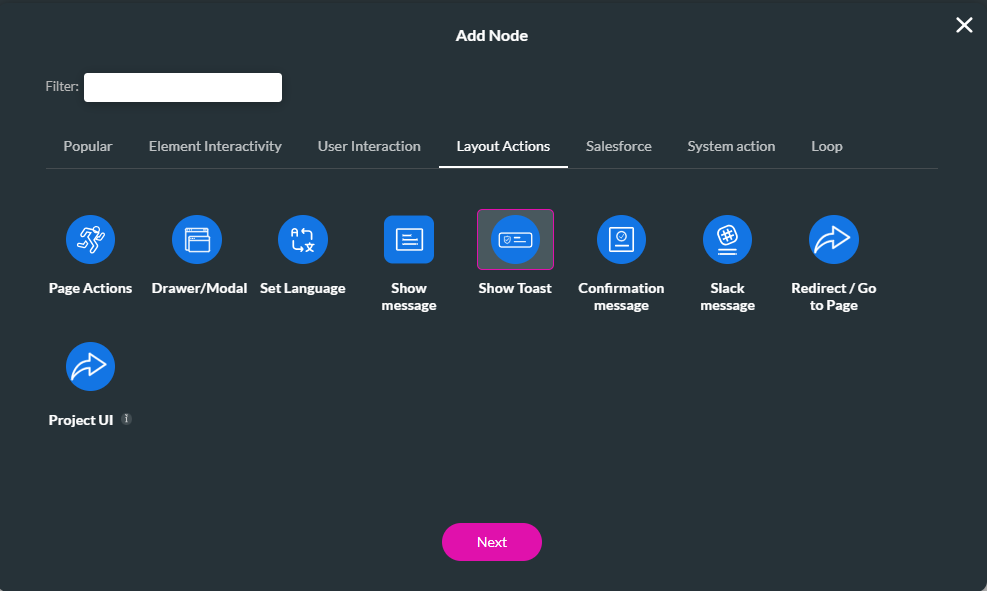
6. Click on the Each + icon to run an action on each row in the table. The Add Node screen opens.
7. Select Show Toast and click Next.
8. Configure your toast message. For example, the element drop-down displayed the account name in the toast. Click Next.
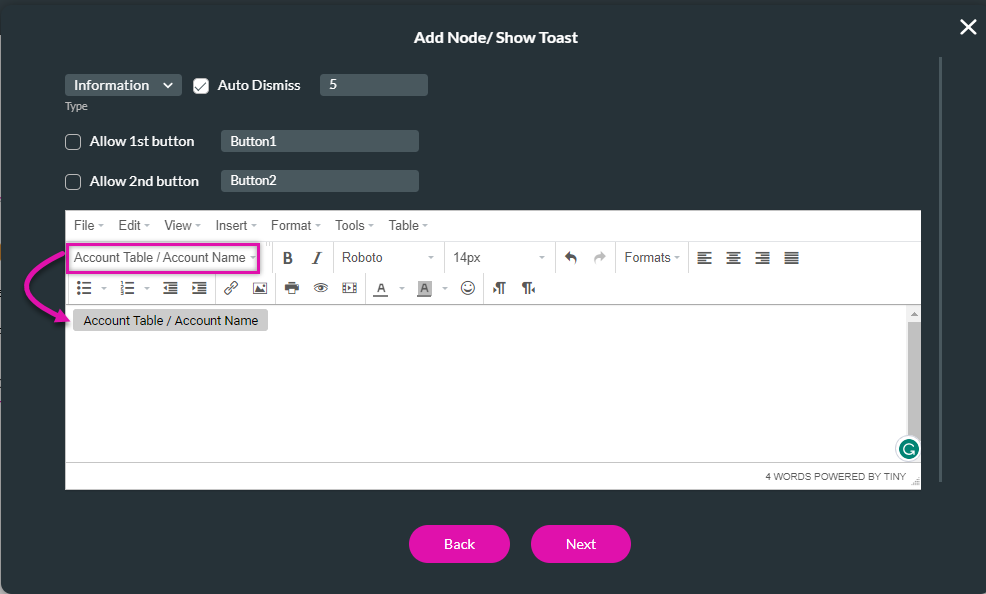
9. Add a tag and click Insert.
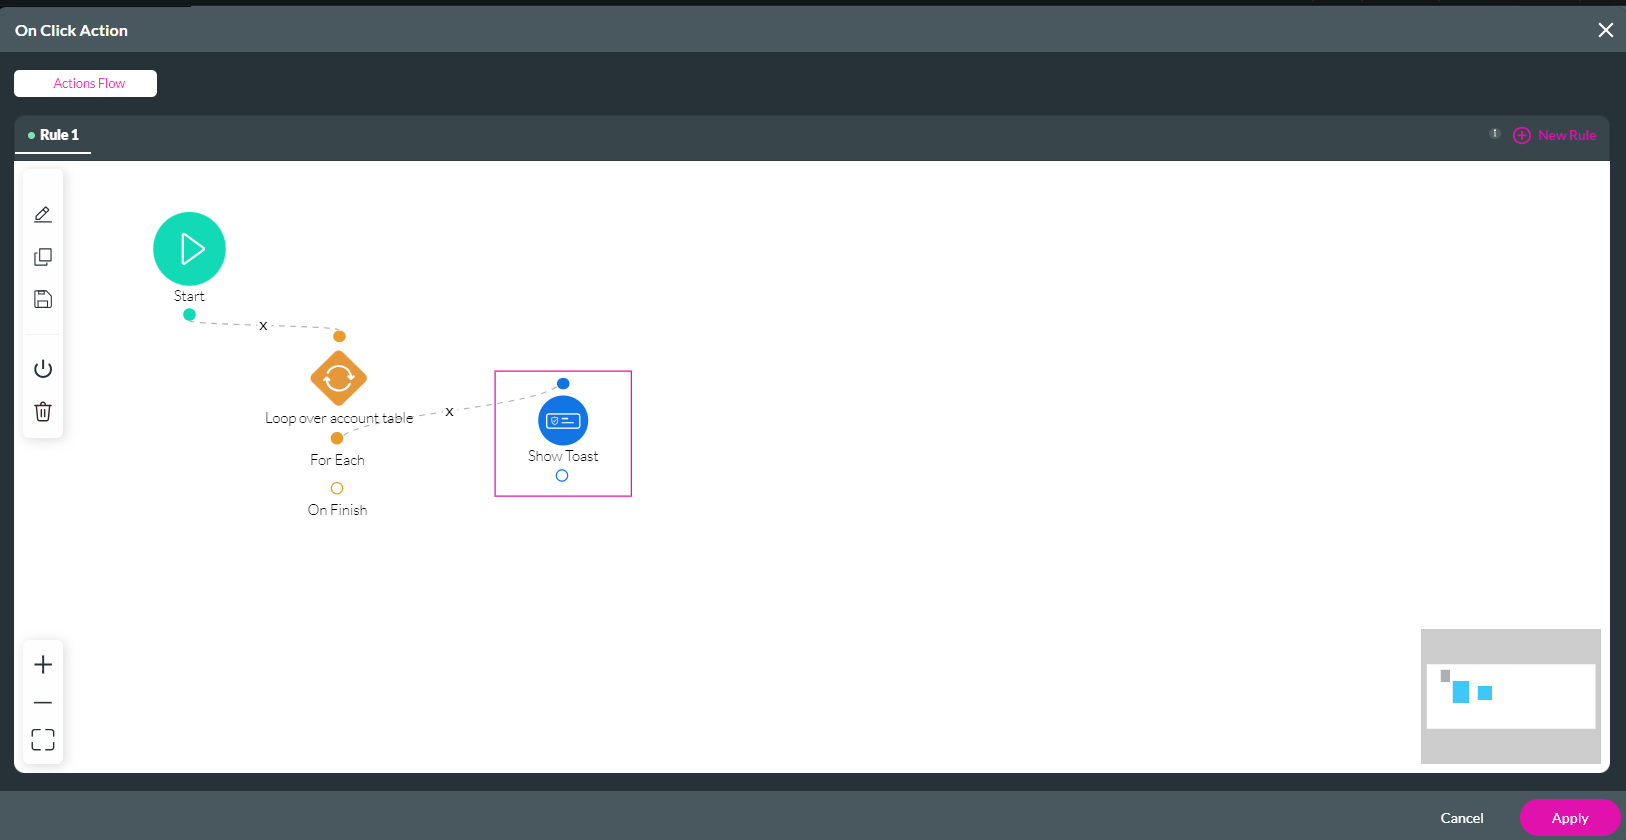
The node is added to the window.
10. Click Apply.
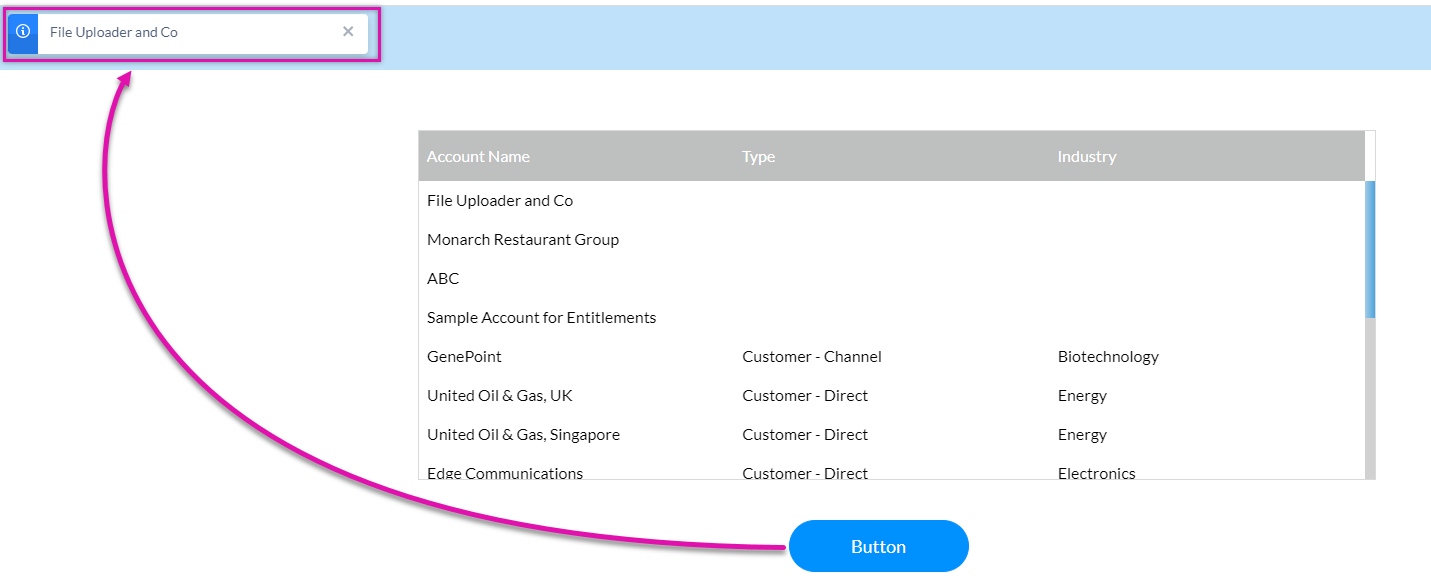
Save and preview. A toast showing the first account name is displayed when clicking the button.
2. Click the Start + icon. The Add Node screen opens.
3. Select Loop and click Next.
4. Use the drop-down to the element you want the Loop to apply—for example, the account table. Click Next.
5. Add a tag and click Insert.
The node is added to the screen.
6. Click on the Each + icon to run an action on each row in the table. The Add Node screen opens.
7. Select Show Toast and click Next.
8. Configure your toast message. For example, the element drop-down displayed the account name in the toast. Click Next.
9. Add a tag and click Insert.
The node is added to the window.
10. Click Apply.
Save and preview. A toast showing the first account name is displayed when clicking the button.
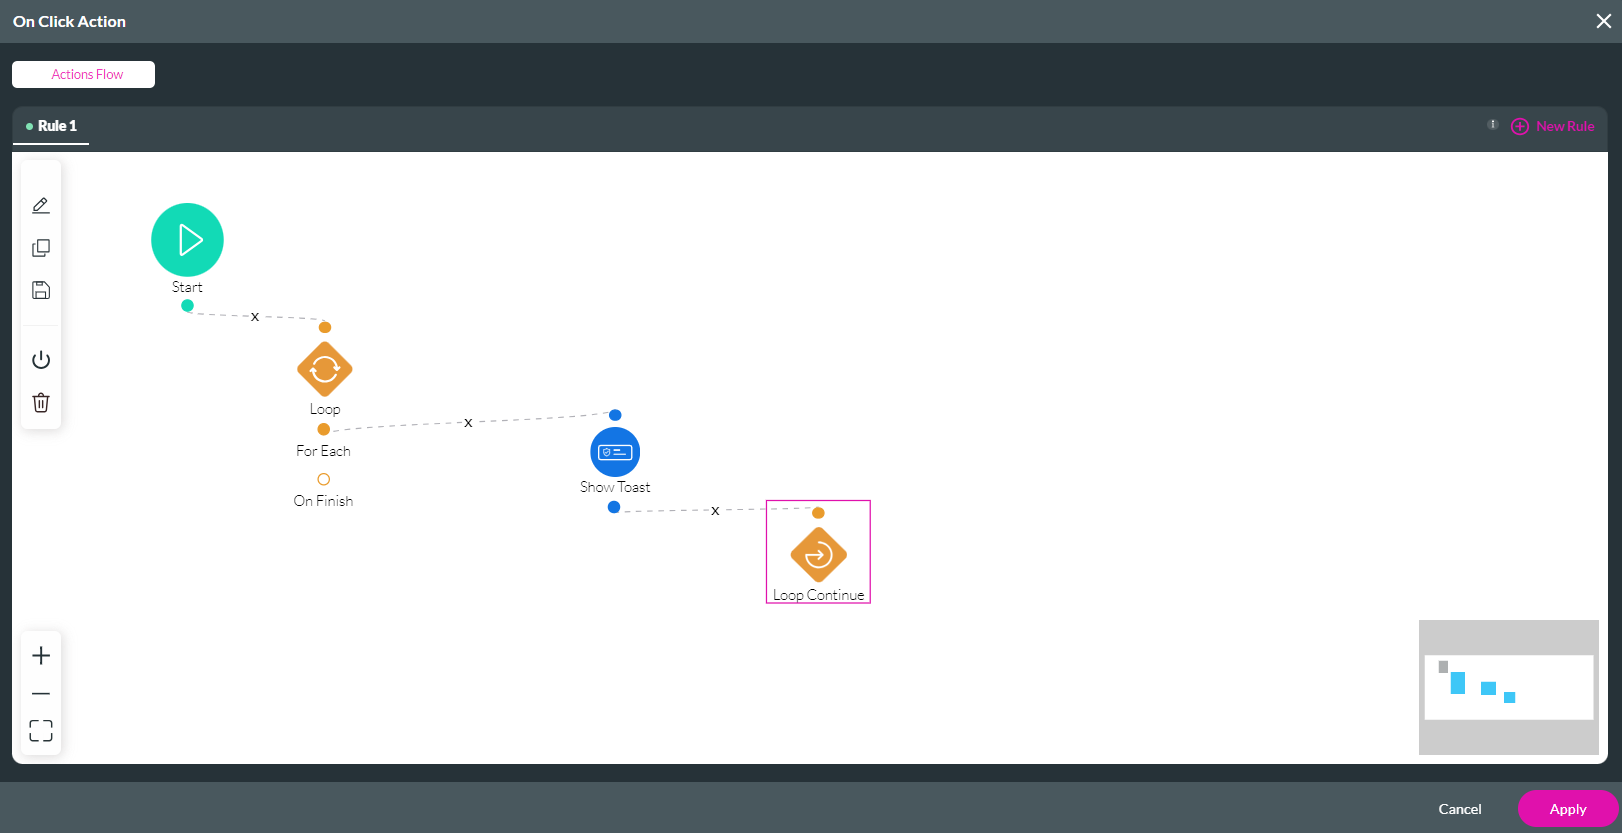
03 Continue the Loop
You can configure the Toast to run all the account names.
1. Navigate to the On Click Action screen. Click the Toast + icon. The Add Node Screen opens.
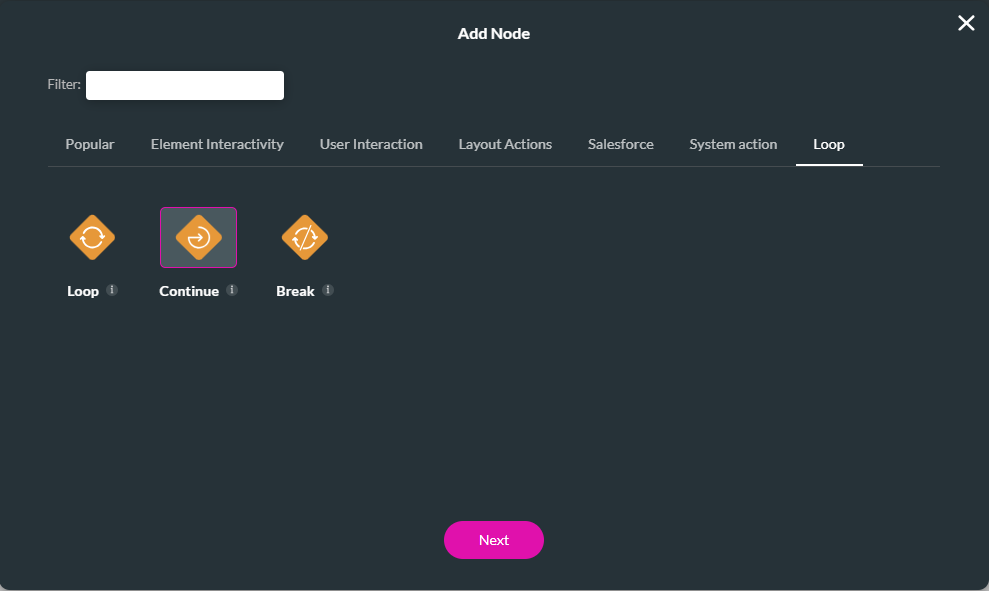
2. Select Continue and click Next.
3. Type in a Tag and click Insert.
The node is added to the screen.
4. Click Apply.

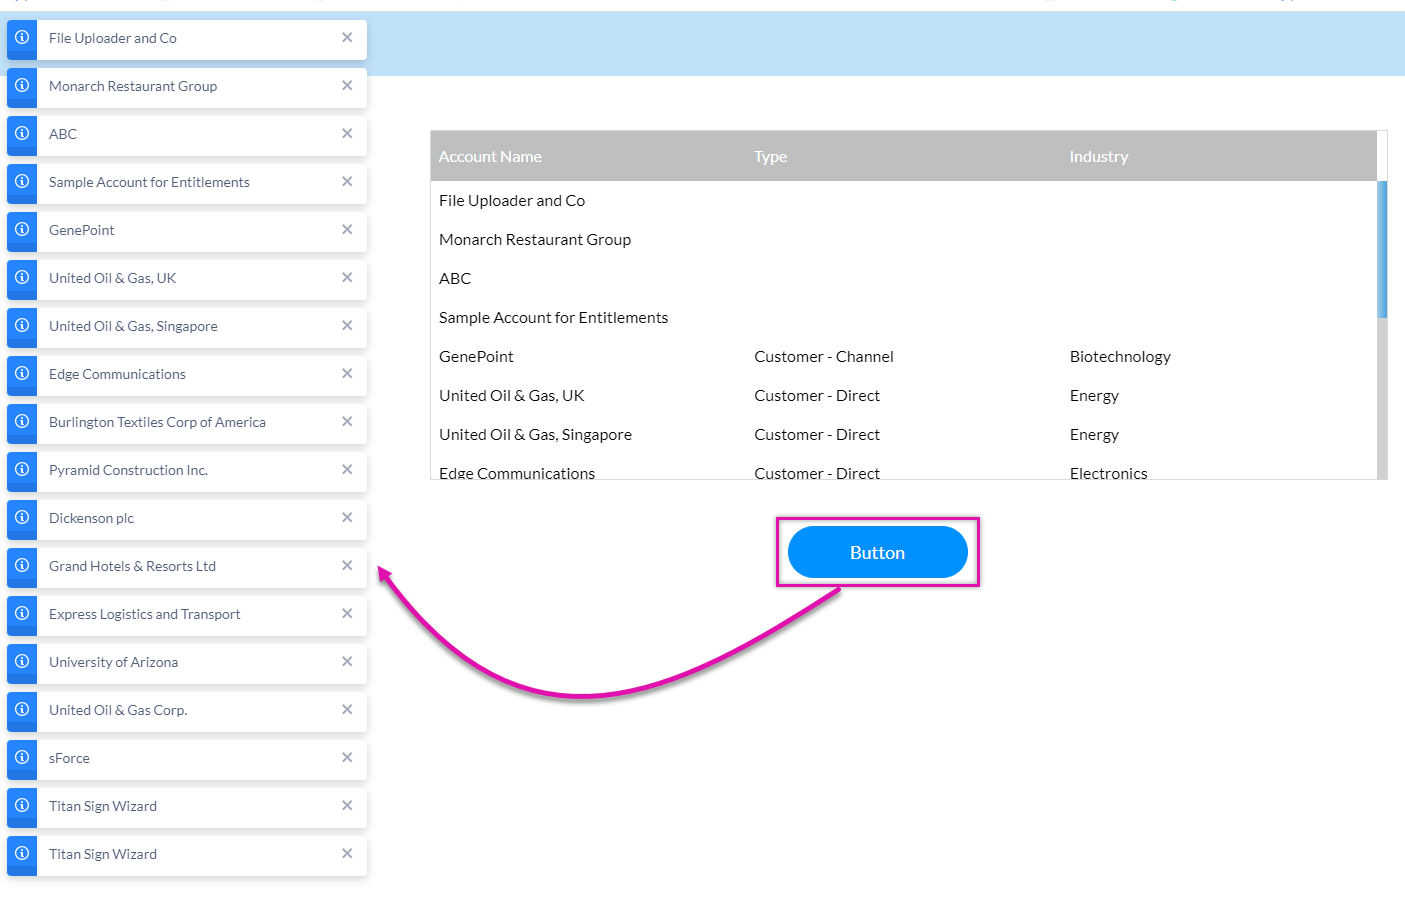
Save and Preview the project. When you click the button, multiple toast messages are displayed for all the account names in the table.
1. Navigate to the On Click Action screen. Click the Toast + icon. The Add Node Screen opens.
2. Select Continue and click Next.
3. Type in a Tag and click Insert.
The node is added to the screen.
4. Click Apply.
Save and Preview the project. When you click the button, multiple toast messages are displayed for all the account names in the table.
04 Add a Condition to a Loop
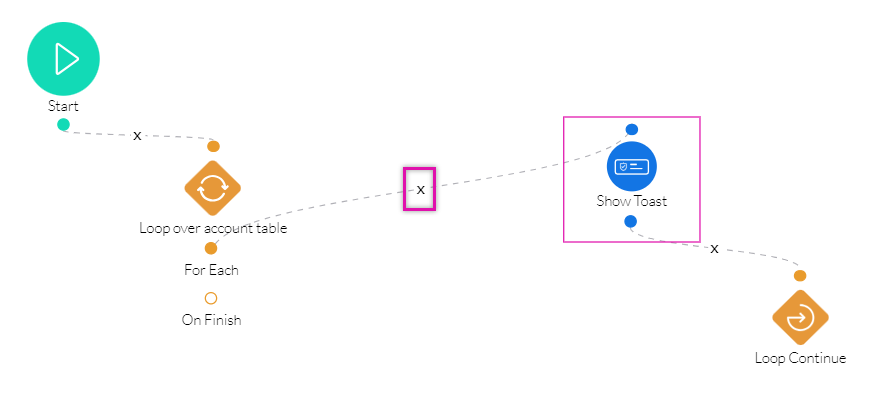
1. Navigate to the On Click Action window. Click the X icon to insert a condition between For Each and Show Toast.
2. Click the For Each + icon. The Add Node screen opens.
3. Select Condition and click Next.
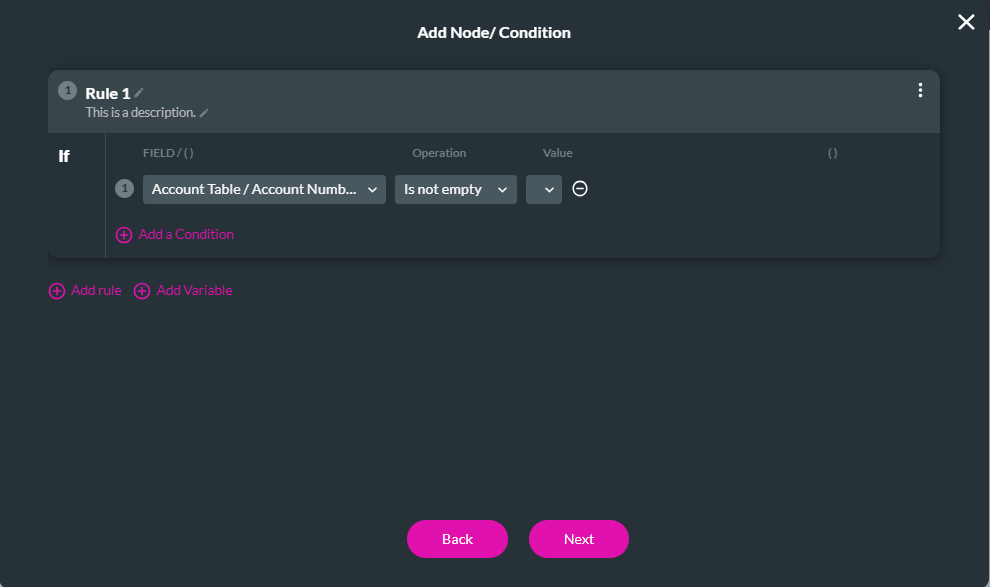
4. Configure the Condition. For example, the account number is not empty. Click Next.
5. Add a Tag and click Insert.
6. Click the Then + icon. The Add Node Screen opens.
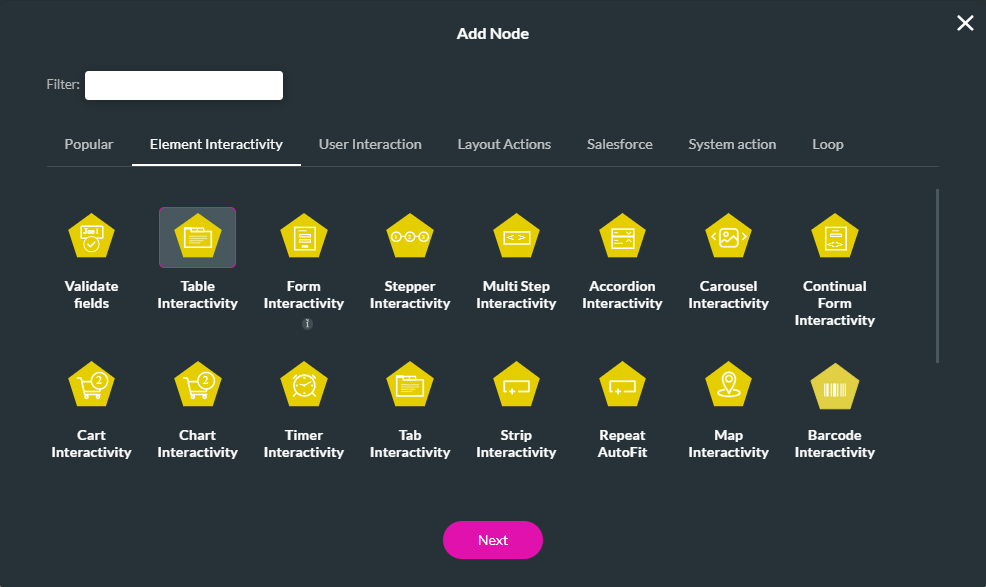
7. Select Table Interactivity and click Next.
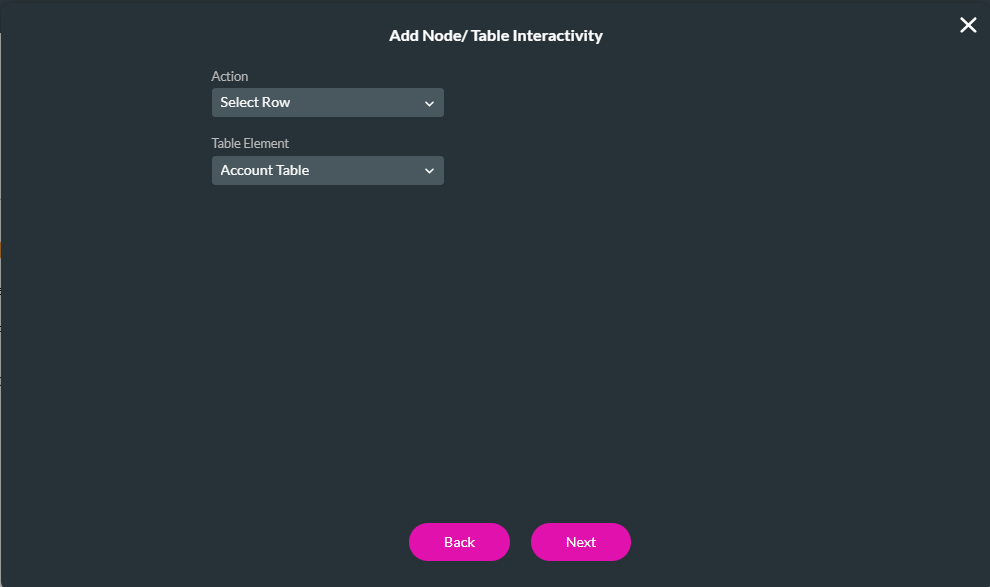
8. Use the drop-downs to configure the action and table element. For example, select a row for the account table.
9. Add a Tag and Click Insert.
The node is added.
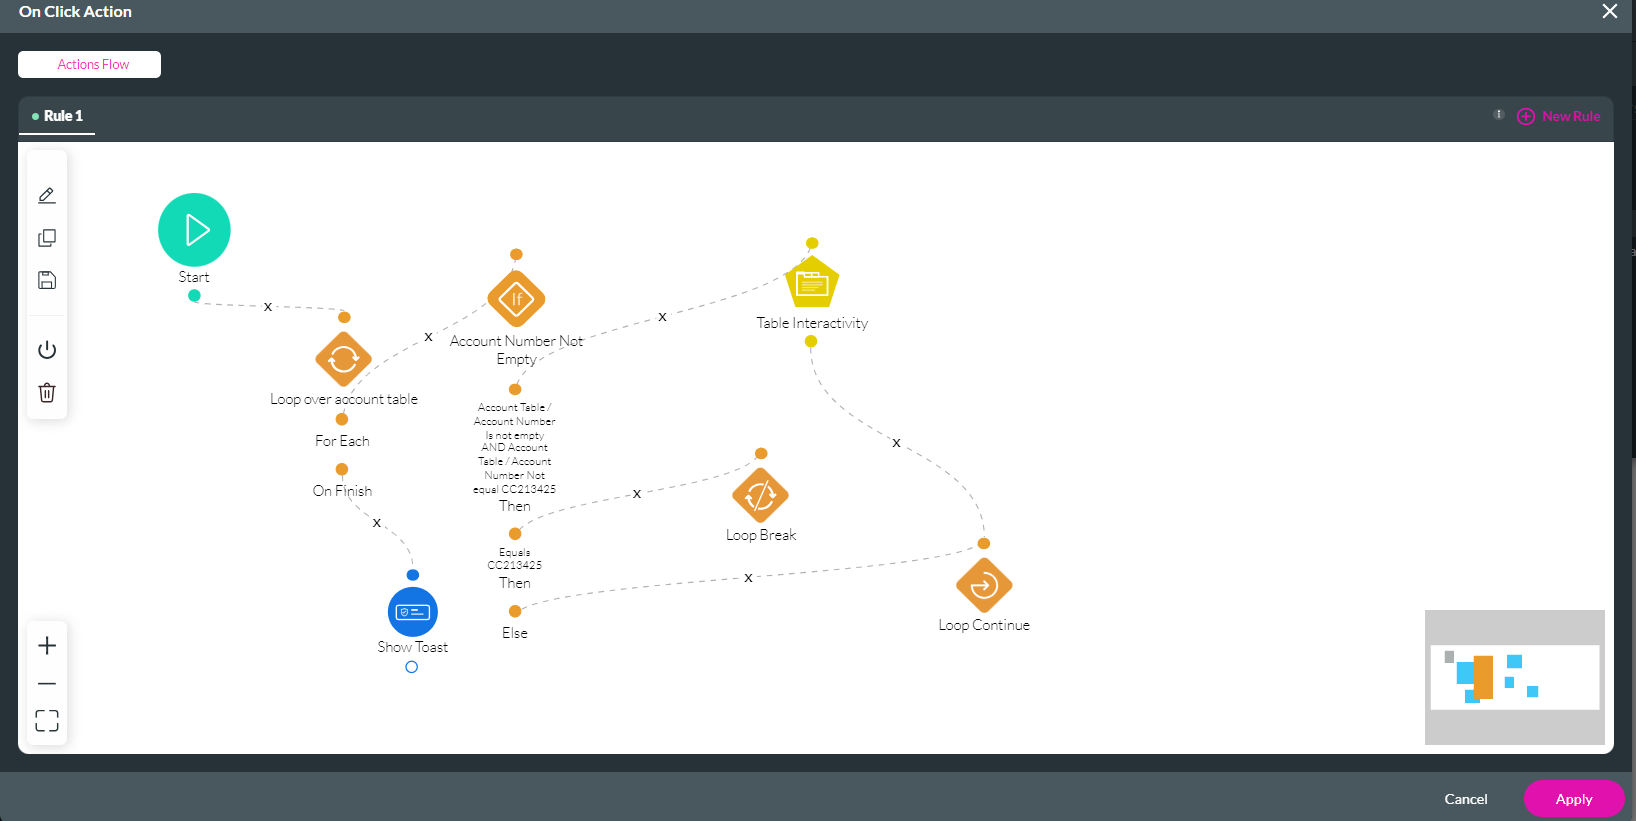
10. Use your cursor to connect Table Interactivity to Continue. For this example, the nodes were connected in the following configuration.
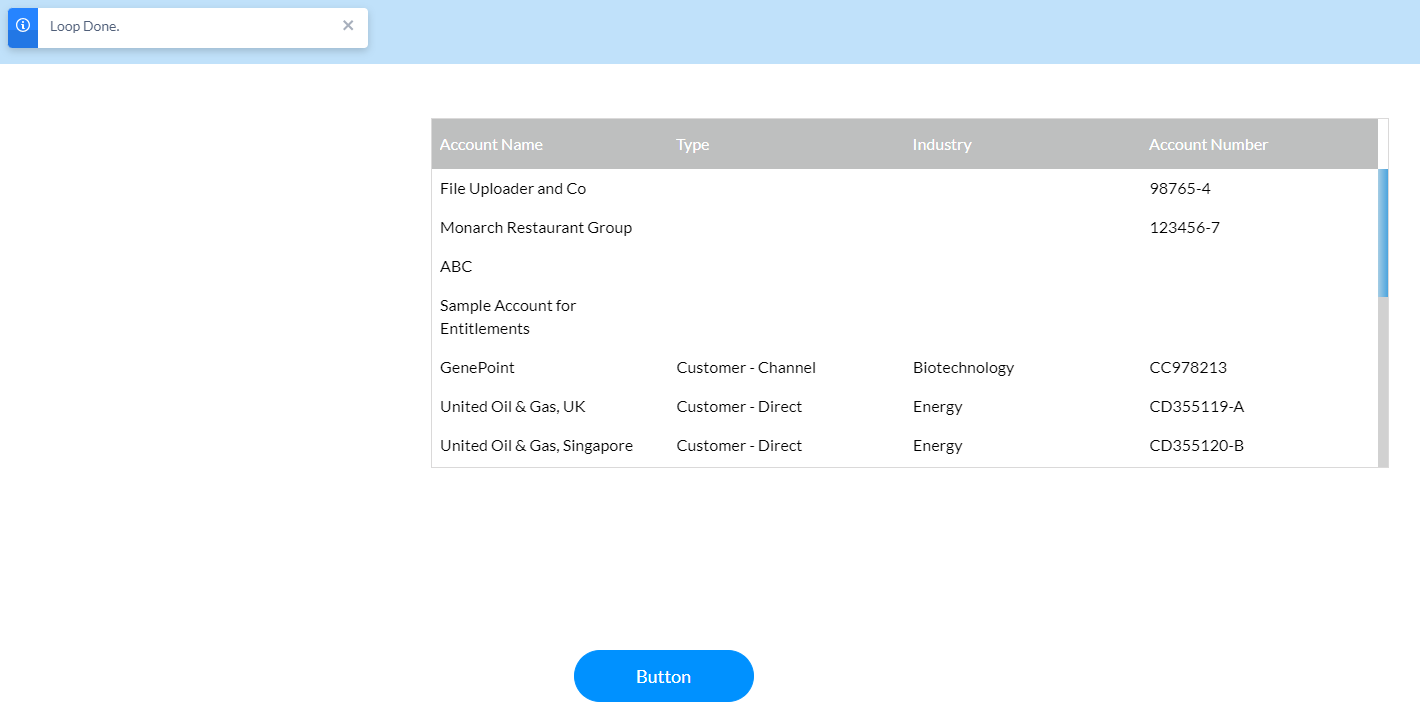
The Toast message was updated to display ‘Loop Done.’
11. Click Apply.
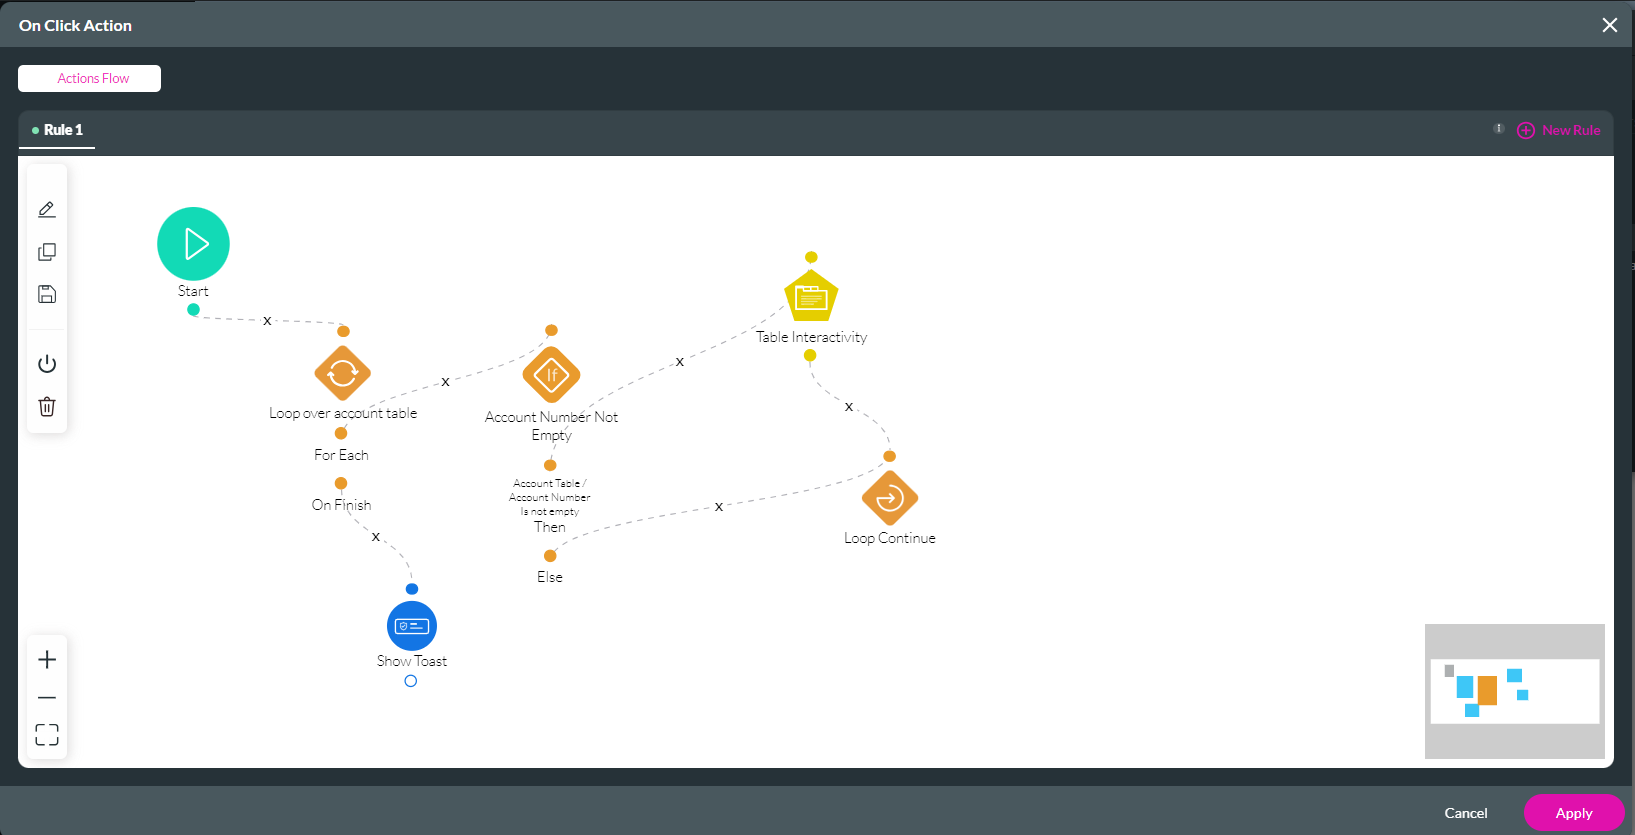
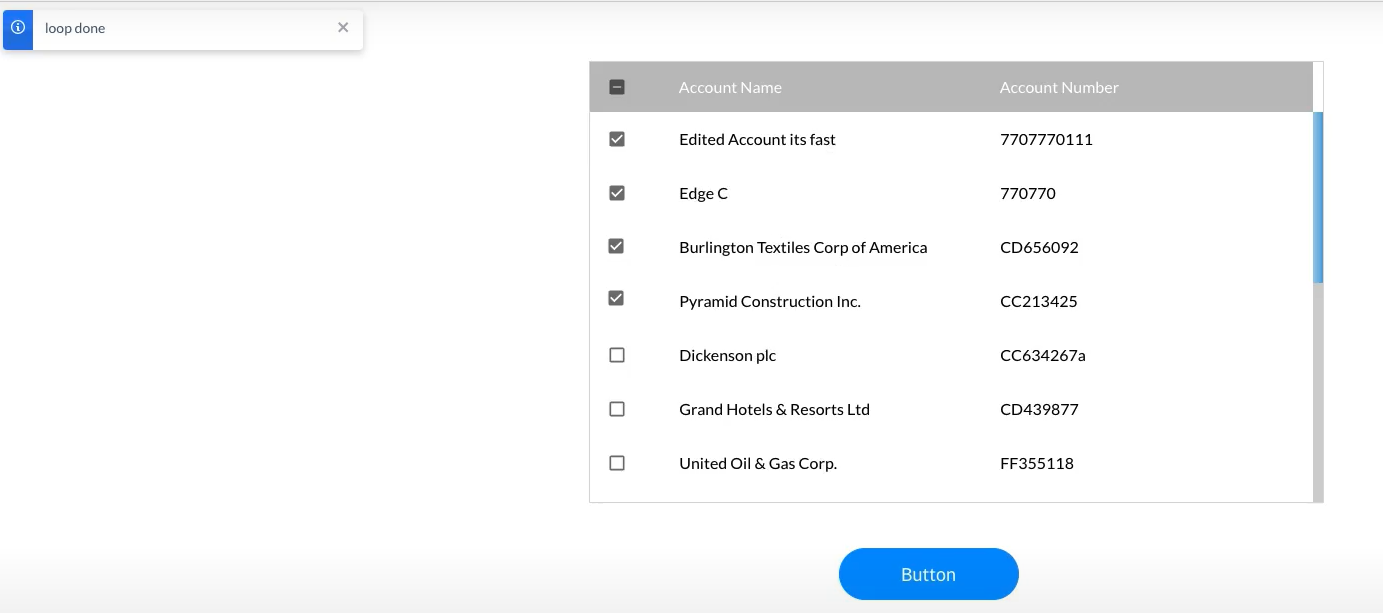
Save and Preview. When you click the button, the loop runs. The Toast displays when the loop is complete.
2. Click the For Each + icon. The Add Node screen opens.
3. Select Condition and click Next.
4. Configure the Condition. For example, the account number is not empty. Click Next.
5. Add a Tag and click Insert.
6. Click the Then + icon. The Add Node Screen opens.
7. Select Table Interactivity and click Next.
8. Use the drop-downs to configure the action and table element. For example, select a row for the account table.
9. Add a Tag and Click Insert.
The node is added.
10. Use your cursor to connect Table Interactivity to Continue. For this example, the nodes were connected in the following configuration.
The Toast message was updated to display ‘Loop Done.’
11. Click Apply.
Save and Preview. When you click the button, the loop runs. The Toast displays when the loop is complete.
05 Insert a Break
You can add a break to stop the loop when it reaches a specific point. In this example, a break will be inserted after a particular Account Number.
1. Navigate to the On Click Action screen.
2. Double-click on the Condition icon. The Edit Node screen opens.
3. Configure your conditions to stop after a specific Account Number.
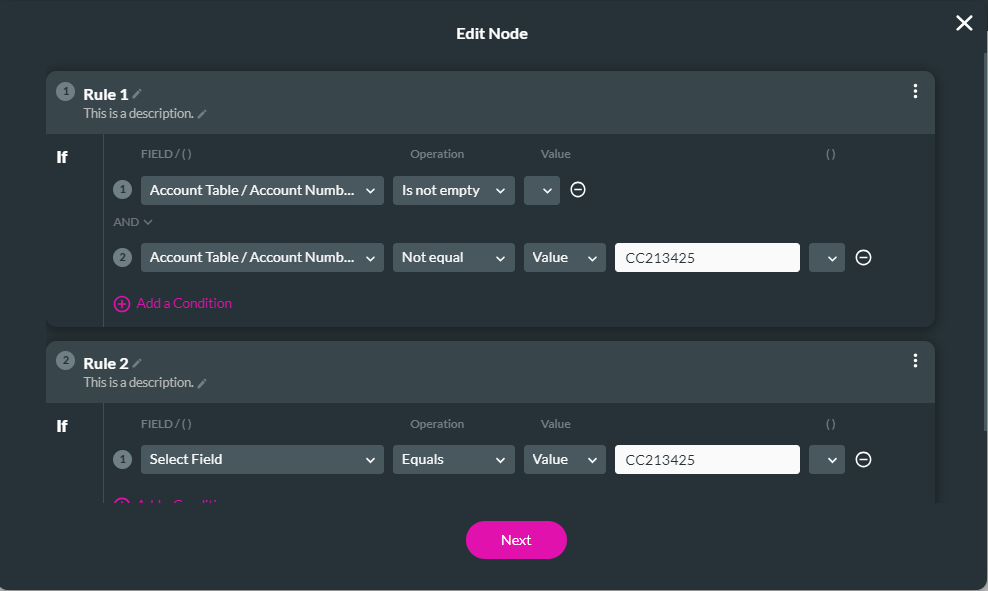
4. Click Next, and on the next screen, click Save.
5. Click the Equals Then + icon. The Add Node screen opens.
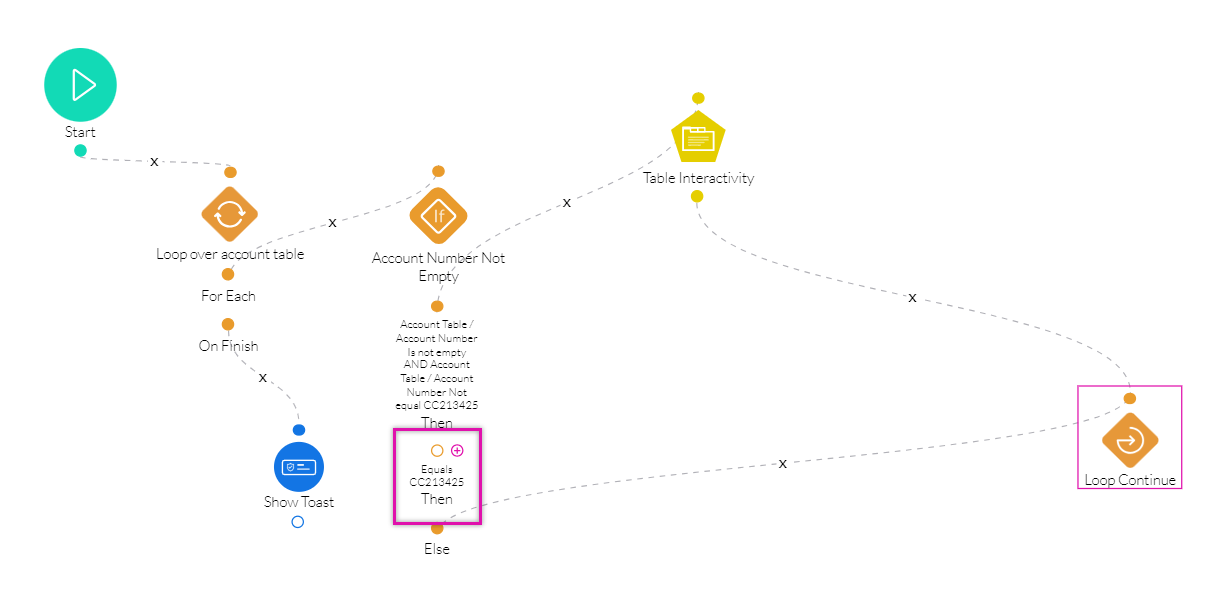
6. Select break and click Next.
7. Add a tag and click Insert.
The node is added.
8. Click Apply.
Save and Preview. The loop will only run when you click the button until you have the specified account number.
1. Navigate to the On Click Action screen.
2. Double-click on the Condition icon. The Edit Node screen opens.
3. Configure your conditions to stop after a specific Account Number.
4. Click Next, and on the next screen, click Save.
5. Click the Equals Then + icon. The Add Node screen opens.
6. Select break and click Next.
7. Add a tag and click Insert.
The node is added.
8. Click Apply.
Save and Preview. The loop will only run when you click the button until you have the specified account number.
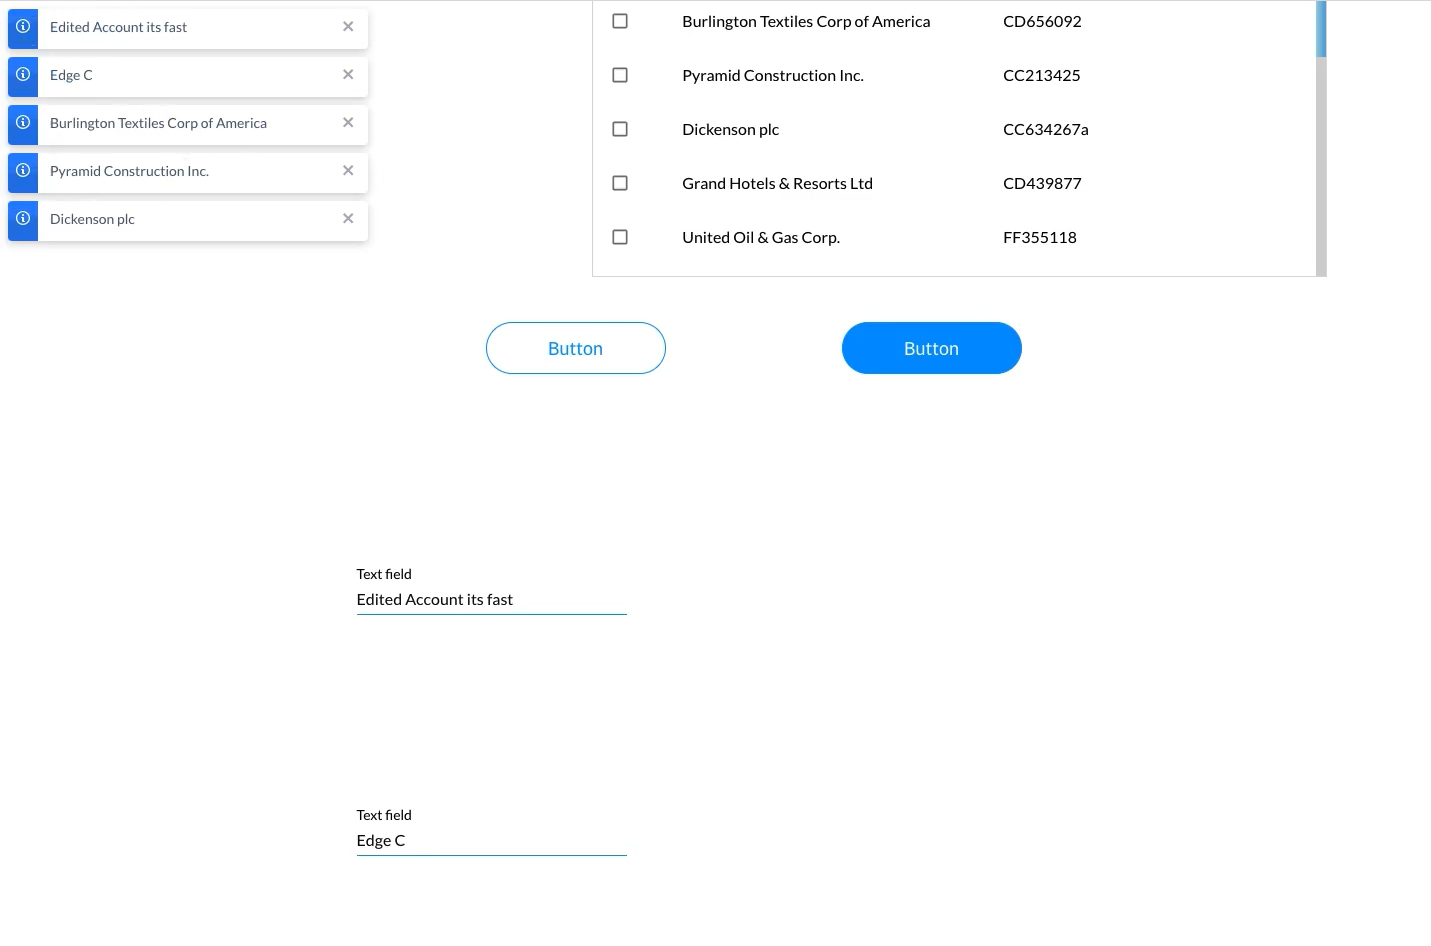
06 Loop for a Repeat Strip
This example is a configured repeat strip with a text field pulling Account data from Salesforce.
A secondary button was inserted into the previous strip.
1. Click the link icon of the secondary button. The On Click Action screen opens.

2. Click the Start + icon. The Add Node screen opens.
3. Select Loop and click Next.
4. Use the drop-down to select the element—for example, the repeat strip. Click Next.
5. Add a tag and click Insert.
6. Click the For Each + icon. The Add Node screen opens.
7. Select Show Toast and click Next.

8. Configure the toast message and click Next.
9. Add a tag and click Insert.
10. Click the Show Toast + icon. The Add Node screen opens.
11. Select Continue and click Next.

12. Add a Tag and click Insert.
The node is added to the actions flow.
13. Click Apply.
Save and preview. When the secondary button is clicked, the toasts are displayed.
A secondary button was inserted into the previous strip.
1. Click the link icon of the secondary button. The On Click Action screen opens.
2. Click the Start + icon. The Add Node screen opens.
3. Select Loop and click Next.
4. Use the drop-down to select the element—for example, the repeat strip. Click Next.
5. Add a tag and click Insert.
6. Click the For Each + icon. The Add Node screen opens.
7. Select Show Toast and click Next.
8. Configure the toast message and click Next.
9. Add a tag and click Insert.
10. Click the Show Toast + icon. The Add Node screen opens.
11. Select Continue and click Next.
12. Add a Tag and click Insert.
The node is added to the actions flow.
13. Click Apply.
Save and preview. When the secondary button is clicked, the toasts are displayed.
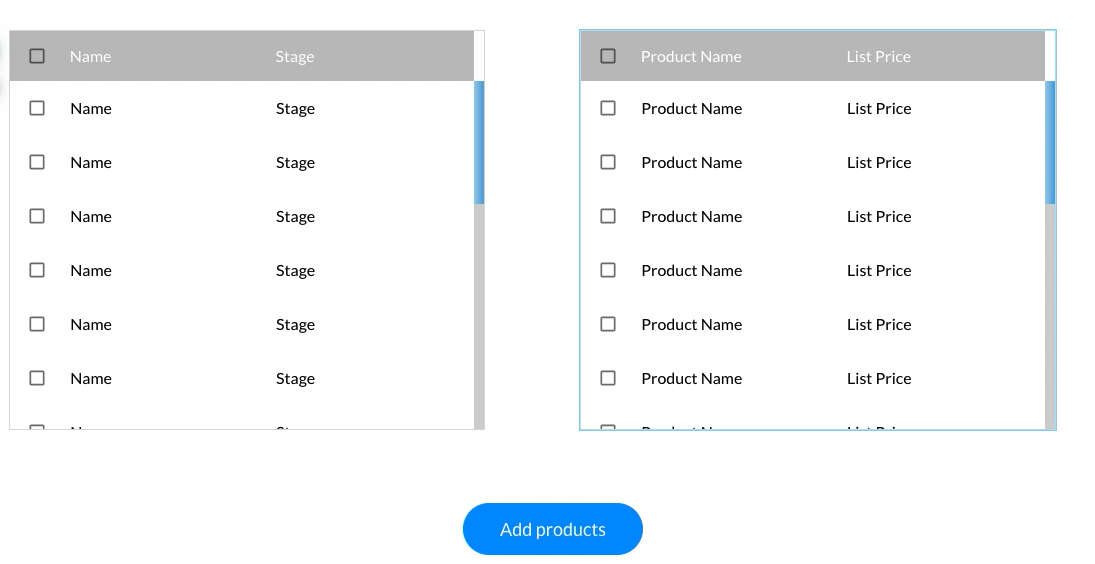
07 Loop for Variables
Two tables were created for this demonstration.
On the left table, users can select opportunities, and the right table displays price book entries.
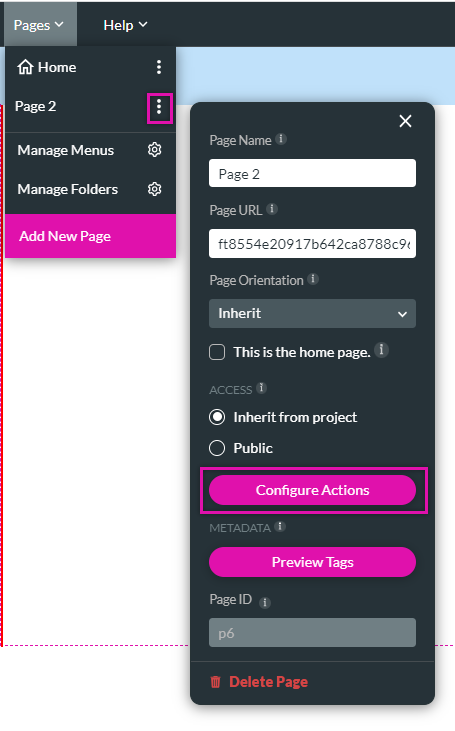
1. Click on the Pages drop-down and open the kebab sub-menu for the page you want to configure.
2. Click the Configure Actions button. The Configure Actions screen opens.
3. Click on the Static Variables tab and create a new variable. For this example, the variable indicates the Opportunity ID from Loop.

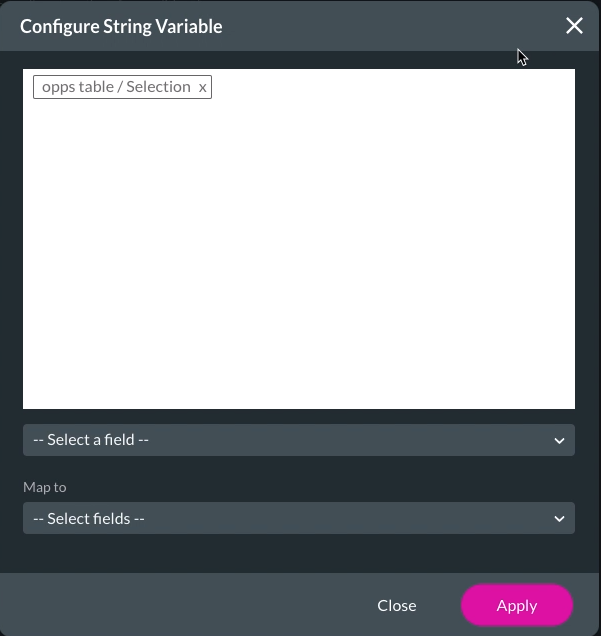
4. Click on the String Formula Field Tab and create a new string variable, opptable_selection. Select the Configure button. The Configure String Varibale screen opens.
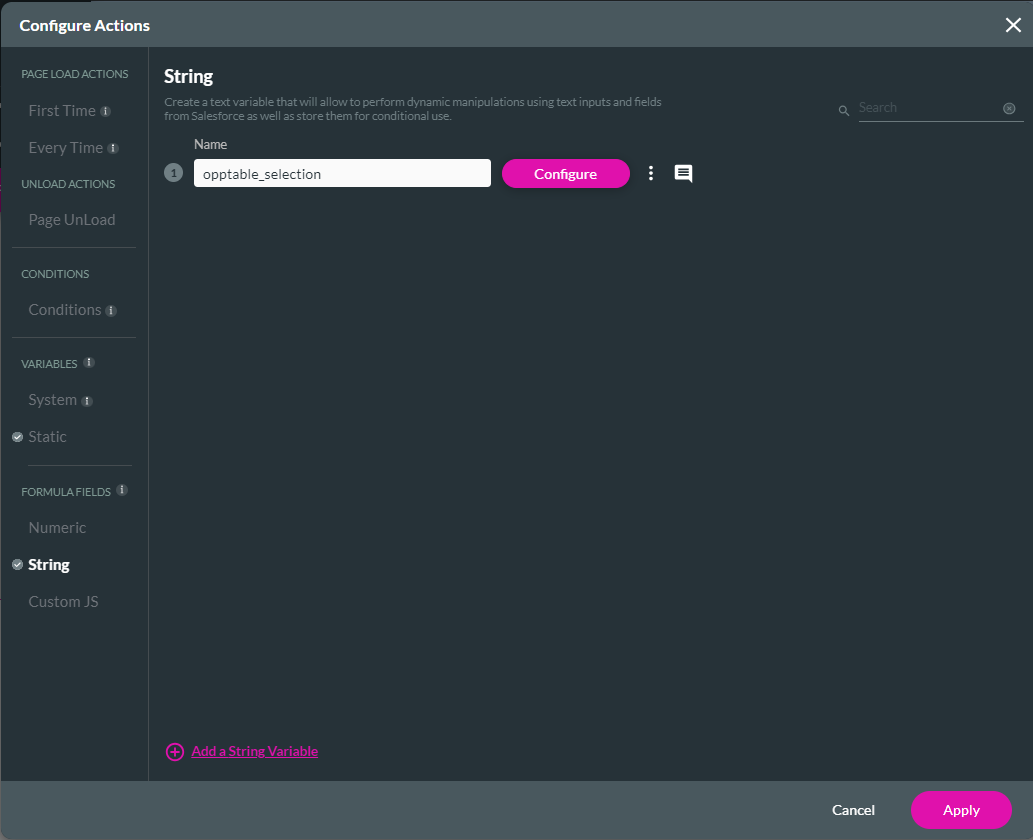
5. Configure the string variable—for example, the opportunity table selection. Click Apply.
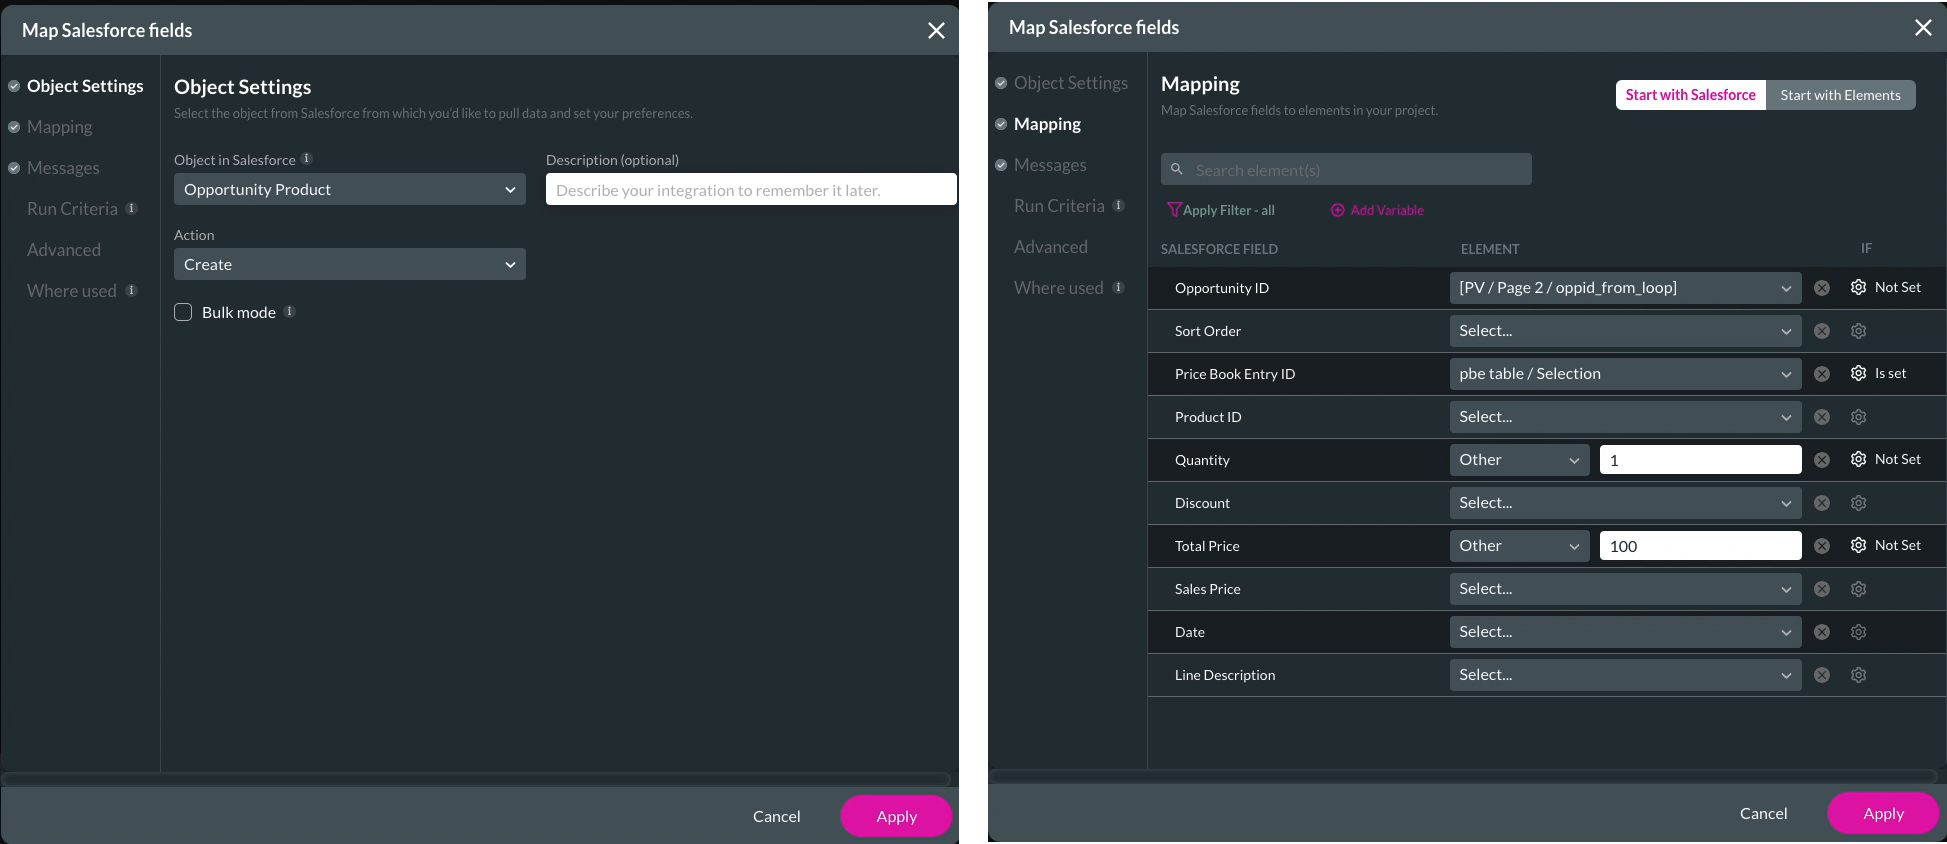
The following action flow was configured for the button. The Salesforce Action was limited to 20 entries as this is the maximum number of pushes to Salesforce that Titan can complete simultaneously.
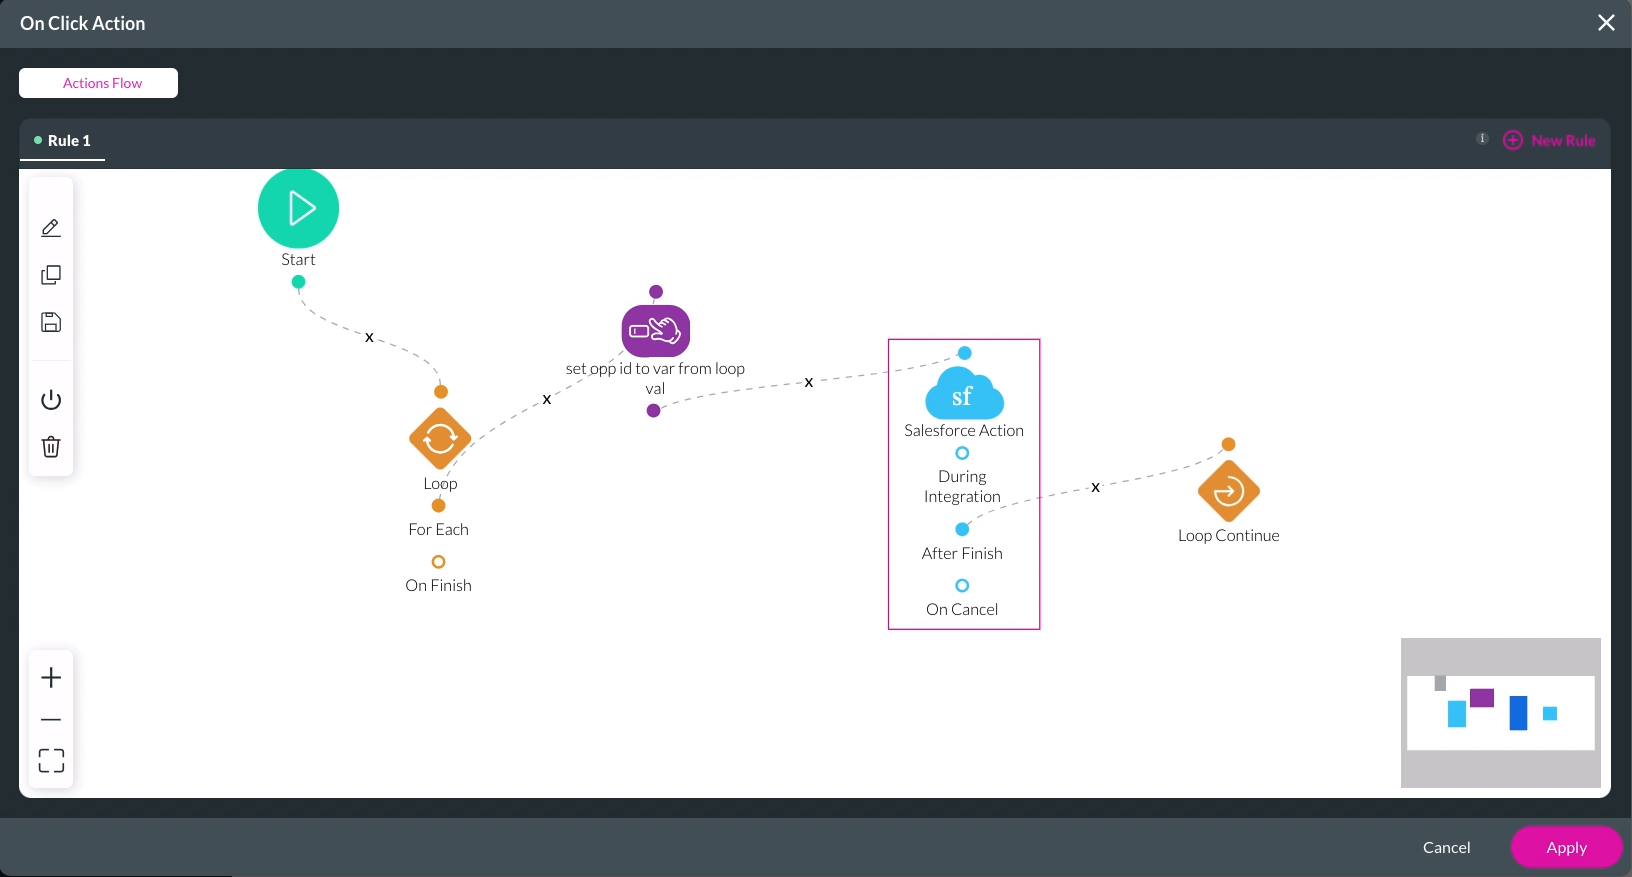
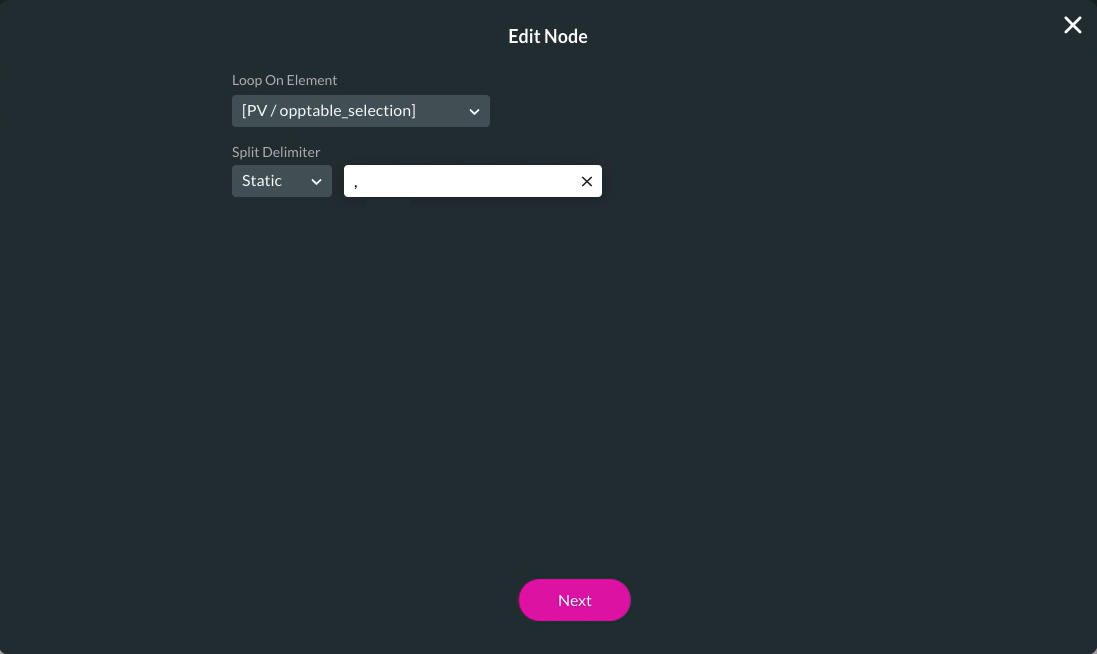
Configuration for the loop was set up as follows:
Note: When the loop is set up over a variable, you can set up a static value or dynamic field split delimiter.
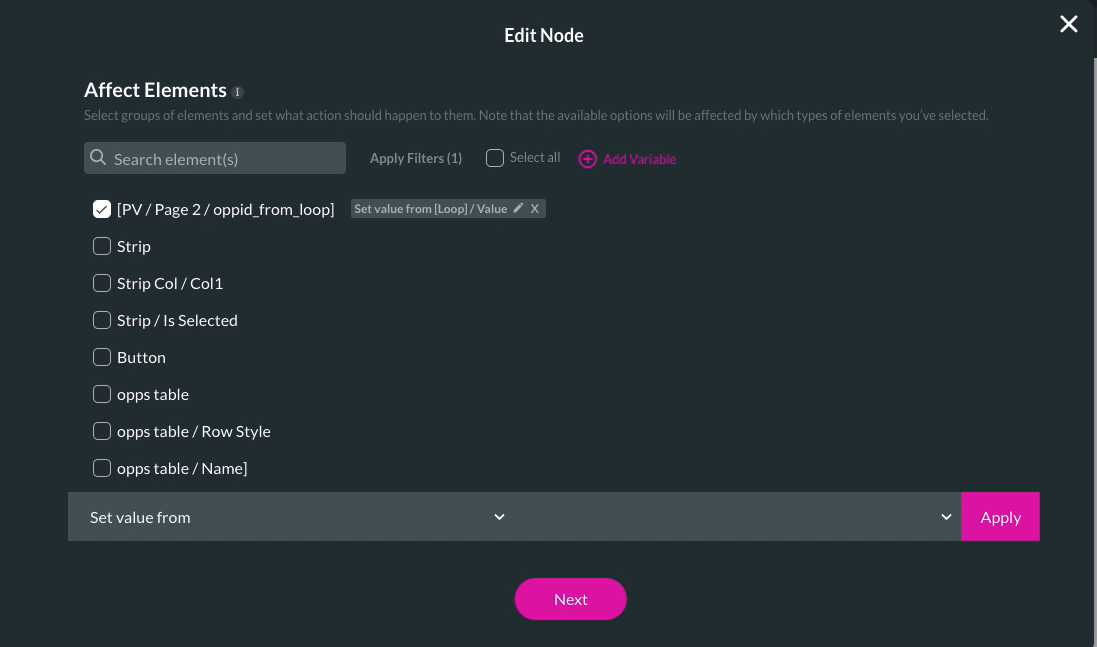
Configuration for the affected variable was set up as follows: The loop variable will display the loop value.
The Salesforce Action was configured as a push.
Save and Preview the project. Make selections from each table and click on the button.
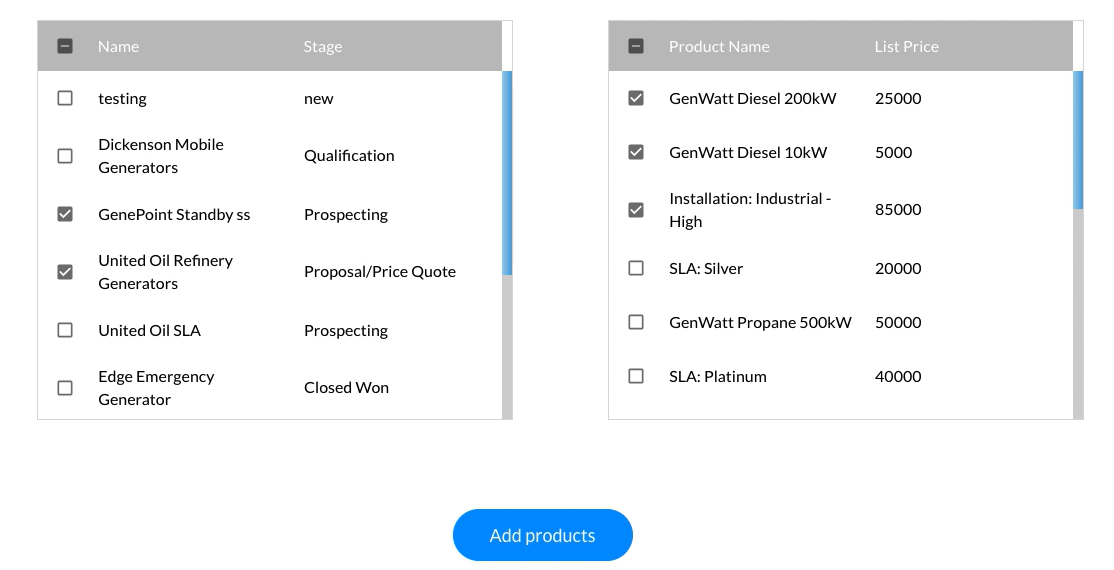
The loop will run over the selected products and run a Salesforce Push.
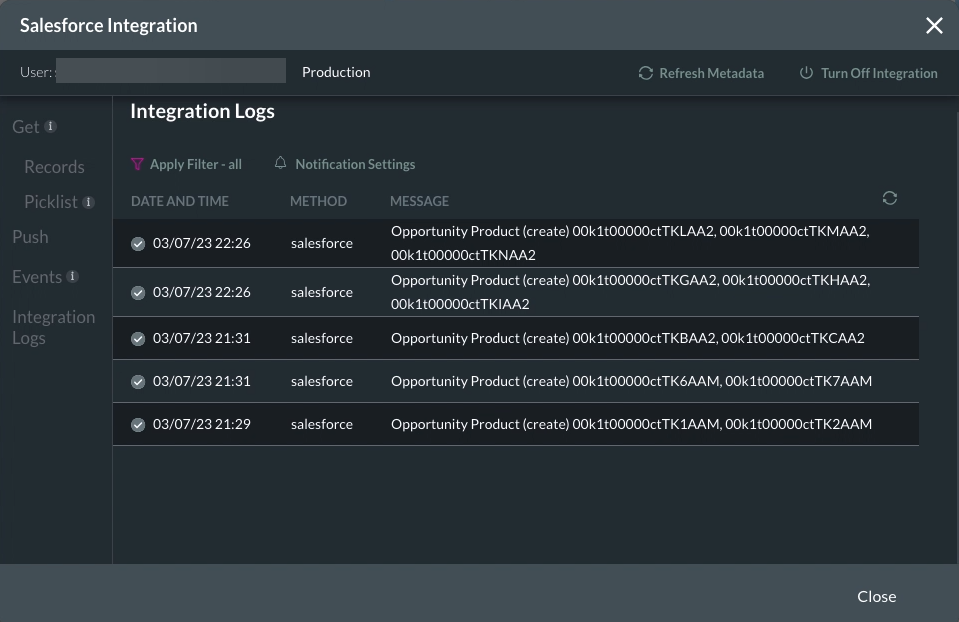
Navigate to the Integration Logs. Five opportunity products were created to match the five selections made.
1. Click on the Pages drop-down and open the kebab sub-menu for the page you want to configure.
2. Click the Configure Actions button. The Configure Actions screen opens.
3. Click on the Static Variables tab and create a new variable. For this example, the variable indicates the Opportunity ID from Loop.
4. Click on the String Formula Field Tab and create a new string variable, opptable_selection. Select the Configure button. The Configure String Varibale screen opens.
5. Configure the string variable—for example, the opportunity table selection. Click Apply.
The following action flow was configured for the button. The Salesforce Action was limited to 20 entries as this is the maximum number of pushes to Salesforce that Titan can complete simultaneously.
Configuration for the loop was set up as follows:
Note: When the loop is set up over a variable, you can set up a static value or dynamic field split delimiter.
Configuration for the affected variable was set up as follows: The loop variable will display the loop value.
The Salesforce Action was configured as a push.
Save and Preview the project. Make selections from each table and click on the button.
The loop will run over the selected products and run a Salesforce Push.
Navigate to the Integration Logs. Five opportunity products were created to match the five selections made.