Preview File (6 min)
Completion requirements
01 Getting Started
This tutorial will cover how to preview a file.
Make sure that a file is attached to the Salesforce object.
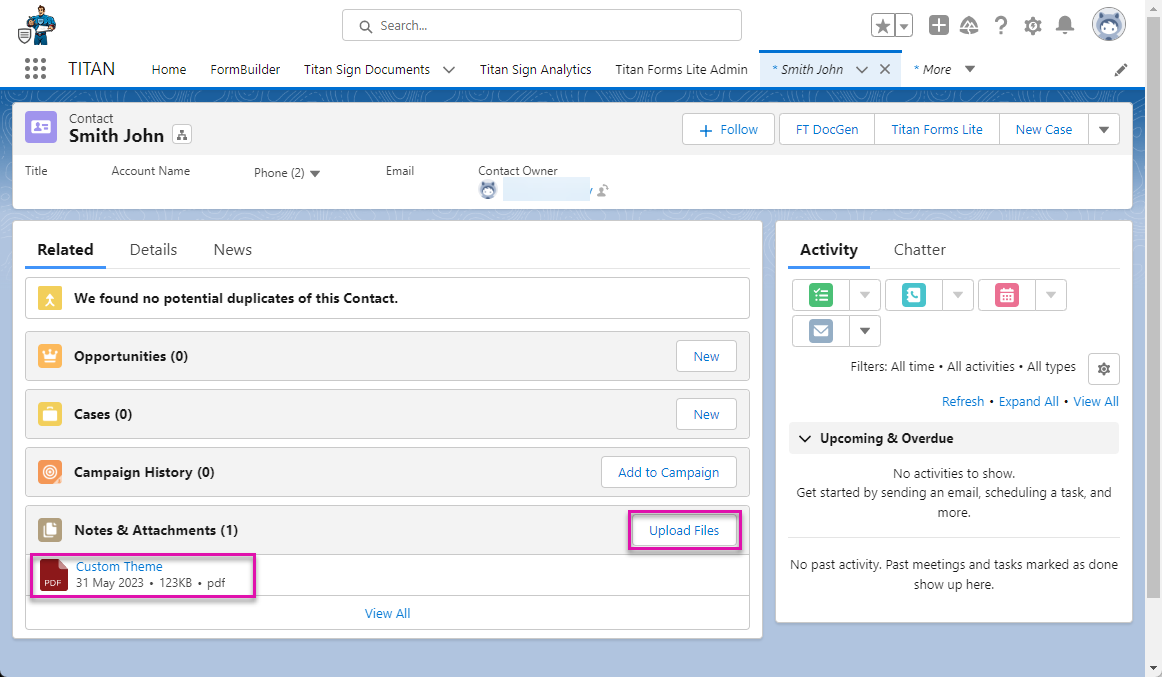
Make sure that a file is attached to the Salesforce object.
02 Inserting a File Viewer Widget
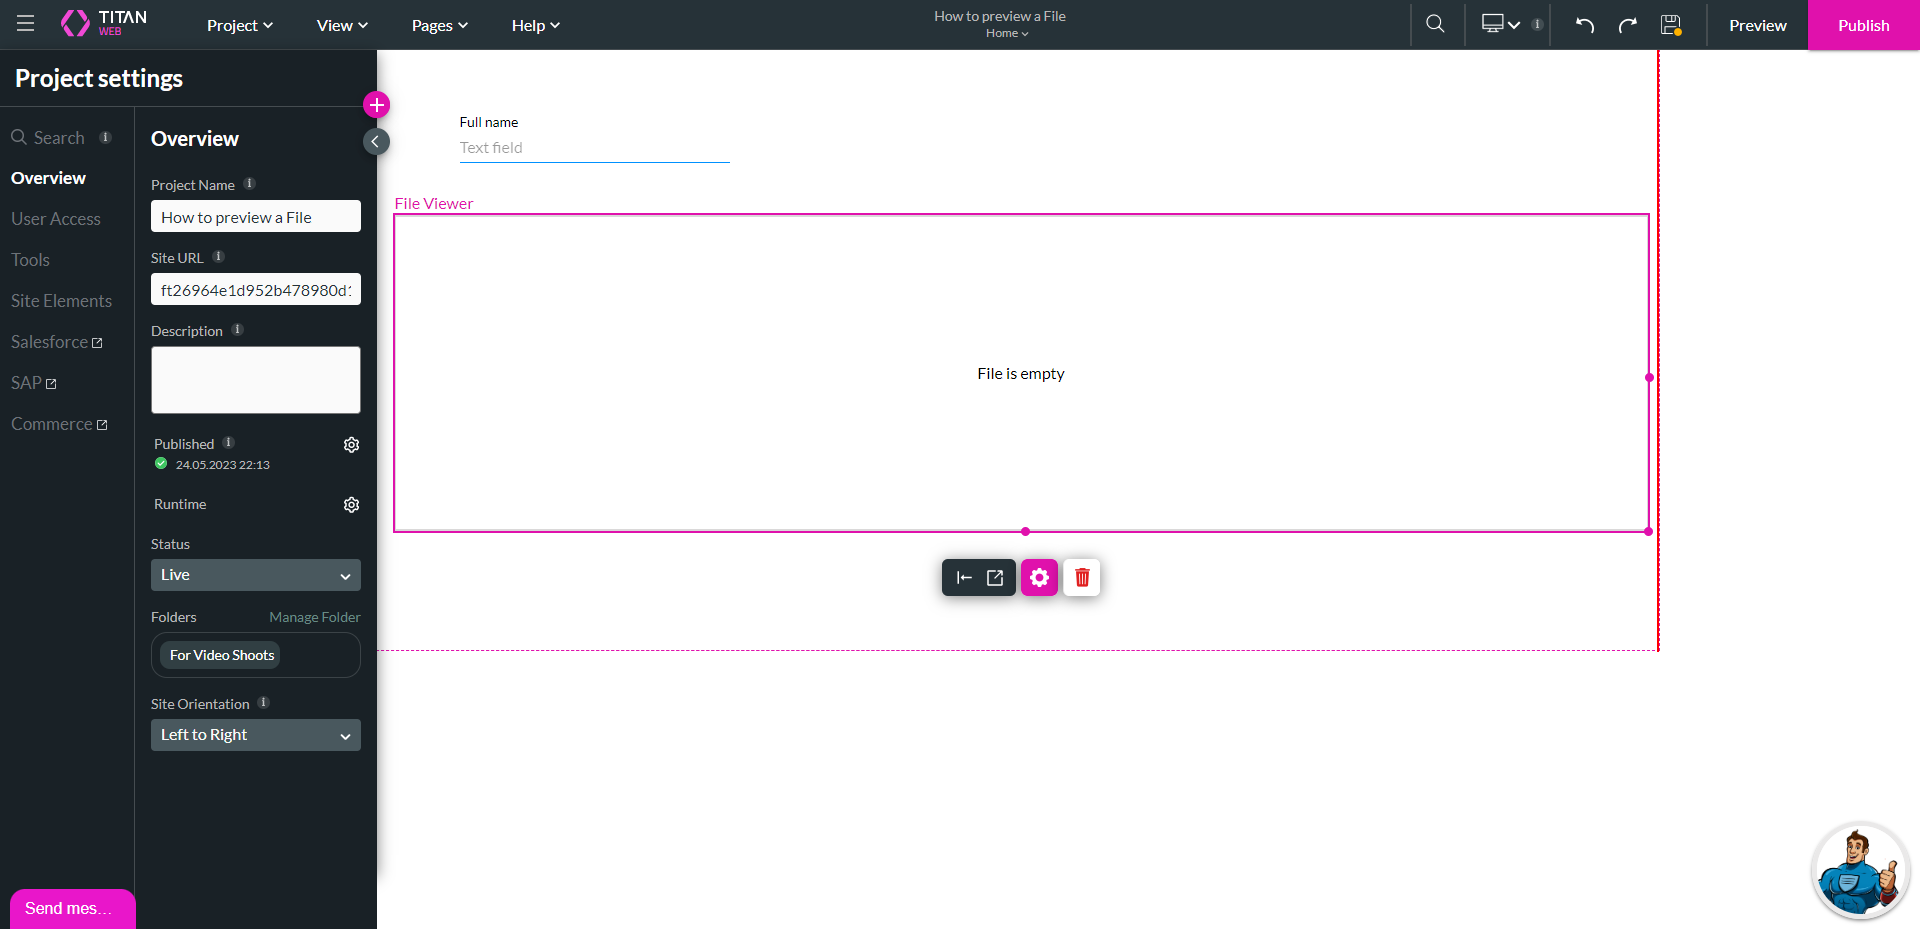
1. Click the + icon to open the element list.
2. Under Input, drag and drop a text field element to the canvas.
3. Drag and drop a File Viewer widget to the canvas under Widgets.
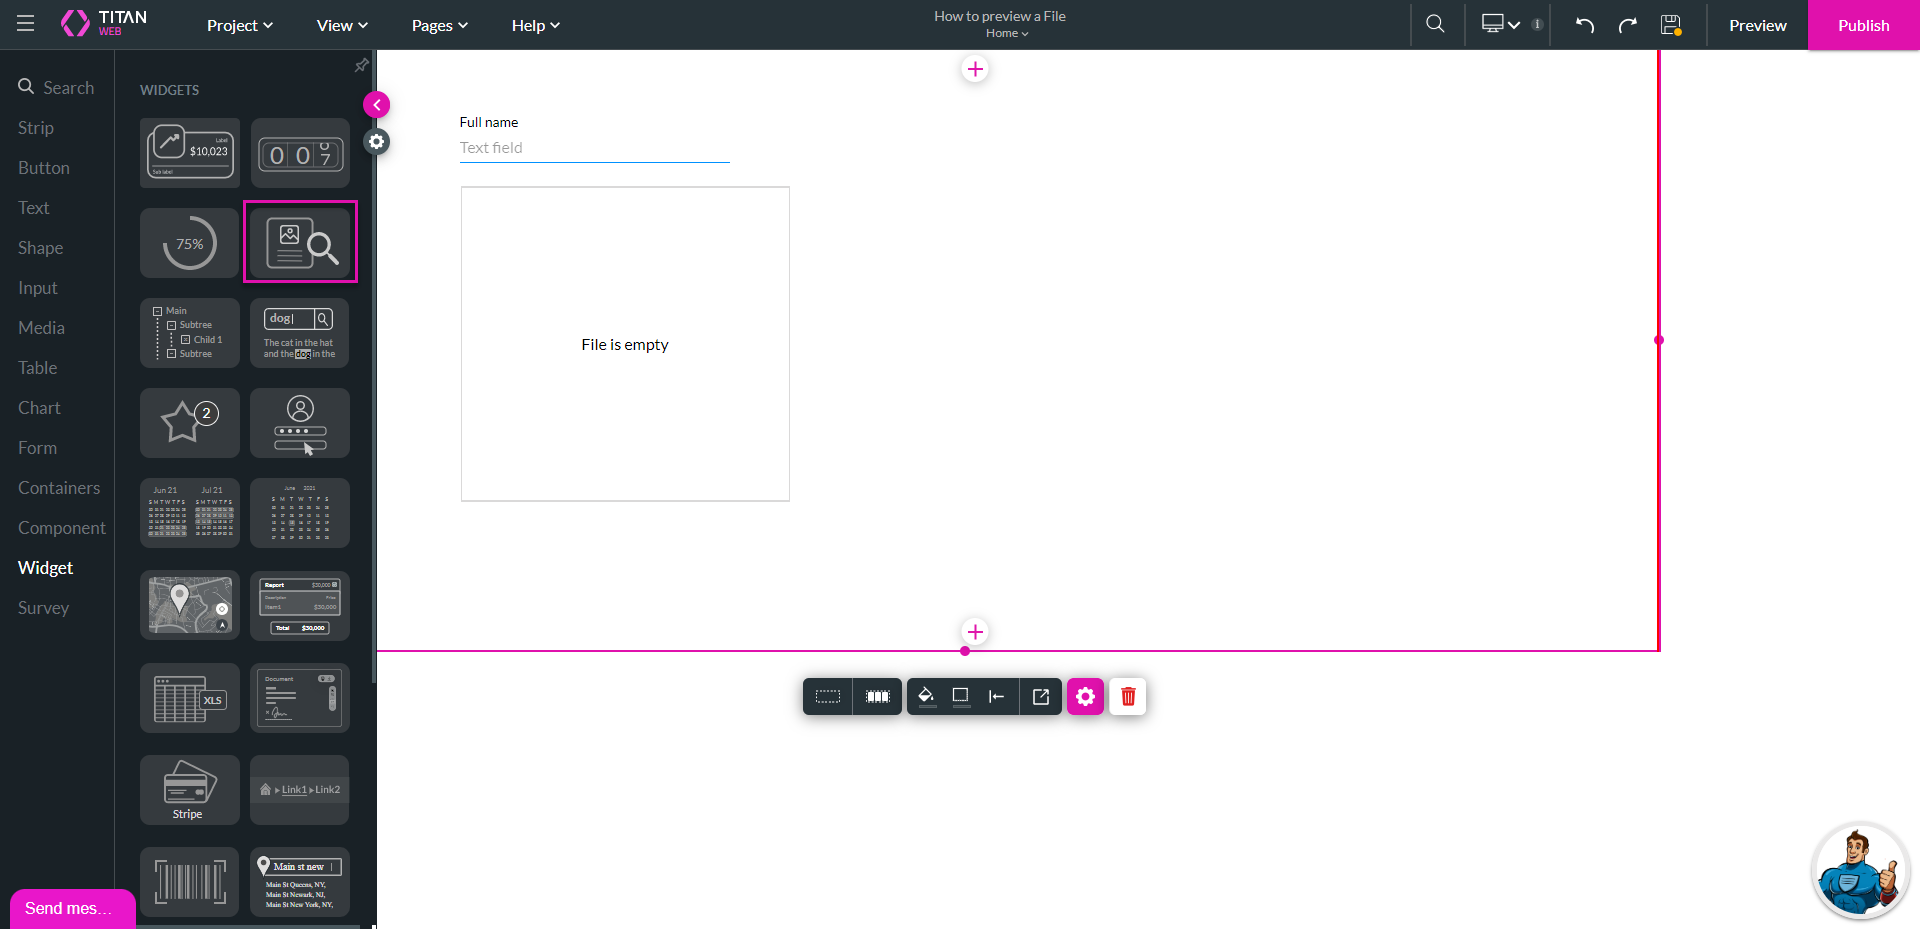
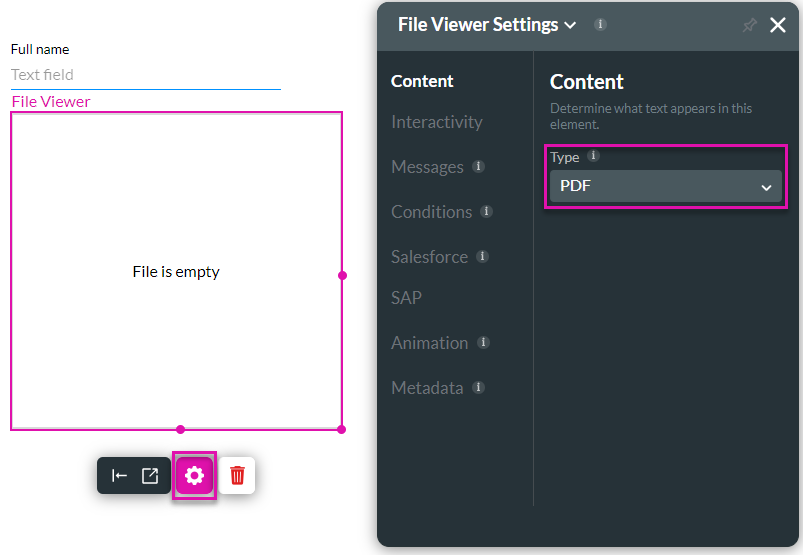
4. Click the Gear icon to open the File Viewer Settings screen.
5. Under Content, use the Type drop-down list to select the type of file, such as a PDF.
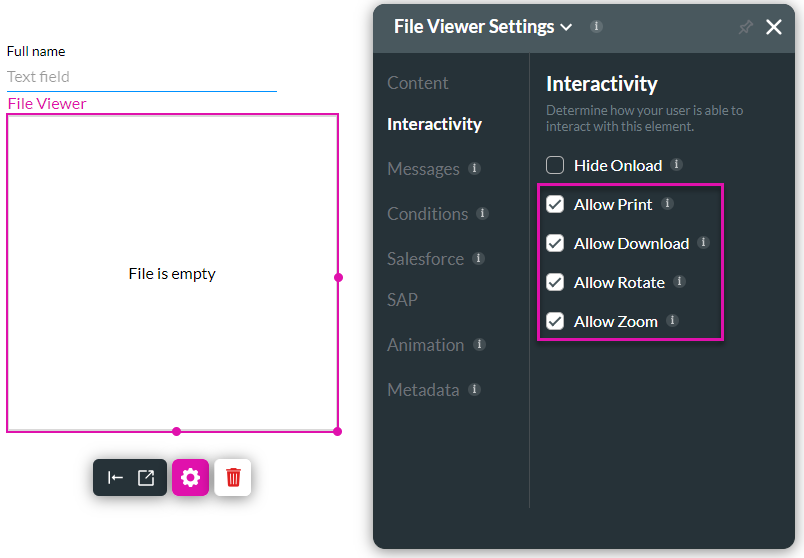
6. Under Interactivity, click the required checkboxes:
7. Increase the size of the file viewer by dragging it bigger.
2. Under Input, drag and drop a text field element to the canvas.
3. Drag and drop a File Viewer widget to the canvas under Widgets.
4. Click the Gear icon to open the File Viewer Settings screen.
5. Under Content, use the Type drop-down list to select the type of file, such as a PDF.
6. Under Interactivity, click the required checkboxes:
- Allow Print
- Allow Download
- Allow Rotate
- Allow Zoom
7. Increase the size of the file viewer by dragging it bigger.
03 Custom Variable
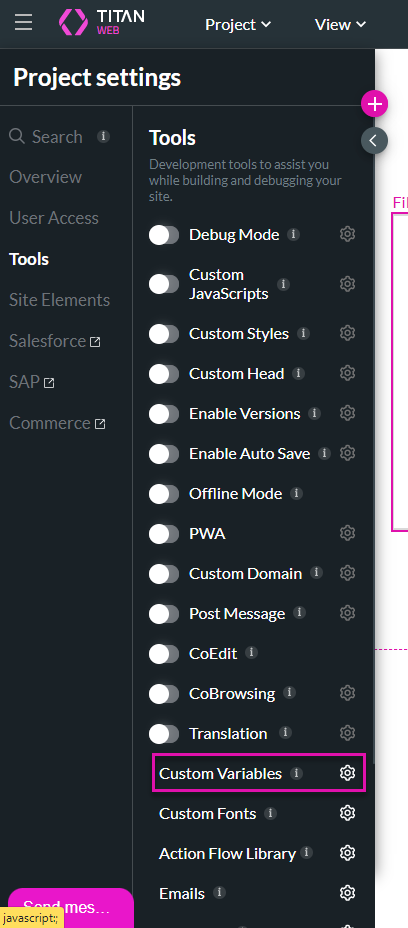
1. Click the Gear icon to open the project Settings screen.
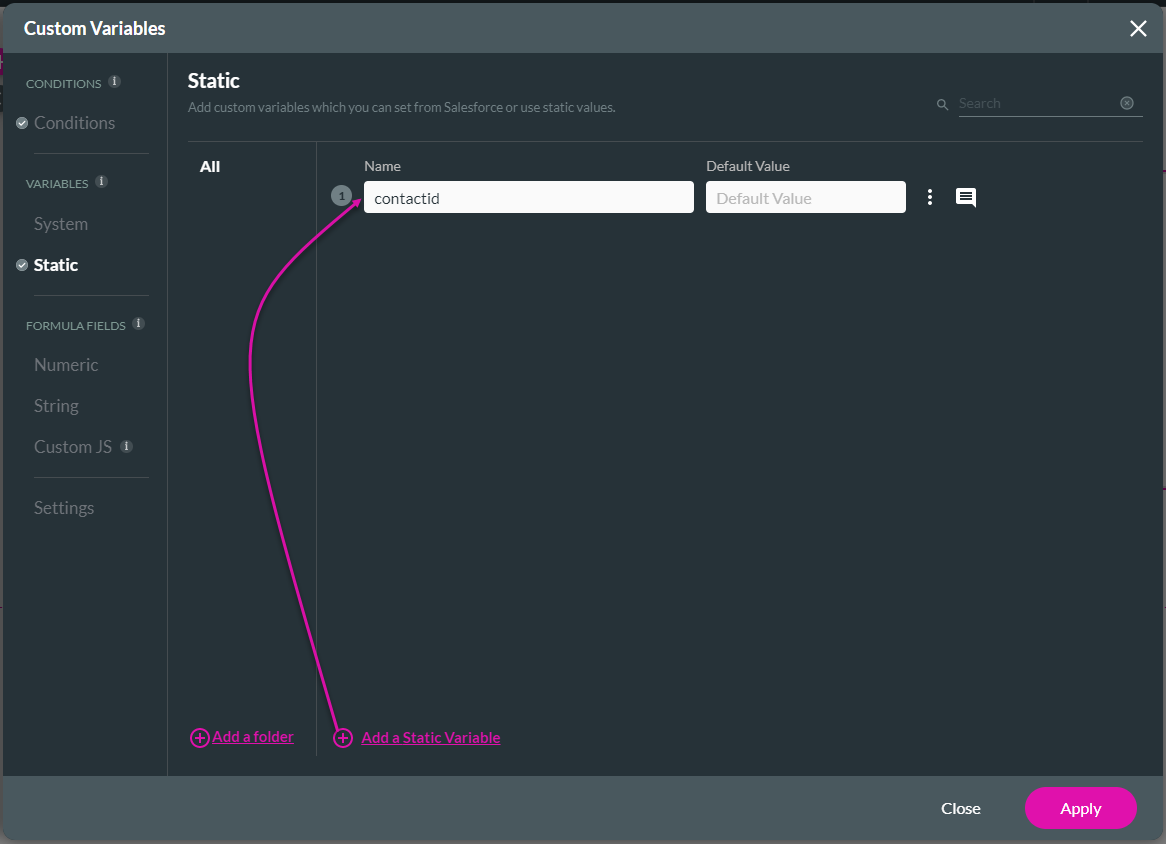
2. Under Tools, click the Custom Variable option’s Gear icon.

3. Under Static, add a custom variable.
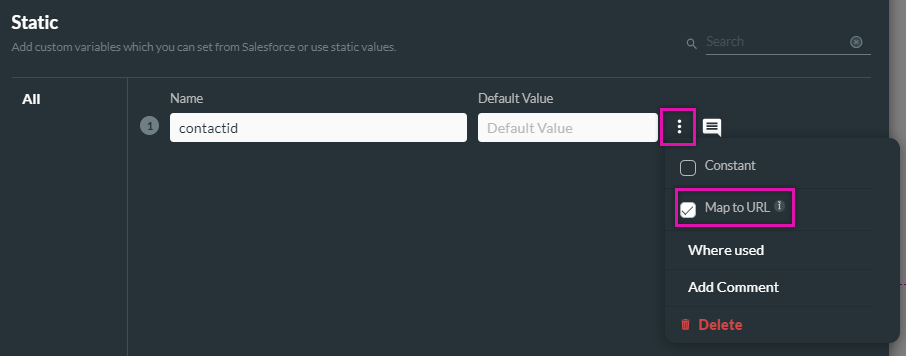
4. Select the kebab menu next to the variable and enable Map to URL.
2. Under Tools, click the Custom Variable option’s Gear icon.
3. Under Static, add a custom variable.
4. Select the kebab menu next to the variable and enable Map to URL.
04 Salesforce Integration
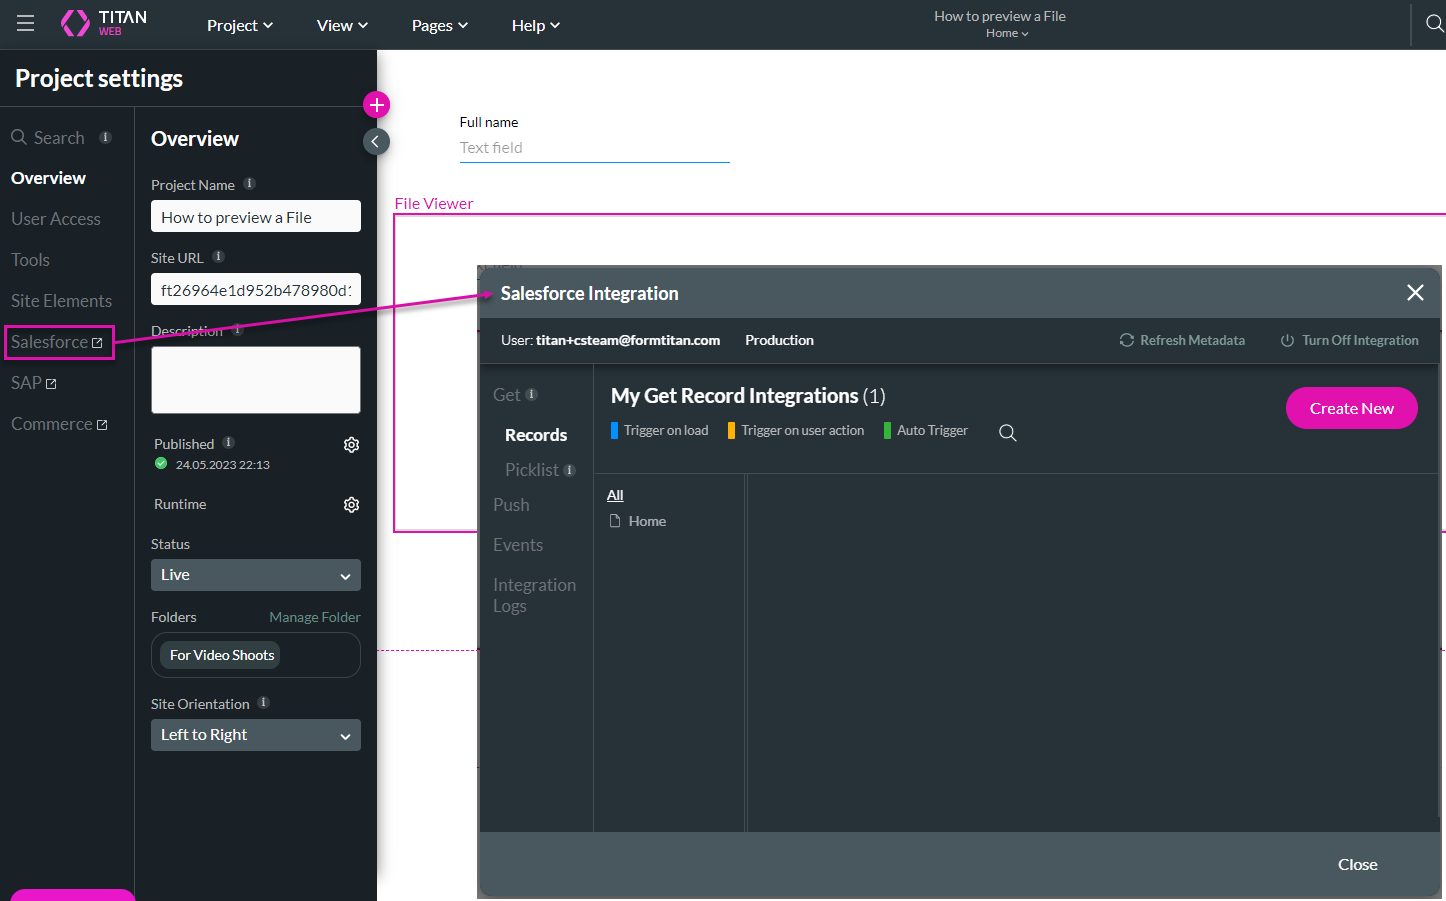
1. Click the Gear icon to open the Project Settings and click the Salesforce option. The Salesforce Integration screen opens.
2. Click the Create New button. The Map Salesforce fields screen opens.
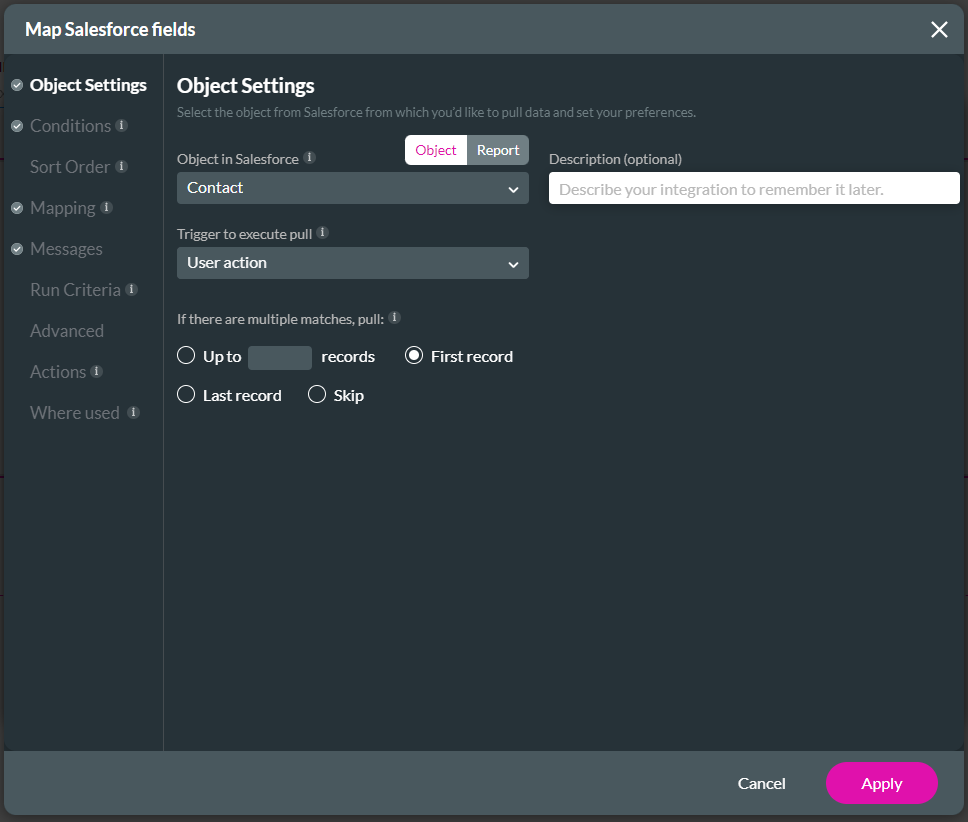
3. Under Object Settings, use the drop-down list to select the Salesforce object.
4. Use the drop-down list to select the trigger to execute the pull.
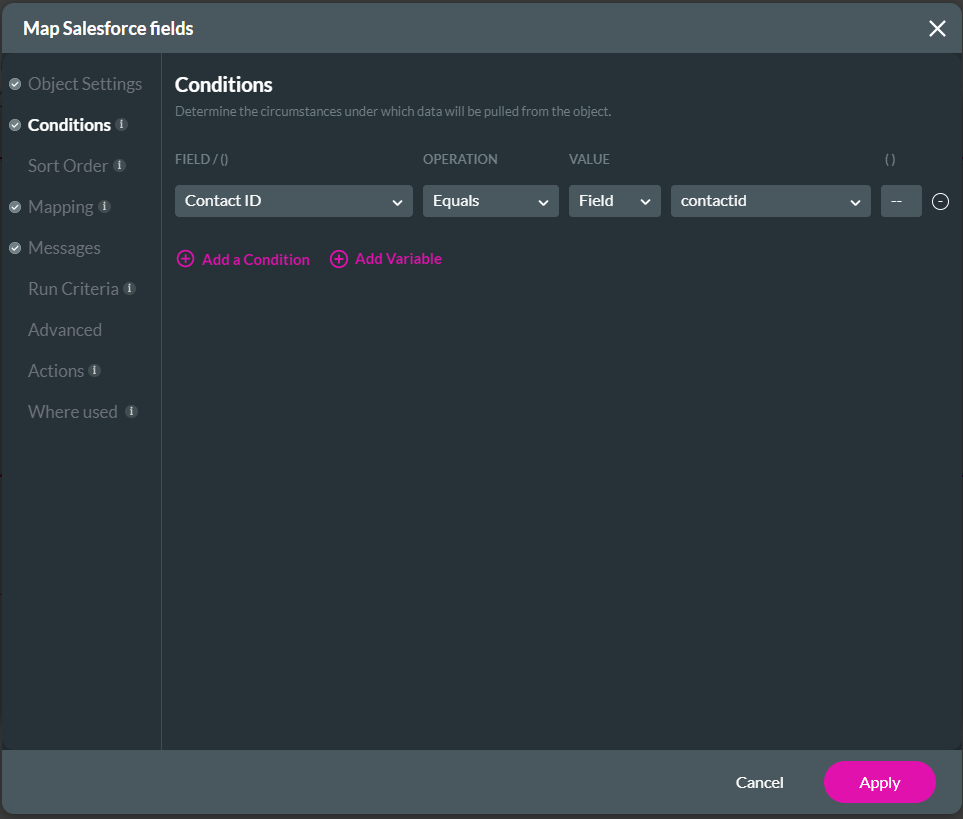
5. Click the Conditions option and configure the condition using the drop-down lists. The Field value is the static variable you added.
6. Click the Mapping option and use the drop-down list to map the Full name to the text field.

7. Click the Apply button. The Salesforce integration has been added.
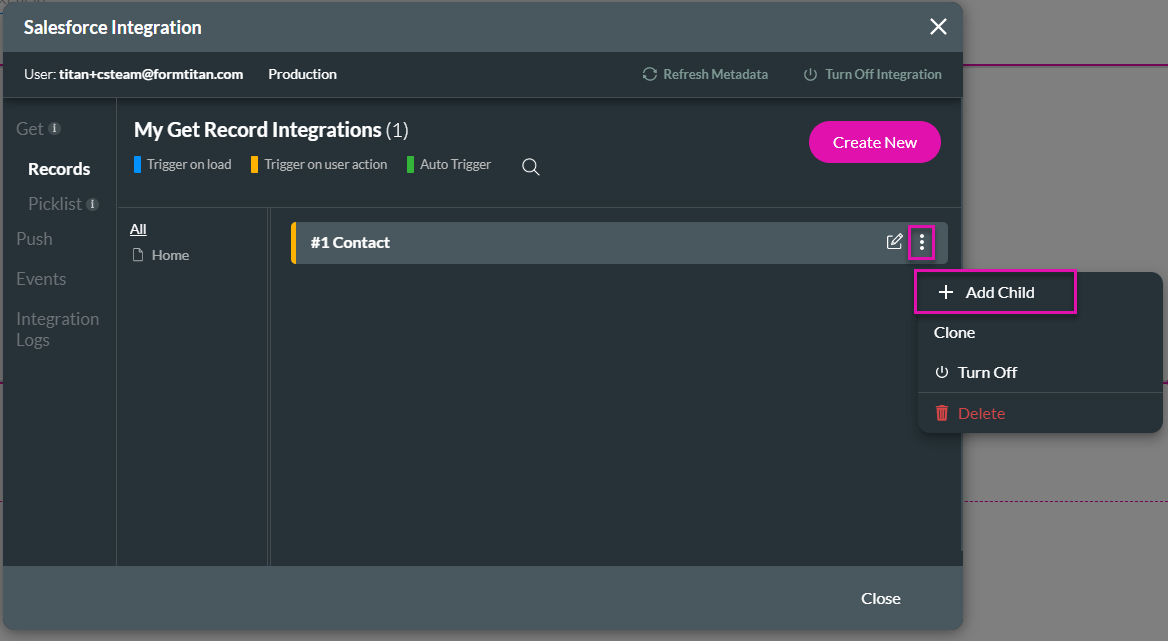
8. Click the Kebab icon and select the Add Child option. The Map Salesforce field screen opens.
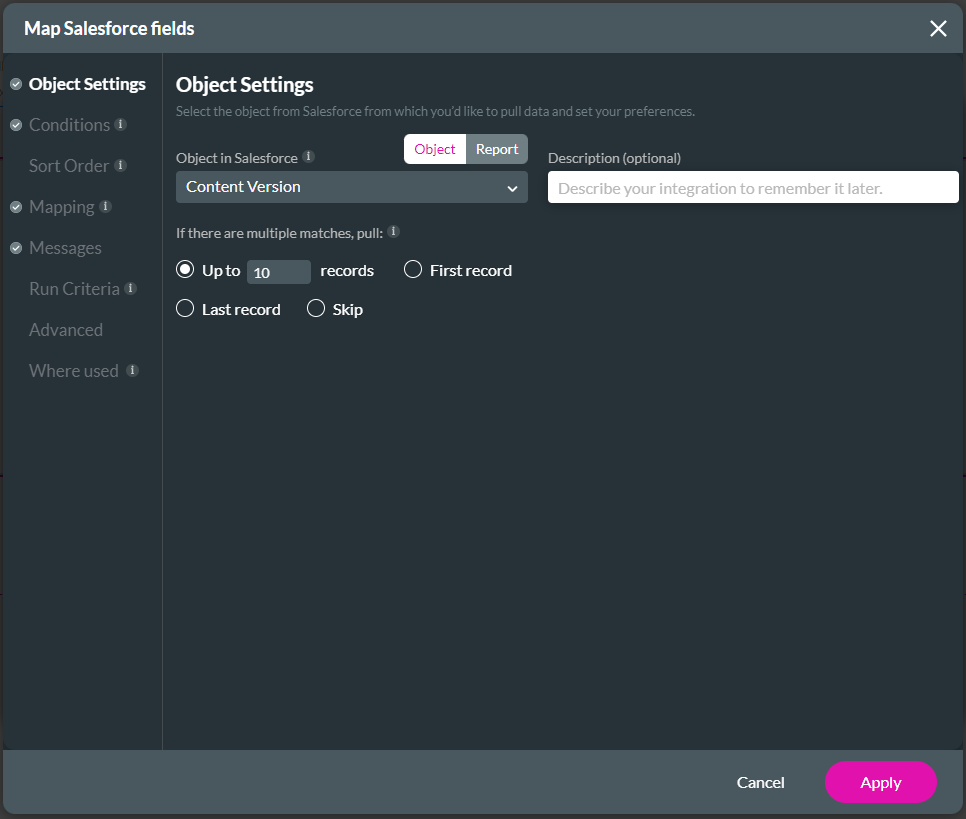
9. Under Object Settings, use the drop-down list to select the Content Version Salesforce object.
10. Select the Up to Radio button and add 100 in the records field.
11. Under Conditions, configure the conditions. The First Published Location ID must equal the Contact ID.
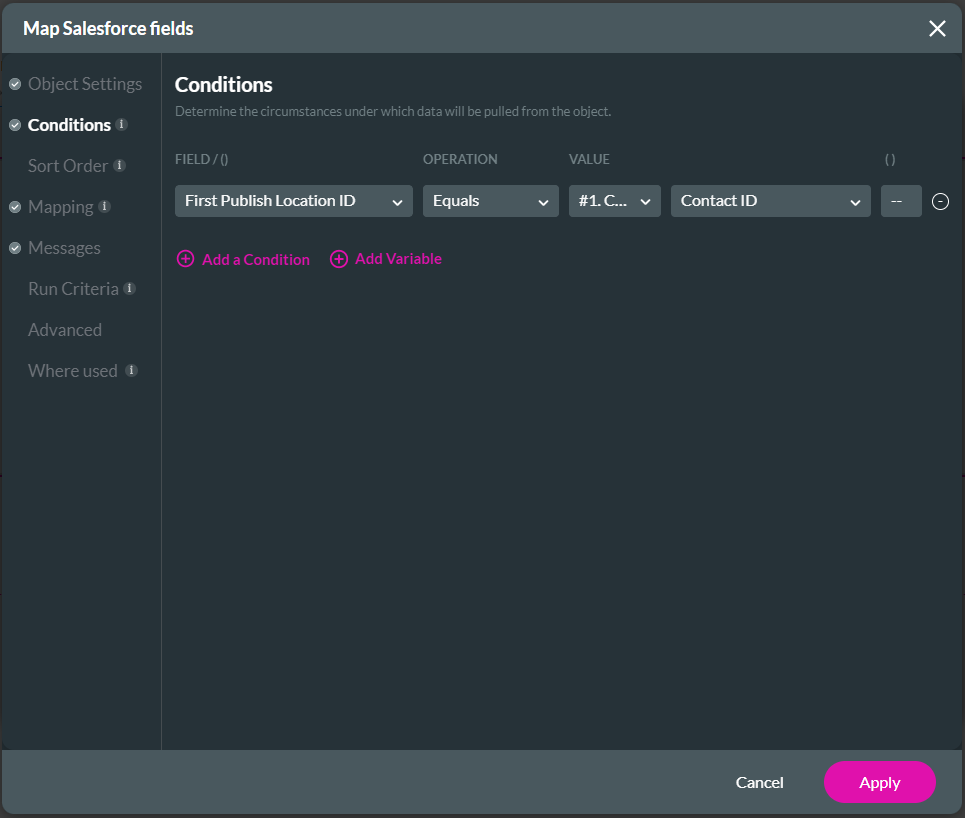
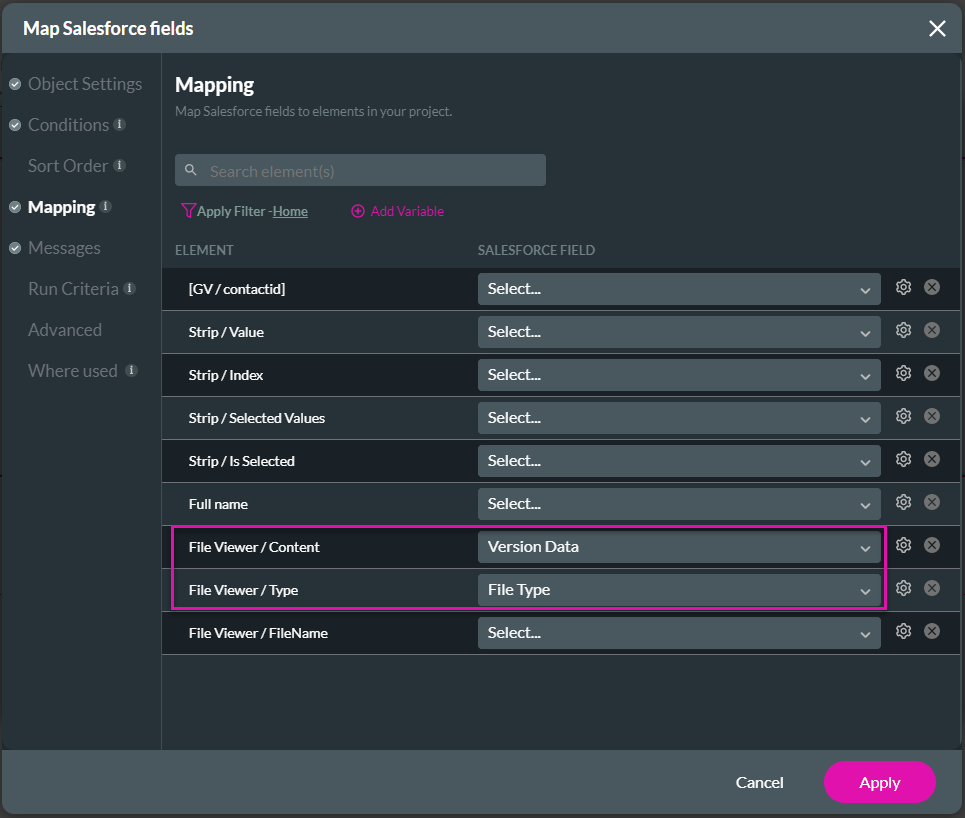
12. Click the Mapping option and use the drop-down list to map the fields as follows:
13. Click the Apply button. The child integration is added.
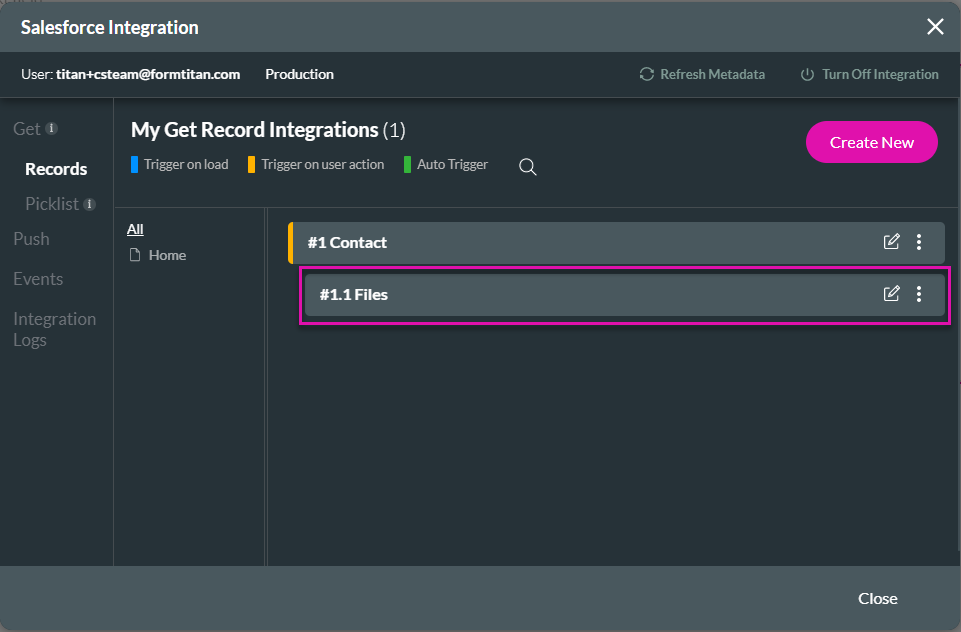
14. Click the Close button.
2. Click the Create New button. The Map Salesforce fields screen opens.
3. Under Object Settings, use the drop-down list to select the Salesforce object.
4. Use the drop-down list to select the trigger to execute the pull.
5. Click the Conditions option and configure the condition using the drop-down lists. The Field value is the static variable you added.
6. Click the Mapping option and use the drop-down list to map the Full name to the text field.
7. Click the Apply button. The Salesforce integration has been added.
8. Click the Kebab icon and select the Add Child option. The Map Salesforce field screen opens.
9. Under Object Settings, use the drop-down list to select the Content Version Salesforce object.
10. Select the Up to Radio button and add 100 in the records field.
11. Under Conditions, configure the conditions. The First Published Location ID must equal the Contact ID.
12. Click the Mapping option and use the drop-down list to map the fields as follows:
- File Viewer/Content to Version Date
- File Viewer/Type to File Type
13. Click the Apply button. The child integration is added.
14. Click the Close button.
05 Condition
1. Click the Gear icon to open the project Settings screen.
2. Under Tools, click the Custom Variable option's Gear icon.
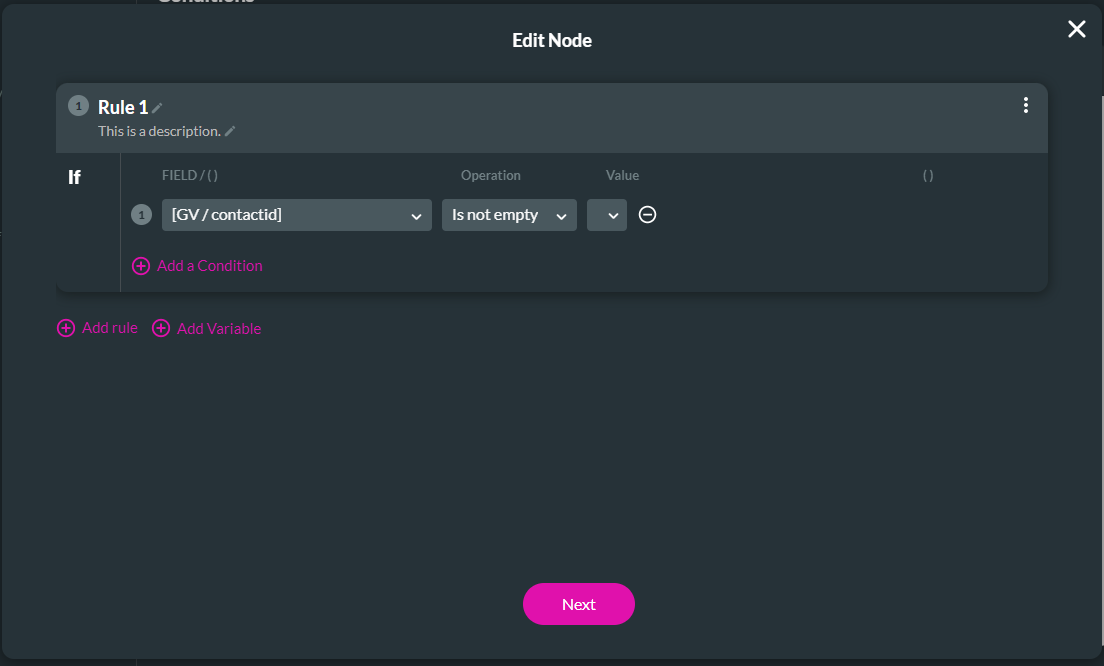
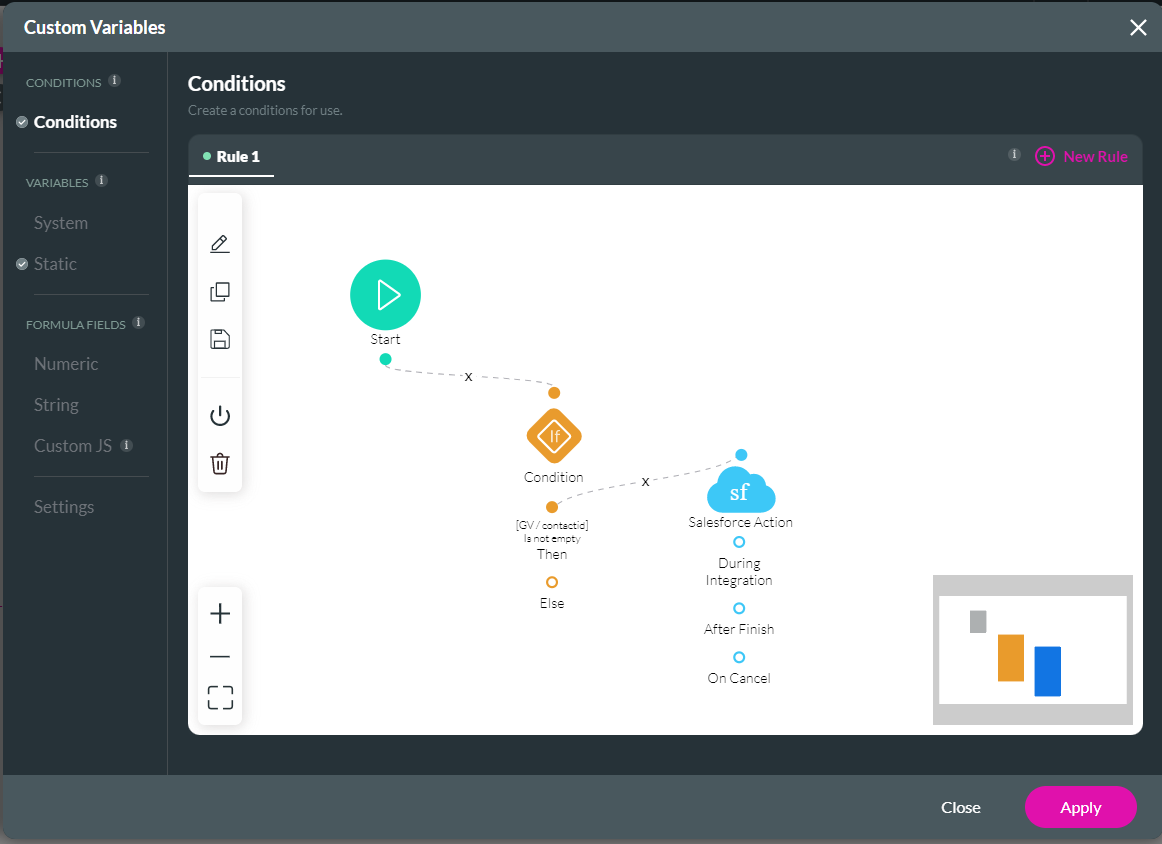
3. Under Conditions, double-click the Condition node. The Edit Node screen opens.
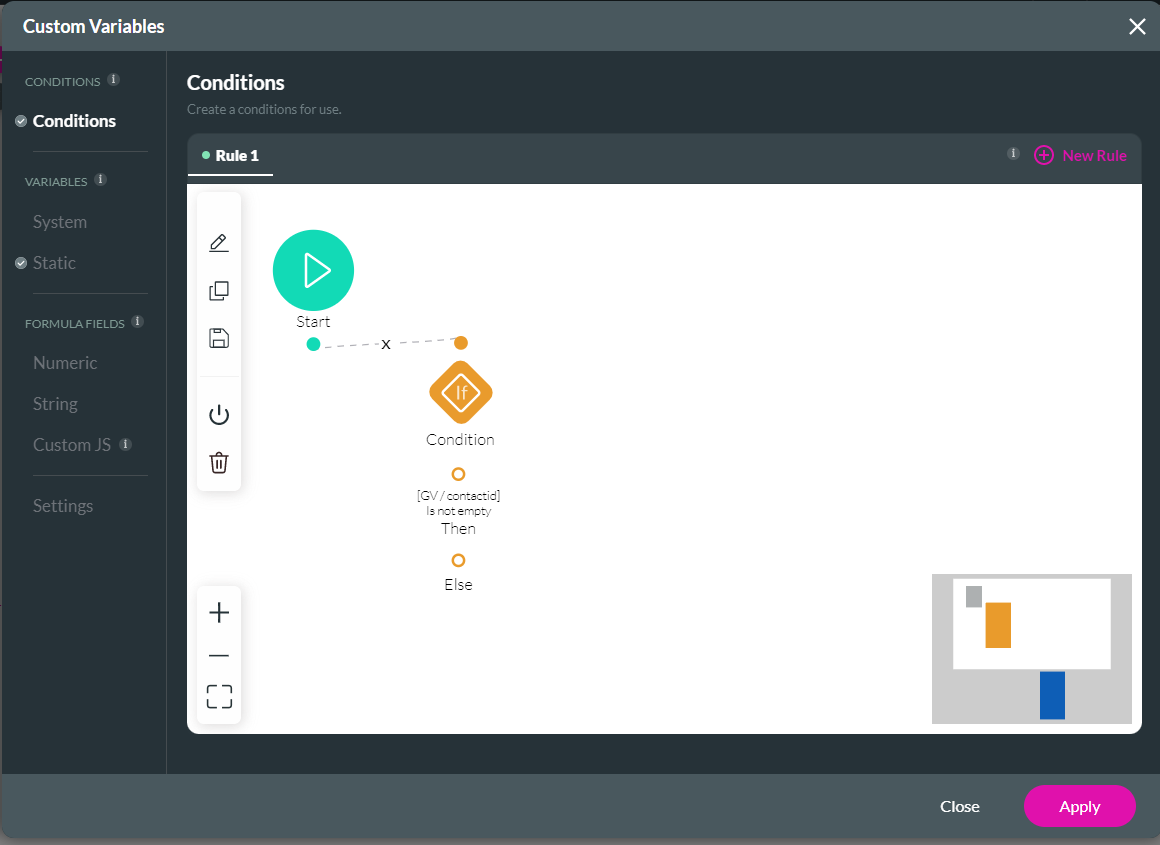
4. Configure the rule:
5. Click the Next button.
6. Add a tag if necessary and click the Save button.
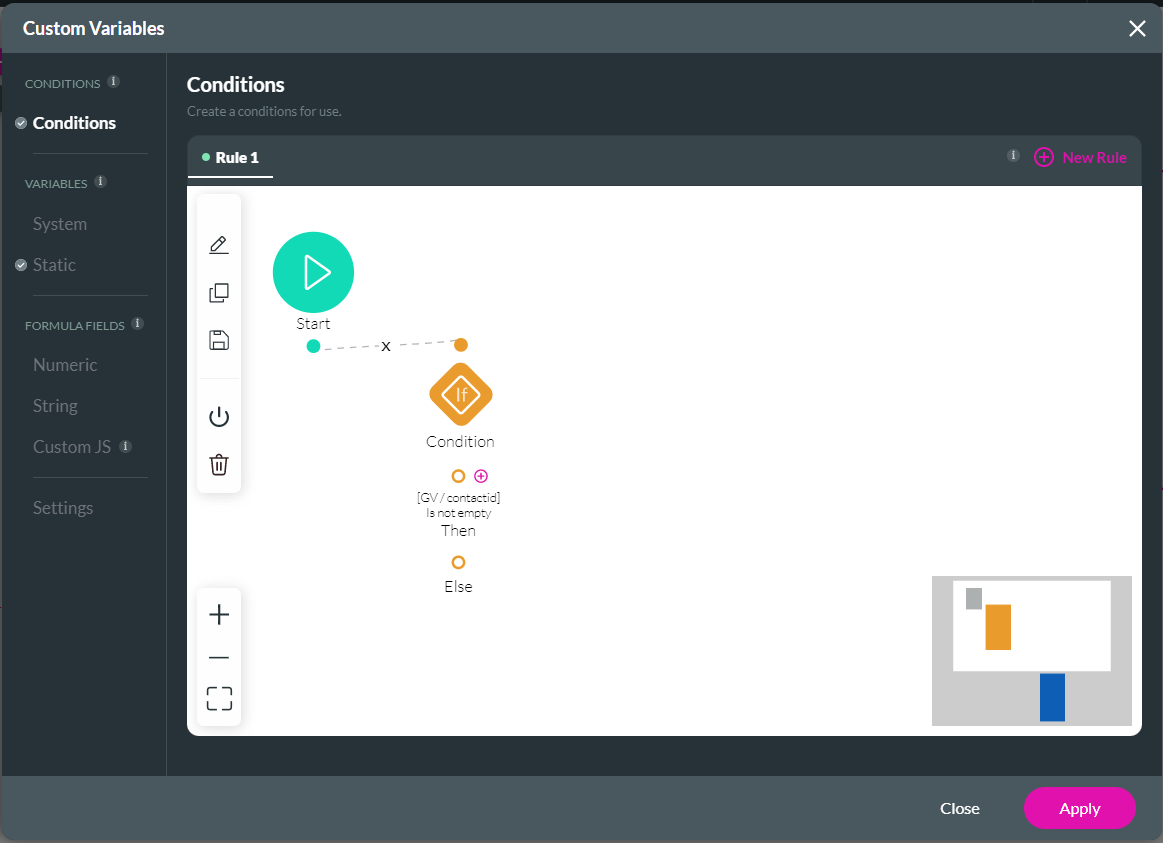
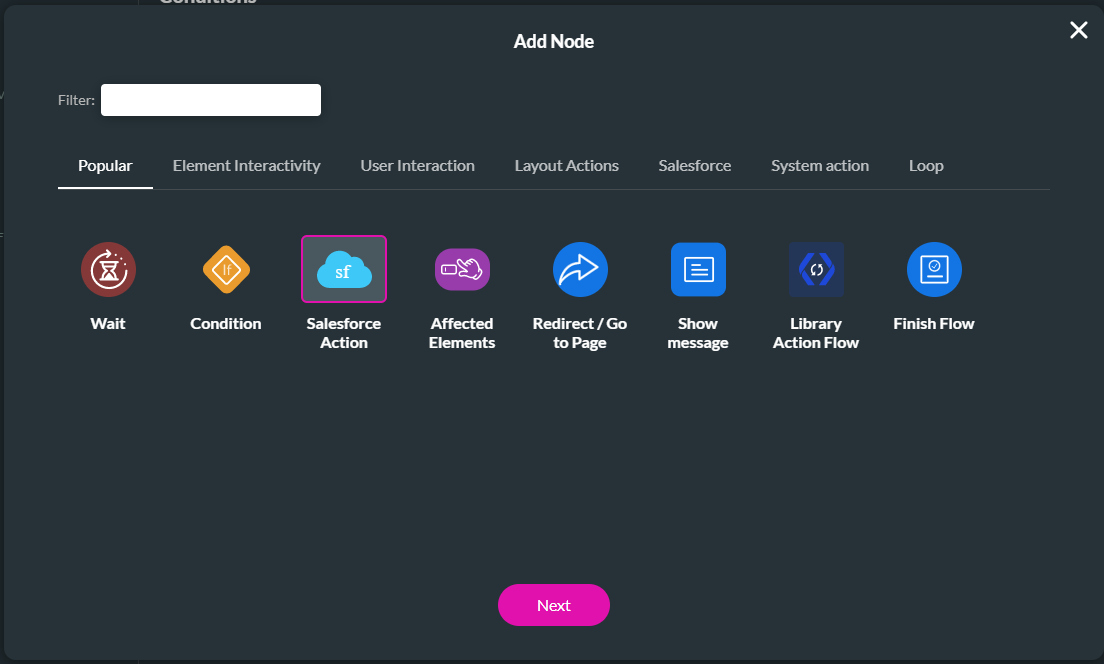
7. Hover over the Condition node with your mouse and click the + icon. The Add Node screen opens.
8. Click the Salesforce Action option and click the Next button.
9. Use the Process push or get dropdown list to select the Salesforce integration. Click the Next button.
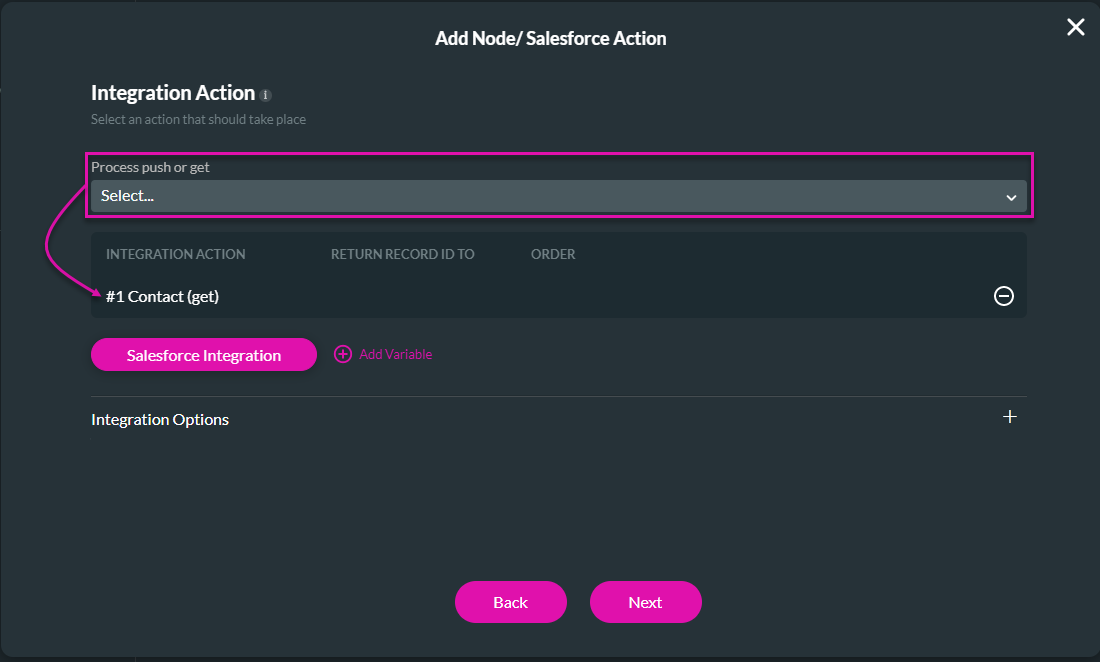
10. If necessary, add a tag and click the Insert button. The Salesforce Action is added to the screen. Click the Apply button.
11. Click the Publish button. The webpage opens in a new tab.
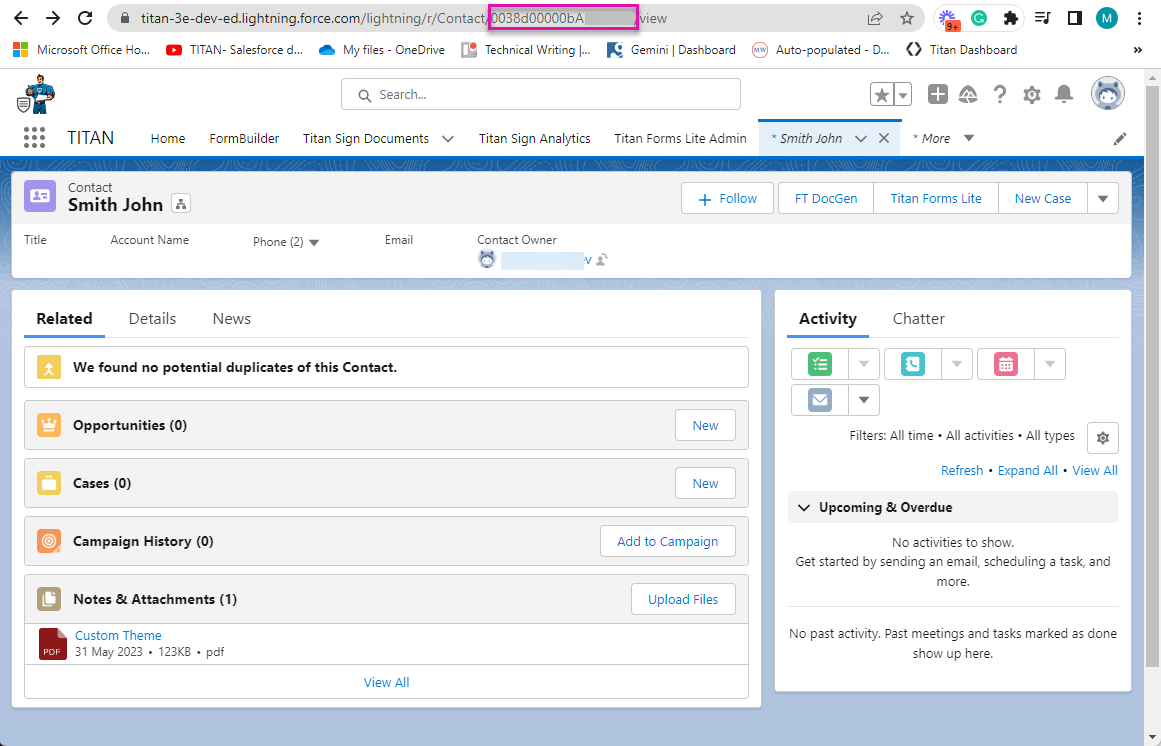
12. Open Salesforce and copy the contact ID from the URL bar.
13. In the published project's URL bar, add
2. Under Tools, click the Custom Variable option's Gear icon.
3. Under Conditions, double-click the Condition node. The Edit Node screen opens.
4. Configure the rule:
- [GV/contactid] Is not empty
5. Click the Next button.
6. Add a tag if necessary and click the Save button.
7. Hover over the Condition node with your mouse and click the + icon. The Add Node screen opens.
8. Click the Salesforce Action option and click the Next button.
9. Use the Process push or get dropdown list to select the Salesforce integration. Click the Next button.
10. If necessary, add a tag and click the Insert button. The Salesforce Action is added to the screen. Click the Apply button.
11. Click the Publish button. The webpage opens in a new tab.
12. Open Salesforce and copy the contact ID from the URL bar.
13. In the published project's URL bar, add
- ?contactid=