General Overview - Part 2 (16 min)
Completion requirements
01 Getting Started
In this tutorial, we will overview different functionalities in Titan Web. We will look at SmartV and add some elements to the canvas, like a heading, input elements, a form, and a modal. We will look at On Click Actions, add conditions, and provide a quick overview of what Salesforce integrations look like.
You open the project Settings by clicking the Gear icon on the left of the canvas.
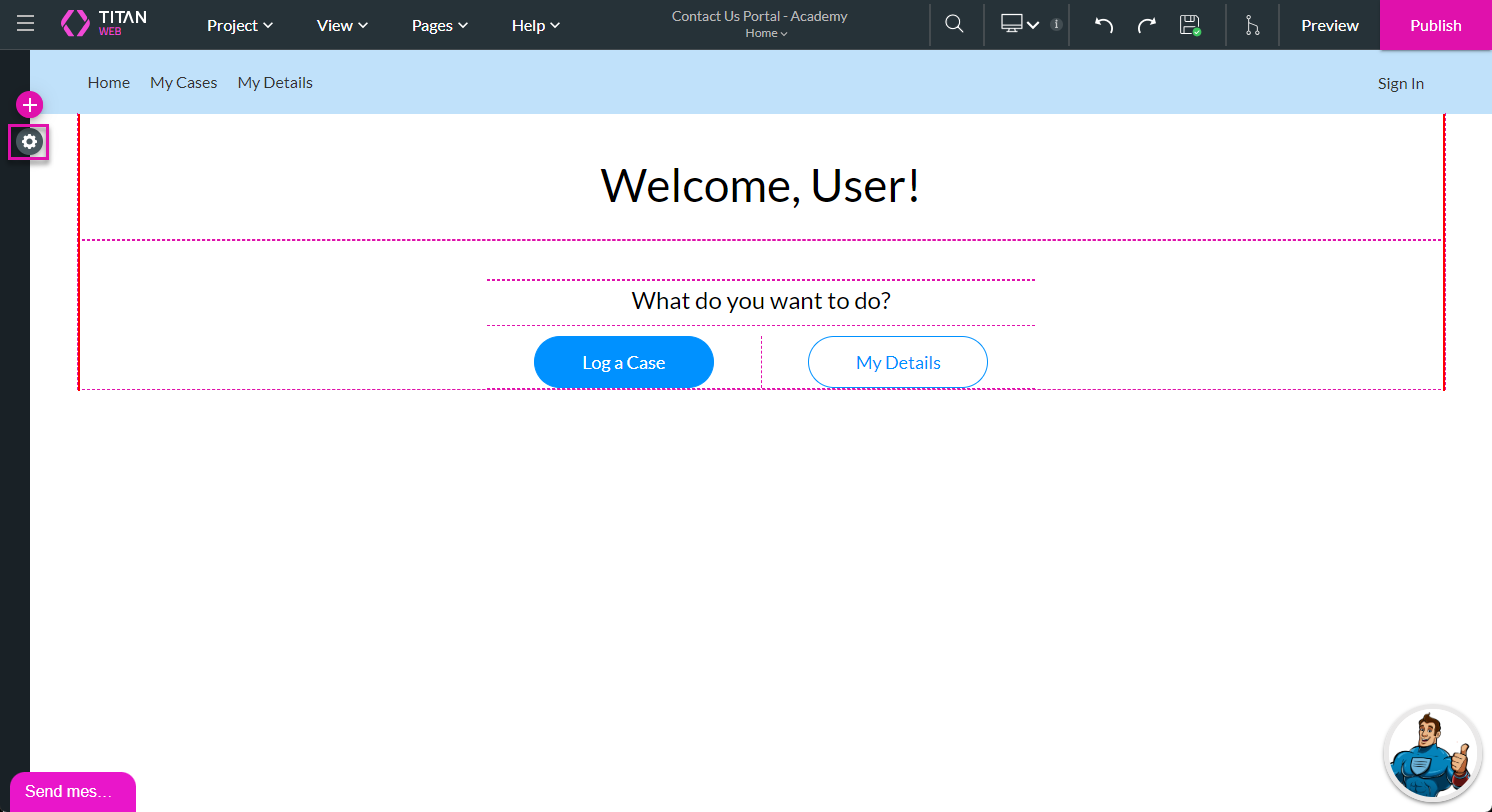
You open the project Settings by clicking the Gear icon on the left of the canvas.
02 Add SmartV
The login method for this project is SmartV, which uses a record in Salesforce to give a user access to the webpage. This is a brief explanation, as SmartV will be fully described in another lesson.
Under User Access, the toggle switch enables the SmartV option. Then, we clicked the Gear icon. The Configure SmartV screen opens.
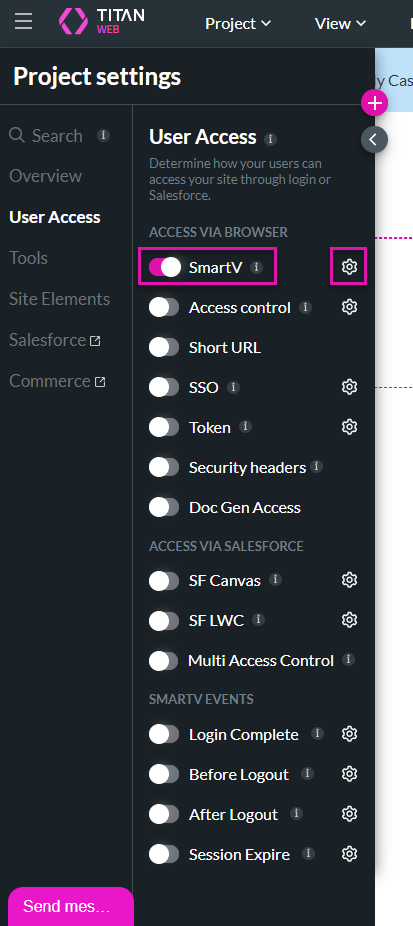
The drop-down list selects an object from Salesforce, such as a contact. This is the object with which you want to authenticate a user in Salesforce.
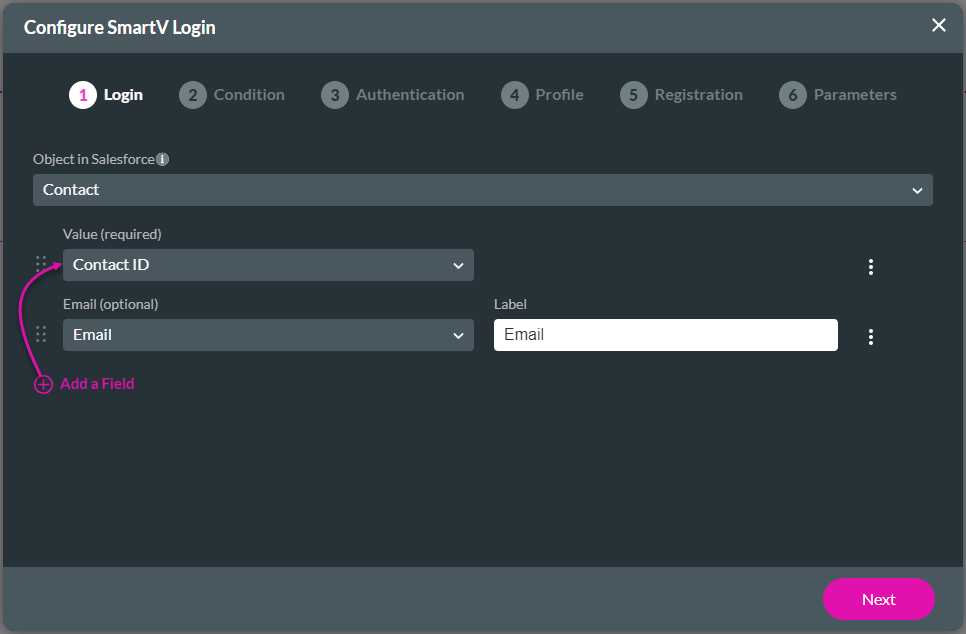
We added the ContactID and Email as unique identifiers. We clicked the Next button on this and subsequent screens until the Configure SmartV screen closed.
Under User Access, the toggle switch enables the SmartV option. Then, we clicked the Gear icon. The Configure SmartV screen opens.
The drop-down list selects an object from Salesforce, such as a contact. This is the object with which you want to authenticate a user in Salesforce.
We added the ContactID and Email as unique identifiers. We clicked the Next button on this and subsequent screens until the Configure SmartV screen closed.
03 Add a title to a project
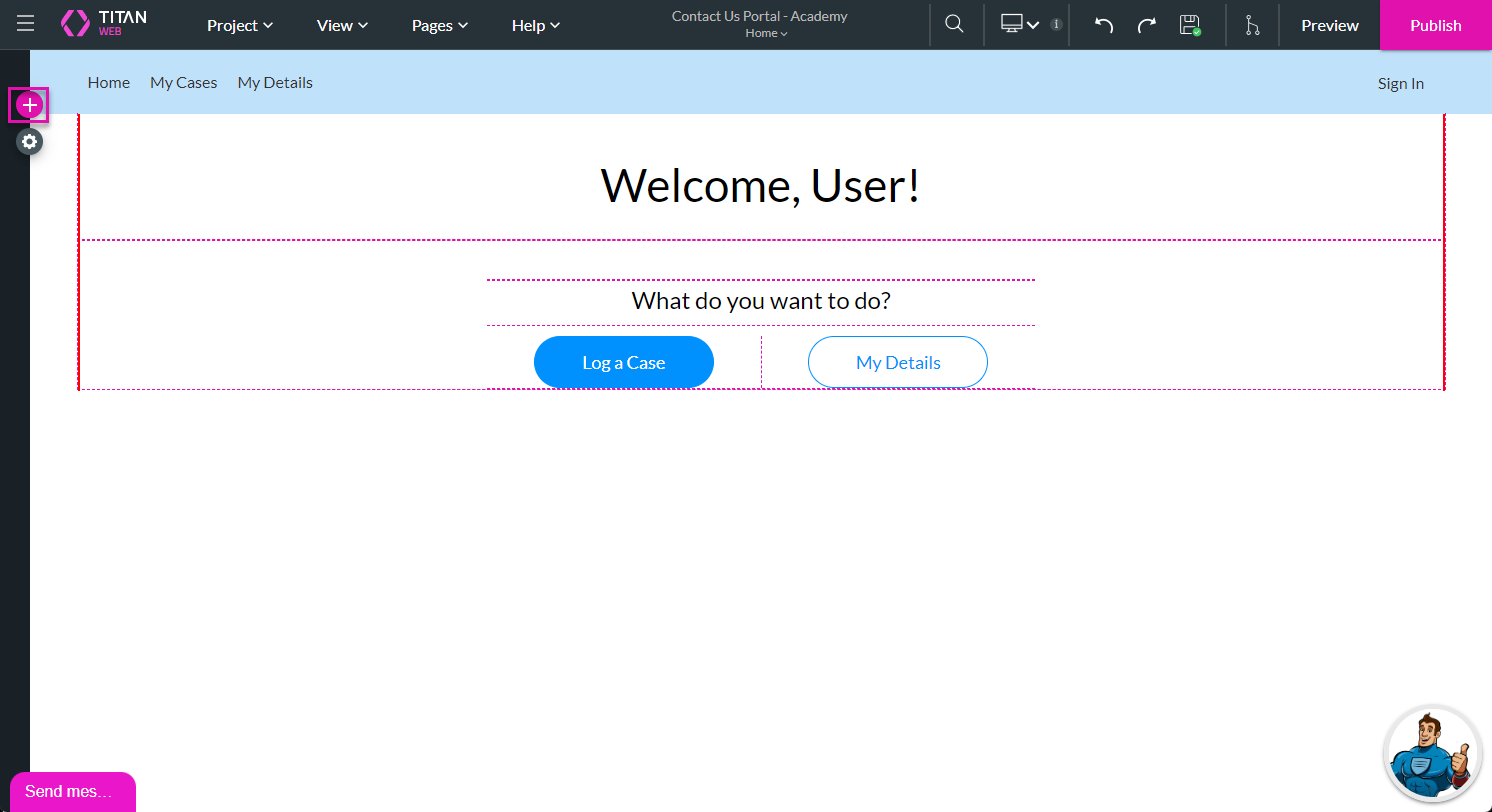
The + icon on the left of the canvas opens the list with elements, also called the palette.
Under Text, the Heading element was dragged and dropped to the canvas.
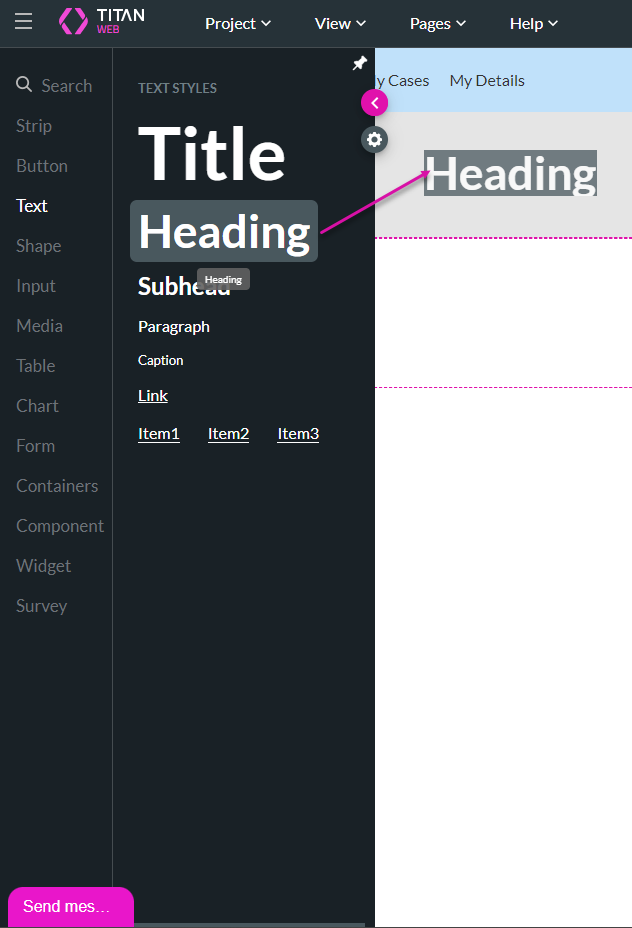
We clicked the Gear icon to configure the Text. The Text Settings screen opened.
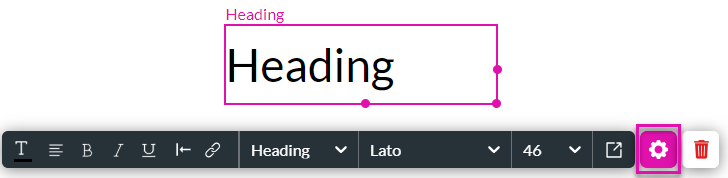
We added the Text in the field.

Under Text, the Heading element was dragged and dropped to the canvas.
We clicked the Gear icon to configure the Text. The Text Settings screen opened.
We added the Text in the field.
04 Add a form element
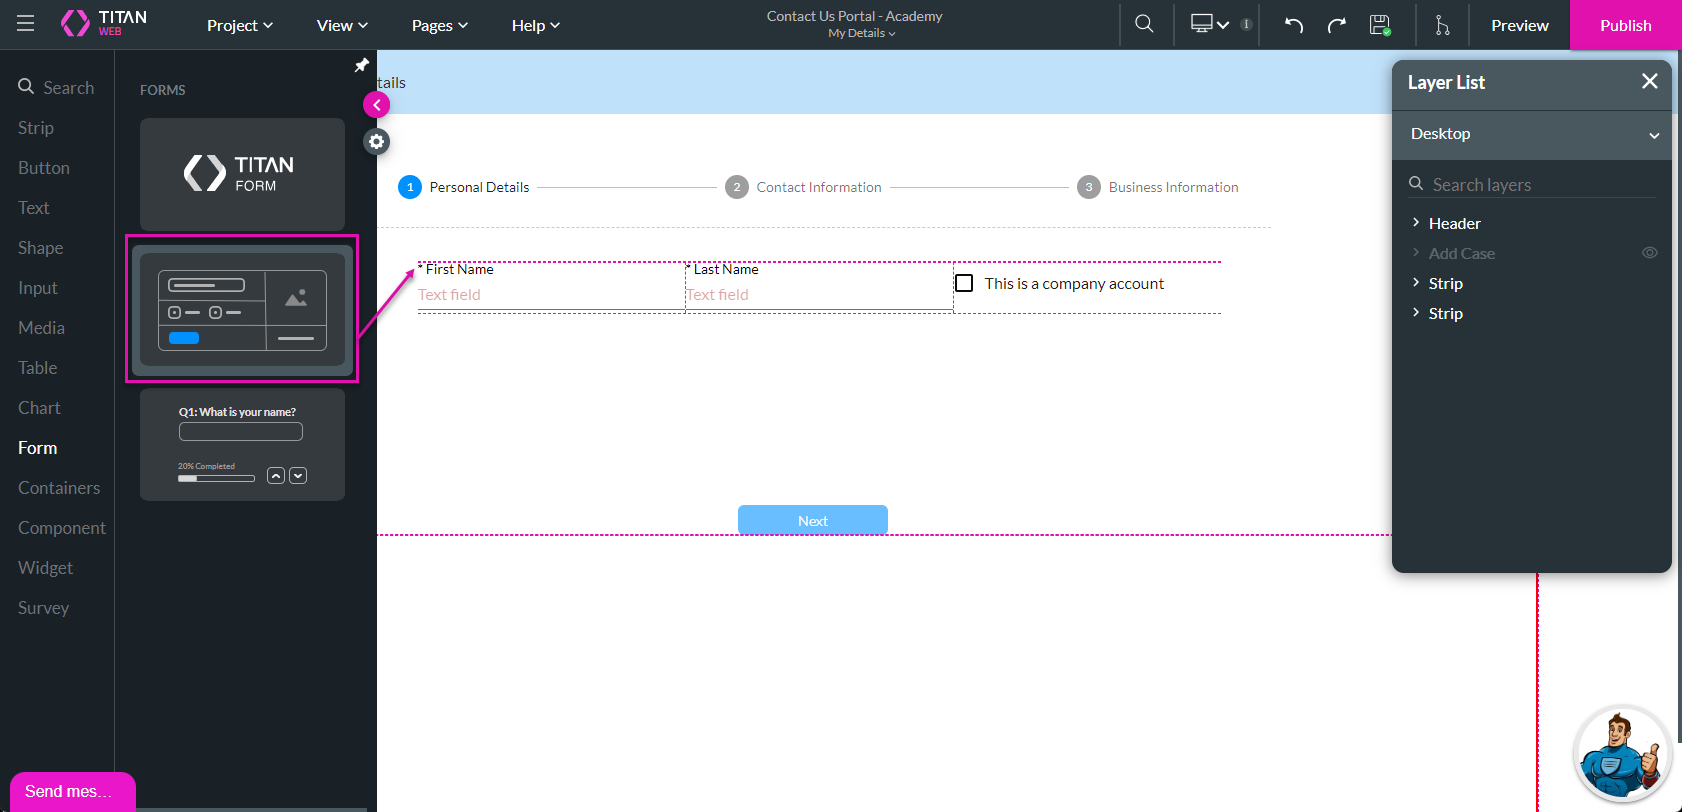
Forms help to structure and align elements as they provide a framework.
We did the following to add a form element to the project.
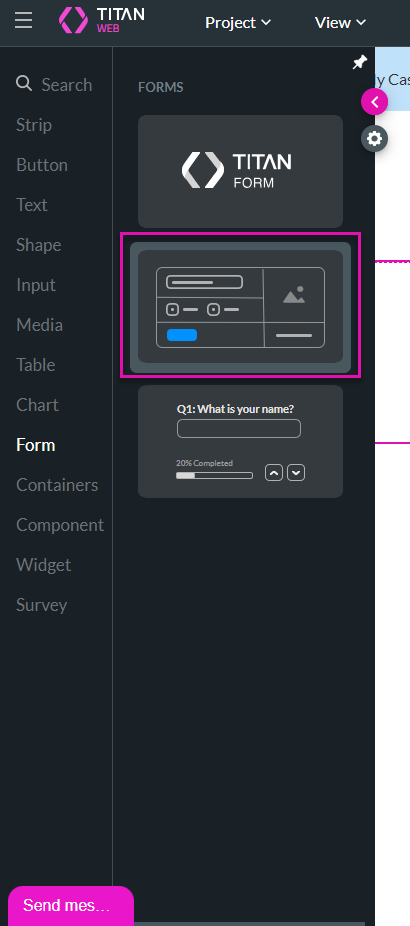
1. Click the + icon on the left of the canvas.
2. Under Form, drag-and-drop the form element to the canvas.
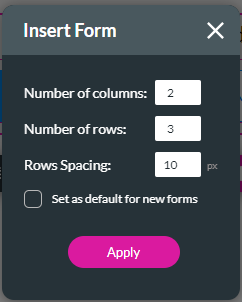
3. Change the following if you do not want to use the default values:
4. Click the Apply button. The Form is added to the canvas.
5. Click the + icon on the left of the canvas and add any elements to the Form, such as buttons, text, or input elements.
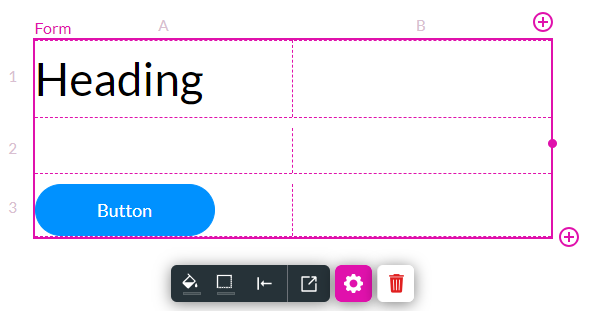
In our example, the Form and the heading are placed on strips. A strip is the basic canvas element where all other elements are placed.

We did the following to add a form element to the project.
1. Click the + icon on the left of the canvas.
2. Under Form, drag-and-drop the form element to the canvas.
3. Change the following if you do not want to use the default values:
- Number of columns: the default is 2.
- Number of rows: the default is 3.
- Row spacing: the default is 10 pixels.
4. Click the Apply button. The Form is added to the canvas.
5. Click the + icon on the left of the canvas and add any elements to the Form, such as buttons, text, or input elements.
In our example, the Form and the heading are placed on strips. A strip is the basic canvas element where all other elements are placed.
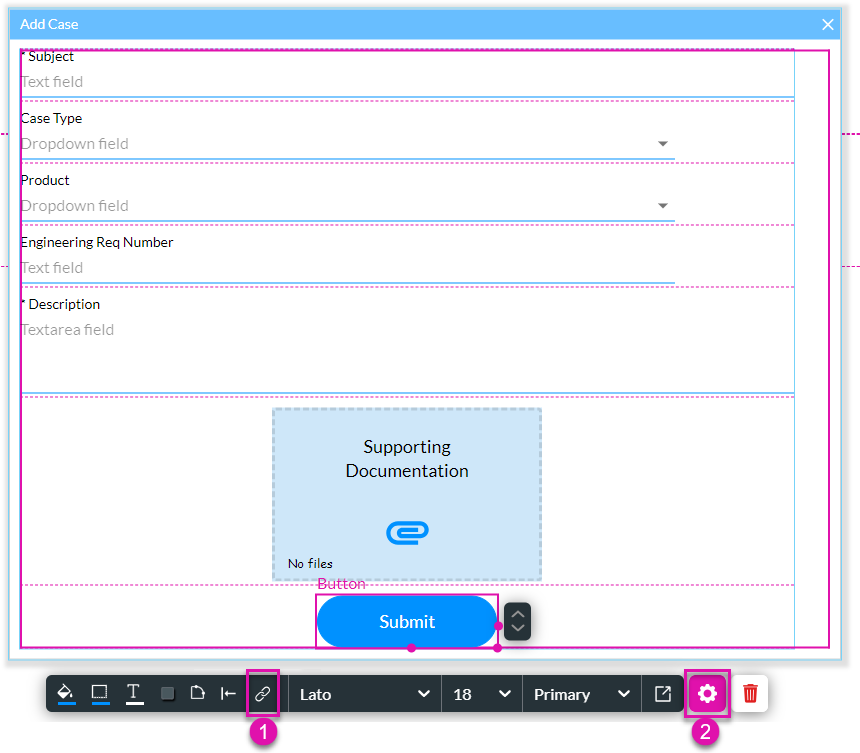
05 Adding a New Case
The Add Case modal has already been configured. You can see the modal in this project by doing the following:
On the Layer List, click the Eye icon to show the Add Case modal.
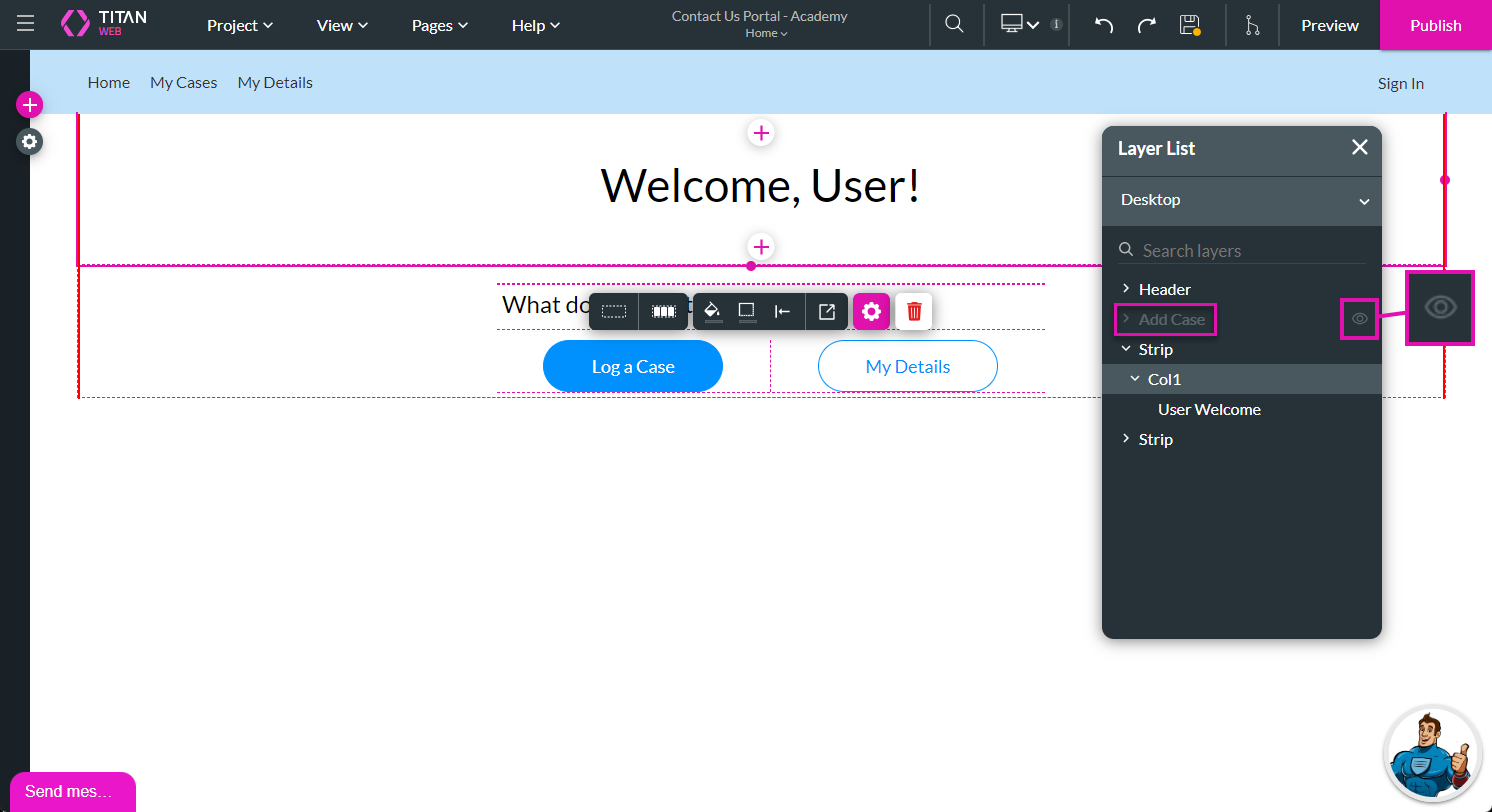
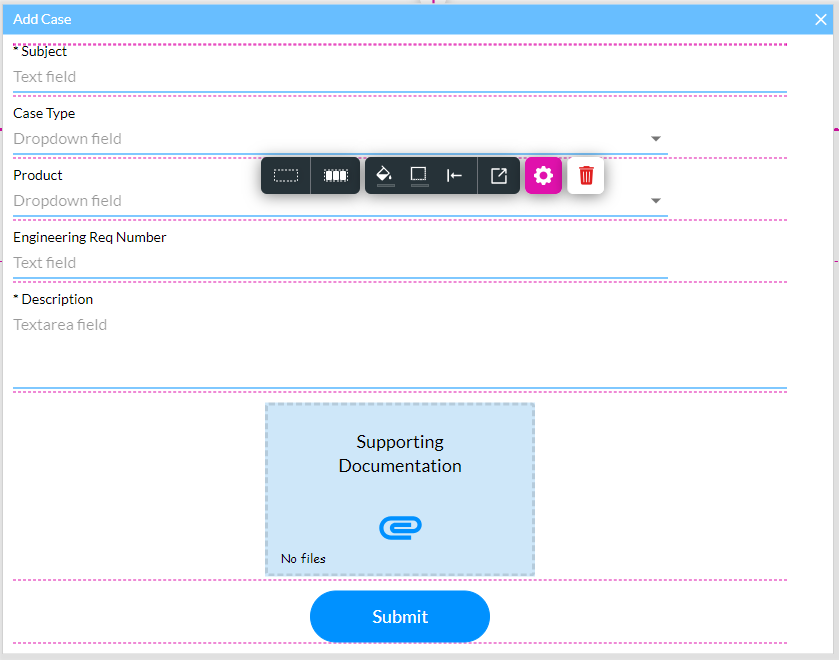
The modal opens with all the added elements, such as different input fields, a file upload element, and a Submit button.
On the Layer List, click the Eye icon to show the Add Case modal.
The modal opens with all the added elements, such as different input fields, a file upload element, and a Submit button.
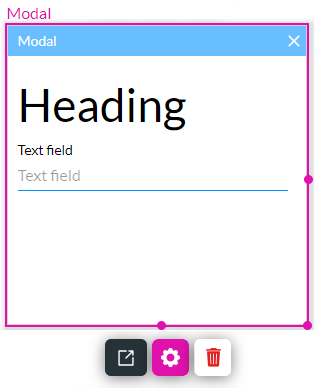
06 Add a Modal
To add a modal, we did as follows:
1. Click the + icon on the left of the canvas.
2. Under Containers, scroll down and drag-and-drop the modal to the canvas.
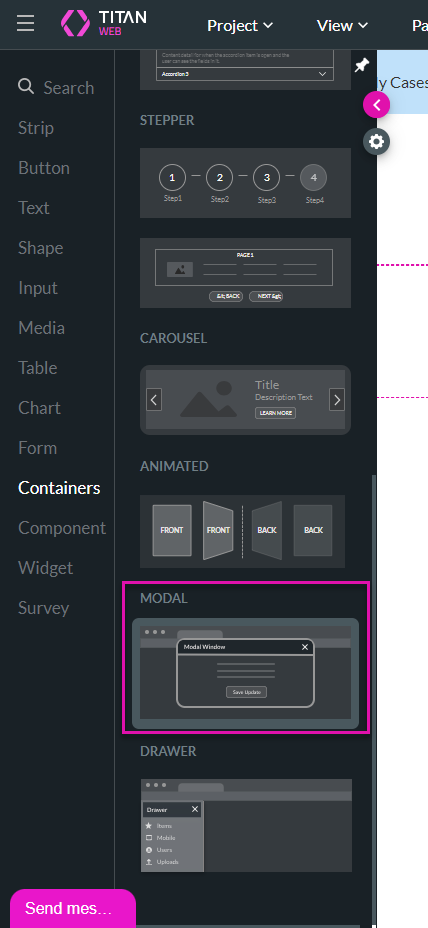
3. Add any elements to the form, for instance, buttons, text, or input elements.
Let’s return to the example modal. We configured an On Click Action on the Submit button.
1. Click the + icon on the left of the canvas.
2. Under Containers, scroll down and drag-and-drop the modal to the canvas.
3. Add any elements to the form, for instance, buttons, text, or input elements.
Let’s return to the example modal. We configured an On Click Action on the Submit button.
07 Configure On Click Action

You can see the On Click Action on the Submit button as follows:
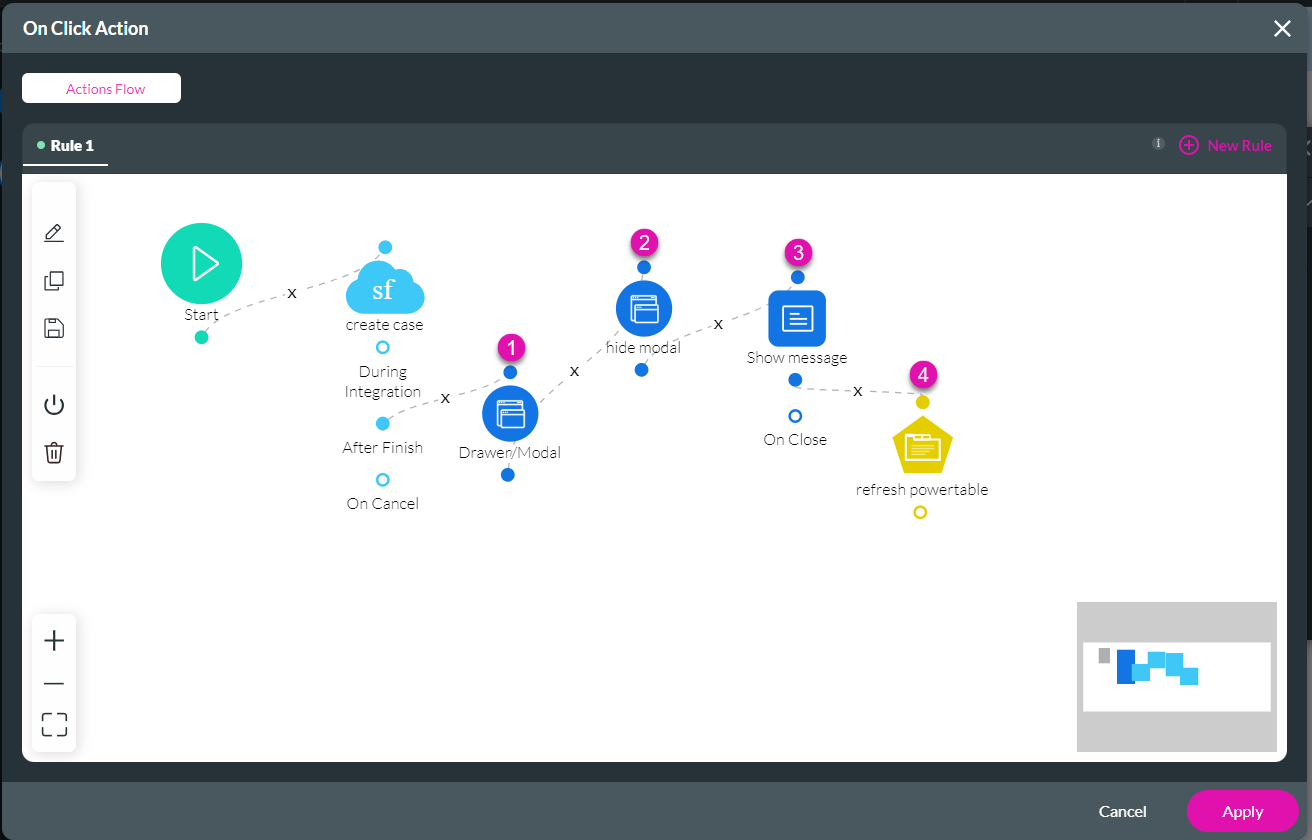
Click the Submit button and the On Click Action icon (1). You can also click the Gear icon (2) to open the Button Settings screen, and, under Interactivity, click the Configure On Click Action button. The On Click Action screen opens. All the actions shown here will happen when the Submit button is clicked.
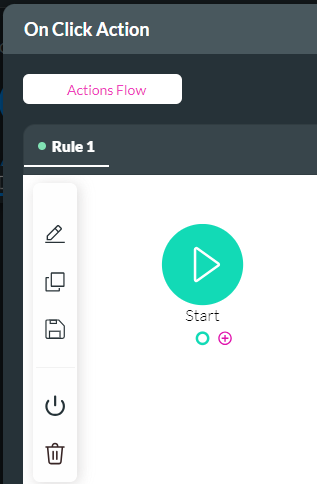
An action is added by hovering your mouse over the Start node and clicking the + icon. The Add Node screen opens.
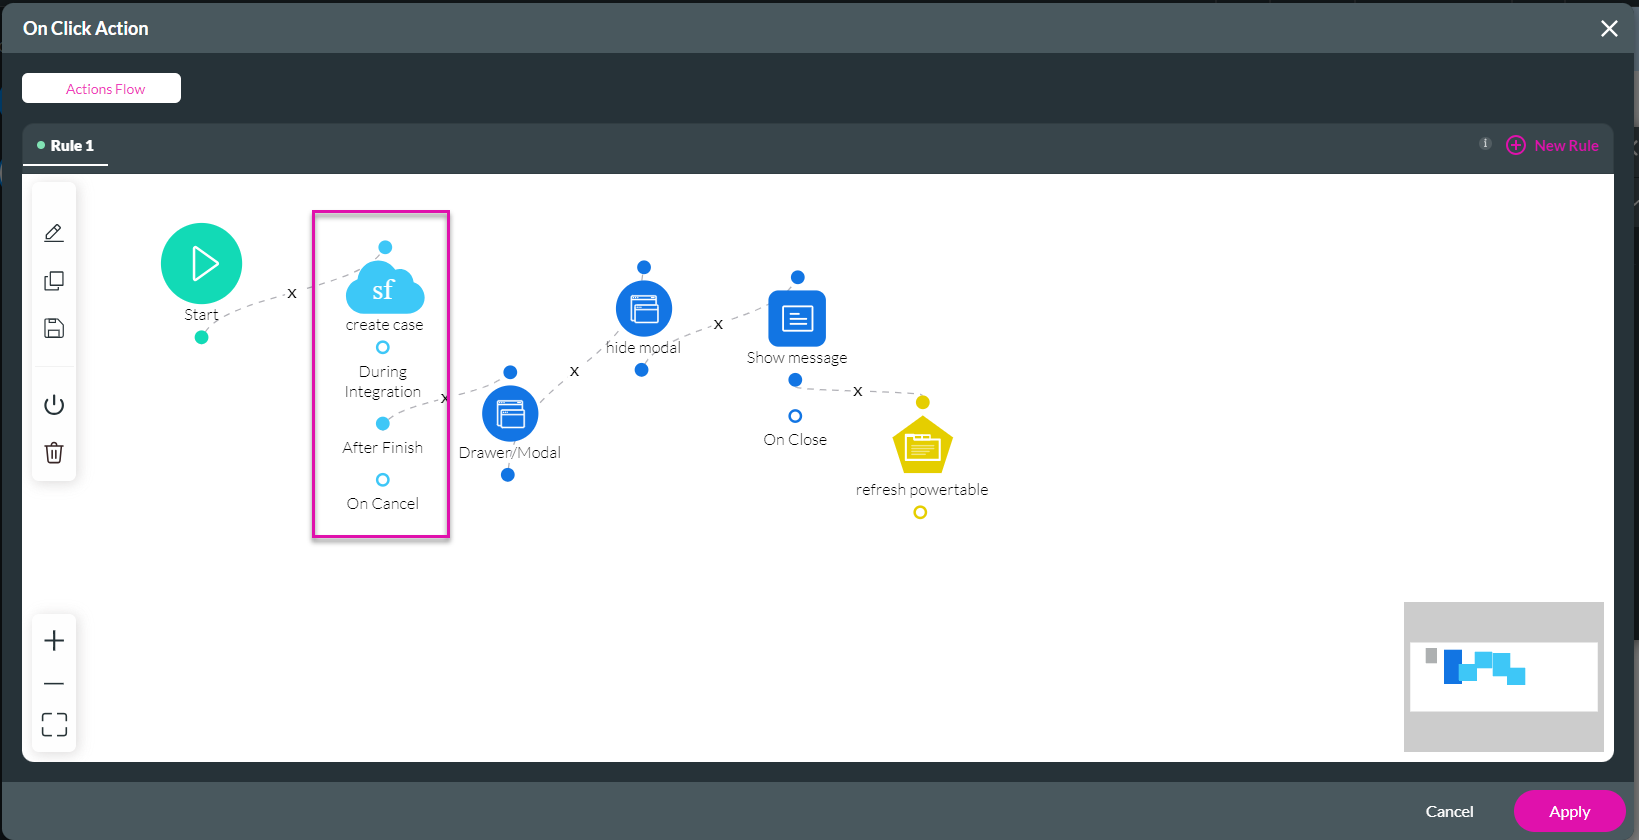
08 View the Salesforce Action
In this example, we added a Salesforce action.
1. Double-click the Salesforce action. The configured actions are shown.
2. Use the Process push or get drop-down list to select any previously configured Salesforce integrations.
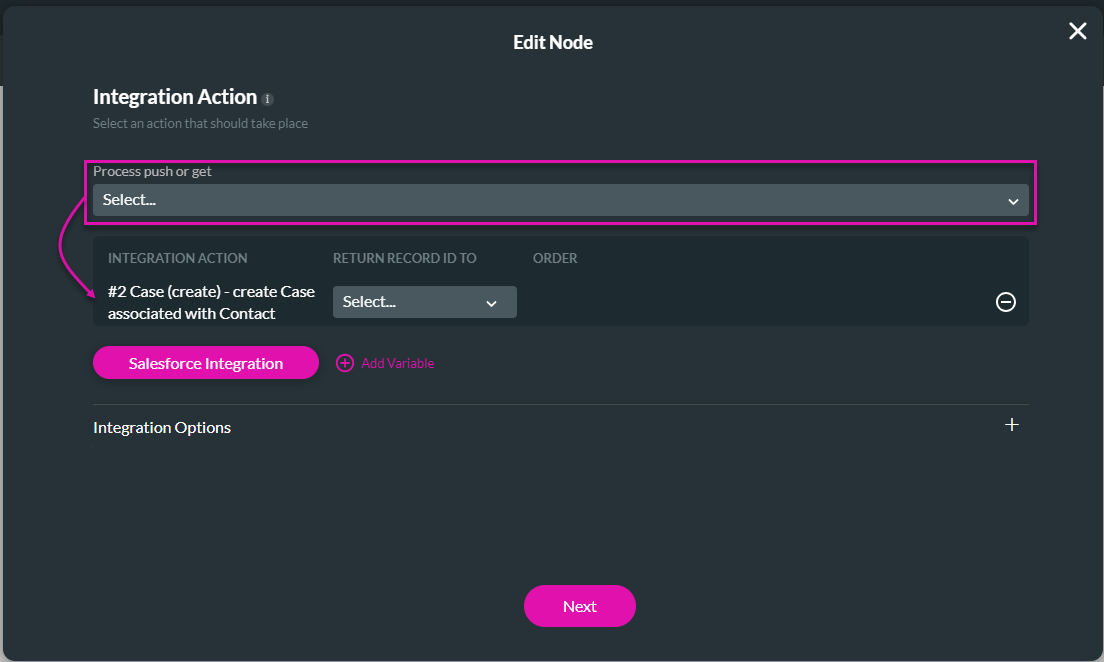
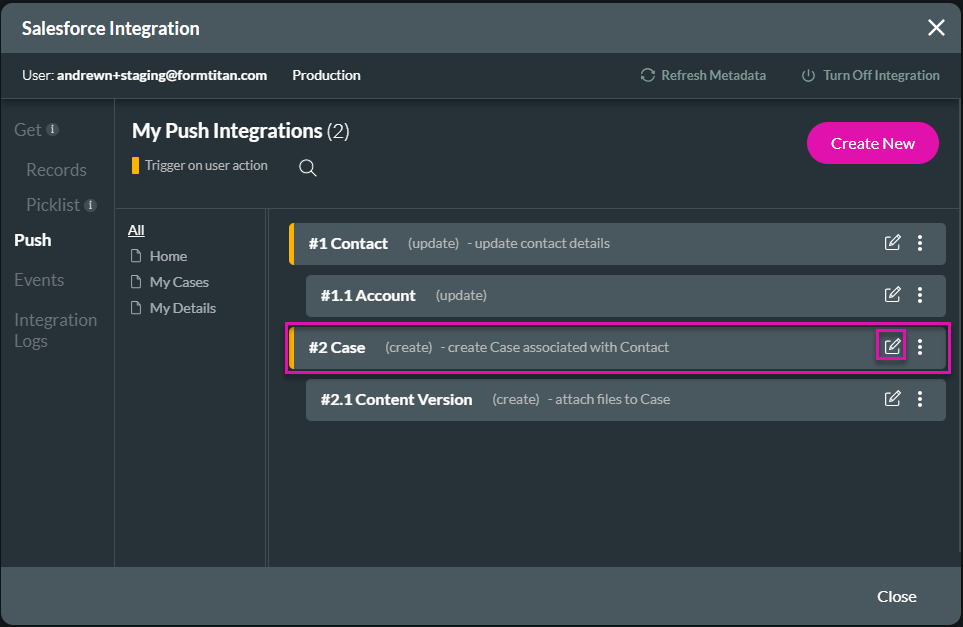
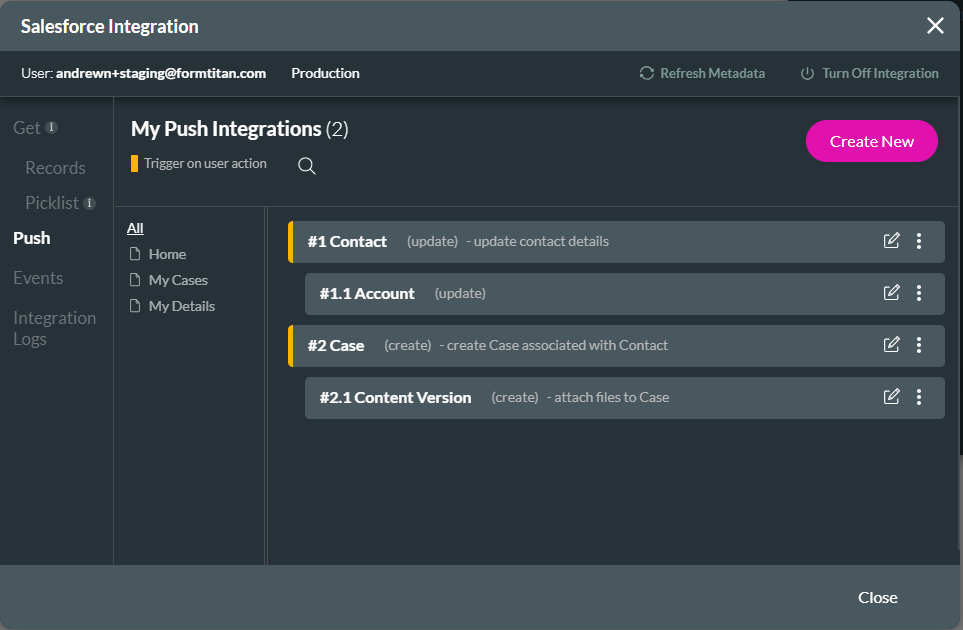
3. Click on the Salesforce Integration button. You will see Get integrations …

…and Push integrations.
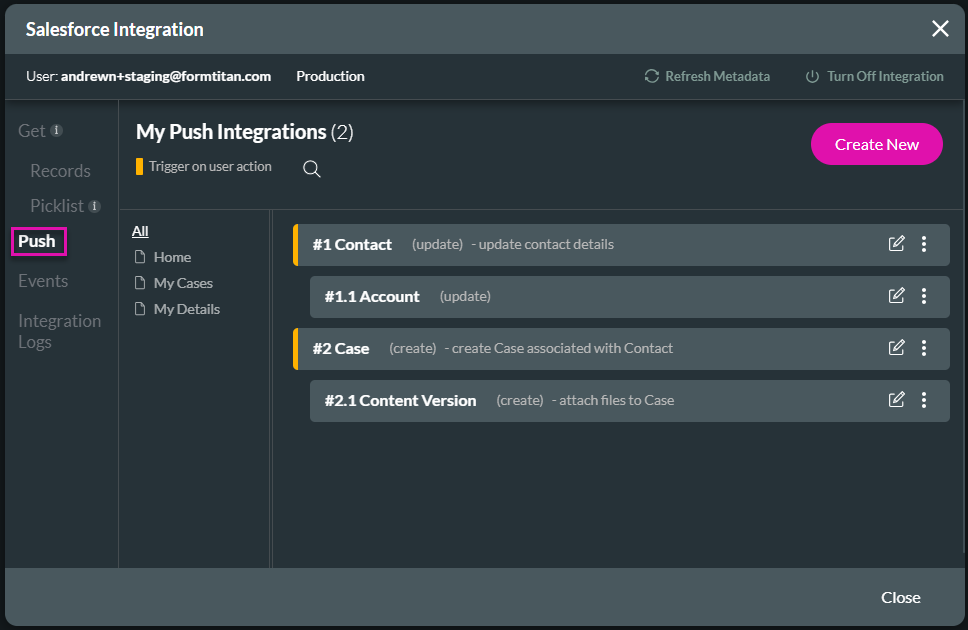
In this example, we created a new case and new file integrations.
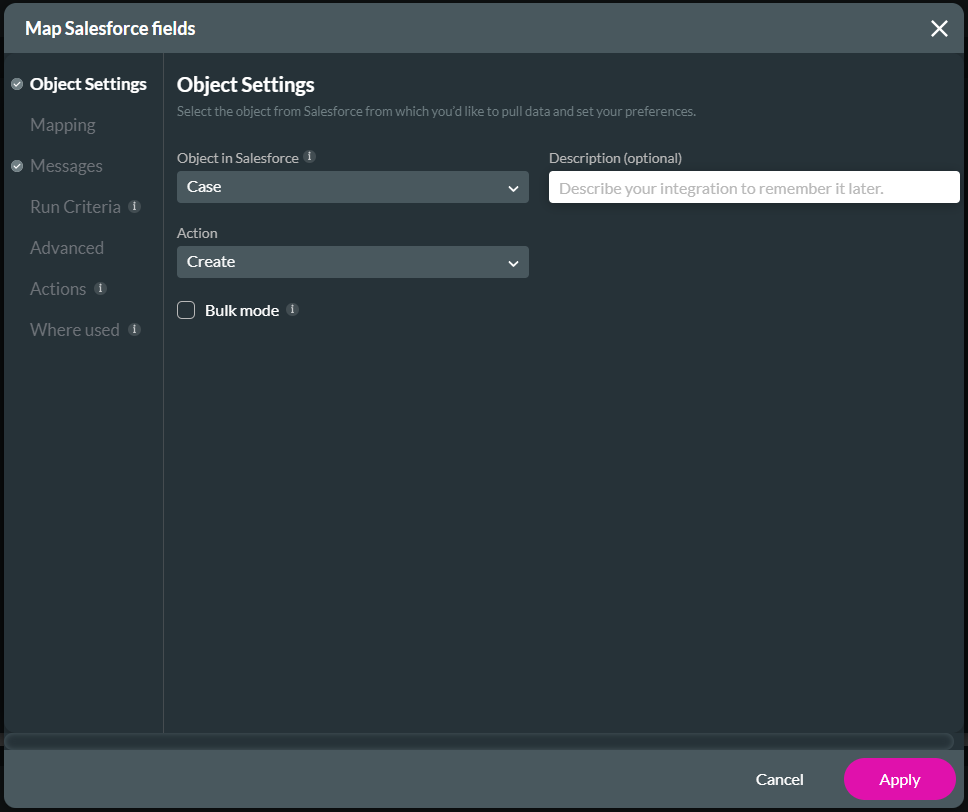
1. Click the Create New button. The Map Salesforce fields screen opens.
2. Under Object Settings, use the drop-down list to select the Salesforce object, for instance, Case.
3. Use the Action drop-down list to select the Create option.
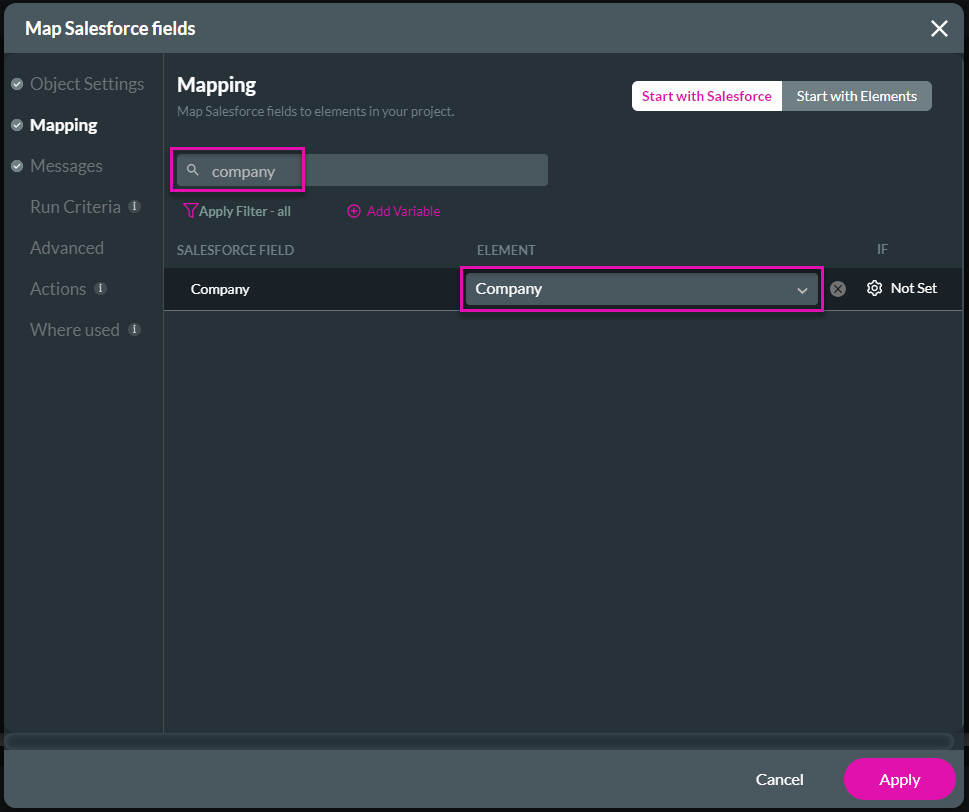
4. Click the Mapping option. The Salesforce Fields, which come from your CRM, are shown on the left. On the right side are the elements from the Titan project.
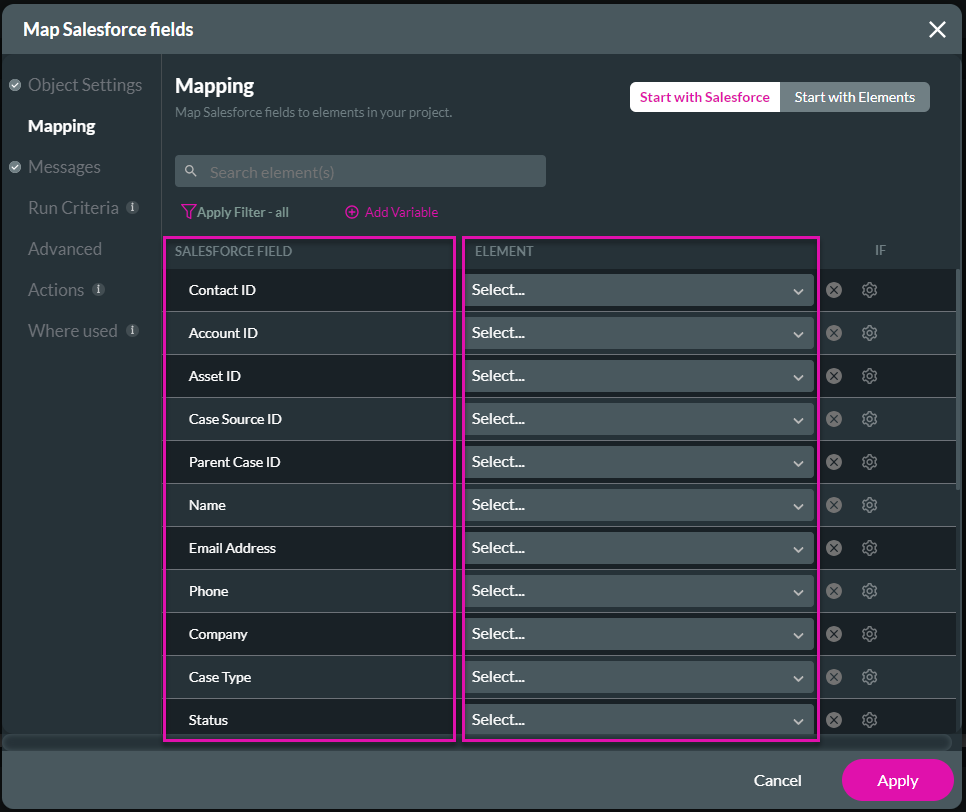
5. Use the Search field to search for an object.
6. Use the drop-down list to map the Company object to the input element called "Company" in the project.
7. Click the Cancel button to close the screen. To save some time, let's open the existing integration.
8. Click the Edit button to open the Case integration.
9. Use the Filter to show only the Mapped fields under mapping.
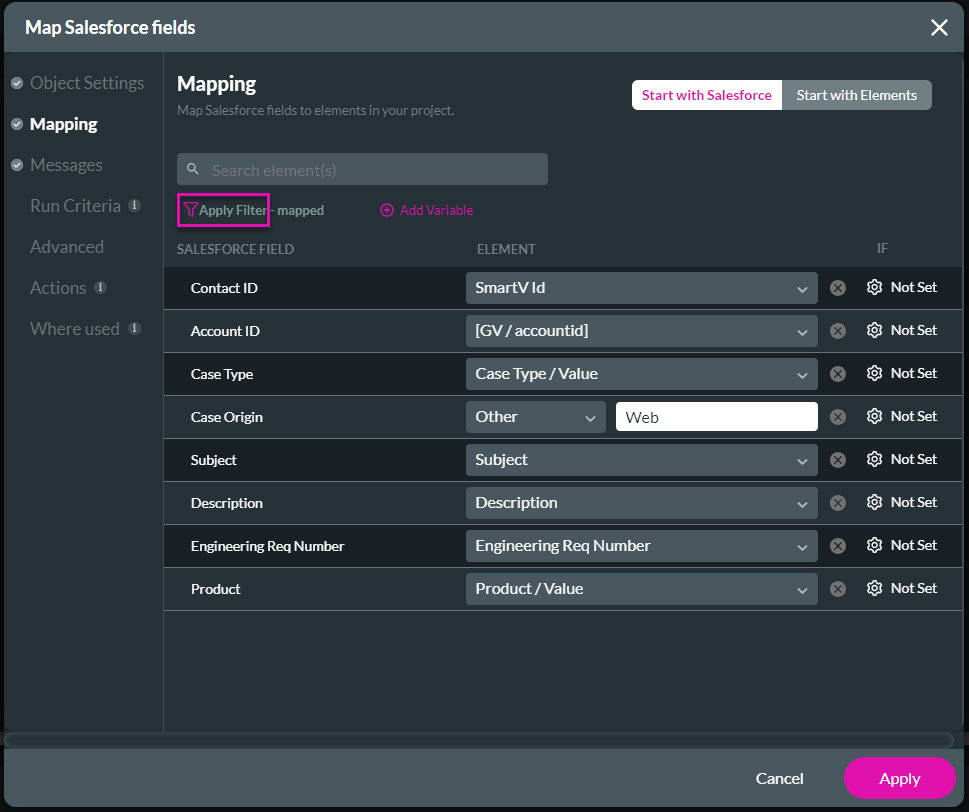
You will see the following mapped fields to input elements on the project:
1. Double-click the Salesforce action. The configured actions are shown.
2. Use the Process push or get drop-down list to select any previously configured Salesforce integrations.
3. Click on the Salesforce Integration button. You will see Get integrations …
…and Push integrations.
In this example, we created a new case and new file integrations.
1. Click the Create New button. The Map Salesforce fields screen opens.
2. Under Object Settings, use the drop-down list to select the Salesforce object, for instance, Case.
3. Use the Action drop-down list to select the Create option.
4. Click the Mapping option. The Salesforce Fields, which come from your CRM, are shown on the left. On the right side are the elements from the Titan project.
5. Use the Search field to search for an object.
6. Use the drop-down list to map the Company object to the input element called "Company" in the project.
7. Click the Cancel button to close the screen. To save some time, let's open the existing integration.
8. Click the Edit button to open the Case integration.
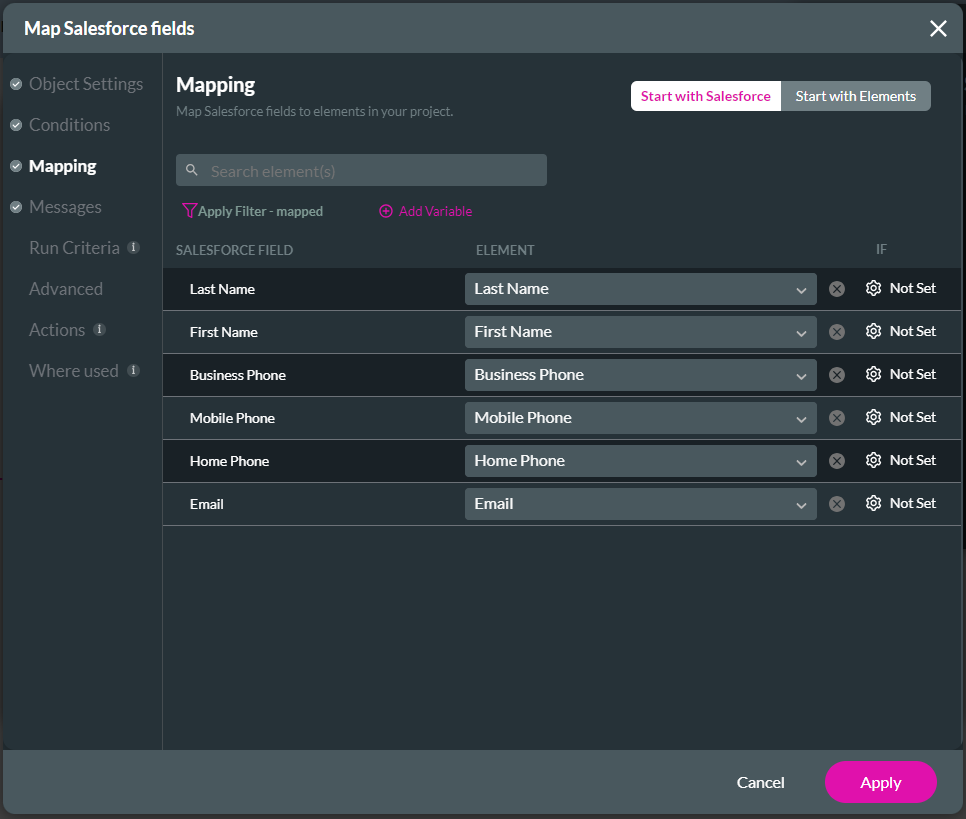
9. Use the Filter to show only the Mapped fields under mapping.
You will see the following mapped fields to input elements on the project:
- The ContactID is mapped to the user's SmartV ID.
- The AccountID is mapped to a variable we created.
- Case Type is mapped to Case Type/Value.
- Case Origin is mapped to Other, and "Web" was added in the field.
09 View the My Details page
Now, we will look at the My Details page.
To open the page, click the arrow next to Home to open the list and select the page.

We added a stepper element from the element list under Containers on this page.
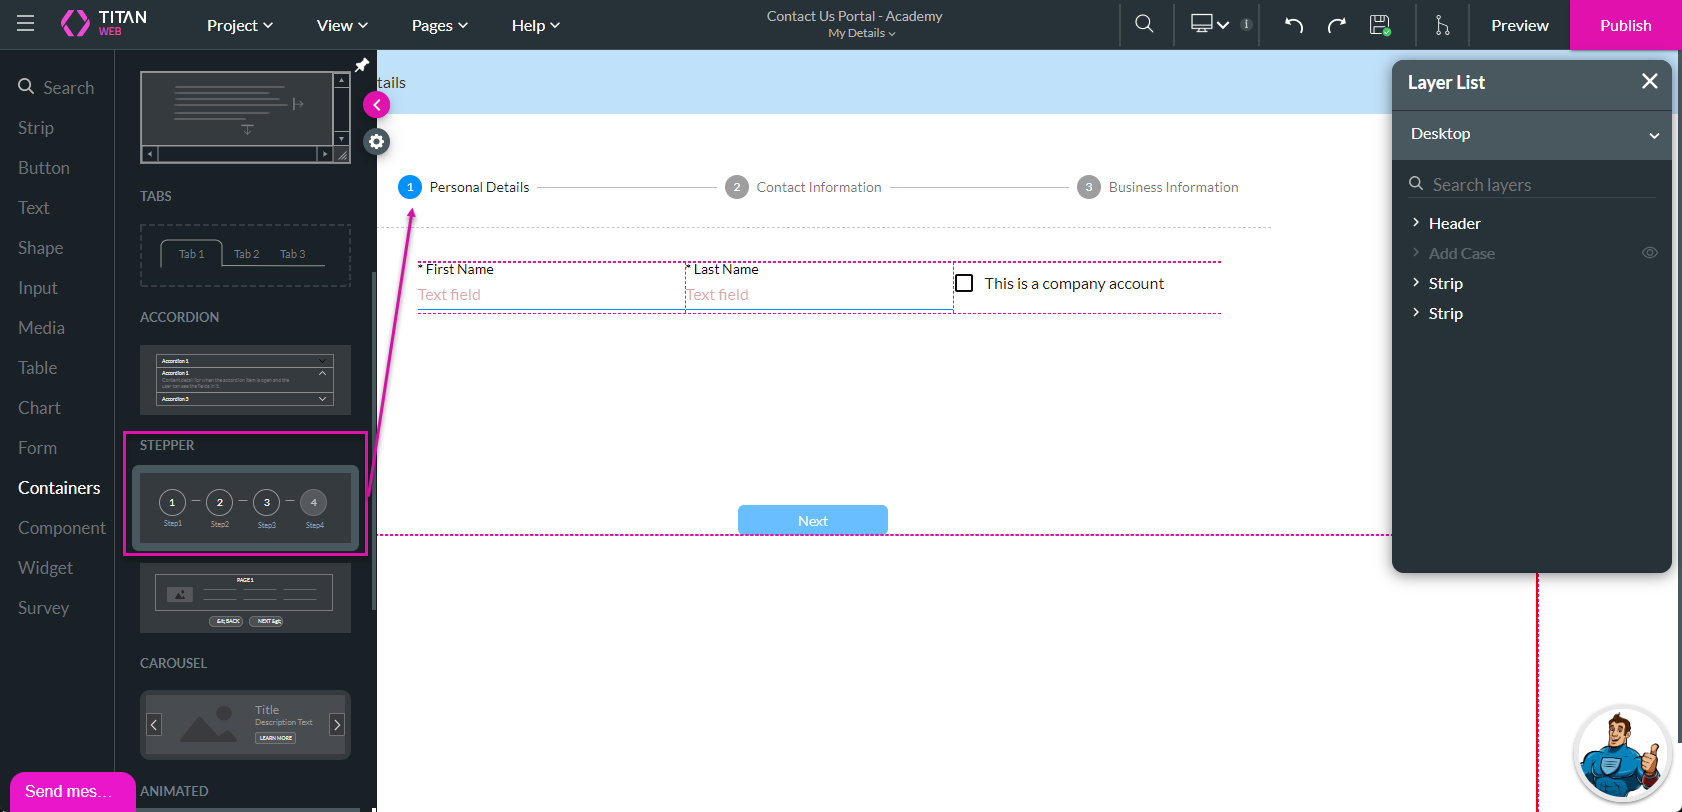
We also added form elements and other input fields to each step.
To open the page, click the arrow next to Home to open the list and select the page.
We added a stepper element from the element list under Containers on this page.
We also added form elements and other input fields to each step.
10 View conditions
Let’s see how the condition for the Business Information step is configured on the checkbox element.
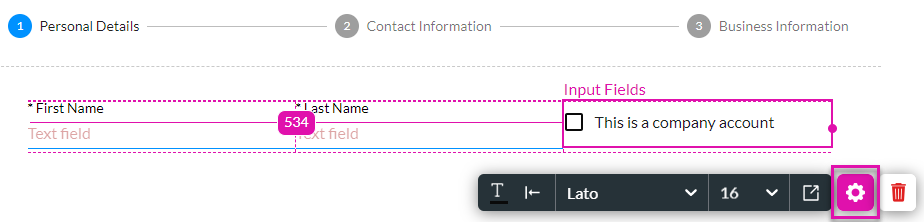
1. Select the checkbox element and click the Gear icon to open the Checkbox Settings screen.
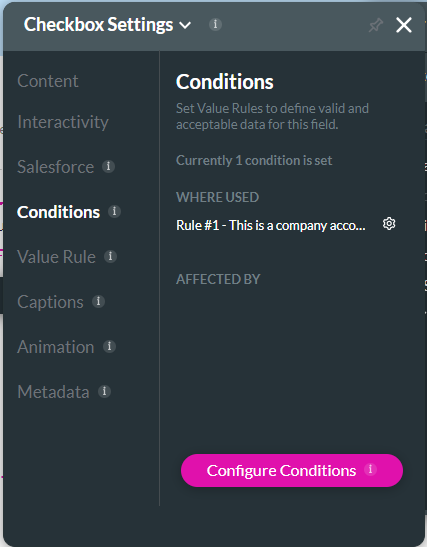
2. Under Conditions, click the Configure Conditions button to see the existing conditions.
Condition (1) states that if “this is a company account” is BOOLEAN TRUE, then the element will be shown (2); otherwise, it will be hidden (3).
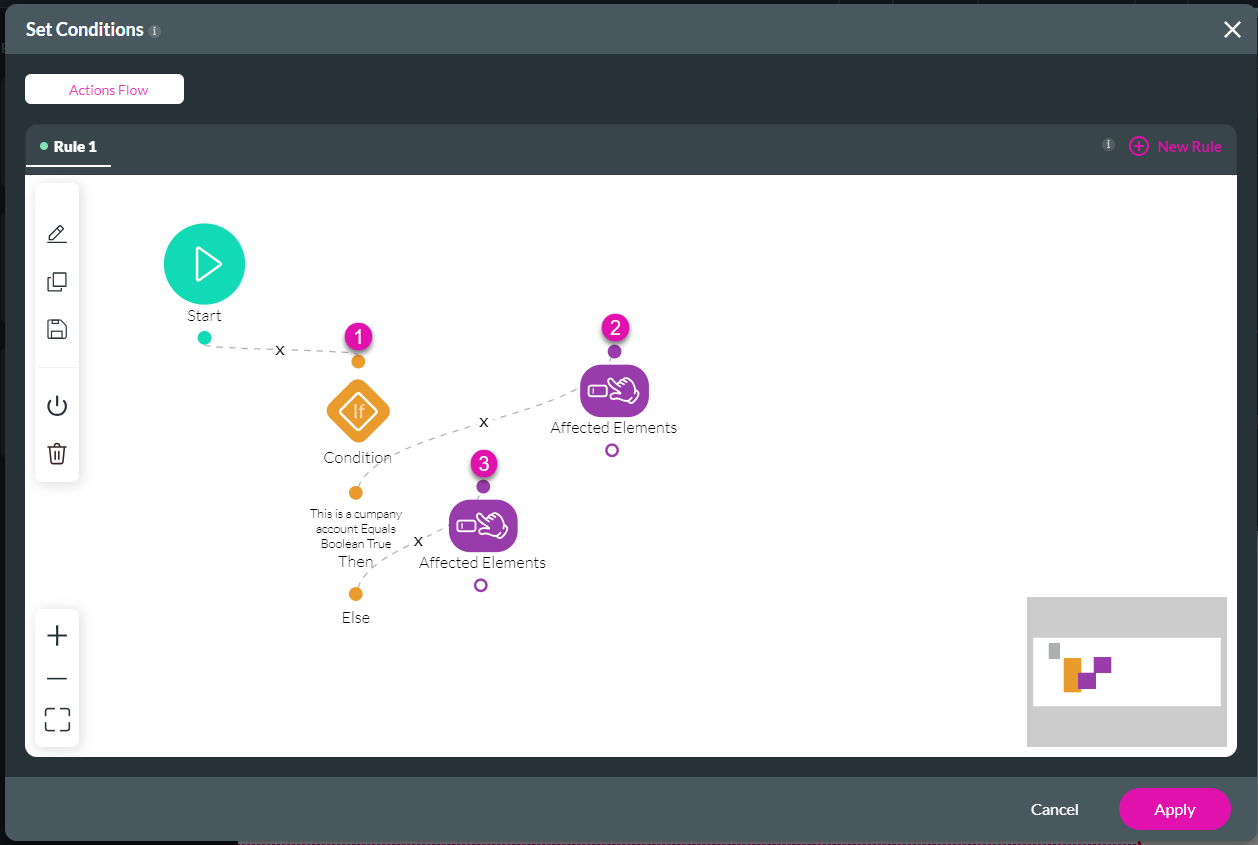
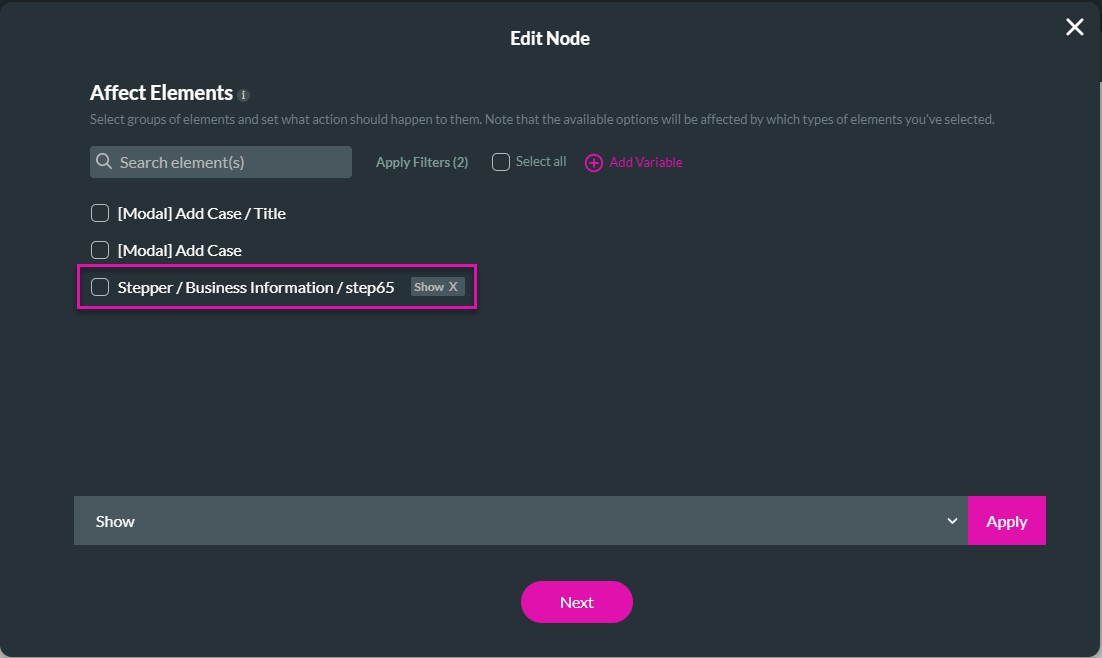
If Affected Element (2) is double-clicked, you will see that the stop Business Information in the stepper will be shown when the statement “this is a company account” is TRUE.
1. Select the checkbox element and click the Gear icon to open the Checkbox Settings screen.
2. Under Conditions, click the Configure Conditions button to see the existing conditions.
Condition (1) states that if “this is a company account” is BOOLEAN TRUE, then the element will be shown (2); otherwise, it will be hidden (3).
If Affected Element (2) is double-clicked, you will see that the stop Business Information in the stepper will be shown when the statement “this is a company account” is TRUE.
11 Submitting the details
When the stepper is completed, the details will be submitted. This is how we did it:
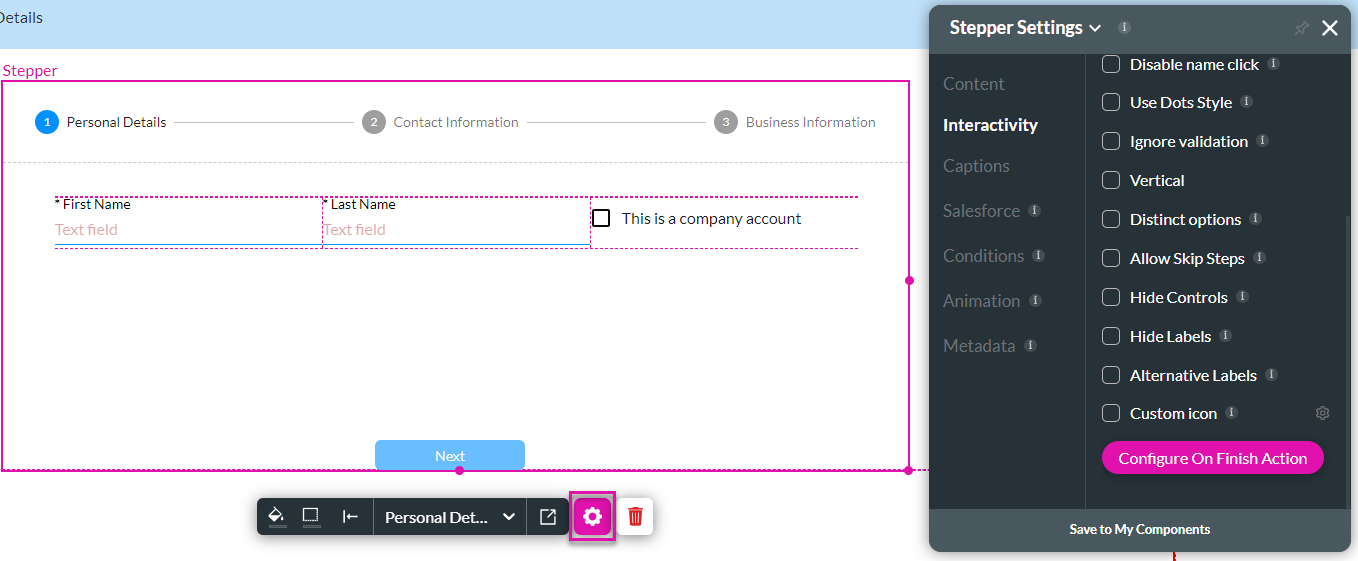
1. Select the Stepper’s Gear icon to open the Stepper Settings screen.
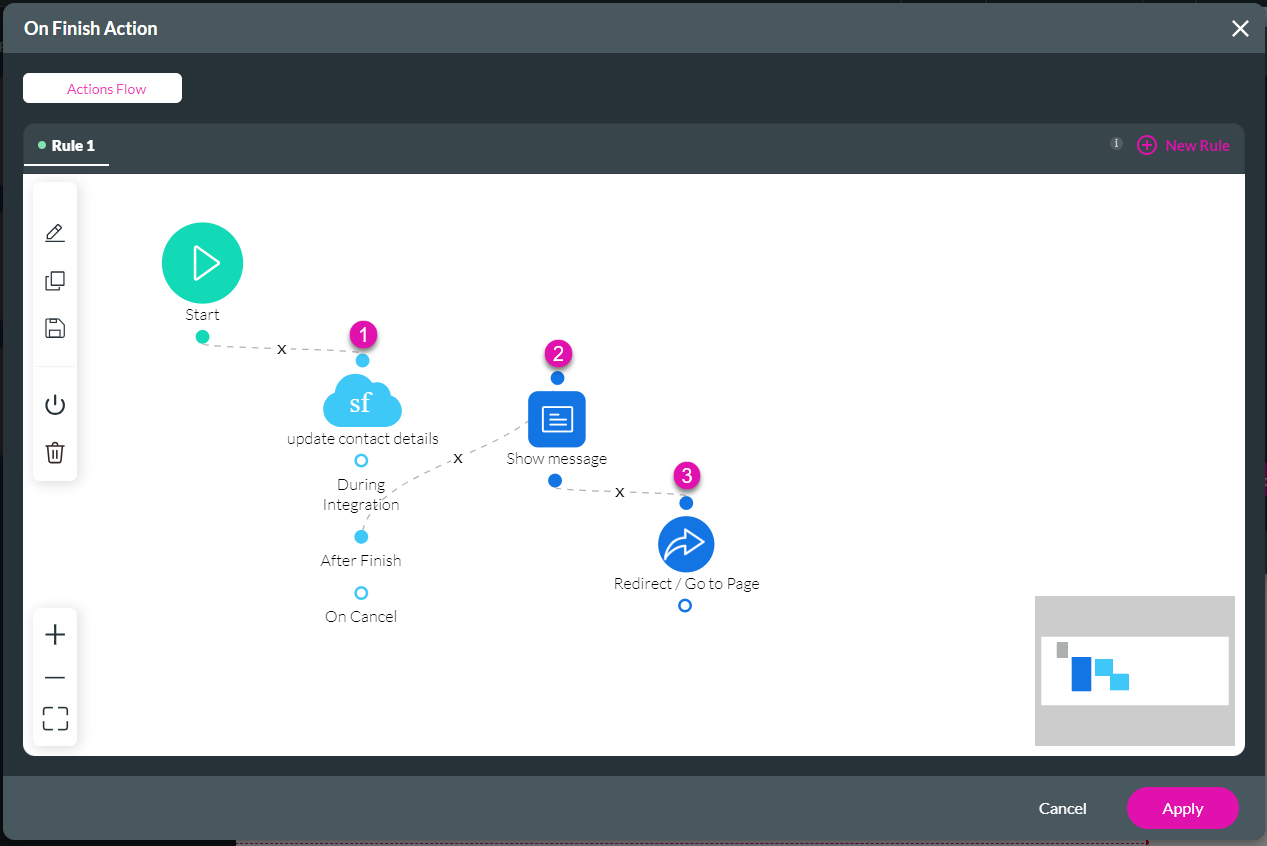
2. Under Interactivity, scroll down and click the Configure On Finish Action button. The On Finish Action screen opens.
We created a Salesforce Action that will update contact details. Then, a message is shown, and the user is redirected to the homepage.
The Salesforce Push actions are on this screen:
The Contact object has been updated, and the mapped fields are as follows.
1. Select the Stepper’s Gear icon to open the Stepper Settings screen.
2. Under Interactivity, scroll down and click the Configure On Finish Action button. The On Finish Action screen opens.
We created a Salesforce Action that will update contact details. Then, a message is shown, and the user is redirected to the homepage.
The Salesforce Push actions are on this screen:
The Contact object has been updated, and the mapped fields are as follows.
12 Page actions
Let’s have a quick look at page actions. Some fields can be pre-populated for the different steps of the stepper element.
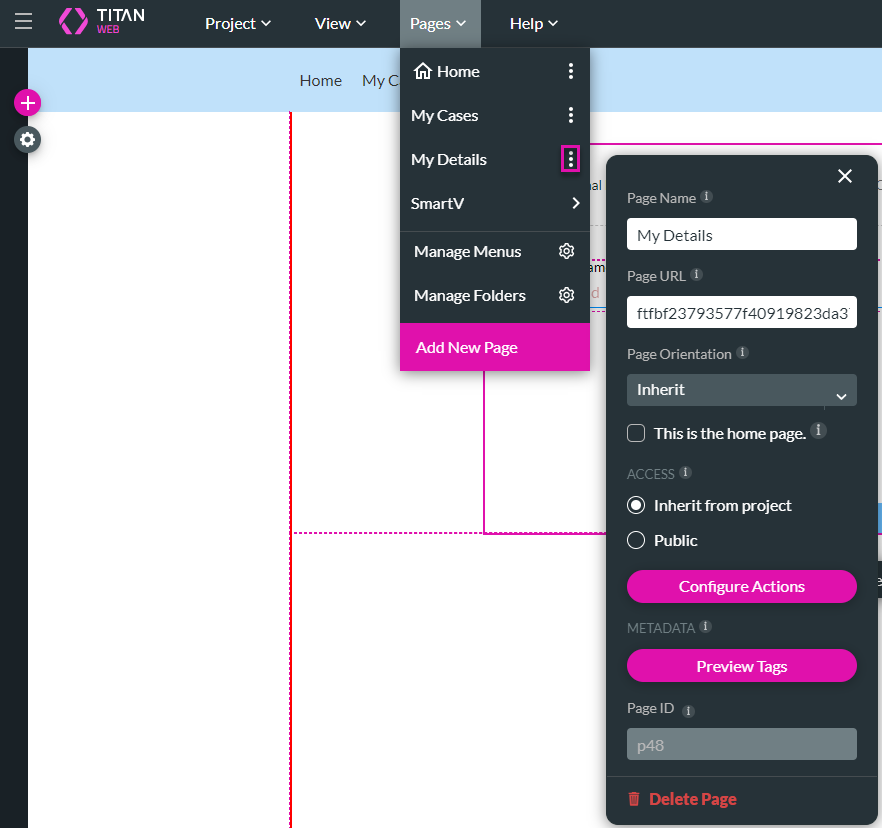
We opened the Pages drop-down list on the My Details page and clicked the Kebab icon.
On the subsequent screen, we clicked the Configure Actions button. The Configure Actions screen opens. This screen is used to configure page load actions.
We are looking at the actions that must happen when a page is loaded.
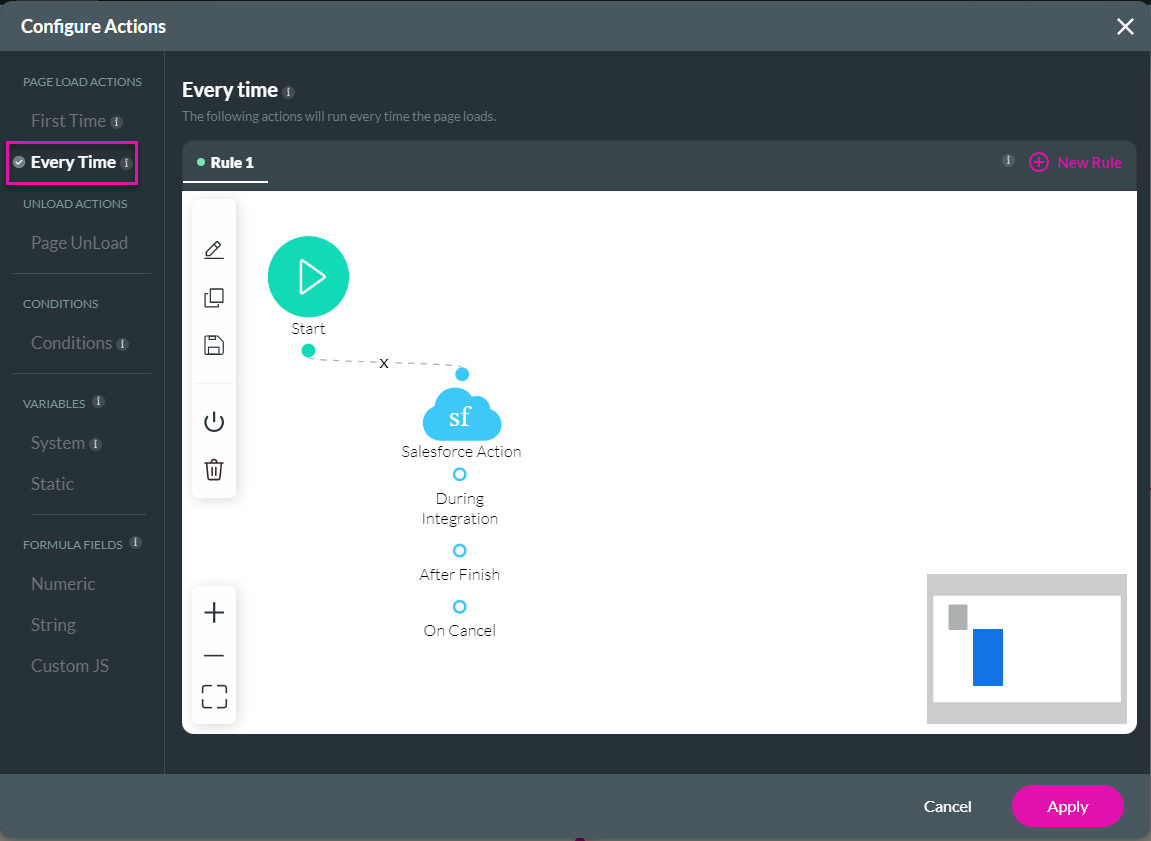
We configured a Salesforce Get action. This will populate the fields on the stepper with the information from Salesforce. When double-clicking on the Salesforce Action, we see the following:

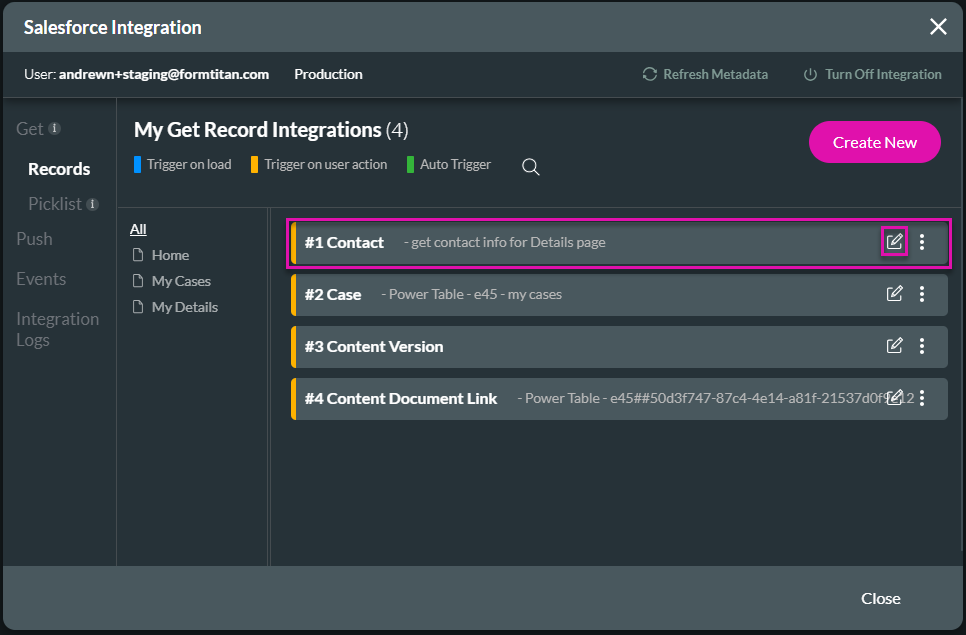
Let’s view this action by clicking the Salesforce Integration button. We clicked on the #1 Contact integration’s Edit icon on the Salesforce Integration screen. This opens the Map Salesforce fields screen.
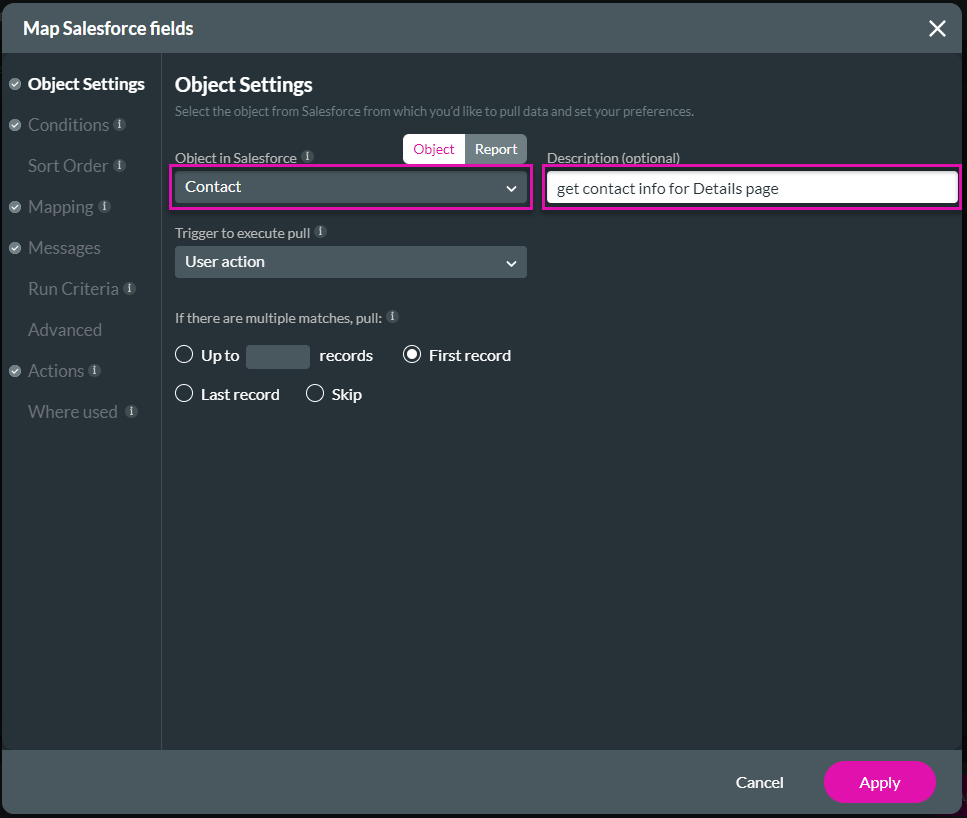
The Contact object in Salesforce was mapped, and we gave it a clear description so that we could know precisely which integration to use, for instance, in a specific condition. A good description also makes maintenance easier.
Under the Conditions option, the condition was configured as follows:

The following element was used for Salesforce field mapping. For the company information, we mapped it to the account ID and used the Set reference Gear icon to map it to the name.
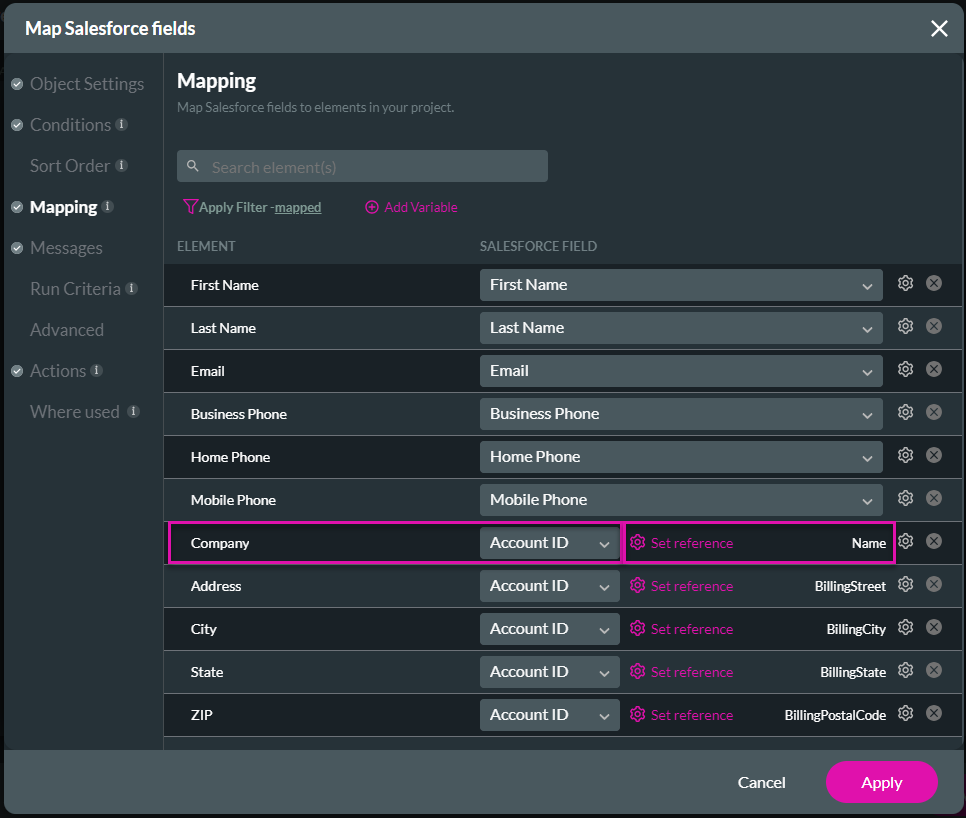
When the page loads, these fields will be updated with the mapped information.
We opened the Pages drop-down list on the My Details page and clicked the Kebab icon.
On the subsequent screen, we clicked the Configure Actions button. The Configure Actions screen opens. This screen is used to configure page load actions.
We are looking at the actions that must happen when a page is loaded.
We configured a Salesforce Get action. This will populate the fields on the stepper with the information from Salesforce. When double-clicking on the Salesforce Action, we see the following:
Let’s view this action by clicking the Salesforce Integration button. We clicked on the #1 Contact integration’s Edit icon on the Salesforce Integration screen. This opens the Map Salesforce fields screen.
The Contact object in Salesforce was mapped, and we gave it a clear description so that we could know precisely which integration to use, for instance, in a specific condition. A good description also makes maintenance easier.
Under the Conditions option, the condition was configured as follows:
- Contact ID Equals Field ID (The ID is the SmartV login ID.)
The following element was used for Salesforce field mapping. For the company information, we mapped it to the account ID and used the Set reference Gear icon to map it to the name.
When the page loads, these fields will be updated with the mapped information.
13 Conclusion
This was a quick overview of some of the functionalities available on Titan Web. We looked at the following: SmartV access, basic conditions, the action flow, basic elements, and Salesforce Get and Push.