Create a Salesforce Push Find (12 min)
Completion requirements
01 Getting Started
This tutorial will demonstrate locating existing records in Salesforce and adding related records.
We will use a simple form to demonstrate this process.
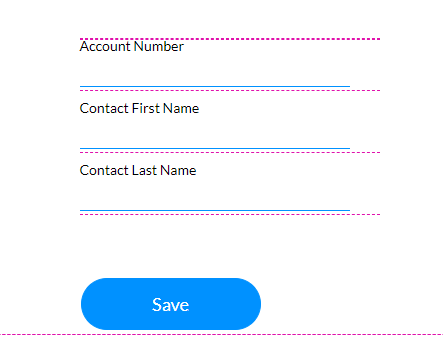
We will use a simple form to demonstrate this process.
02 Configuring the Push
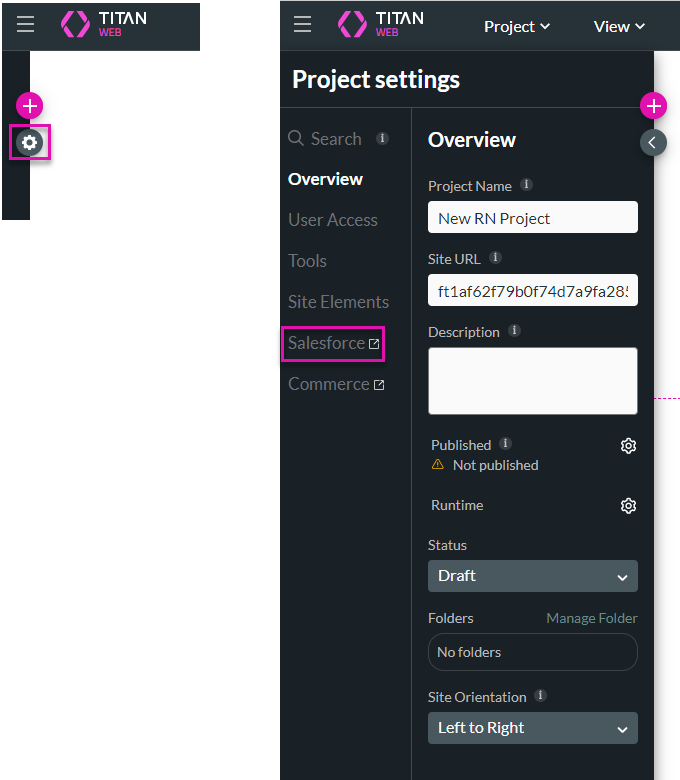
1. Click the + icon to open the Project Settings and click the Salesforce option. The Salesforce Integration screen opens.
2. Select the Push option and click the Create New button. The Map Salesforce fields screen opens on Object Settings.
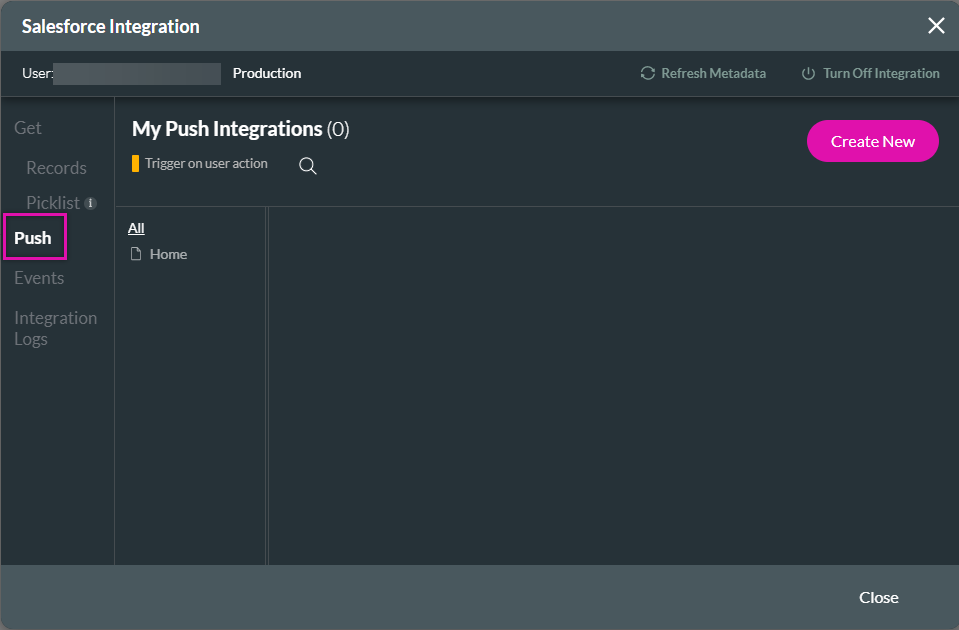
2. Select the Push option and click the Create New button. The Map Salesforce fields screen opens on Object Settings.
03 The Object Settings Tab
1. Use the Object in Salesforce drop-down list to find the object, for instance, Account.
2. Add a description that defines the purpose of the push.
3. Use the Action drop-down to select the Find option. If multiple matches are found, you can set parameters. For this example, only one Account should be linked to the account number so that we can keep the first record default option.
If no match is found, you can choose to skip or create a record ID. For this use case, we want to skip.
04 The Conditions Tab
1. Click on the Conditions tab to start creating a condition.
2. Configure the condition to Account Number Equals Field Account Number. Click the Apply button.
This process will not require mapping as we will not create a record.
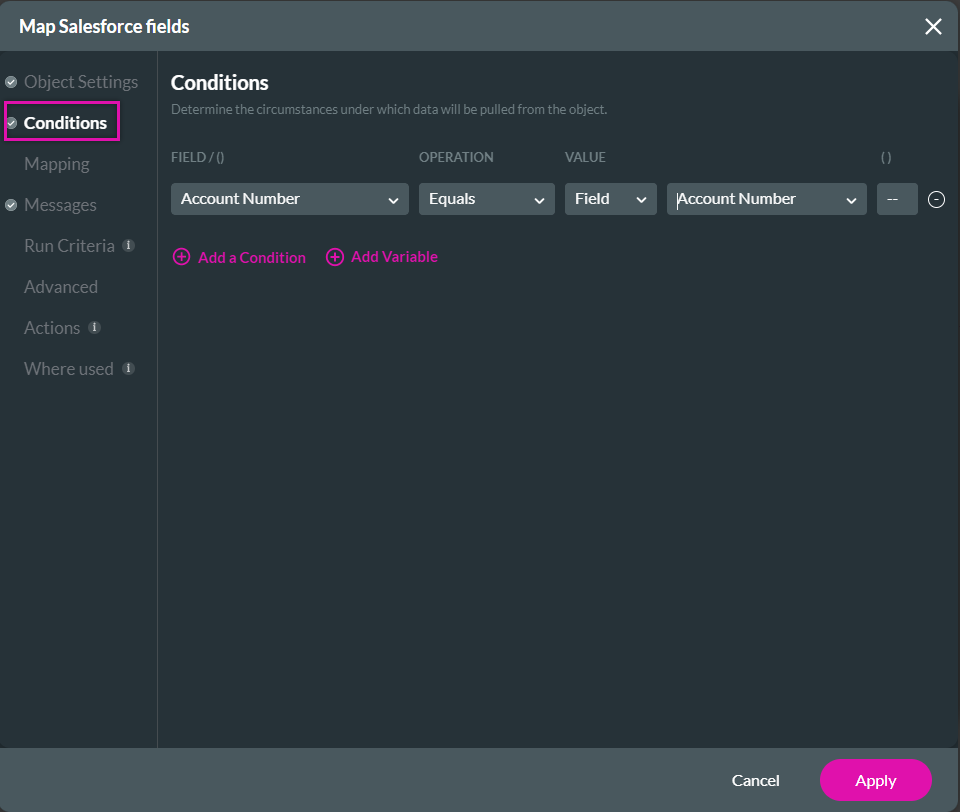
2. Configure the condition to Account Number Equals Field Account Number. Click the Apply button.
This process will not require mapping as we will not create a record.
05 What does a Push Find do?
When this push is triggered to find a single record, the Account Number in Salesforce must match the Account Number entered by the user.
This differs from a get records operation, which finds data in Salesforce and returns it to your Titan Web project. This process typically runs a little slower as security measures exist when pulling data from Salesforce into Titan.
A Push Find runs entirely on Salesforce. It locates the record and does nothing else, which means it runs faster and is more secure.
You should use a push find in scenarios where you need to locate a record and reference it.
06 Creating a Child Push
1. Navigate to the Salesforce Integration screen and select the Push tab.
2. Click on the Kebab icon next to the created get. Select Add Child. The Map Salesforce Screen will open.
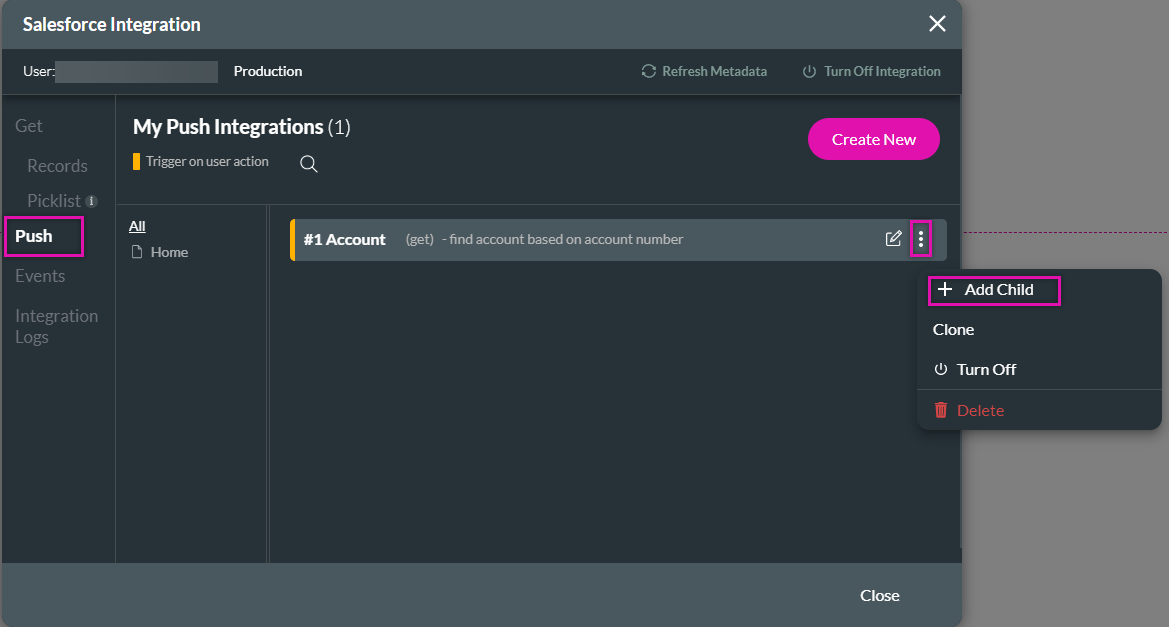
2. Click on the Kebab icon next to the created get. Select Add Child. The Map Salesforce Screen will open.
07 The Object Settings Tab for the Child Push
1. Use the Object in Salesforce to select the Contact option.
2. Add a description that defines the purpose of the push.
3. Use the action drop-down and select Create.

2. Add a description that defines the purpose of the push.
3. Use the action drop-down and select Create.
08 The Mapping Tab for the Child Push
1. Click on the Mapping Tab.
Titan has automatically matched the Account ID field on the contact object. This means that the newly created record will be assigned the ID of the account located in the push find.
2. Map the dropdown next to the Last Name field to the corresponding field.
3. Repeat the same step with the First Name field. Click Apply.
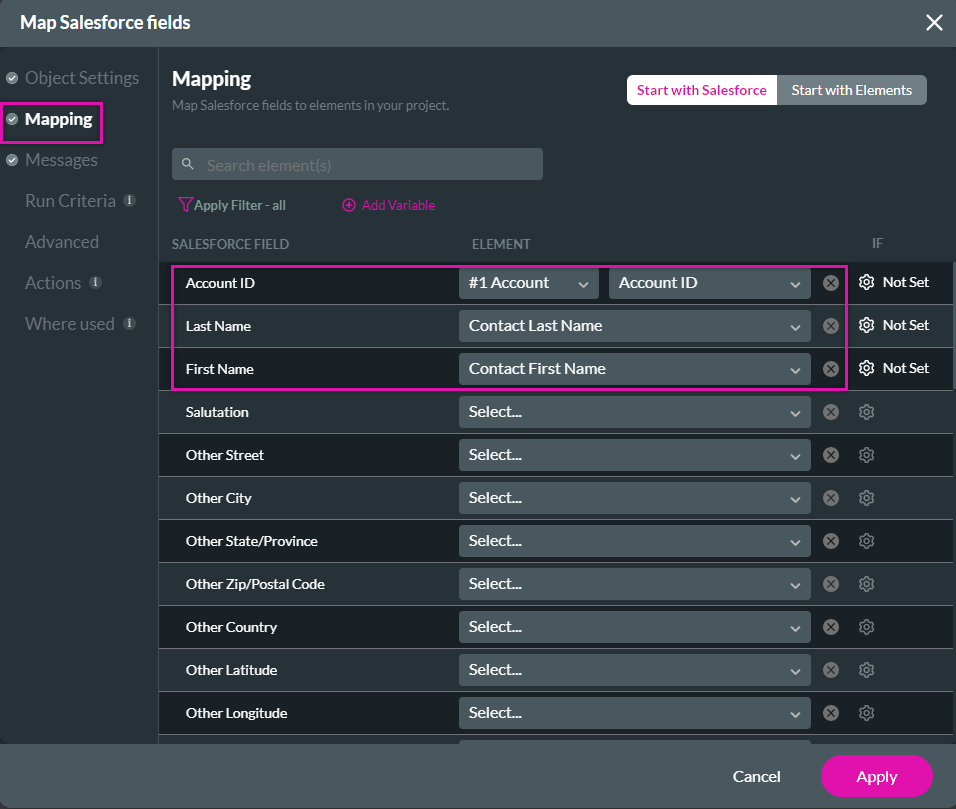
2. Map the dropdown next to the Last Name field to the corresponding field.
3. Repeat the same step with the First Name field. Click Apply.
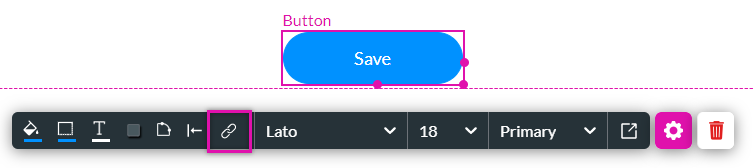
09 Adding the Push Find to an Element
1. Click the button element and click the On Click Action icon. The On Click Action screen opens.
2. Hover your mouse over the Start icon and click the + icon to open the Add Node screen.
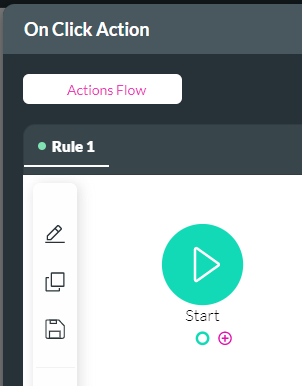
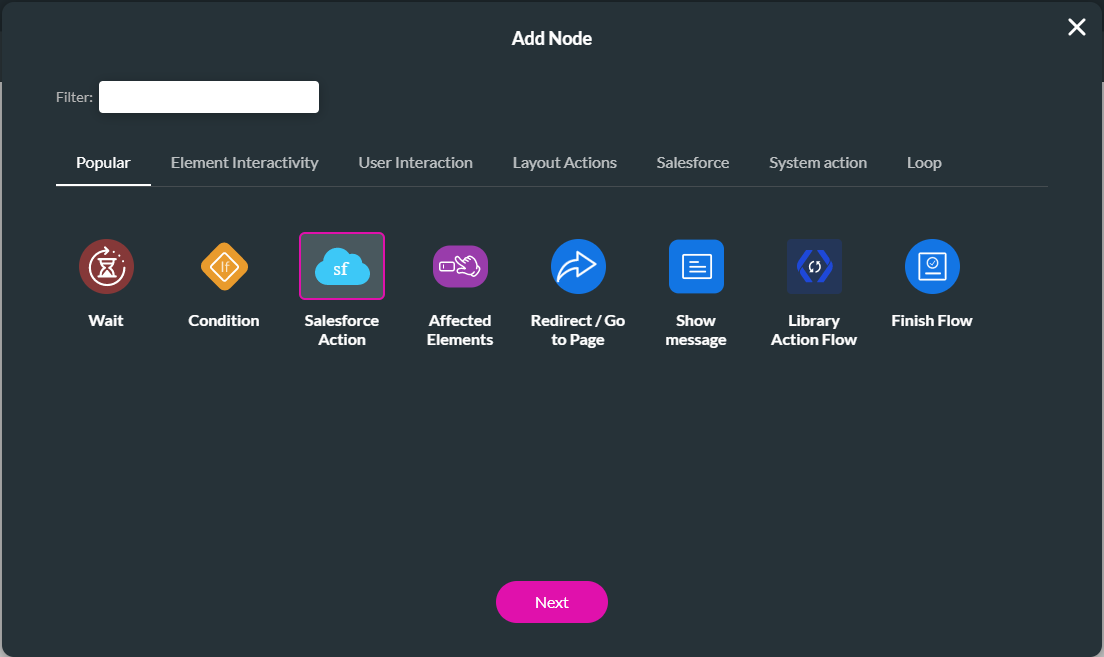
3. Select the Salesforce Action option and click the Next button.
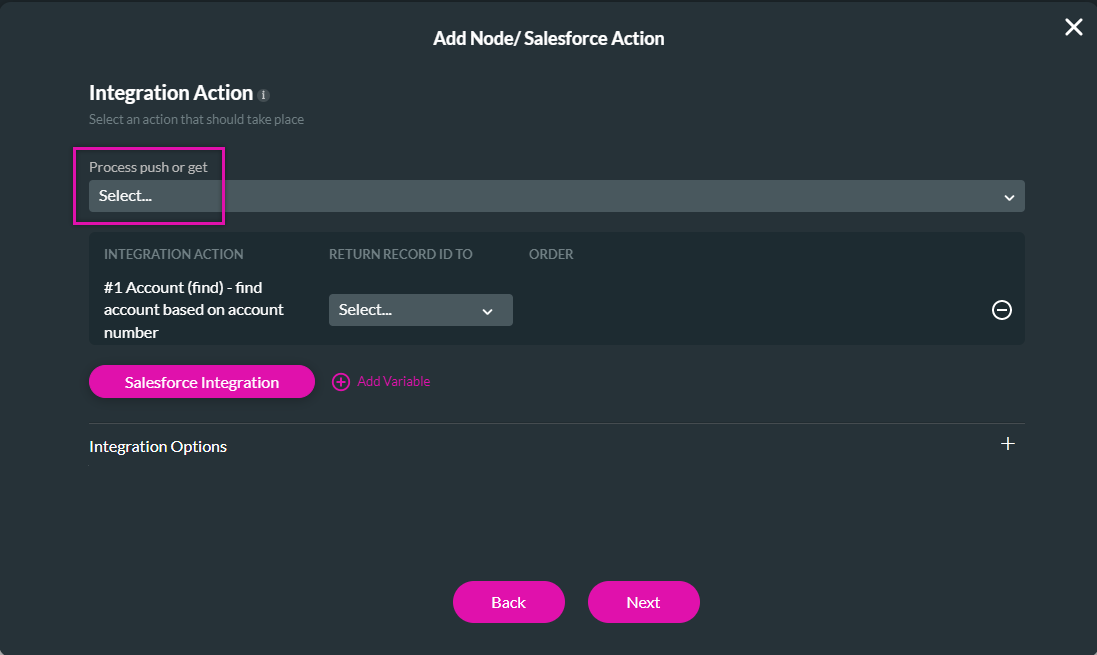
4. Use the Process push or get drop-down list and select the Push you created. Click the Next button.
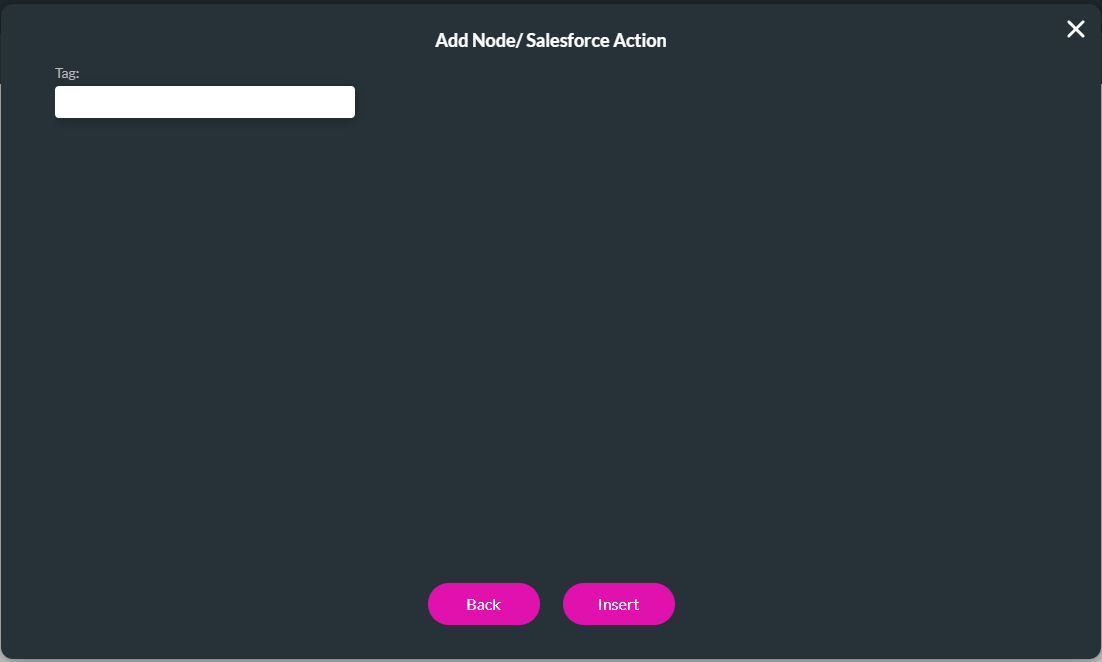
6. Add a tag if necessary and click the Insert button.
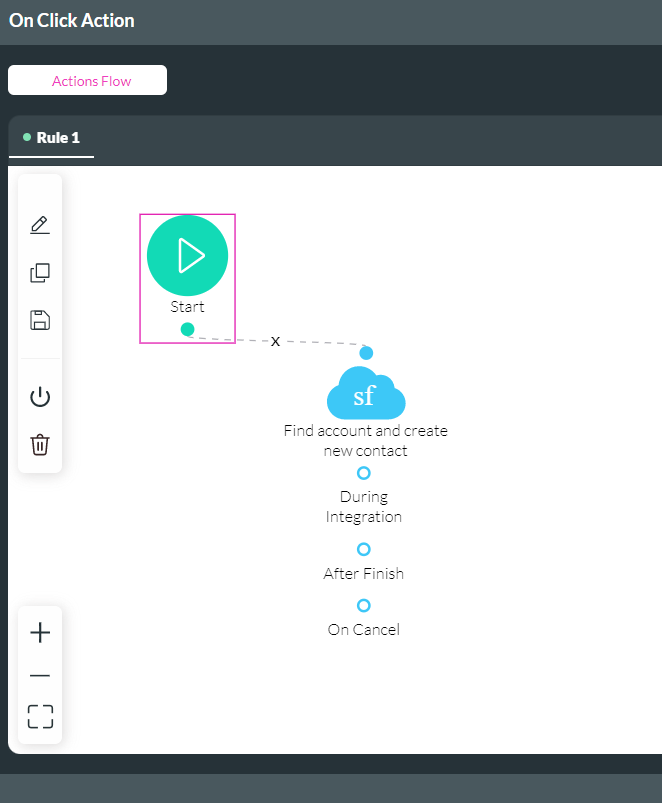
7. The Salesforce action is added to the On Click Action screen. Click the Apply button.
10 Save and Preview the Project
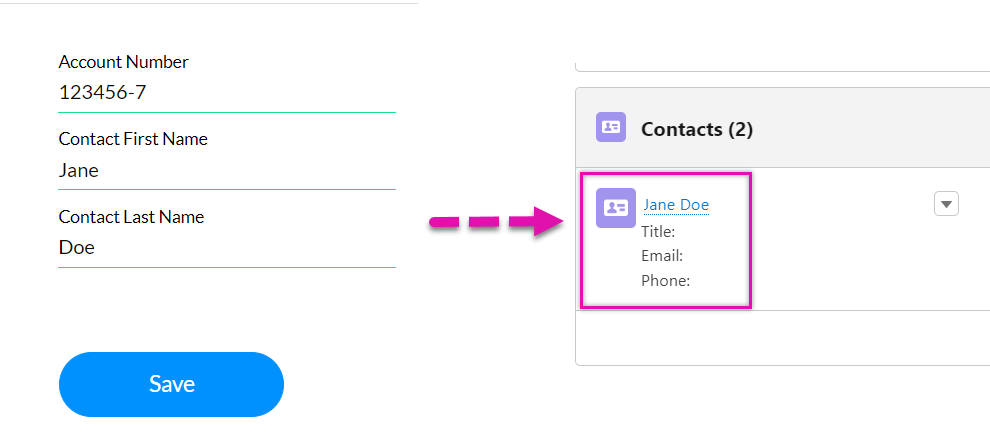
1. Save and Preview your project.
When a user provides new details associated with an account number, their details will be added to Salesforce.
When a user provides new details associated with an account number, their details will be added to Salesforce.