Create a Salesforce Get (9 min)
Completion requirements
01 Getting Started
This tutorial will cover how to get data from Salesforce into a Titan Web project. A get will be created for a simple form element for demonstrative purposes.
02 Navigate to the Salesforce Integration Screen
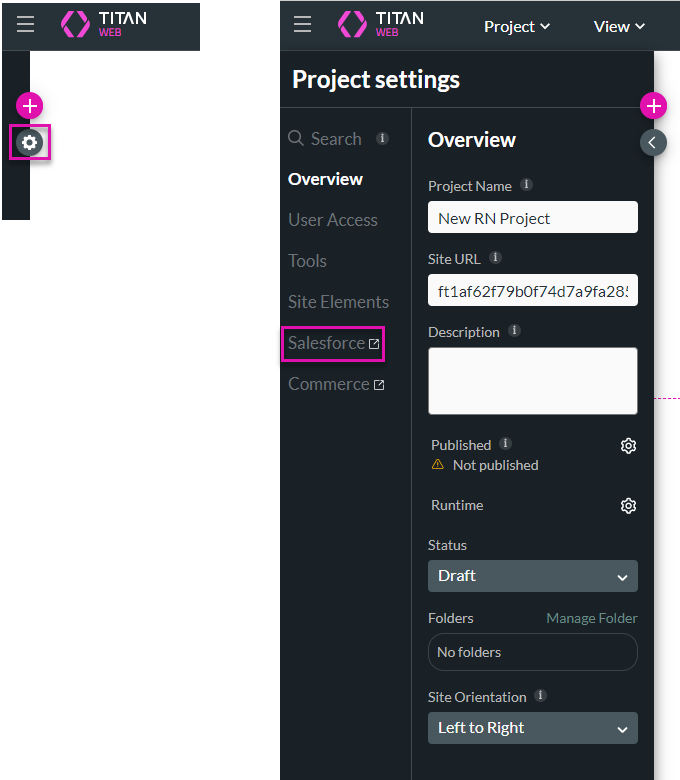
1. Click the project settings gear icon and select the Salesforce tab. The Salesforce Integration screen opens.
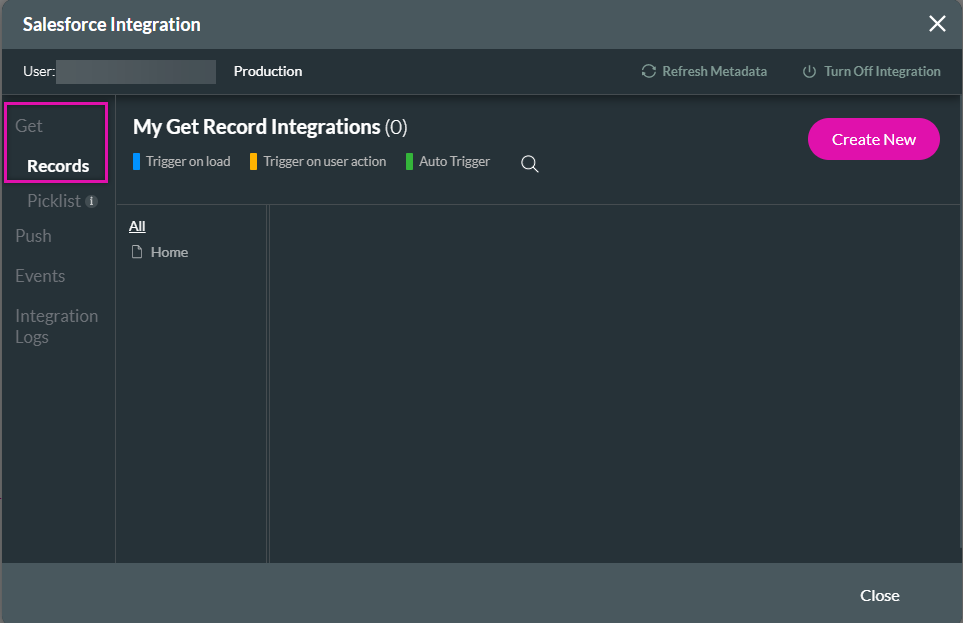
2. To create a Get record, click on the Record tab in the Salesforce Integrations screen. Select the Create New button to start the configuration process.
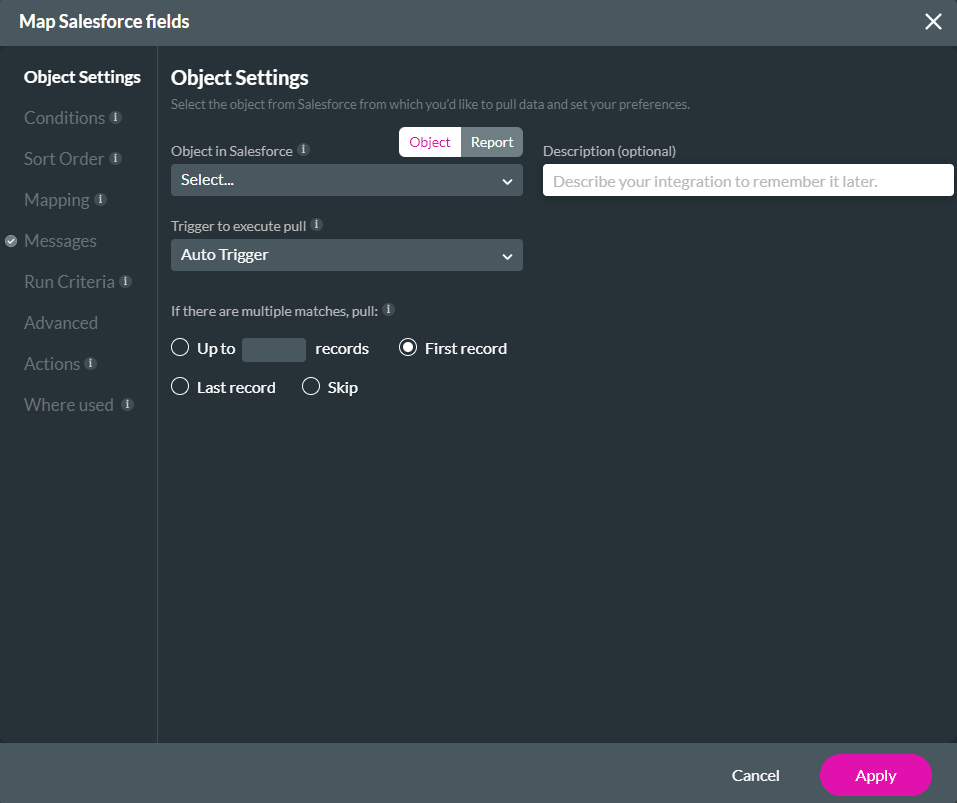
The Map Salesforce fields screen opens.
2. To create a Get record, click on the Record tab in the Salesforce Integrations screen. Select the Create New button to start the configuration process.

The Map Salesforce fields screen opens.

03 The Object Settings Tab
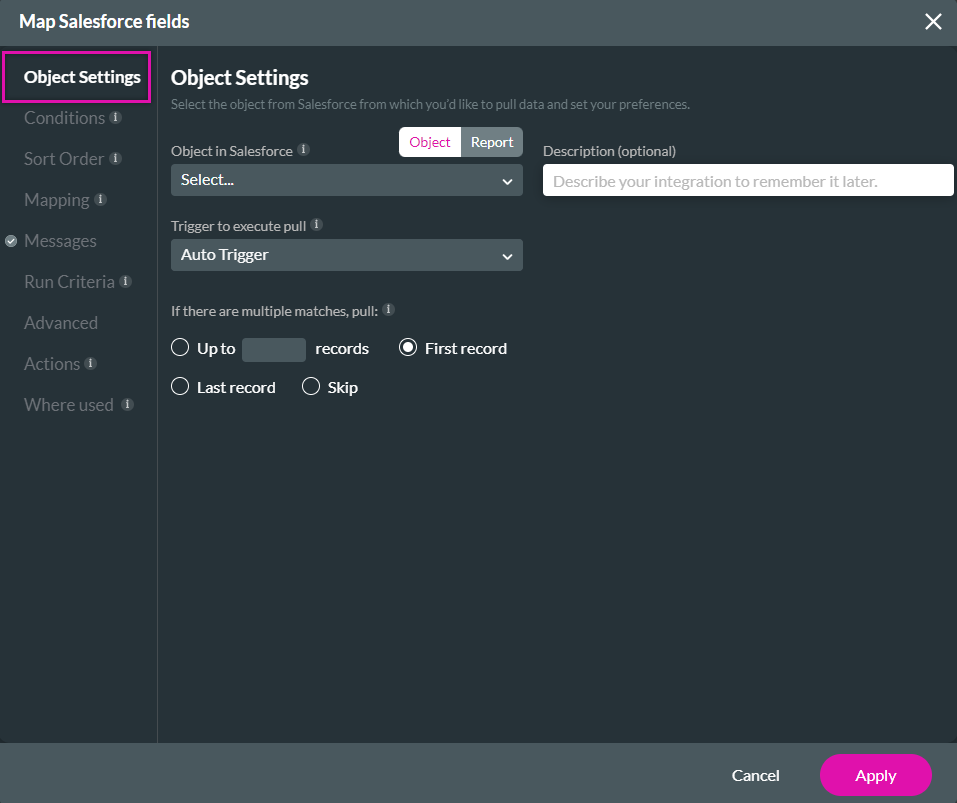
1. configure the data you will be pulling from Salesforce using the Object in Salesforce dropdown.
2. You can choose to add a description that details the integration.
3. The Trigger to execute pull offers:
2. You can choose to add a description that details the integration.
3. The Trigger to execute pull offers:
- Auto-trigger that activates when certain conditions are met.
- On Load activates when the user loads the page.
- User Action, this is the most popular use case, the get will trigger when the user does something.

04 The Conditions Tab
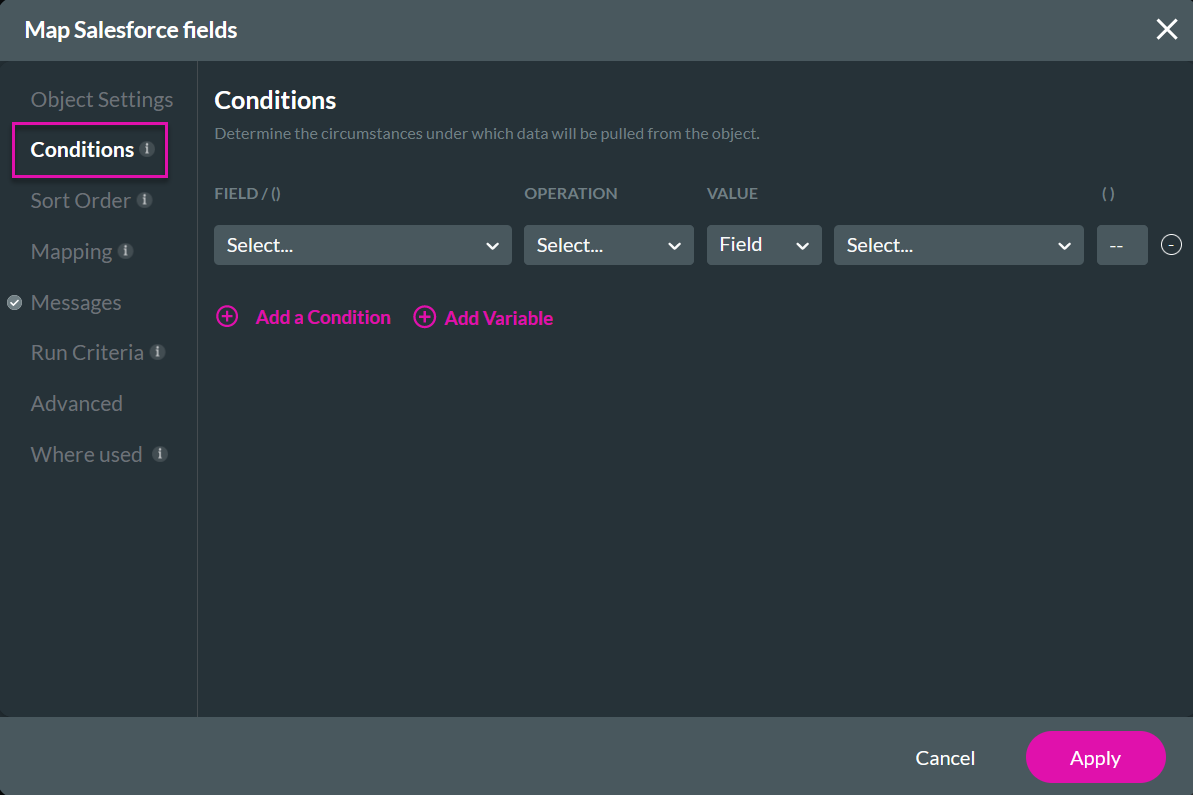
1. Click on the conditions tab to start configuring search conditions.
2. Use the Field dropdown menu to choose the object in Salesforce. For example, the account number.
3. The operation dropdown is used to set the condition type. For example, we want the Account Number to equal a specific value.
4. Choose the type of value you want to use to validate the data., For example, a field value.
5. Lastly, set the specific value. For example, we want the Account Number Field to match the Account Number in Salesforce.

You can set a sort order, which determines the sequence the data is ordered in.
05 The Mapping Tab
1. Click the Mapping tab to configure how the results are mapped to the fields we have created.
2. Use the dropdowns to match your element to the Salesforce field. For example, match the Account Name element to the Account Name object in Salesforce.
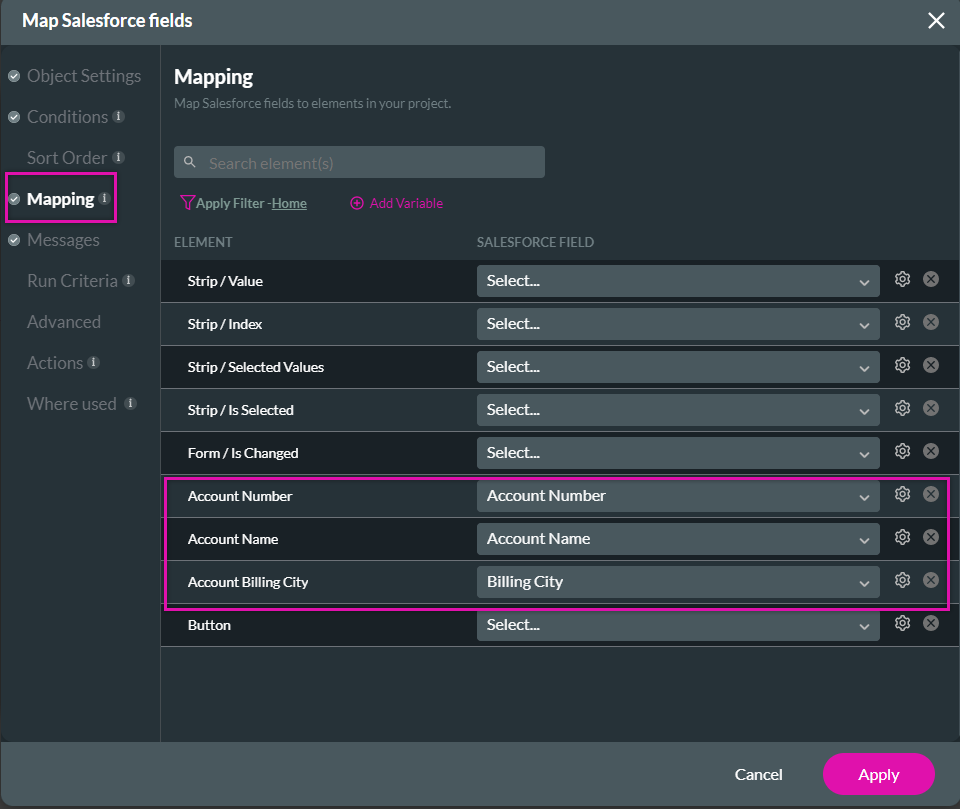
2. Use the dropdowns to match your element to the Salesforce field. For example, match the Account Name element to the Account Name object in Salesforce.

06 Applying the Config
Once you have completed your configuration, click the Apply button.
Now that the get has been created, it’s time to link the get to the action button on the form.
Now that the get has been created, it’s time to link the get to the action button on the form.
07 Configure the On Click Action
1. Click on the Button and select the link icon in the element menu.
![]()
2. The On Click Action screen opens. Click the + icon next to Start to add a node.

3. The Add Node screen opens. Select the Salesforce Action option.

4. The Integration Action screen opens. Use the dropdown to select the created Get. The selected Get displays in the Integration Action window. Click the Next button.
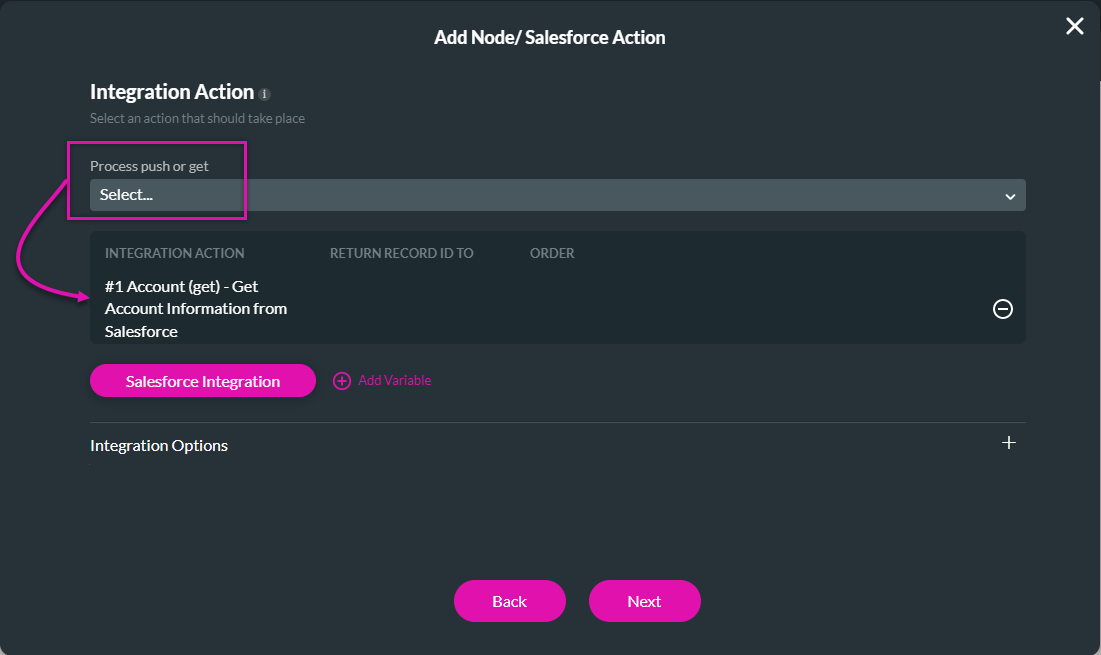
Add a tag describing the get action and click Insert to apply the configuration.

The configured action is displayed in the Action flow window.

08 Previewing the Configuration
1. Save your project and select the preview option.
2. Enter an account number into the relevant field.
3. Click the button, this will trigger the get action.
Titan will pull the data from Salesforce and autocomplete the relevant data.

2. Enter an account number into the relevant field.
3. Click the button, this will trigger the get action.
Titan will pull the data from Salesforce and autocomplete the relevant data.
