Building a Multi-Page Private Portal (20 mins)
Completion requirements
01 Getting Started
This tutorial explores how to create a secure portal on Titan Web.
02 Setting Up SmartV
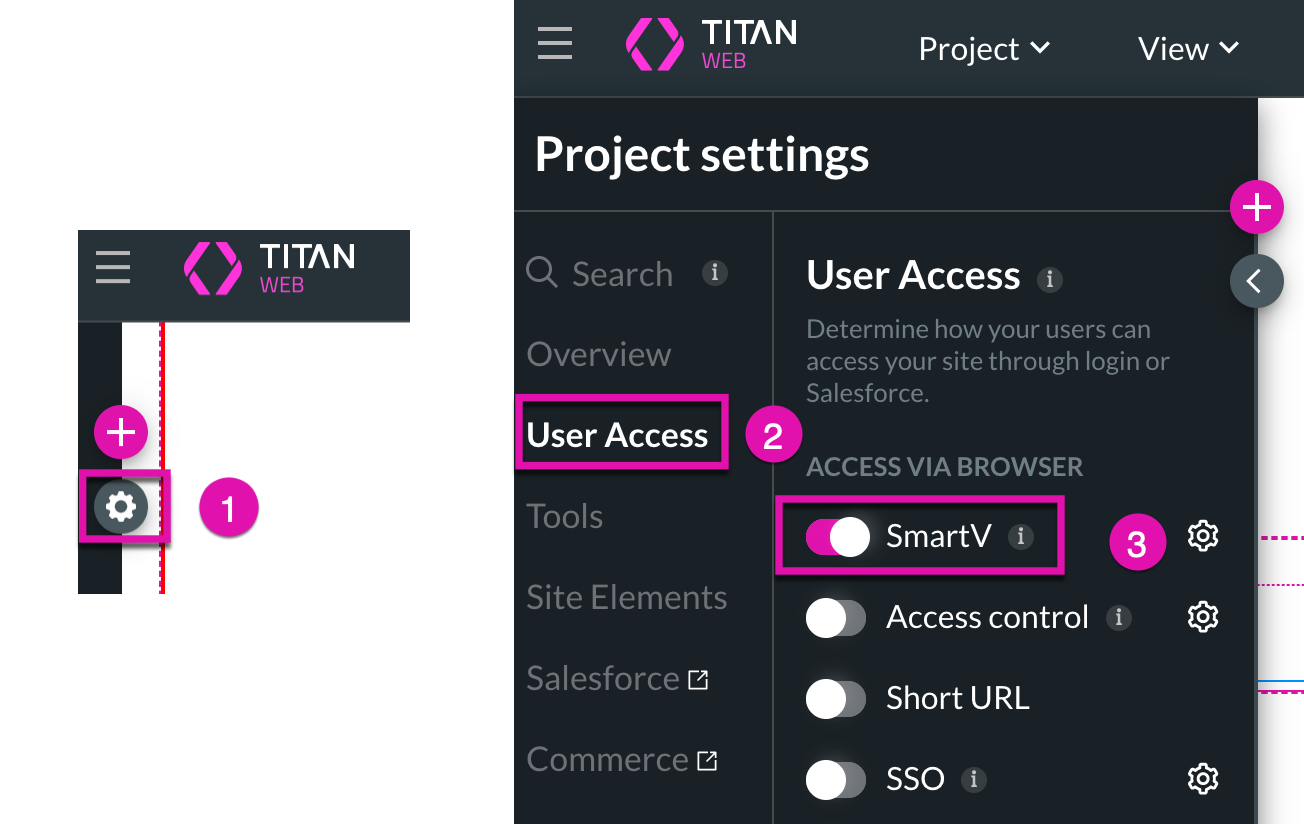
1. Click on the Gear Icon and choose the User Access option in the side menu.
2. Ensure that the toggle switch for SmartV is set to on.
3. Then, click the gear icon next to the toggle switch to configure the SmartV Login.
4. Configure the object and value you will use to log into the project.
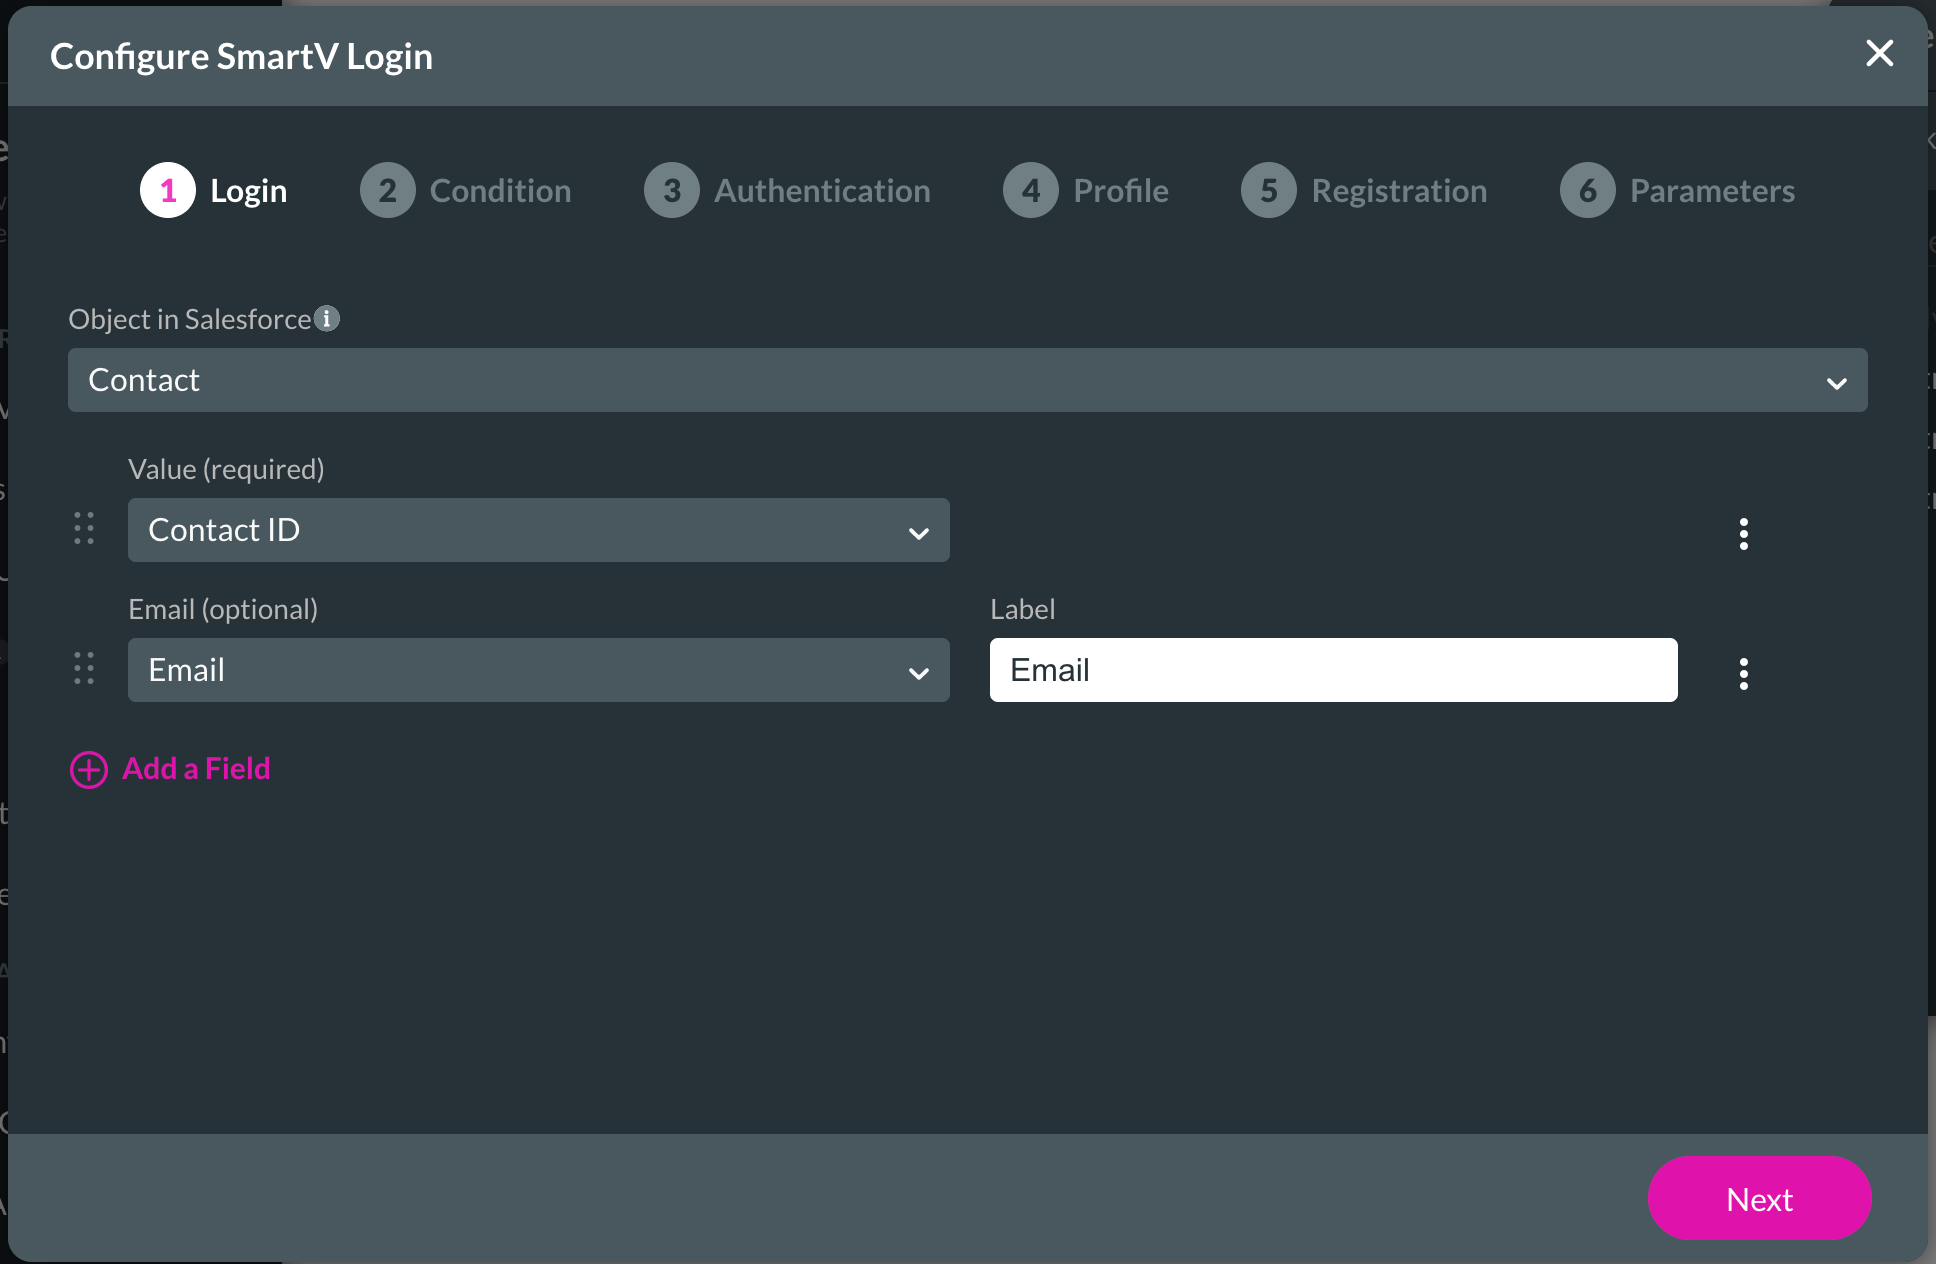
5. Add a field with the + Add a Field button and choose Last Name from the drop-down list. Click on the Next button to proceed.
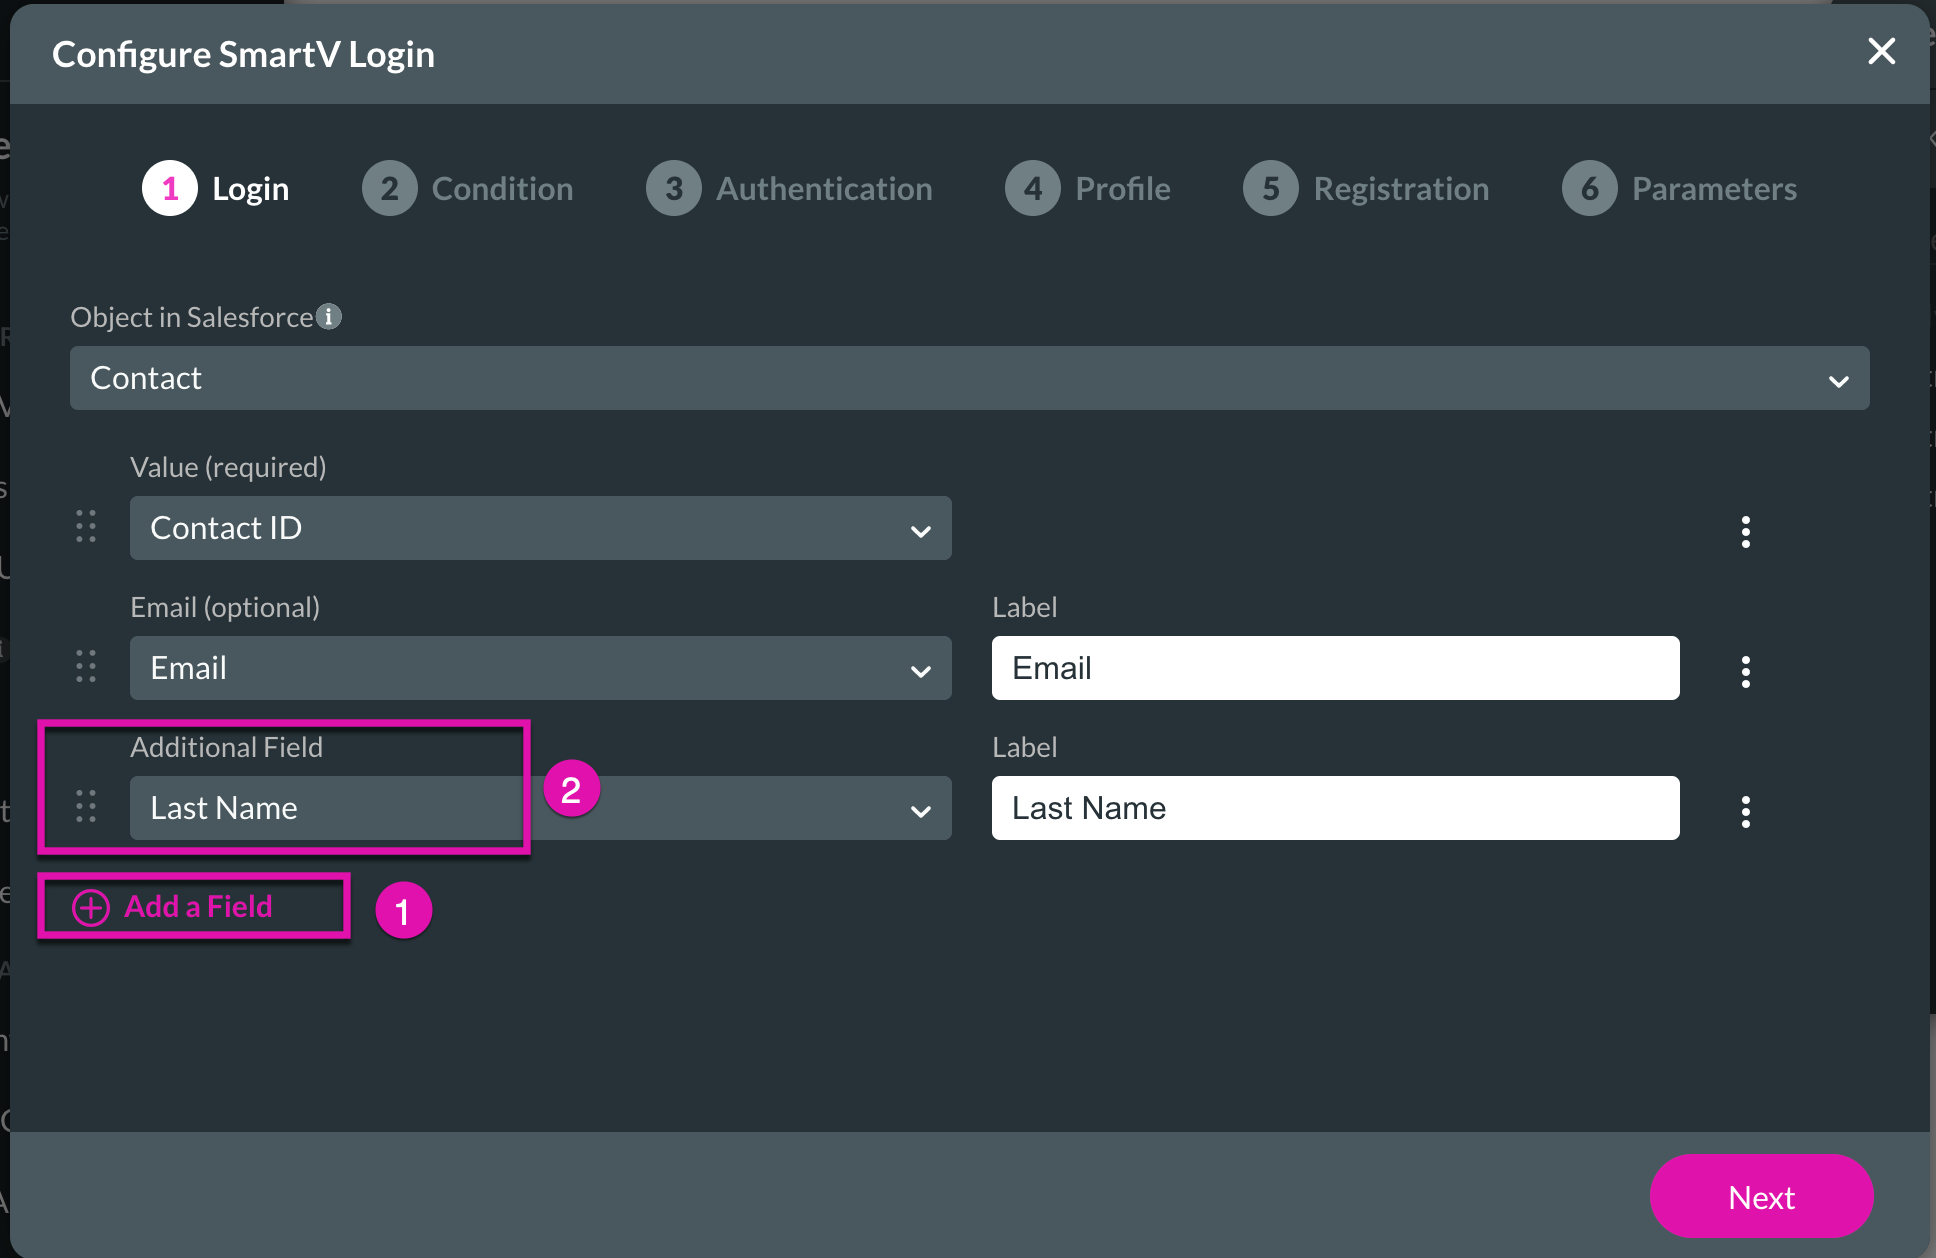
6. Use the drop-down menus to set up conditions that allow or restrict certain users from logging in to your portal.
We have set up a condition that allows only Salesforce users with the demo checkbox ticked in Salesforce to log into our portal.
7. Click on the Next button.
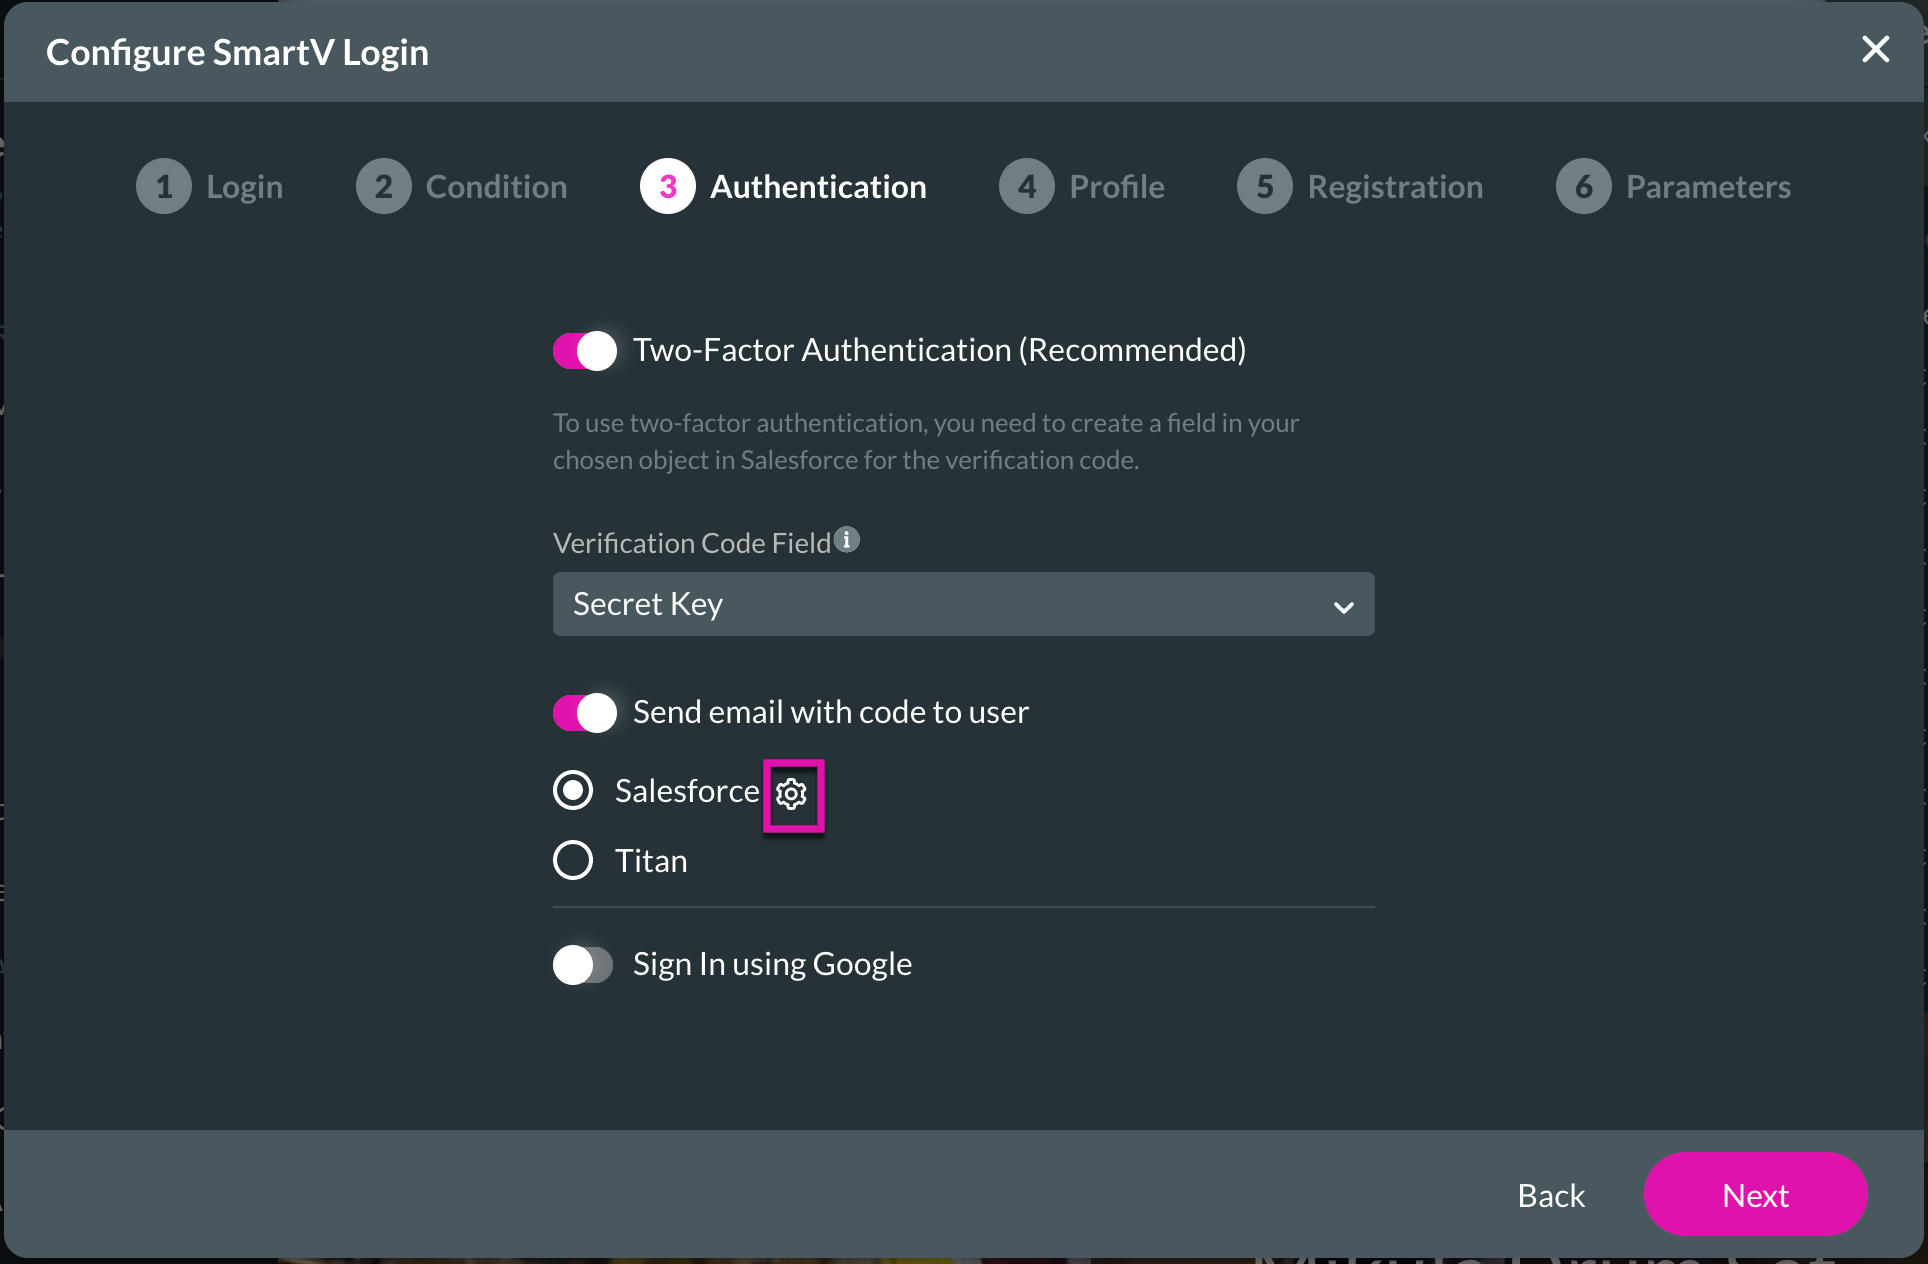
8. Configure Authentication for an additional security layer for user login. This step adds a one-time password (OTP) to log in and is set to a user’s email.
9. Click the gear icon next to the Salesforce radio button to configure email details.
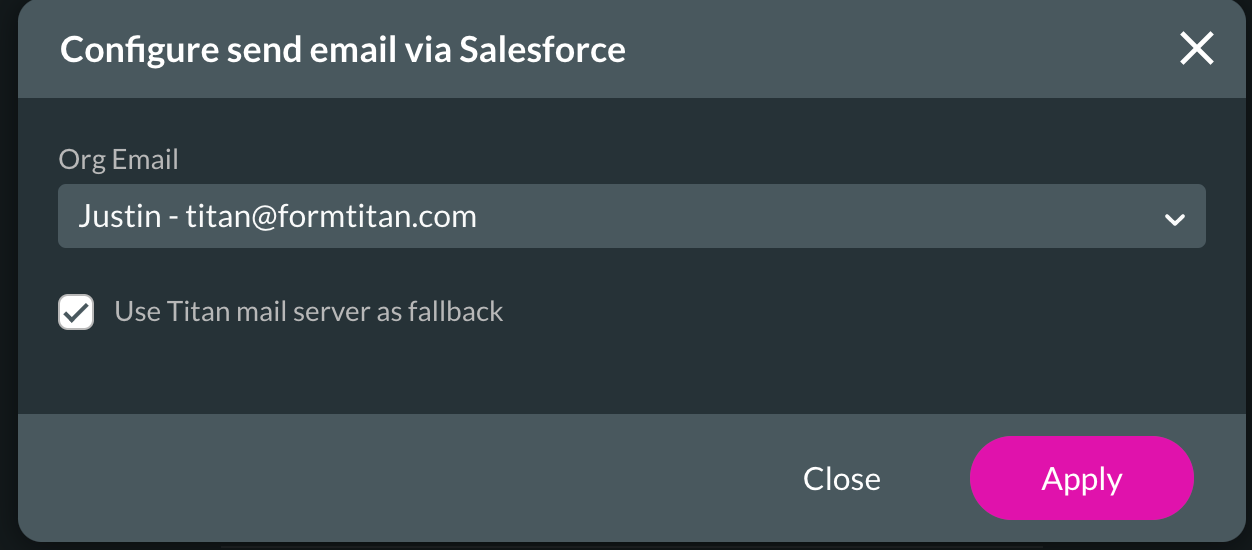
10. Add the email address you want to use to send the OTP email via Salesforce, then click the Apply button.
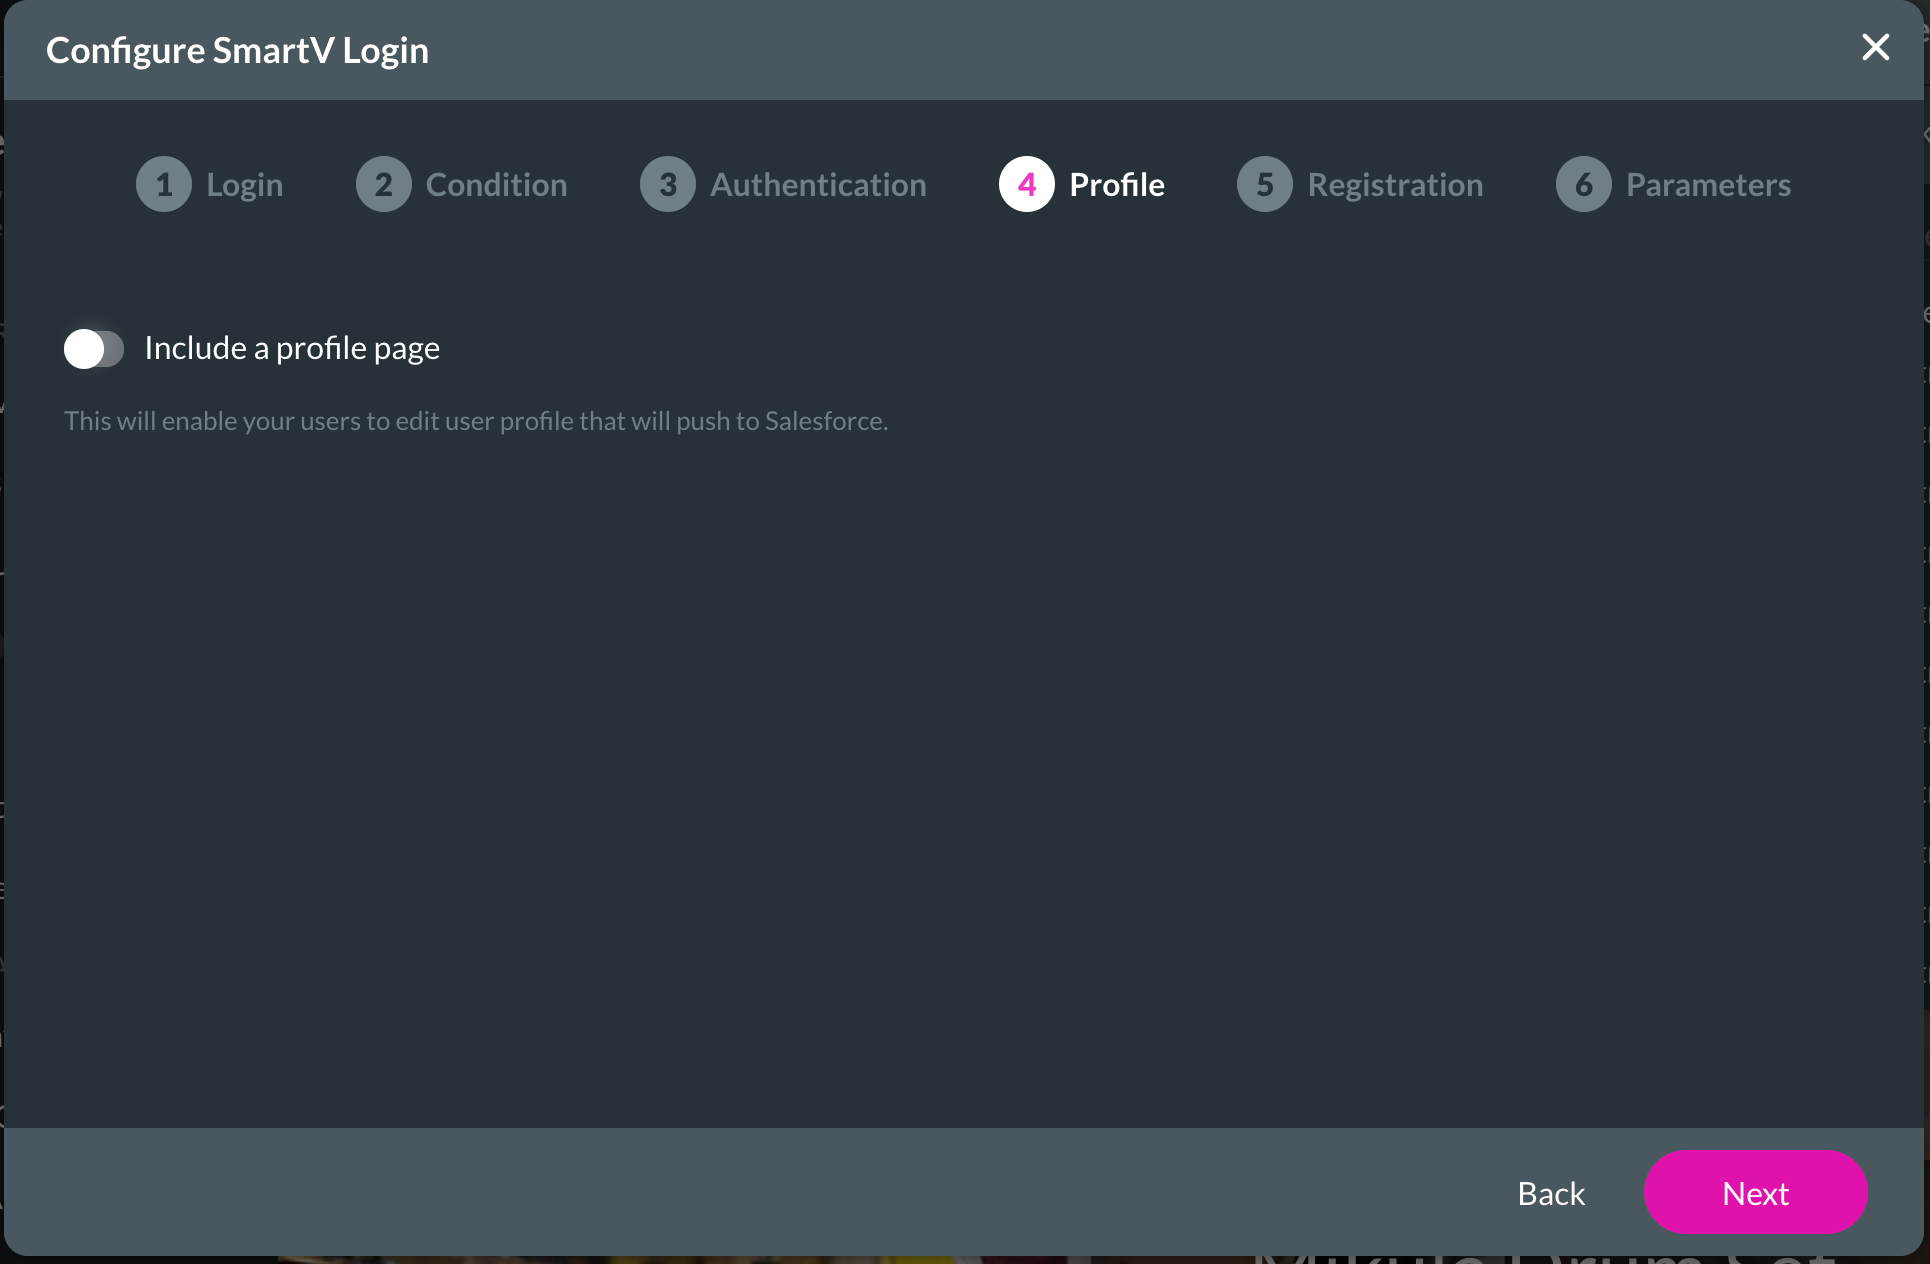
The next step in SmartV config is the Profile section.
11. Turn the toggle switch on if you want to include a profile page. We will not add one in this tutorial.
12. Click on the Next button.
13. Turn the toggle switch on to include a registration page so users can create a contact in Salesforce.
14. Select the Standard or Custom radio button and click Next.
We have used a Custom pre-built registration page for this tutorial, but you can use the standard option if you wish.

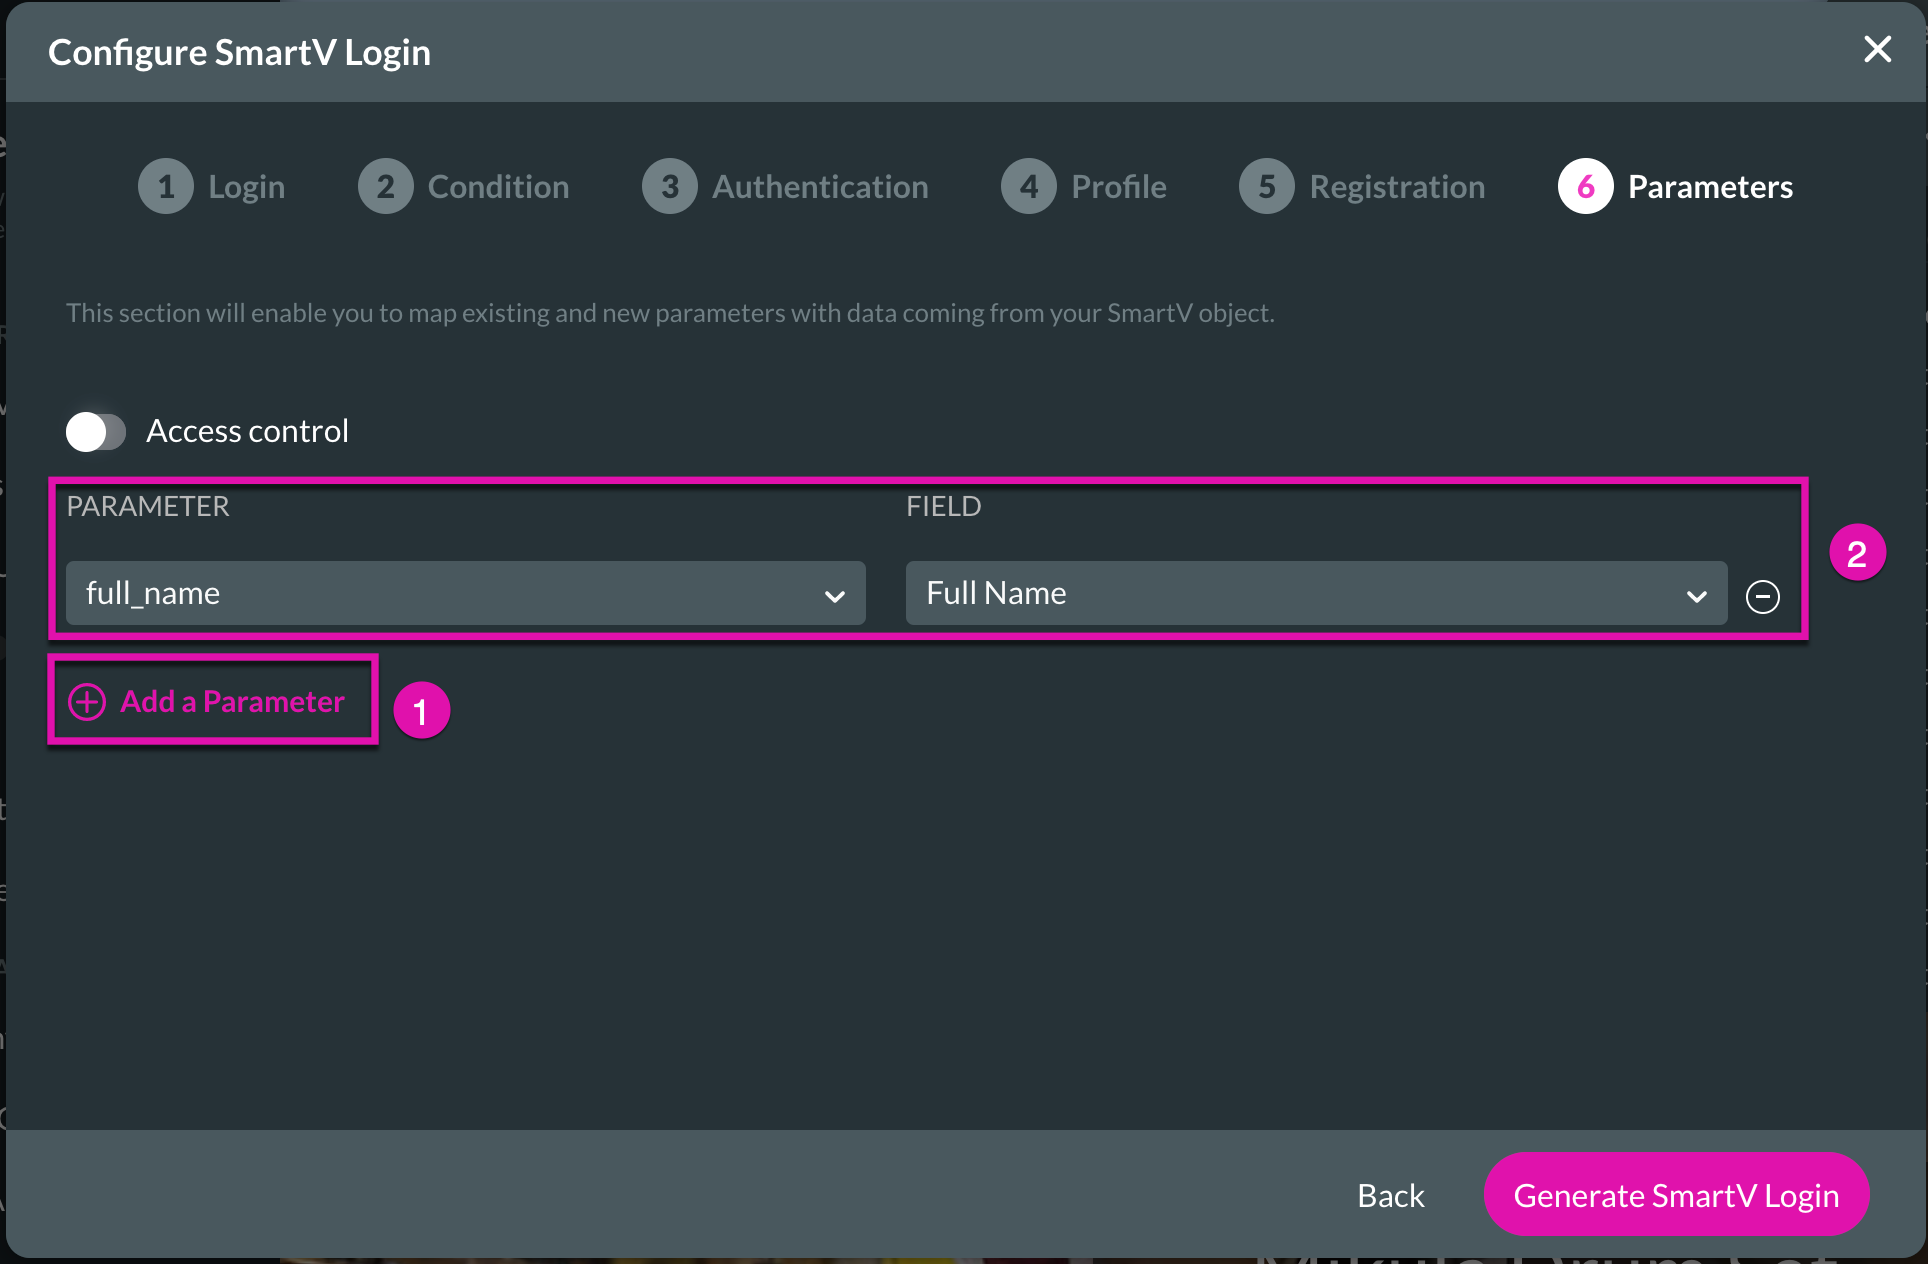
15. Decide if you want to pass any parameters from records into the portal. Use the + Add a Parameter button to insert a new parameter.
16. Click on the Generate SmartV Login.
2. Ensure that the toggle switch for SmartV is set to on.
3. Then, click the gear icon next to the toggle switch to configure the SmartV Login.
4. Configure the object and value you will use to log into the project.
5. Add a field with the + Add a Field button and choose Last Name from the drop-down list. Click on the Next button to proceed.
6. Use the drop-down menus to set up conditions that allow or restrict certain users from logging in to your portal.
We have set up a condition that allows only Salesforce users with the demo checkbox ticked in Salesforce to log into our portal.
7. Click on the Next button.
8. Configure Authentication for an additional security layer for user login. This step adds a one-time password (OTP) to log in and is set to a user’s email.
9. Click the gear icon next to the Salesforce radio button to configure email details.
10. Add the email address you want to use to send the OTP email via Salesforce, then click the Apply button.
The next step in SmartV config is the Profile section.
11. Turn the toggle switch on if you want to include a profile page. We will not add one in this tutorial.
12. Click on the Next button.
13. Turn the toggle switch on to include a registration page so users can create a contact in Salesforce.
14. Select the Standard or Custom radio button and click Next.
We have used a Custom pre-built registration page for this tutorial, but you can use the standard option if you wish.
15. Decide if you want to pass any parameters from records into the portal. Use the + Add a Parameter button to insert a new parameter.
16. Click on the Generate SmartV Login.
03 Create a Customized Welcome Message for a Logged In User
You can view your parameters in the custom variables.
1. Click on the gear icon and choose the Tools option from the side menu.
2. Then click on the gear icon next to Custom Variables.
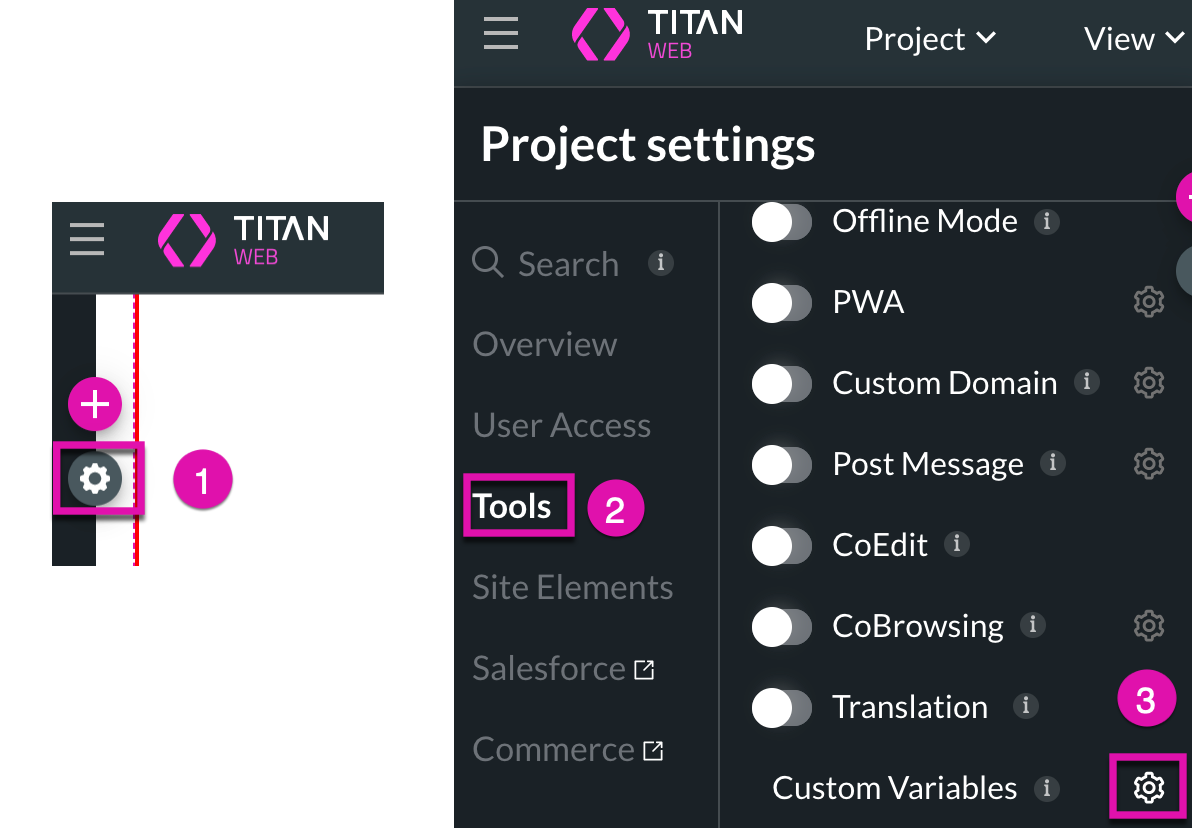
This portal populates the variable from the SmartV login.
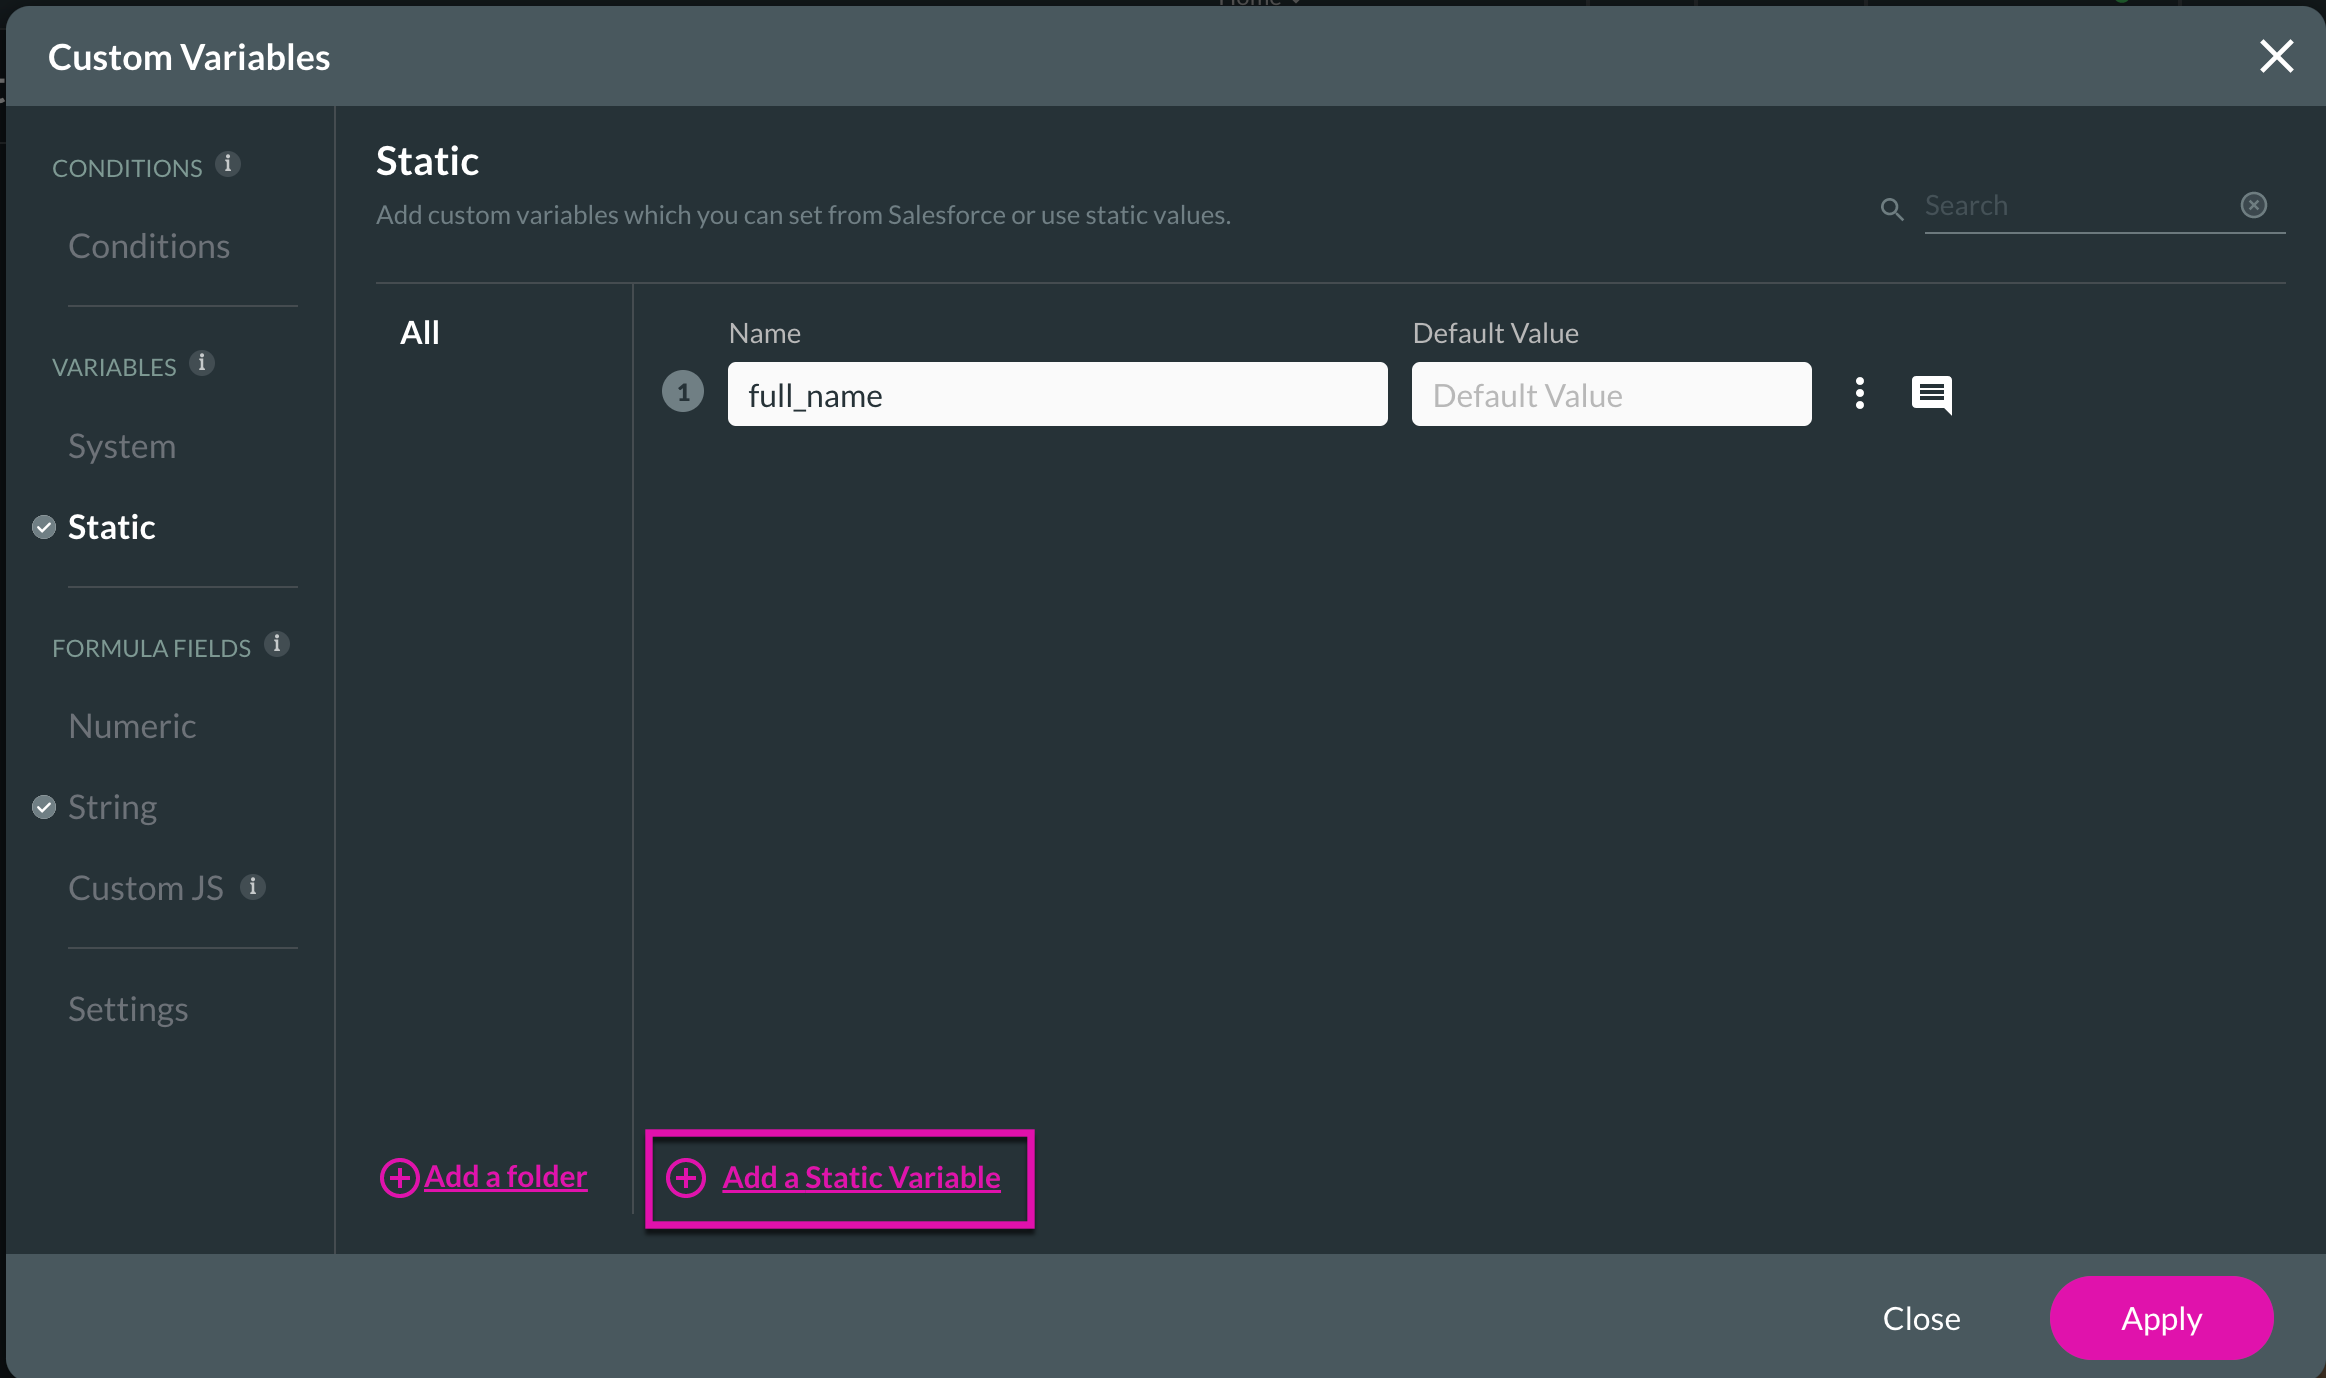
4. Click on the String section and add a string variable with the + Add a String Variable button.
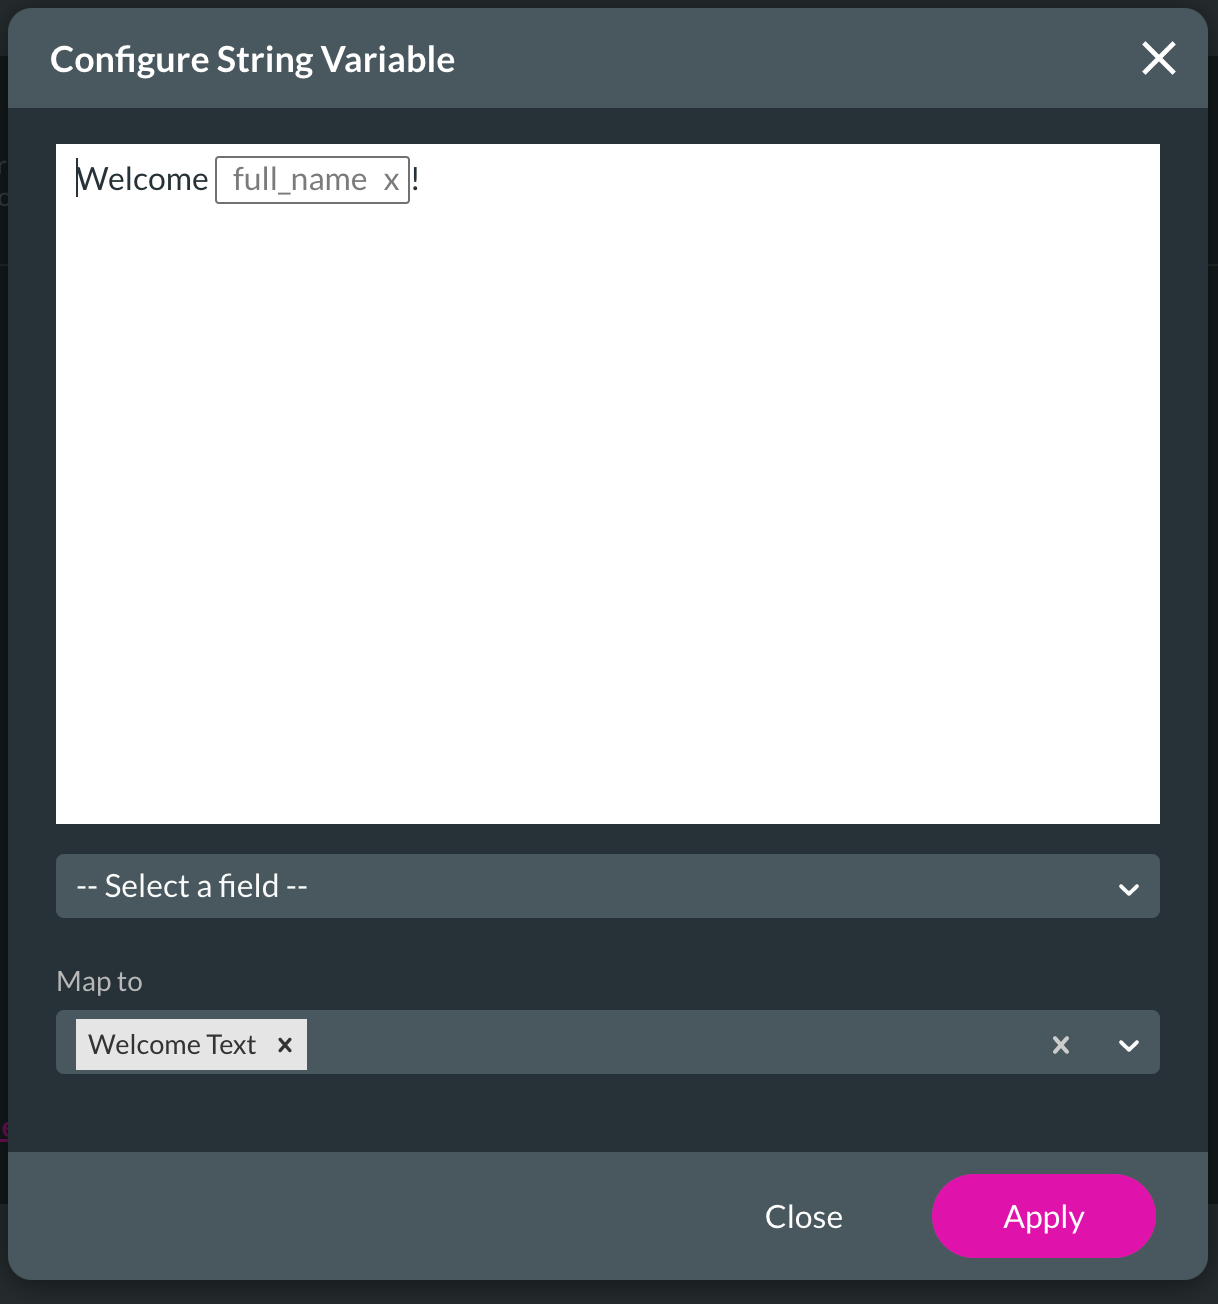
5. Click on the Configure button to concatenate your message and variable.
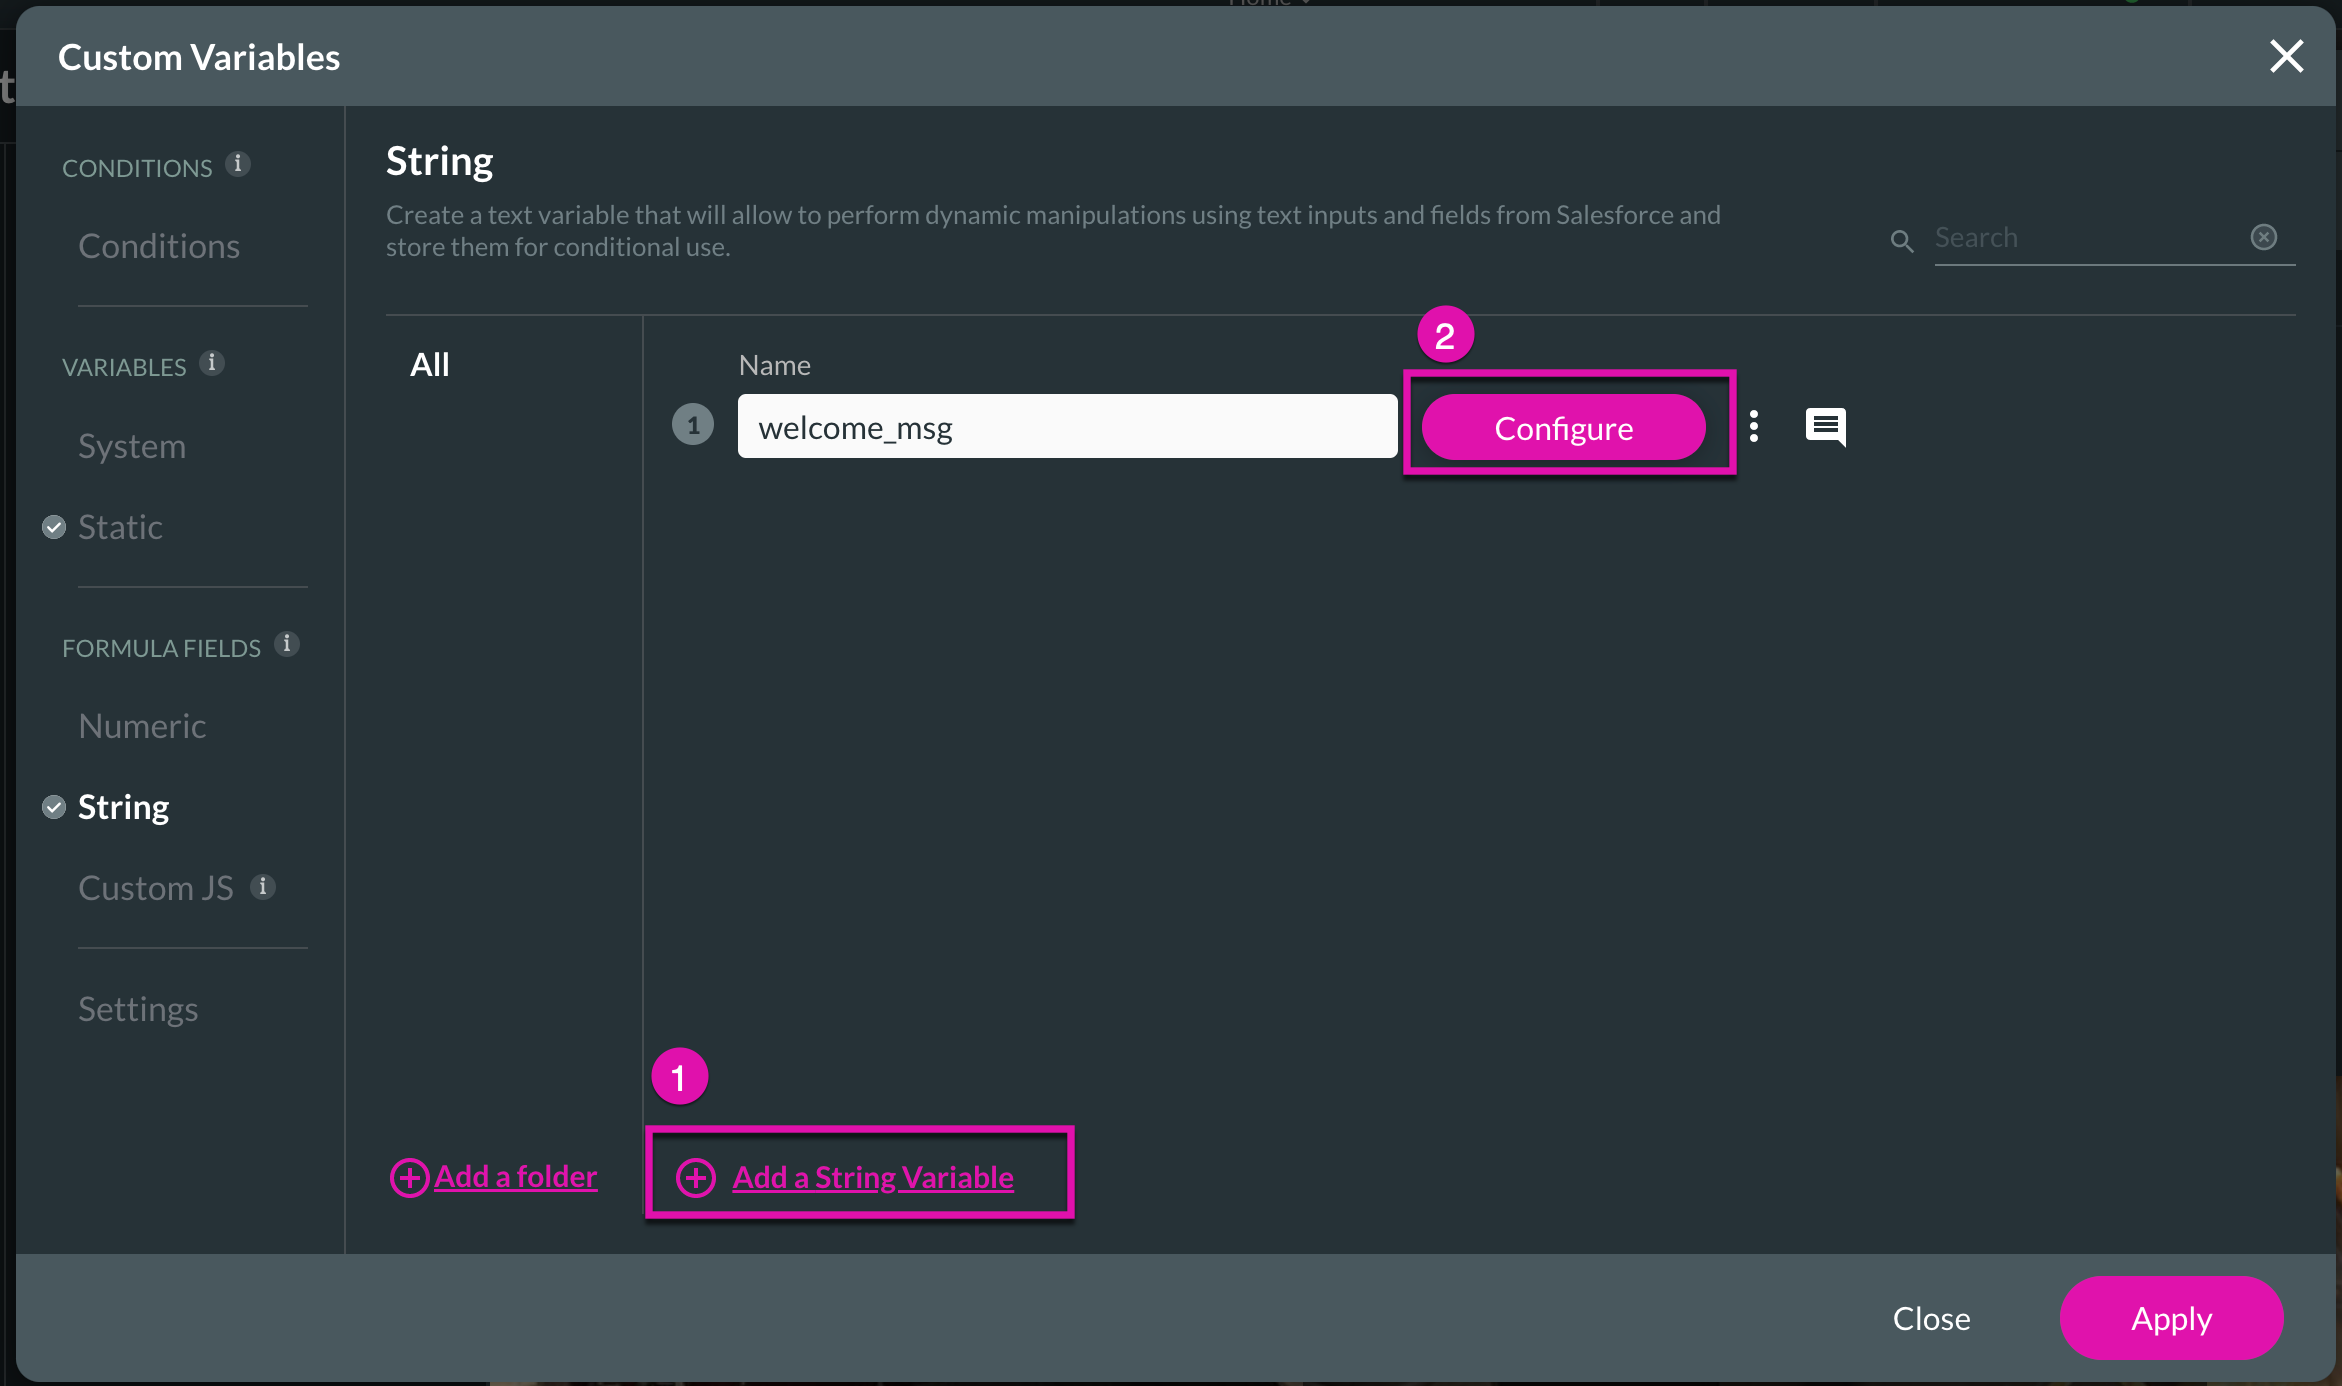
6. Click the Apply button to complete your custom welcome message setup for a logged-in user.
1. Click on the gear icon and choose the Tools option from the side menu.
2. Then click on the gear icon next to Custom Variables.
This portal populates the variable from the SmartV login.
4. Click on the String section and add a string variable with the + Add a String Variable button.
5. Click on the Configure button to concatenate your message and variable.
6. Click the Apply button to complete your custom welcome message setup for a logged-in user.
04 How to Add a Page to your Portal
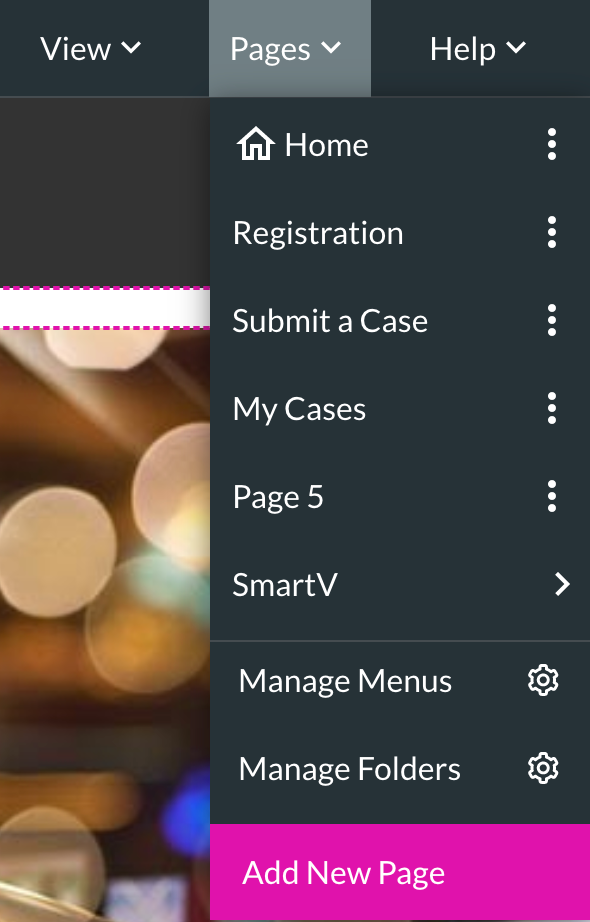
1. Click on the Pages tab in the header and select Add New Page
.
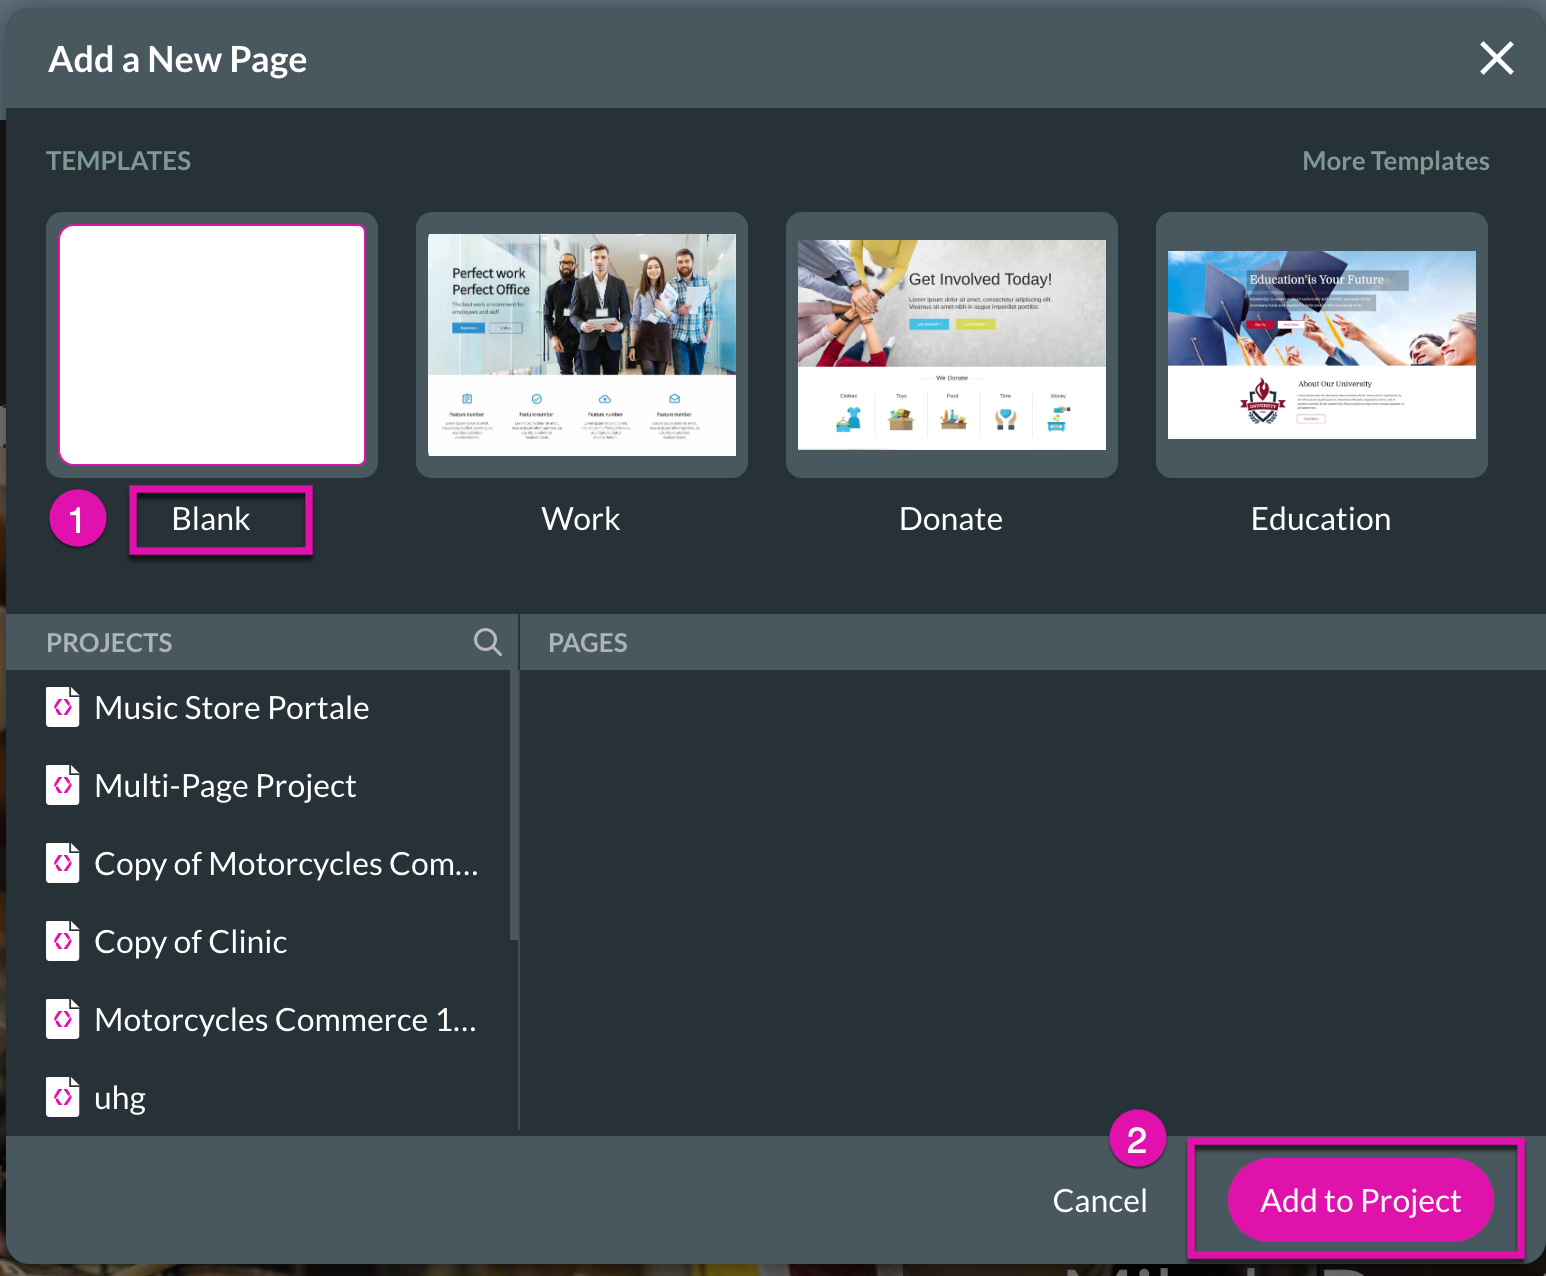
2. Select the Blank template and click the Add to Project button.
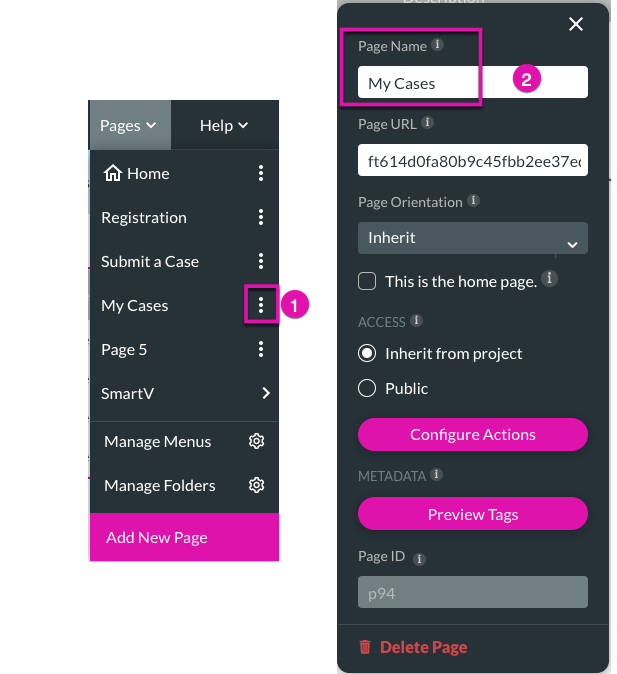
3. Click the Pages tab and then the Kebab button next to a page to rename it.
4. Edit the text in the Page Name field to read My Cases.
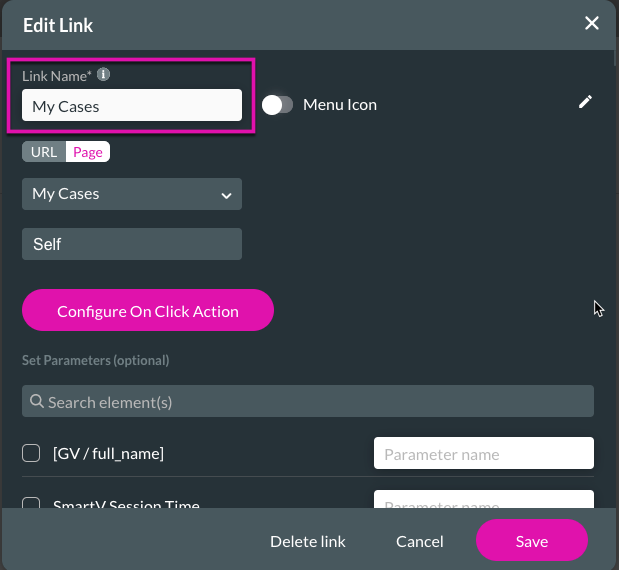
5. Remember also to update your header with the new page name. Click on the gear icon for your header and then the gear icon next to your page.
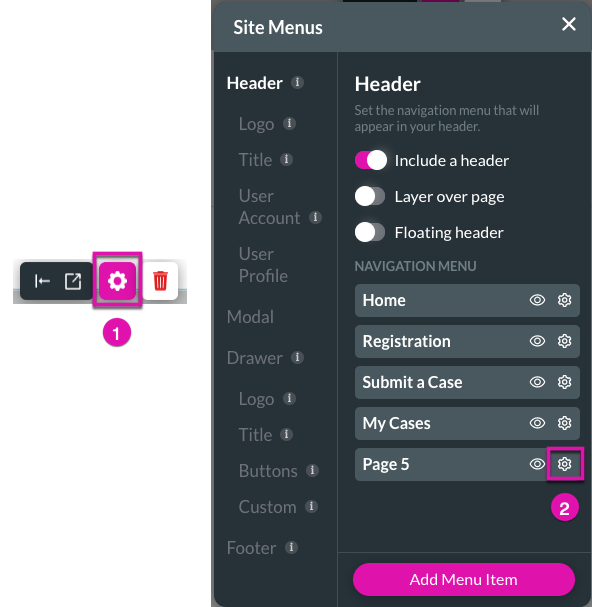
6. Add your page name to the Link Name field and click the Save button.
This tutorial will use the My Cases page to see all the cases that have been submitted.
.
2. Select the Blank template and click the Add to Project button.
3. Click the Pages tab and then the Kebab button next to a page to rename it.
4. Edit the text in the Page Name field to read My Cases.
5. Remember also to update your header with the new page name. Click on the gear icon for your header and then the gear icon next to your page.
6. Add your page name to the Link Name field and click the Save button.
This tutorial will use the My Cases page to see all the cases that have been submitted.
05 How to Style your Login Page
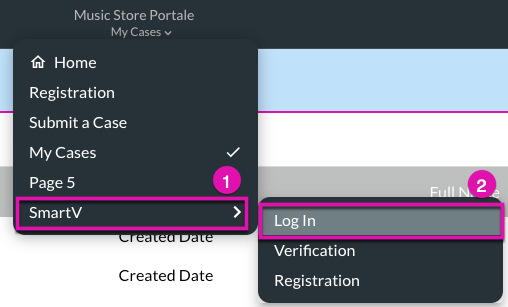
1. Click on the SmartV page and then choose the Login page.
2. Select any element on the Log In page to bring up the Styling settings panel that can be configured.
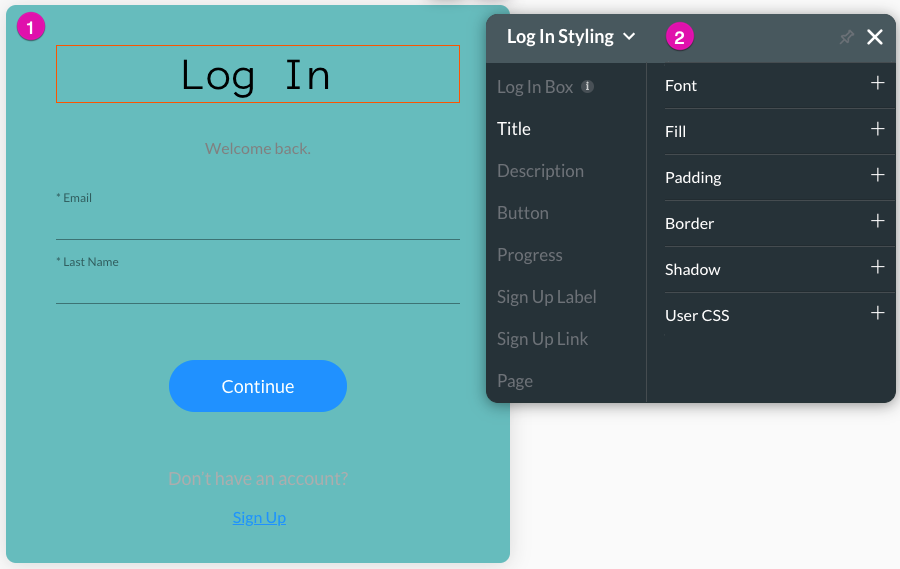
2. Select any element on the Log In page to bring up the Styling settings panel that can be configured.
06 Extra Settings for your Login Page
1. Click on the gear icon and choose the Overview section in the Login Settings panel.
2. Choose the amount of time you want a user to stay logged into the SmartV session by adjusting the Session Duration.
3. Other settings for the Login page, including layout, verification, CAPTCHA, captions, and value rules, can be adjusted.
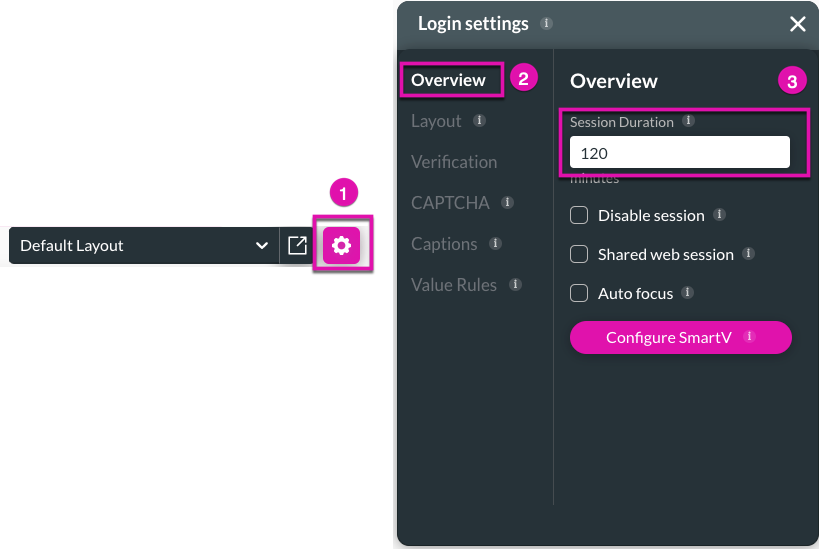
2. Choose the amount of time you want a user to stay logged into the SmartV session by adjusting the Session Duration.
3. Other settings for the Login page, including layout, verification, CAPTCHA, captions, and value rules, can be adjusted.
07 How to To Make a Page Public
1. Click on the Pages tab and then the Kebab button.
2. Select the Public radio button.
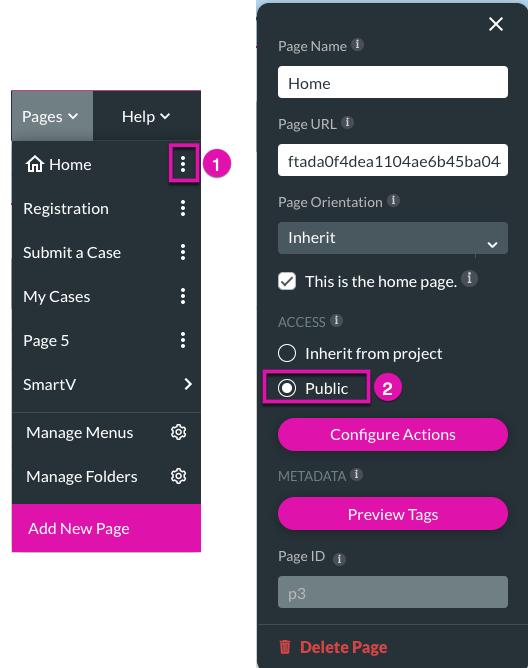
2. Select the Public radio button.
08 How to To Make a Page Private to Specific Users
1. Click on the Pages tab and then the Kebab button.
2. Select Inherit from the project radio button.
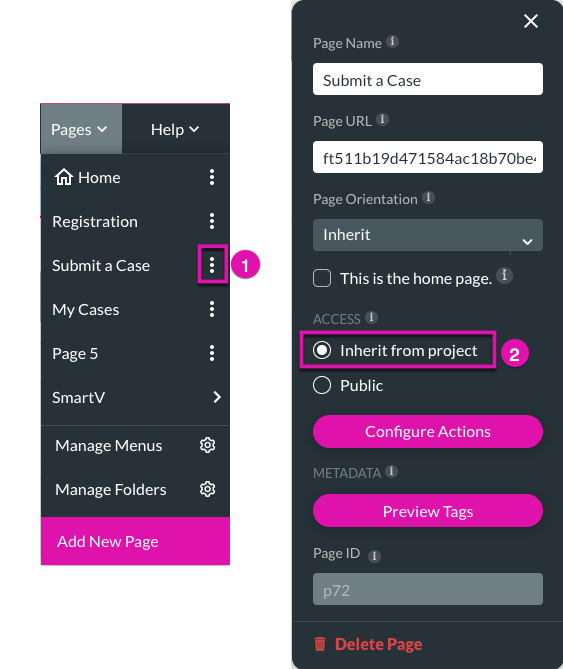
2. Select Inherit from the project radio button.
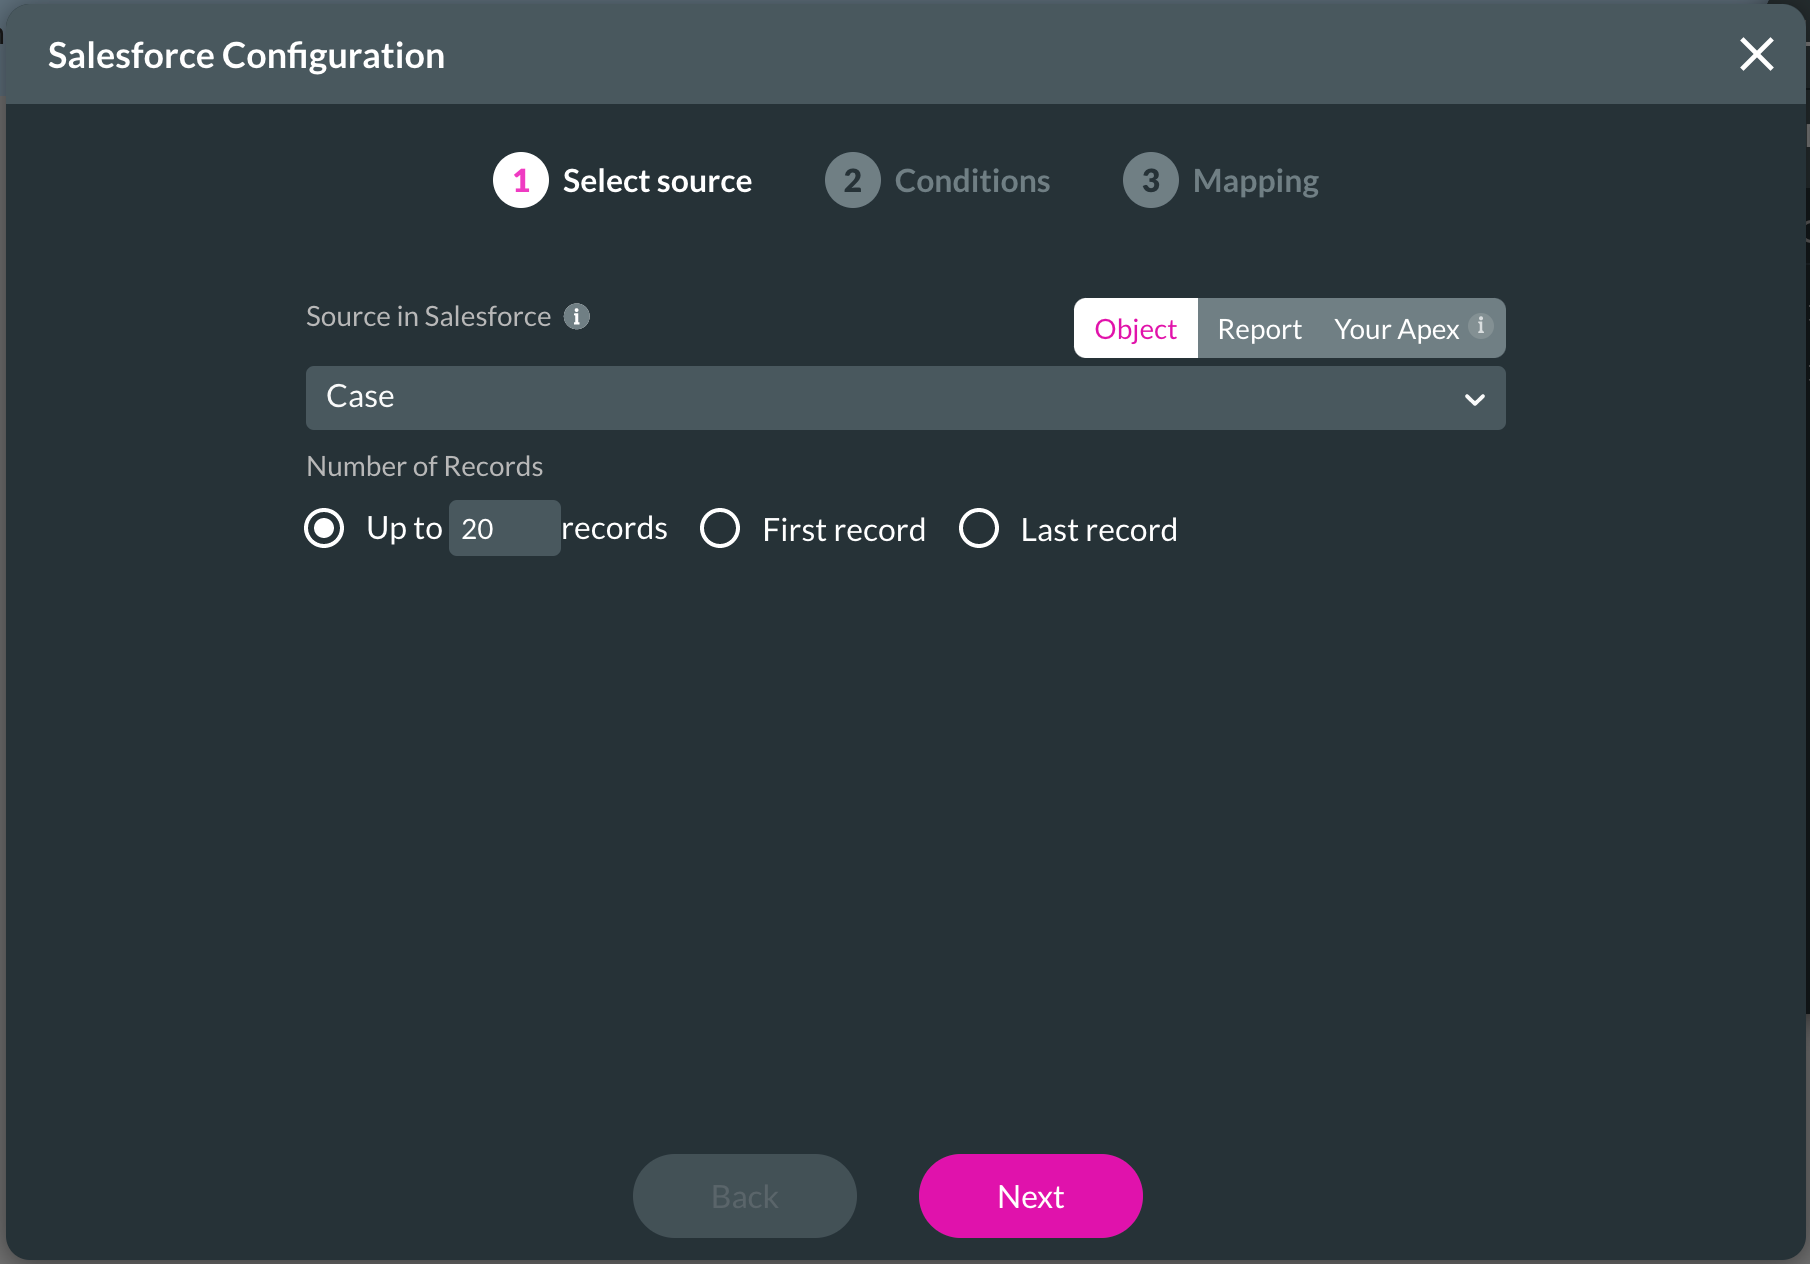
09 Adding a Power Table to the New Page
1. Search for a Power Table in your elements list and then drag it into a Titan Web project.

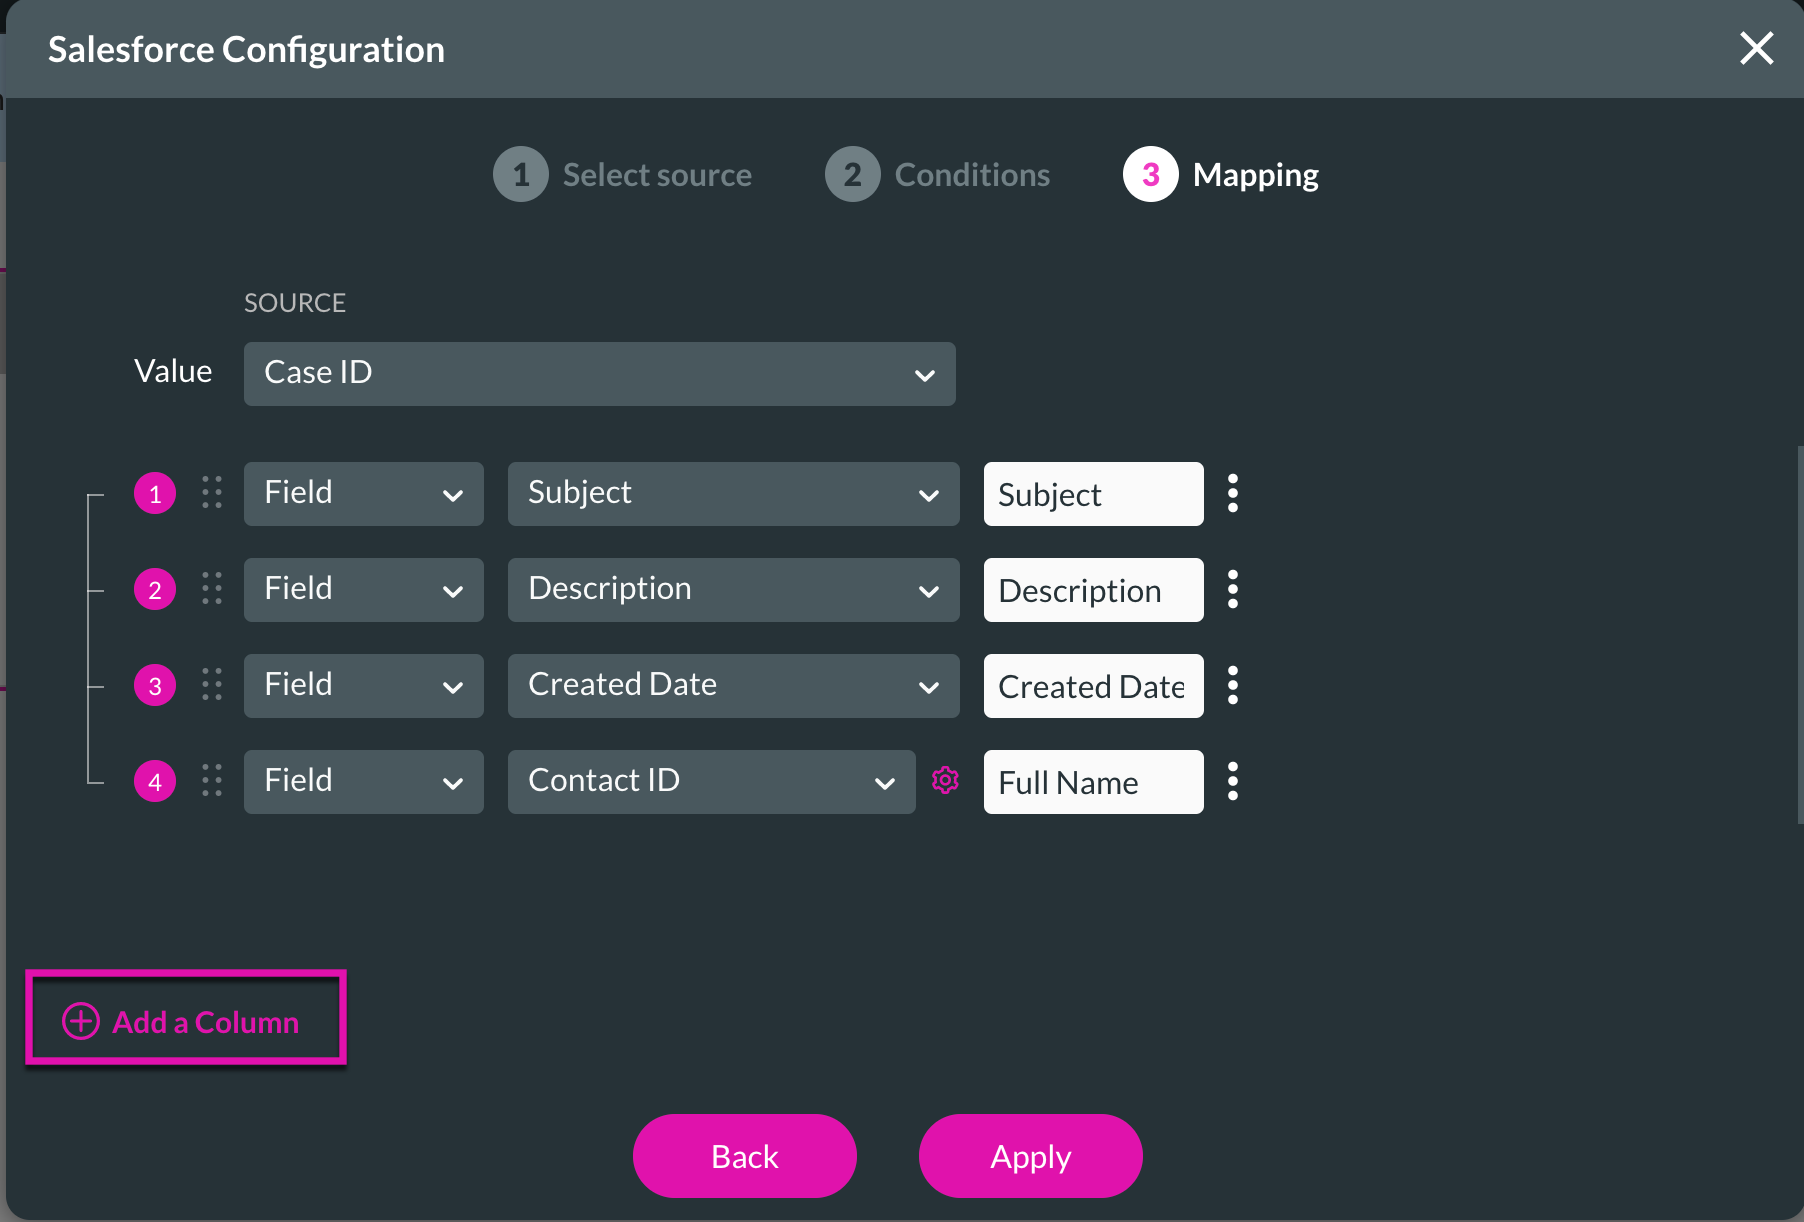
2. Choose your source in Salesforce and click on the Next button.
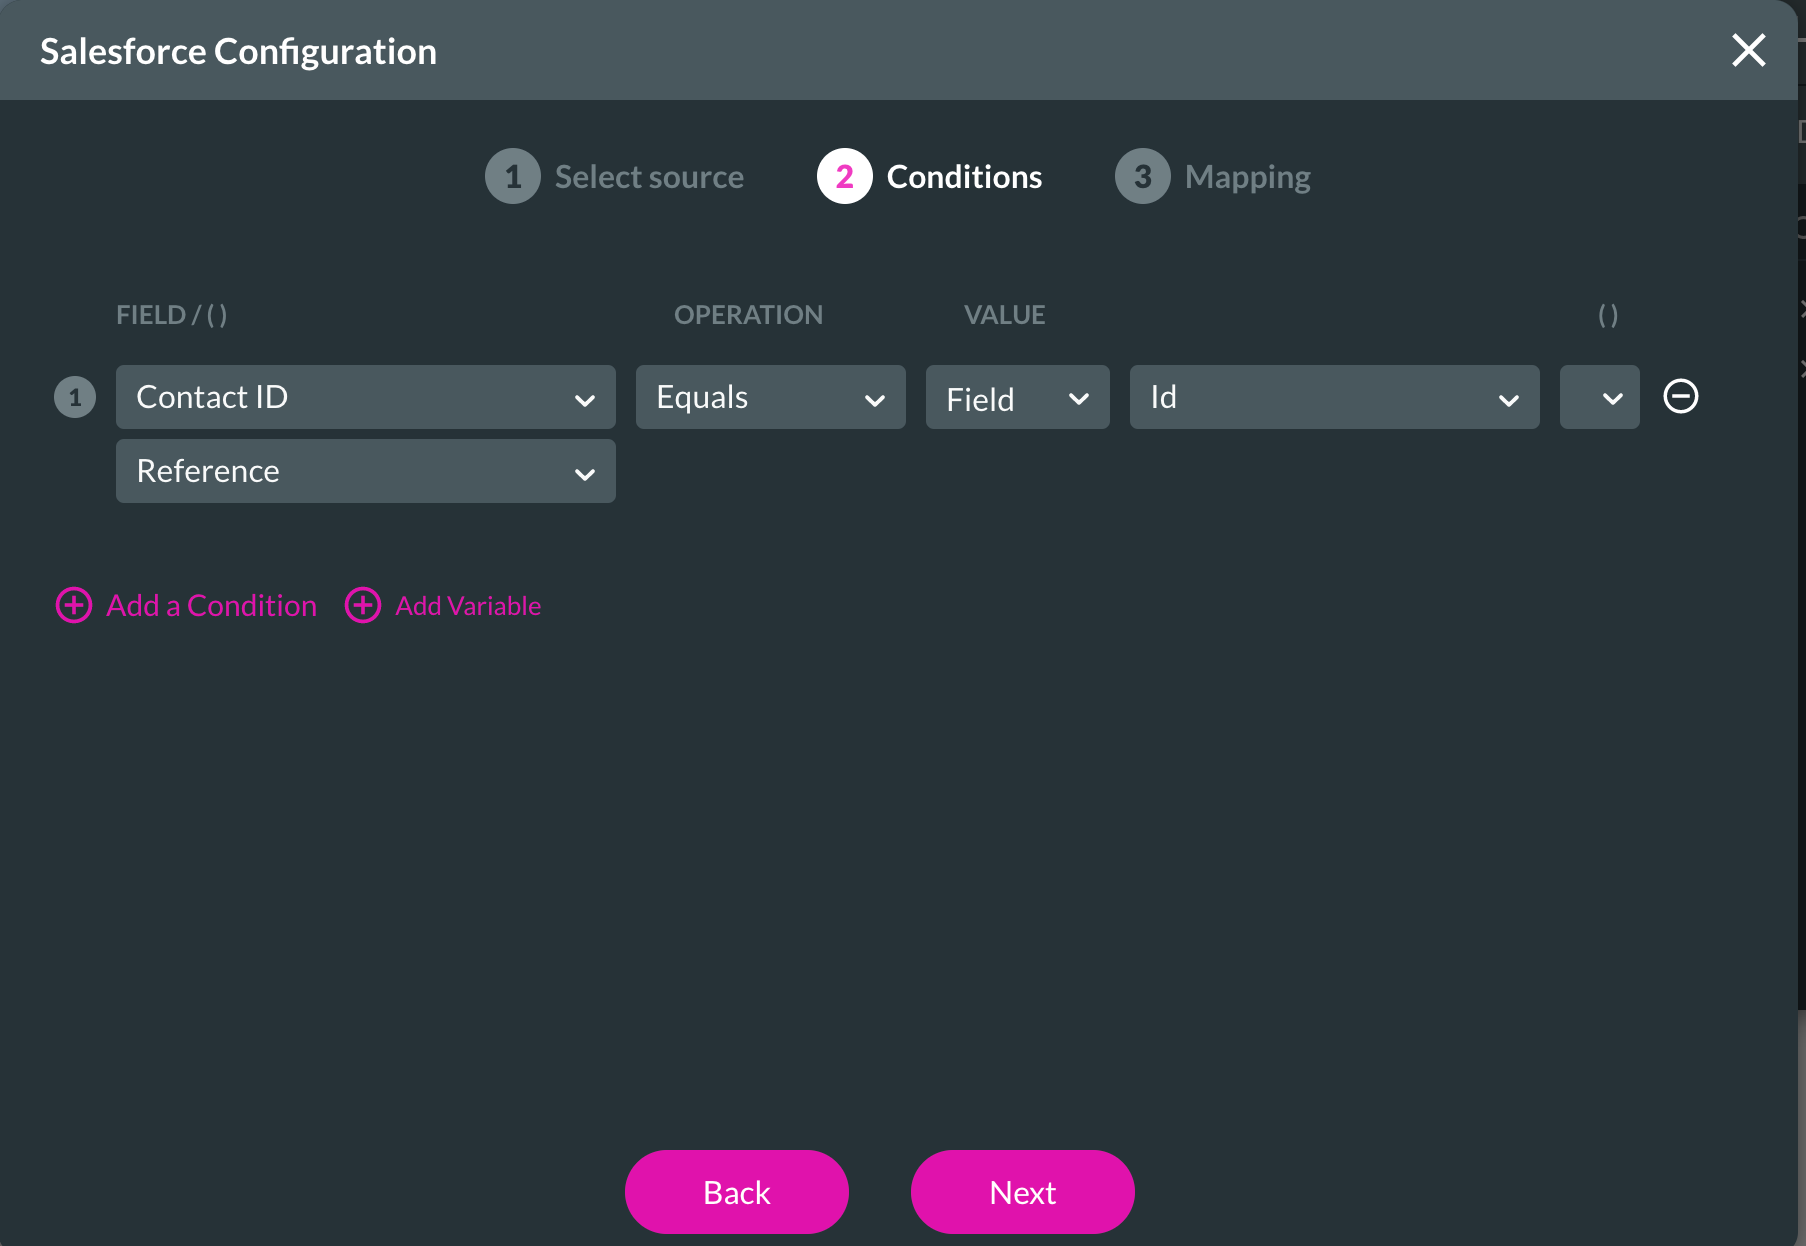
3. Set up your conditions and click on the Next button. We have used Contact ID > Equals > Field > SmartV ID for this tutorial.
4. Set up your Mapping for the Power Table by adding a few fields with the + Add a Column button.
5. Click the Apply button to finish your Salesforce configuration for your Power Table.
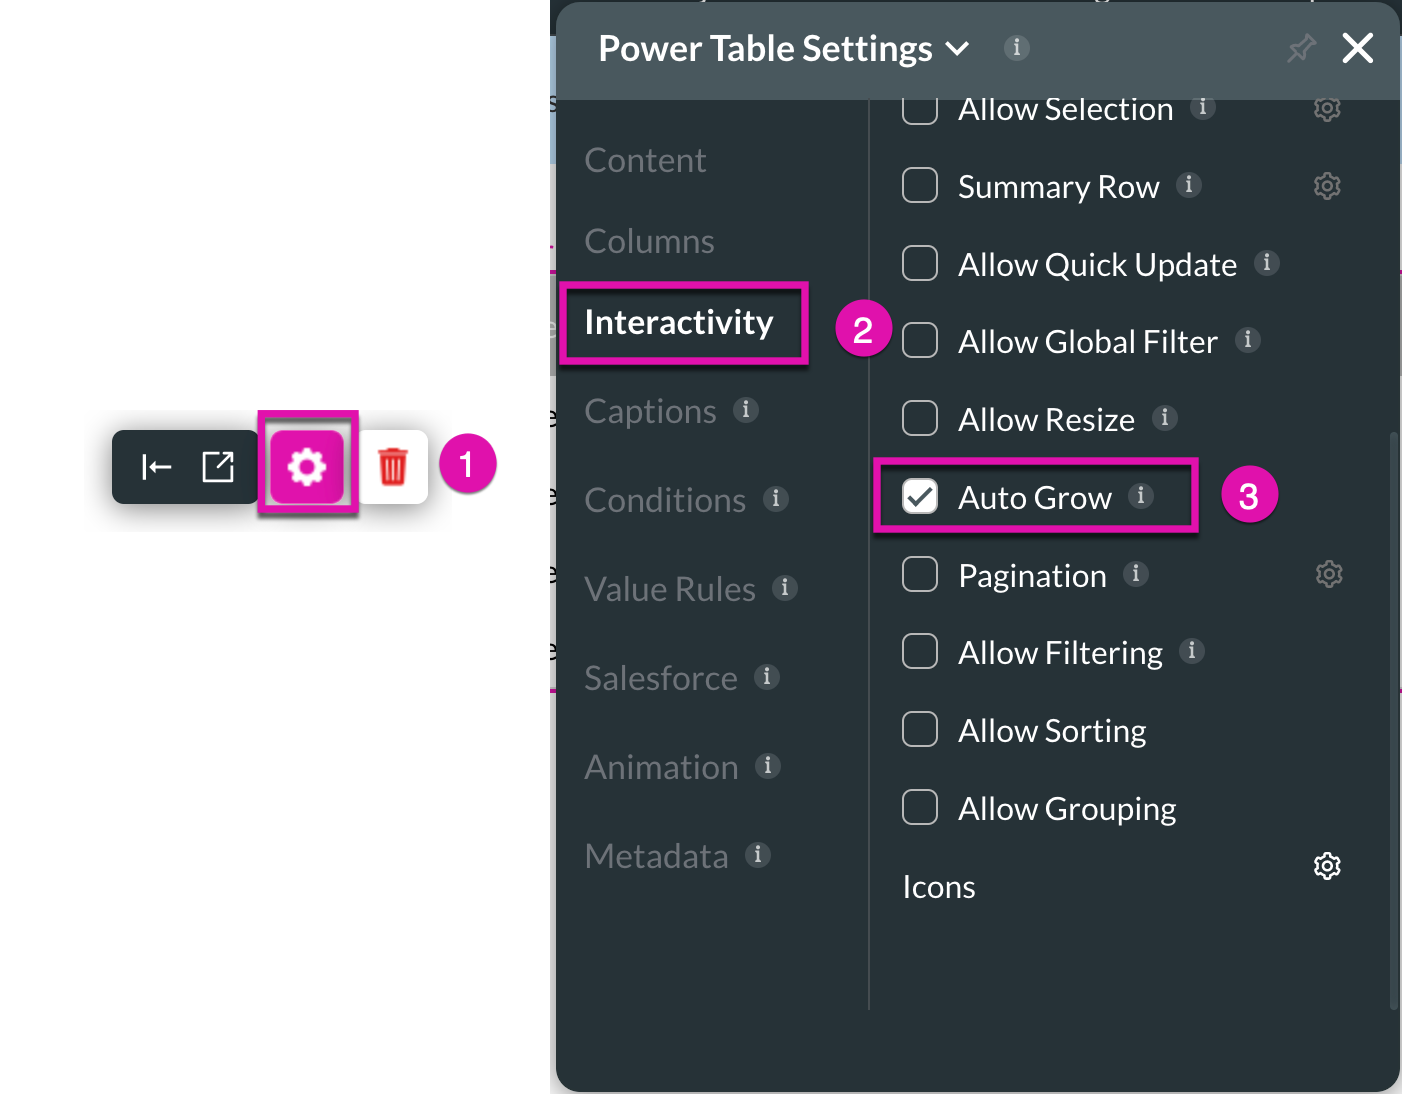
6. Click on the gear icon and Select the Auto Grow checkbox under Interactivity in the Power Table settings so that the Power Table looks nicer.
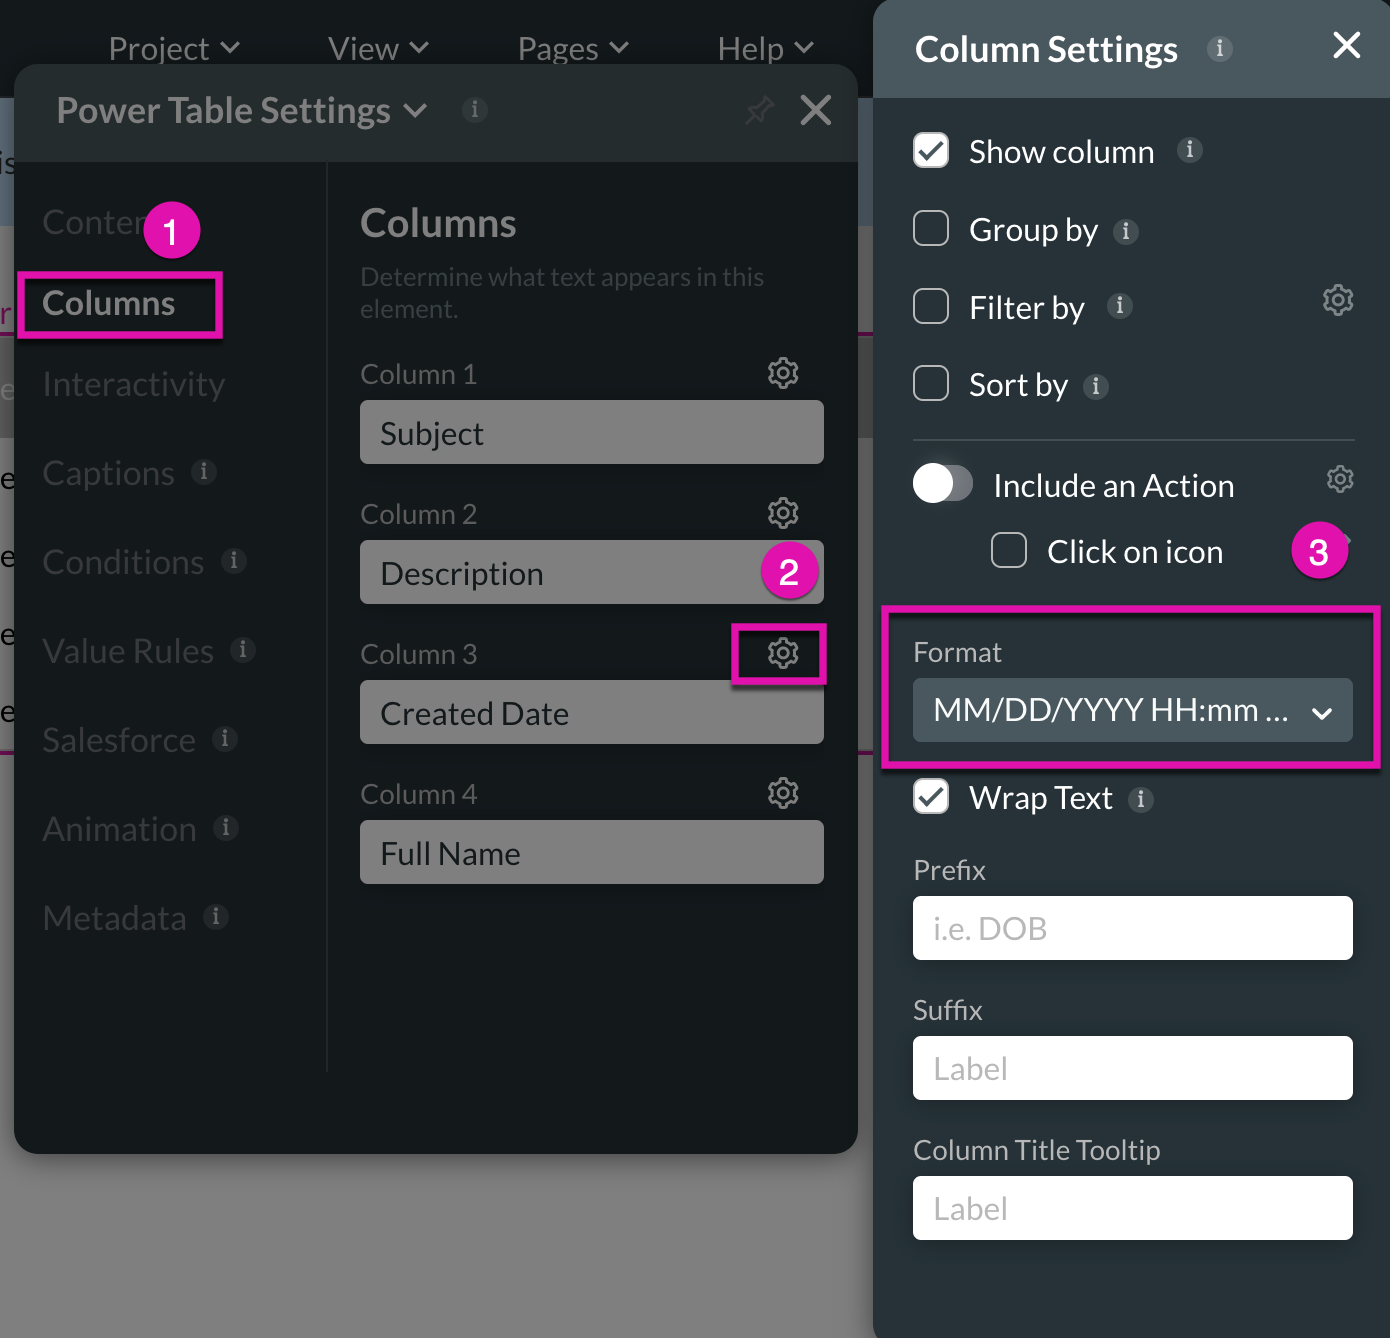
7. Format the created date column by choosing the Columns option in the side menu.
8. Click on the gear icon in your Created Date column and select a date format from the Format drop-down list.
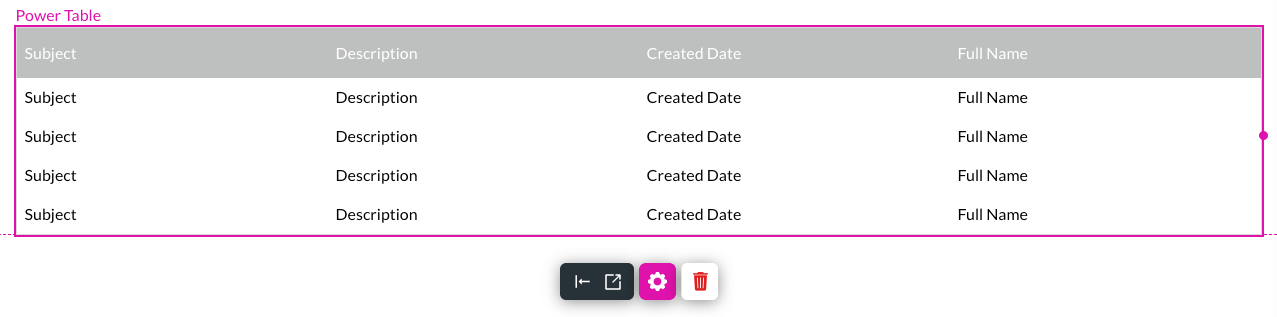
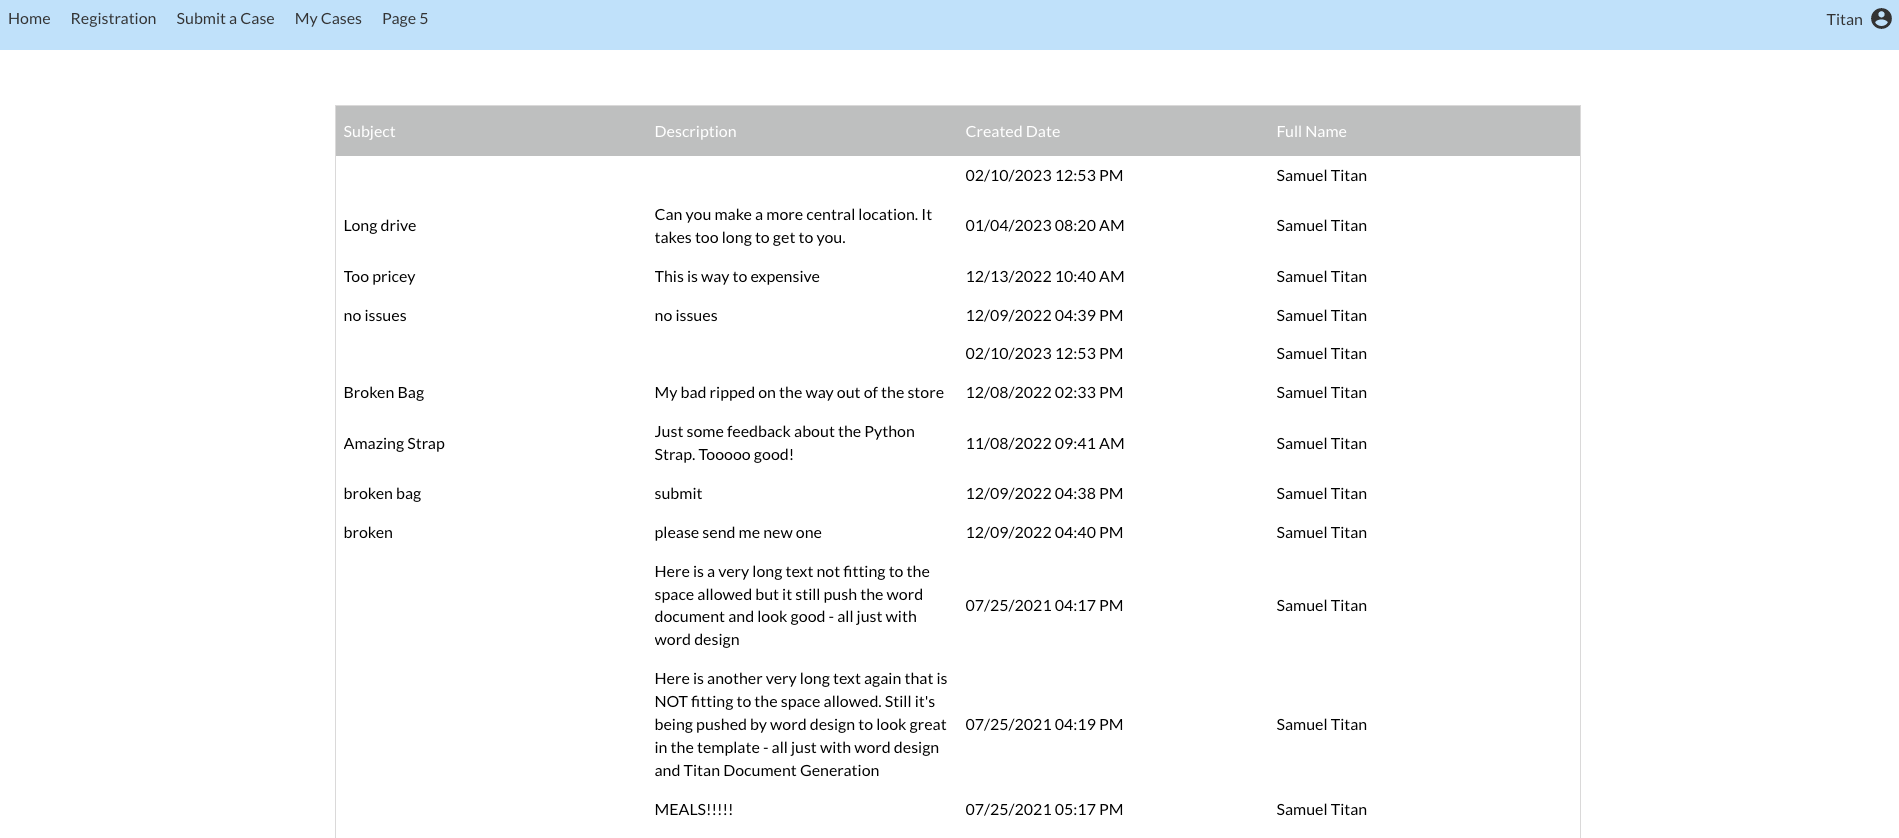
9. Your Power Table should look like the example below.
2. Choose your source in Salesforce and click on the Next button.
3. Set up your conditions and click on the Next button. We have used Contact ID > Equals > Field > SmartV ID for this tutorial.
4. Set up your Mapping for the Power Table by adding a few fields with the + Add a Column button.
5. Click the Apply button to finish your Salesforce configuration for your Power Table.
6. Click on the gear icon and Select the Auto Grow checkbox under Interactivity in the Power Table settings so that the Power Table looks nicer.
7. Format the created date column by choosing the Columns option in the side menu.
8. Click on the gear icon in your Created Date column and select a date format from the Format drop-down list.
9. Your Power Table should look like the example below.
10 Preview your Multi-Page Private Portal
1. Click on the Save and Preview buttons.
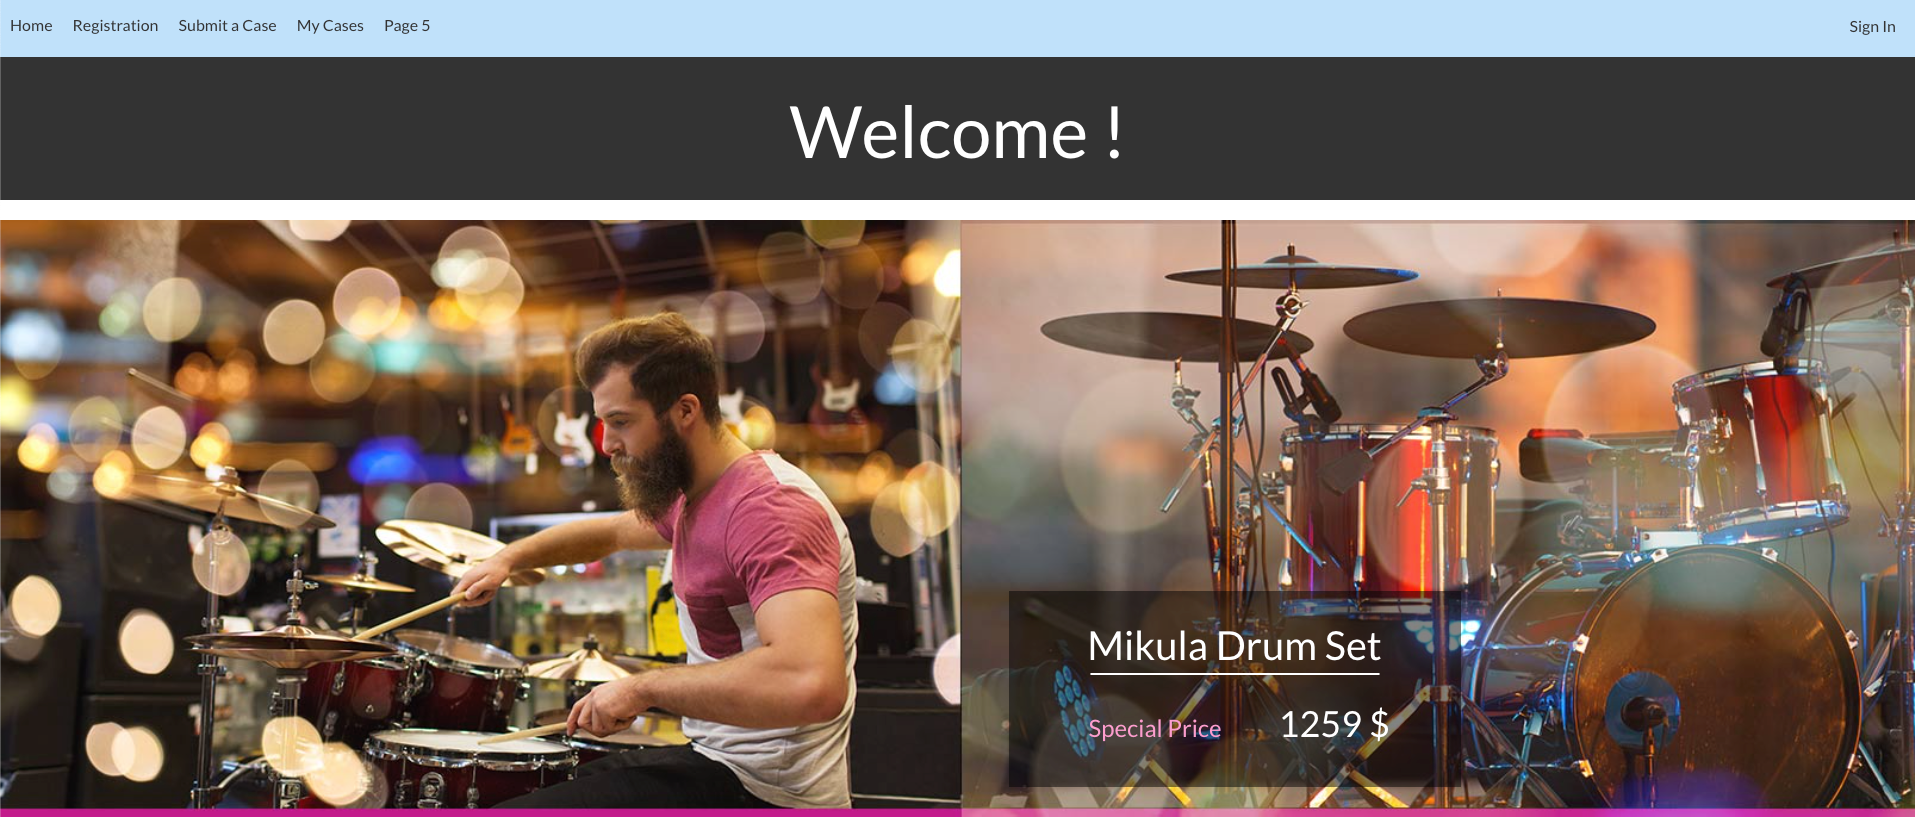
2. View the public Home Page.
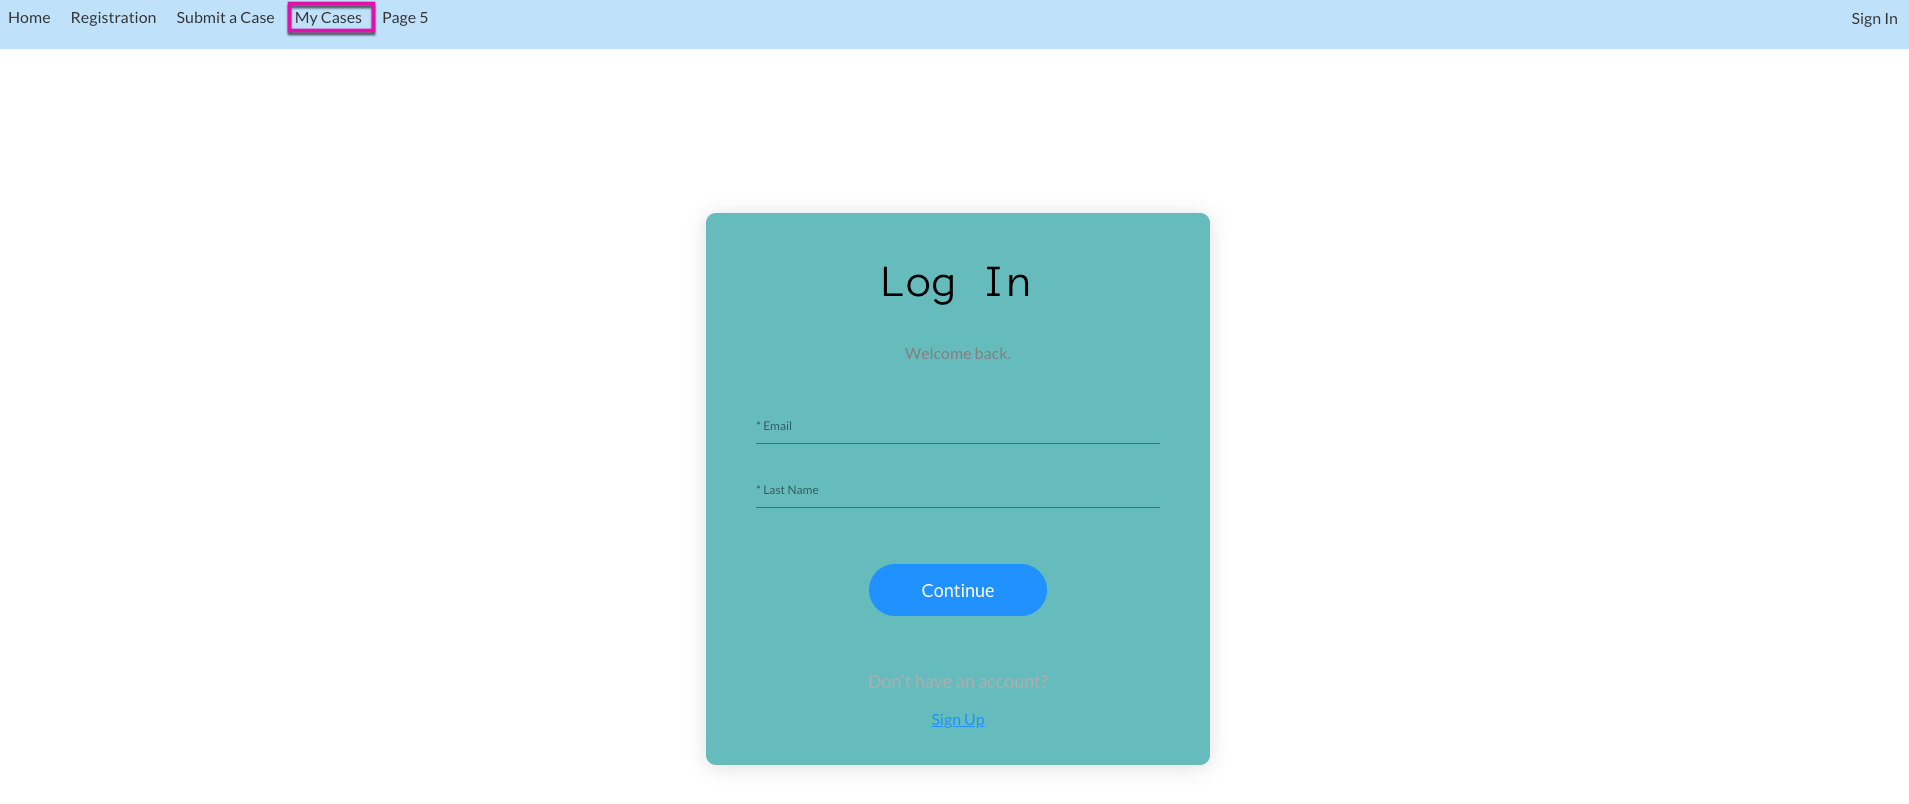
3. Click on the My Cases link in the header and view that this page is private, and a user has to log in to access the information on it.
4. Log in to the web page by entering an email address and a last name before clicking the Continue button.
5. Enter the verification code sent to your email address.
6. Now that you are logged in to the Private page, you should have access to all My Cases web pages.
7. If logged-in users navigate to the Home page, they can view the custom Welcome message.

2. View the public Home Page.
3. Click on the My Cases link in the header and view that this page is private, and a user has to log in to access the information on it.
4. Log in to the web page by entering an email address and a last name before clicking the Continue button.
5. Enter the verification code sent to your email address.
6. Now that you are logged in to the Private page, you should have access to all My Cases web pages.
7. If logged-in users navigate to the Home page, they can view the custom Welcome message.