Build an Email Survey in 10 minutes (12 min)
Completion requirements
Note: A copy of the Survey and images used in this use case are available to you here if you wish to practice yourself.
01 Before You Begin
Could you build a professional Salesforce-integrated email survey in less than 10 minutes?
Well, you can do it with the TITAN Survey!
Increase your response rate by up to 50% with Titan’s Email Surveys. Embed a survey question within the email body to gain immediate responses.
We’ve prepared in advance a proofread digital copy of a Survey, a folder with all the logos and images we will need, and our Salesforce Admin account details. Our Survey includes one email question and one follow-up question, depending on the feedback provided, to help us gather customer feedback about our support services.
So, let’s see if we can build our Survey in less than 10 minutes.
Note: If you wish to practice, you can access a copy of the Survey and images used in this use case here.
02 Install the Survey App in Salesforce
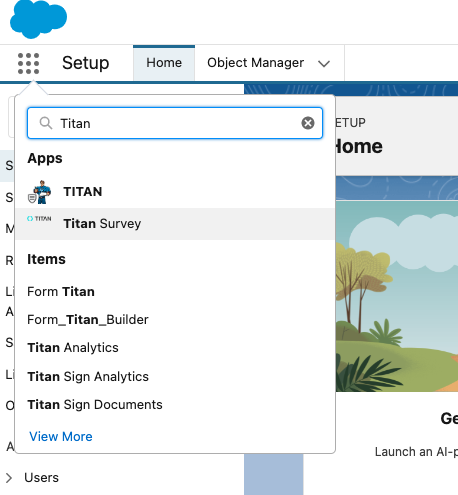
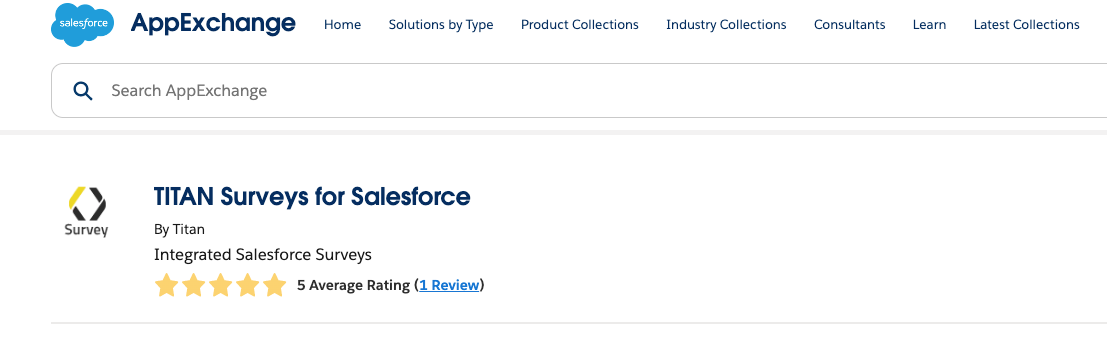
1. Navigate to the Salesforce AppExchange, search for "Titan Survey," click Enter, and select "Get it Now."
2. Follow the prompts to install the package, and you are all set!
Additional information about the Survey App installation is available on our support website at: https://support.titandxp.com/survey/finish-slide
2. Follow the prompts to install the package, and you are all set!
Additional information about the Survey App installation is available on our support website at: https://support.titandxp.com/survey/finish-slide
03 Open a New Survey Project
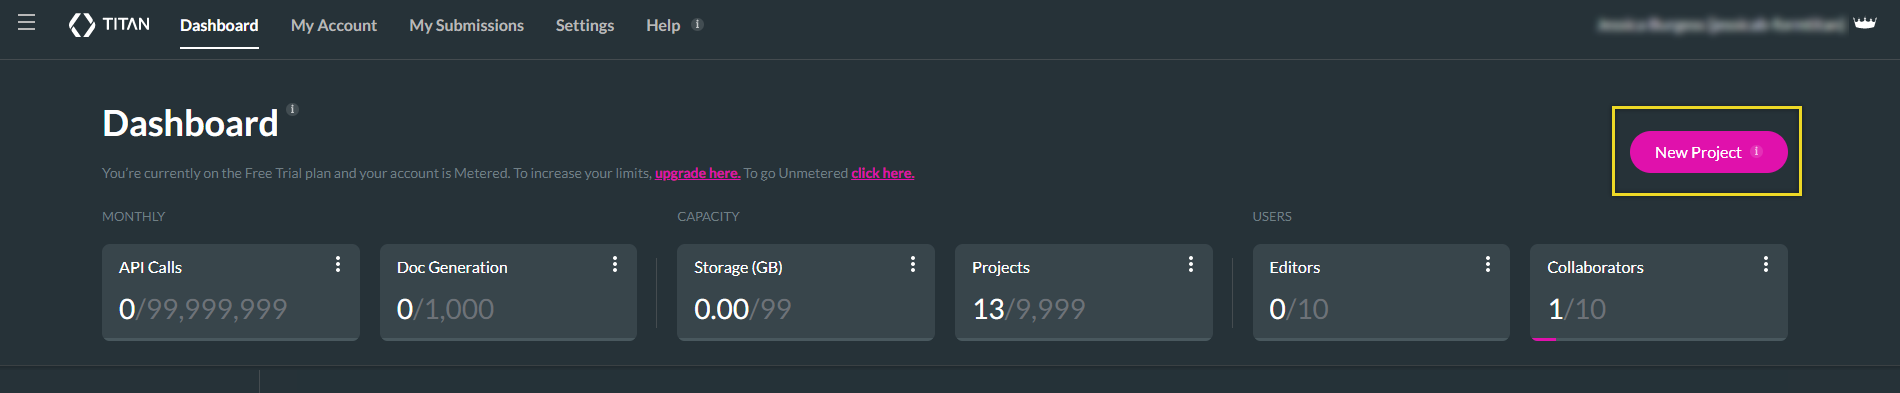
1. On the Titan Dashboard, select the New Project button. The Select Project Type screen opens.
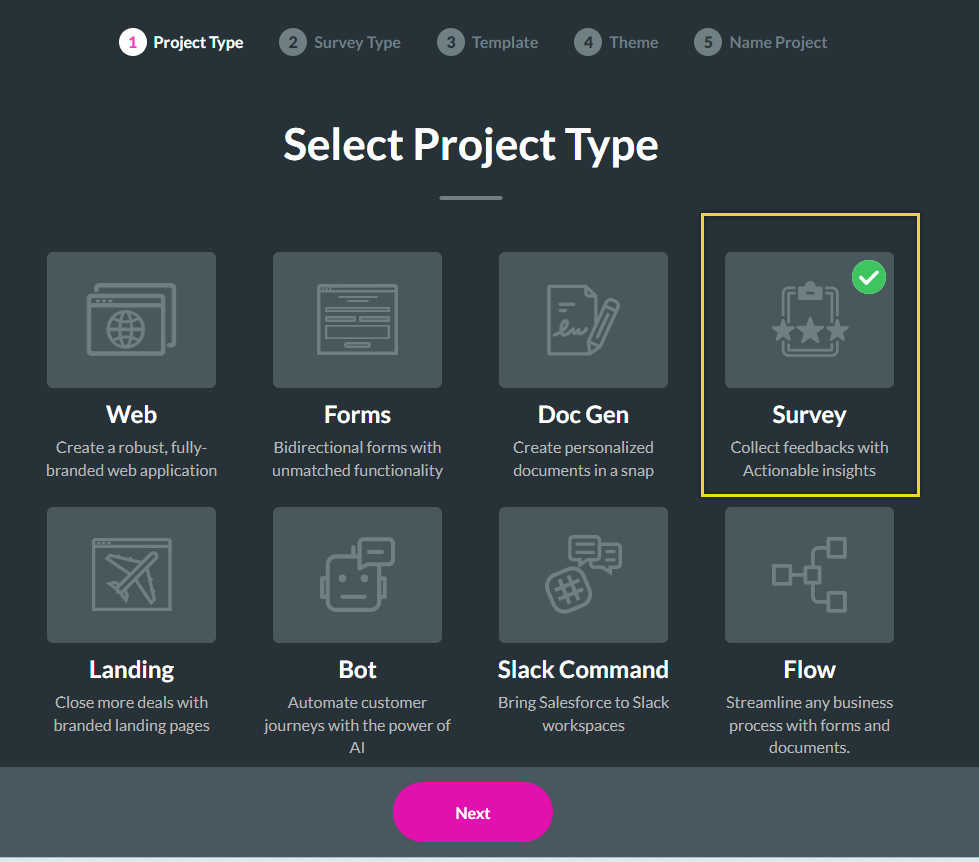
2. Select the Survey option and click on the Next button. The Select Survey Type screen opens.
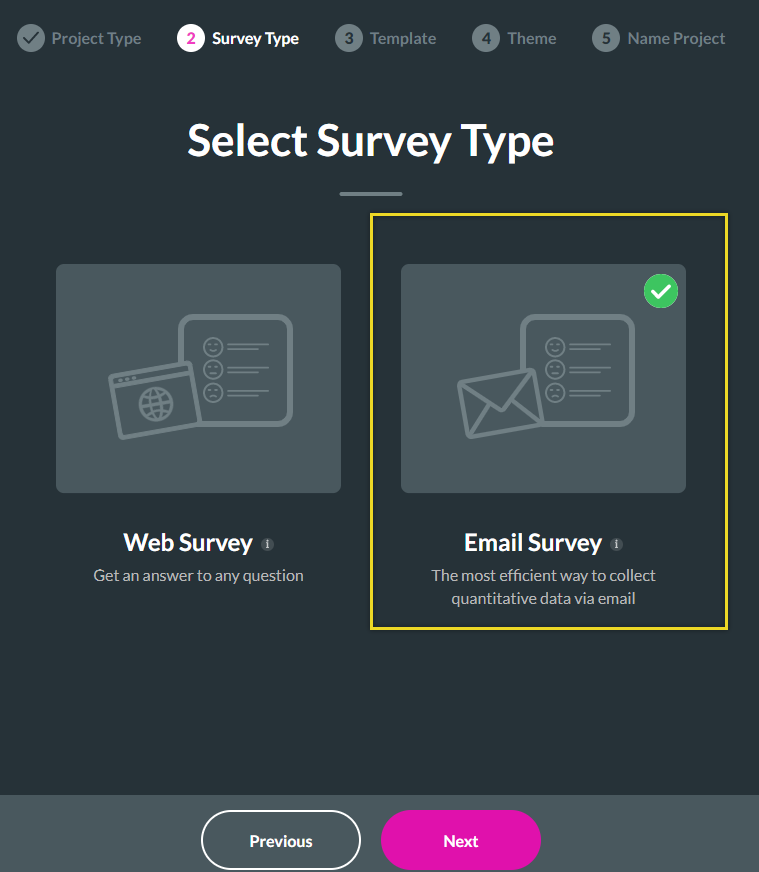
3. Select the Email Survey option and click on the Next button. The Select Template screen opens.
4. Select a template. The Blank template is selected by default. The templates can be chosen by complexity. Click on any template to select it and click the Next button. The Select Theme screen opens.

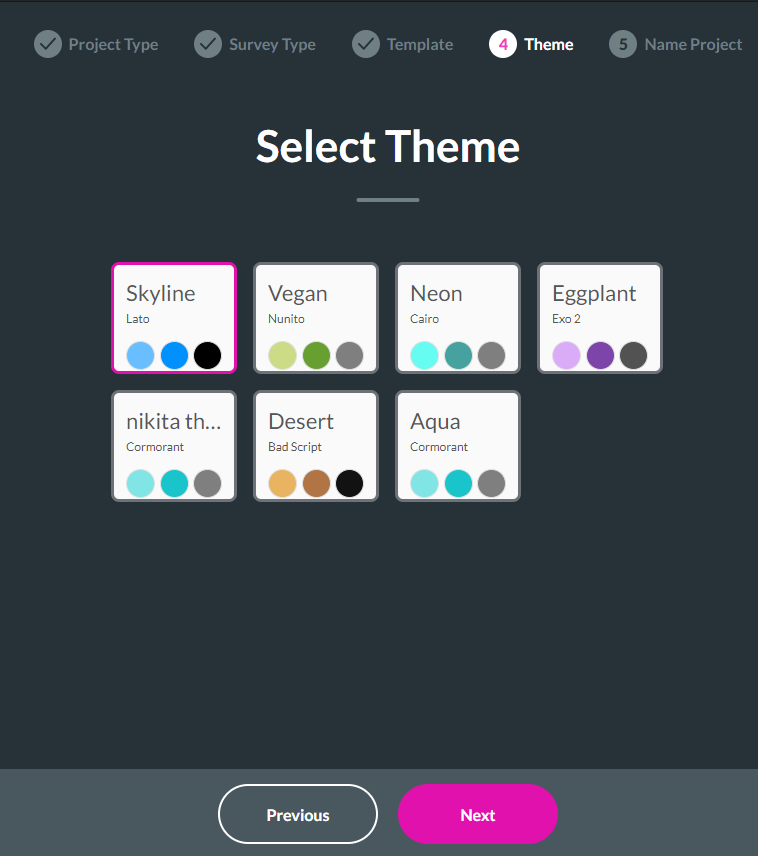
5. Click on the desired theme. Select the Next button.
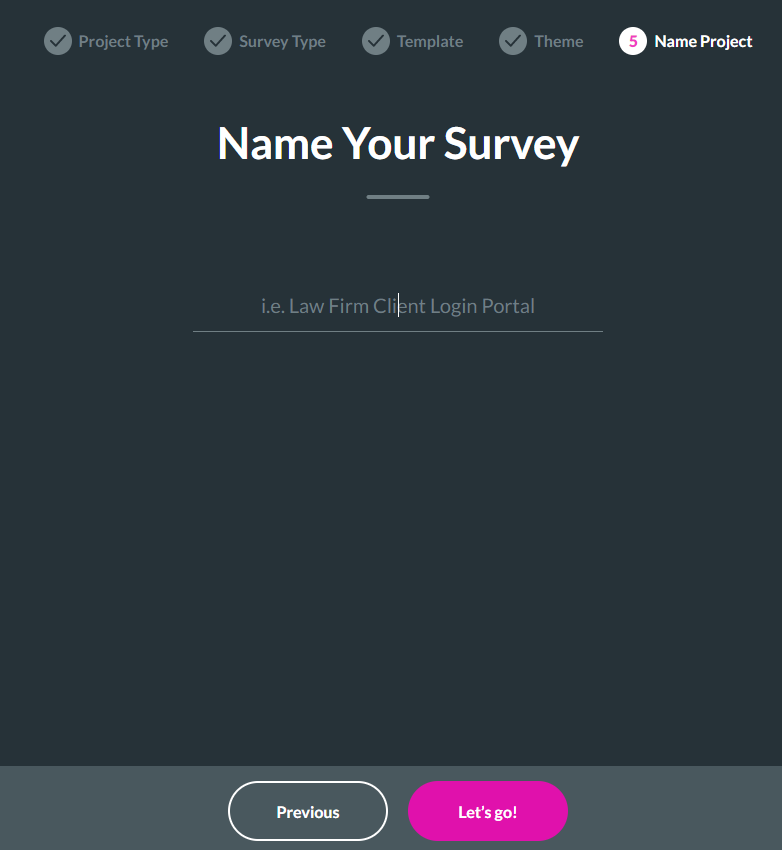
6. It’s now time to give our survey a name. Type a unique name for your survey. Select the Let’s go! Button.
2. Select the Survey option and click on the Next button. The Select Survey Type screen opens.
3. Select the Email Survey option and click on the Next button. The Select Template screen opens.
4. Select a template. The Blank template is selected by default. The templates can be chosen by complexity. Click on any template to select it and click the Next button. The Select Theme screen opens.
5. Click on the desired theme. Select the Next button.
6. It’s now time to give our survey a name. Type a unique name for your survey. Select the Let’s go! Button.
04 Adding the Email Embedded Question
1. To set up the email content, including the header and footer. Click on the Add Text/Media icons to upload an image.
To edit the content, use the corresponding kebab menu.
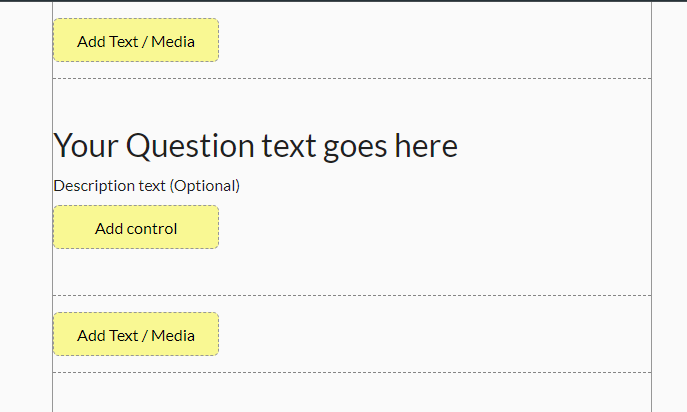
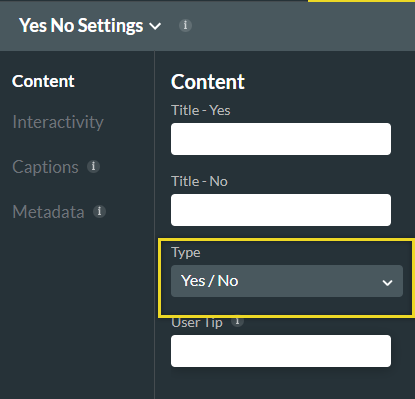
2. Click the Add Control button to add a question. Any single-click answer questions can be inserted. For this example, we will use a Yes/No question.
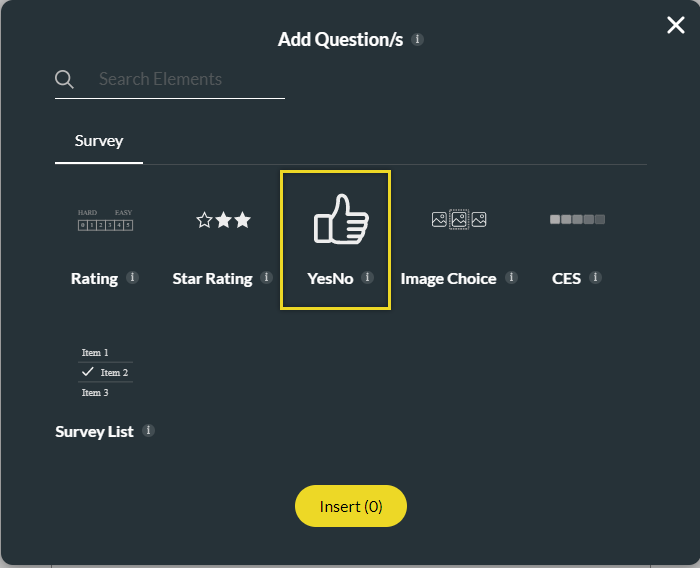
3. Use the Element Settings options to change the question type to Yes/No.
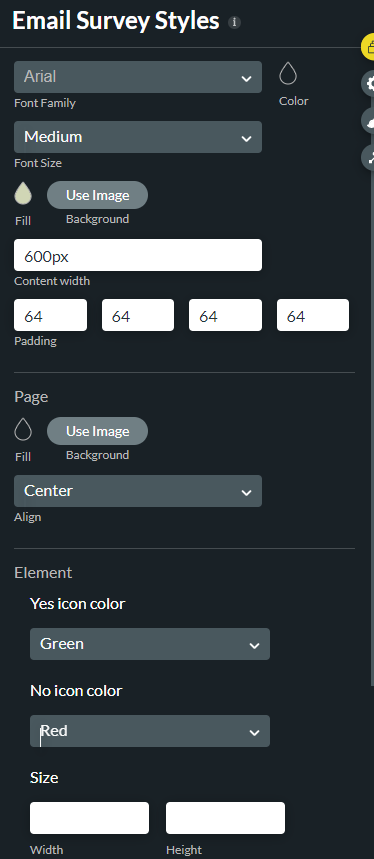
4. To make styling changes, navigate to the survey styling menu.
2. Click the Add Control button to add a question. Any single-click answer questions can be inserted. For this example, we will use a Yes/No question.
3. Use the Element Settings options to change the question type to Yes/No.
4. To make styling changes, navigate to the survey styling menu.
05 Adding a Follow Up Question
Our next step is to create a follow-up question depending on the respondent’s feedback. If the respondents are unsatisfied, it is vital to understand why.
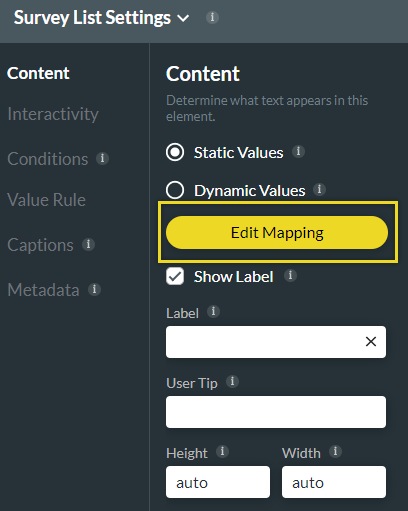
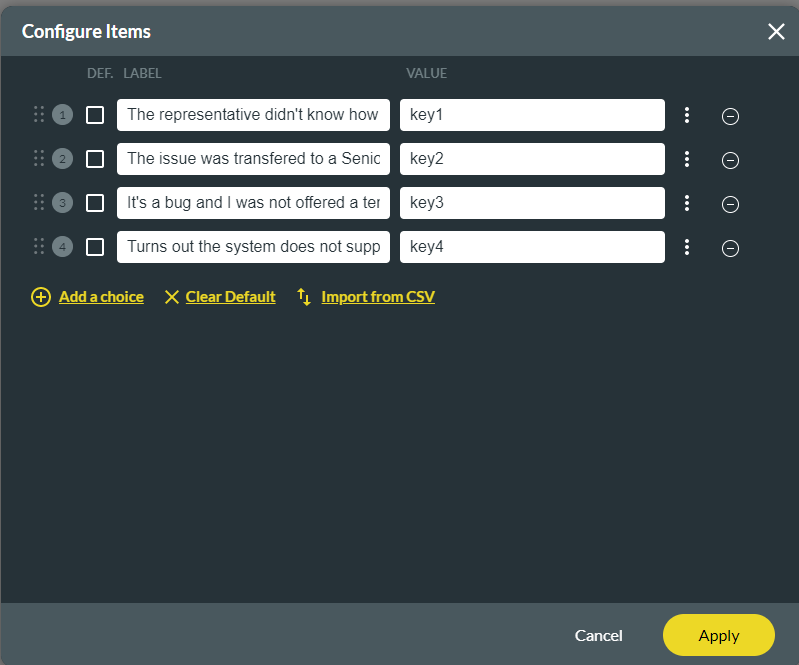
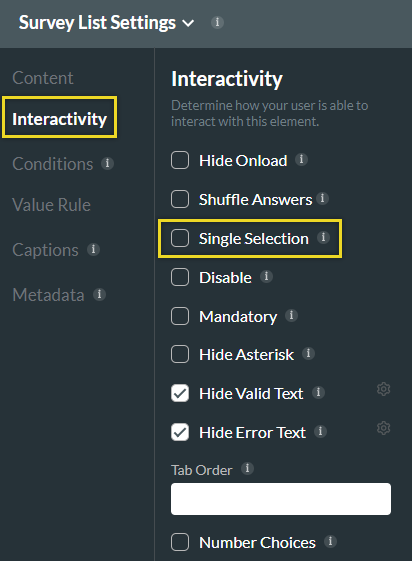
3. The configure item screen opens. In the label column, enter the answer options. Use the Add a Choice button to add more options.
4. To allow respondents to select more than one option. Click the interactivity tab on the element settings menu and uncheck the single selection option.
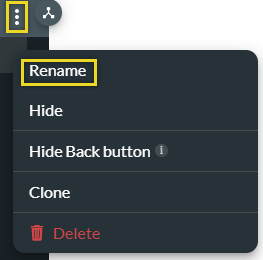
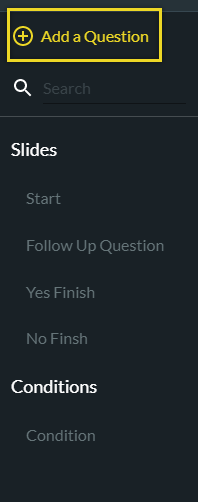
5. Use the kebab menu located next to each slide to rename the slides. This makes creating a custom question flow easier.
1. Press Add Slide to add another question to the survey.
- In this example, we used a Survey List.

3. The configure item screen opens. In the label column, enter the answer options. Use the Add a Choice button to add more options.
4. To allow respondents to select more than one option. Click the interactivity tab on the element settings menu and uncheck the single selection option.
5. Use the kebab menu located next to each slide to rename the slides. This makes creating a custom question flow easier.
06 Creating Two Finish Slides
In line with the respondents' answers, personalizing surveys will enable engagement with unsatisfied customers.
To do so, add a second Finish slide, customized for respondents who selected "no".
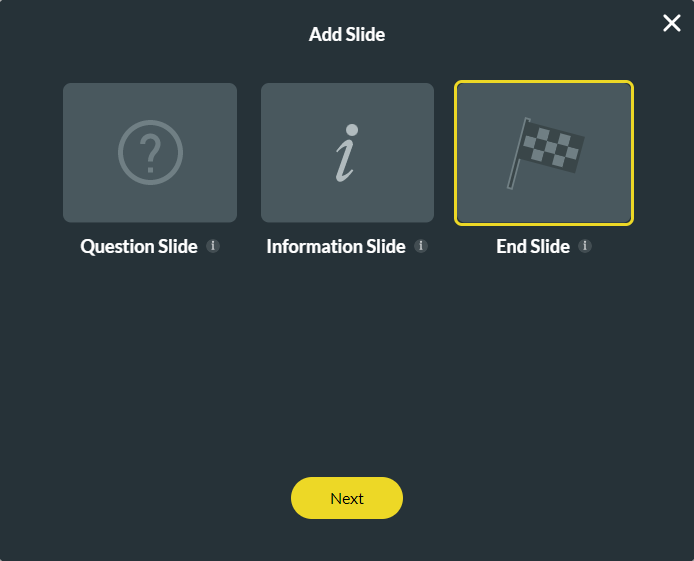
1. Click Add Slide, select End Slide, and press Select.
To do so, add a second Finish slide, customized for respondents who selected "no".
1. Click Add Slide, select End Slide, and press Select.
2. Customize the slide by inserting images and custom content.
Tip: Rename the finish slide according to the desired flow for easy tracking.
07 Setting Up a Custom Flow
Depending on the provided feedback, we can create different survey journeys for respondents in the same survey.
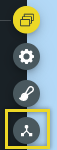
1. Click on the Node icon to start creating a custom flow.
2. Click on the Add a Question Flow and insert all slides.
3. This can be achieved in the custom flow settings. Let’s add all our questions and configure the flow.
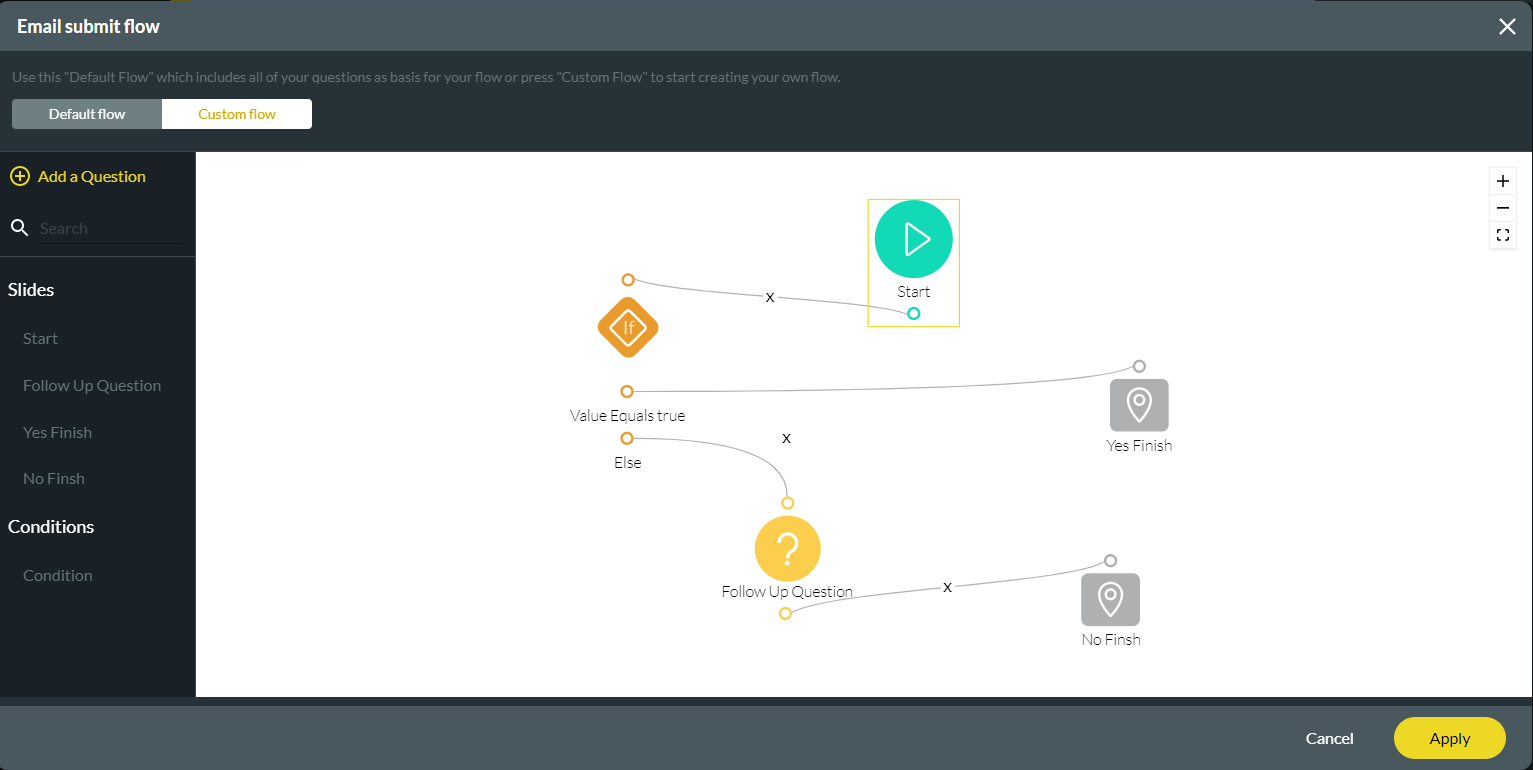
1. Click on the Node icon to start creating a custom flow.
2. Click on the Add a Question Flow and insert all slides.
3. This can be achieved in the custom flow settings. Let’s add all our questions and configure the flow.
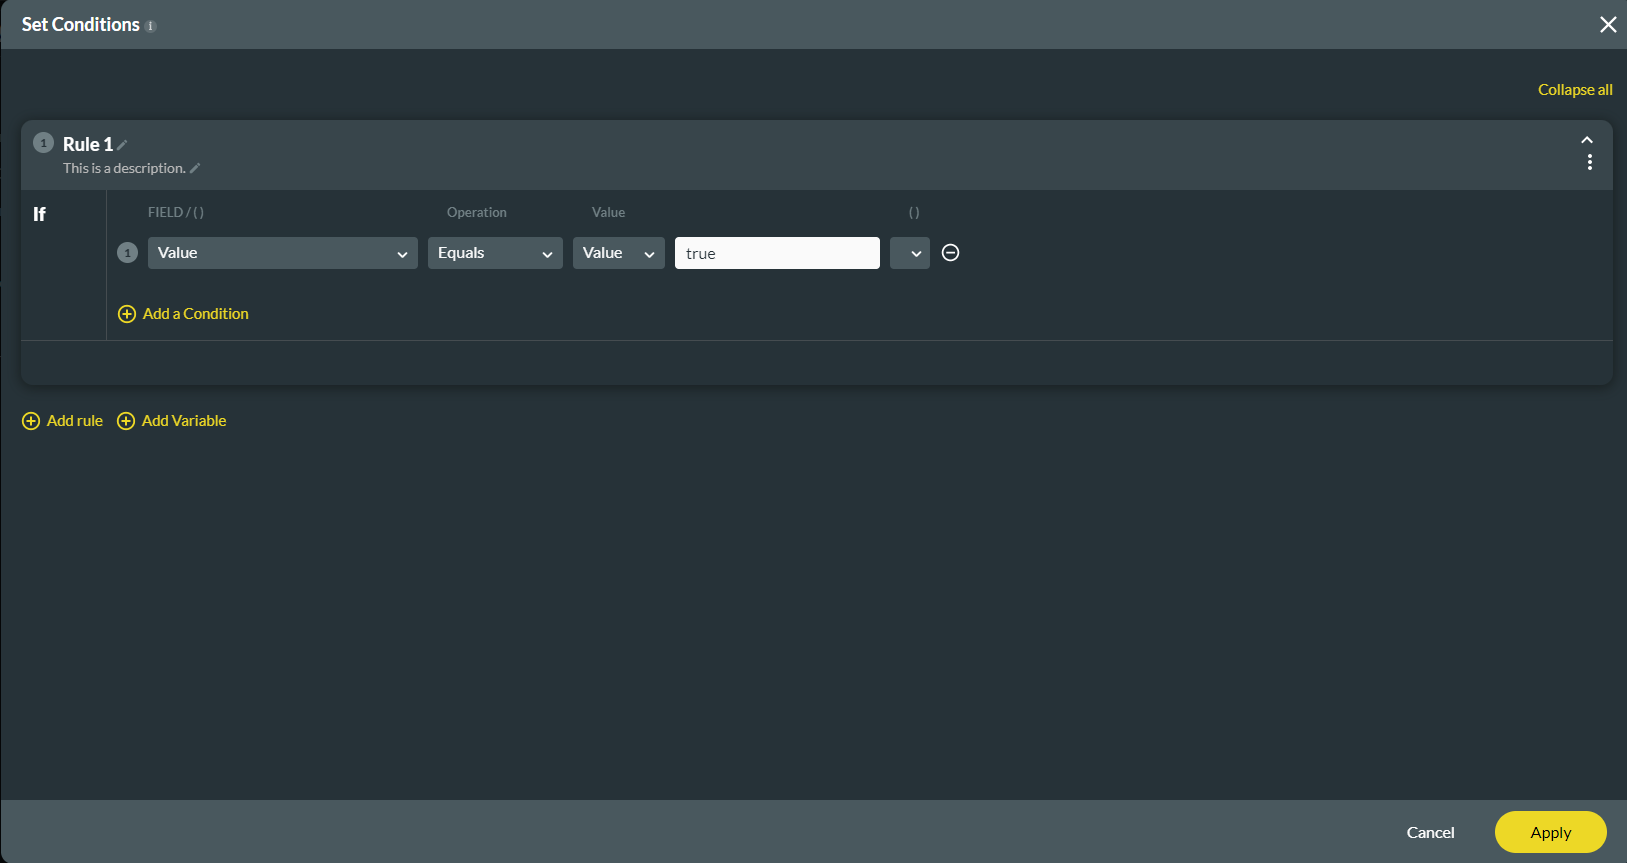
4. Next, add a condition to the starting question. This will define what the respondent sees next depending on whether their feedback is negative or positive.
a. Click the kebab menu next to the start icon and select add condition.
08 Distributing our Survey
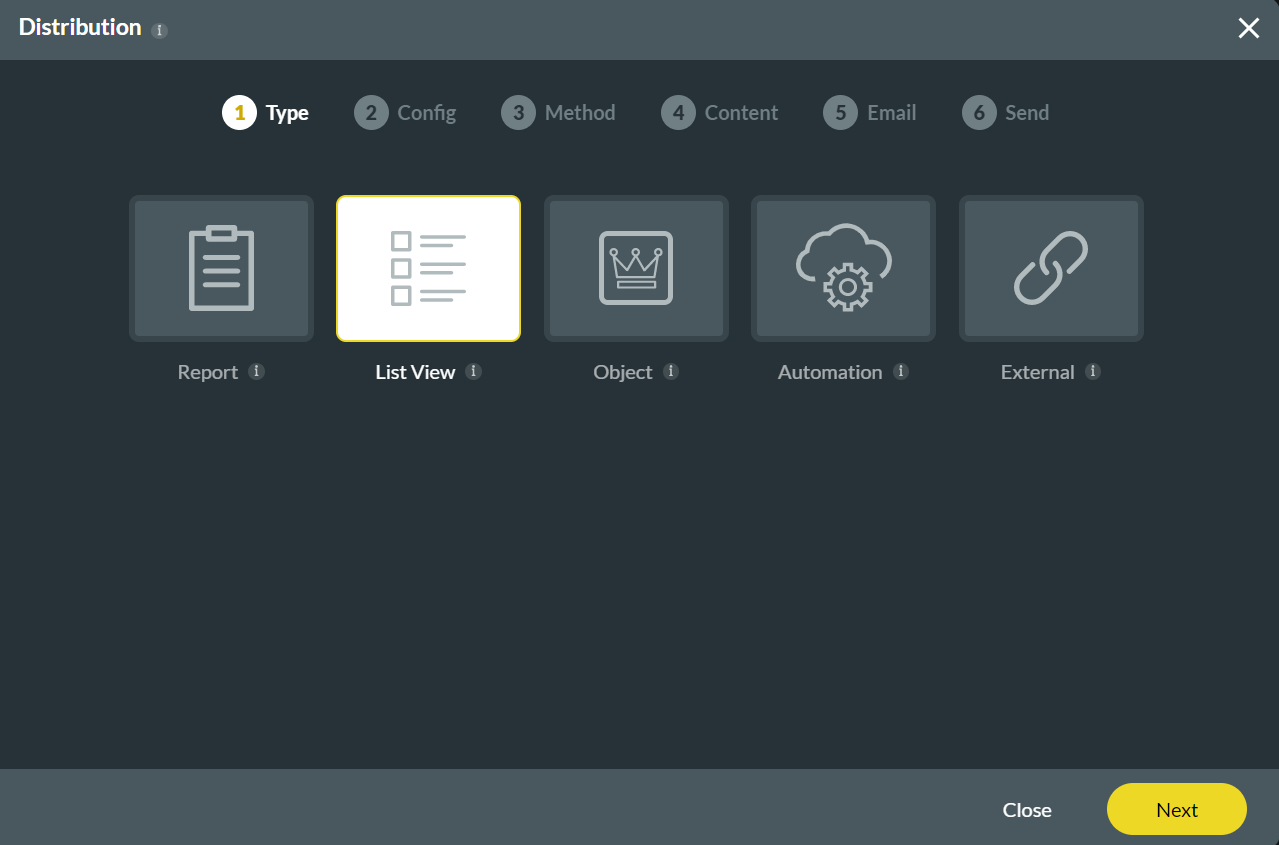
1. To distribute your Survey, click the Publish button and choose your Distribution type. For example, the List View is selected.
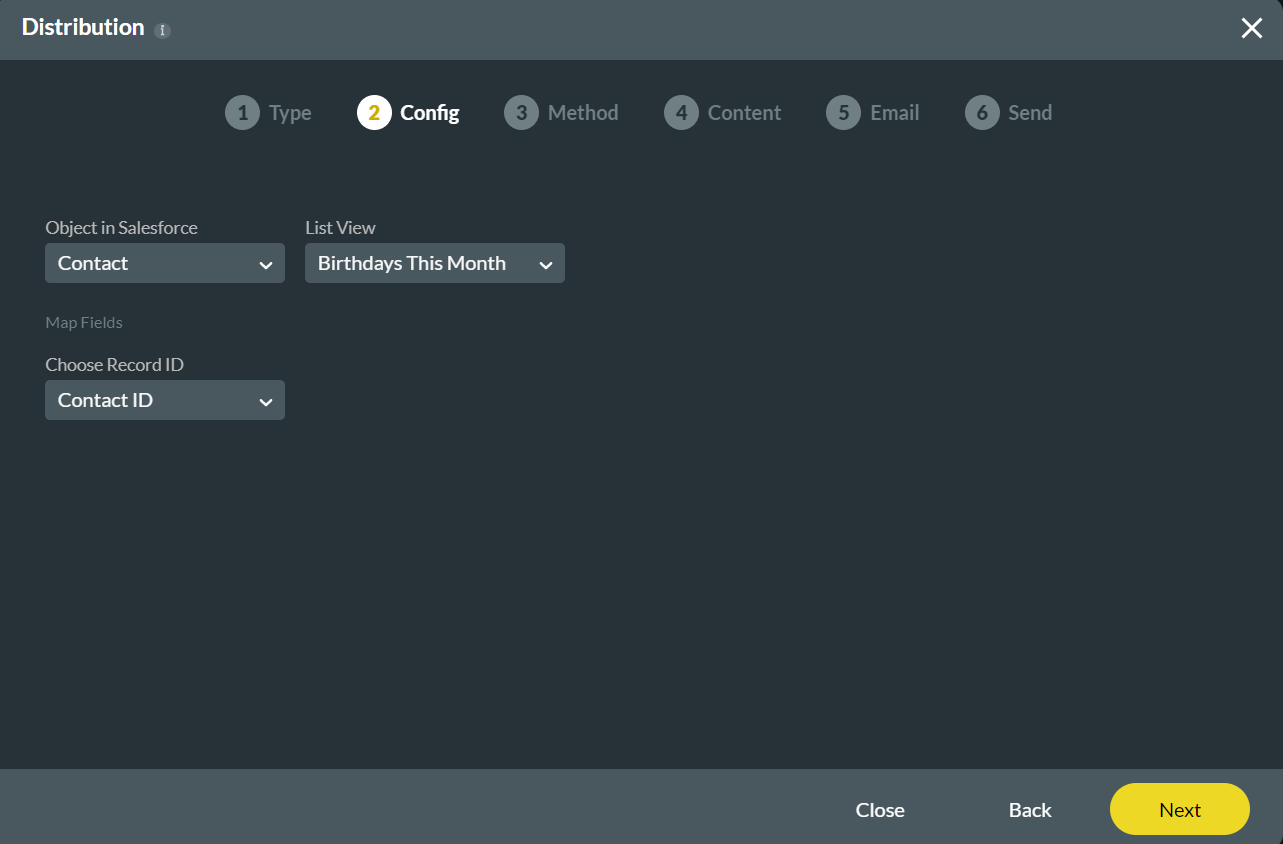
2. Set configuration for the Object in Salesforce, List View, and Record ID fields.
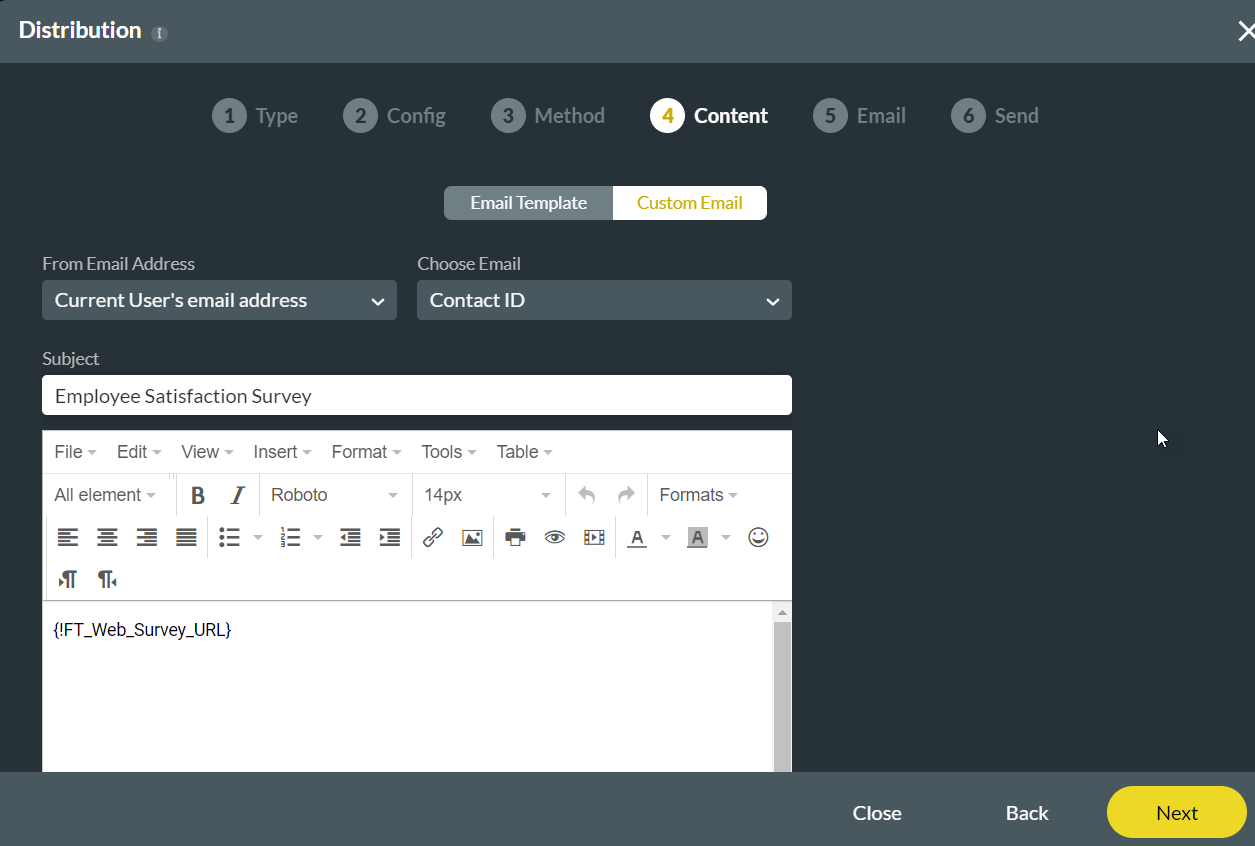
3. You can choose Mail as the distribution method and select the Custom Email option. Go ahead and configure the From Email Address and the Choose Email fields. You can also give your email a subject and body text.
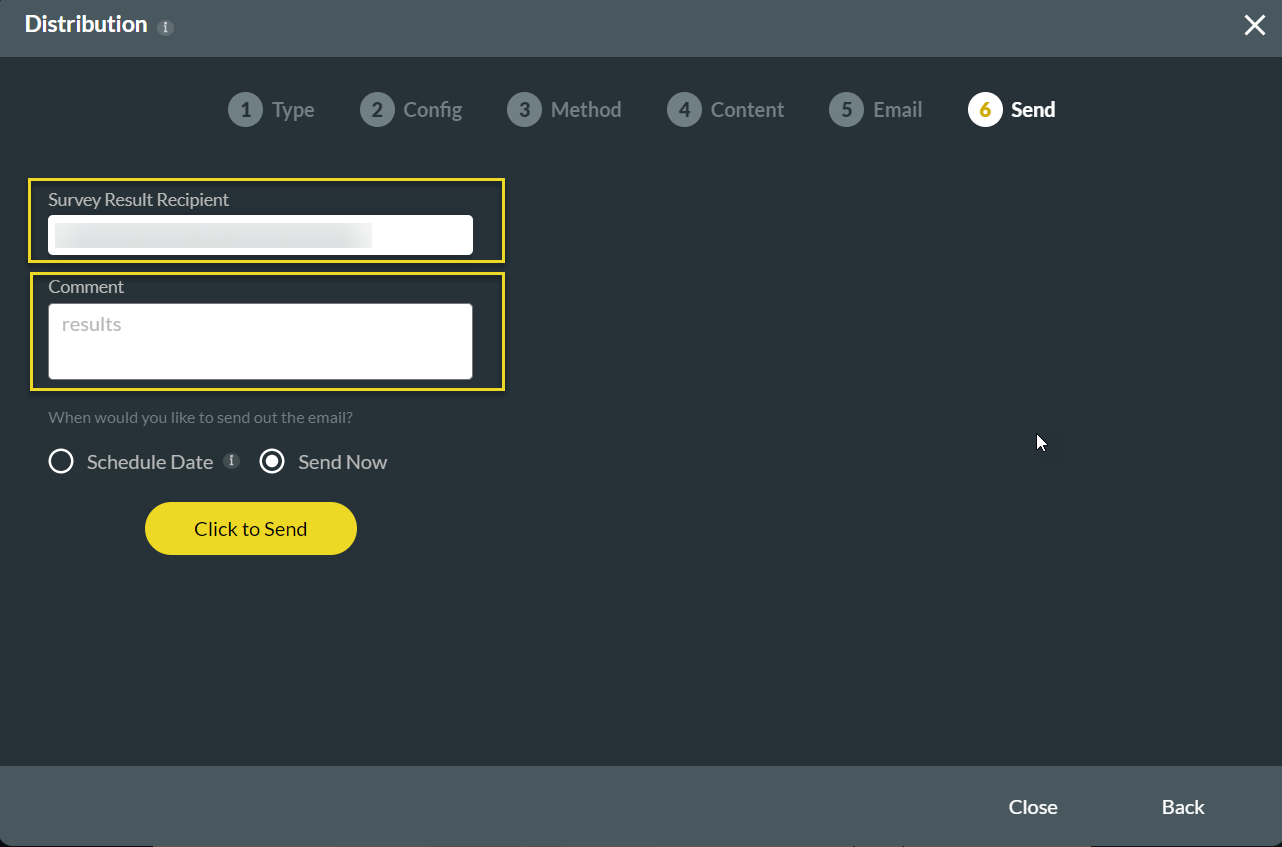
4. Add the Survey Results Recipient's email address and a comment before sending the Survey. Finally, choose to send the Survey now or later, and select the Click to Send button.
2. Set configuration for the Object in Salesforce, List View, and Record ID fields.
3. You can choose Mail as the distribution method and select the Custom Email option. Go ahead and configure the From Email Address and the Choose Email fields. You can also give your email a subject and body text.
4. Add the Survey Results Recipient's email address and a comment before sending the Survey. Finally, choose to send the Survey now or later, and select the Click to Send button.
09 Reviewing Survey Data
The Salesforce Data Collected from Surveys includes:
1. Get the TITAN Surveys for Salesforce app from the AppExchange store.
2. Log into your Salesforce account and search for the Titan Survey app.
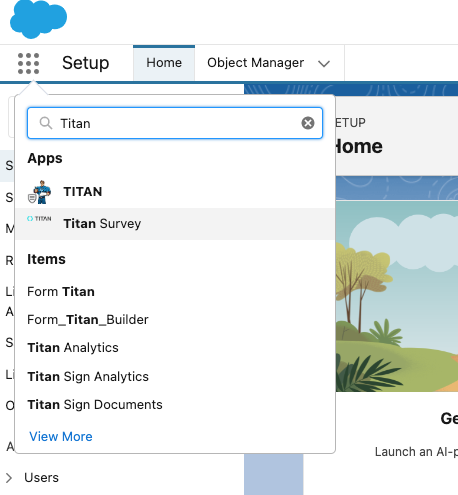
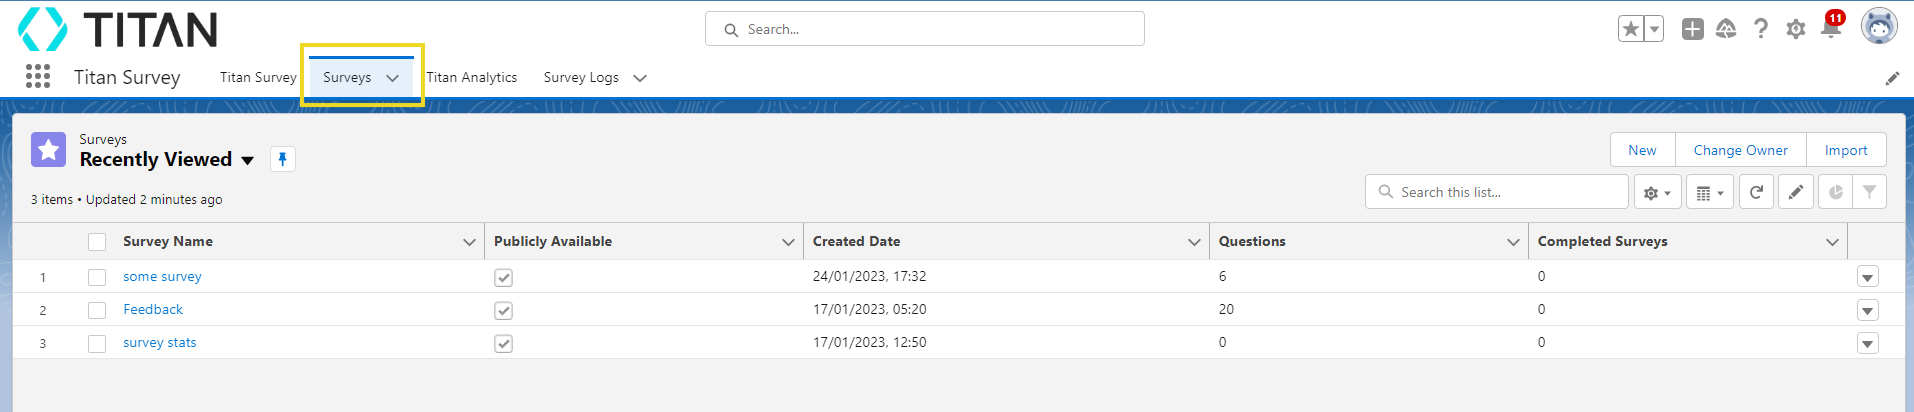
3. Use the Surveys tab drop-down arrow to choose a specific project.

Alternatively, select the Surveys tab to view all projects and key figures.
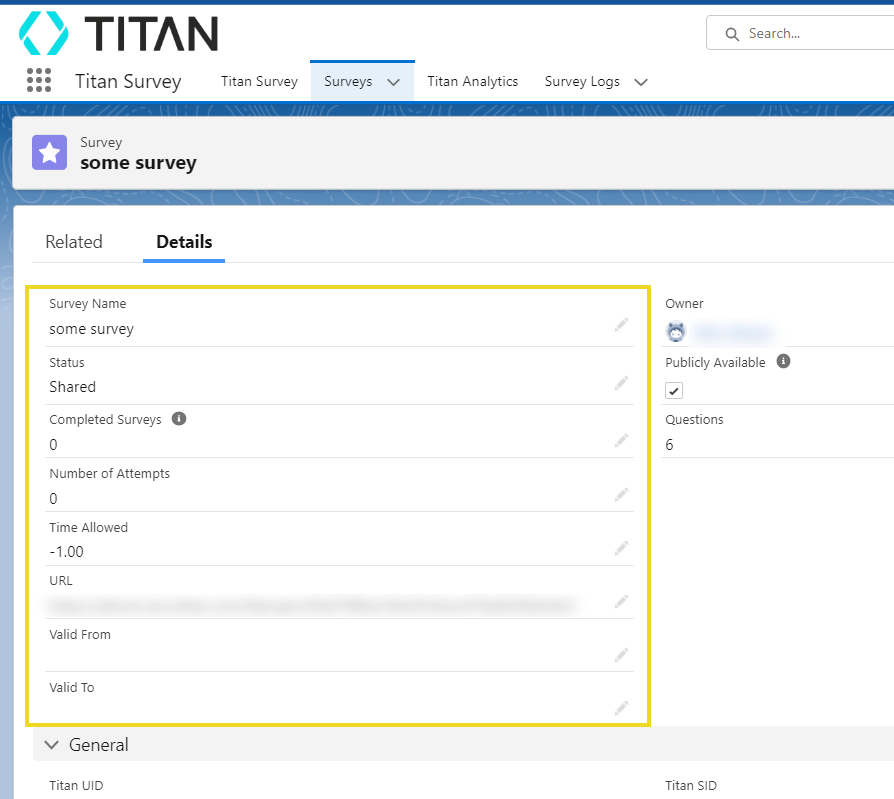
1. Select a project to view all the details regarding the survey.
2. View details of your survey by selecting the Details tab.
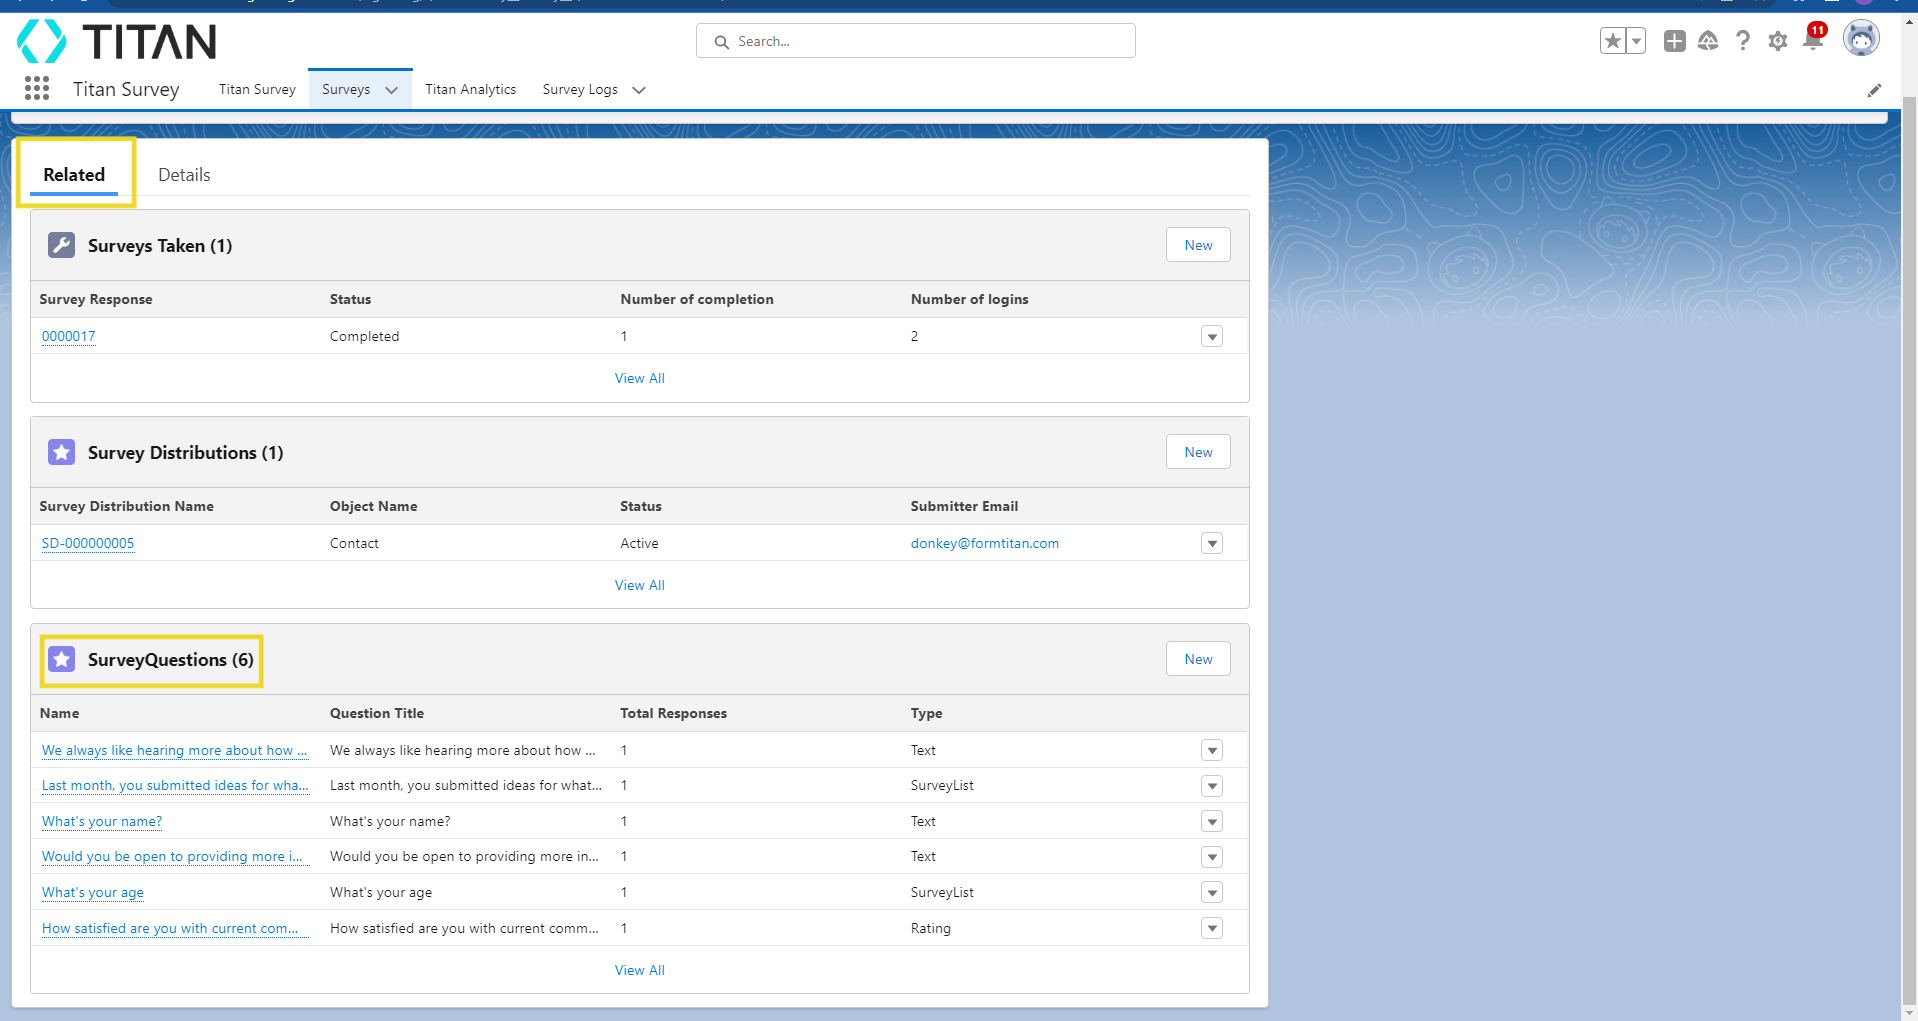
3. Choose the Related tab to view the number of surveys taken, details regarding survey distribution, and a list of your questions in the survey.
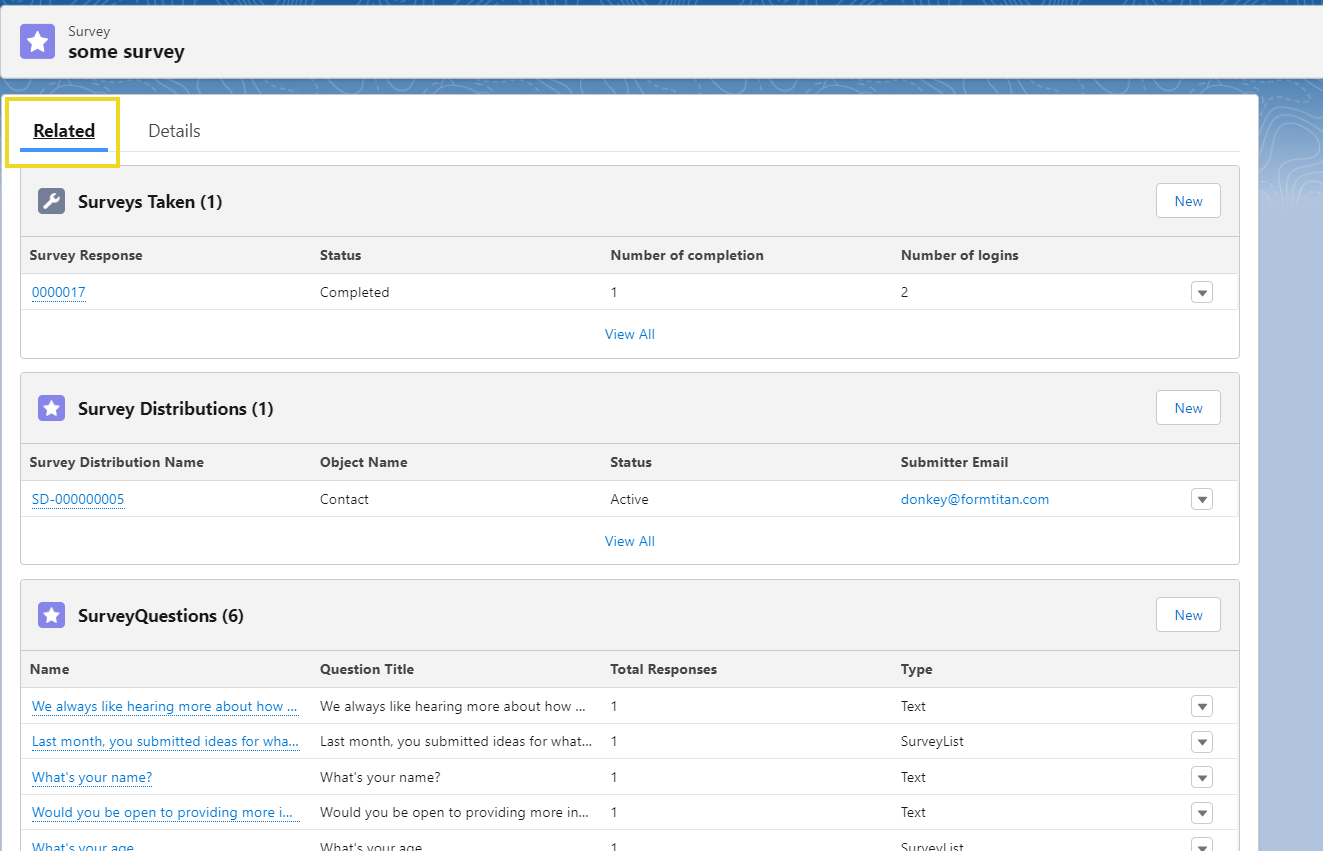
View your Survey Taken Data in Salesforce
1. Navigate to the Related tab for your chosen survey and select the Surveys Taken link.
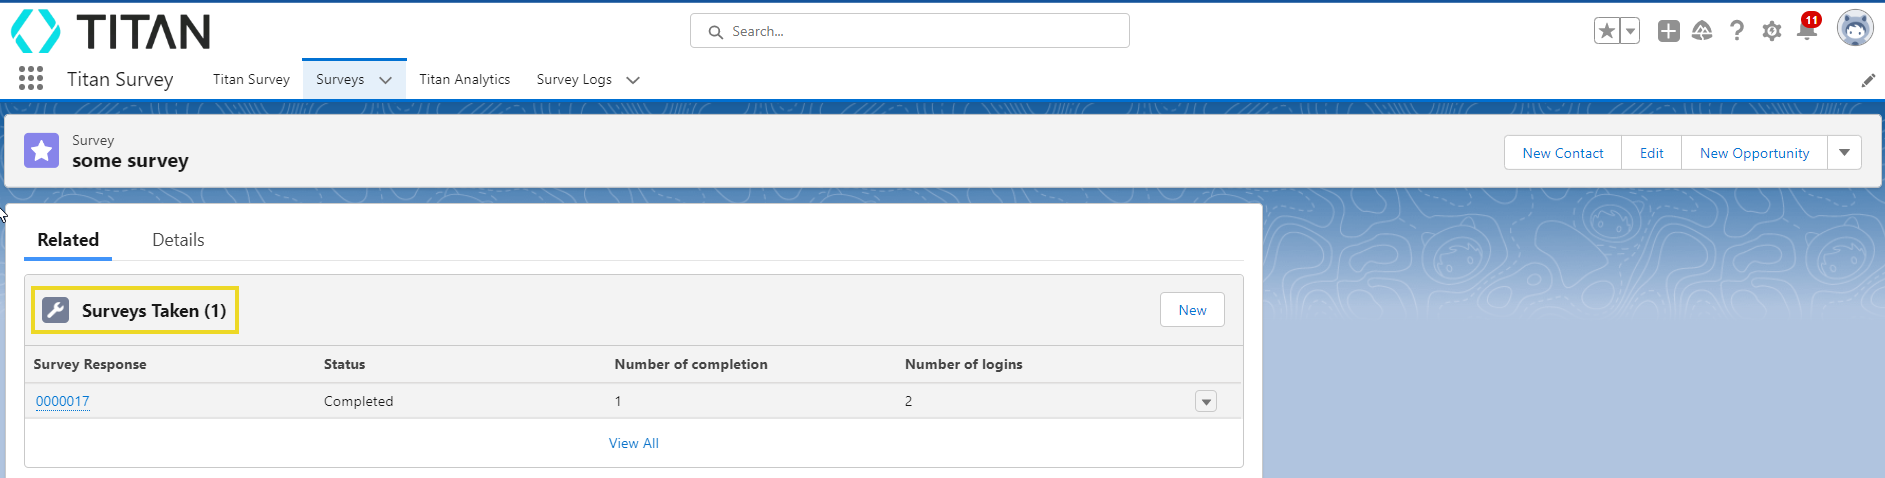
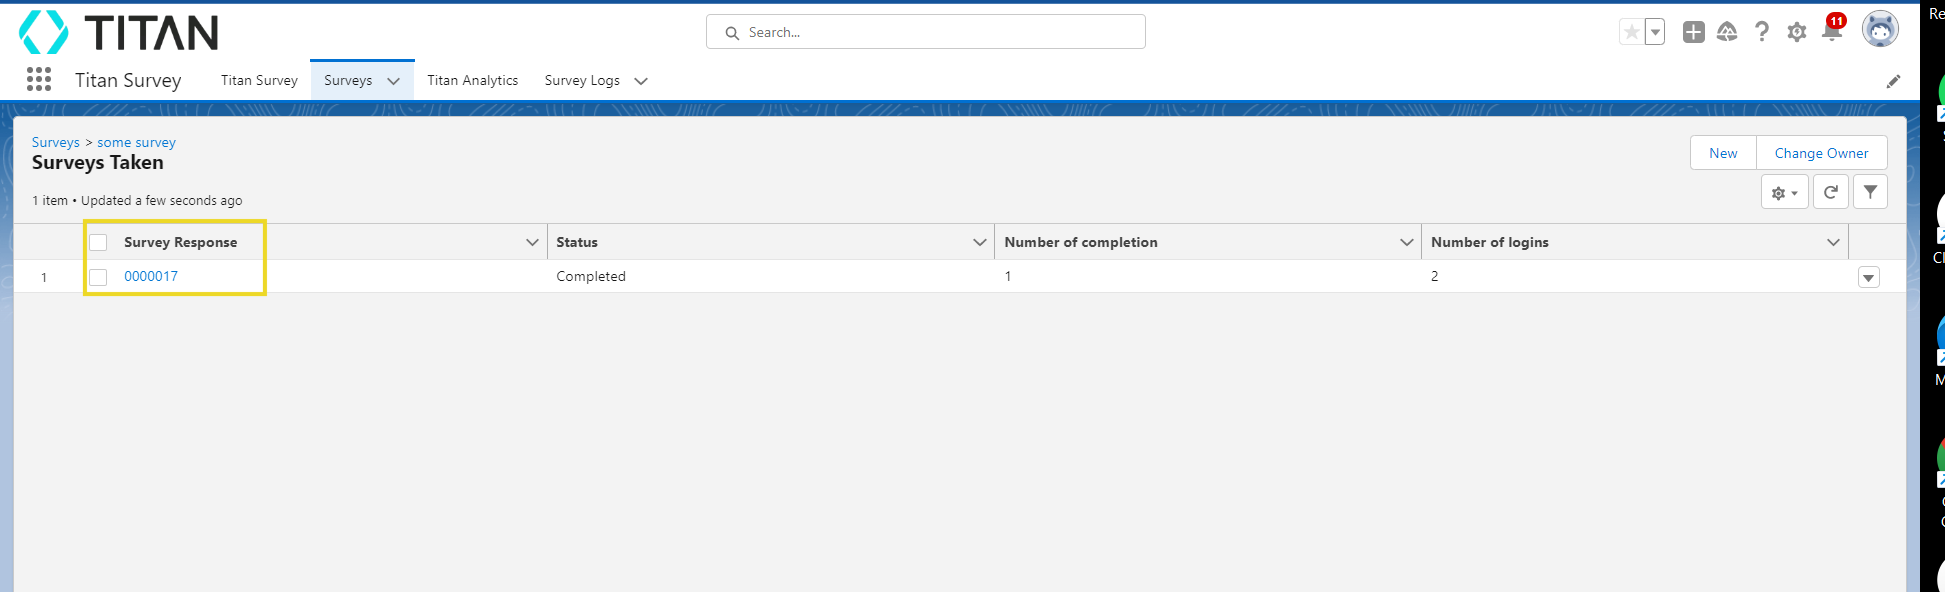
2. The Surveys Taken page opens up and displays all your survey responses with key data regarding the status of the survey, the amount of completed surveys, and the number of logins to your survey.
3. Obtain a detailed breakdown of each response by choosing one of the records.
4. Selecting the Details tab will provide a host of information regarding the respondent’s responses.
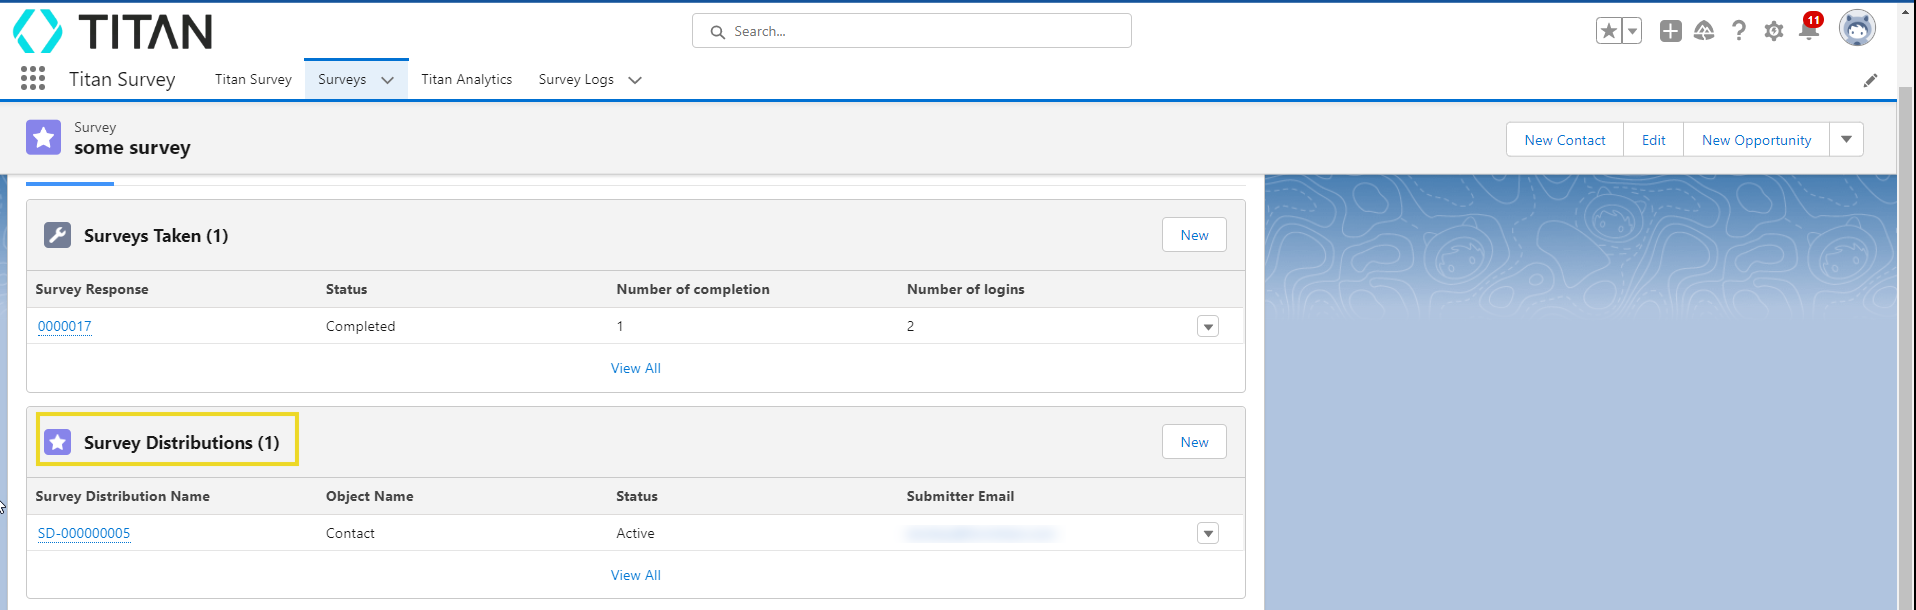
View your Survey Distributions Data in Salesforce
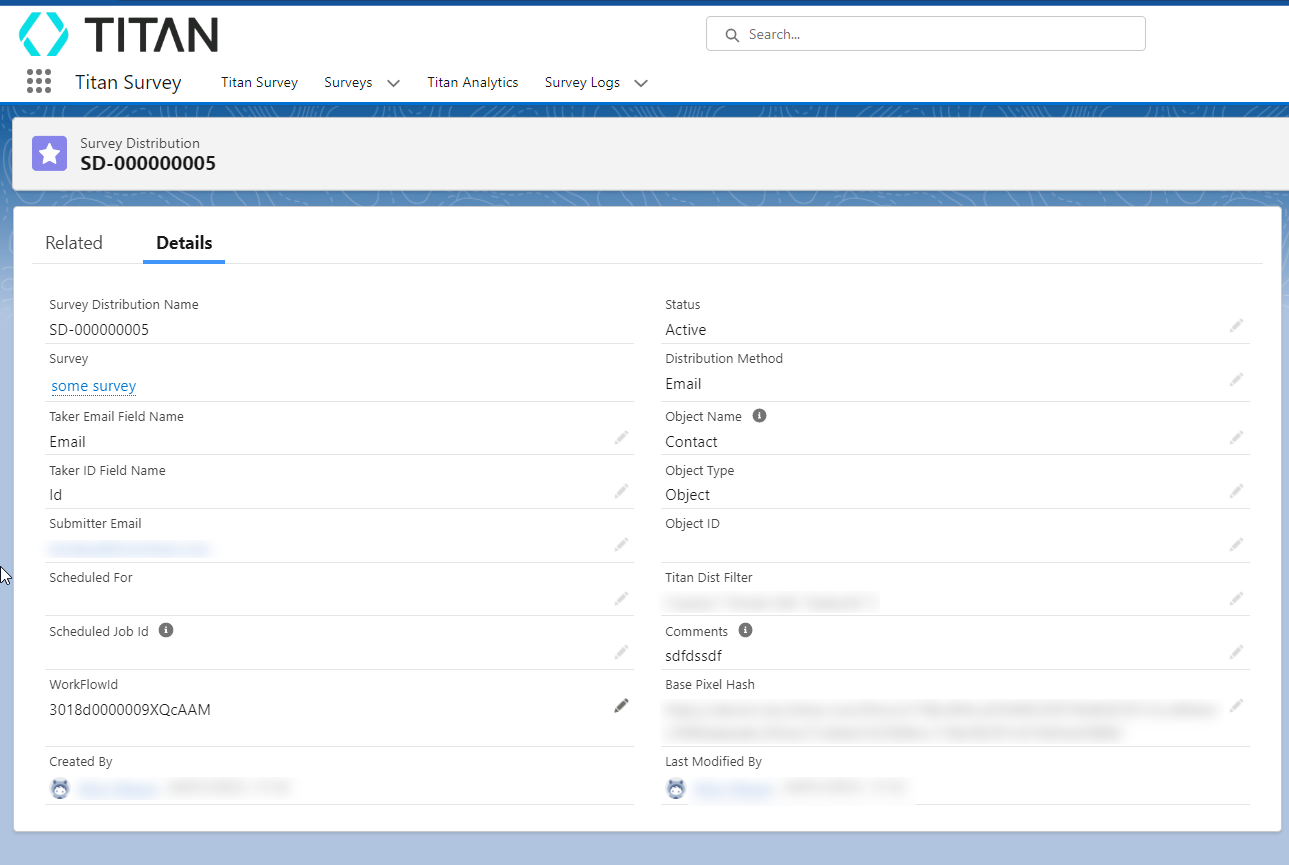
1. Select the Survey Distributions link under the Related tab to explore the distribution data.

2. The Details tab will display various distribution data in an easy-to-view dashboard collected from your survey.
View your Survey Questions Data in Salesforce
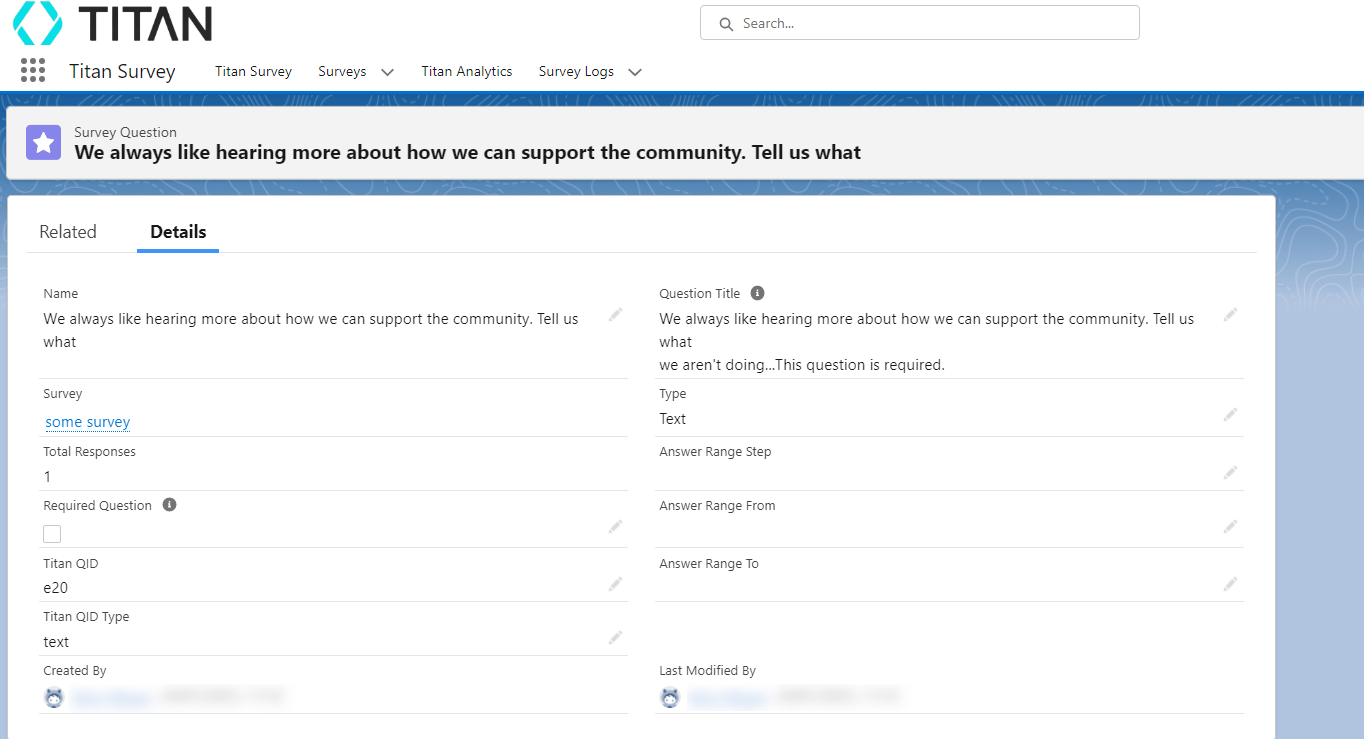
1. Select the Survey Questions link under the Related tab to explore the question data from your survey.
- Taken Surveys Data - includes all data that provides insight into each survey taker’s responses.
- Survey Distribution Data - shows data related to every time the survey was distributed.
- Survey Questions Data - lists a breakdown of the questions found in the survey.
1. Get the TITAN Surveys for Salesforce app from the AppExchange store.
2. Log into your Salesforce account and search for the Titan Survey app.
3. Use the Surveys tab drop-down arrow to choose a specific project.
Alternatively, select the Surveys tab to view all projects and key figures.
1. Select a project to view all the details regarding the survey.
2. View details of your survey by selecting the Details tab.
3. Choose the Related tab to view the number of surveys taken, details regarding survey distribution, and a list of your questions in the survey.
View your Survey Taken Data in Salesforce
1. Navigate to the Related tab for your chosen survey and select the Surveys Taken link.
2. The Surveys Taken page opens up and displays all your survey responses with key data regarding the status of the survey, the amount of completed surveys, and the number of logins to your survey.
3. Obtain a detailed breakdown of each response by choosing one of the records.
4. Selecting the Details tab will provide a host of information regarding the respondent’s responses.
View your Survey Distributions Data in Salesforce
1. Select the Survey Distributions link under the Related tab to explore the distribution data.
2. The Details tab will display various distribution data in an easy-to-view dashboard collected from your survey.
View your Survey Questions Data in Salesforce
1. Select the Survey Questions link under the Related tab to explore the question data from your survey.
2. Choose a specific question to get a more detailed breakdown.