403 Page (2:30 min)
Completion requirements
01 Getting Started
This tutorial covers styling the 403 pages, including:
- An overview of the 403 pages.
- How to add a custom 403 page.
- How to style a custom 403 page.
02 403 Page Overview
A 403 is known as a forbidden page. The server understands the request; however, the page will not be displayed to unauthorized users. You can create a custom 403 page to match your business branding.
03 Adding a Custom 403 Page
1. Navigate to Project Settings and select the Site Elements tab.
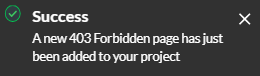
2. Enable the Custom 403 Page toggle switch.
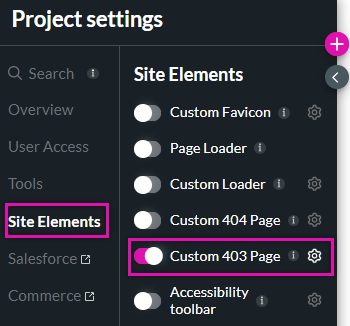
A 403 page will be automatically inserted into your project.
You can navigate the page using the pages menu or click the Custom 403 page gear icon.
2. Enable the Custom 403 Page toggle switch.
A 403 page will be automatically inserted into your project.
You can navigate the page using the pages menu or click the Custom 403 page gear icon.
04 Styling a Custom 403 Page
You can insert any element into your 403 page. Use the corresponding styling menu of each component to give your custom 403 page a unique look and style.