Adding a Footer (5 min)
Completion requirements
01 Getting Started
This tutorial covers footers, including:
- An overview of footers.
- Position options.
- How to hide the footer.
- Footer style options.
02 Overview
The footer is a strip that can be added to the bottom of web pages. It usually displays company details and copyrights, offers additional site links, or contains clickable social media icons.
To add a footer to your project:
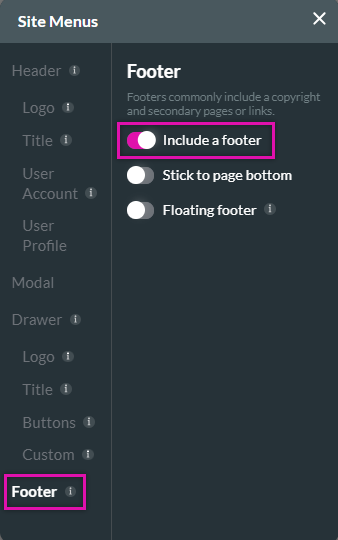
1. Expand the Pages dropdown and click Manage Menus. The Site Menus window opens.
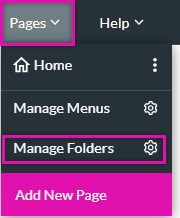
2. Click on the Footer tab and enable the Include a Footer toggle switch.

To add a footer to your project:
1. Expand the Pages dropdown and click Manage Menus. The Site Menus window opens.
2. Click on the Footer tab and enable the Include a Footer toggle switch.
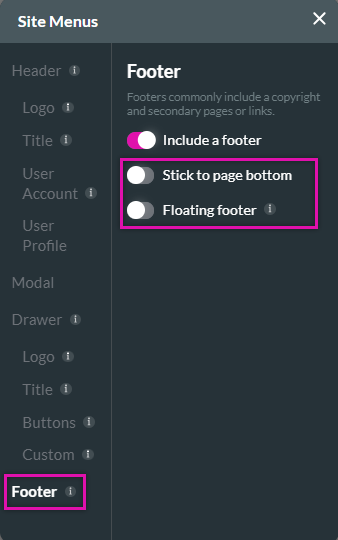
03 Positioning the Footer
There are two position options in the Site Menu window. By default, your footer will be added after the last strip in the project.
- Stick to Page Bottom - This ensures the footer will always display at the bottom of the content. The footer might be hidden from view if there is a large quantity of content for the user to scroll through.
- Floating the footer - This means that the footer will always be displayed to the user at the bottom of the screen.
04 Footer Style Options
You can make your footer stand out by using the element styling menu.
The footer strip is completely flexible. You can add any elements to it and adjust the number of columns it consists of.
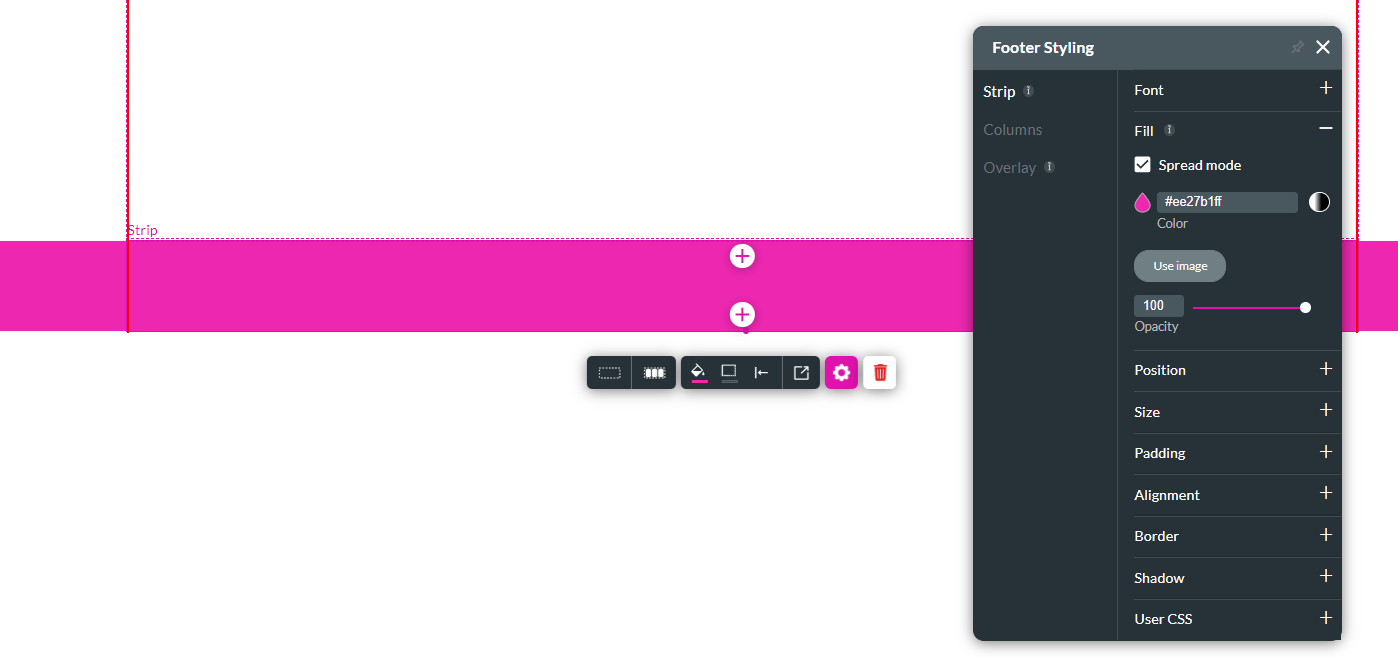
The footer strip is completely flexible. You can add any elements to it and adjust the number of columns it consists of.
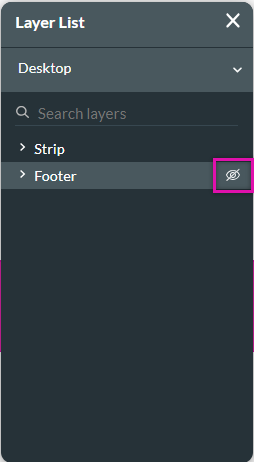
05 Hiding the Footer
Using the layer list. You can easily hide or display the footer.
1. Locate the footer in the layer list.
2. Click the eye icon.
1. Locate the footer in the layer list.
2. Click the eye icon.