Interactive Settings (12 min)
Completion requirements
01 Getting Started
This tutorial covers the interactive settings in Titan Web. Check out this lesson if you need a quick refresher on inserting Interactive Fields into your Word documents.
02 Interactive Fields
To insert an interactive field:
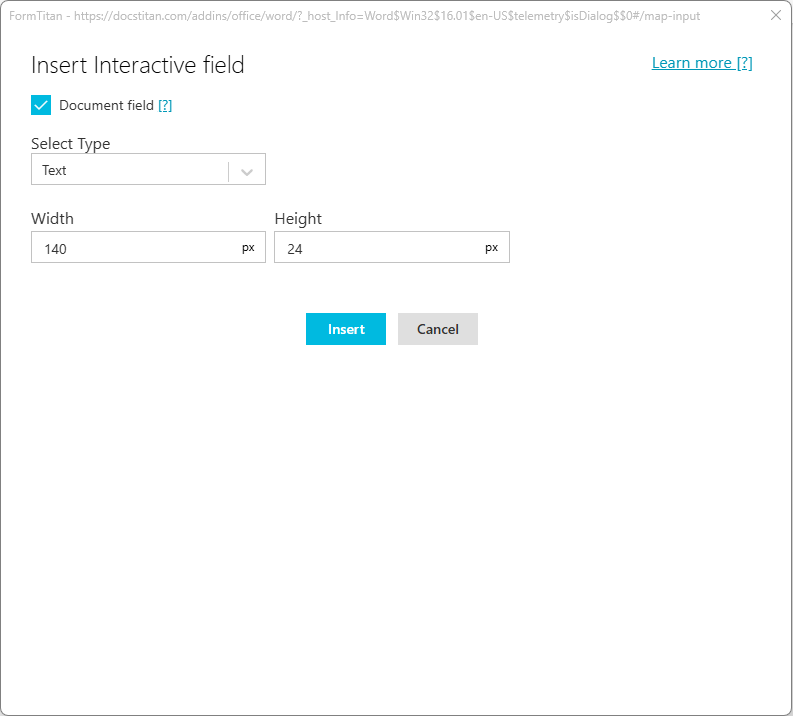
1. Place your cursor where you want the interactive field to display. Click Insert/Edit Interactive field.

For document-only fields:
2. Enable the Document Field setting if the field is specific to your Word document and not needed in other formats or contexts. Note: This is relevant only for sign projects.
3. Set the Type, width, and type. Click Insert.
For project fields:
4. Select which project type to pull the field from.
5. Select the page that contains the field.
6. Choose your form field, choose whether your form field is mandatory, and click Insert.

7. Publish your document to the corresponding Titan Web project once the configuration is completed.
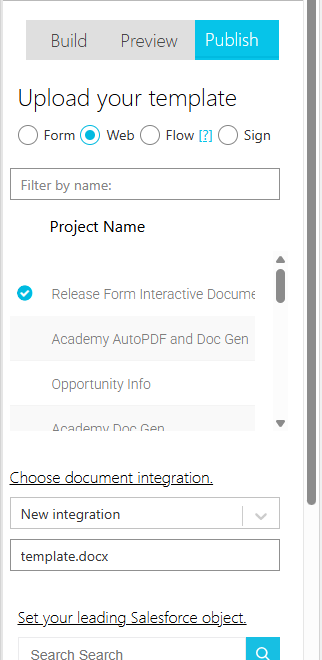
1. Place your cursor where you want the interactive field to display. Click Insert/Edit Interactive field.

For document-only fields:
2. Enable the Document Field setting if the field is specific to your Word document and not needed in other formats or contexts. Note: This is relevant only for sign projects.
3. Set the Type, width, and type. Click Insert.

For project fields:
4. Select which project type to pull the field from.
5. Select the page that contains the field.
6. Choose your form field, choose whether your form field is mandatory, and click Insert.

7. Publish your document to the corresponding Titan Web project once the configuration is completed.

03 Document Generation
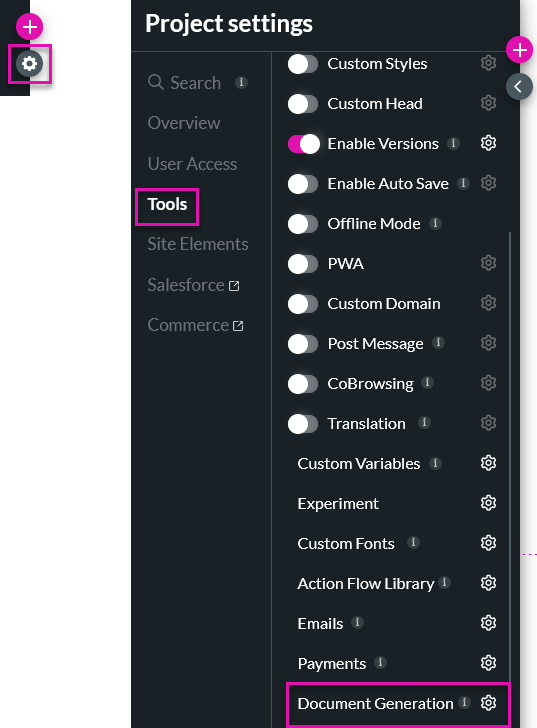
1. Click the Project Settings gear icon.
2. Select the Tools tab and click Document Generation.
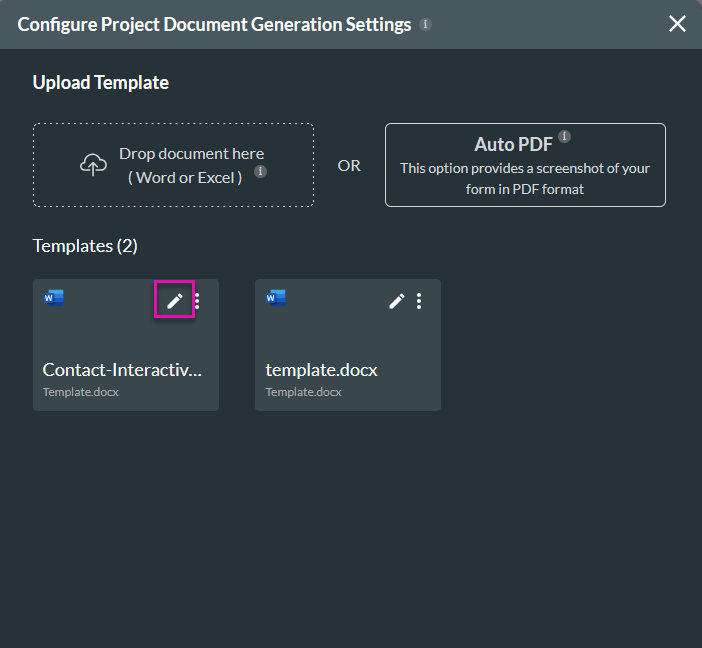
3. Click the Edit icon of the document.
4. Click Next.
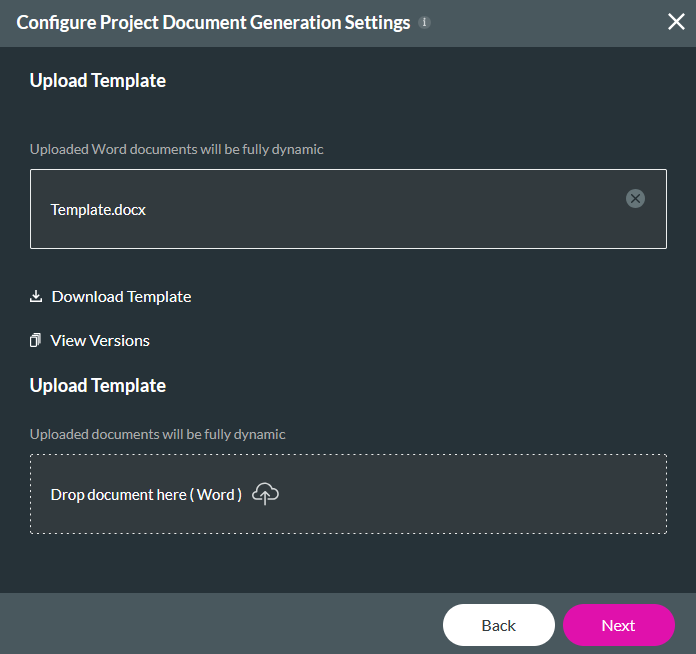
5. Click the Interactive tab under General, or click + Add Option and select the Interactive Option.
6. Switch the Enable Interactive toggle on.
There are a variety of interactive settings for your document:
2. Select the Tools tab and click Document Generation.

3. Click the Edit icon of the document.

4. Click Next.

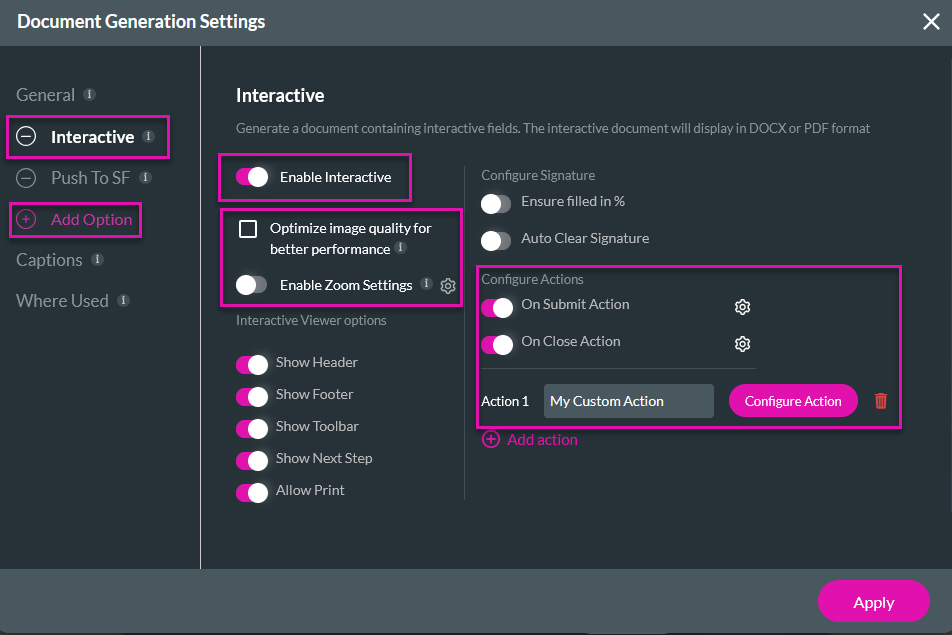
5. Click the Interactive tab under General, or click + Add Option and select the Interactive Option.
6. Switch the Enable Interactive toggle on.
There are a variety of interactive settings for your document:
- Enable Zoom.
- Optimize image quality to compress images.
- You can choose to show a variety of navigation and toolbar menus.
- Configure actions to trigger when the document is closed or submitted, or if a custom button is clicked. For example, when users click a button, they are redirected to another page.
04 Invoking the Document
To invoke the document generation, you must configure a button that generates the document. Click here for information on how to complete these steps.
When the user clicks the button, the document is generated. The user can then complete the interactive elements on the form.
When the user clicks the button, the document is generated. The user can then complete the interactive elements on the form.