Prefill Email Fields (6 min)
Completion requirements
01 Getting Started
This tutorial covers setting a default value for the email function in the Document Generation window. When you use the email option to send your document, you must manually fill out all the fields. You can set default values to make the email process more convenient.
02 Configure Email Fields
1. Navigate to your Titan Docs project.
2. In the Form Settings menu, expand the Document Generation dropdown. As this is a Word document, we will use the options in the Word mapping dropdown.
3. Click the Configure button. The Word mapping window opens.
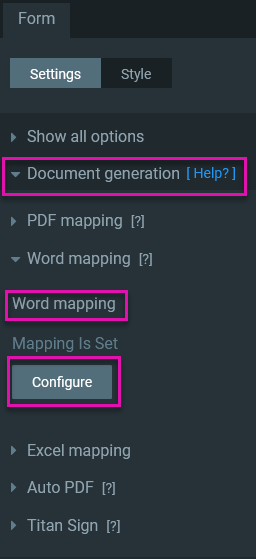
4. Expand the Salesforce Button dropdown and click Configure. The Salesforce Button window opens.
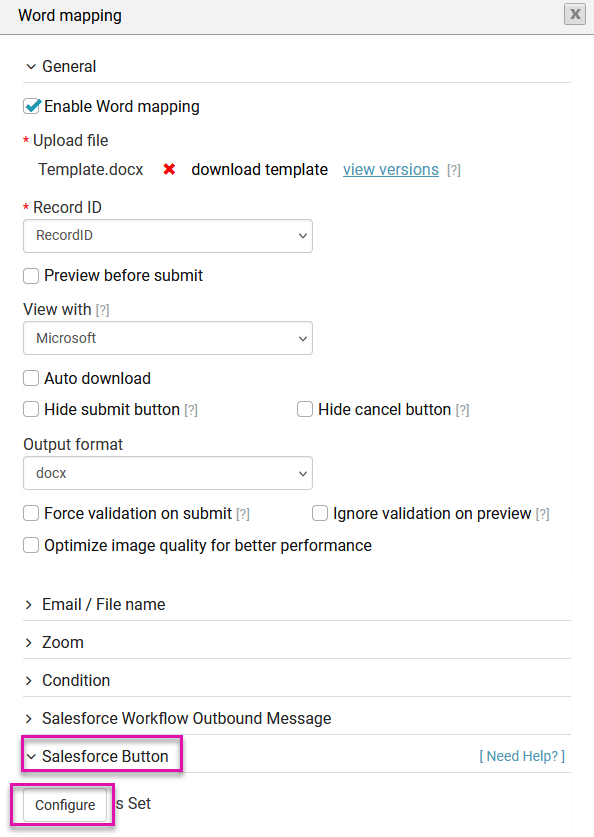
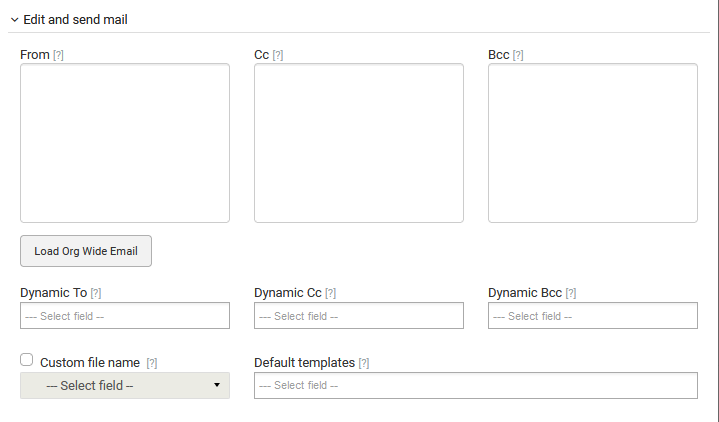
5. Expand the Edit and Send Mail dropdown.
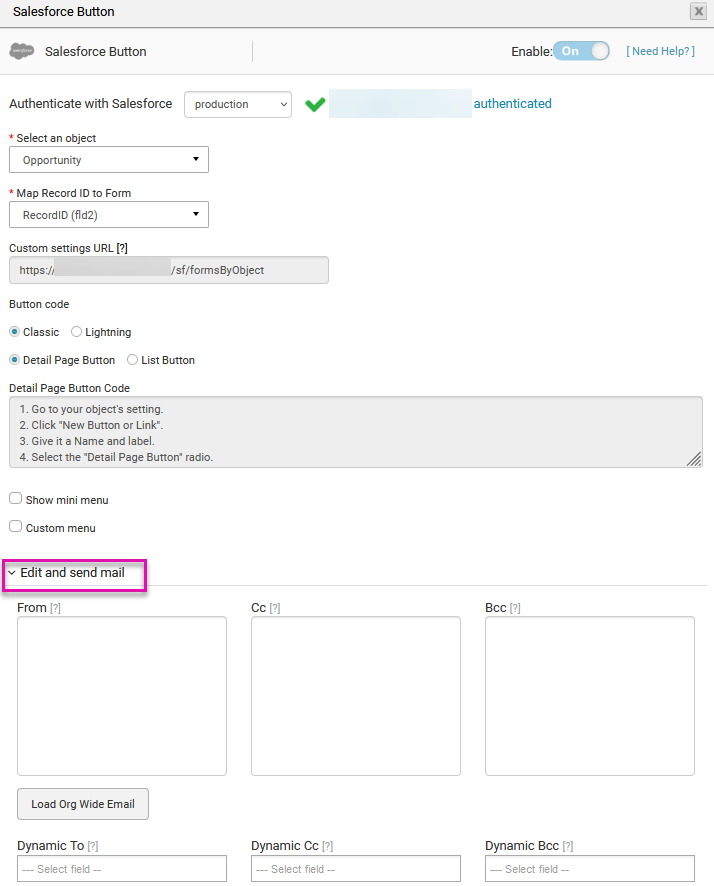
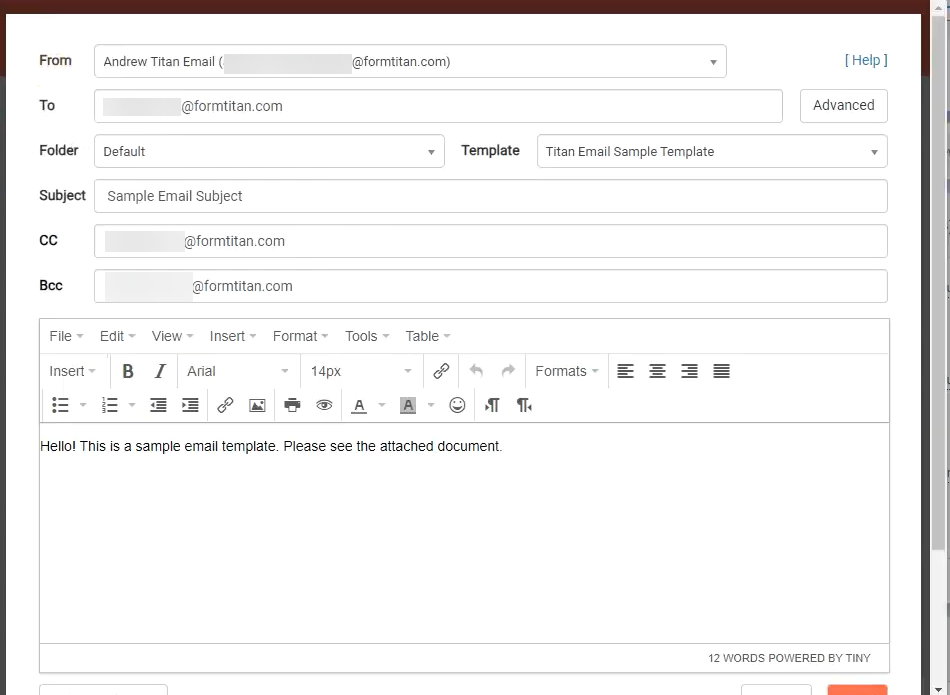
There are a variety of options you can choose from when configuring your email settings:
When you click the email icon in the Document Generation window, the email window will open with your preconfigured fields.
2. In the Form Settings menu, expand the Document Generation dropdown. As this is a Word document, we will use the options in the Word mapping dropdown.
3. Click the Configure button. The Word mapping window opens.
4. Expand the Salesforce Button dropdown and click Configure. The Salesforce Button window opens.
5. Expand the Edit and Send Mail dropdown.
There are a variety of options you can choose from when configuring your email settings:
- Manually type in each email address.
- Choose from your organization-wide emails.
- Set dynamic email addresses using your Salesforce fields.
- Select a custom file name using a dynamic Salesforce field, then choose from several templates.
When you click the email icon in the Document Generation window, the email window will open with your preconfigured fields.