Configure Owner and Collaborators (9 min)
Completion requirements
01 Getting Started
This
lesson will describe ways to configure collaborators and assign owners
in the CLM tool. We will distinguish between defining the current
Salesforce user as the owner and defining the user using a query. We
will also examine how the tool allows you to add other users as
collaborators during the process.
But first, we will look at the differences between the document owner and the collaborator.
But first, we will look at the differences between the document owner and the collaborator.
02 Document Owner vs Collaborator
The document owner is the individual who is primarily responsible for the document. This person initiates the process and approves and rejects all edits and final changes before triggering the sign process.
The collaborator can edit and provide input on the document at different permission levels, such as for any changes or comments only.
There are various ways to configure the owner and collaborator within CLM. Currently, we collaborate online rather than using the Titan CLM add-on. Therefore, you can choose the current Salesforce user when configuring the owner. This means that the user who initiates or launches the process in Salesforce is the document owner by default.
Alternatively, you can assign the owner by adding collaborators and dictating responsibilities as follows:
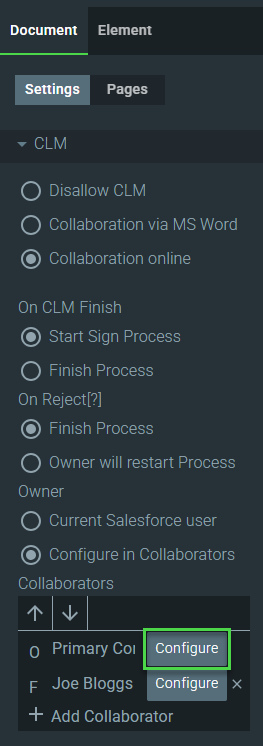
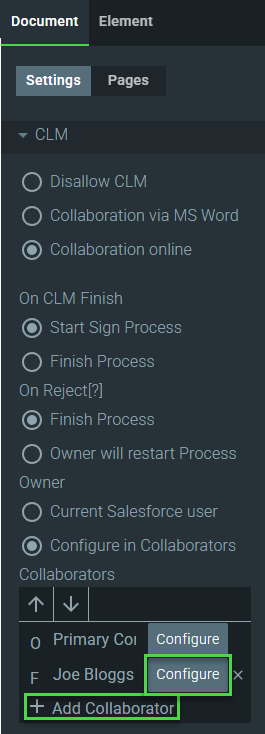
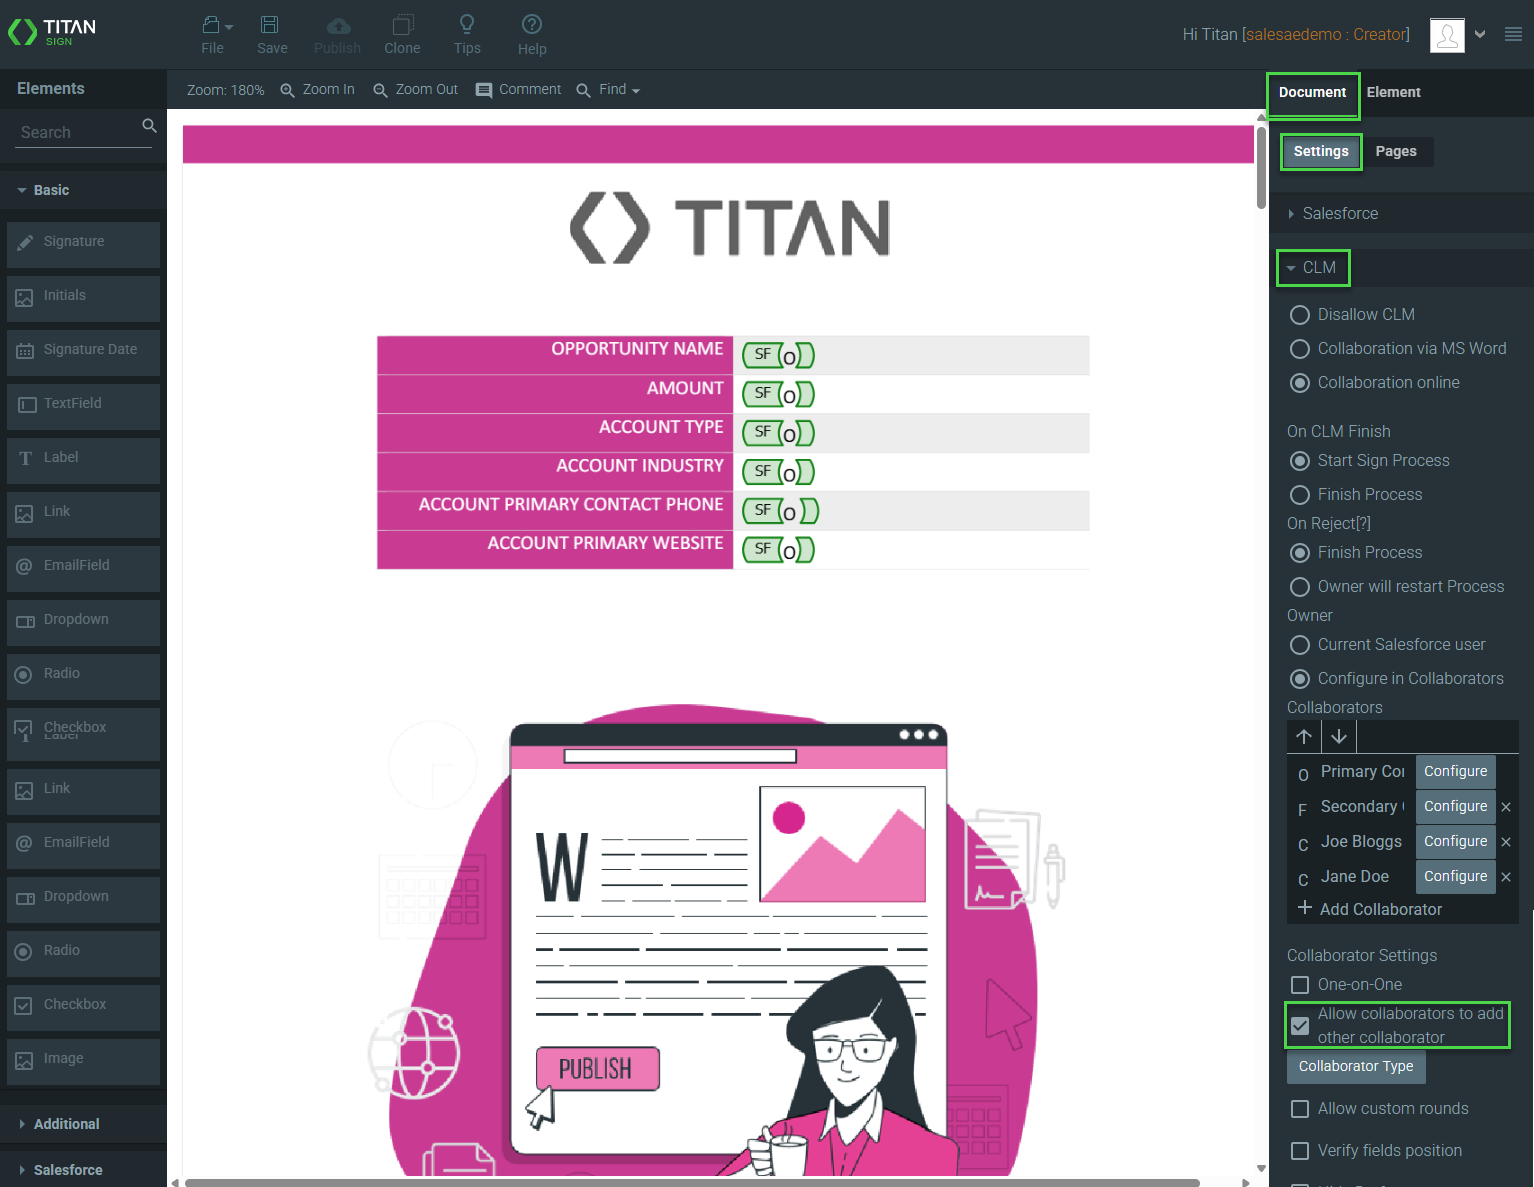
1. Click the Document option and then click the Settings button.
2. Expand the CLM list and click the Collaborator Type button. The Configure collaborators screen opens. By default, the primary contact is the document owner.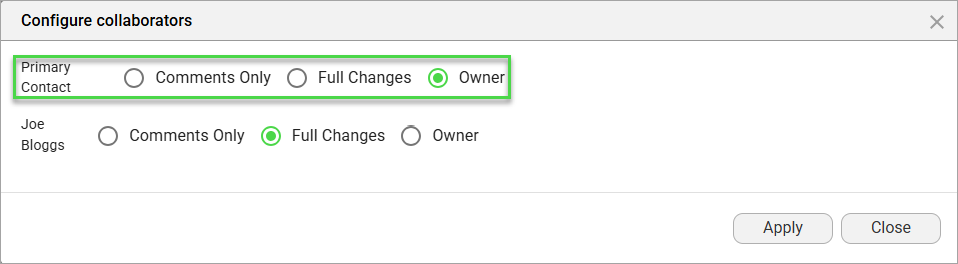
This can be changed by clicking the radio button next to Joe Bloggs.
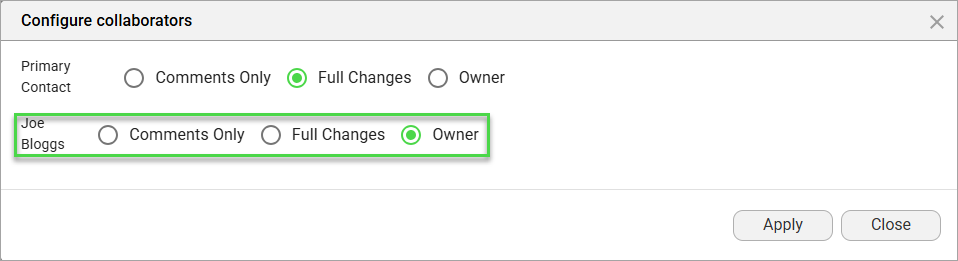
In this lesson, the owner will be the primary contact, and Joe Bloggs will be a collaborator with permission to make full changes.
The collaborator can edit and provide input on the document at different permission levels, such as for any changes or comments only.
There are various ways to configure the owner and collaborator within CLM. Currently, we collaborate online rather than using the Titan CLM add-on. Therefore, you can choose the current Salesforce user when configuring the owner. This means that the user who initiates or launches the process in Salesforce is the document owner by default.
Alternatively, you can assign the owner by adding collaborators and dictating responsibilities as follows:
1. Click the Document option and then click the Settings button.
2. Expand the CLM list and click the Collaborator Type button. The Configure collaborators screen opens. By default, the primary contact is the document owner.
This can be changed by clicking the radio button next to Joe Bloggs.
In this lesson, the owner will be the primary contact, and Joe Bloggs will be a collaborator with permission to make full changes.
03 Configuration for the Primary Contact
Do the configuration for the primary contact as follows:
1. Click the Configure button next to the primary contact’s name.
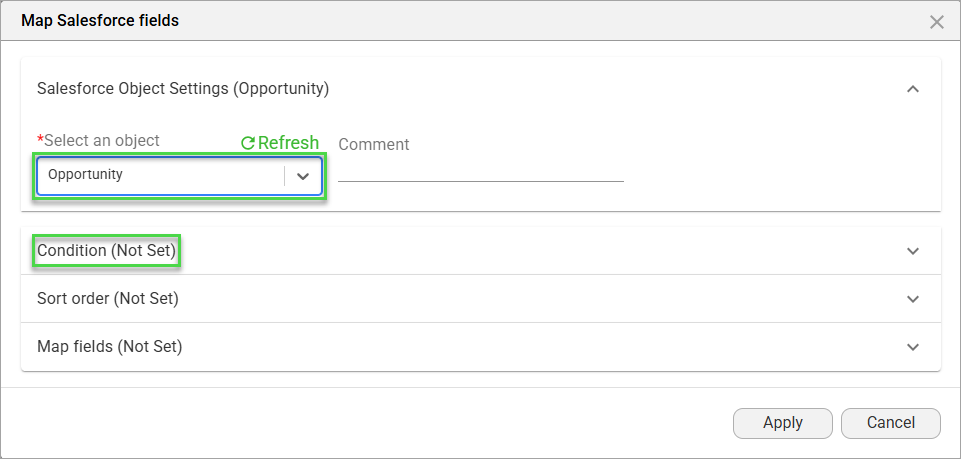
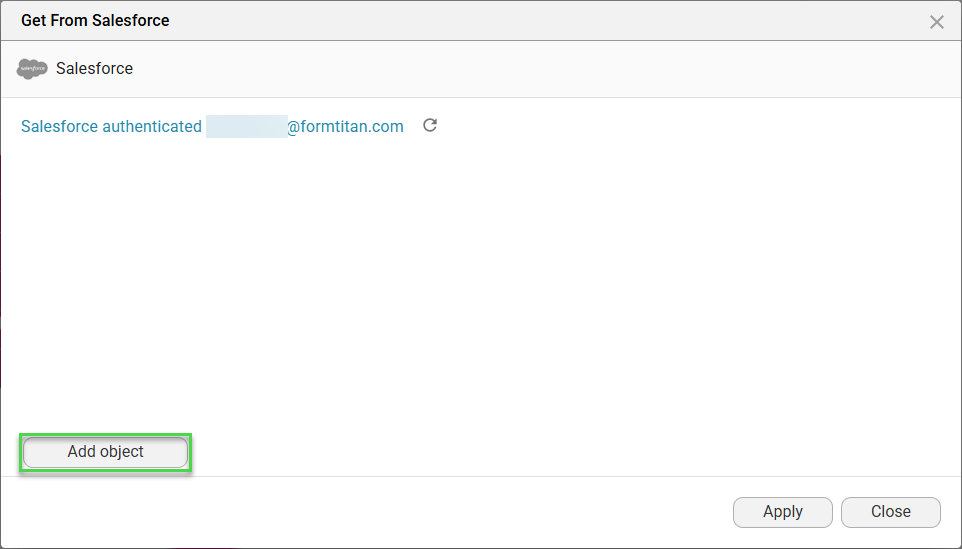
2. Click the Add object button.

3. Use the drop-down list to select the Salesforce object.
a. In this example, the Opportunity object was selected.
b. That is the object from which the data will be pulled into the document.
4. Click the Condition option.
5. Click the Set Conditions button.
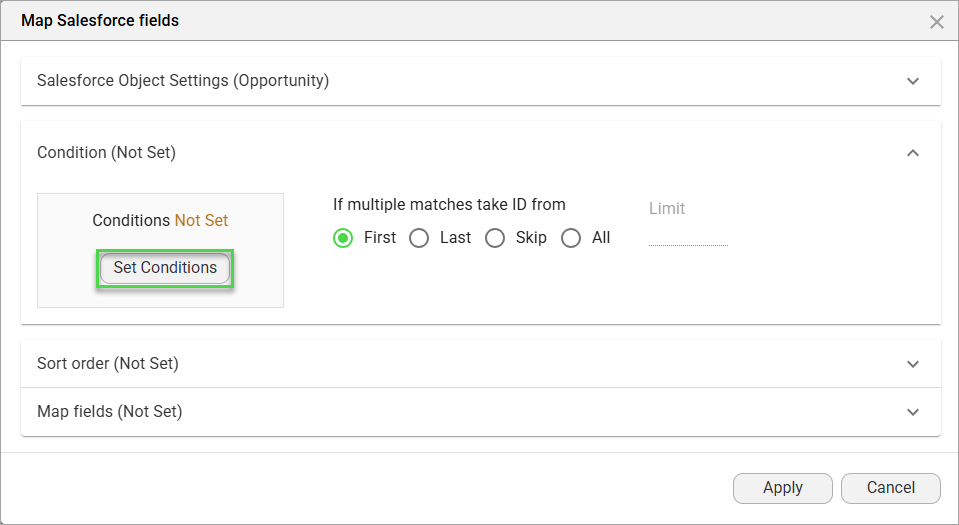
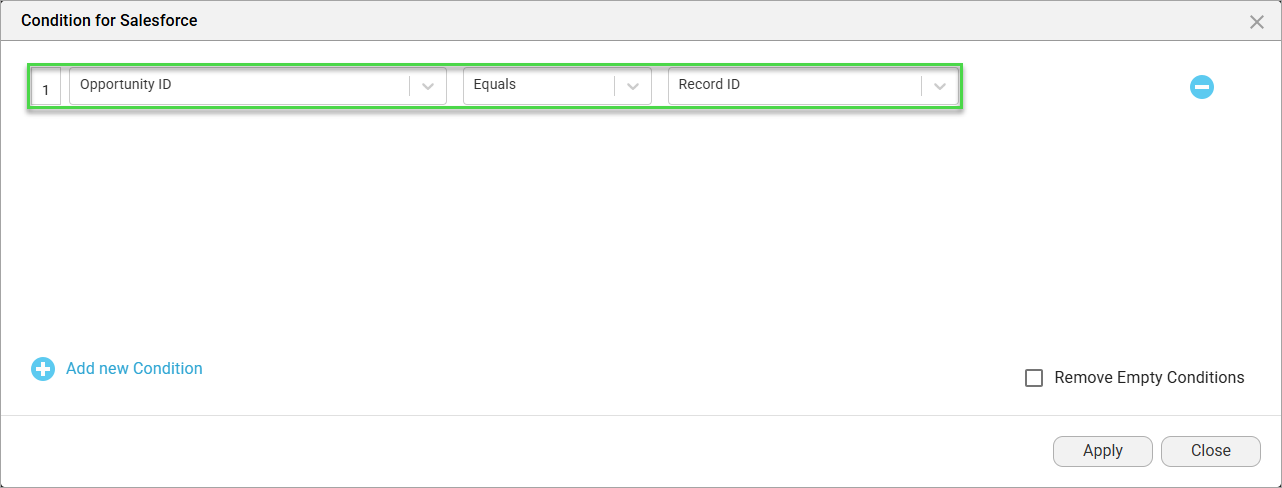
6. Configure the condition and click the Apply button.
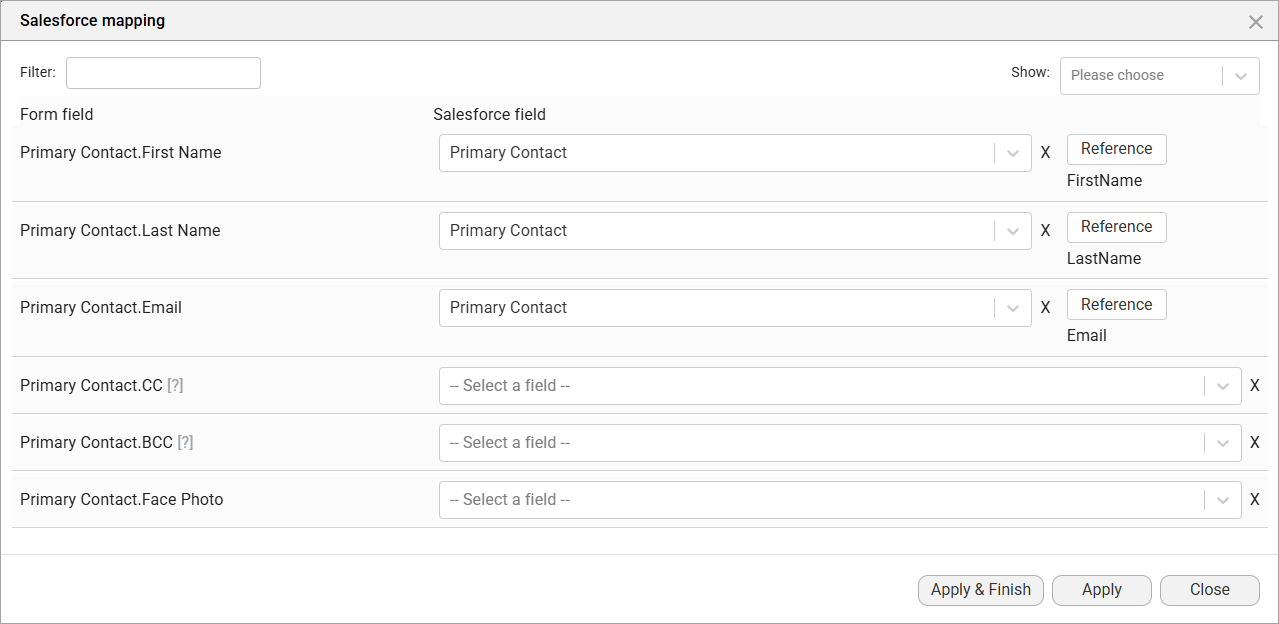
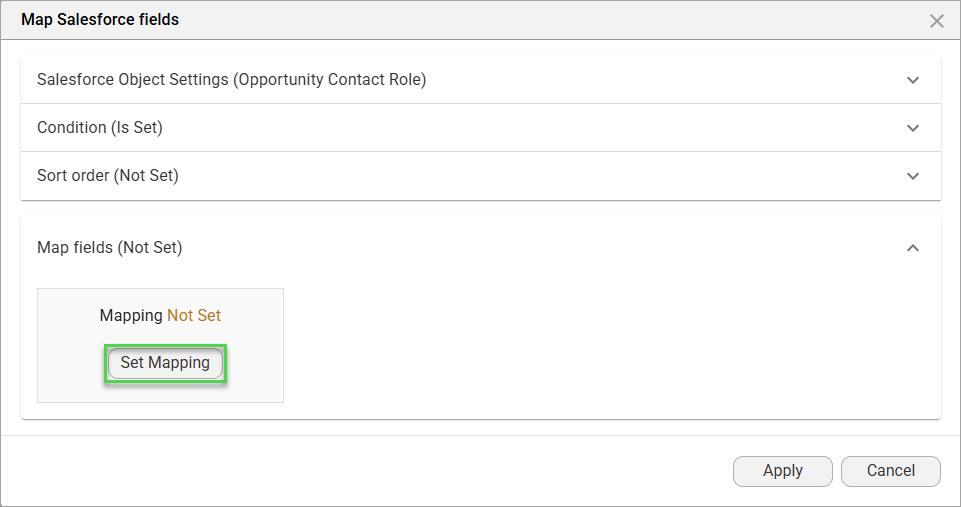
7. Click the Map fields option.
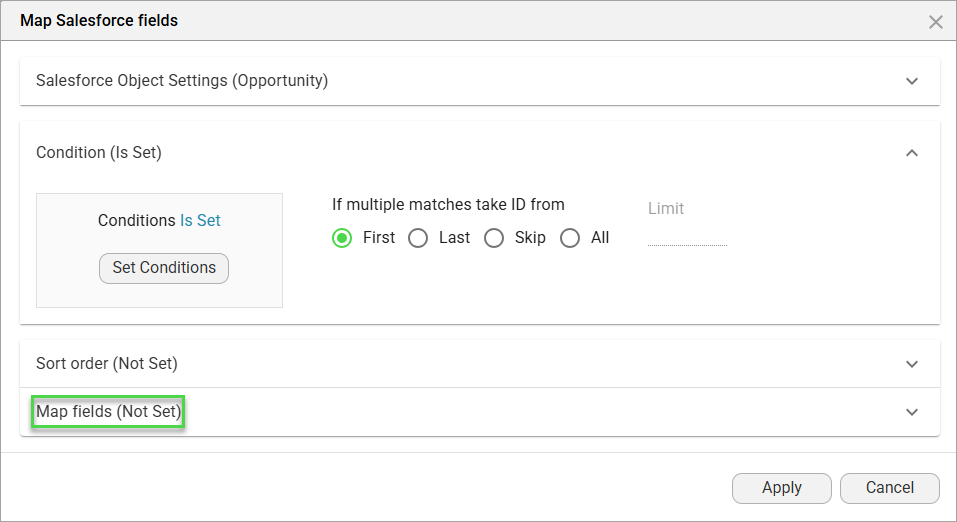
8. Click the Set Mapping button.
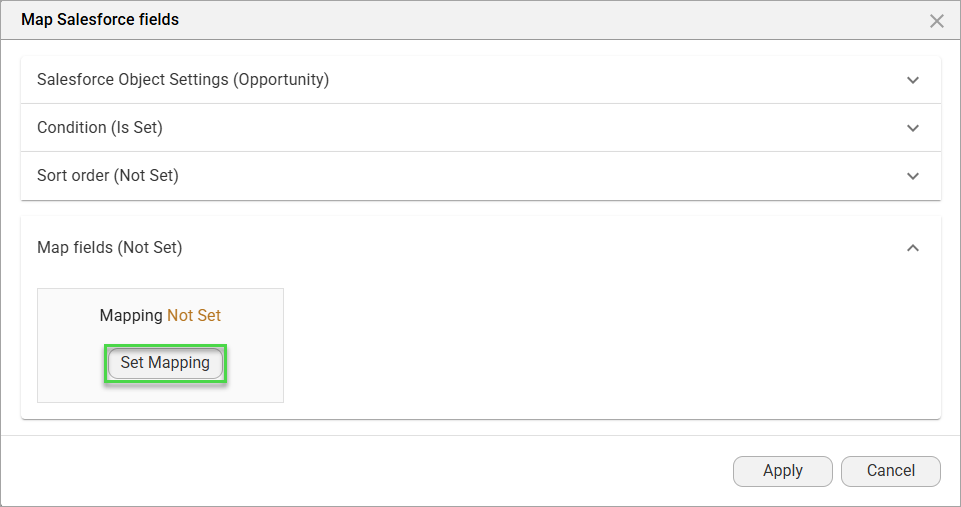
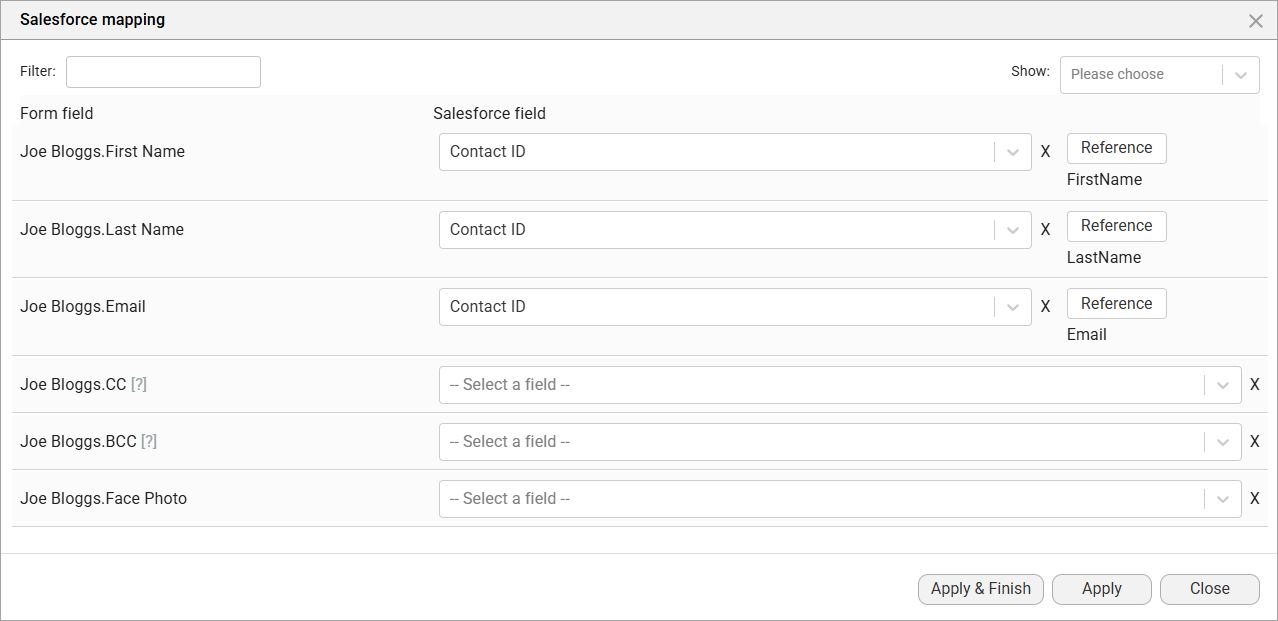
9. Use the drop-down lists to map the Form fields to the relevant Salesforce fields.
a. The first name, last name, and email address are mapped in this lesson.
b. Without an email address, the collaborator cannot access the document to make edits, as the link is sent via email.
10. Click the Apply & Finish button.
Remember to save the project.
1. Click the Configure button next to the primary contact’s name.
2. Click the Add object button.
3. Use the drop-down list to select the Salesforce object.
a. In this example, the Opportunity object was selected.
b. That is the object from which the data will be pulled into the document.
4. Click the Condition option.
5. Click the Set Conditions button.
6. Configure the condition and click the Apply button.
7. Click the Map fields option.
8. Click the Set Mapping button.
9. Use the drop-down lists to map the Form fields to the relevant Salesforce fields.
a. The first name, last name, and email address are mapped in this lesson.
b. Without an email address, the collaborator cannot access the document to make edits, as the link is sent via email.
10. Click the Apply & Finish button.
Remember to save the project.
04 Add Collaborators using a Query
A listed contact will be configured as a collaborator based on their standard industry role.
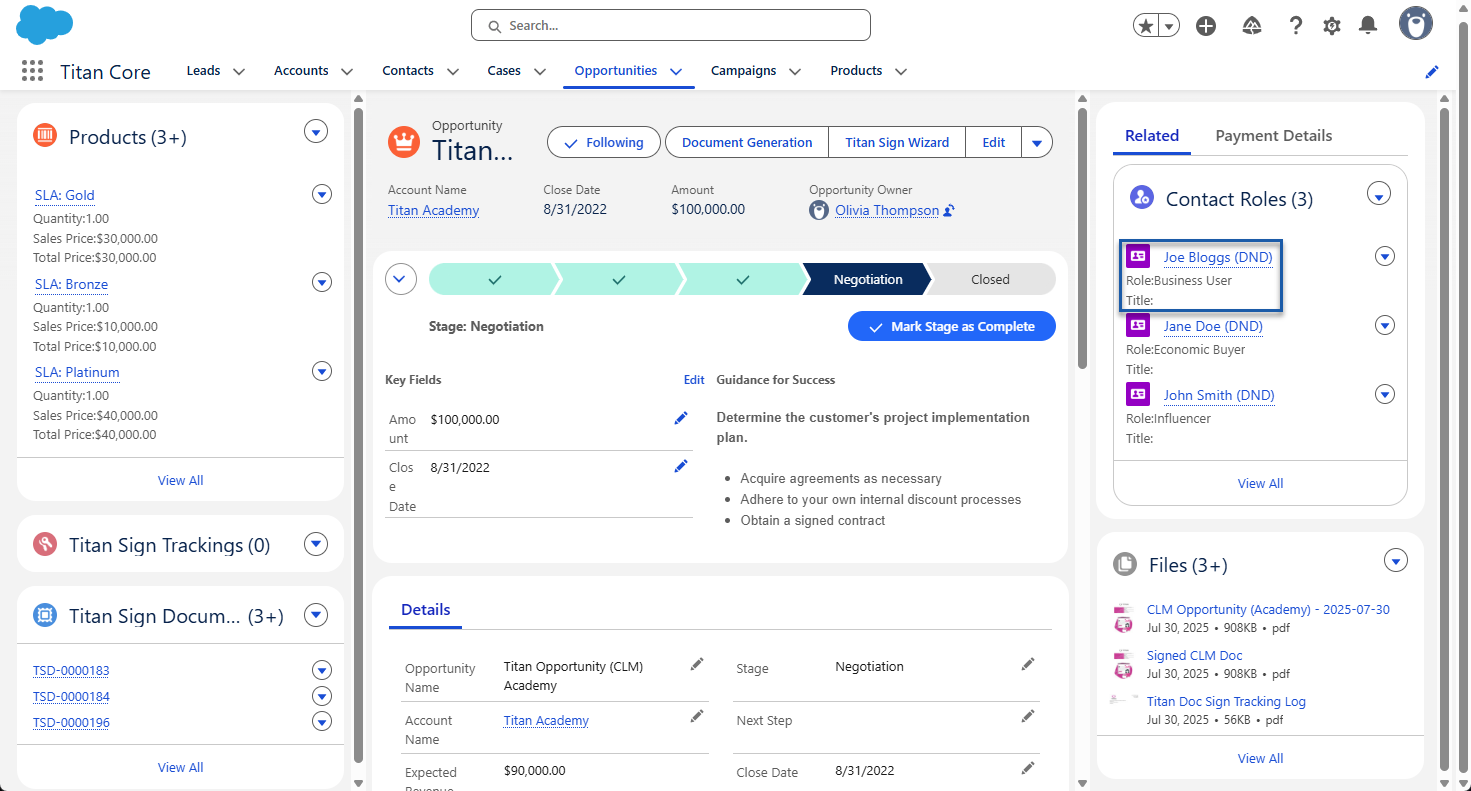
1. Browse to Salesforce and open the Opportunity record.
a. You will see the contact roles.
b. Joe Bloggs will be added as a collaborator in this lesson.
2. In Titan CLM, click the Add Collaboration option.
3. Type the name of the collaborator and click the Configure button.
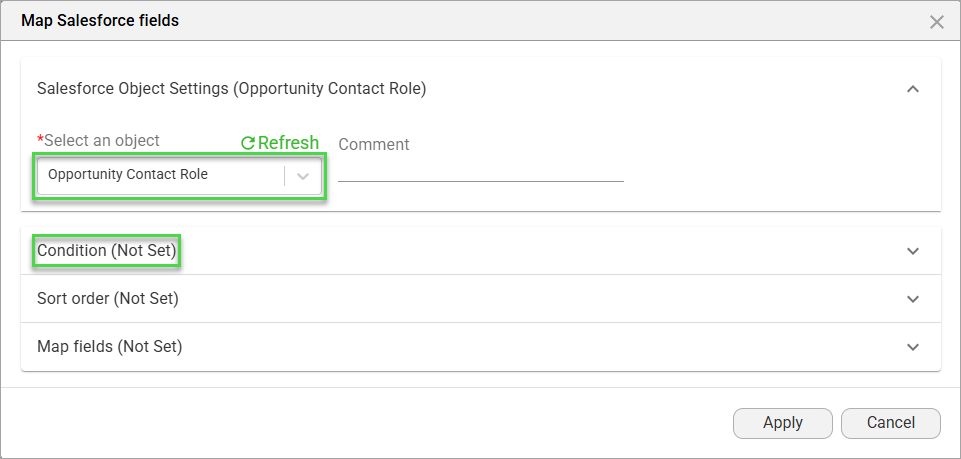
4. Click the Add object button.
5. Use the drop-down list to select the Salesforce contact object.
a. In this example, the Opportunity Contact Role object was selected.
b. That is the object from which the data will be pulled into the document.
6. Click the Condition option.
7. Click the Set Conditions button.
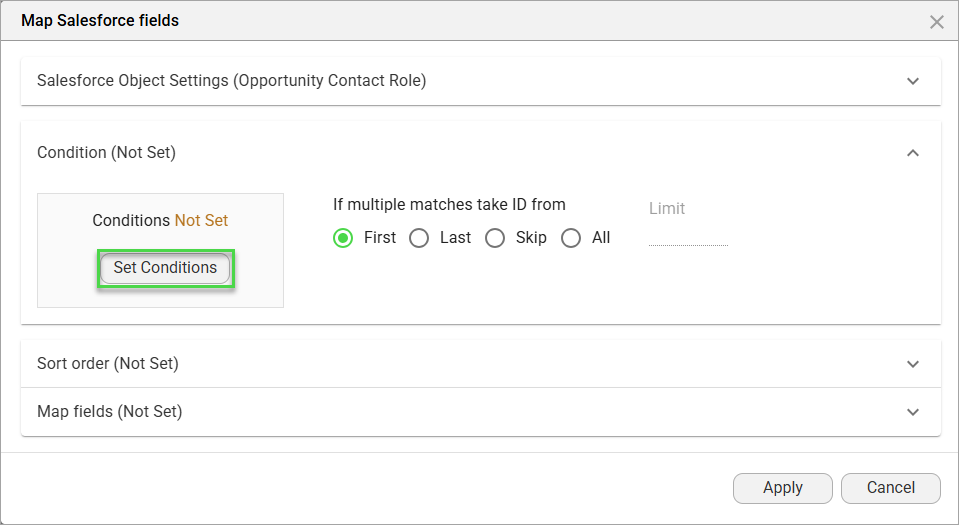
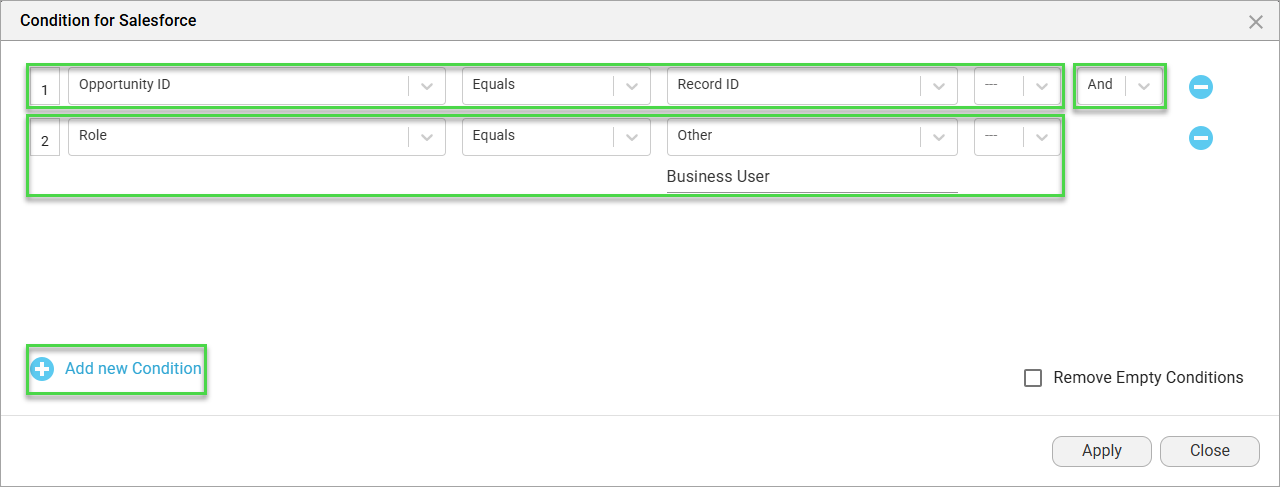
8. Configure the condition to narrow the query.
a. Click the Add new option.
b. Use the drop-down list to select the AND operator.
c. Add a second condition where the Role Equals Other - Business User.
9. Click the Apply button.
10. Click the Map fields option.
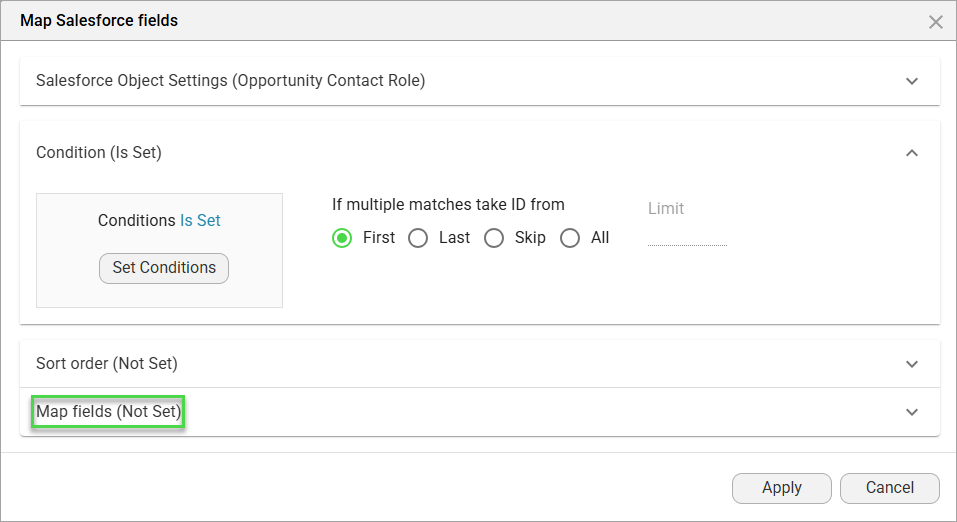
11. Click the Set Mapping button.
12. Map the Form fields to the relevant Salesforce fields.
13. Click the Apply & Finish button.
Remember to save the project.
1. Browse to Salesforce and open the Opportunity record.
a. You will see the contact roles.
b. Joe Bloggs will be added as a collaborator in this lesson.
2. In Titan CLM, click the Add Collaboration option.
3. Type the name of the collaborator and click the Configure button.
4. Click the Add object button.
5. Use the drop-down list to select the Salesforce contact object.
a. In this example, the Opportunity Contact Role object was selected.
b. That is the object from which the data will be pulled into the document.
6. Click the Condition option.
7. Click the Set Conditions button.
8. Configure the condition to narrow the query.
a. Click the Add new option.
b. Use the drop-down list to select the AND operator.
c. Add a second condition where the Role Equals Other - Business User.
9. Click the Apply button.
10. Click the Map fields option.
11. Click the Set Mapping button.
12. Map the Form fields to the relevant Salesforce fields.
13. Click the Apply & Finish button.
Remember to save the project.
05 Use the CLM Interface to add Collaborators
The CLM interface opens when the collaborator opens the document using the link in the email. Configured collaborators can use this interface to add other collaborators. Parties who work on a project can add others who may not have been configured initially to be part of the collaboration process. This reduces unnecessary revisions later and speeds up the approval process.
1. In Titan CLM, check the Allow collaborators to add other collaborators checkbox.
2. On the CLM document interface, click the Add user option. The Add User screen opens.

3. Click the Add button.
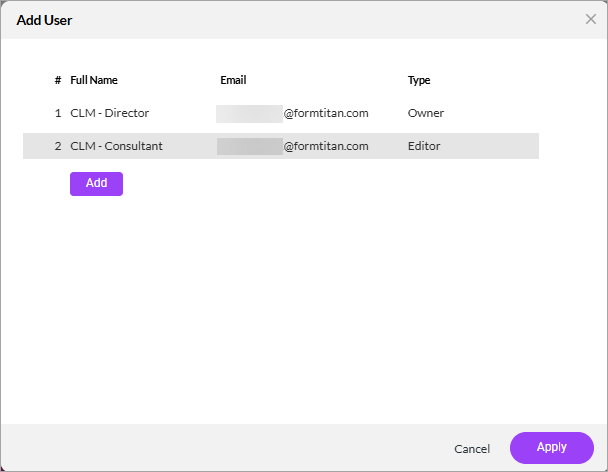
4. Type the first name, last name, and email address in the fields.
5. Use the drop-down list to select an option:
a. Editor
b. Comments Only
6. Click the Apply button.

The collaborator is added to the review process.
1. In Titan CLM, check the Allow collaborators to add other collaborators checkbox.
2. On the CLM document interface, click the Add user option. The Add User screen opens.
3. Click the Add button.
4. Type the first name, last name, and email address in the fields.
5. Use the drop-down list to select an option:
a. Editor
b. Comments Only
6. Click the Apply button.
The collaborator is added to the review process.