CLM Emails (7 min)
Completion requirements
01 Getting Started
CLM includes built-in email notifications that help you keep collaborators updated at every stage of the contract process. You can send these notifications from Titan or from Salesforce, depending on your workflow. Titan gives you complete control to customize the email content. Salesforce gives you the option to use classic email alerts triggered by flows.
02 Enable and Customize CLM Emails in Titan
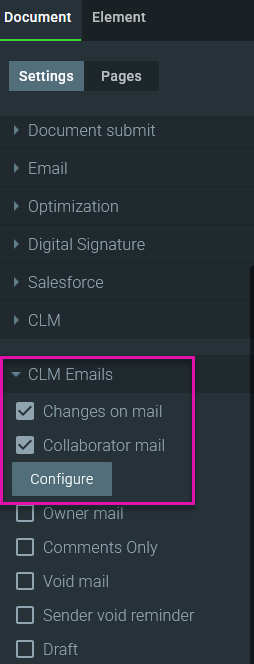
1. Open your CLM project and go to Settings.
2. Select the CLM Emails tab.
3. Enable Changes on Mail to send notifications when updates are made to the project.
4. Toggle "Collaborator Mail" to reveal the "Configure" option.
5. Select Configure to open the email editor.
Note: The same process applies to owner and comments only mail.
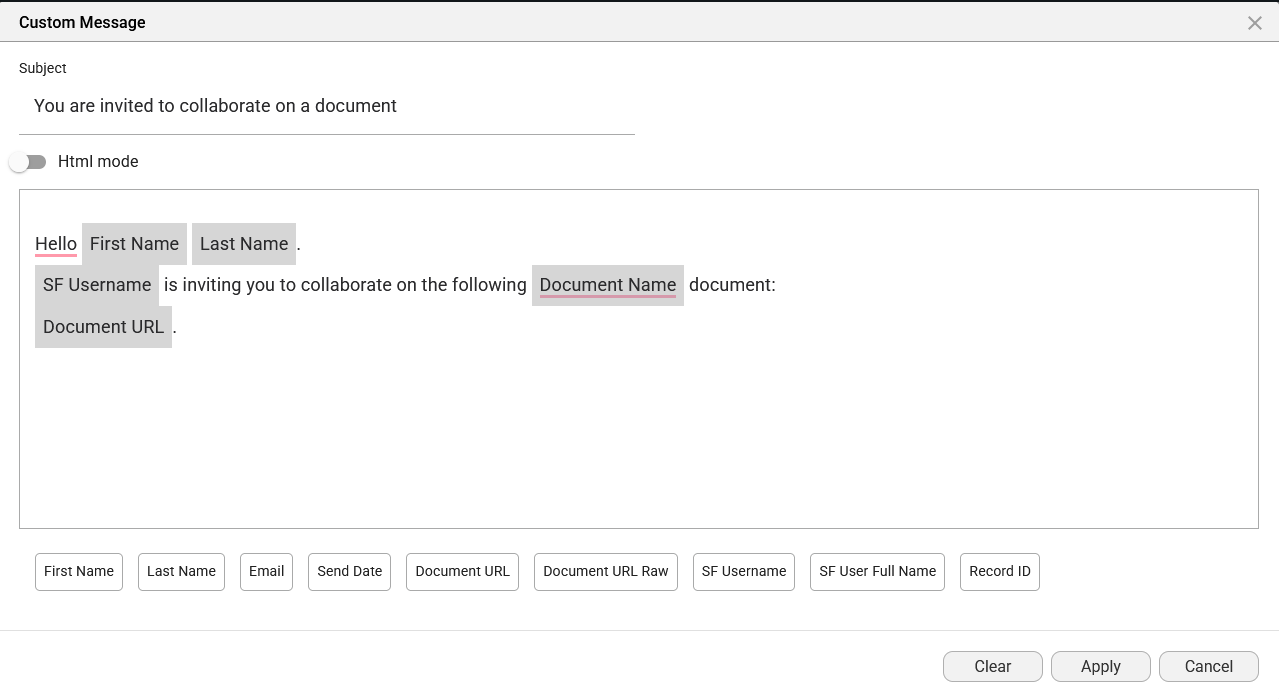
6. Customize the subject and body as needed. For example, update the subject to match your project name, such as Titan Service Agreement.
7. Clean up fonts, spacing, and any Salesforce elements you have dragged into the template.
8. Select Apply and then Save.
2. Select the CLM Emails tab.
3. Enable Changes on Mail to send notifications when updates are made to the project.
4. Toggle "Collaborator Mail" to reveal the "Configure" option.
5. Select Configure to open the email editor.
Note: The same process applies to owner and comments only mail.
6. Customize the subject and body as needed. For example, update the subject to match your project name, such as Titan Service Agreement.
7. Clean up fonts, spacing, and any Salesforce elements you have dragged into the template.
8. Select Apply and then Save.
03 See It In Action
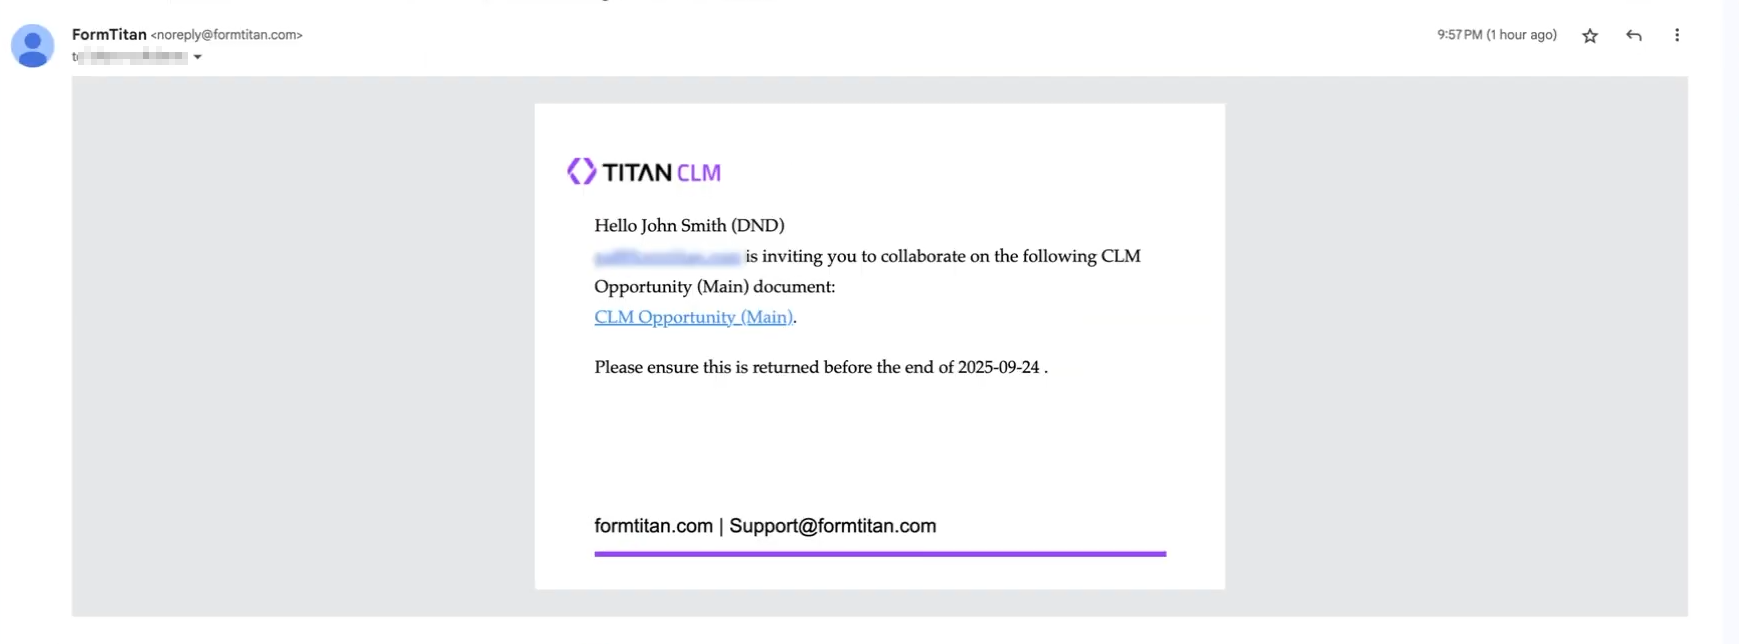
After saving your settings, start a CLM round to trigger the email. Your collaborator will receive the customized message you created. This confirms that Titan is sending notifications correctly and that your edited template is active.
04 Trigger Email Notifications from Salesforce
Titan can send the notifications by default, but you can also send them through Salesforce by creating a flow. This is useful when your team wants Salesforce-branded alerts or when all communication must follow internal Salesforce templates.
Before you start :
Before you start :
- Set up an Email Alert in Salesforce
- Create a classic letterhead to support the alert
- Ensure you have the required admin permissions for flow creation
05 Build the Salesforce Flow
1. In Setup, search for Flows.
2. Select New Flow.

3. Choose Record Triggered Flow.
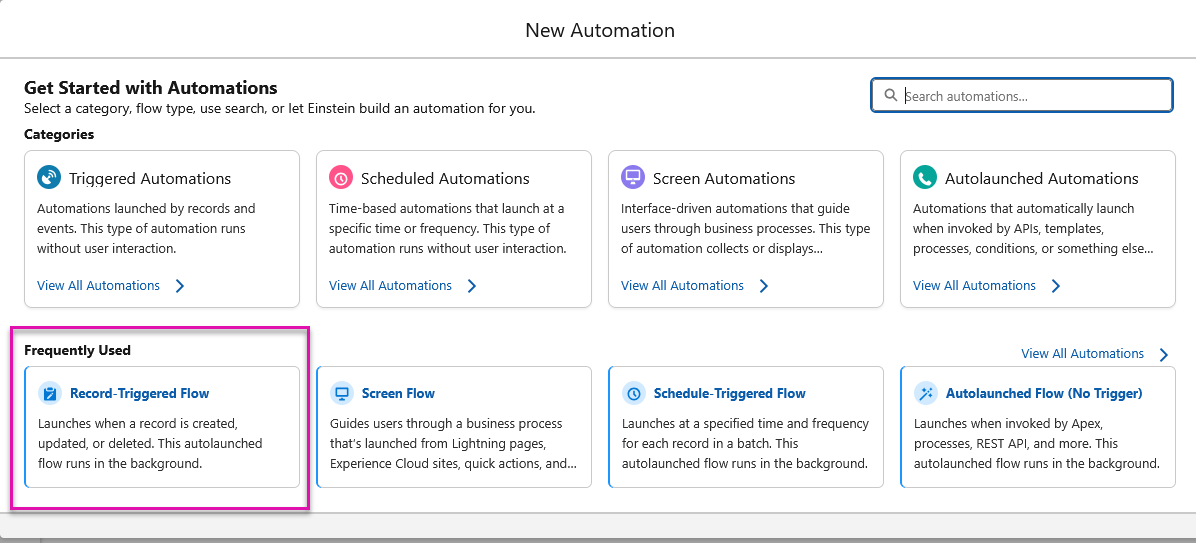
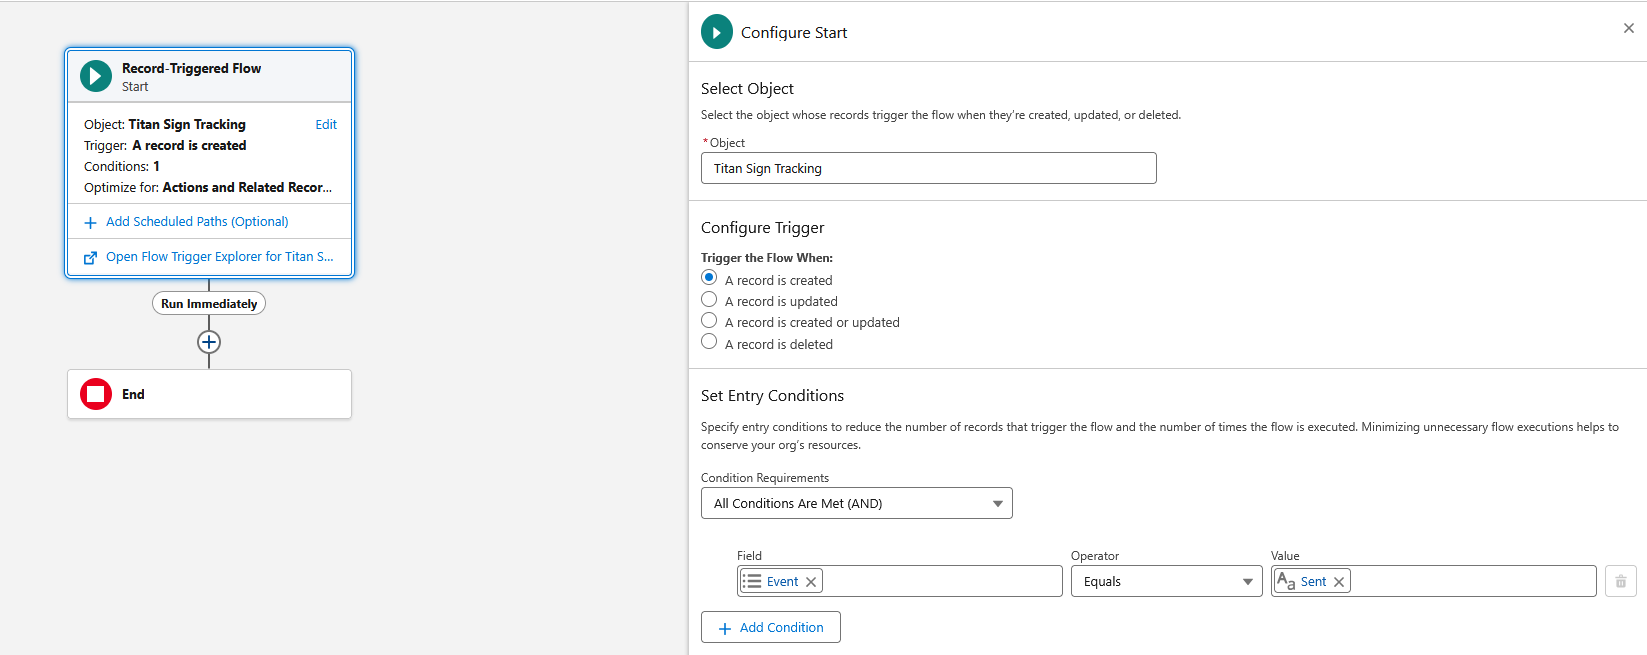
4. For the Object field, search for Titan Sign Tracking.
5. Set the trigger to run when a record is created.
6. Choose All Conditions Are Met.
7. Set the condition Event equals Sent.
Note: You can also trigger on Viewed, Signed, or Rejected, depending on your process.
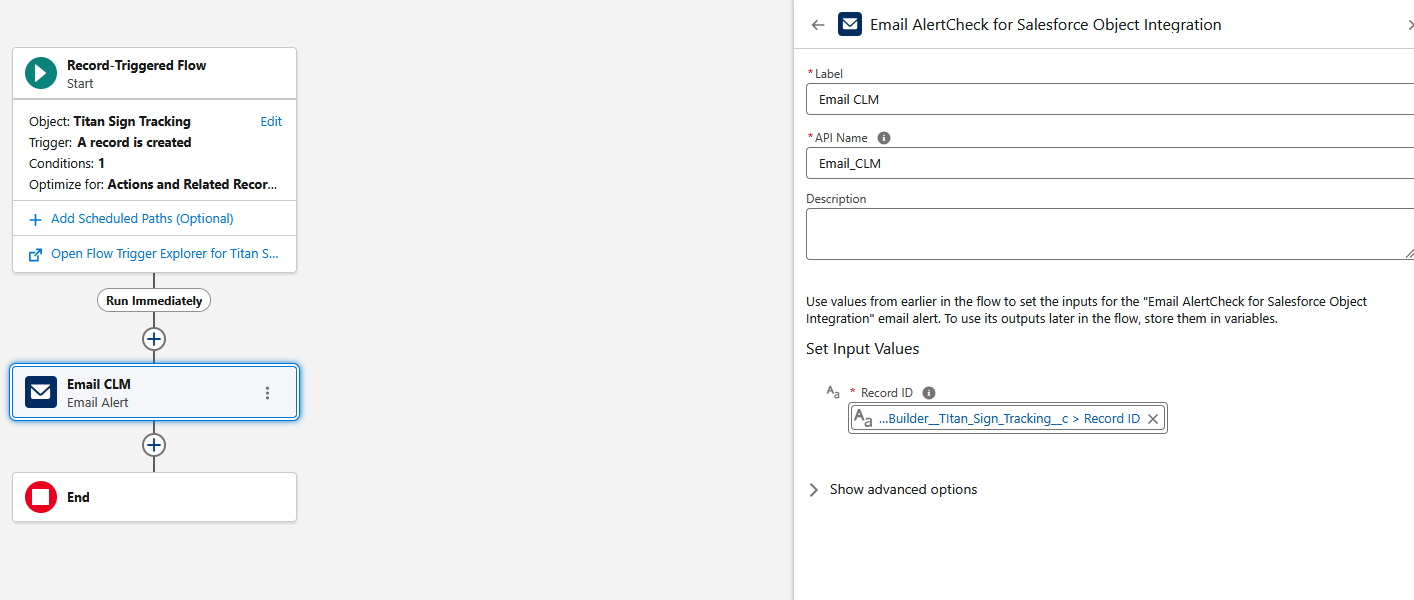
8. Add an Email Alert element and choose your prepared alert.
9. Set the Record ID input value to Titan Sign Tracking.
10. Save your flow and activate it.
2. Select New Flow.
3. Choose Record Triggered Flow.
4. For the Object field, search for Titan Sign Tracking.
5. Set the trigger to run when a record is created.
6. Choose All Conditions Are Met.
7. Set the condition Event equals Sent.
Note: You can also trigger on Viewed, Signed, or Rejected, depending on your process.
8. Add an Email Alert element and choose your prepared alert.
9. Set the Record ID input value to Titan Sign Tracking.
10. Save your flow and activate it.
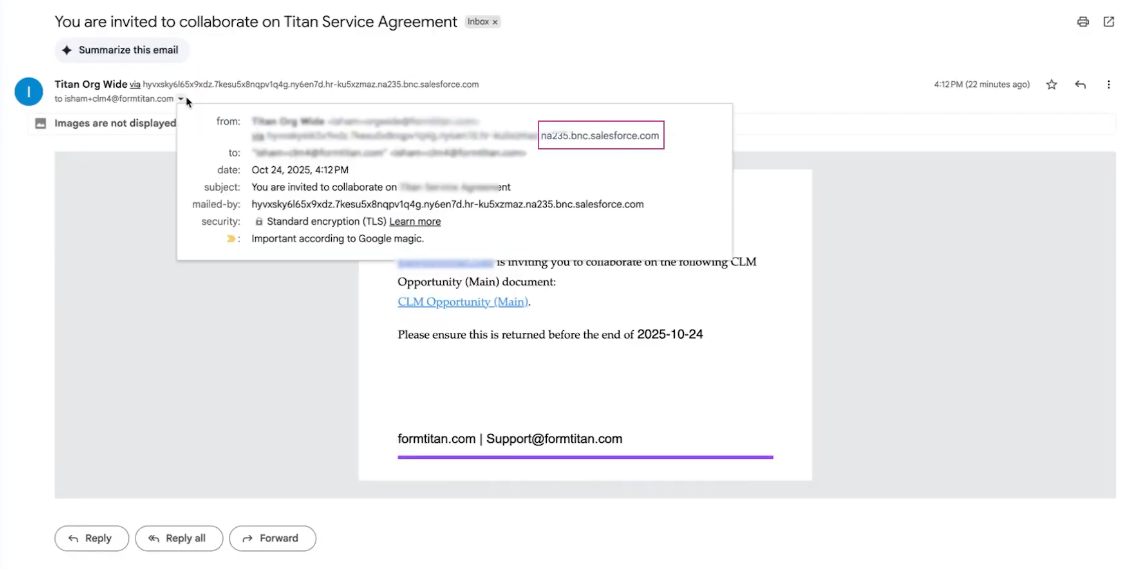
06 See It In Action
Trigger your CLM process again. This time, the notification will come from Salesforce. You can confirm this by checking the sender section of the email.
07 Summary
You can send CLM notification emails from two places.
- Titan for fast customization and template control.
- Salesforce for classic email alerts triggered by flows.