Edit Before CLM (8 min)
Completion requirements
01 Getting Started
You can edit a document before the CLM process begins. There are two ways to do this.
Both options let you make changes before the first collaborator receives the document.
- Edit the document from the Generate Document button inside Salesforce
- Edit the document from an instant URL created through a Salesforce flow
Both options let you make changes before the first collaborator receives the document.
02 Edit a Document from the Generate Document Button
1. Open your opportunity in Salesforce.
2. Select the Titan Generate Document button. The location may differ based on your layout.
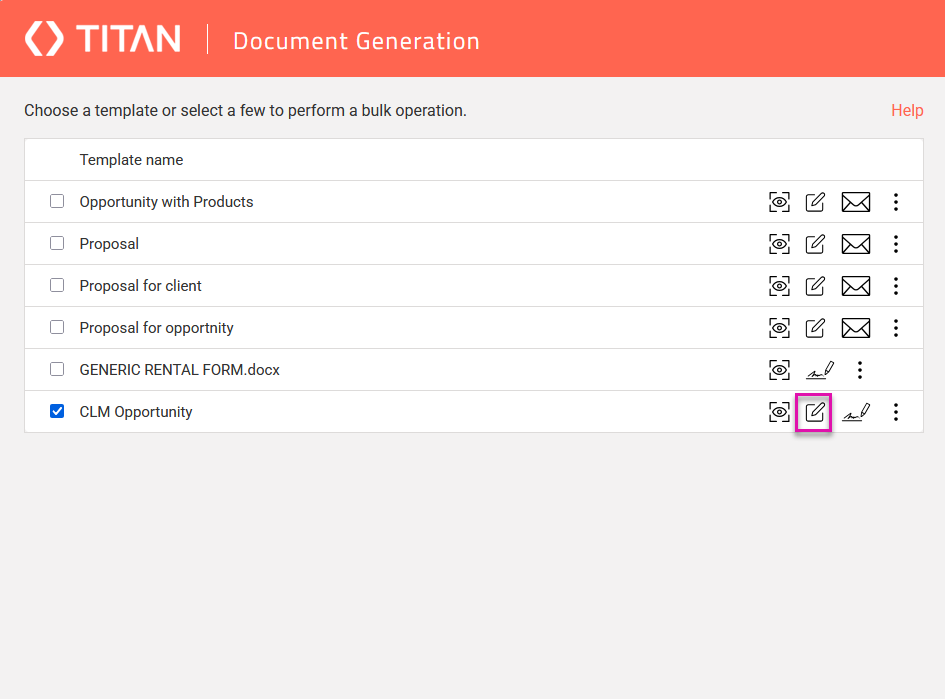
3. When the Titan modal opens, select your CLM template and click Edit.
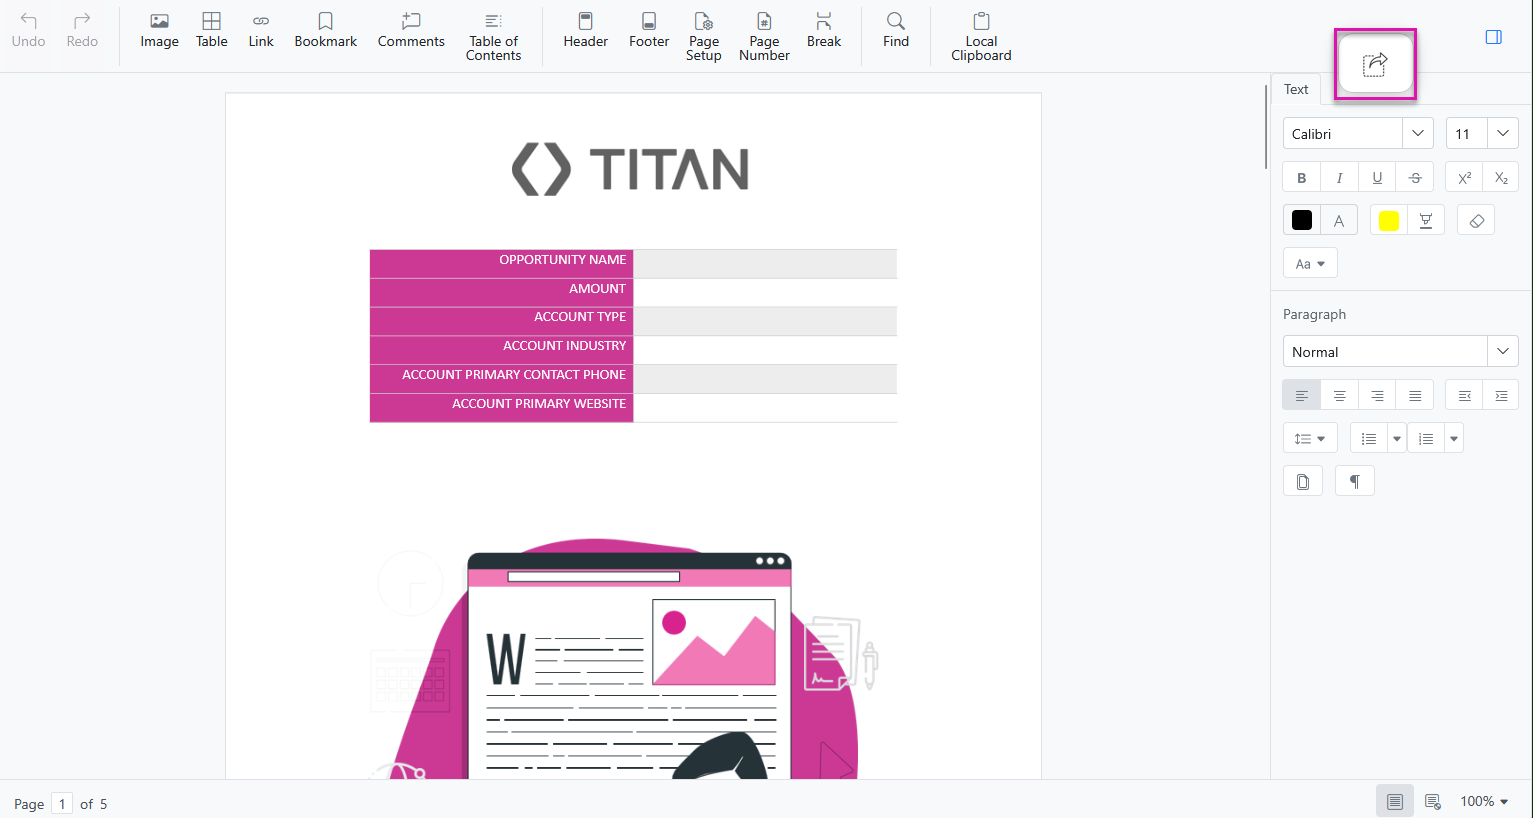
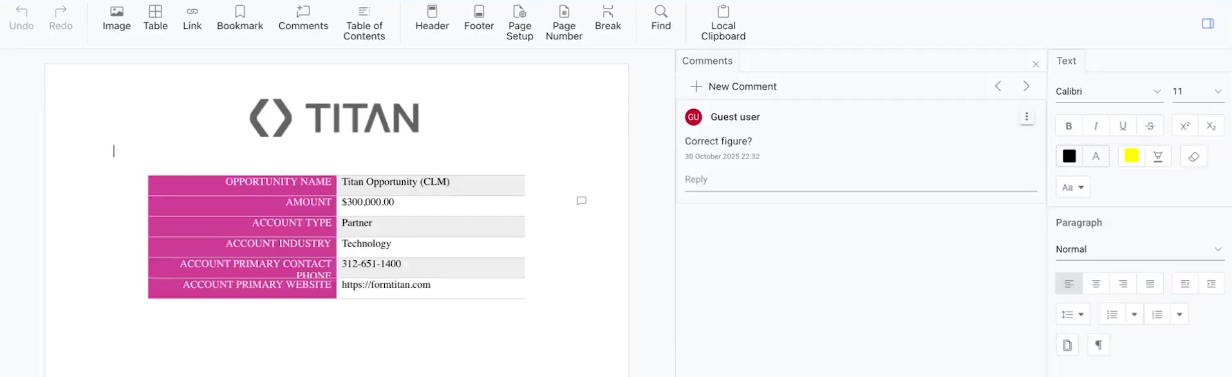
4. Use the Titan editor to update text or add comments. You can work with the toolbar on the top and the toolbar on the right.
Note: These edits apply only to the current document. The template itself is not changed.
5. Select the Send Confirm icon in the top right to deliver the edited document to the first collaborator.
2. Select the Titan Generate Document button. The location may differ based on your layout.
3. When the Titan modal opens, select your CLM template and click Edit.
4. Use the Titan editor to update text or add comments. You can work with the toolbar on the top and the toolbar on the right.
Note: These edits apply only to the current document. The template itself is not changed.
5. Select the Send Confirm icon in the top right to deliver the edited document to the first collaborator.
03 See It In Action
Your collaborator receives an email with a link to the updated document. Opening the link starts the CLM process. All changes are tracked as they move through the workflow.
04 Edit a Document with an Instant URL
An instant URL lets a user open the document in edit mode without navigating through Salesforce. This is helpful when you want users who do not work inside Salesforce to have fast access.
Before you start
Save your changes before building the flow.
Before you start
- Create a long text area field with at least 1024 characters to store the URL
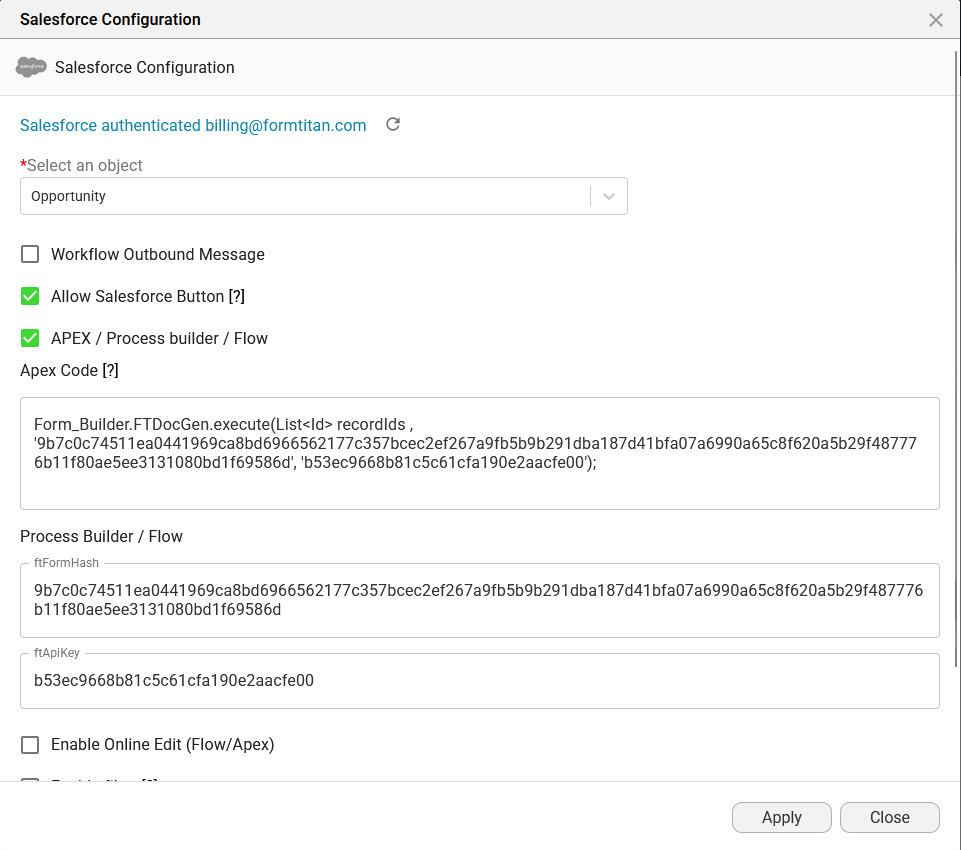
- In your Titan project, open Document Access and then Salesforce Configuration
- Select the option for Apex, Process Builder, or Flow
- Copy the FT Form Hash
Save your changes before building the flow.
05 Build the Salesforce Flow
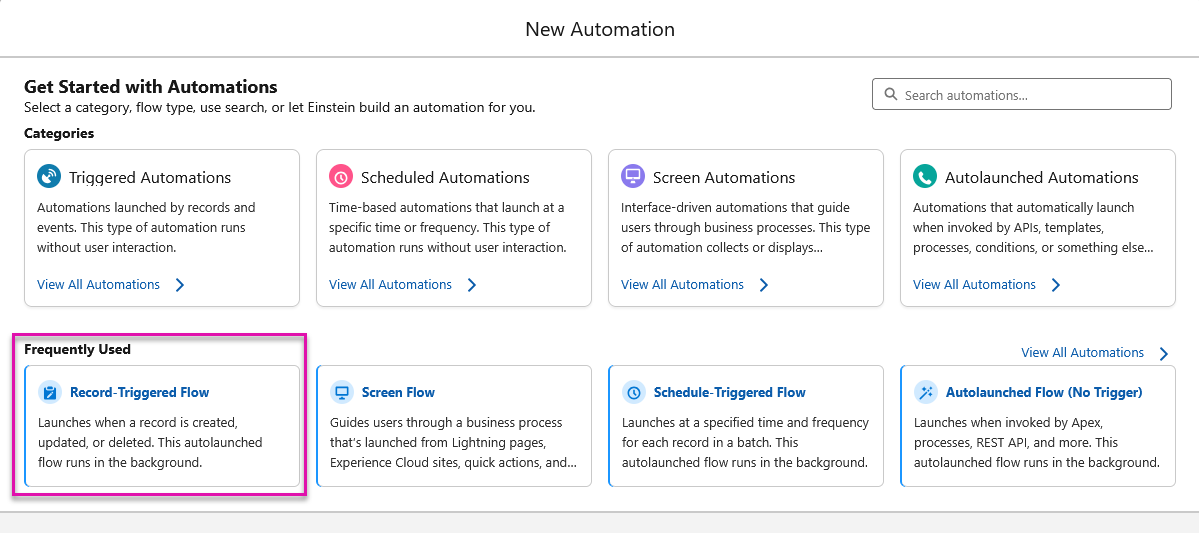
1. In Setup, search for Flows.
2. Select New Flow.

3. Choose Record Triggered Flow.
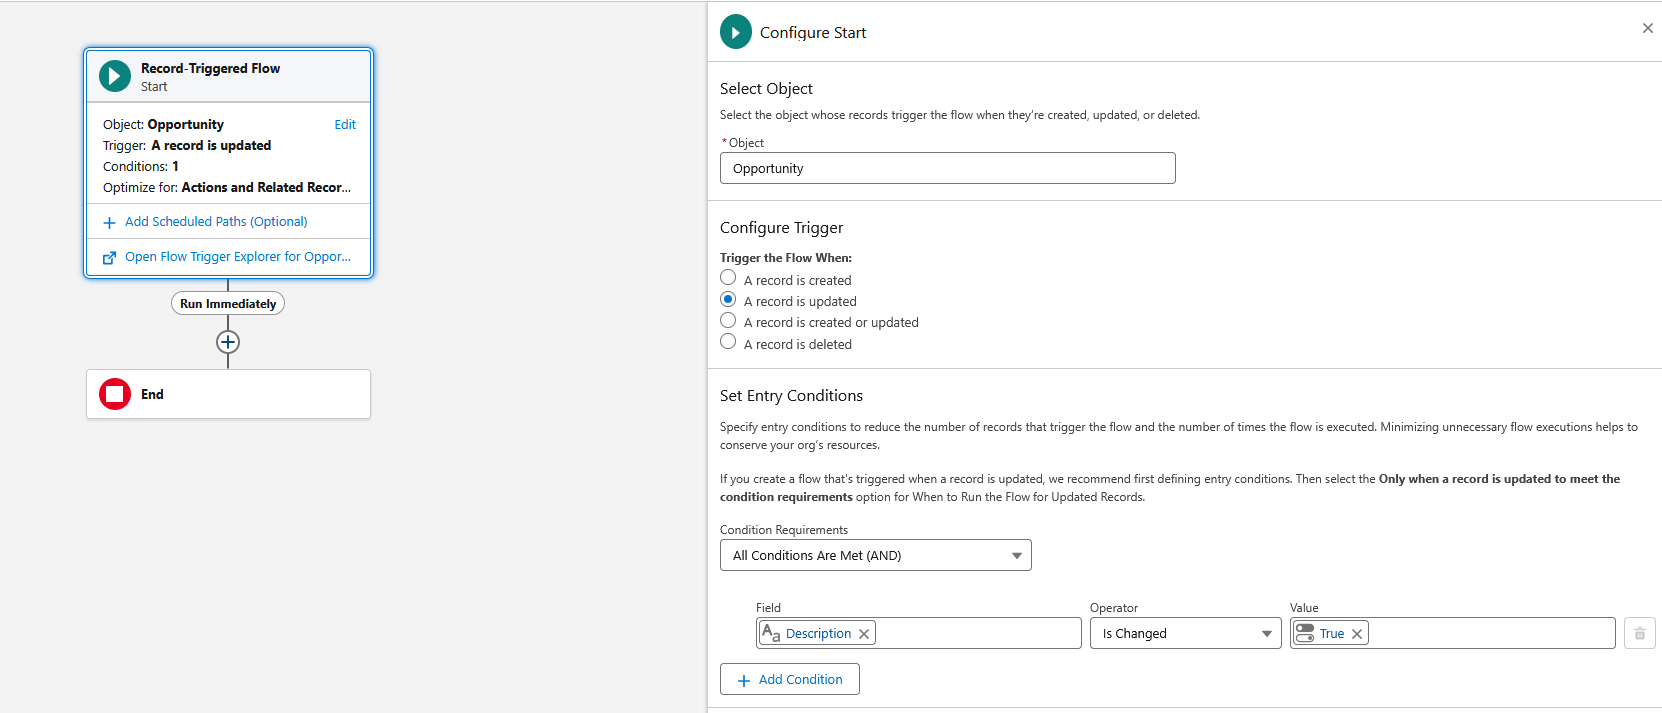
4. Set the object to Opportunity.
5. Set the trigger to run when a record is updated.
6. Choose All Conditions Are Met.
7. Select a field that will trigger the flow.
In this lesson, the Description field is used. Any update to this field runs the flow.
8. Add the Titan Sign Instant URL action.
9. Complete the required fields
2. Select New Flow.
3. Choose Record Triggered Flow.
4. Set the object to Opportunity.
5. Set the trigger to run when a record is updated.
6. Choose All Conditions Are Met.
7. Select a field that will trigger the flow.
In this lesson, the Description field is used. Any update to this field runs the flow.
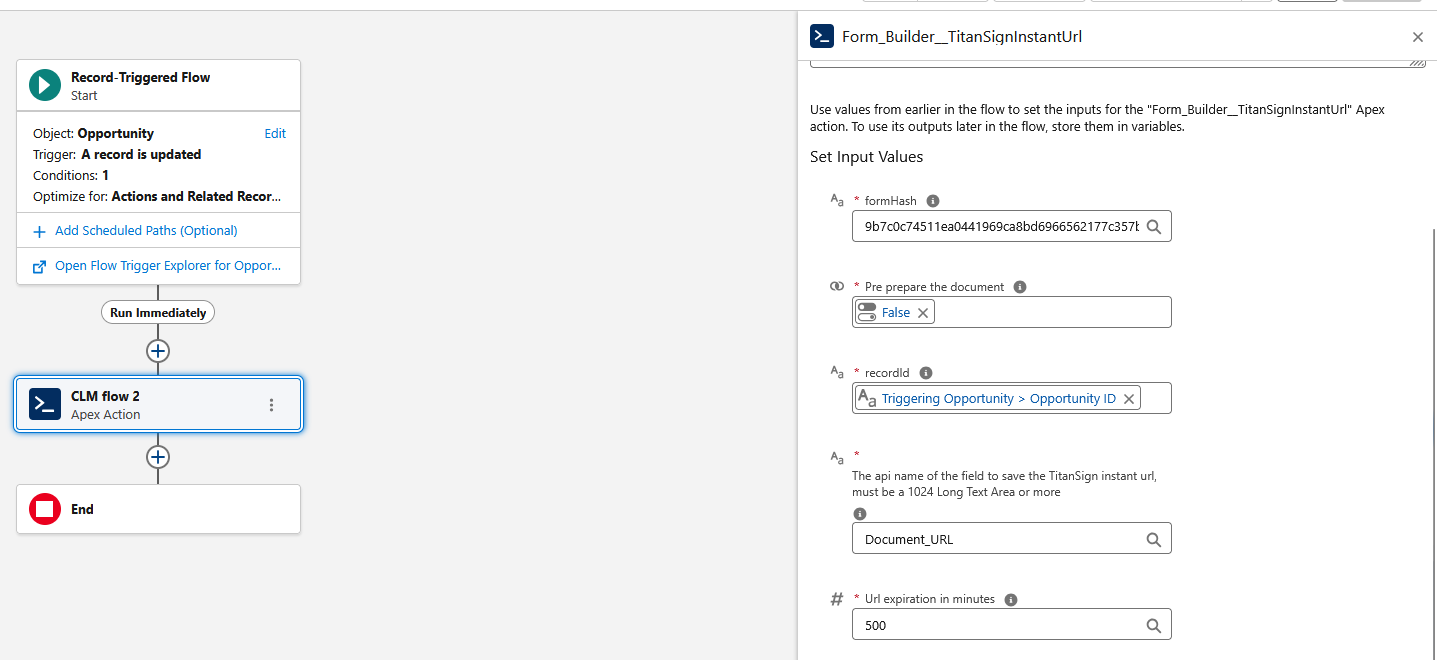
8. Add the Titan Sign Instant URL action.
9. Complete the required fields
- Label for the action
- FT Form Hash
- Pre prepare the document set to False
- Record ID set to Opportunity ID
- Field to store the URL set to your long text area field
- URL expiry time for example, five hundred minutes
06 See It In Action
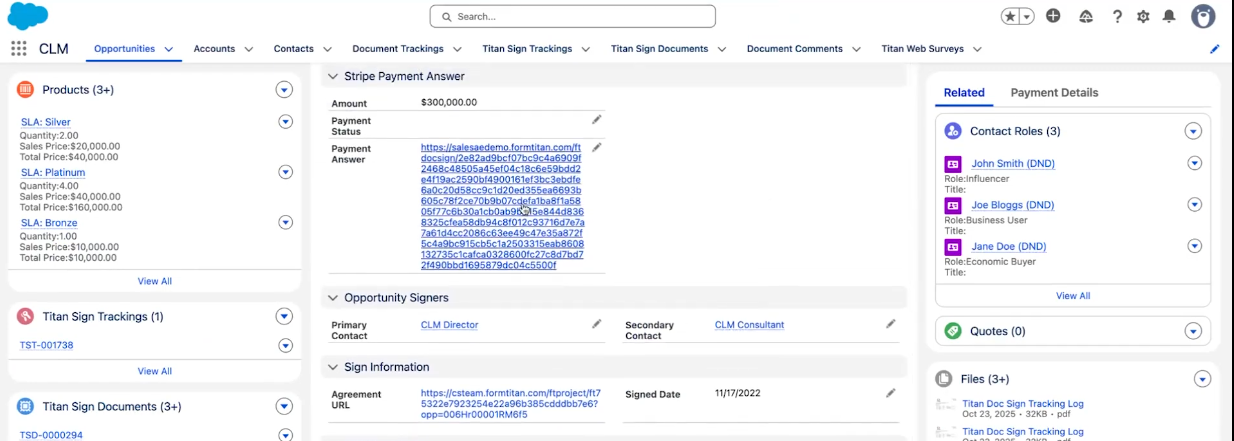
Update the field that triggers the flow. The long text field now contains the instant URL.
Select the link to open the document in edit mode. Make your changes and save.
The updated document is sent to the first collaborator. They receive a link to the edited version and continue through the CLM process with full tracking.
Select the link to open the document in edit mode. Make your changes and save.
The updated document is sent to the first collaborator. They receive a link to the edited version and continue through the CLM process with full tracking.
07 Summary
You can edit a document before CLM begins in two ways.
- Use the Generate Document button for direct editing inside Salesforce
- Use an instant URL when you want fast access to the editor without navigating through records