Collaborator Rounds (9 min)
01 Getting Started
In this lesson, we will look at how to set up custom rounds in the CLM tool. We will explore the custom round functionality and determine the type of collaboration for each round. We will also see how the owner approves each round when custom rounds are used. (When there are no rounds, the document is only sent to the owner at the end of the editing process.) This increases contract integrity, aligns with approval workflows, and reduces risk by supporting role-based access control.
02 Create Custom Rounds
For custom rounds, the collaborators are grouped into rounds. The rounds must reflect the permission set for each individual.
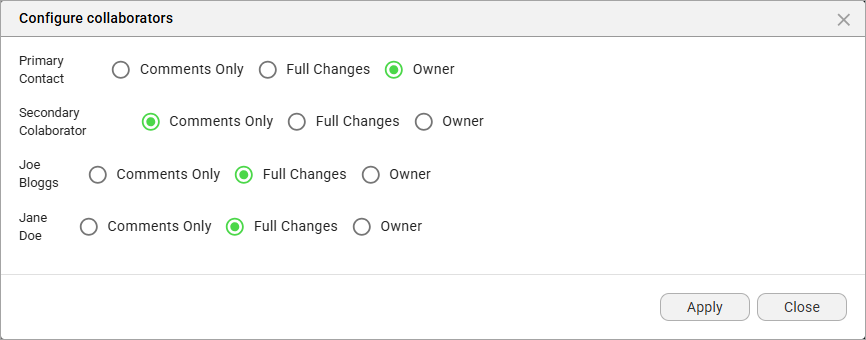
1. Under CLM, click the Collaborator Type button to see the permission types for each collaborator. The Configure collaborators screen opens.
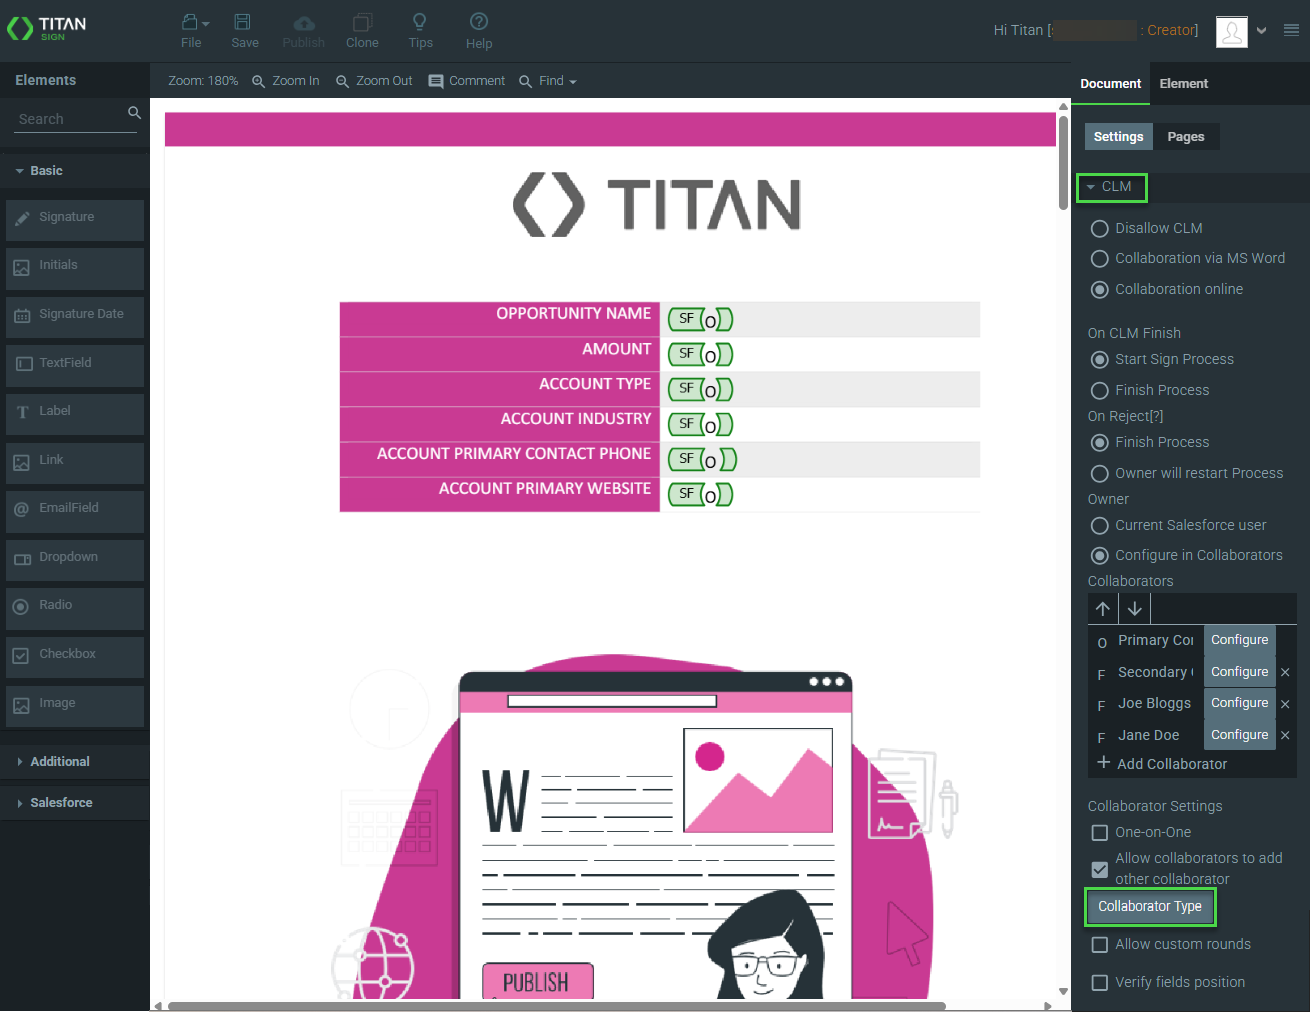
The permissions in this lesson are as follows:
- The primary contact (CLM Director) is the document owner
- The secondary contact (CLM Consultant) can only add comments to the document
- Joe Bloggs and Jane Doe can make full changes
2. If necessary, use the radio buttons to make any necessary permission changes, and click the Apply button.
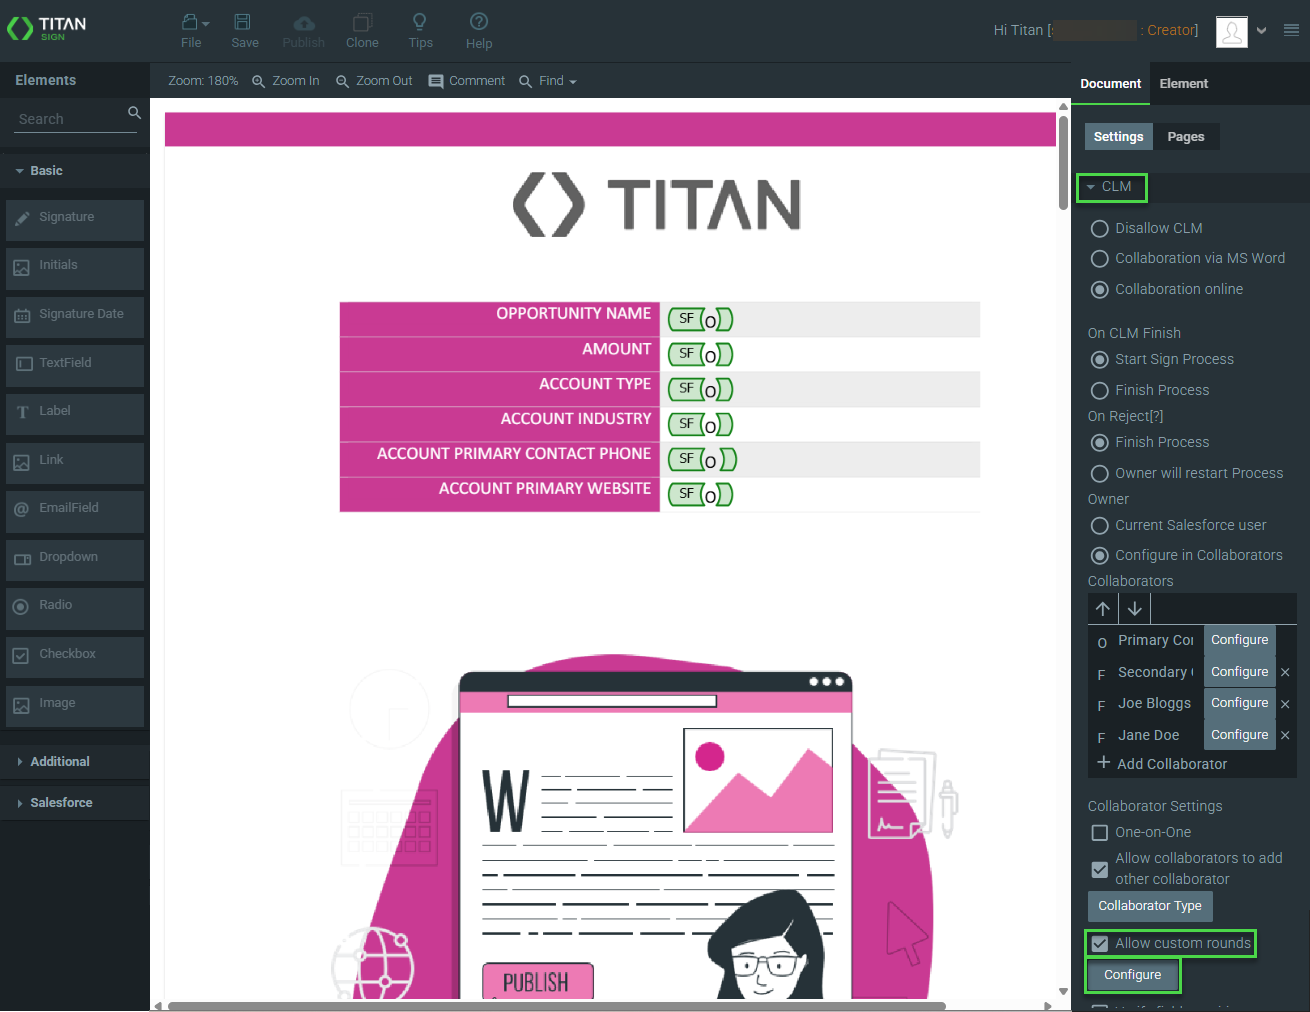
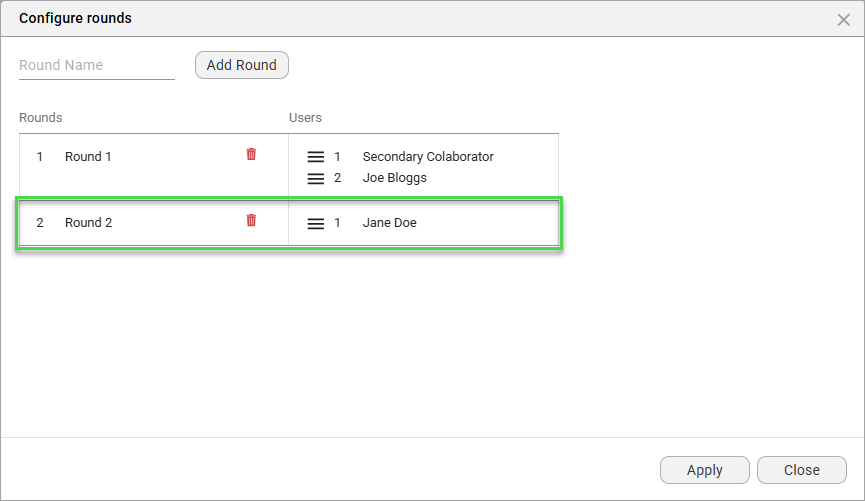
3. Click the Allow custom rounds checkbox and click the Configure button. The Configure Rounds option opens with a complete list of the collaborators.
4. Type a round name in the field and click the Add Round button. The new round is added without any collaborator names attached to it.
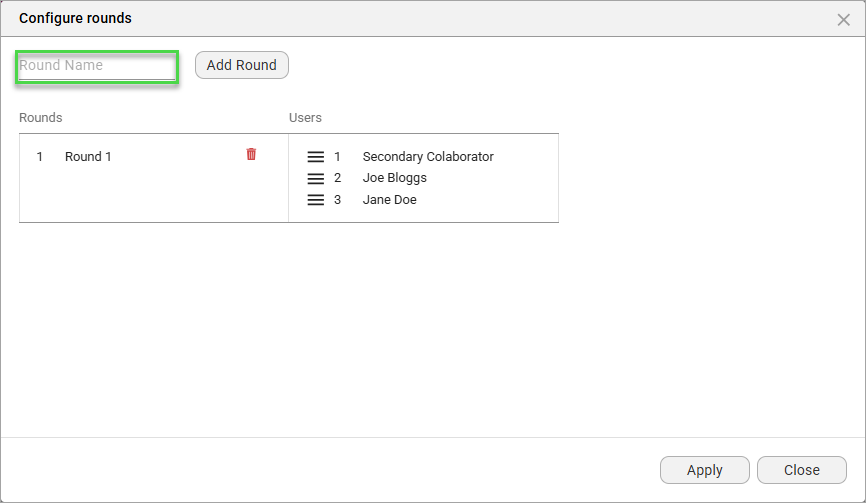
5. Drag a collaborator's name from Round 1 to Round 2.
6. Do the same for round 3 and click the Apply button.
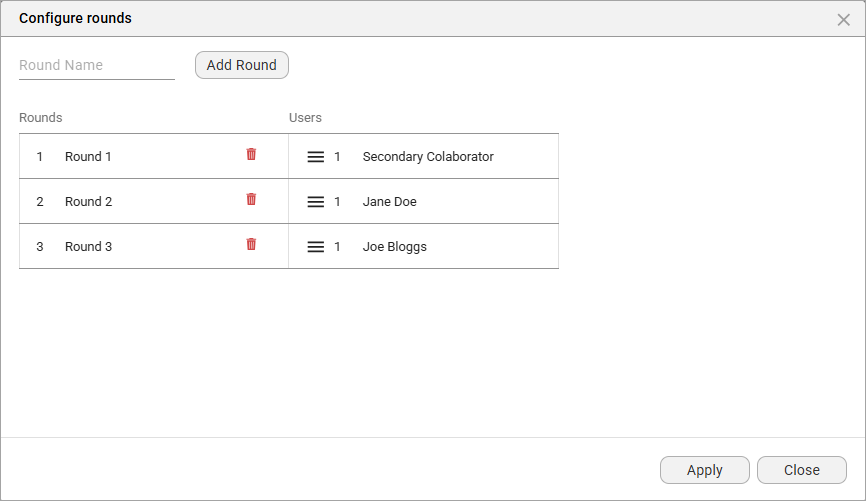
7. Remember to save the project.
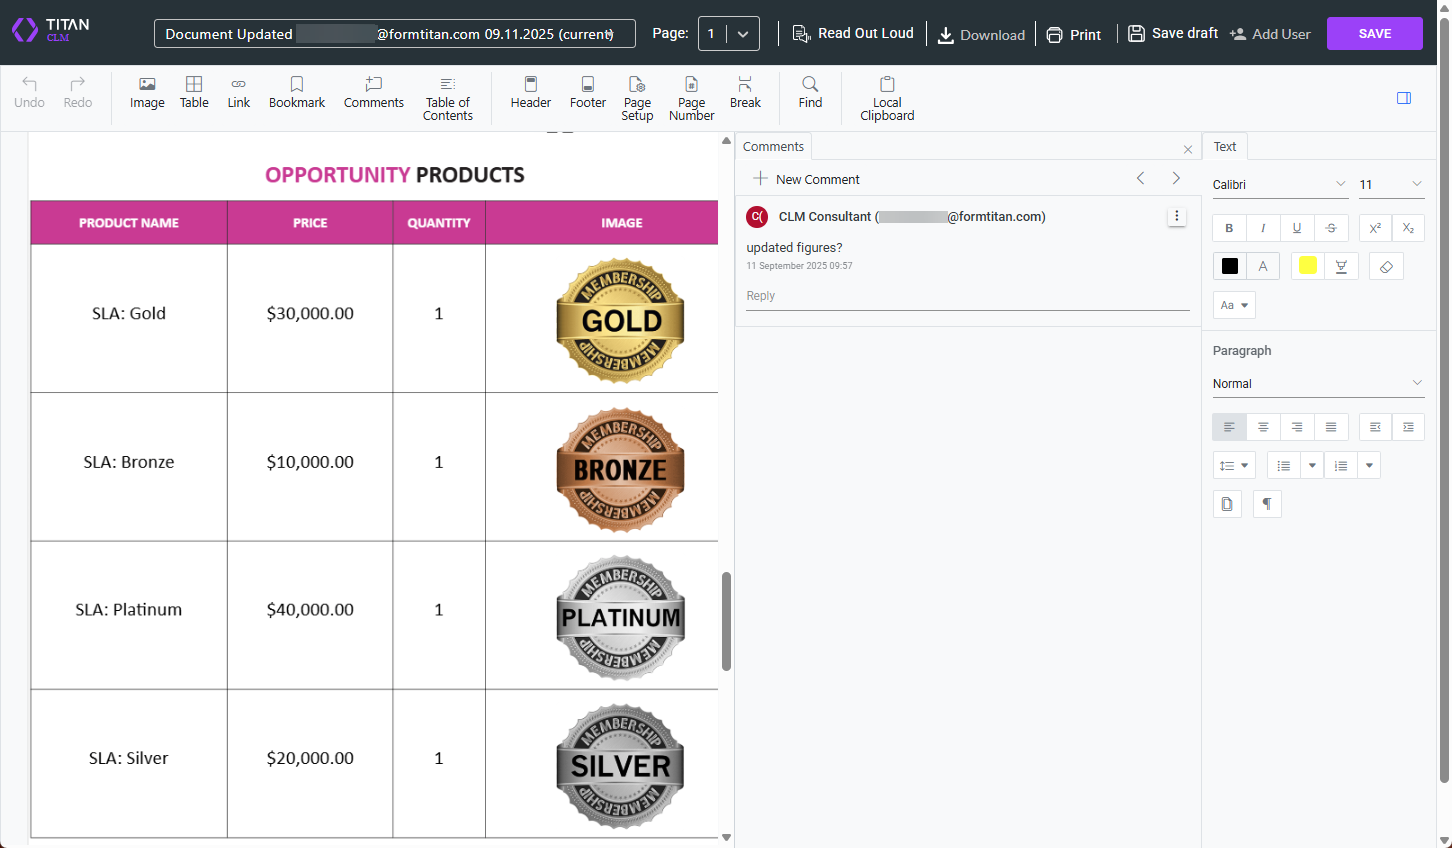
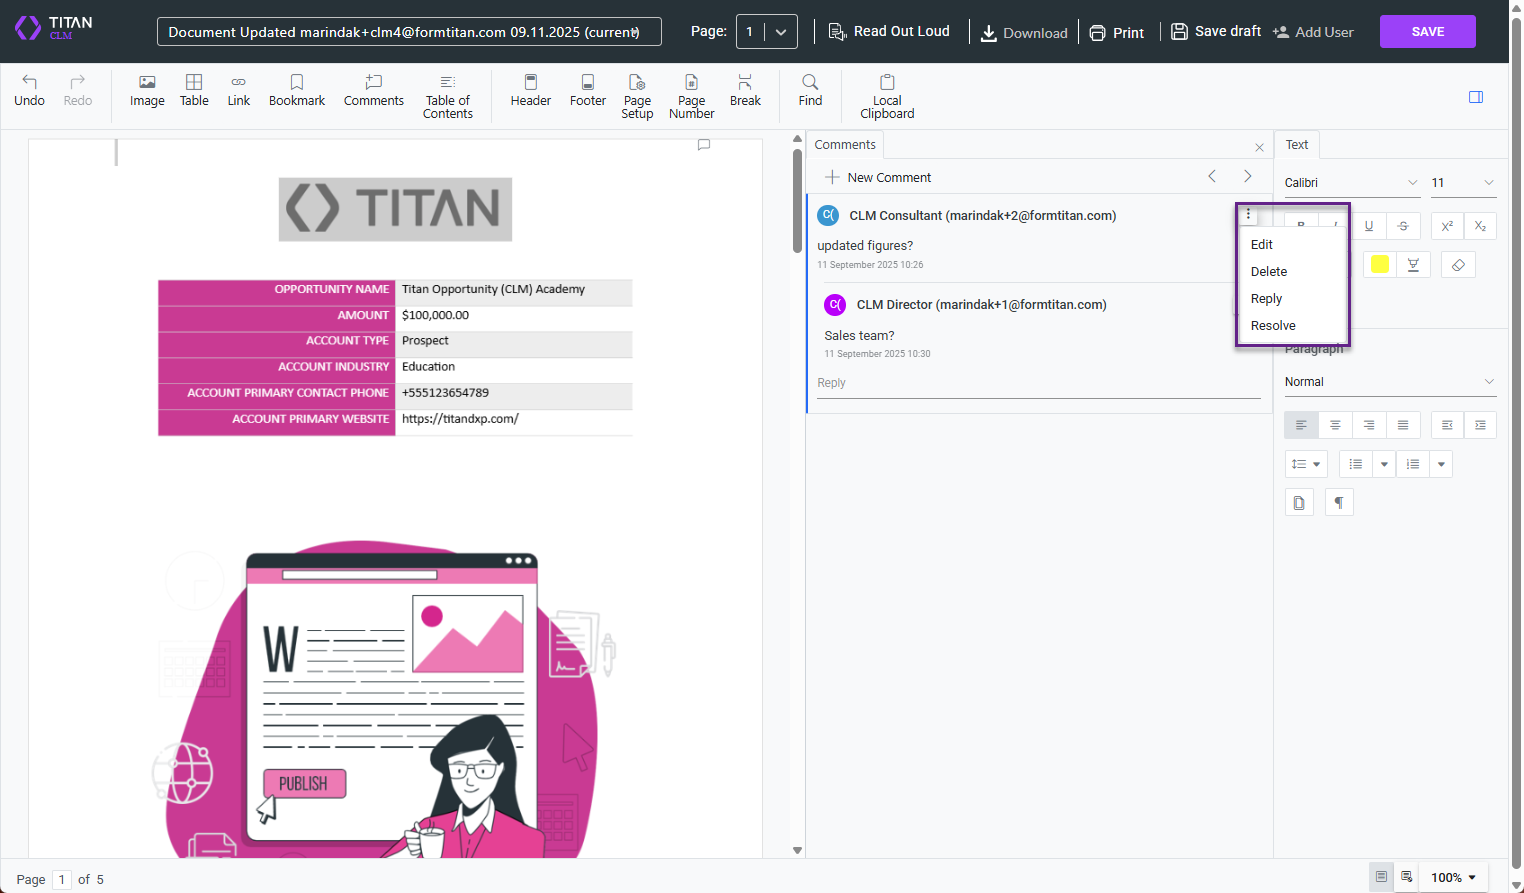
The first collaborator (who can only make comments) receives an email with a link to the document. When they open the document, they see the following:
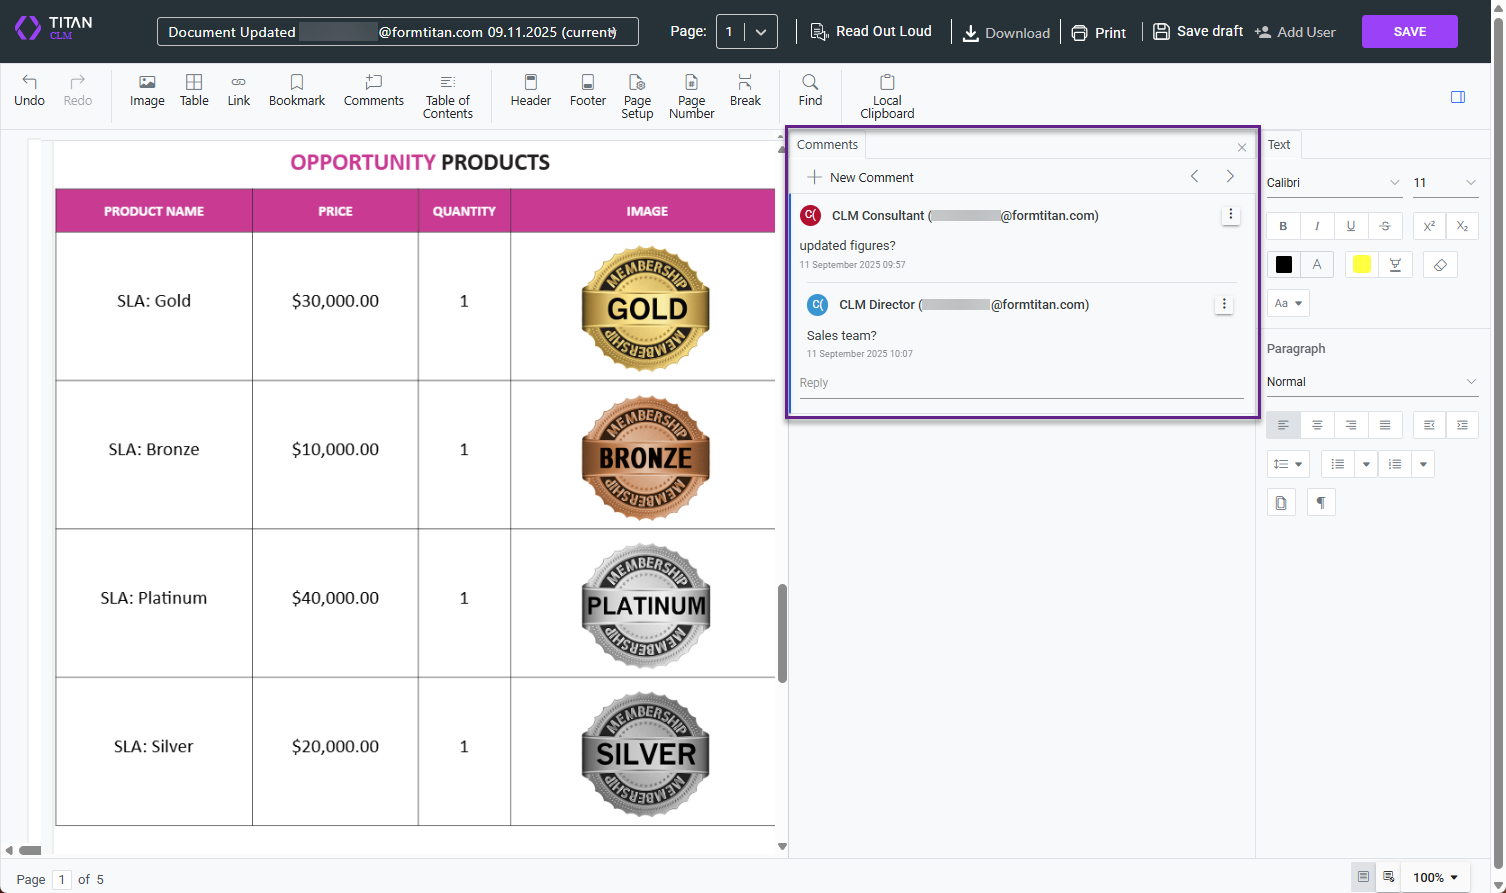
1. Click the Comments option on the toolbar. A Comments tab is added to the document.

2. Type a comment in the field and click the Save icon.
3. Click the Save button on the toolbar. The document is sent to the document owner to review the comments.
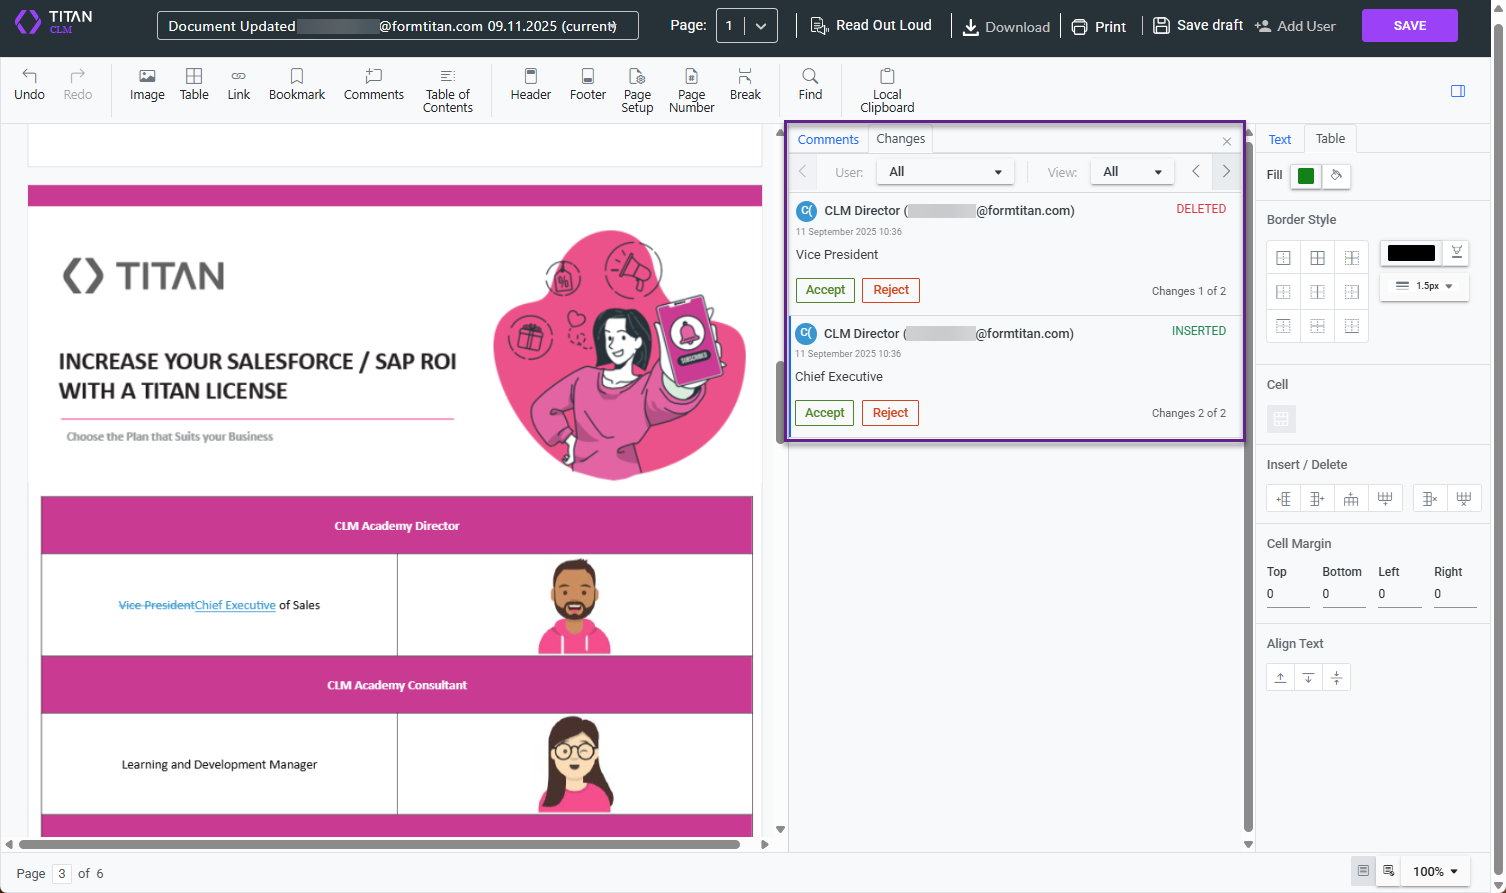
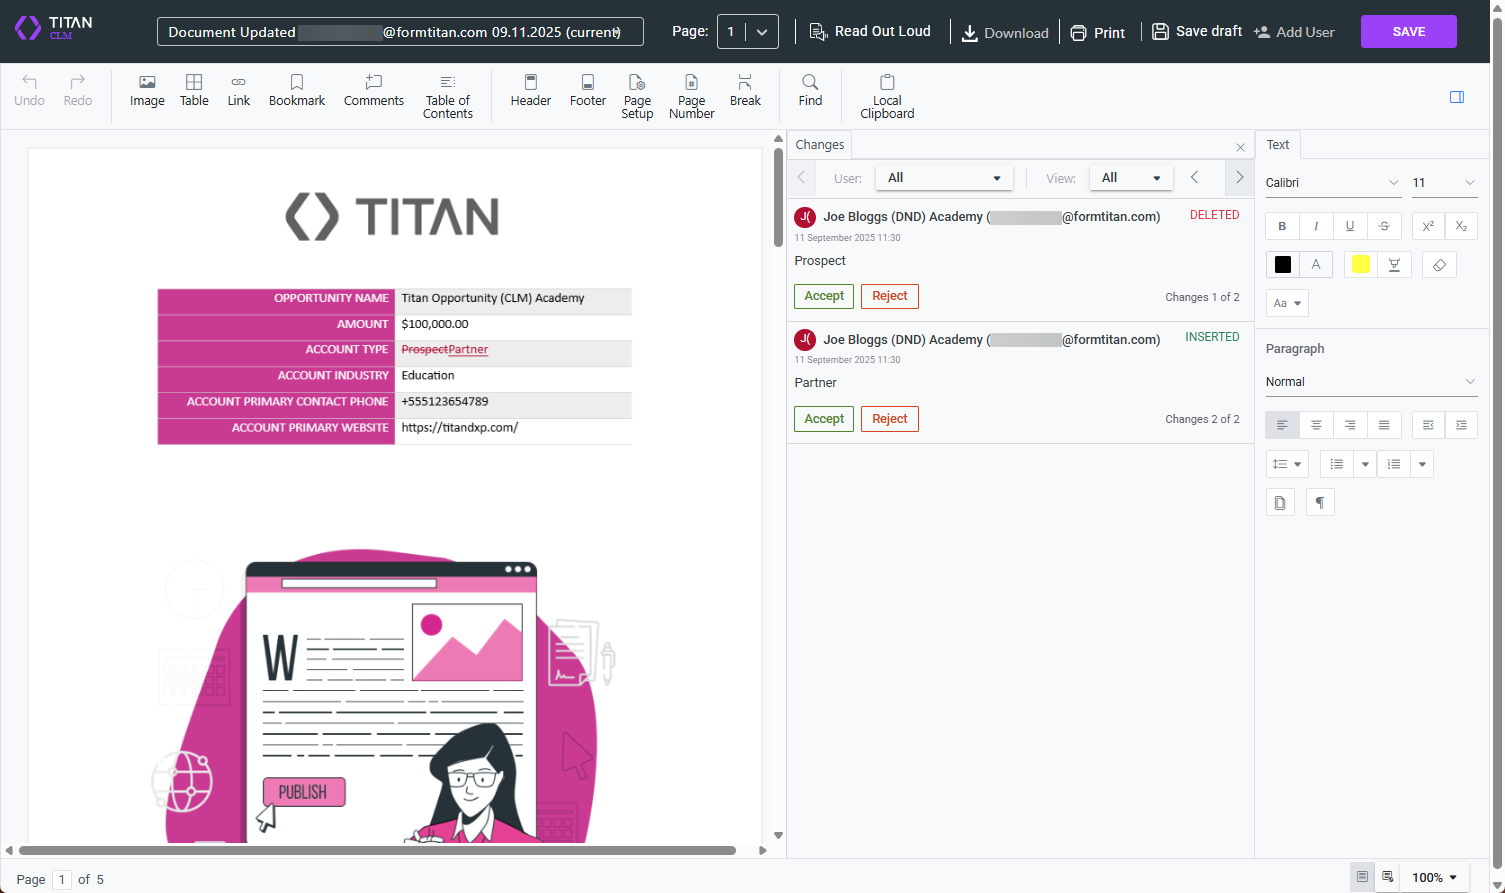
The owner receives an email with a link to the document. When they open the document, they see the following:
1. Reply to the comment and click the Save icon as necessary.

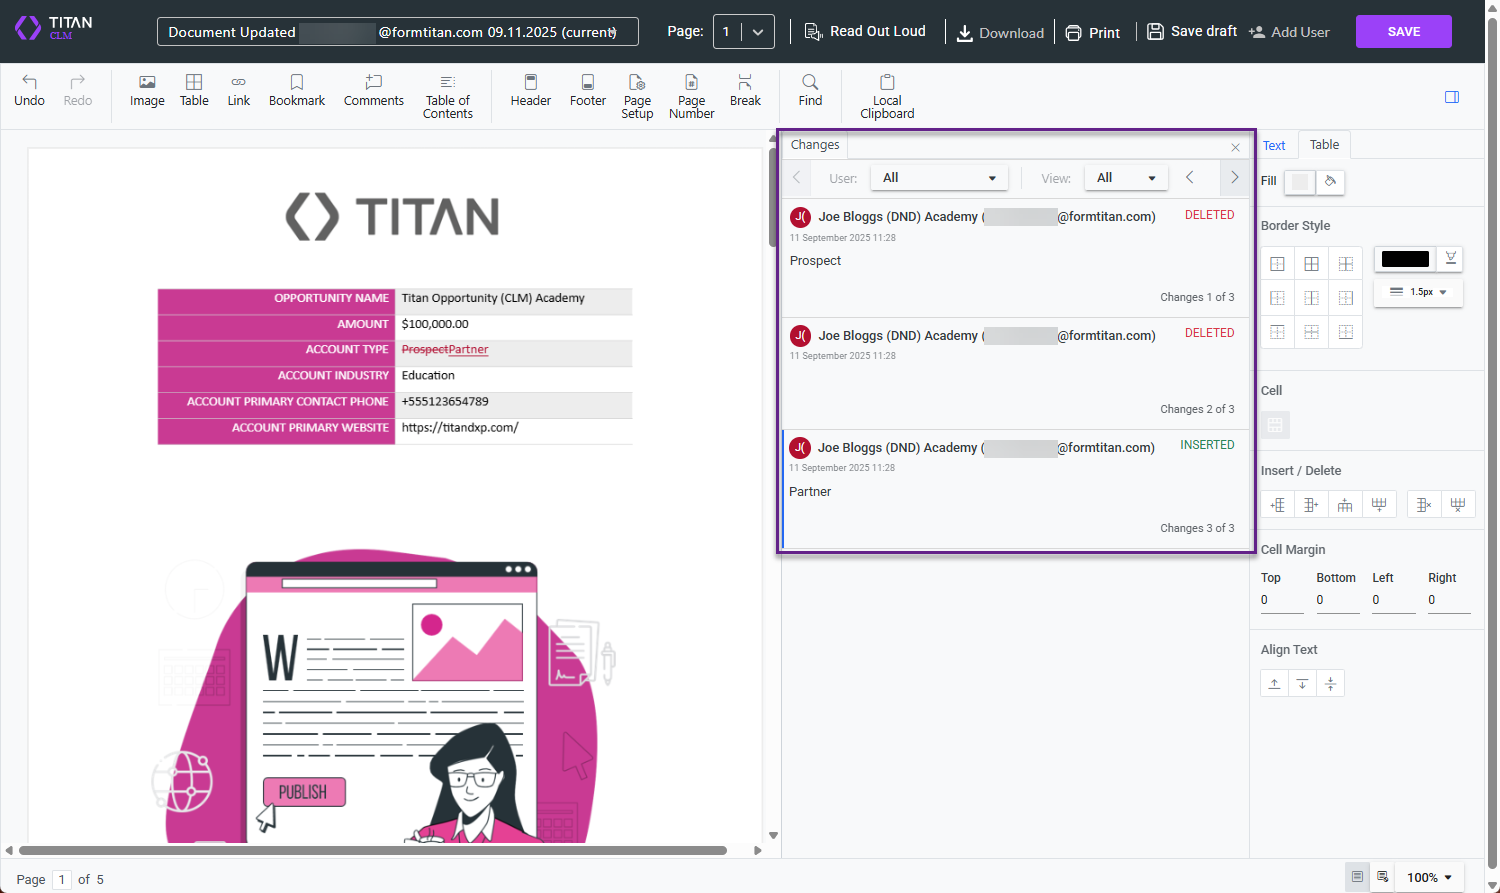
2. Make any changes as necessary. The deletions and insertions are added to the Changes tab.
3. Accept the changes by clicking the button.
4. Click the Save button on the toolbar.
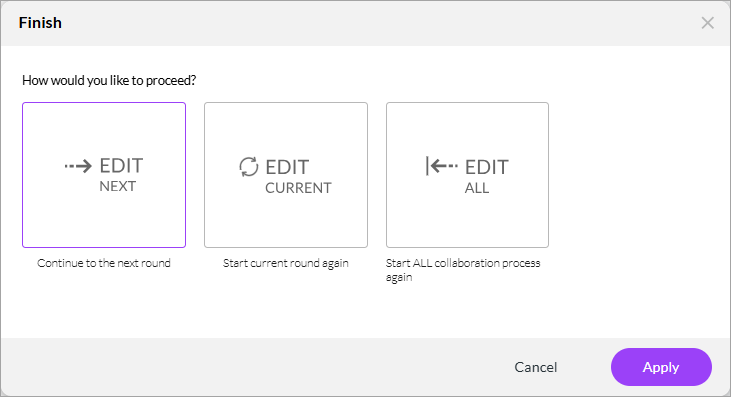
The owner can click one of the following options:
- Edit Next button to continue to the next round
- Edit Current to start the current round again
- Edit All to start the collaboration process again
5. Click the Apply button. The document is sent to the next collaborator.

The next collaborator (who has full editing permissions) receives an email with a link to the document. When they open the document, they see the following:
1. Edit the document as necessary and click the Save button on the toolbar.
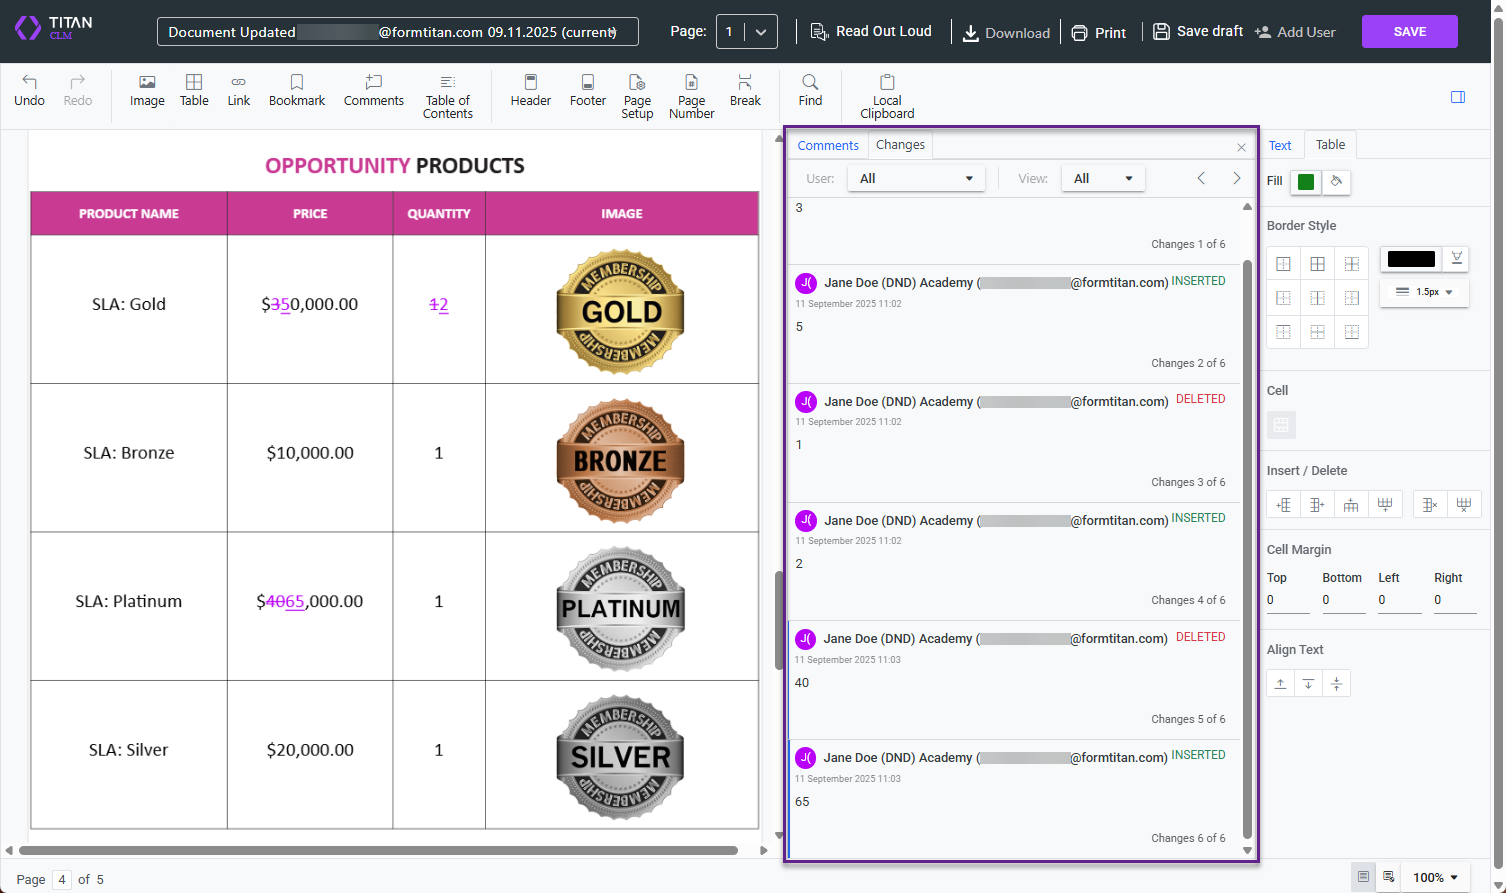
The document is again sent to the owner, who can accept or reject the second collaborator's changes.
As the figures have been updated, the comments can be deleted.
When the owner clicks the Save button on the toolbar, they see the message again.
After clicking the Apply button, the document is sent to the final collaborator.
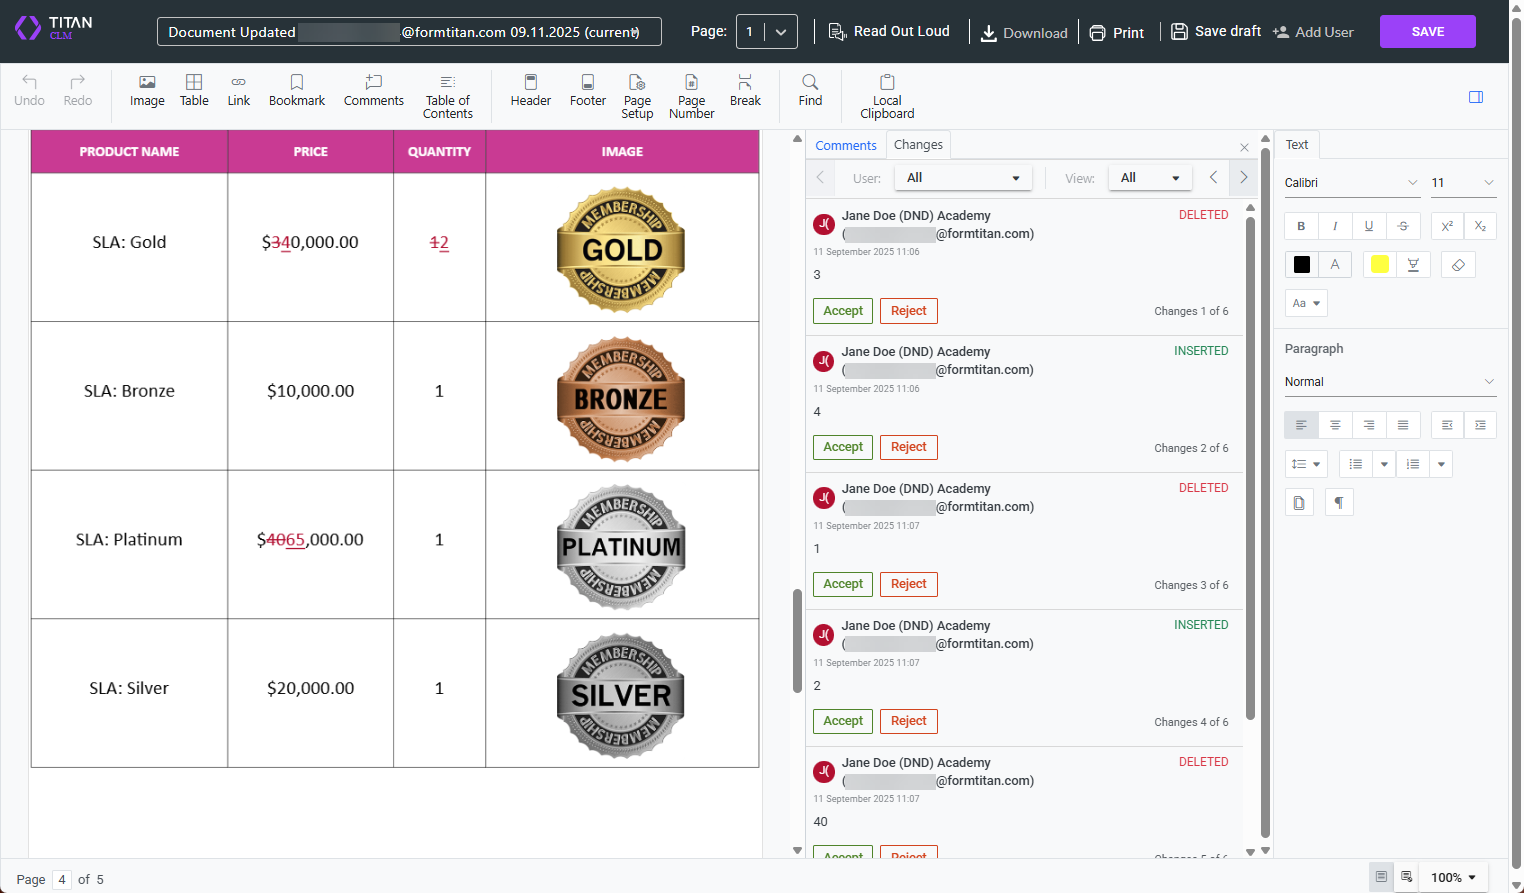
The final collaborator (who also has full editing permissions) receives an email with a link to the document. When they open the document, they see the following:
The collaborator makes the necessary changes and, when clicking the Save button, sends the document to the owner for the final time.
The document is sent to the owner for the final time, and they can accept or reject the changes that the last collaborator made.
When the owner clicks the Save button on the toolbar, they see the following message:

The owner can click one of the following options:
- Finish All button to finish the collaboration and start the signing process
- Edit Current to start the current round again
- Edit All to start the collaboration process again
After clicking the Apply button, the document is sent to the first signer.