Use Case 1 - Building a Quote Request Survey (13 min)
01 Introduction
In this Use Case, we will learn how to build a Quote Request Form using TITAN Survey’s advanced integration with Salesforce.
We will learn how to:
Use various question types, including Survey List, File Upload, and Select.
Customize question elements and use conditions to control how they are displayed.
Map questions with Salesforce.
Set up question flow.
Distribute the survey using the Object.
02 Let’s start!
Christine is a Salesforce Integrator at JFS Ltd, the largest chemical producer in the country.
The Marketing department has asked her to help update the Quote Request Form and integrate it with the data stored on Salesforce.
The form will be available to customers on the company’s website and must accommodate different customer types in three categories:
Existing Customers
Former Customers
New Customers
New customers must provide additional information, including a hazardous materials permit.
Before starting, Christine prepared in advance:
A digital copy of the form.
A folder with the logos and images.
Then, she made sure that the integration with Salesforce was active.
03 Customize the Start and Finish Slide
1. Open a new Web Survey Project, select a blank template to be able to customize your project, choose a color theme, and give your project a name:
2. Select the Start Slide on the left-hand menu and choose a slide layout from the menu on the right of the screen.
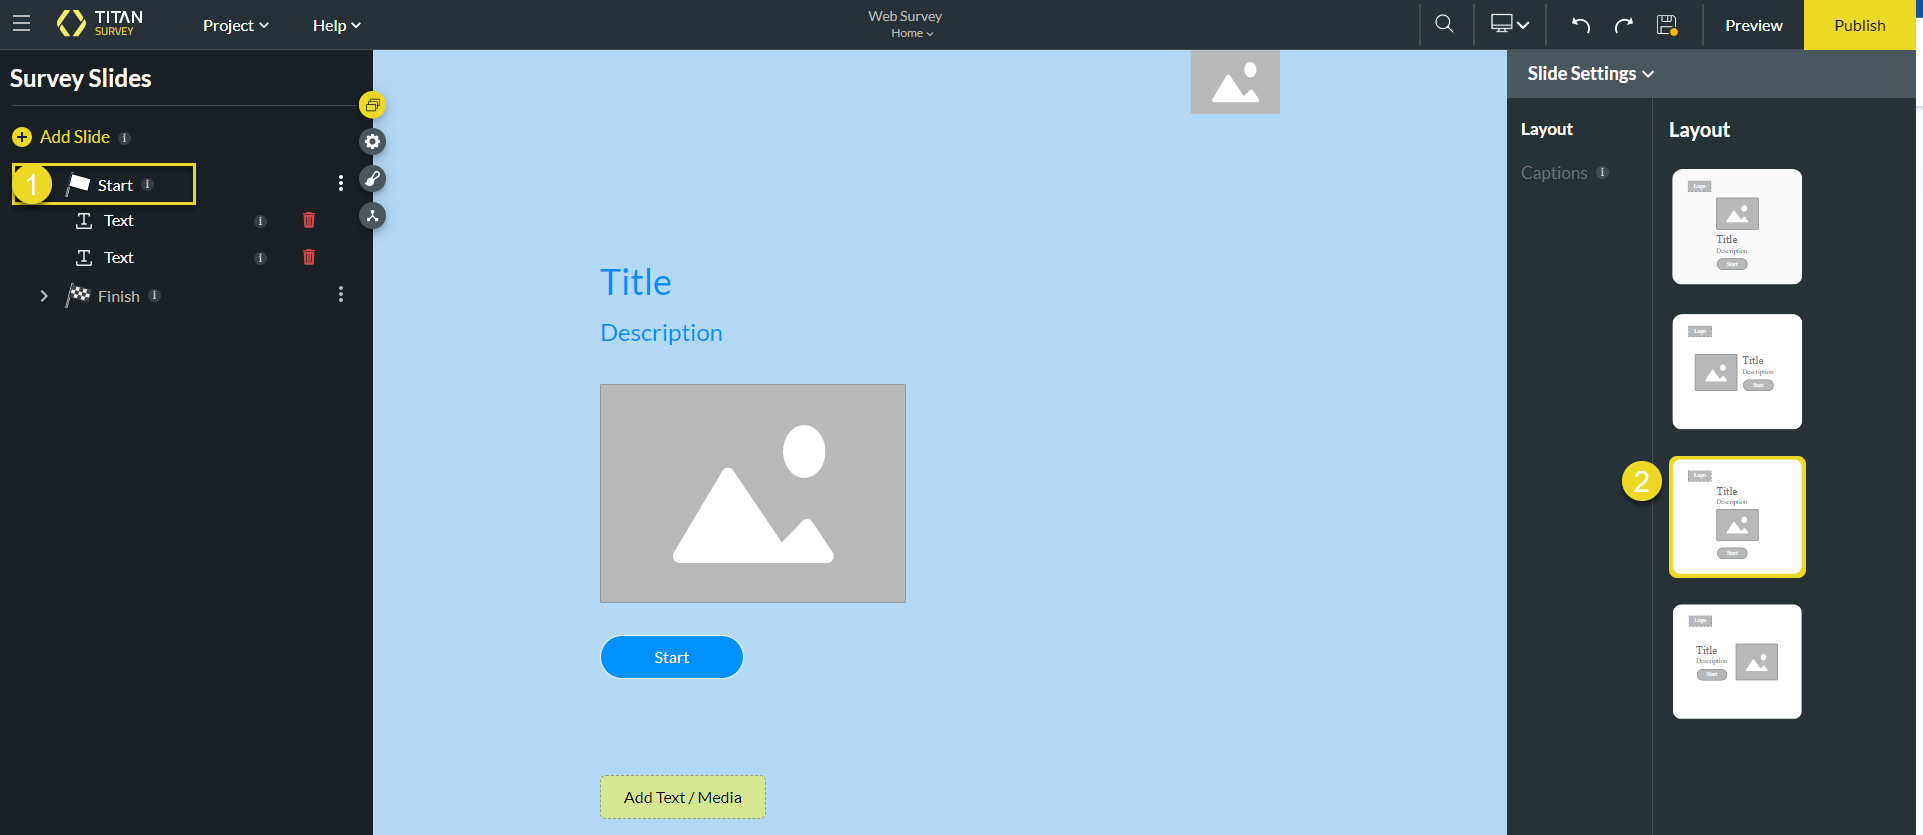
3. Click on the title text to add your Title.
4. Next, add a logo to your survey by clicking the empty logo box and either choosing an image from your library, selecting an image from Salesforce, uploading an image, or pasting an image URL. Below, the Titan logo has been selected from the image library. After this, click Apply. You can add an image to your Start Slide in the same way by first clicking the empty image box and then choosing your desired image.

The same steps are followed for the Finish Slide.
04 Adding an Intermediate Slide
This slide will determine what content the respondent sees depending on their answer.
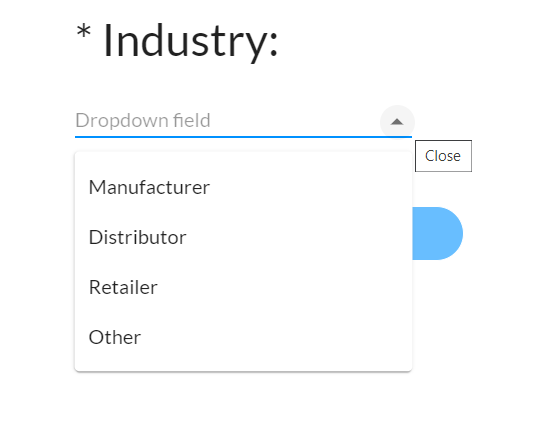
1. Insert a drop-down question element. This question is used to determine what kind of customer they are.2. Use the Placeholder field to clarify what data the respondent should provide.
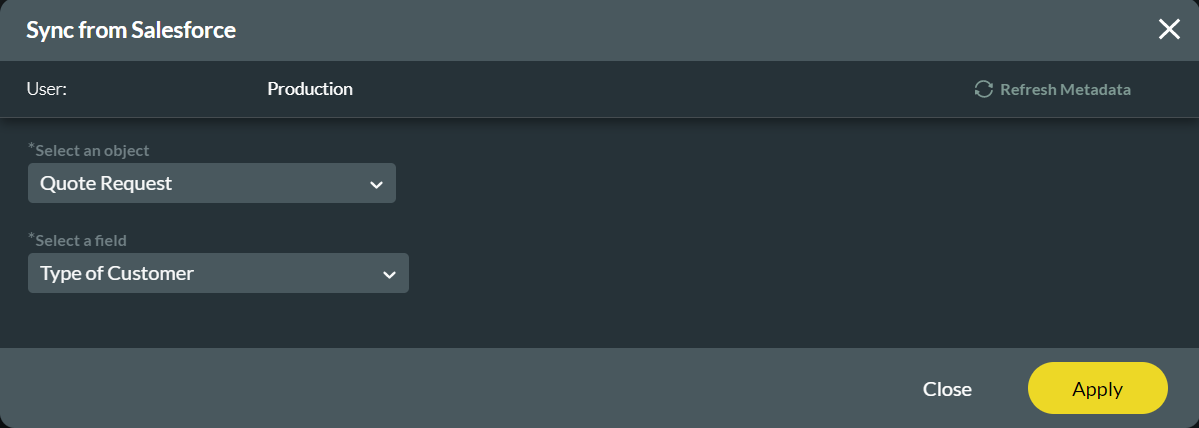
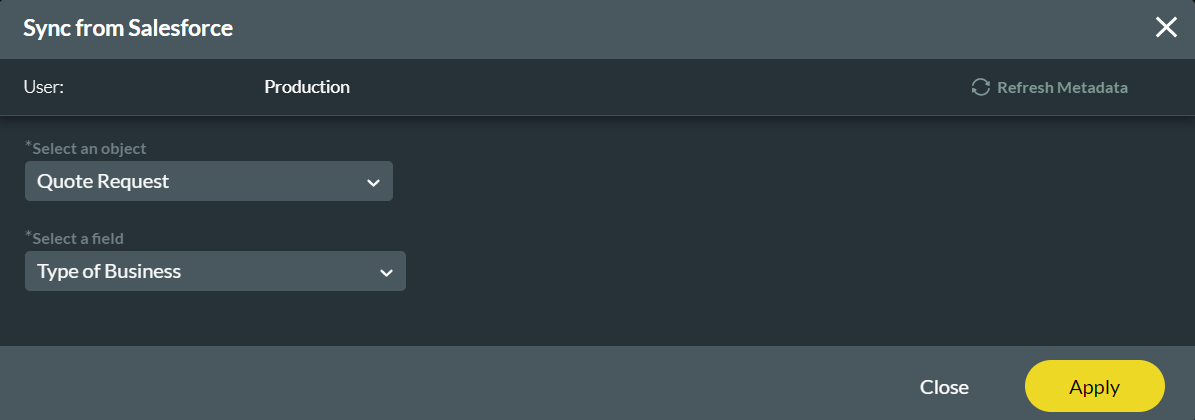
3. To sync the answer options from Salesforce, select the Dynamic Values radio button and select Sync from Salesforce.

4. In the configuration screen, map the object and the related field to which the data will be mapped. Once you have completed the configuration, click Apply.
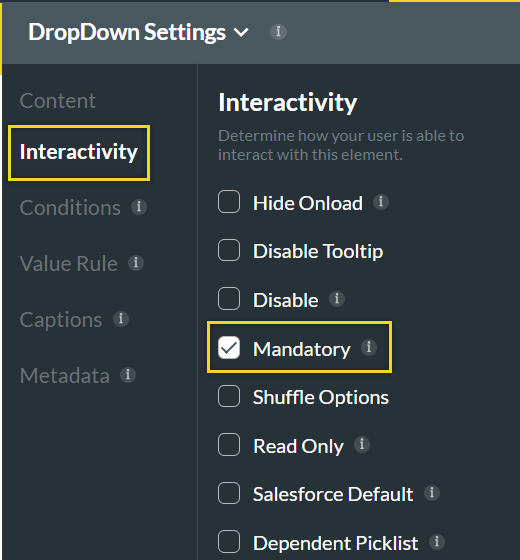
5. To make the question mandatory, click the interactivity tab and enable the Mandatory function.
05 Collecting Existing Customer Company ID Number
This question will only be displayed to existing customers for this next step.
1. Insert a text element requesting that existing customers provide their company ID number.
2. In the content tab, insert a field mask. This will automatically format the input.

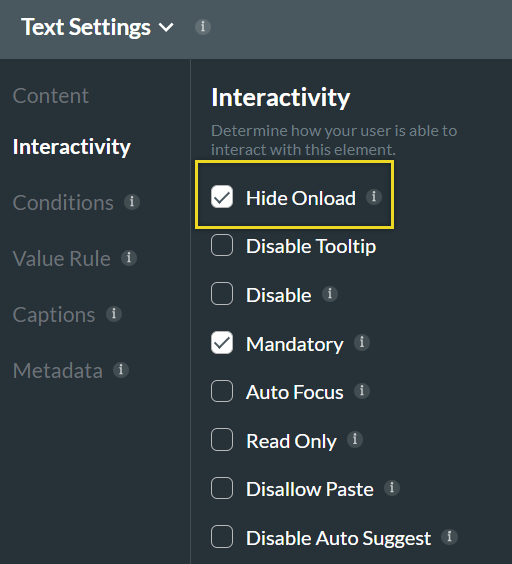
3. To ensure the element does not display to the user while the page is loading, enable the Hide Onload function found under the Interactivity tab.
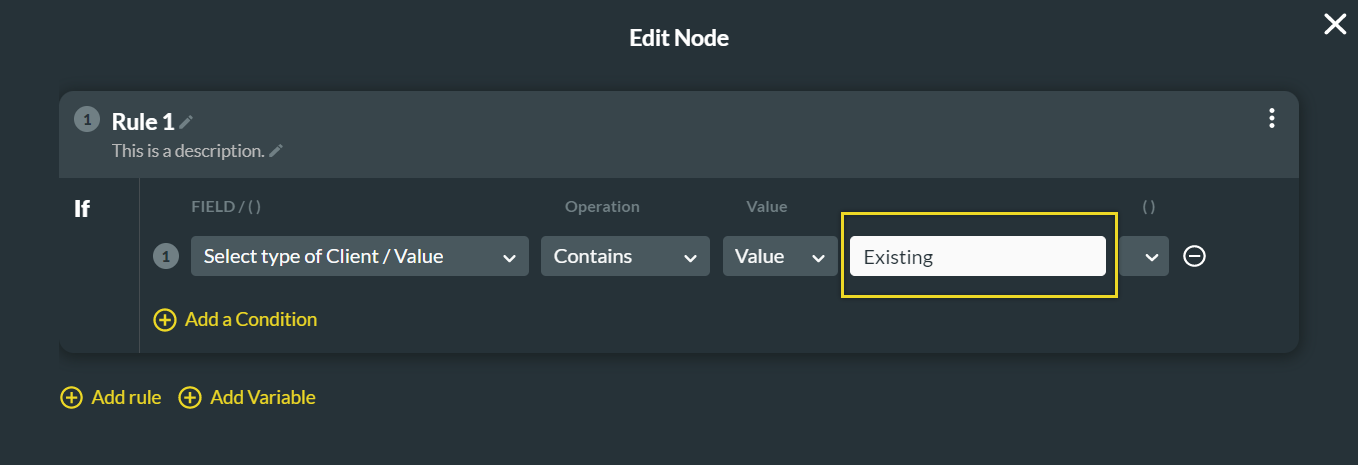
4. Next, set up the condition to ensure this page shows to existing customers only. Click on the Conditions tab and select the Configure Conditions button.
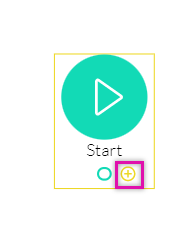
5. Click the + icon to add a condition.
6. The “Company ID Number” field should appear if the conditions are met.
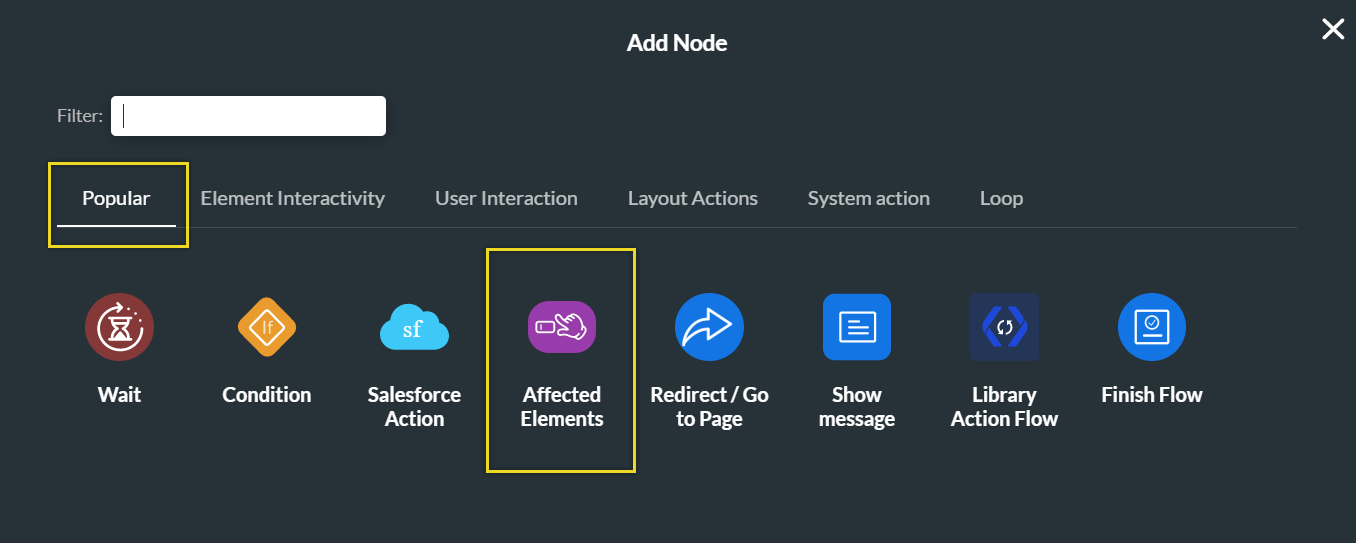
7. Click on the kebab menu next to the If condition and select edit.
8. Choose the Affected Element option found under the Popular tab.
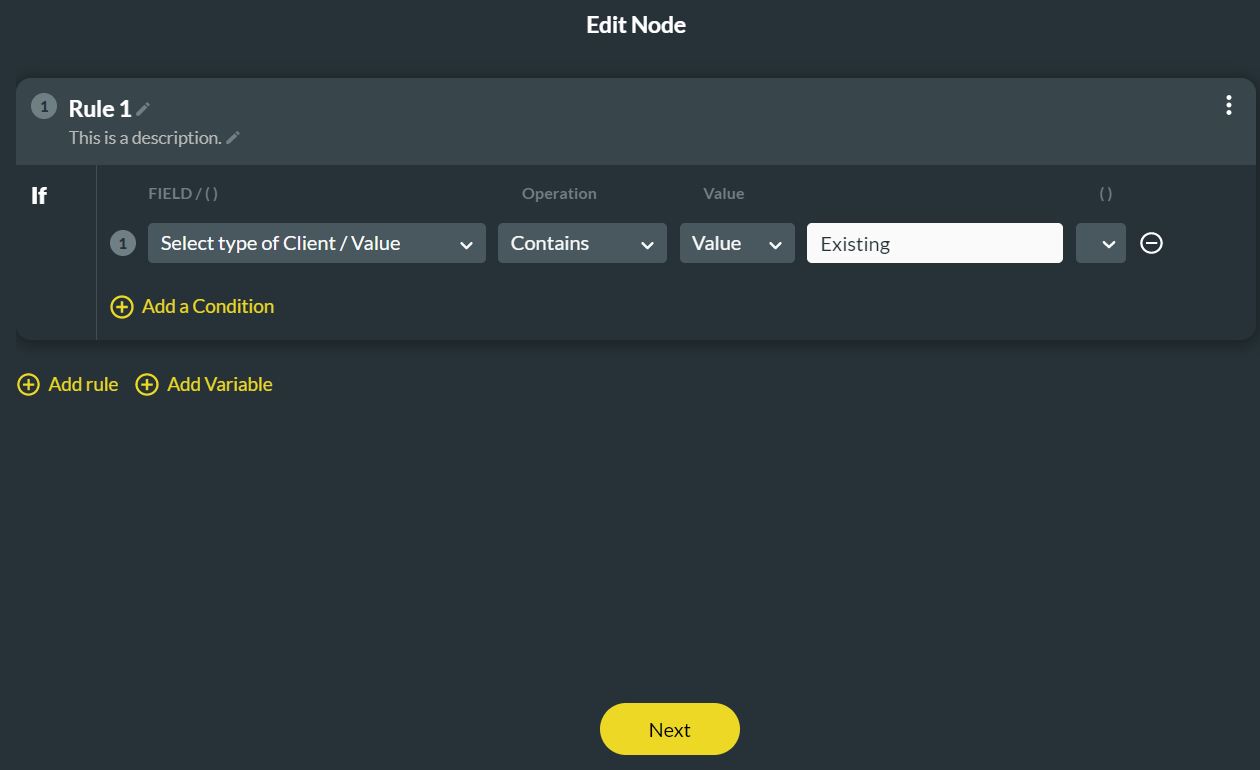
9. Configure the condition only to show the element if the client exists.
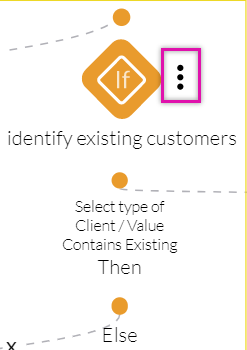
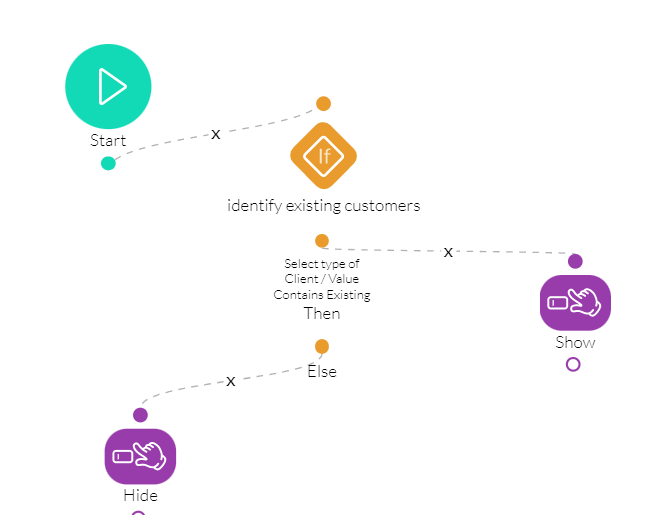
10. If the condition is not met, the field should not display to the respondent. This is configured using the else condition. Click on the Kebab Icon next to the else icon and select edit. Add an Affected Element node. The “Hide” condition is added so that if “existing customer” is selected accidentally, the field will disappear once the selection is changed.
06 Collecting Business Contact Details
These elements collect business and personal details. You can add several text elements to capture details. This section will focus on configuring answer options to sync from Salesforce.
1. Insert a dropdown question and the details in the title.2. To sync the answer options from Salesforce, select the Dynamic Values radio button and select Sync from Salesforce.
3. In the configuration screen, map the object and the related field from which the data will be mapped. Click Apply once you have completed the config.
Only the data available in the object will be displayed to the user.
The same steps can be followed to map any data from Salesforce.
07 Quote Summary
You can insert data provided from previous slides to display to the user.
1. Enable the Advanced Mode switch and click on the gear icon.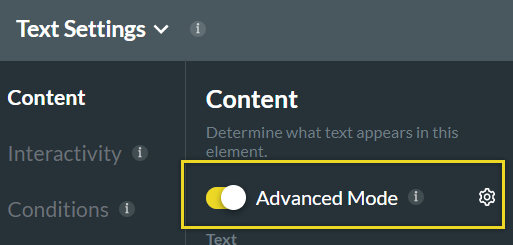
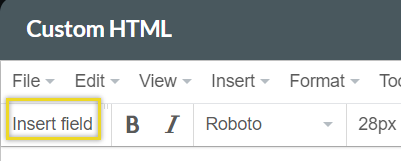
2. In the custom HTML screen, click the Insert Field button.
3. Select the Slide radio button and use the drop-down menus to configure the slide and corresponding question from which to pull data.

You can insert previous answers from the same slide.
08 Creating a Custom Flow
Christine can create different survey journeys for respondents in the same survey depending on the provided feedback.
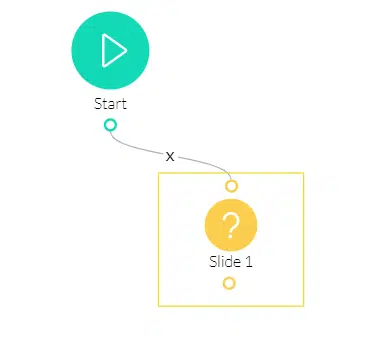
1. This can be achieved in the custom flow settings. First, she adds all her slides to configure the flow.2. Navigate to the question flow icon on the left of the screen.
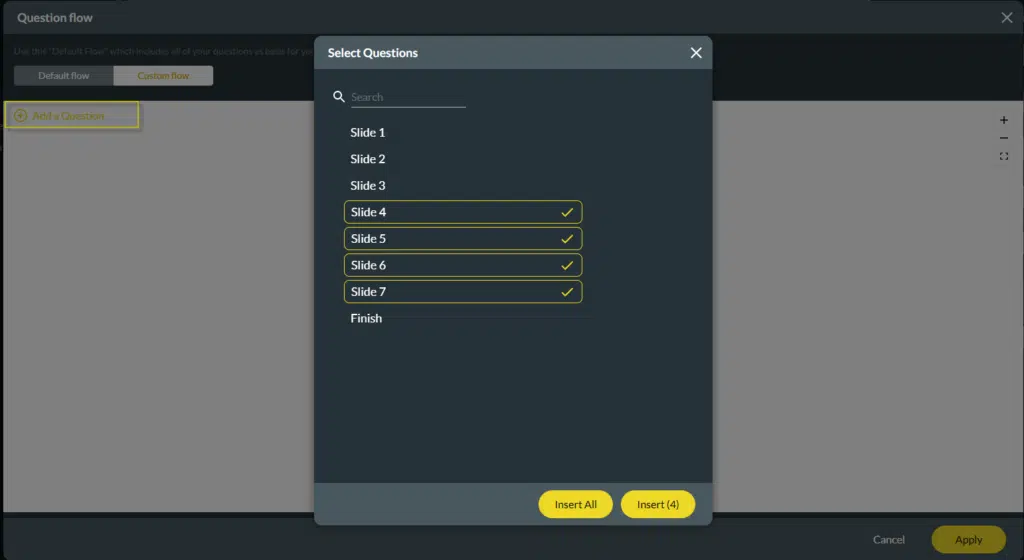
3. Click on the Custom Flow tab. Click on the Add a Question option. The Select Question screen opens.
4. Select the question from the list. You can select more than one option. Click on the Insert button or the Insert All button to insert all questions.
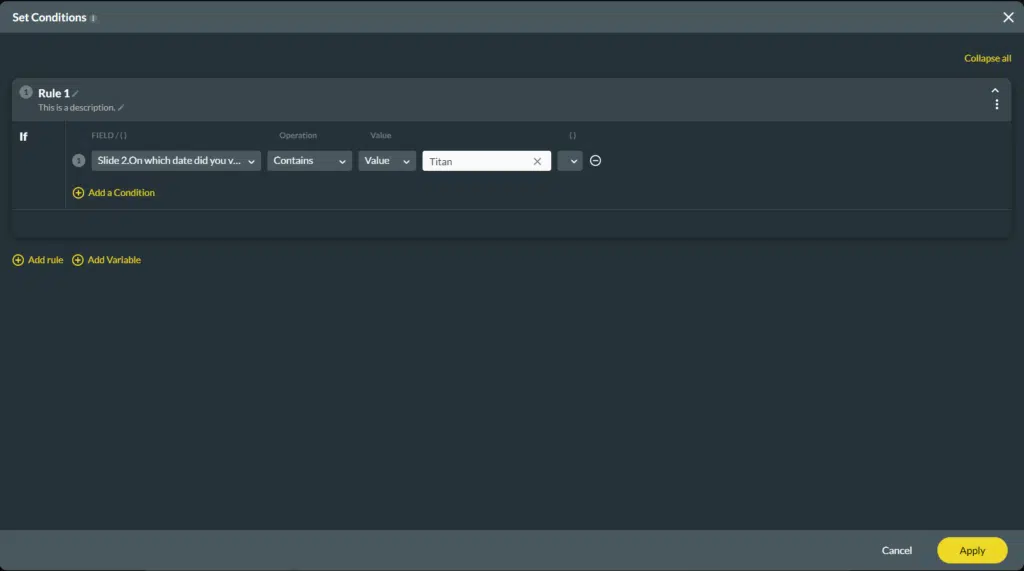
7. Click on the + sign on the slide to add conditions.
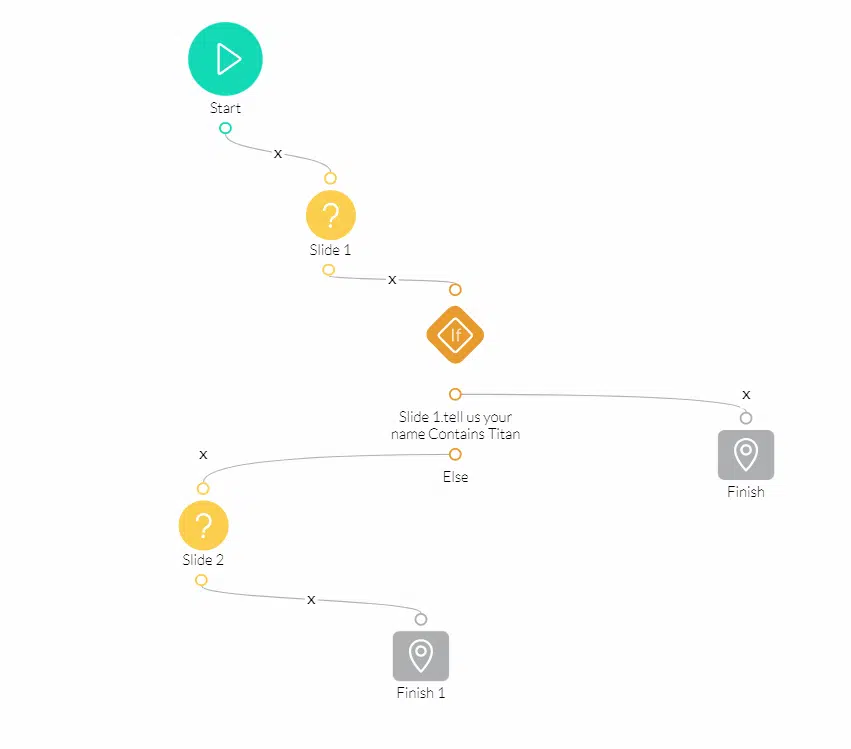
8. Select a condition from the Field drop-down list, such as a question on a slide, and set an Operation, such as Contain type, which should be identified in the condition. If the taker’s slide contains the added condition, it will move to the Finish Slide, and if not, it will move to the next slide.
You can add multiple conditions to the Custom Flow and multiple finish slides according to your requirements.
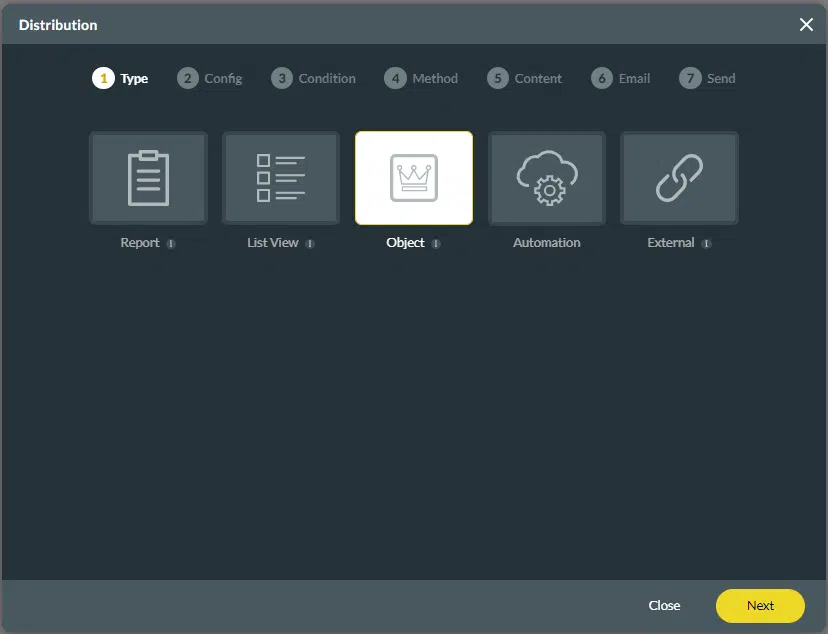
09 Distribution from an Object
2. Click on the Object option and then the Next button.
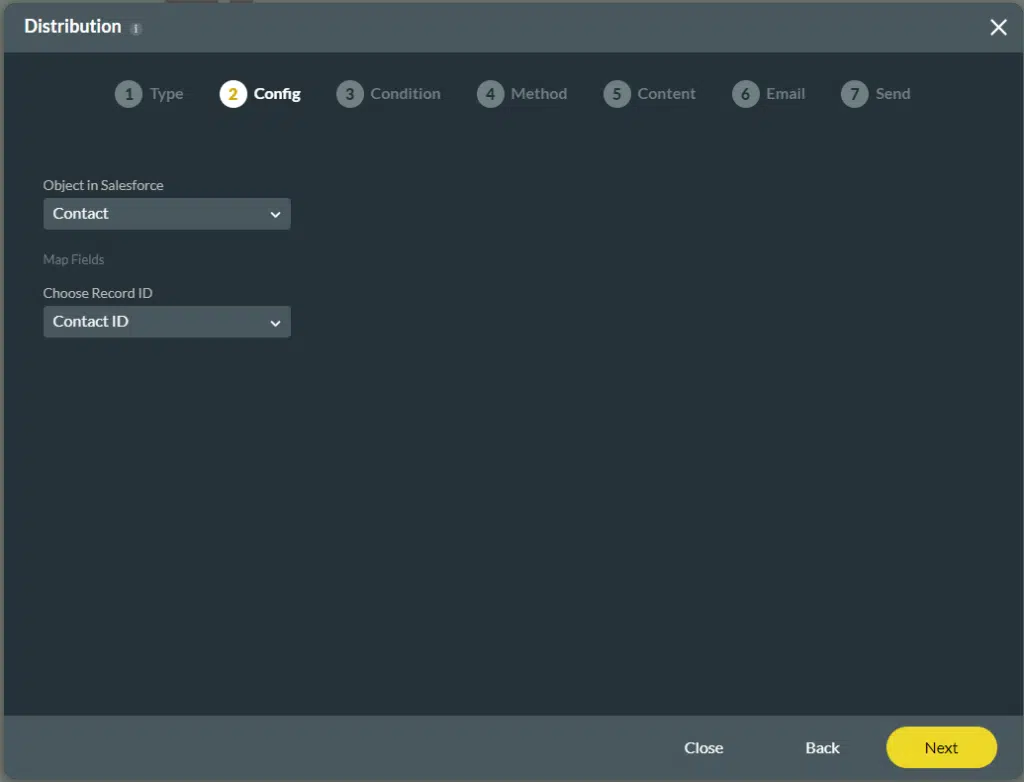
3. Select the Object in Salesforce from the drop-down list, for instance, Contact, to identify your recipients.
4. Choose the Record ID from the drop-down list, for example, Contact ID, to select the object's ID. This ID will be used to identify your recipient and added to the survey distribution list.
5. Select the object's ID from the Record ID drop-down list. It will be used to identify your recipient and added to the survey distribution list.
Click on the Next button.
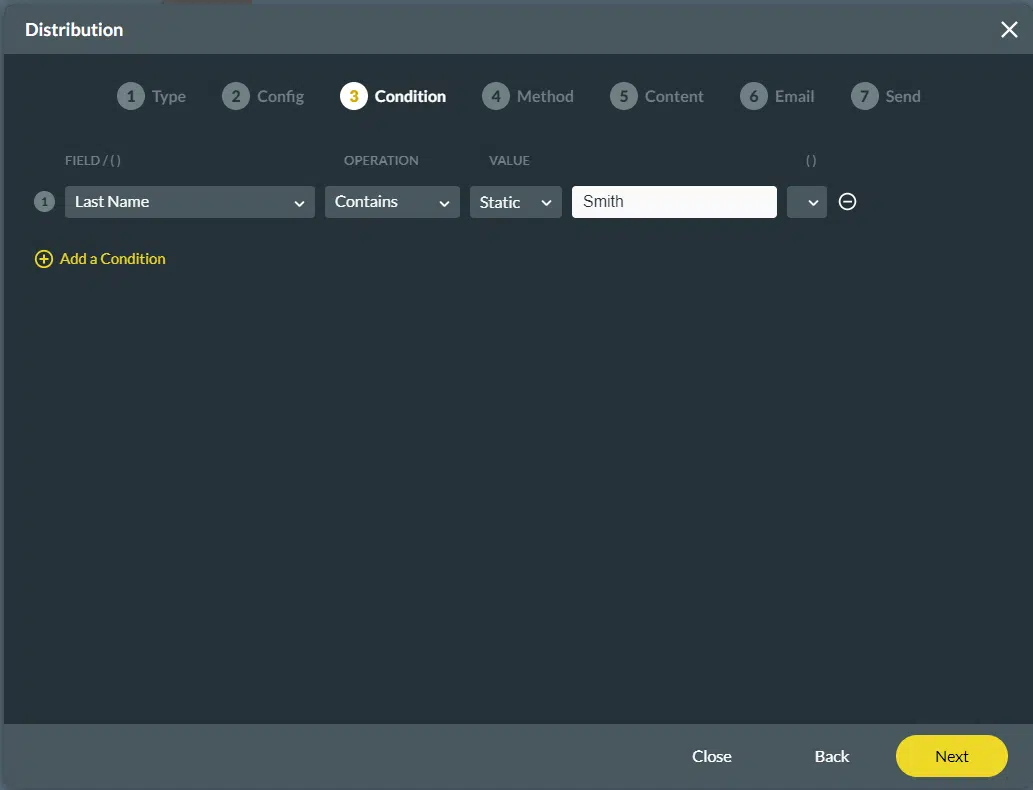
7. Click on the Add a Condition option. A condition field is added.
8. Set a condition like Last Name Contains Static value to filter your recipients.
9. Click on the Next button.
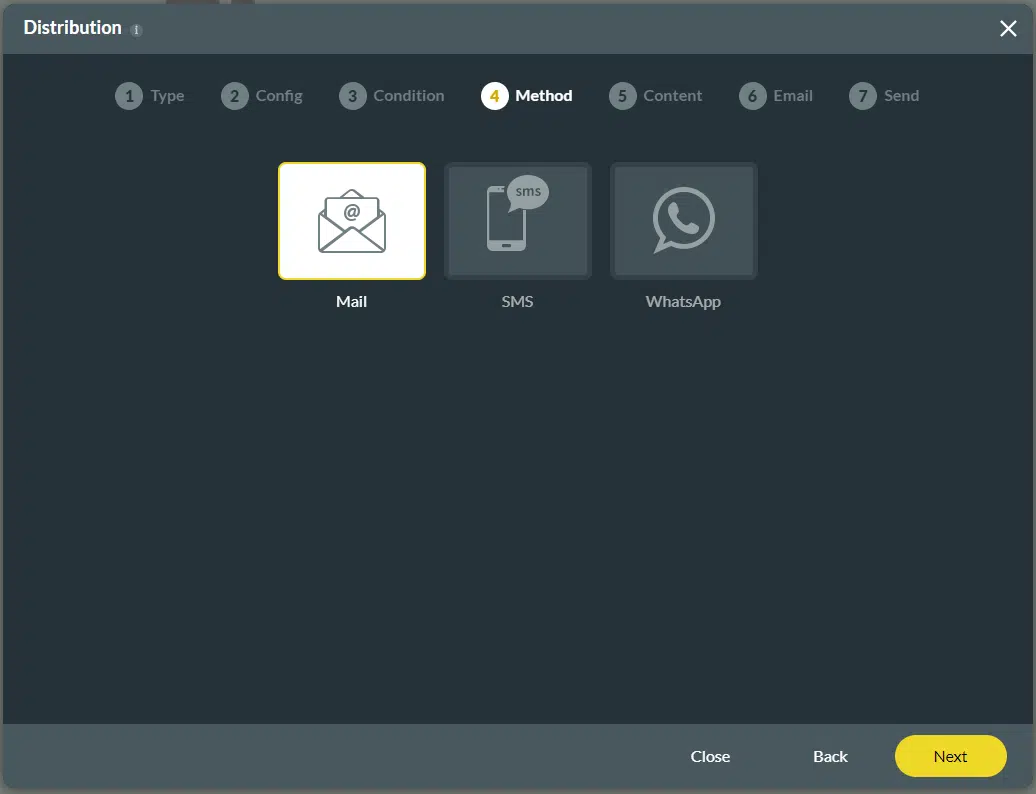
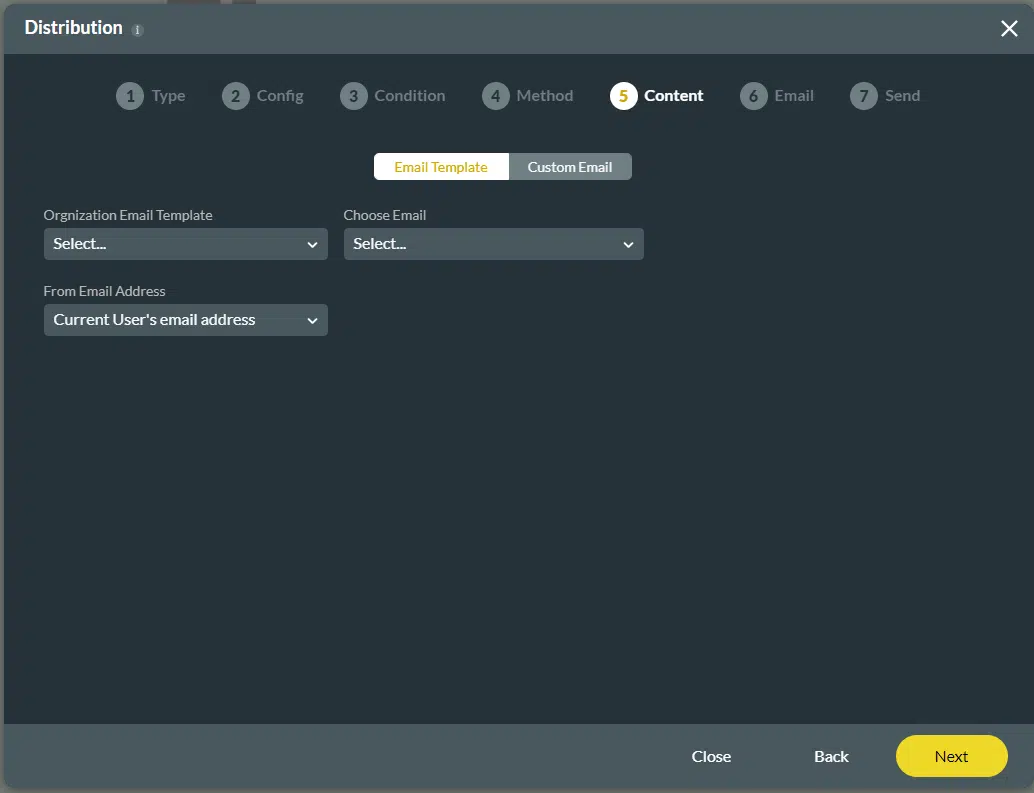
10. Click on the Mail option and then the Next button. We have two options you can select: Email template or Custom Email.
11. If required, use the Email template.
- Select the Organizational Email Template from the drop-down list. This template was configured in Salesforce.
- Choose Email from the drop-down list. The options in the drop-down list are linked to the object you selected in Salesforce in Step 4. This is the Email of the customer who will receive the survey.
- Choose the From Email Address from the drop-down list. For more information on this email address in Salesforce, click here.
12.
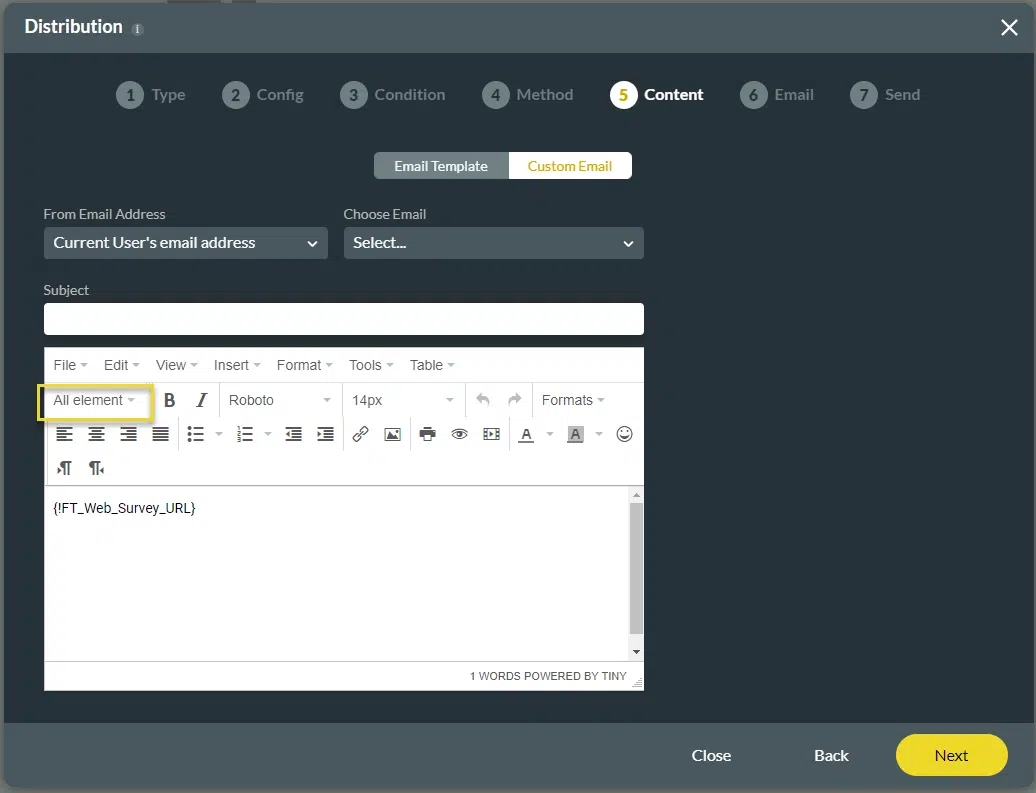
As an alternative, click on Custom Email.
- Choose the From Email Address from the drop-down list. For more information on this email address in Salesforce, click here.
- Choose Email from the drop-down list. The options in the drop-down list are linked to the object you selected in Salesforce in step 4. This is the Email of the customer who will receive the survey.
- Type a subject in the Subject line. This field is mandatory.
- Type a body in the Body of the Email.
14. Type the email address of the Survey Result's Recipient in the field.
15. Type any comment in the field. This is a mandatory field. The comment will be displayed in Salesforce under Survey Distribution.
16. Send the Email.
Send Now is the default option.
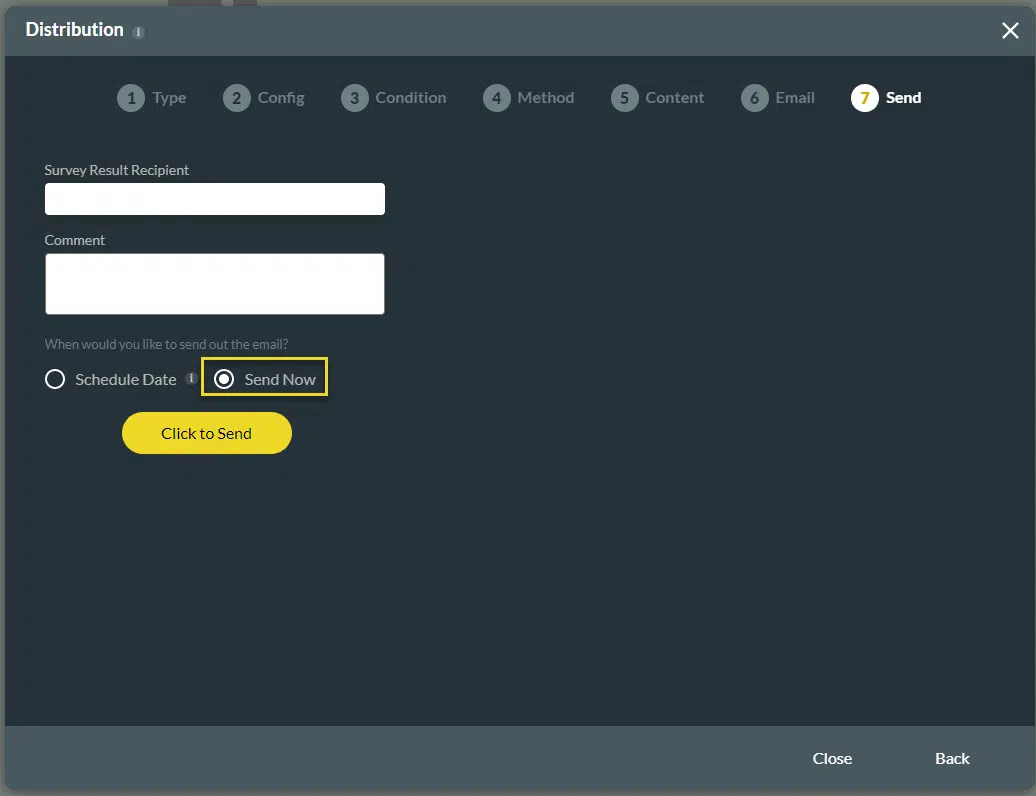
Schedule a date. Click on the calendar icon to schedule a date and time.

Click on the Click to Send button.
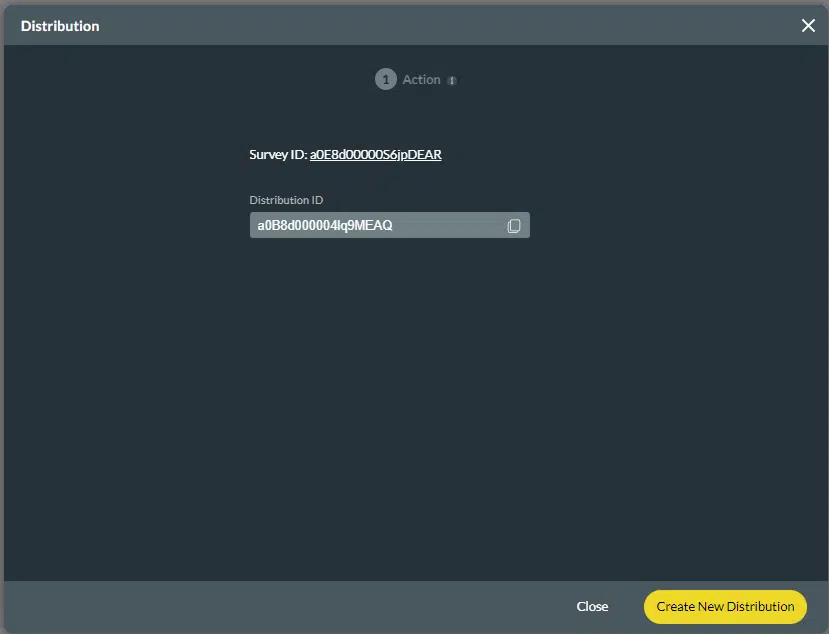
After a few moments, the Distribution screen opens. It shows the Survey ID and the Distribution ID.