Salesforce Actions (11 min)
01 Getting Started
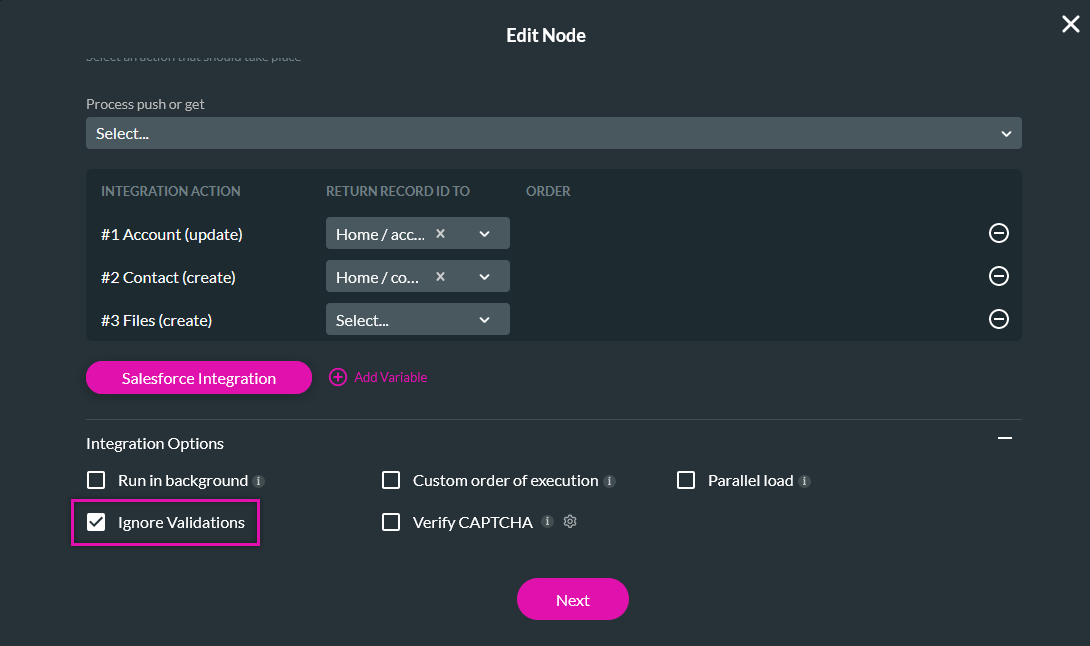
02 Return ID
You can set up relationships between Salesforce actions, this can be used to feed information from one action to another. For example, if you have a form that creates an account, then a contact for the account, and a file associated with that contact. You need to store the Account ID and Contact ID using static variables and reference them when configuring your Salesforce Action node.
To map the values to the variables, use the Return Record ID To dropdown to select the corresponding variable.

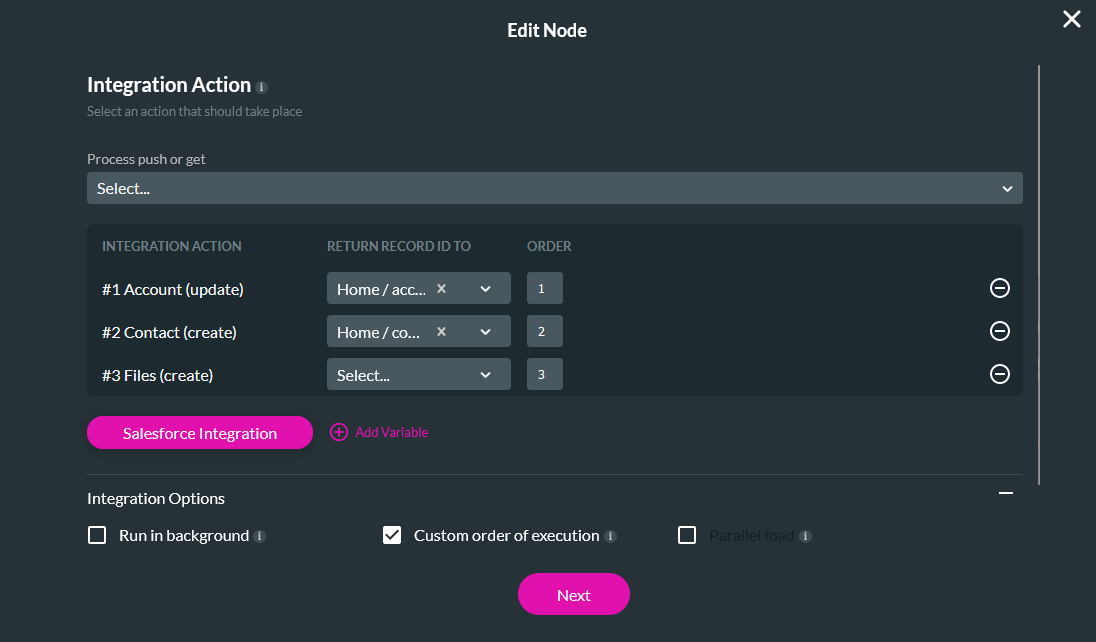
03 Custom Order of Execution
You can combine nodes when configuring an Integration Action. This ensures that all the nodes will run in a single Salesforce action instead of separate actions that can slow down your projects.
1. Use the dropdown to select all the nodes that will be combined.
2. Expand the Integration Options menu and enable Custom Order of Execution.
3. Using the Order fields, you can determine the execution order for each action.
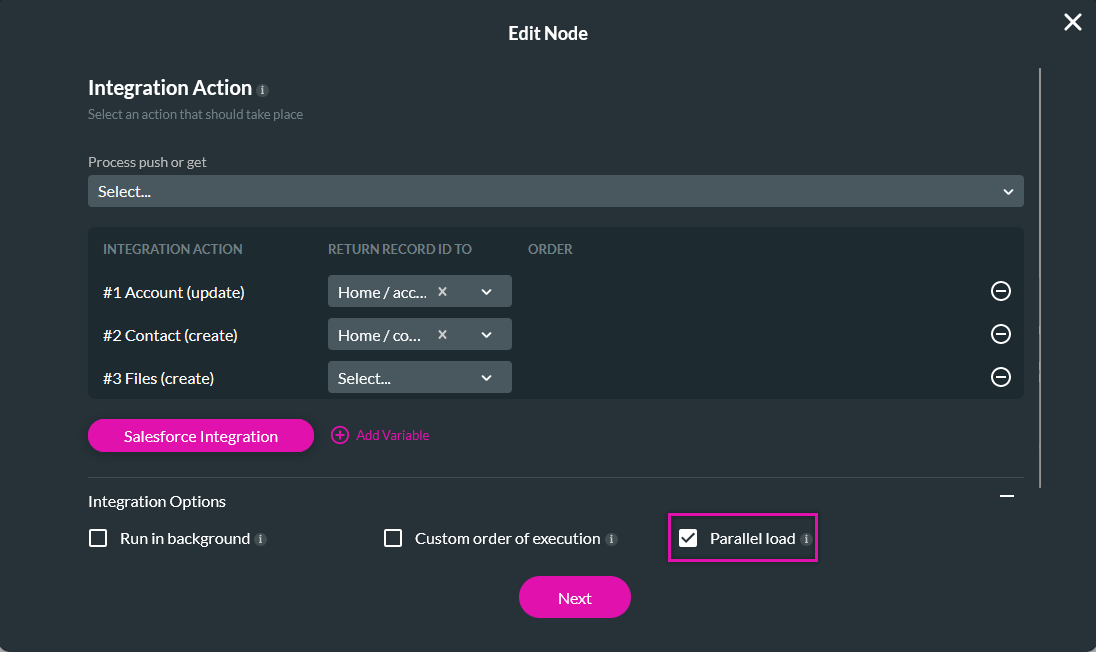
04 Parallel Load
If your actions are not dependent on one another, you can enable Parallel load which will ensure all your actions are executed side by side to one another. This will also optimize your project’s performance.
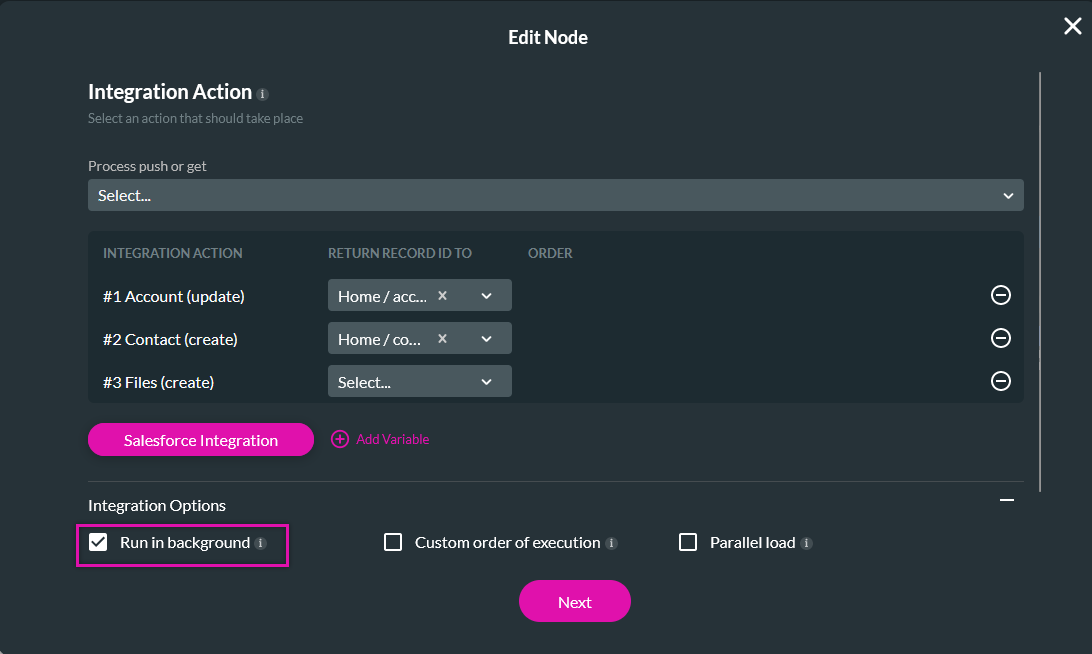
05 Run in Background
This feature turns off the Titan preloader, which will allow your user to interact with your project while actions are running in the background. A drawback of this feature is that the user is unable to see whether or not an action is currently running - for example, a user may exit the current screen as they are unable to see an action is still underway.
06 Ignore Validations
You can choose to ignore validation, this means that mandatory fields’ validation will be ignored upon running the Salesforce Get action.
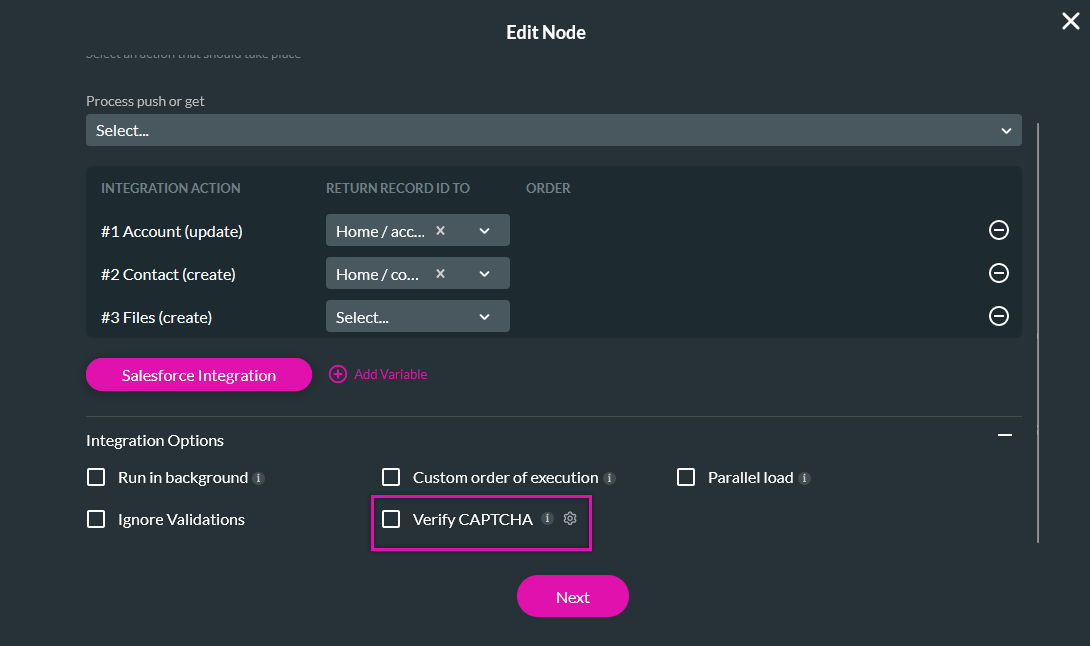
07 Verify CAPTCHA
This feature allows you to set a CAPTCHA on an action level. This will ensure that the user is verified each time the action is triggered.