Push Hierarchy (12 min)
01 Getting Started
This tutorial covers pushing a hierarchy of Objects to Salesforce.
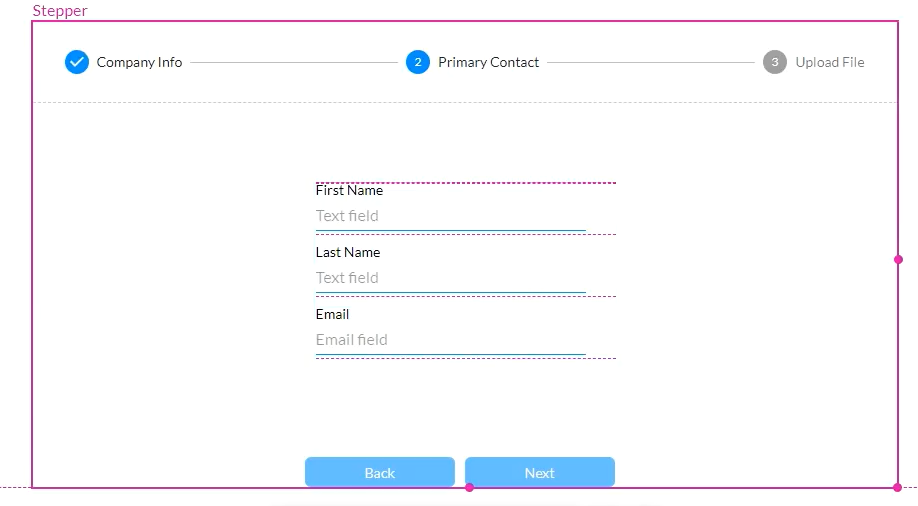
For demonstrative purposes, a Stepper element was created with three steps. We will configure three Push actions to create an account, an associated contact, and a related file.
02 Stepper Setup
A stepper element was used to create three different forms.
- Step 1 will create an account.
- Step 2 will create a contact associated with the account.
- Step 3 will upload a file attachment to the account.
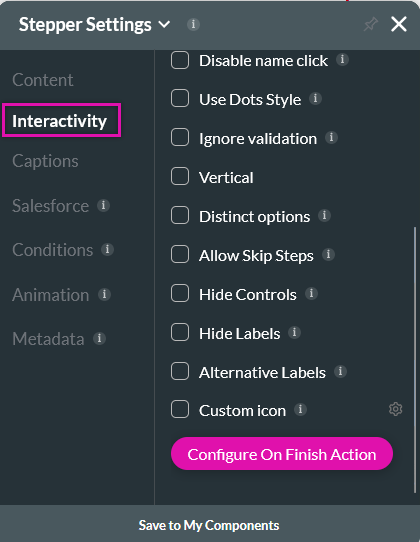
1. Navigate to the Stepper settings menu and select the Interactivity tab.
2. Click the Configure On Finish Action button.
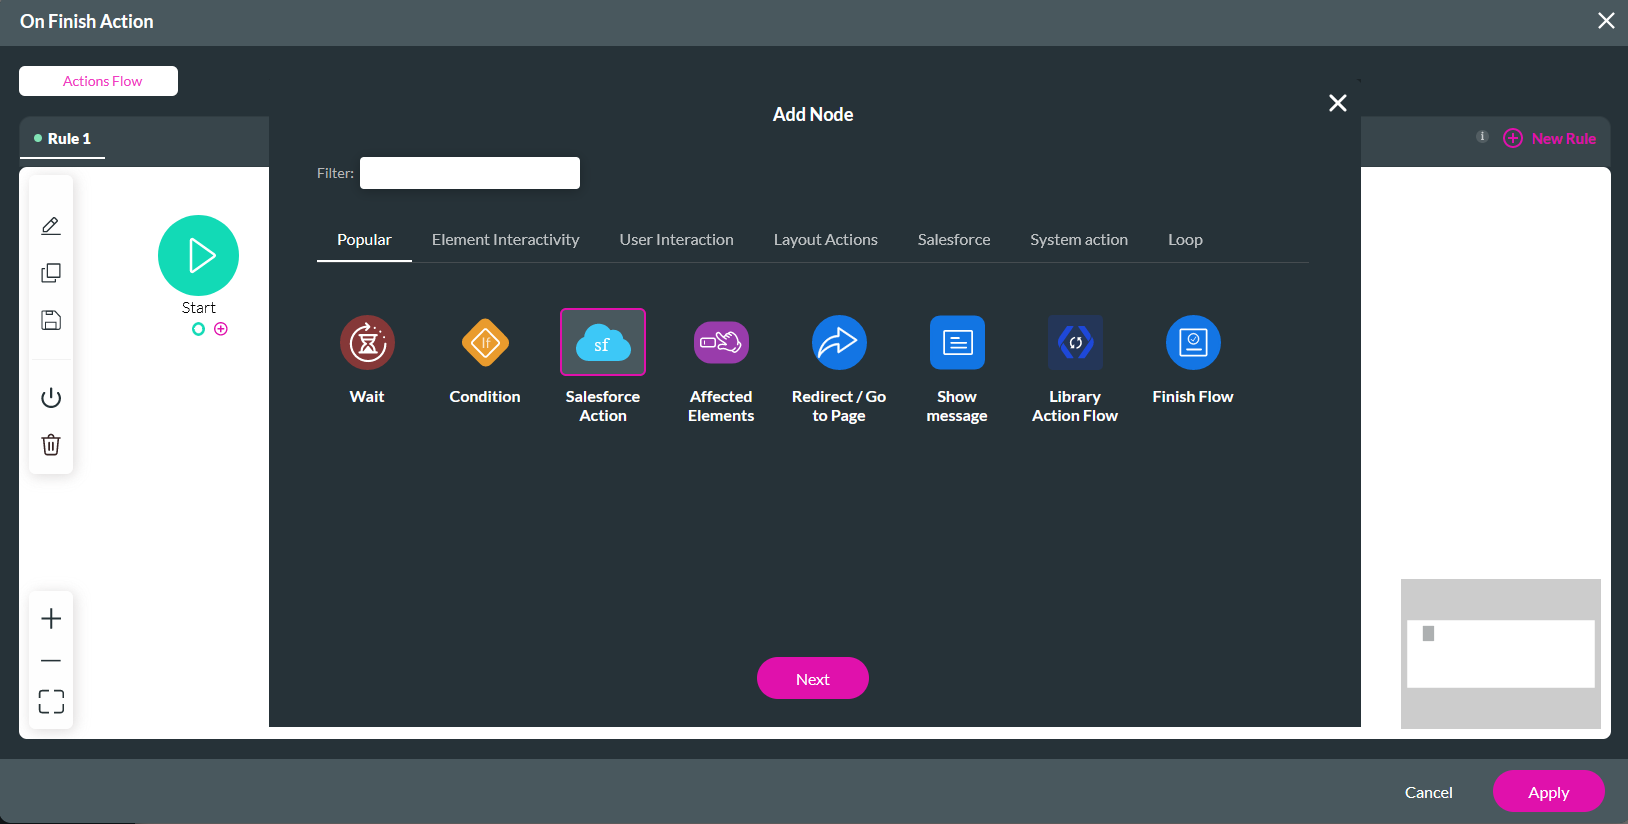
3. Select the Start + icon, choose Salesforce Action as the node, and click Next.
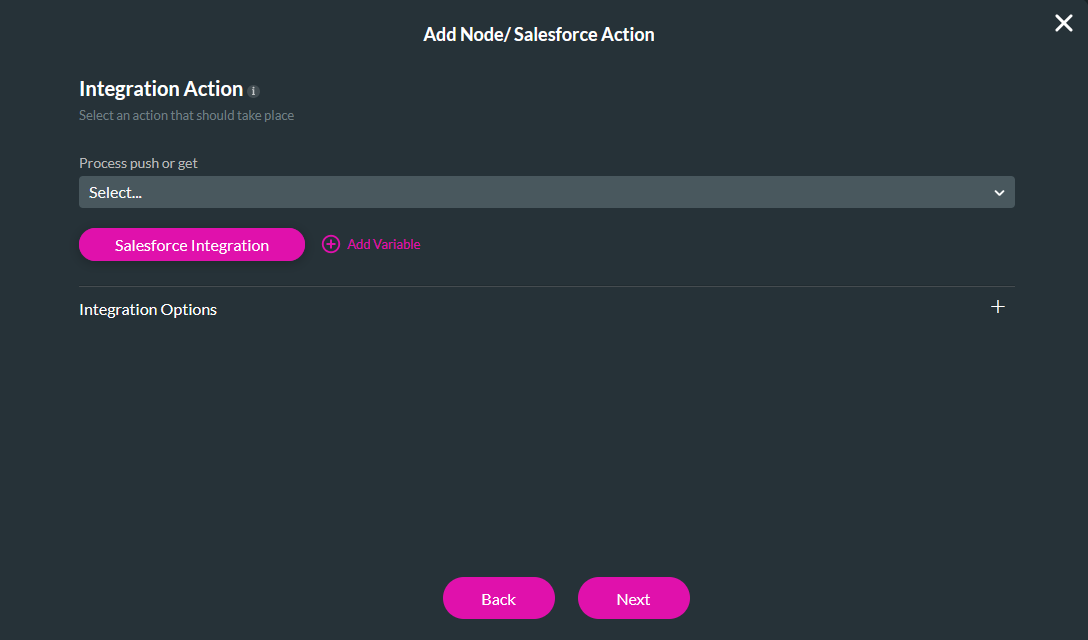
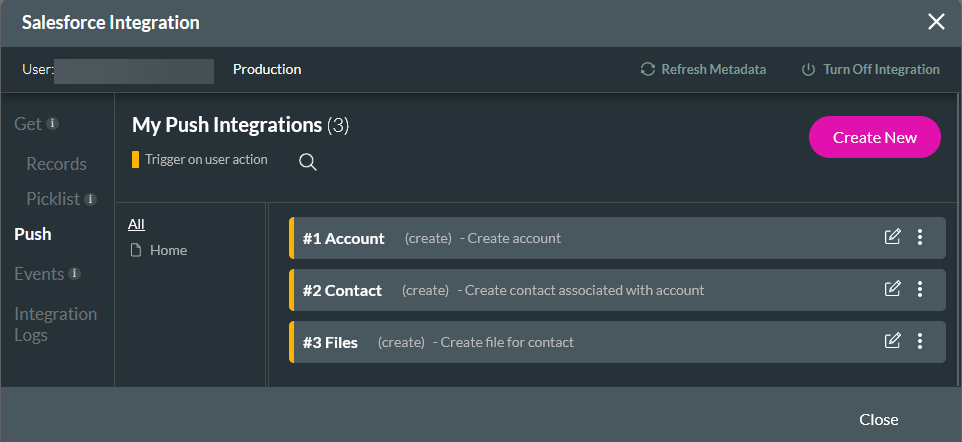
4. Click the Salesforce Integration button.
03 Parent Push
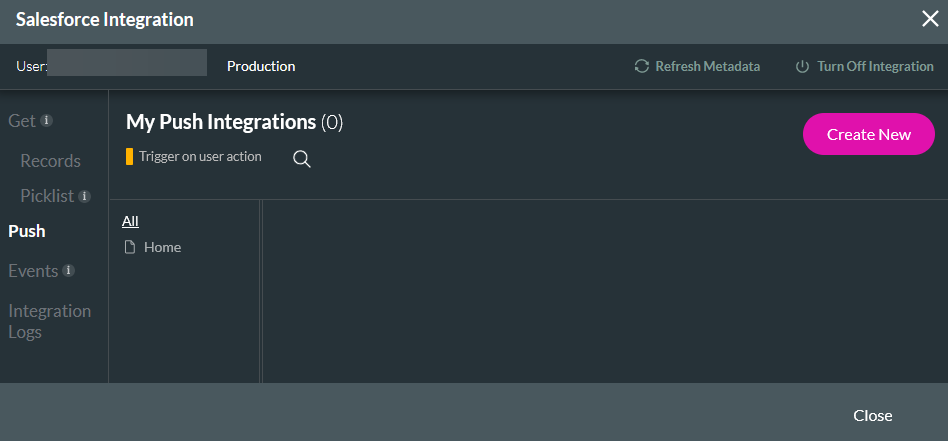
2. In the Object Settings tab, configure Account as the Salesforce Object, Create as the Action, and add a description.
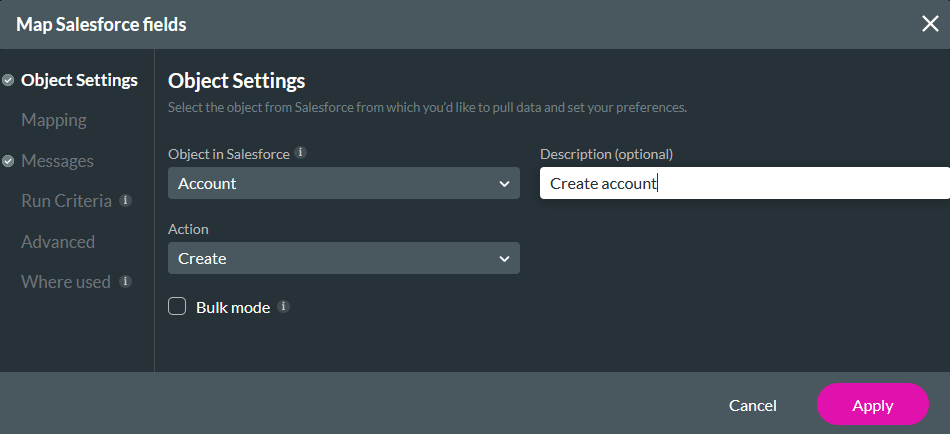
3. In the Mapping tab, map the project elements to their corresponding Salesforce fields. Click Apply.

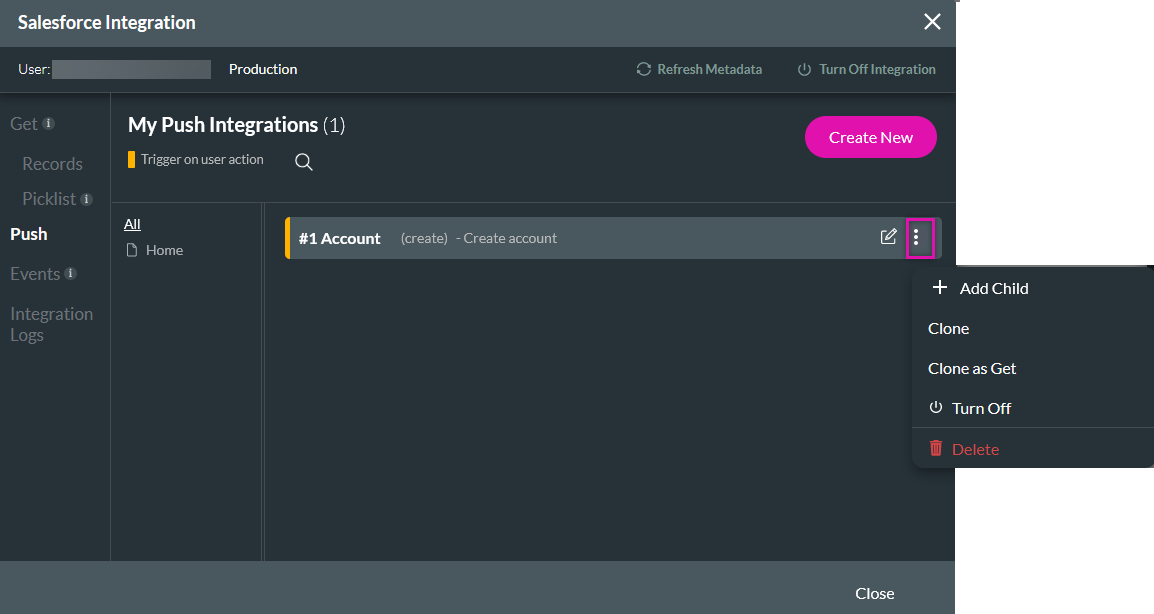
04 First Nested Push
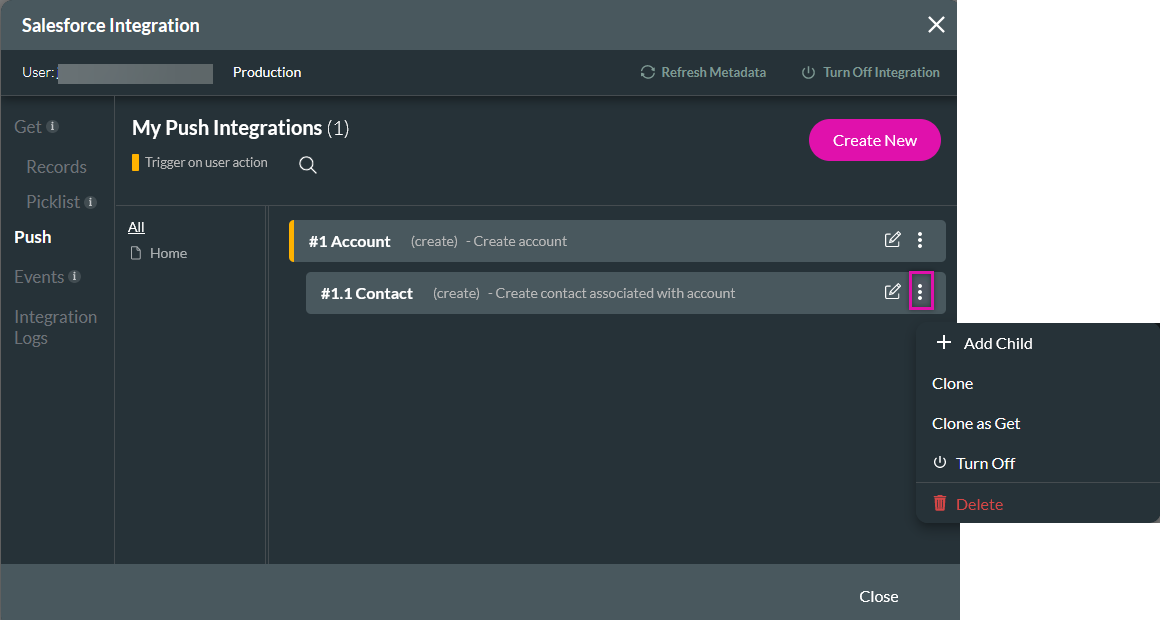
1. Select the ellipsis icon and select + Add Child from the submenu. This will create a nested push.
2. In the Object Settings tab, configure: choose Contact as the Salesforce, Create as the Action, and add a description.
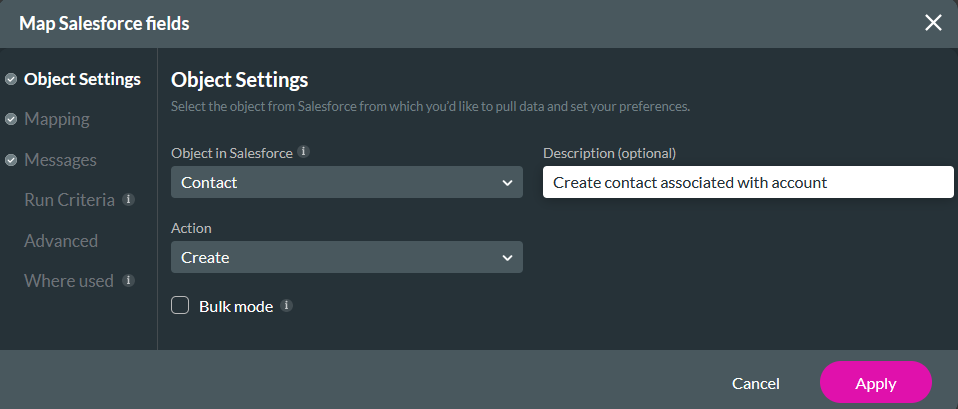
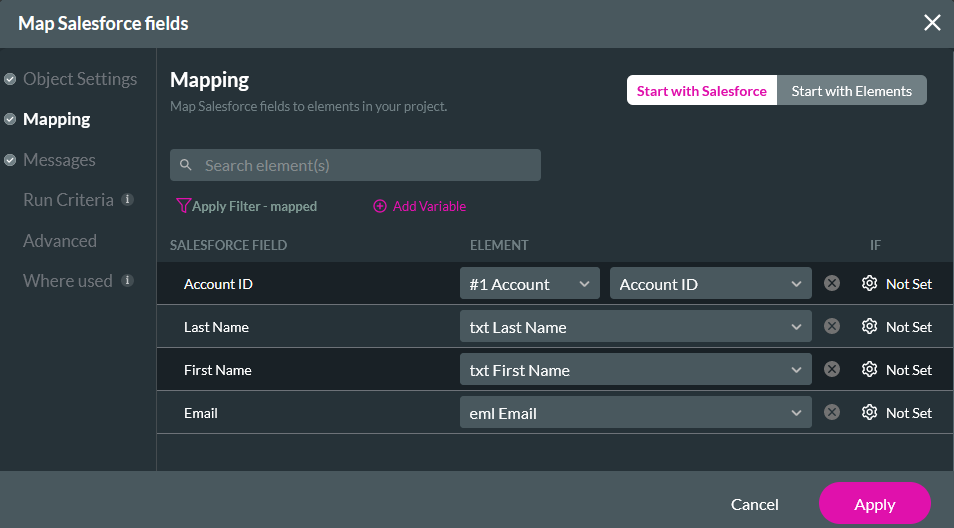
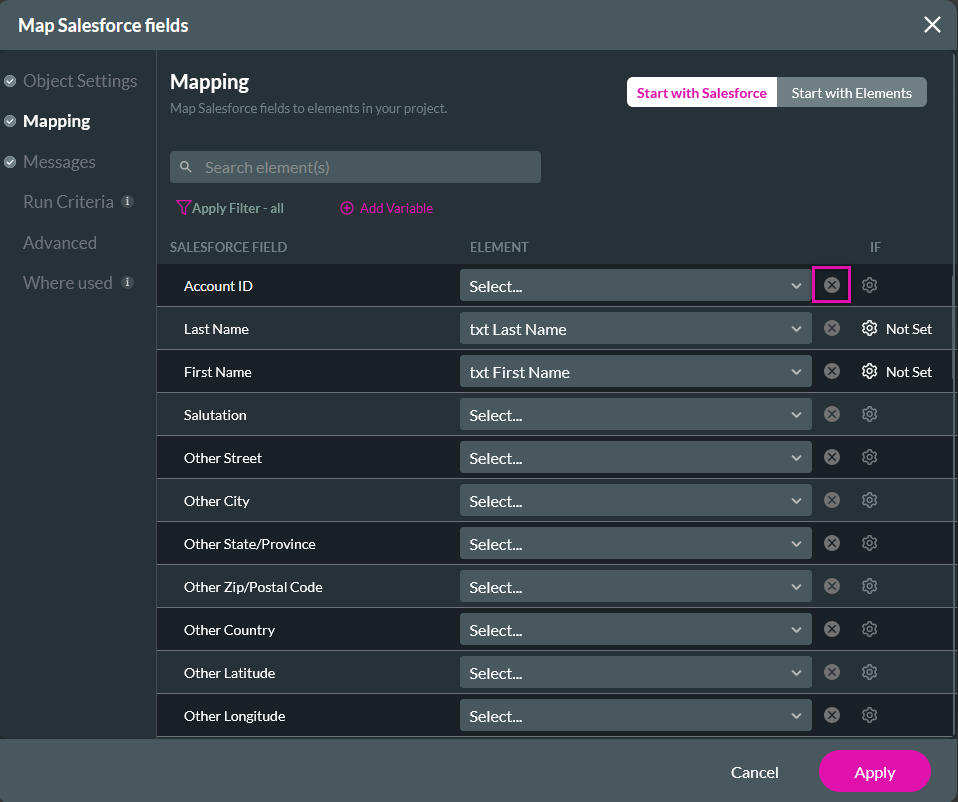
3. The Mapping tab shows that the Account ID is already mapped as this is a child push associated with the create account push. This mapping will only occur for nested actions. You can map the project elements to the corresponding Salesforce fields. Click Apply.
05 Second Nested Push
1. Select the ellipsis icon of the first nested push and select + Add Child from the submenu.
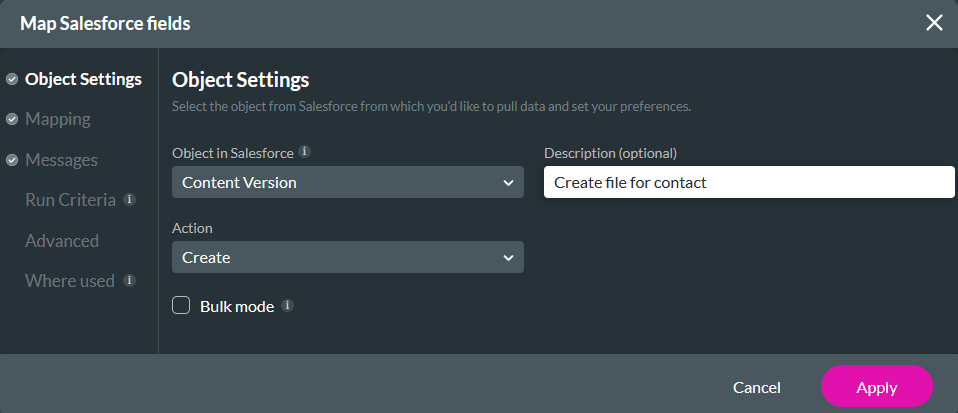
2. In the Object Settings tab, configure Files/Content Version as the Salesforce Object, Create as the Action, and add a description.
3. The Mapping tab shows that the First Publish Location ID has already been mapped according to the parent push. This mapping will only occur for nested actions. Map Version Data to the Choose Files element. Click Apply.

4. Click Close.
06 Choose Salesforce Action
1. Using the dropdown, select the first push. You cannot choose the child's push actions as the first parent push will automatically trigger them. Click Next.
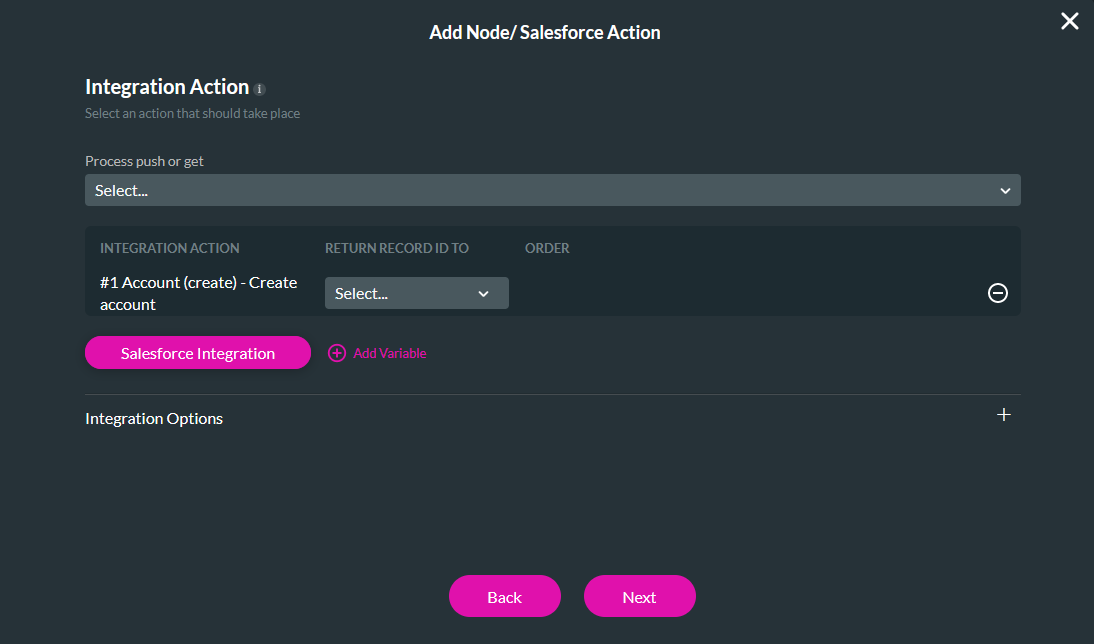
2. Enter a Tag and click Insert.
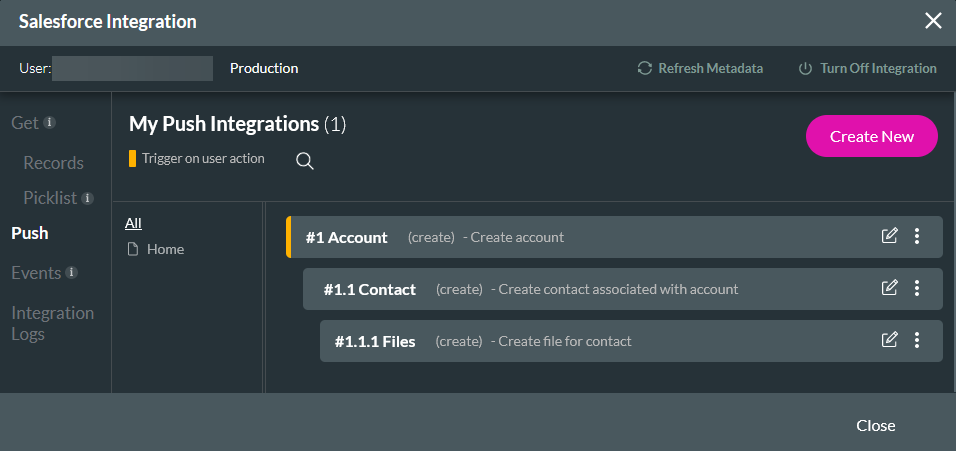
The current configuration works as follows: An account will be created once the user provides their information. First, a contact associated with that account will be pushed, and then the file upload will be saved to that contact.
07 Separating the Pushes
It is best practice to push associated data in a nested format. If you need to make each push a separate action, some additional steps are required.
To change the hierarchy of your push actions, drag and drop the actions to reorder them.
Navigate to the mapping tab of the sub-pushes and remove the automatic mapping for each.
08 Page Variables
When each push is configured separately, information is no longer automatically passed. We will need to create variables to store that information.
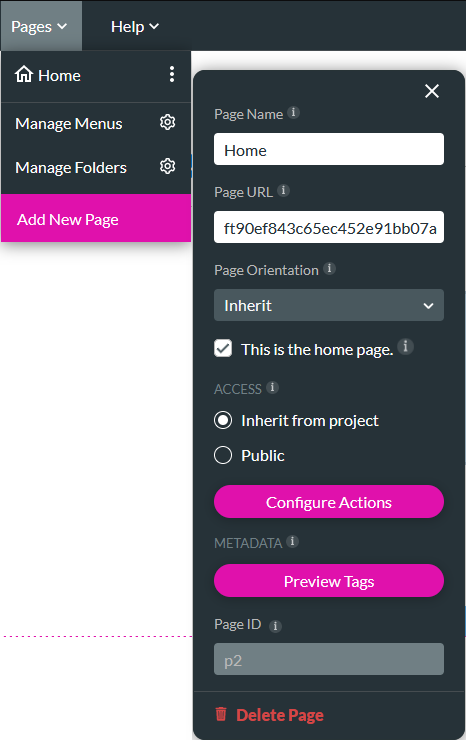
1. Expand the Pages dropdown and click the ellipsis icon of the page for which you wish to configure the variables.
2. Click the Configure Actions button from the submenu.
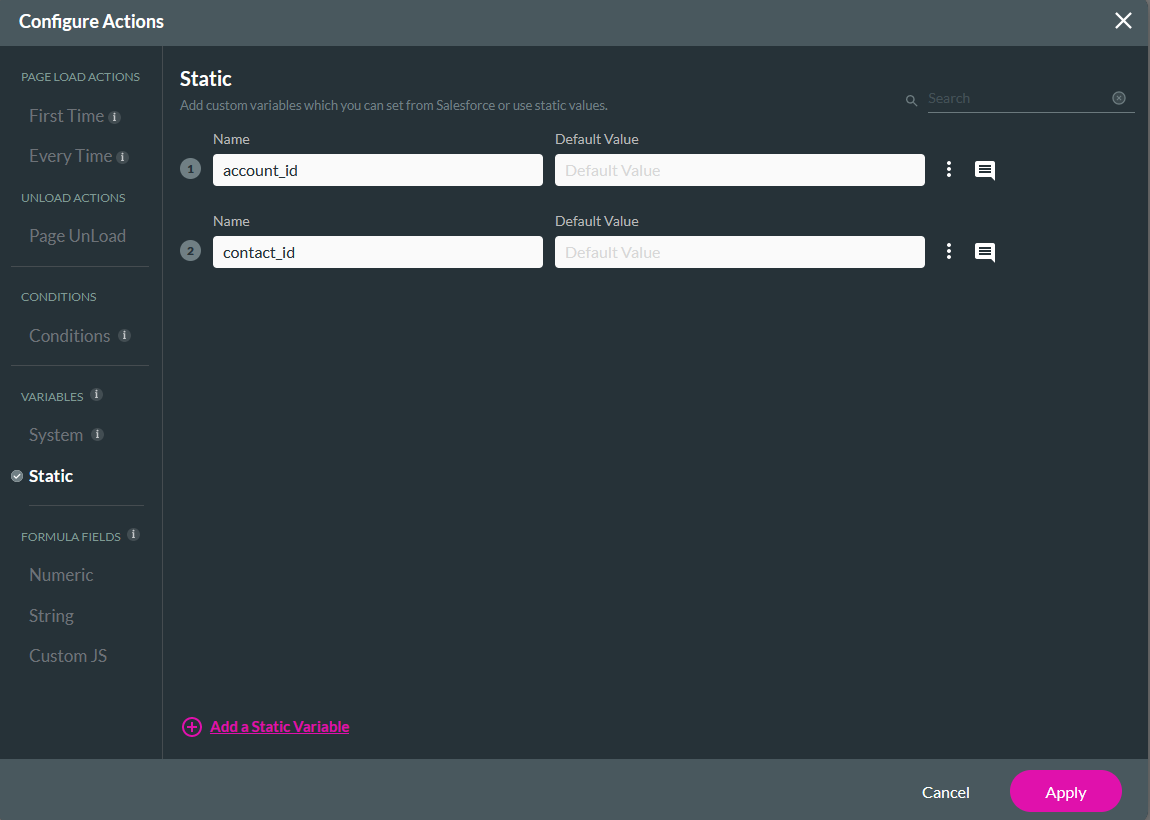
3. Click on the Static Variables tab and add the following variables: account_id and contact_id. The account_id variable will be used for the contact push to ensure the contact is associated with the account, and the contact_id variable will be used for the file push to ensure the file is associated with the contact. Click Apply.
09 Using Variables in Pushes
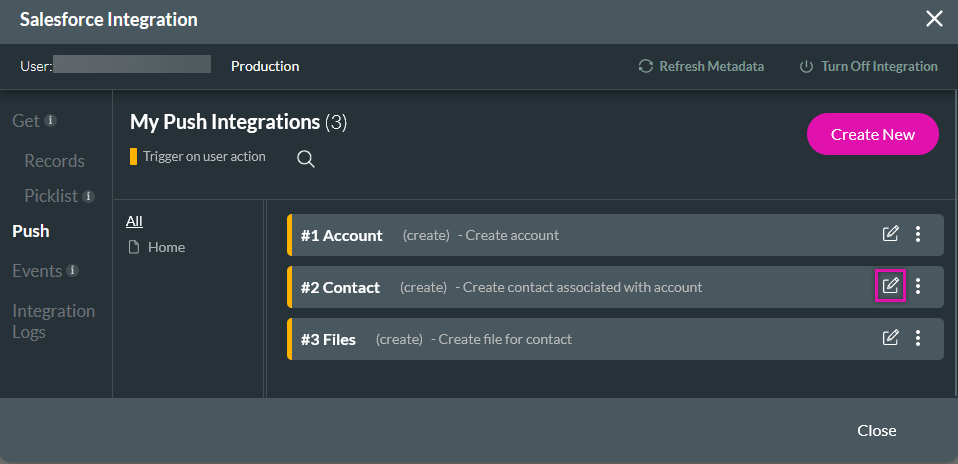
1. Navigate to the Salesforce Integration window and click the Contact edit icon.
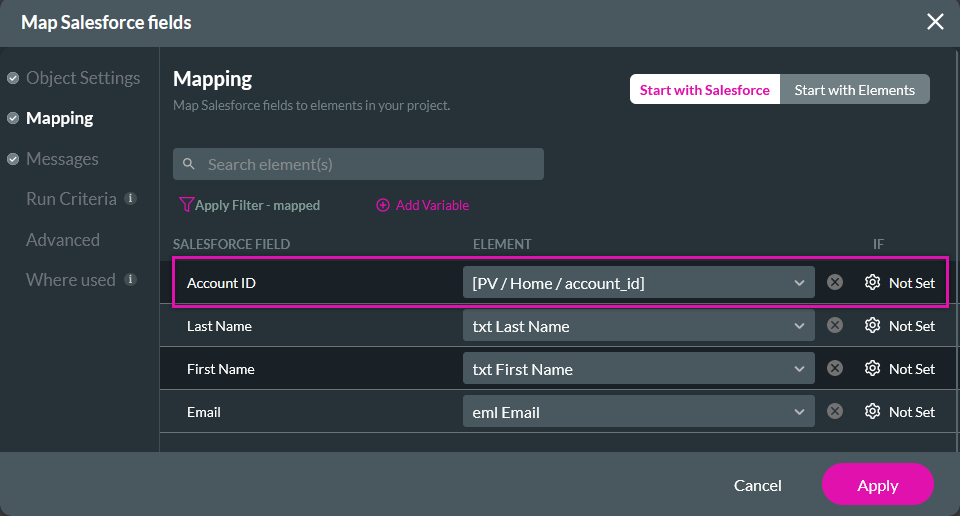
2. Click the Mapping tab and use the dropdown to map the Account ID to the account_id variable.
3. Follow the same step with the file push. However, you will map the First Publish Location ID to the contact_id variable.

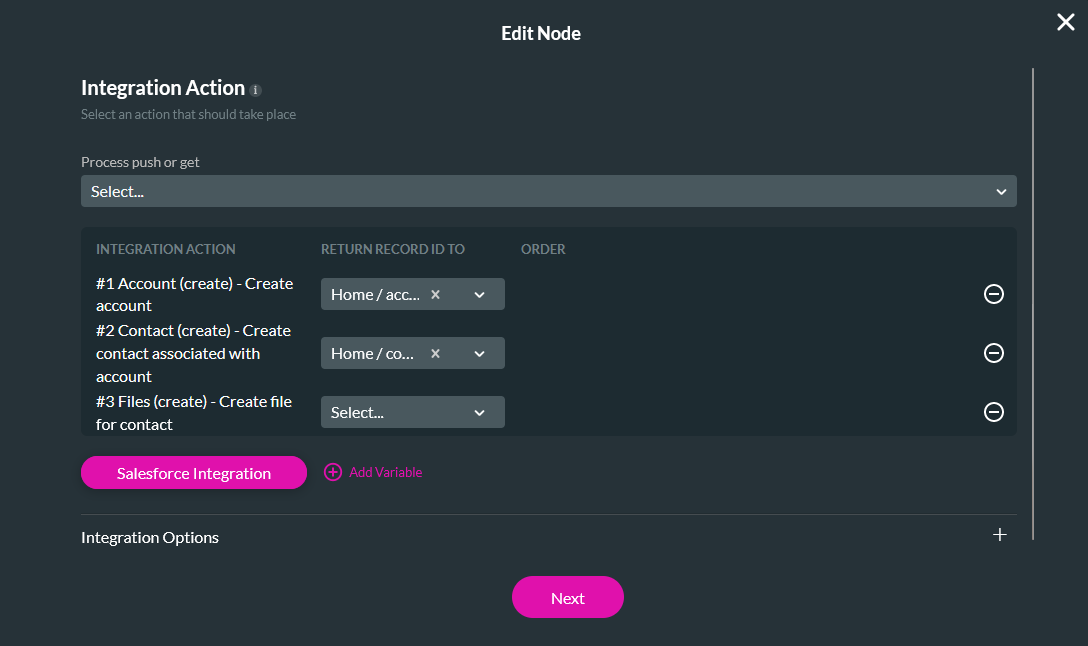
10 Updating the Salesforce Action
Now that the pushes are no longer nested, each push must be selected separately when configuring the finish action.
1. Navigate back to the Stepper On Finish Action window.
2. Double-click the node to edit it.
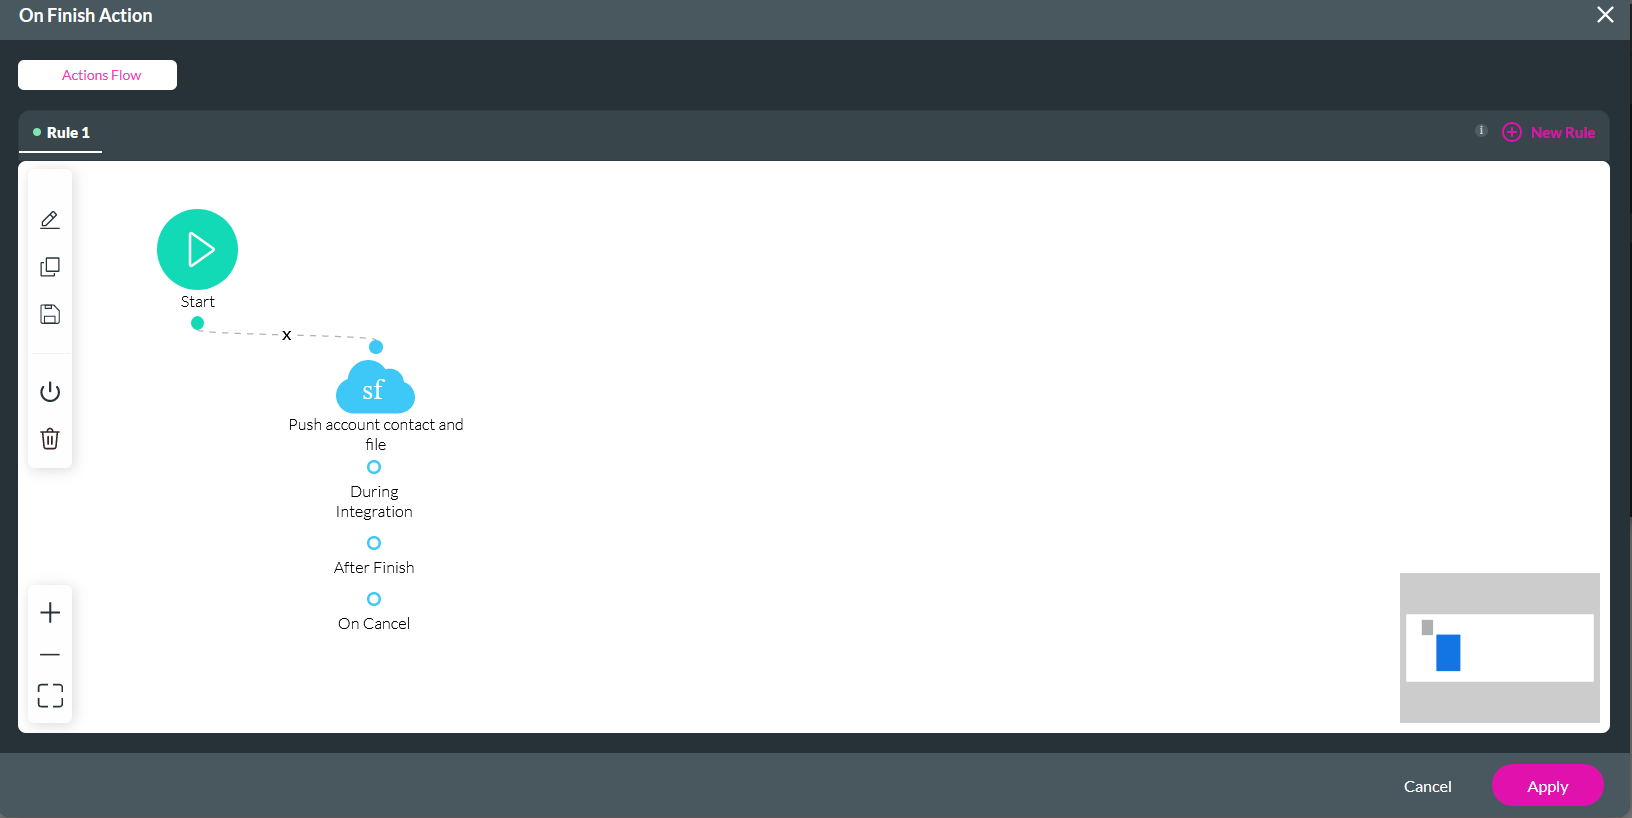
3. Use the dropdown to select the separate Salesforce push actions. Ensure you choose the Actions in the correct order, or you can use the custom order feature to number each action individually.
4. Use the Return Record ID To dropdown to select the corresponding variable. Click Next and Save.
Note: You can also choose to run these actions in other nodes. For example, you could display a pop-up message asking the user whether to create a contact associated with the account and trigger the push separately.
The current configuration works as follows: An account will be created once the user provides their information. First, a contact associated with that account will be pushed, and then the file upload will be saved to that contact. Each of these pushes will happen after the previous one instead of happening in one nested push action.