Find Action (12 min)
Completion requirements
01 Getting Started
This tutorial covers the Find action, including:
- The security benefits of using the Find action.
- How to set up a Find action in a Nested Push.
- Creating a record if no matching record is found.
02 Security Benefits
The Find action is a secure method of querying a record and using data from that record in your push. Often, you will not want to return the queried data to your project, so your Find action will primarily be used for Salesforce push actions.
03 Create a Find Action
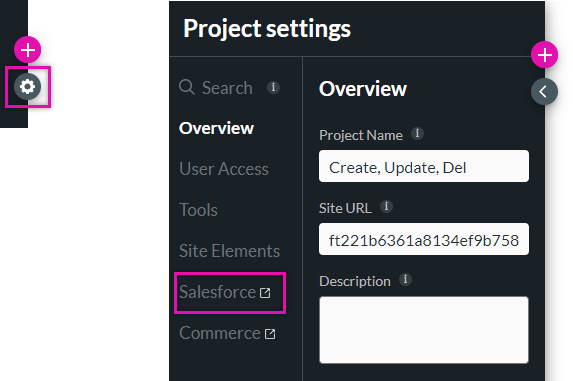
1. Select the Project Settings gear icon and click the Salesforce tab. The Salesforce Integration window opens
2. Select the Push tab and click Create New.
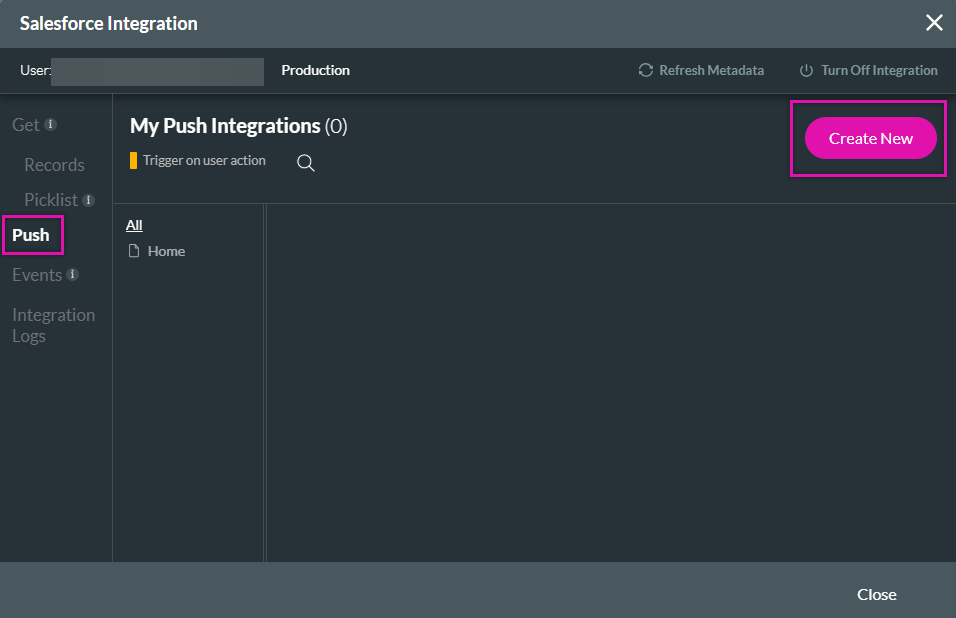
2. Select the Push tab and click Create New.
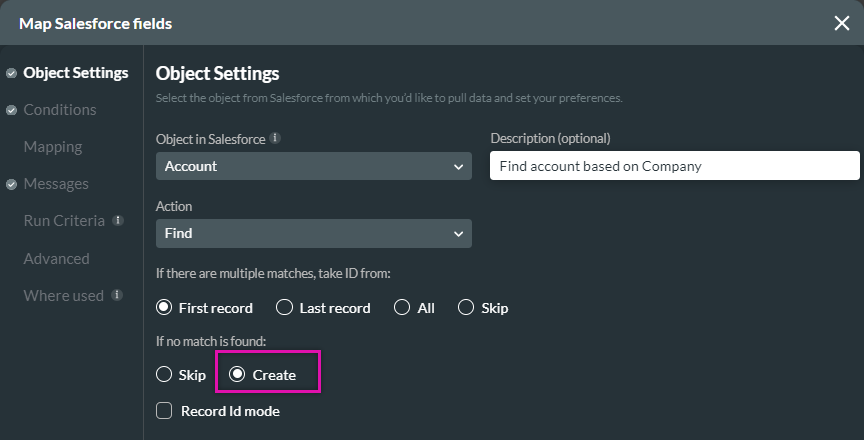
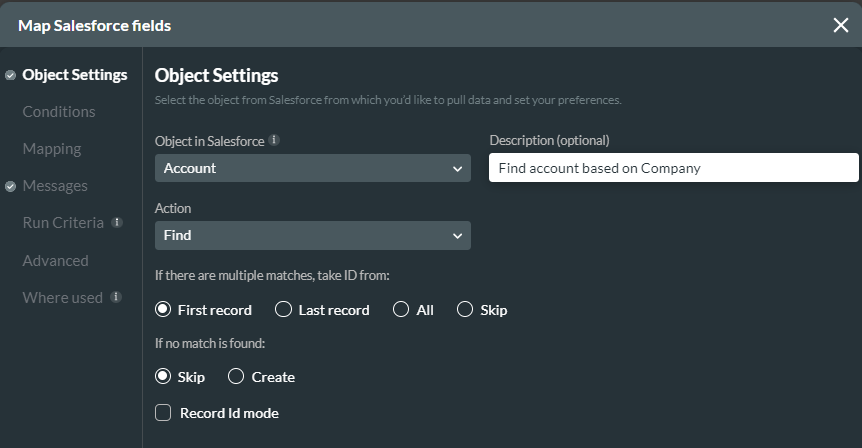
04 Object Settings
1. Select your Salesforce object. This can be a custom or standard object in Salesforce.
2. Select the Find action.
3. Add a description. Although this step is optional, labeling each Salesforce action you create provides a quick overview of what each action does.
4. You can choose which ID should be used if multiple matches are found.
5. Choose what action should trigger if no match is found.
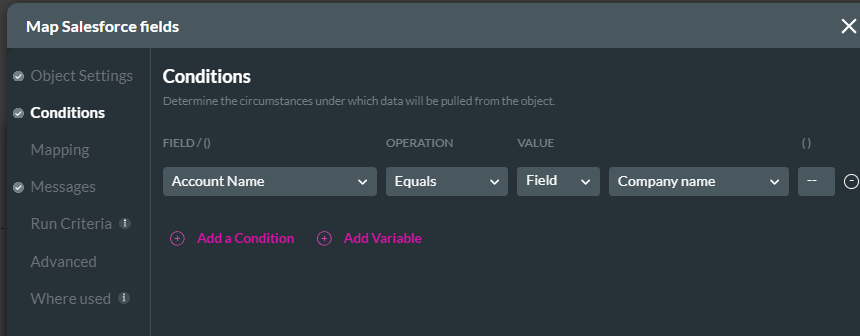
05 Conditions
Create conditions so only records that meet the criteria are found.
06 Creating a Nested Push
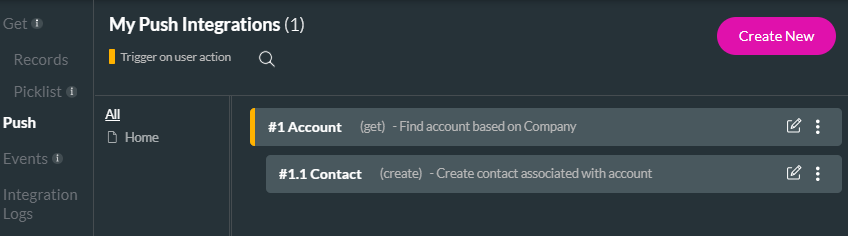
Add the requested Push action as a Nested Child Push under the Find action to relate the push to the found record. For this example, we will create a contact under the found account.
1. Click the kebab menu and select + Add Child.
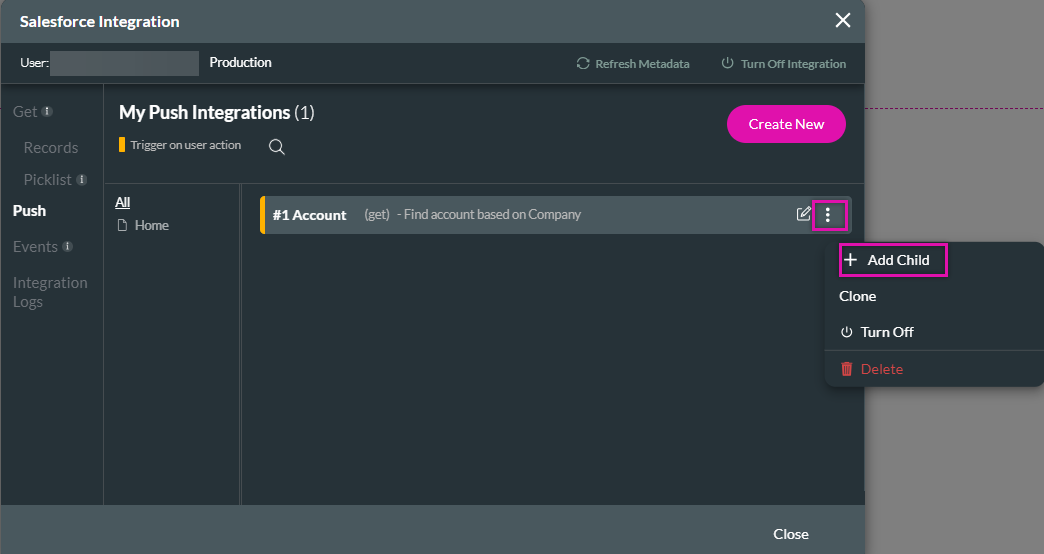
1. Click the kebab menu and select + Add Child.
07 Object Settings
1. Select your Salesforce object. This can be a custom or standard object in Salesforce.
2. Select the Create action.
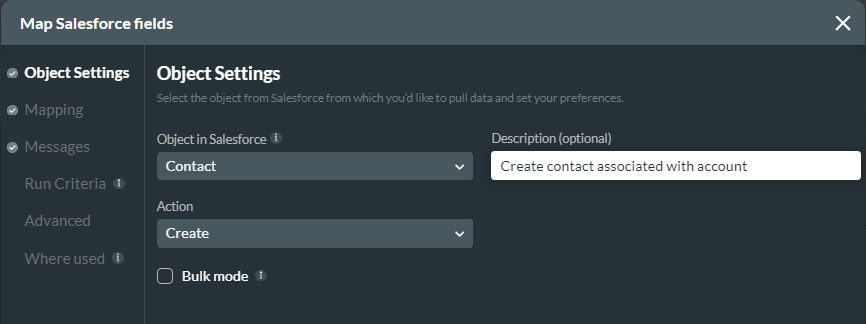
2. Select the Create action.
08 Mapping
When you select the mapping tab, you will see that the Account ID is already related to the parent Find action.
1. Use the dropdowns to map Salesforce fields to your form elements.
You can map fields from the parent's Find record to the child's record Push.
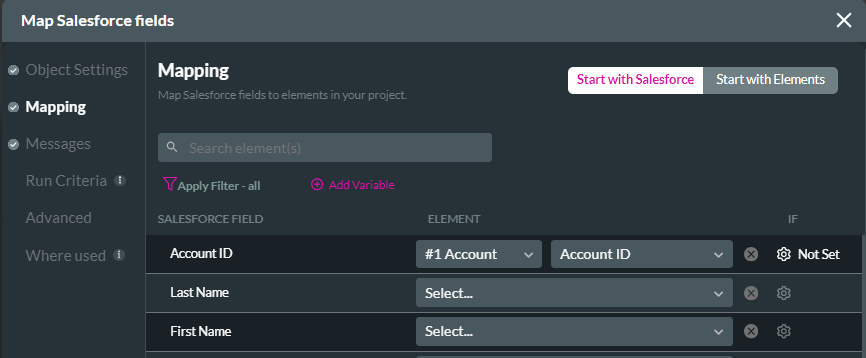
1. Use the dropdowns to map Salesforce fields to your form elements.
You can map fields from the parent's Find record to the child's record Push.
Your Create action will be nested under your Find action.
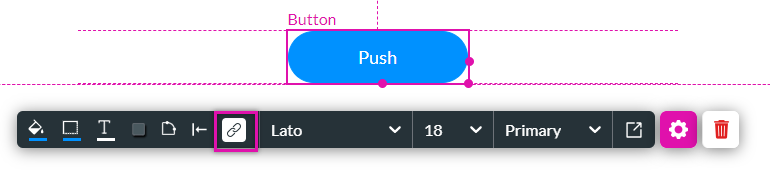
09 Button On Click Action
Now that you have created a push, you must assign the Salesforce action to an interactive element, such as a button.
1. Click the button interactivity icon.
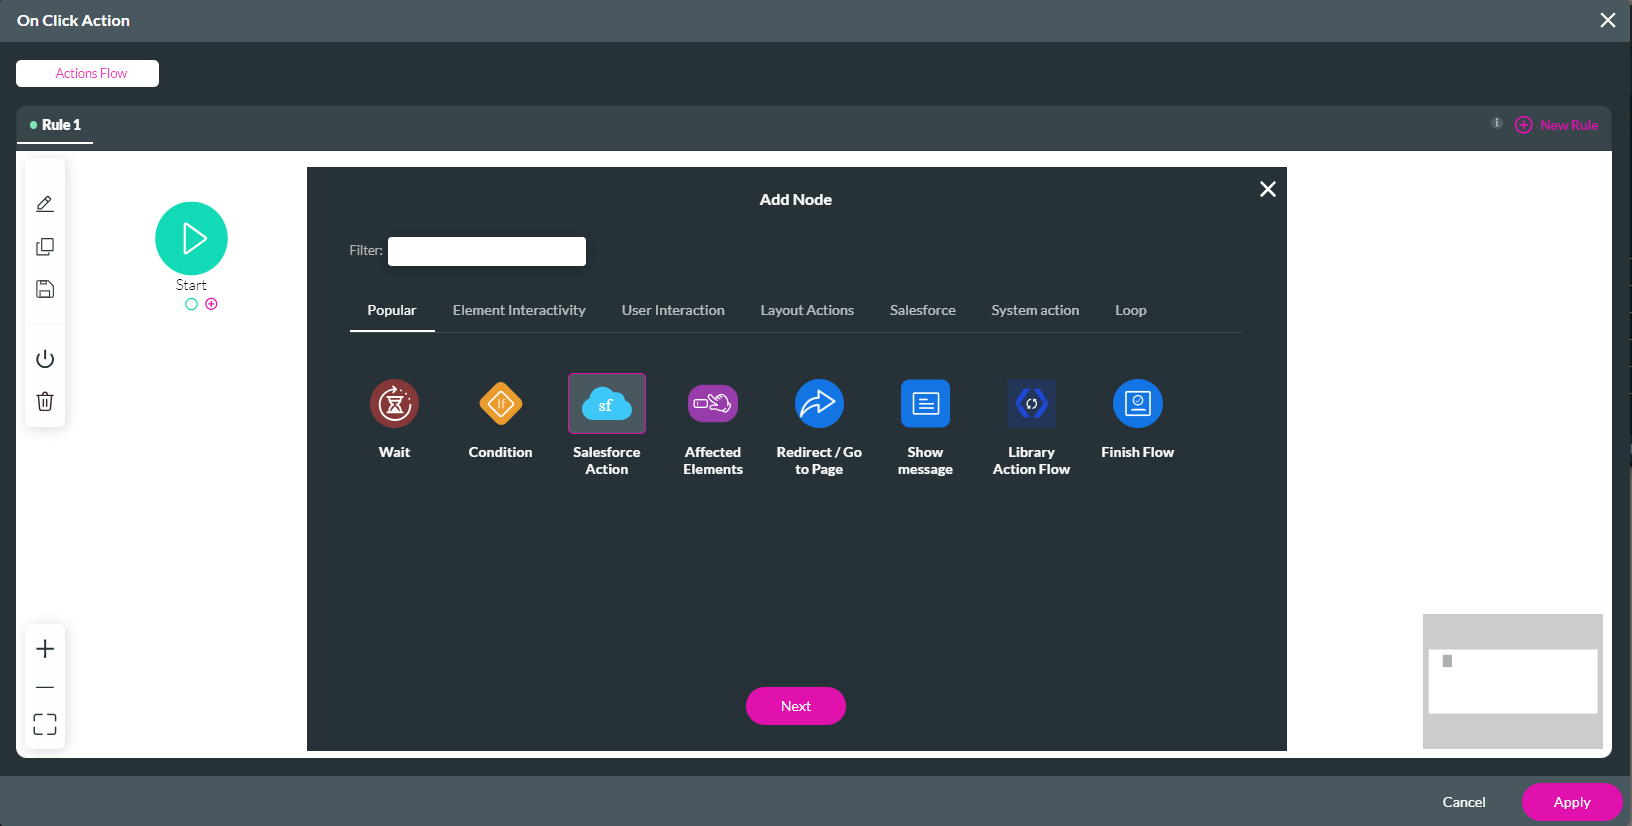
2. Select the Start + icon, Salesforce Action, and click Next.
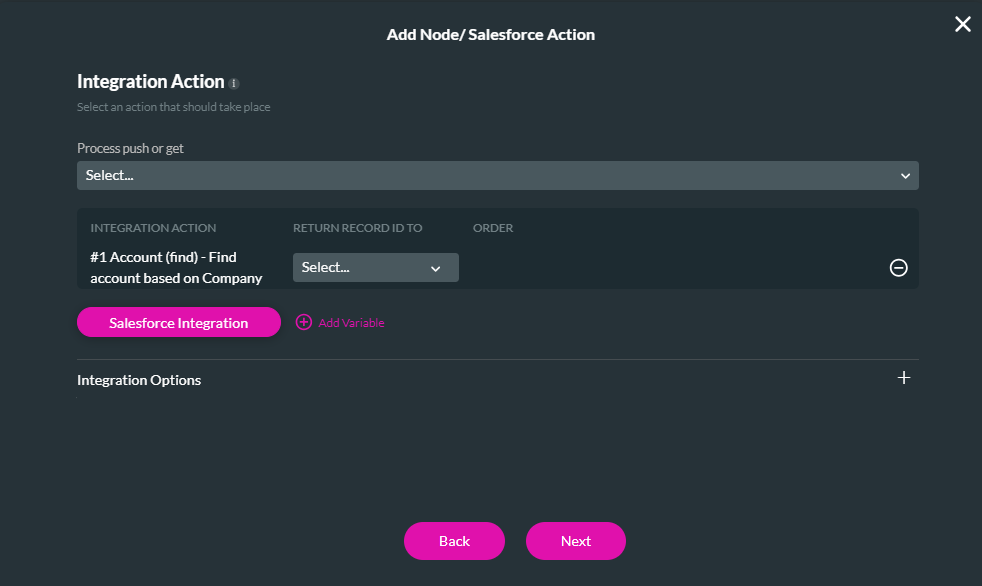
3. Using the dropdown, select the Salesforce push you just created. By giving each action a unique description, you can easily see which action to choose from. Click Next.
Note: You can only choose a parent action from the list.
4. Add a tag, click Insert, and select Apply.
The two configured actions run when a user provides their details and clicks the button. First, the account is found, and then an associated contact is created.
1. Click the button interactivity icon.
2. Select the Start + icon, Salesforce Action, and click Next.
3. Using the dropdown, select the Salesforce push you just created. By giving each action a unique description, you can easily see which action to choose from. Click Next.
Note: You can only choose a parent action from the list.
4. Add a tag, click Insert, and select Apply.
The two configured actions run when a user provides their details and clicks the button. First, the account is found, and then an associated contact is created.
10 Find and Create
If no match is found, you can find an account or create a new one. Select the Create option when configuring the object settings for your Salesforce find action.