Create, Update, Delete Actions (12:30 min)
Completion requirements
01 Getting Started
This tutorial covers pushing data to Salesforce, including:
- Creating a record.
- Updating or creating a record.
- Deleting a record.
02 Create a Record
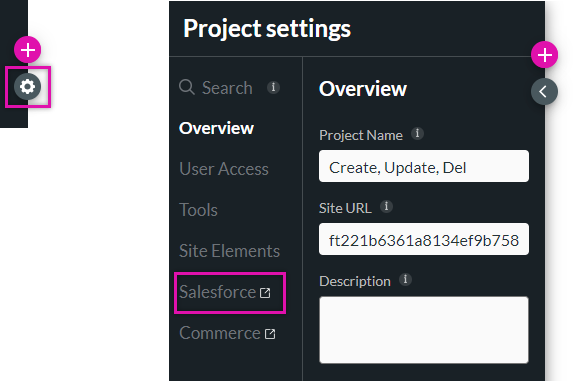
1. Select the Project Settings gear icon and click the Salesforce tab. The Salesforce Integration window opens.
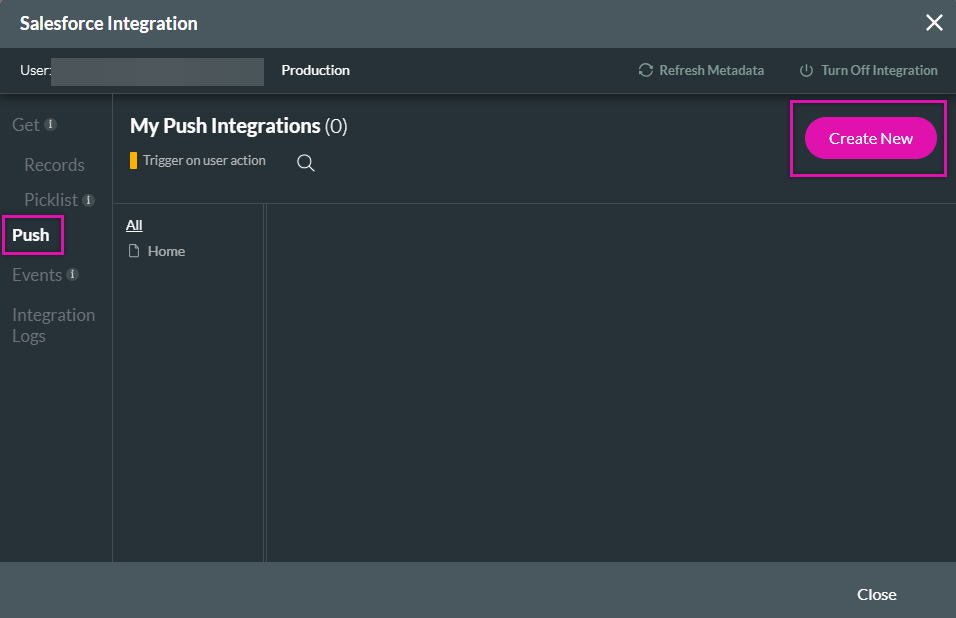
2. Select the Push tab and click Create New.
2. Select the Push tab and click Create New.
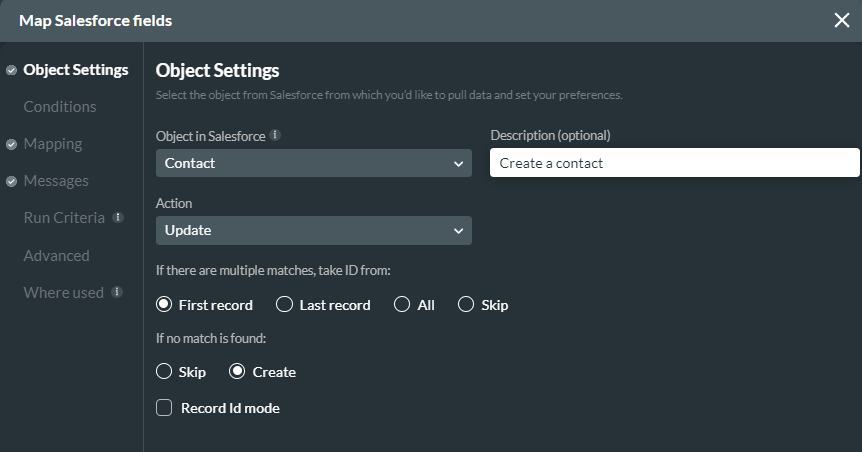
03 Object Settings
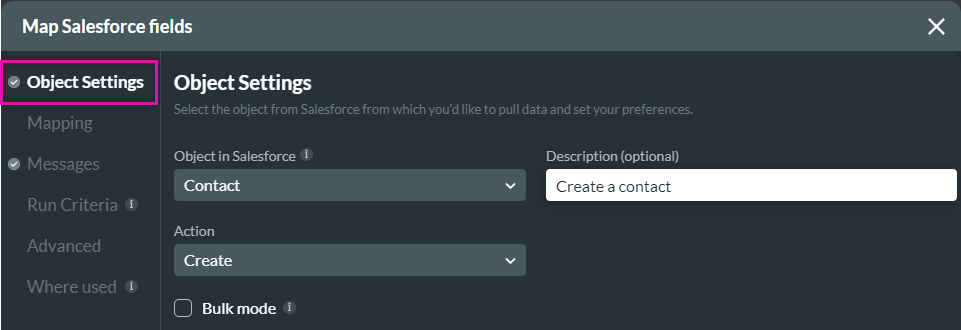
1. Select your Salesforce object. This can be a custom or standard object in Salesforce.
2. Select your action. This tutorial will focus on the create, update, and delete actions.
3. Add a description. Although this step is optional, labeling each Salesforce action you create provides a quick overview of what each action does.
2. Select your action. This tutorial will focus on the create, update, and delete actions.
3. Add a description. Although this step is optional, labeling each Salesforce action you create provides a quick overview of what each action does.
04 Mapping
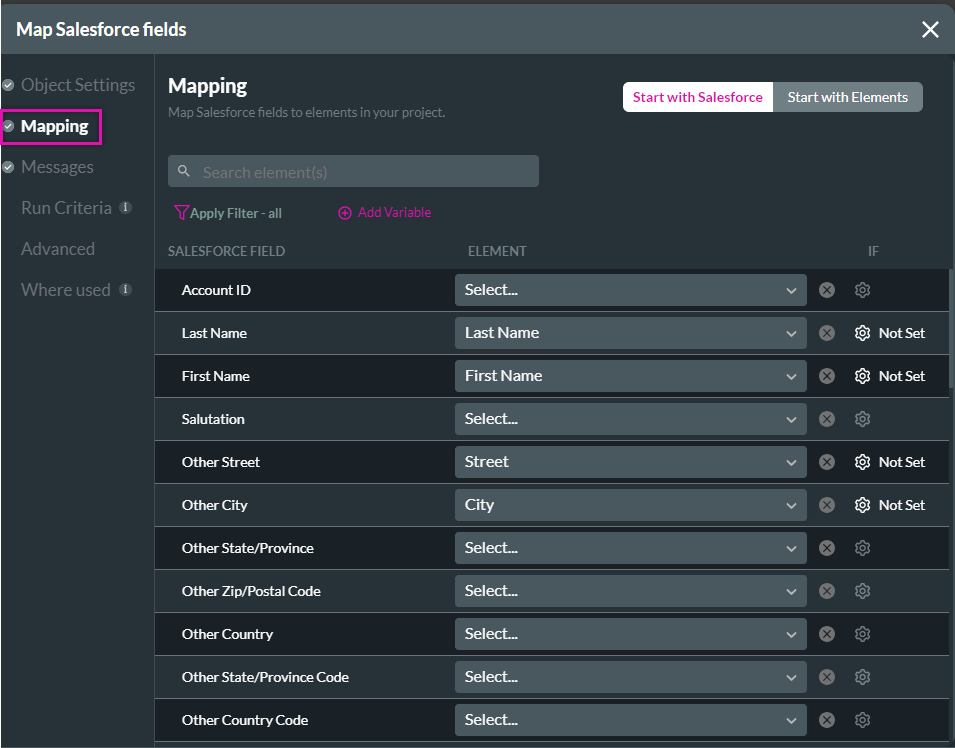
Using the dropdowns, map your Salesforce field to the corresponding element. Once your configuration is complete, use the filters provided to view all fields, specific pages, and mapped or unmapped fields. Click Apply.
05 Button On Click Action
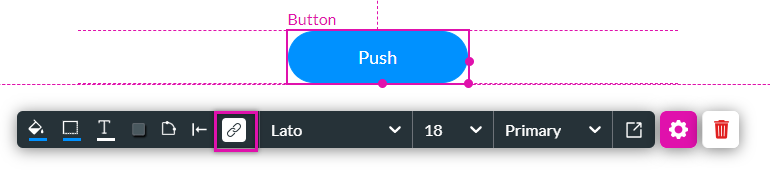
Now that you have created a push, you must assign the Salesforce action to an interactive element, such as a button.
1. Click the button interactivity icon.
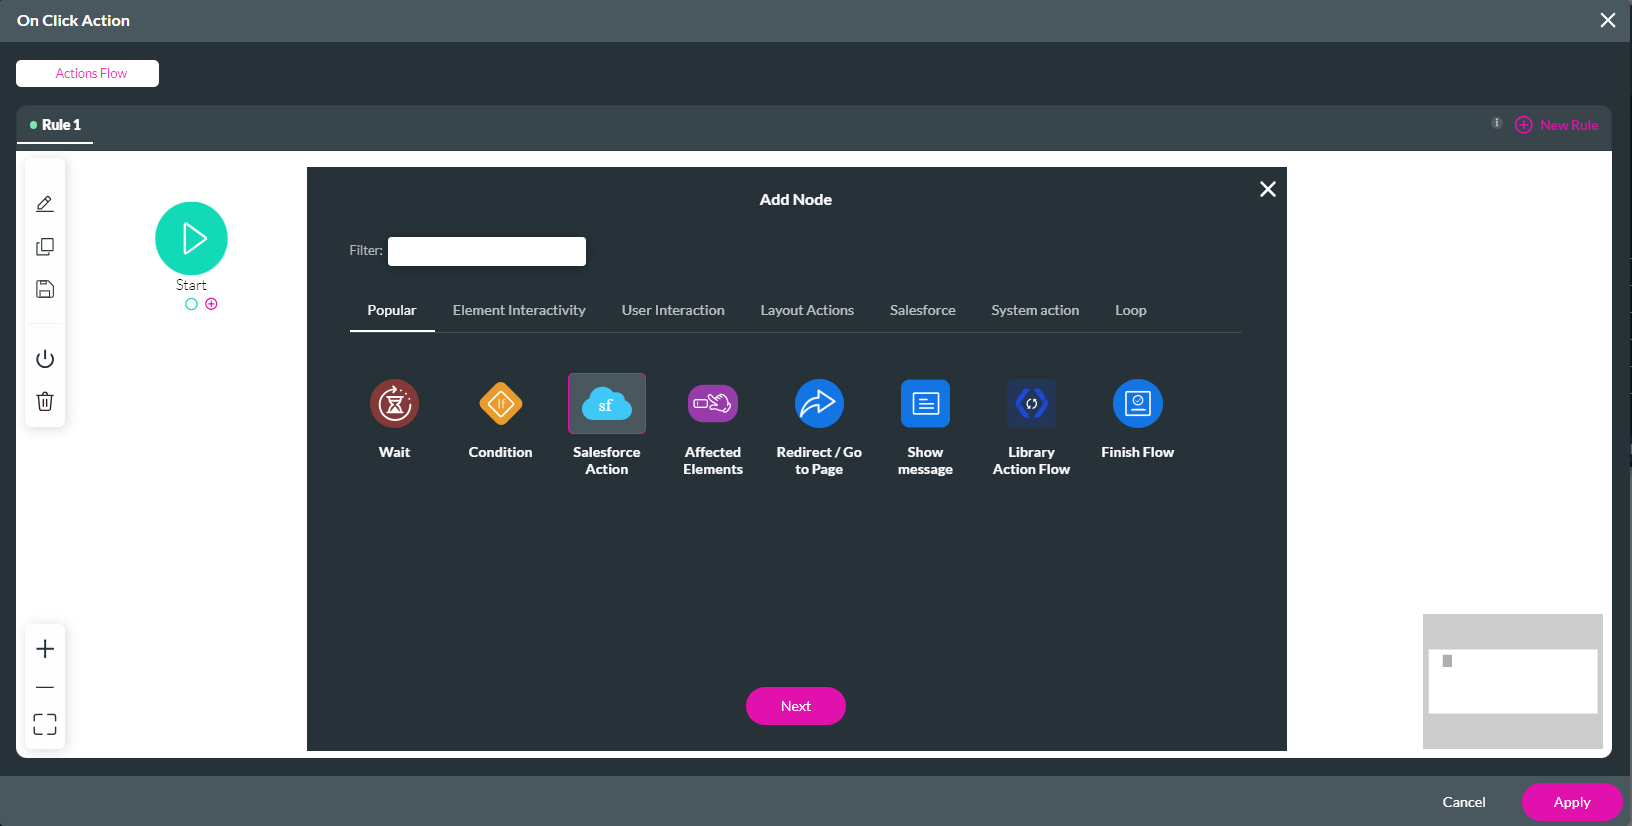
2. Select the Start + icon, choose Salesforce Action, and click Next.
3. Using the dropdown, select the Salesforce push you just created. By giving each action a unique description, you can easily see which action to choose from. Click Next.
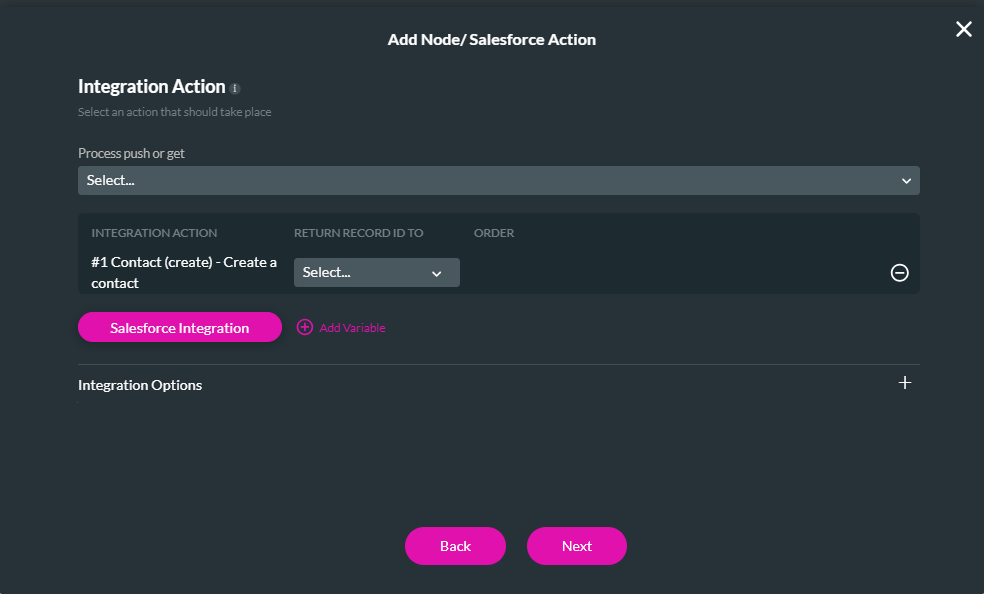
4. Add a tag for the action, click Insert, and select Apply.
Save and preview when users enter their contact information and click the button. The data will be pushed to Salesforce to create a new contact.

1. Click the button interactivity icon.
2. Select the Start + icon, choose Salesforce Action, and click Next.
3. Using the dropdown, select the Salesforce push you just created. By giving each action a unique description, you can easily see which action to choose from. Click Next.
4. Add a tag for the action, click Insert, and select Apply.
Save and preview when users enter their contact information and click the button. The data will be pushed to Salesforce to create a new contact.
06 Update a Record
You can change your Salesforce action to update a record instead of creating a new one.
1. Navigate to your Salesforce integration window.
2. Click the edit icon next to your created push.
1. Navigate to your Salesforce integration window.
2. Click the edit icon next to your created push.
07 Object Settings
1. Use the Action dropdown to select Update.
2. If Salesforce finds multiple matches, you can choose which record to update. If Salesforce does not find a match, you can create a new contact.
2. If Salesforce finds multiple matches, you can choose which record to update. If Salesforce does not find a match, you can create a new contact.
08 Conditions
Create a condition to ensure the correct record is updated. For example, the email field in Salesforce must equal the email field provided by the user.

When a user completes the form and provides an email that matches an existing contact, any information they provide that does not match the current Salesforce data will be updated.
When a user completes the form and provides an email that matches an existing contact, any information they provide that does not match the current Salesforce data will be updated.
09 Delete a Record
You can choose to delete your Salesforce record.
1. Navigate to your Salesforce integration window.
2. Click the edit icon next to your created push.
1. Navigate to your Salesforce integration window.
2. Click the edit icon next to your created push.
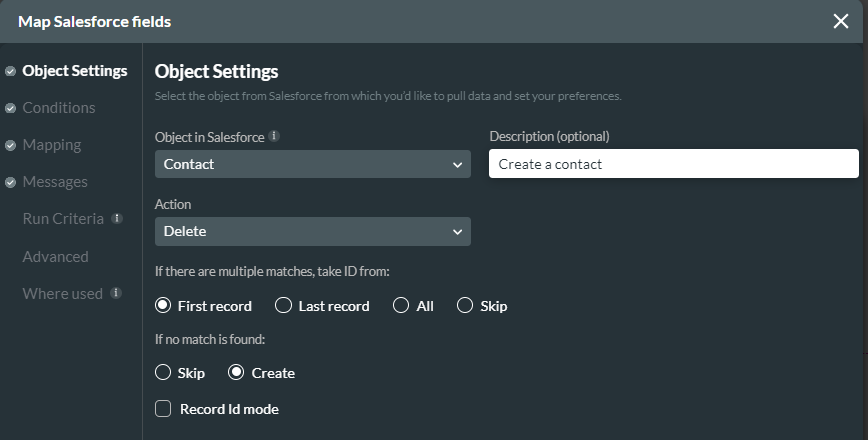
10 Object Settings
1. Use the Action dropdown to select Delete.
2. Configure which record ID should be deleted if multiple matches are found and what action must run if no match is found.
2. Configure which record ID should be deleted if multiple matches are found and what action must run if no match is found.
11 Conditions
Create a condition to ensure the correct record is deleted. For example, the email field in Salesforce must equal the email field provided by the user.
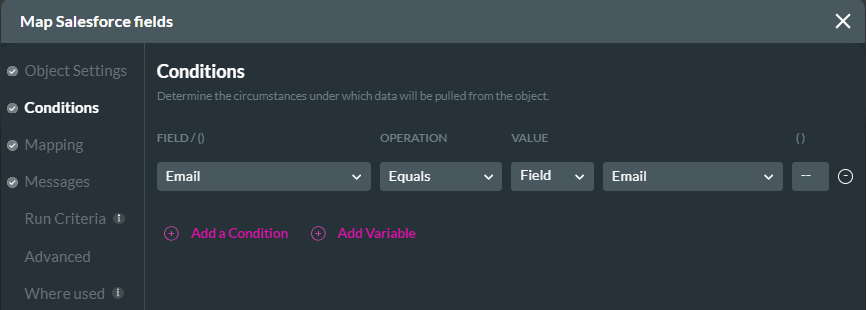
When a user completes the form and provides an email that matches an existing contact, any information they provide that does not match the current Salesforce data will be updated.
When a user completes the form and provides an email that matches an existing contact, any information they provide that does not match the current Salesforce data will be updated.