Encrypted Check (4 min)
01 Getting Started
This tutorial covers setting up encryption on top of the SmartV process.
This ensures your user is authenticated and authorized to certain project parts.
This will be achieved by passing an Encrypted ID on the page URL and comparing it to the encrypted ID in the logged-in record.
Refer to the Record ID encryption process in the following tutorial.
02 Creating Variables
Create a custom variable to pass the allowed encrypted ID on the page URL.
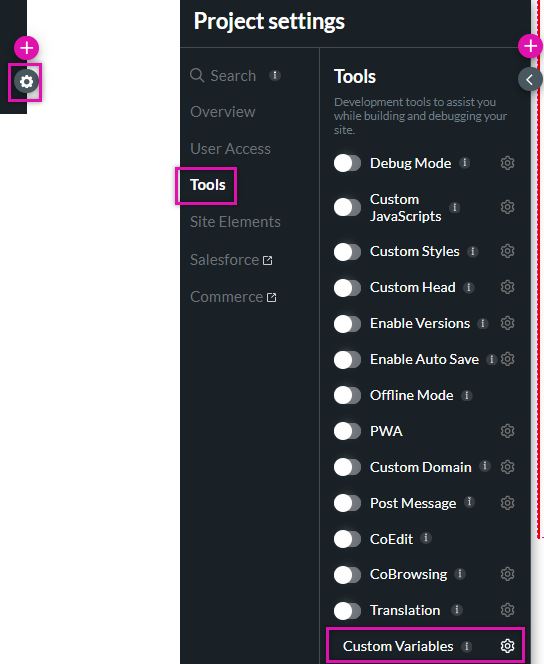
1. Select the project settings gear icon.2. Select the Tools tab and click the Custom Variables gear icon.
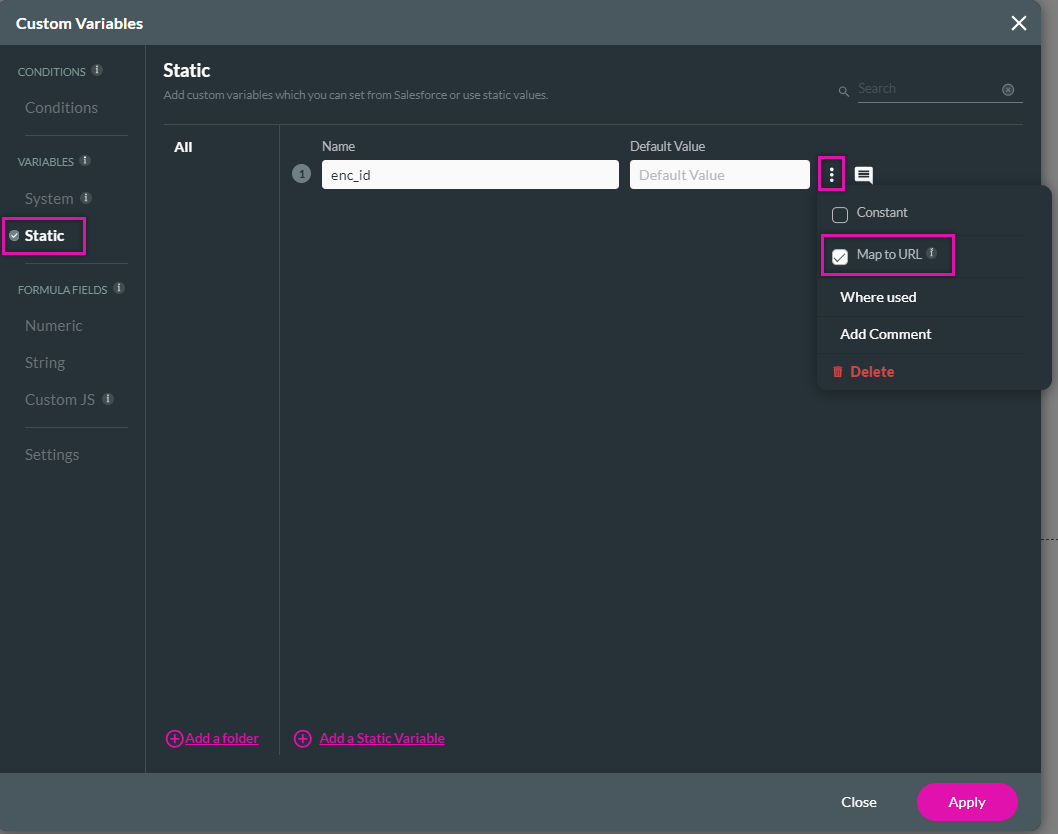
3. Click on the Static tab and add a new custom variable. For this example, we named the variable enc_id.
4. Select the Kebab menu and enable the Map to URL checkbox. Click Apply.
03 Setting a SmartV Parameter
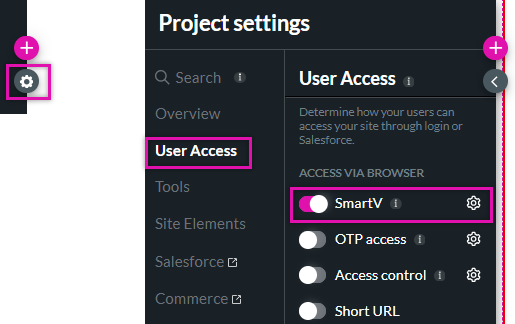
2. Select the User Access tab and click the SmartV gear icon.
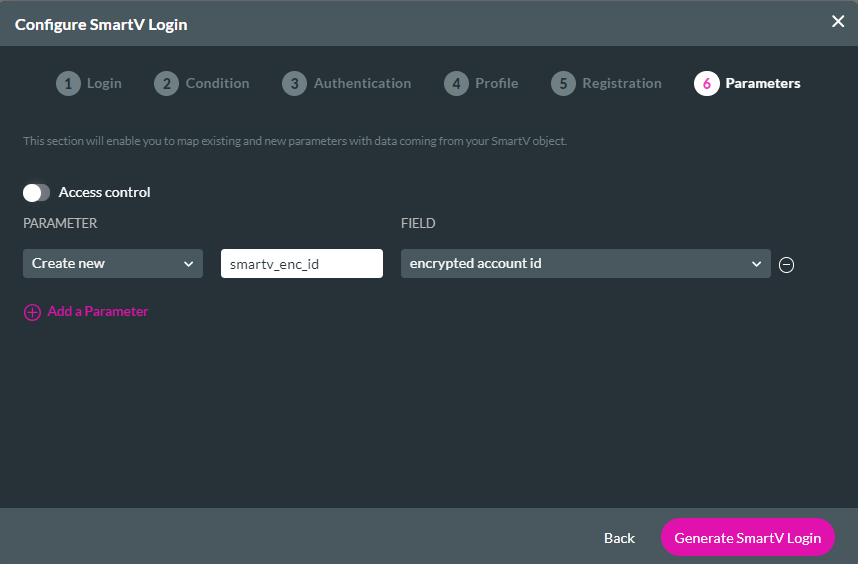
3. Navigate to the Parameters step and create a New Parameter. Give your parameter a name and select the corresponding Salesforce field in the dropdown.
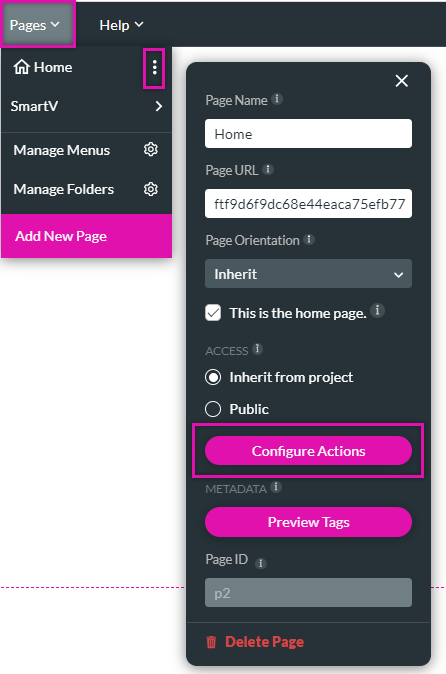
04 Configuring a Page Load Every Time Action
2. Click the Configure Actions button from the submenu.
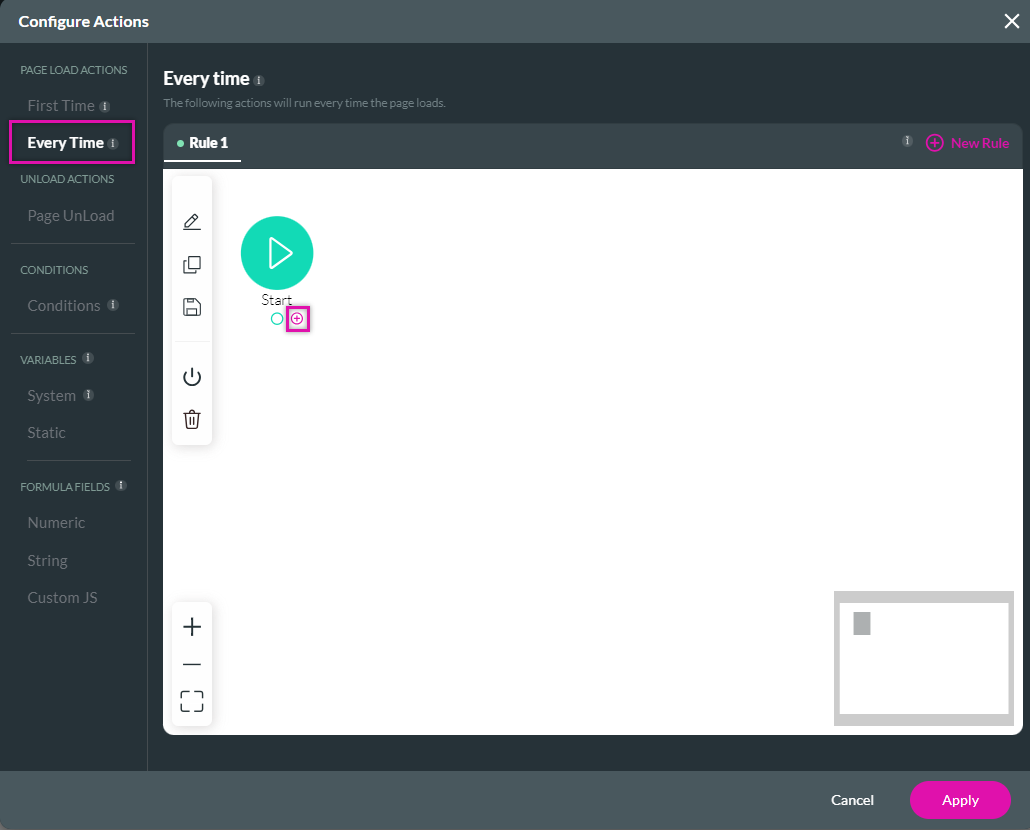
3. Select the Every Time tab and click the Start + icon.
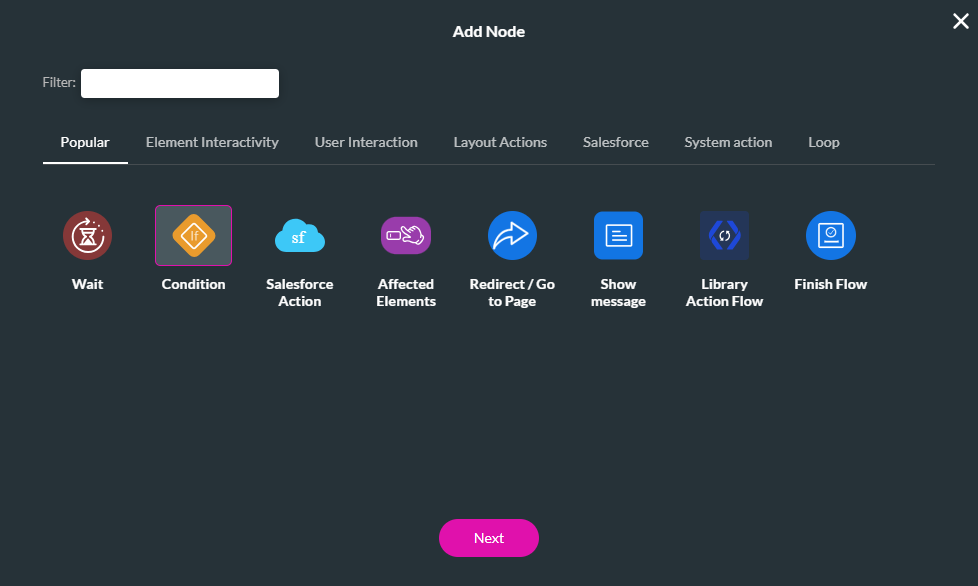
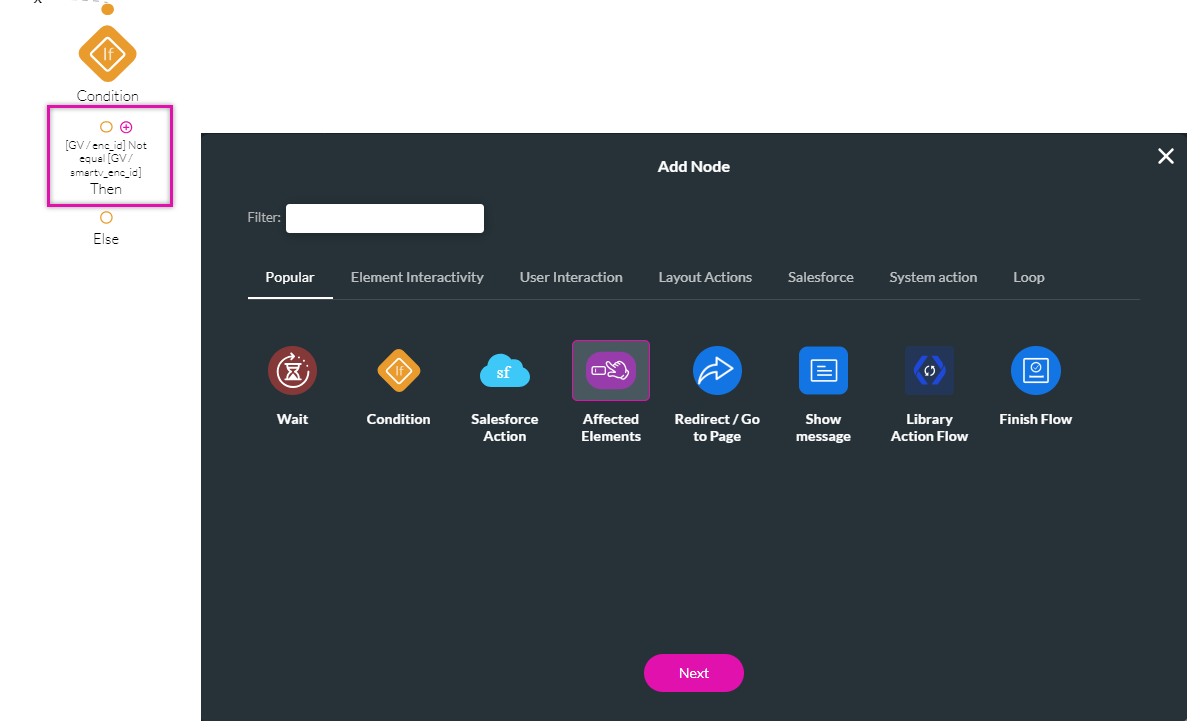
4. Choose Condition and click Next.
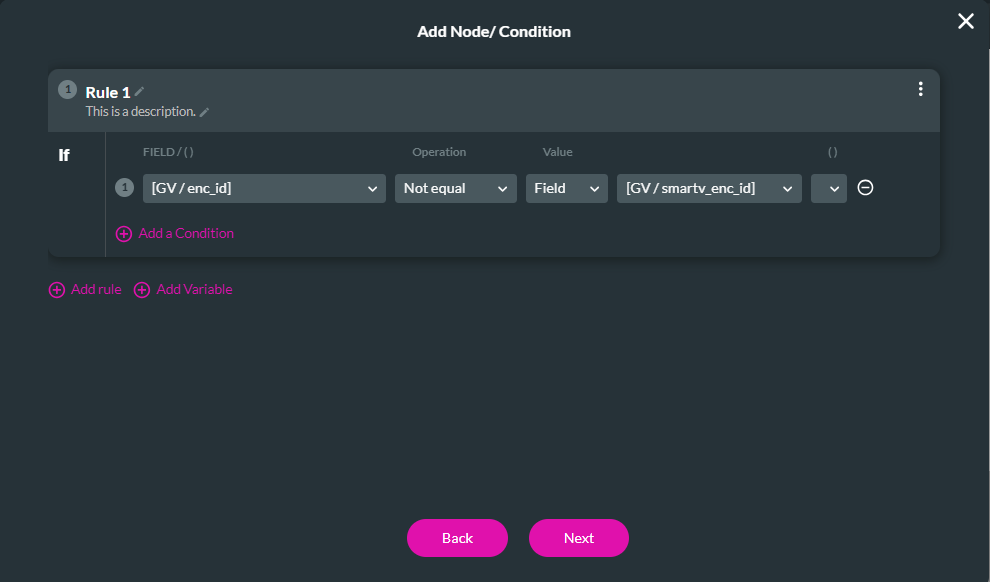
5. Configure the following Condition: if the encrypted ID does not equal the SmartV encrypted ID, click Next.
6. Add a Tag and click Insert.
7. Click the Then + icon and choose Affected Element. Click Next.
8. Select the elements you wish to secure. You can choose to hide or replace these elements for non-authorized users. We recommend adding a text or message notifying the user that he is unauthorized to review this data. Click Next.
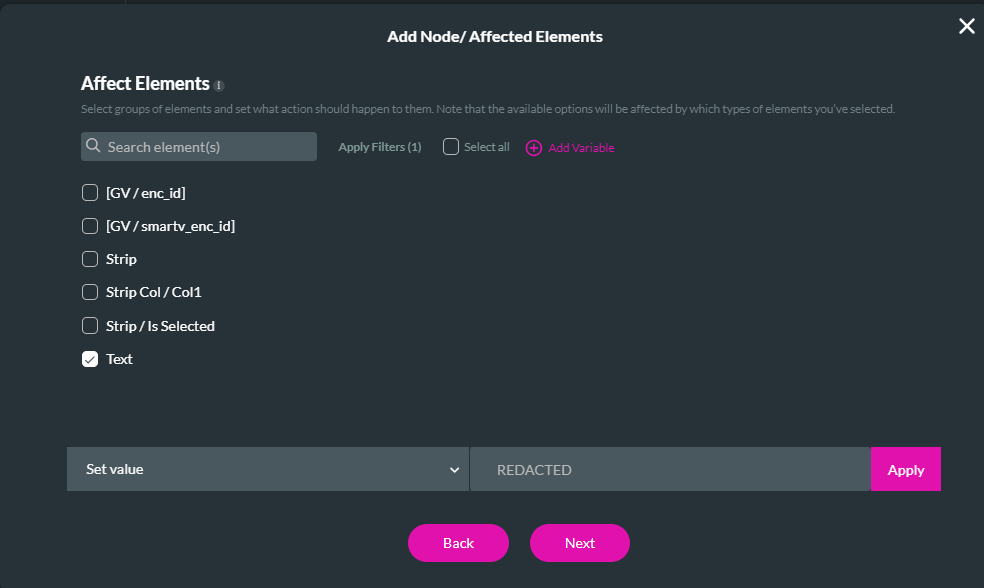
9. Add a Tag, click Insert, and click Apply.
While testing via Preview- map the authorized encrypted record ID to the project URL.
If the logged-in record ID doesn't match the URL, the secured data should be hidden/replaced, as was set up on the project.