Lookup (8:30 min)
Completion requirements
01 Getting Started
We will discuss the lookup input element in this lesson, including:
- How to use conditions where users can insert search text to display results.
- How do you query lookup fields based on fields or variables in the project?
- Displaying additional fields in the lookup modal.
- Toggling auto-suggestions.
- Using the lookup element as a filter for power tables.
02 Project Setup
In this lesson, we have a project as follows:
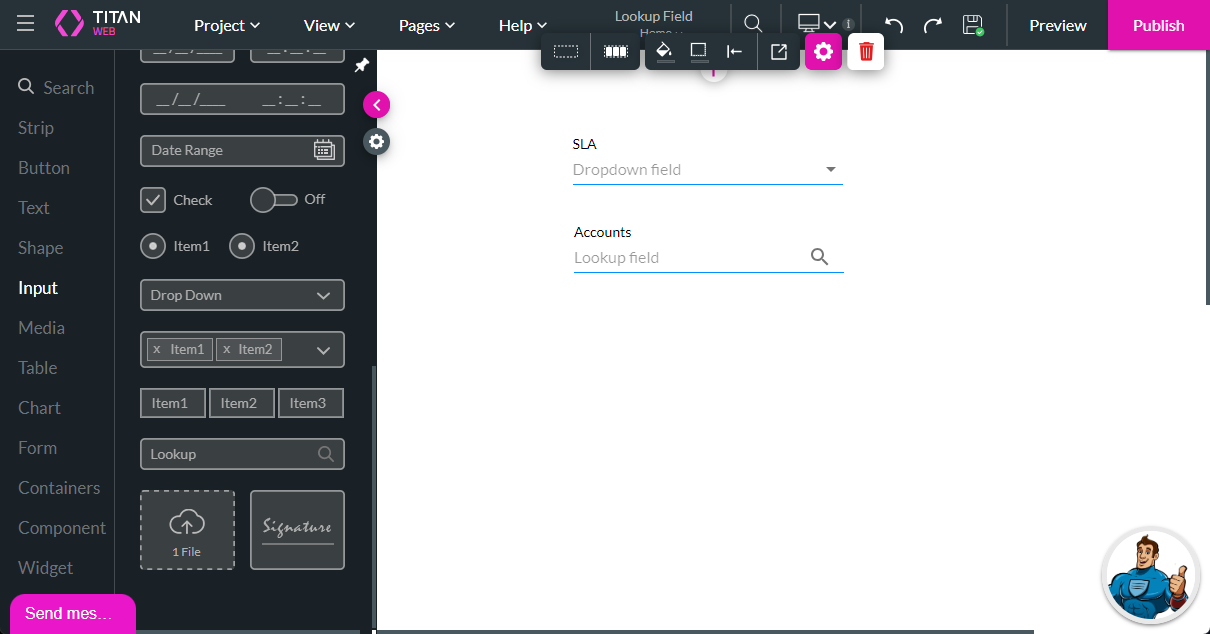
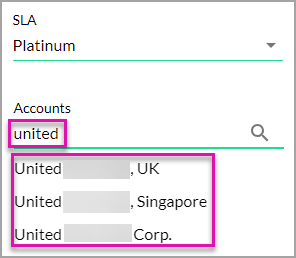
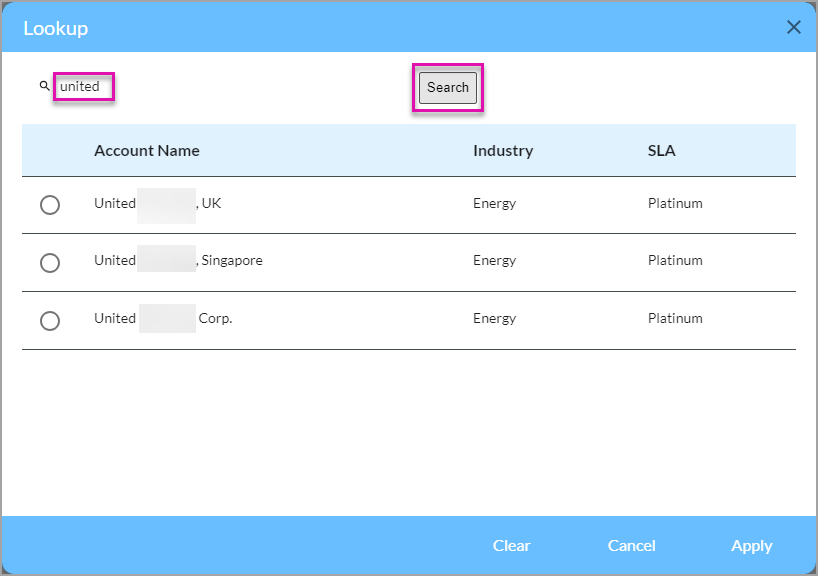
A lookup field will display the accounts linked to a specific SLA. Typing a letter or letters in the search field will show results that contain that letter or sequence of letters. Clicking the search icon opens the lookup modal with all the possible accounts.
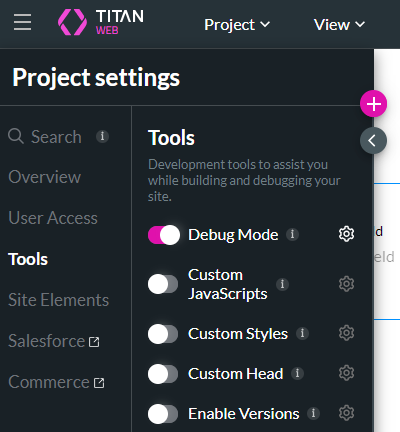
The Debug Mode is on.
A lookup field will display the accounts linked to a specific SLA. Typing a letter or letters in the search field will show results that contain that letter or sequence of letters. Clicking the search icon opens the lookup modal with all the possible accounts.
The Debug Mode is on.
03 Configure the Lookup
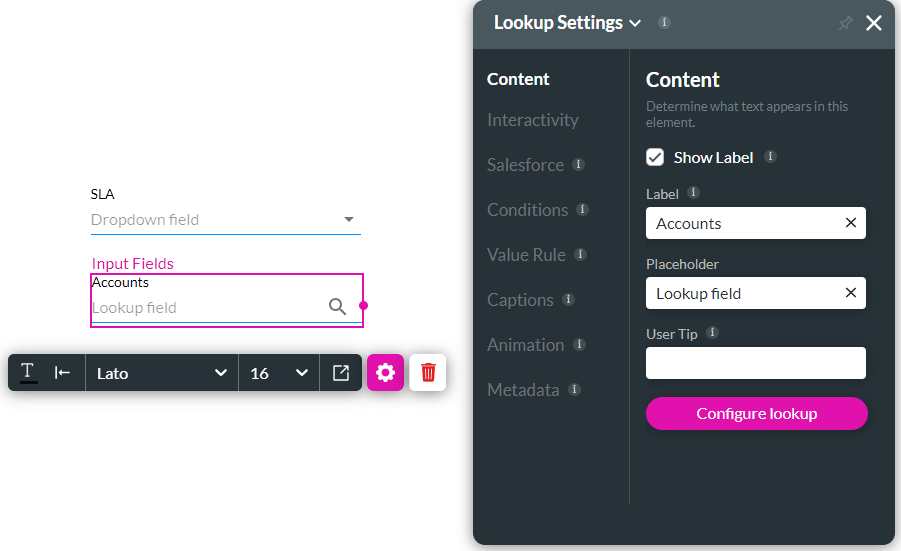
1. Select the lookup element and click the Gear icon to open the Settings screen.
2. Click the Configure Lookup button.
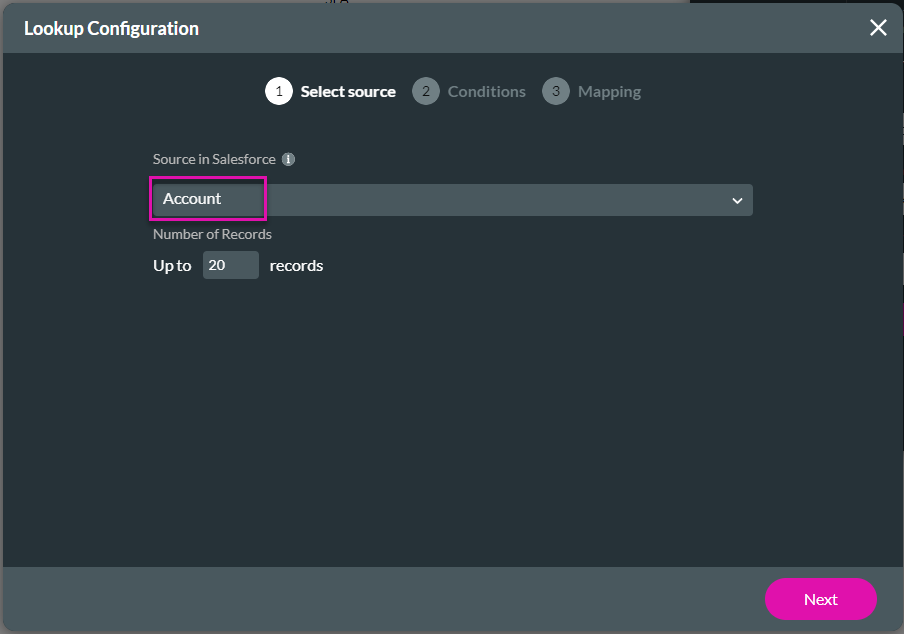
3. Use the drop-down list to select the Salesforce object. In this lesson, we chose Account.
4. Click the Next button.
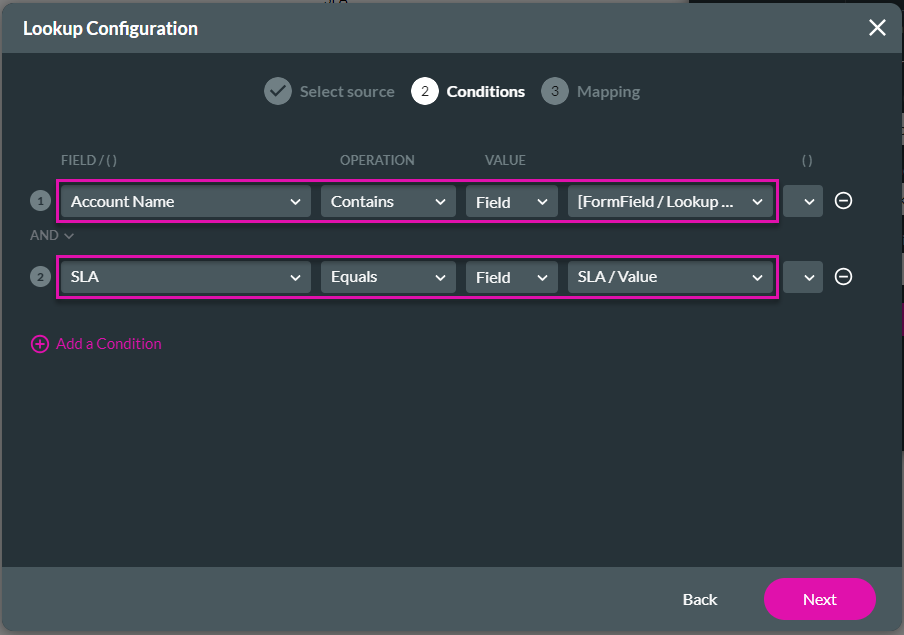
5. Configure the conditions. The first field is added by default:
7. Configure the additional mapping as follows. These extra fields will be displayed on the modal:
8. Click the Apply button.

9. Save and preview the project.
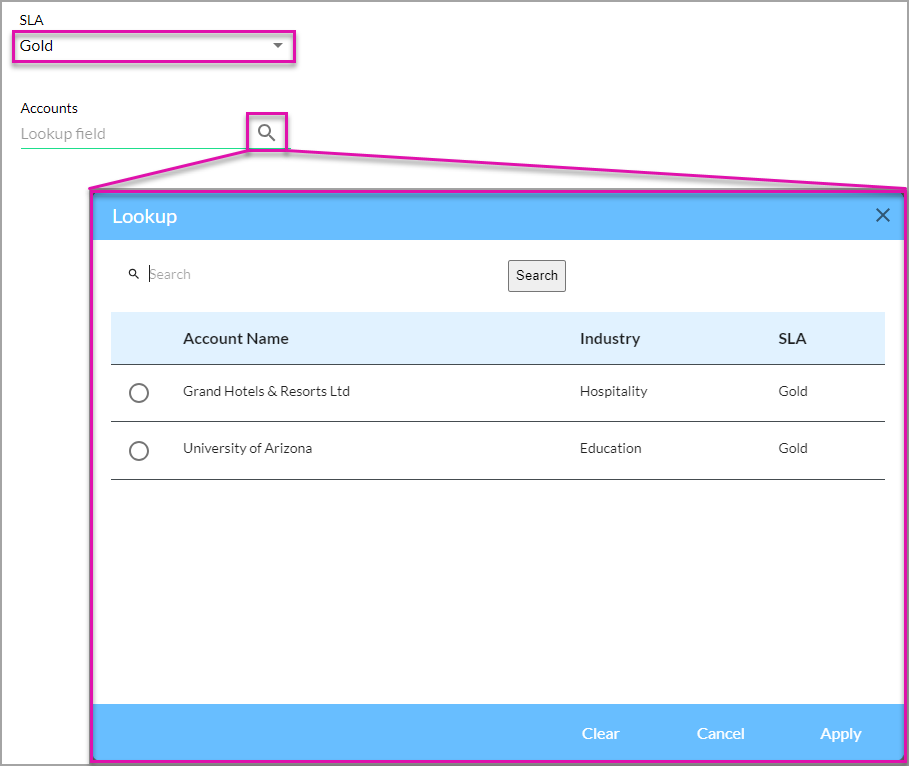
10. Use the drop-down list to select an SLA.
11. Click the lookup icon to open the modal with the results.
12. Select an option and click the Apply button.
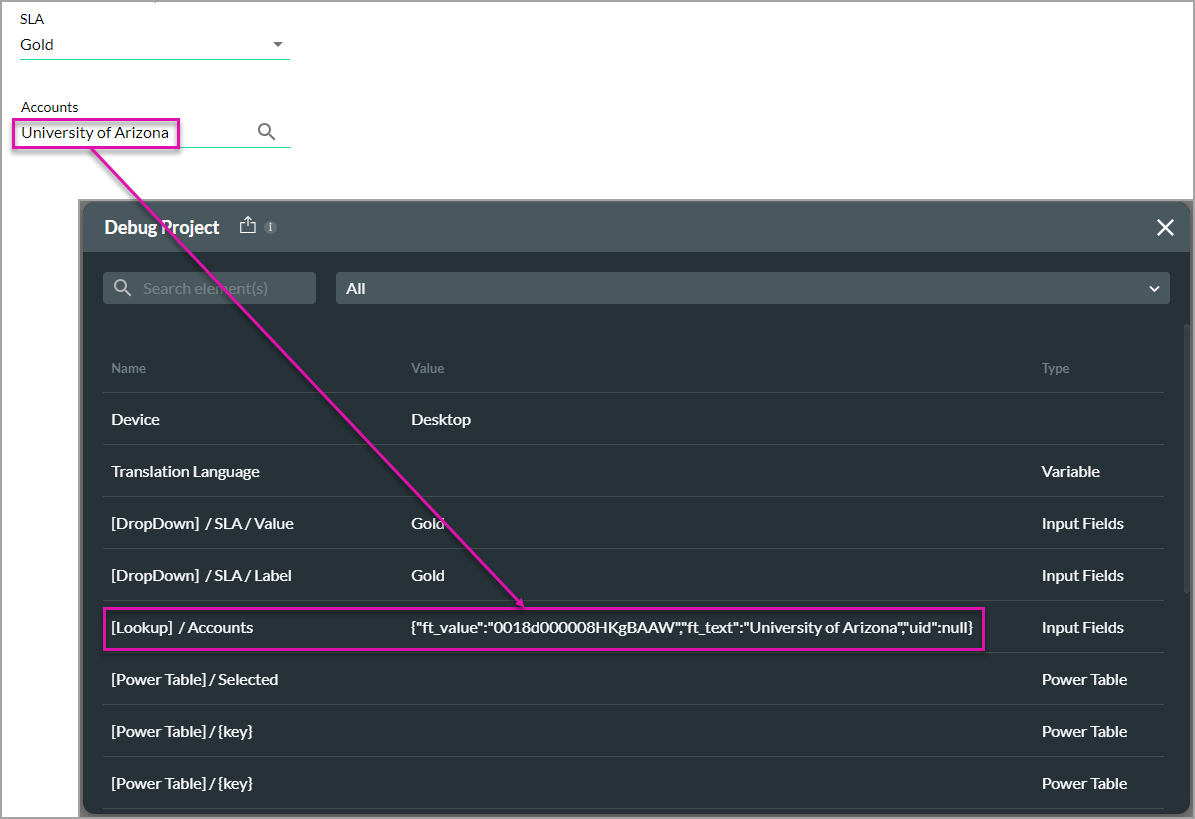
13. Click the Debug button. Although the account name is displayed in the lookup field, the account ID is shown on the Debug Project screen. This Value can be used to run Gets or be pushed to Salesforce.
2. Click the Configure Lookup button.
3. Use the drop-down list to select the Salesforce object. In this lesson, we chose Account.
4. Click the Next button.
5. Configure the conditions. The first field is added by default:
- Account Name Contains Field FormField/Lookup field. This will allow the end user to put in some values that will filter down to the accounts that contain that search value.
- SLA Equals Field SLA/Value
7. Configure the additional mapping as follows. These extra fields will be displayed on the modal:
- Column 1 Industry = Industry
- Column 2 SLA = SLA
8. Click the Apply button.
9. Save and preview the project.
10. Use the drop-down list to select an SLA.
11. Click the lookup icon to open the modal with the results.
12. Select an option and click the Apply button.
13. Click the Debug button. Although the account name is displayed in the lookup field, the account ID is shown on the Debug Project screen. This Value can be used to run Gets or be pushed to Salesforce.
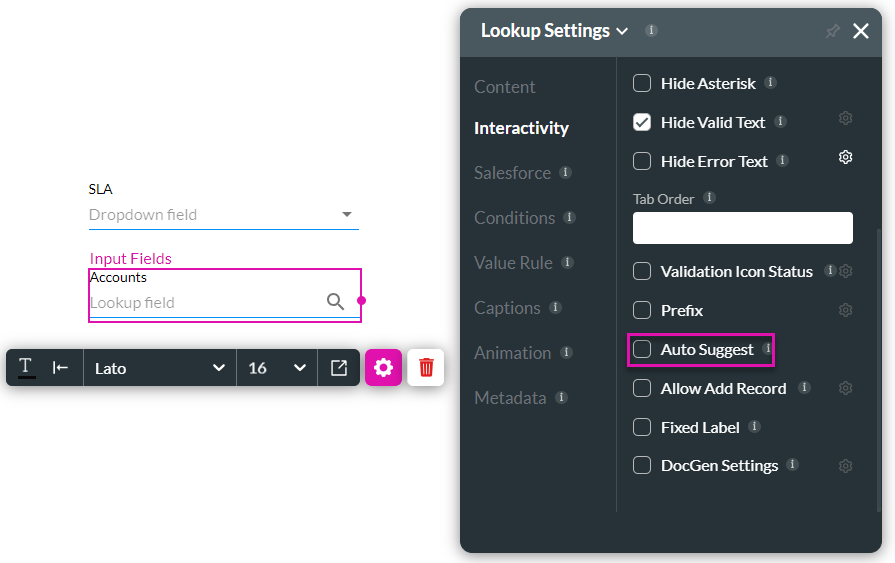
04 Disable Autosuggest
When the user types a search term, suggestions are automatically shown.
1. Select the lookup element and click the Gear icon to open the Settings screen.
2. Under Interactivity, scroll down and deselect the Auto Suggest checkbox. This option is on by default.
3. Save and preview the project. You will see no suggestions when a search term is entered.
You can still search using the lookup modal.
05 Using Lookup Value as a Condition for a Different Element
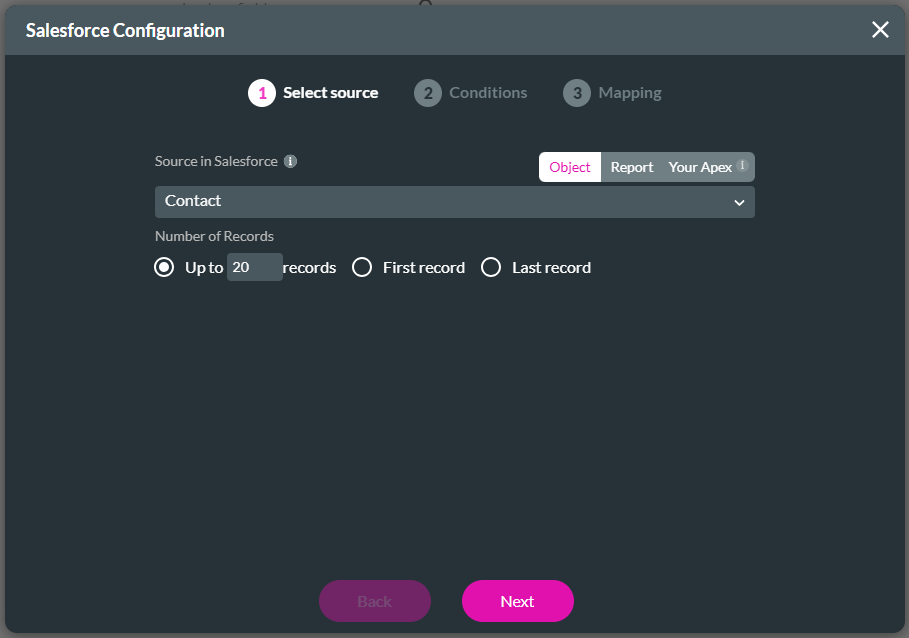
1. Add a power table to the project.
2. Use the drop-down list to select the Salesforce object. In this lesson, we chose Contact.
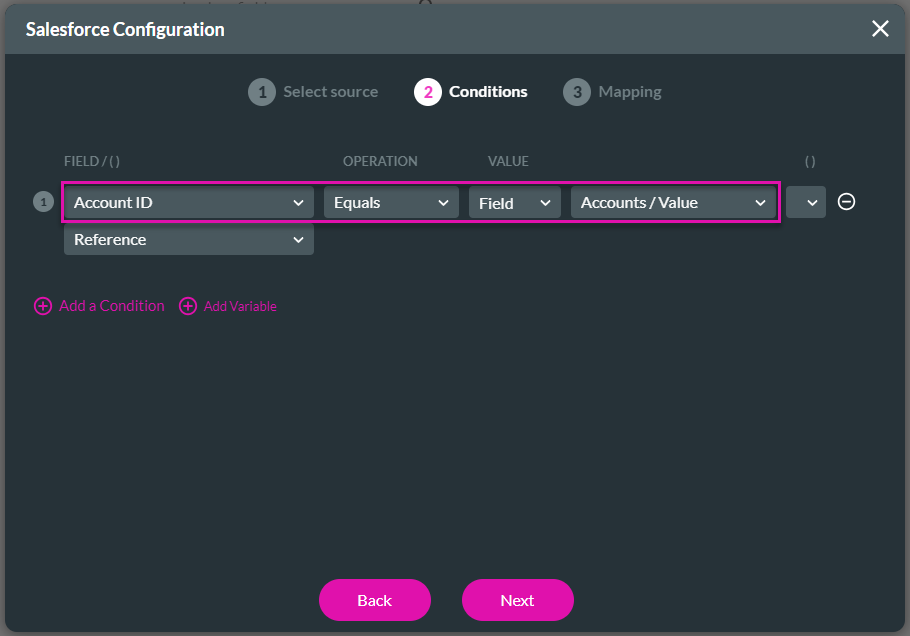
3. Configure the condition:
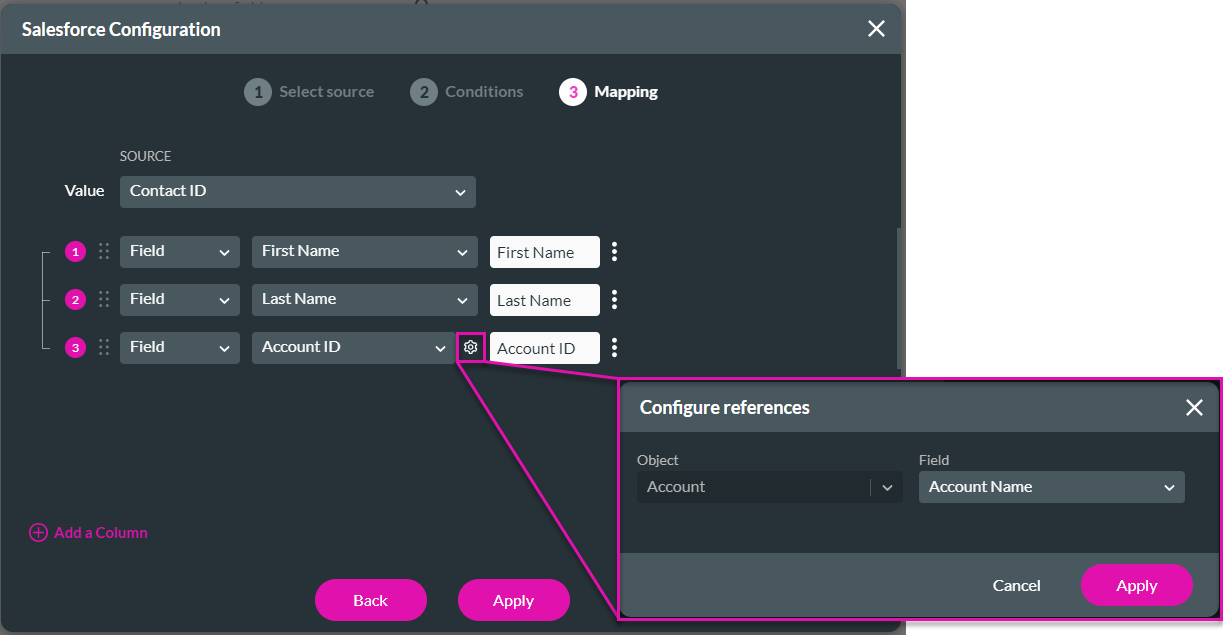
5. Add extra columns and configure the mapping:
7. Click the Apply button on the Salesforce Configuration screen.
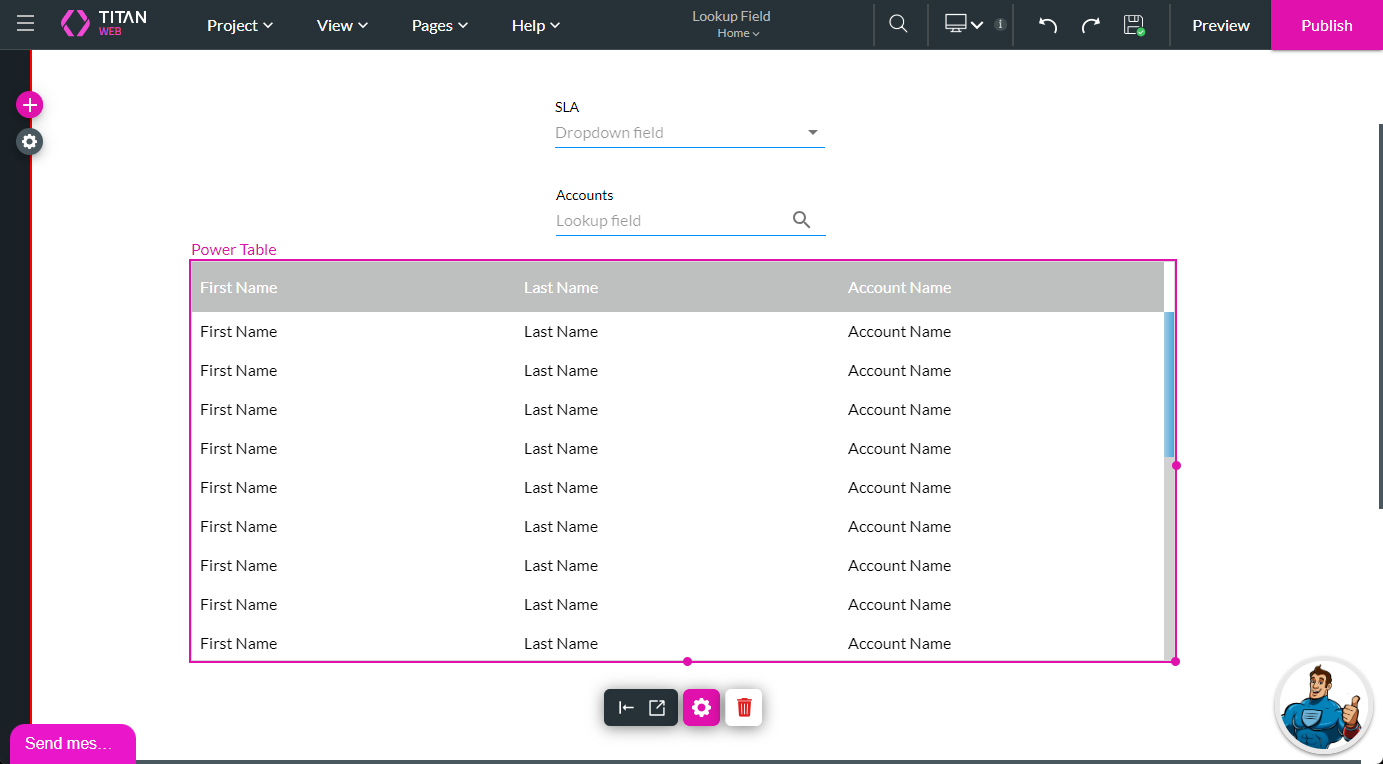
The power table is added to the canvas.
2. Use the drop-down list to select the Salesforce object. In this lesson, we chose Contact.
3. Configure the condition:
- Account ID Equals Field Accounts/Value
5. Add extra columns and configure the mapping:
- First Name
- Last Name
- Account ID = Field Account Name (This is to demonstrate in this lesson that the correct values are returned.)
7. Click the Apply button on the Salesforce Configuration screen.
The power table is added to the canvas.
06 Replace Auto Created Trigger with Custom One
The automatic Get will be turned off, and we will configure a condition to trigger the information to the power table.
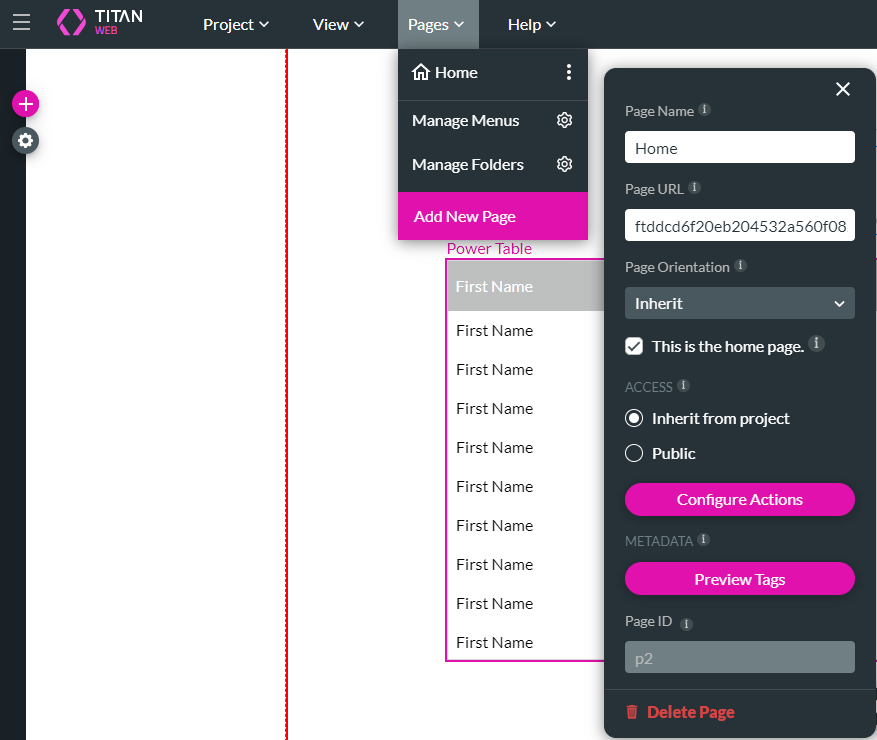
1. Open the Pages drop-down list and click the Kebab icon next to the Home page.
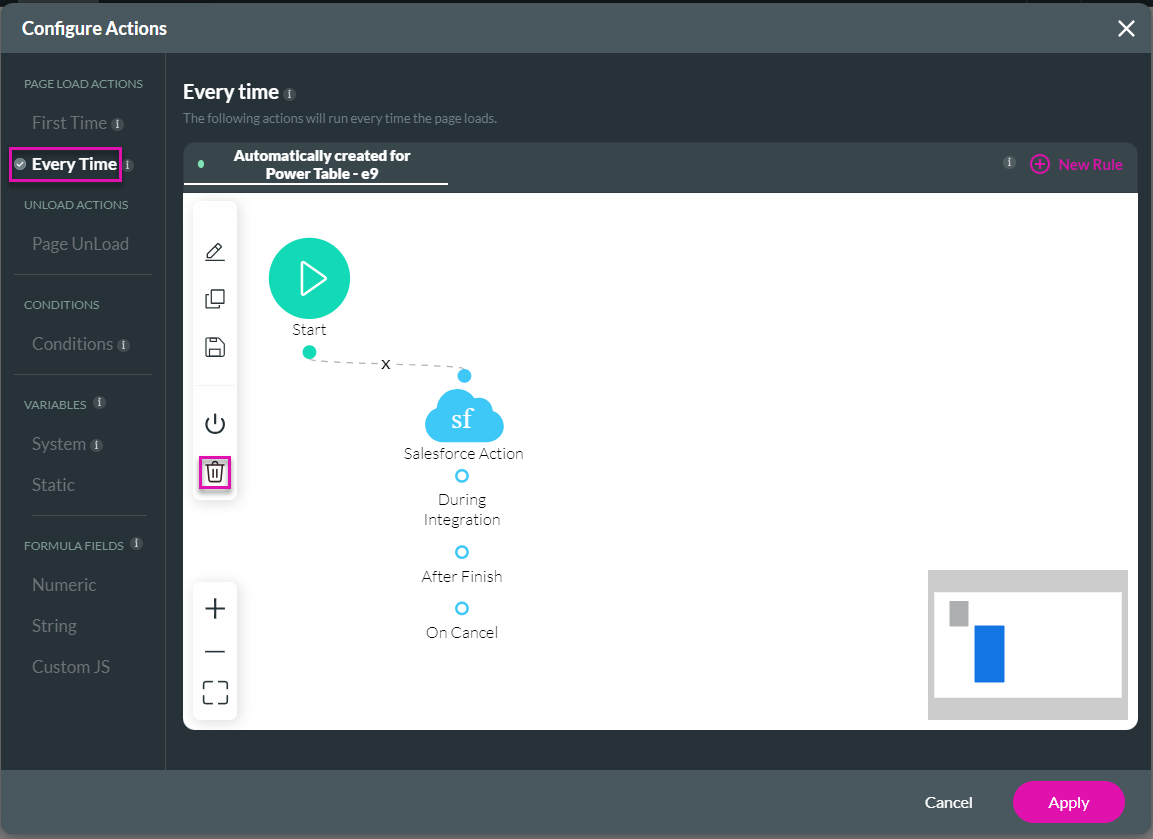
2. Click the Configure Actions button.
3. Select the Every Time option and delete the Salesforce Action.
4. Click the Apply button.
5. Select the power table and click the Gear icon to open the Settings screen.
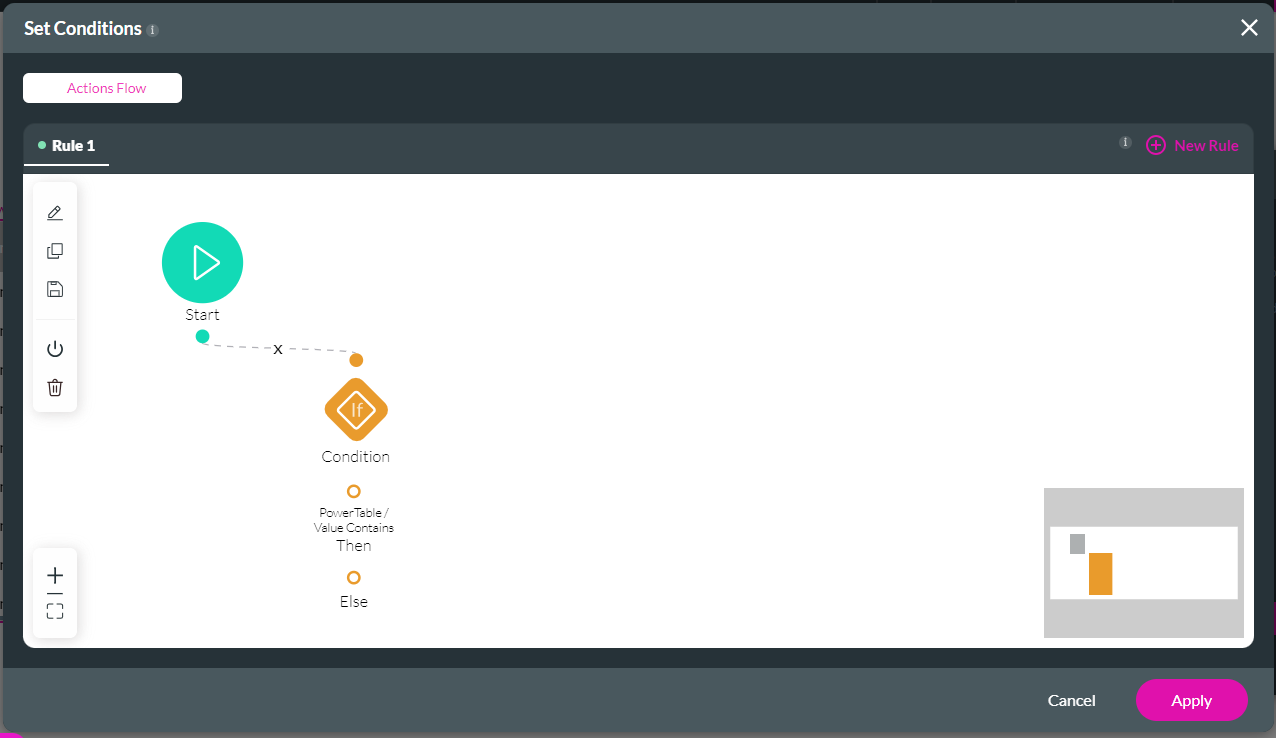
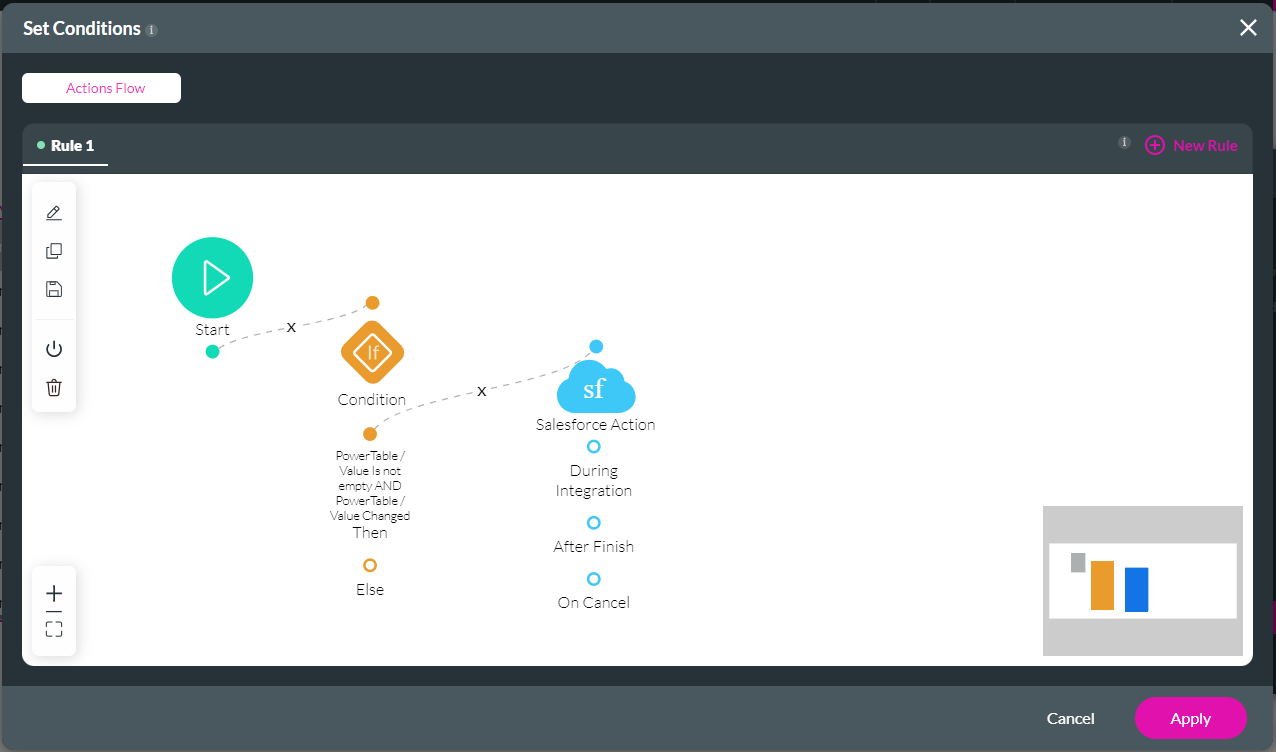
6. Under Conditions, click the Configure Conditions button.

7. Double-click the Conditions node.
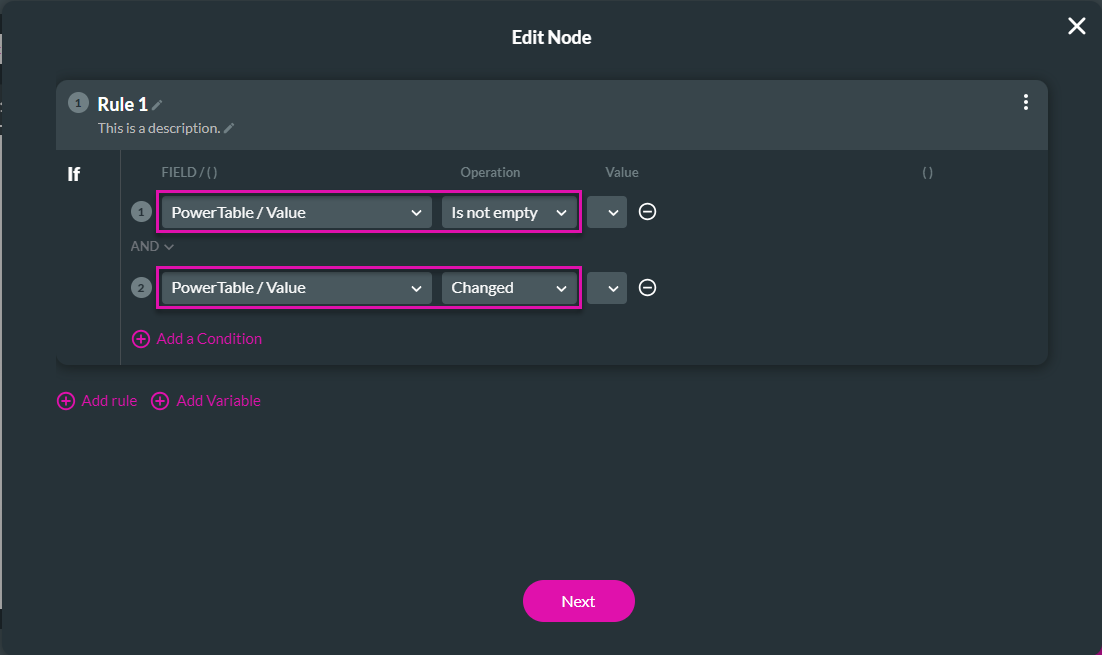
8. Configure the conditions as follows:
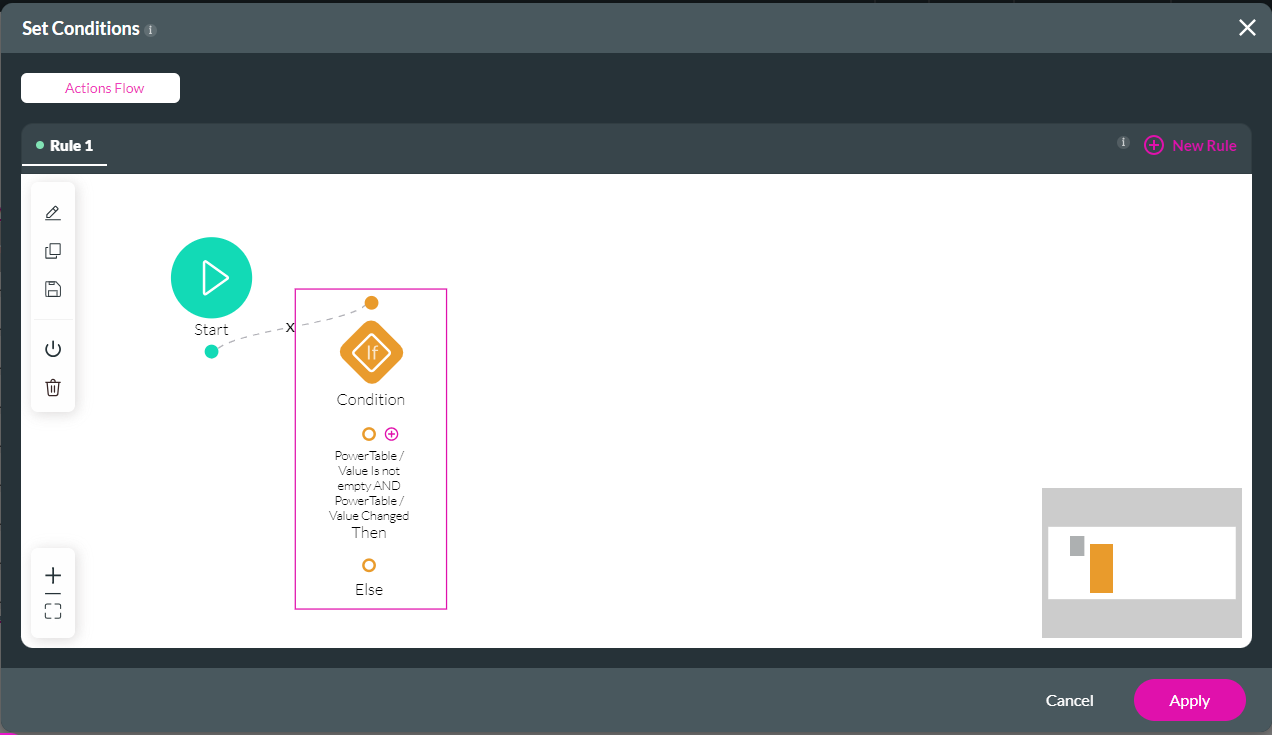
10. Add a tag and click the Save button.
11. Click the + icon next to the Condition node.
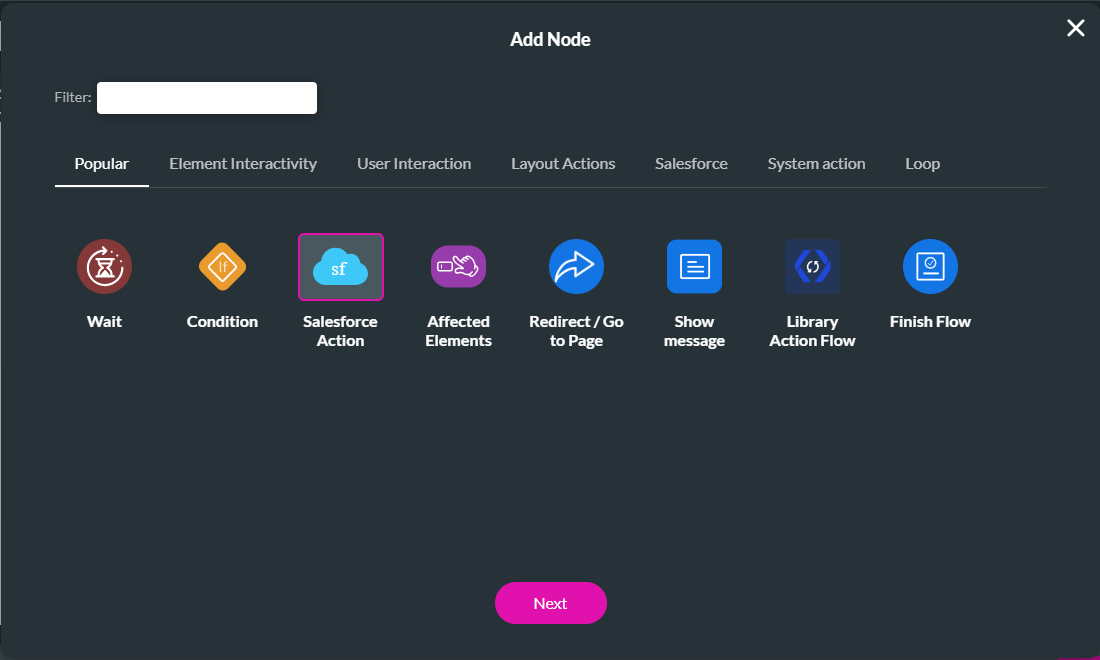
12. Select the Salesforce Action option and click the Next button.
13. Use the drop-down list to select the Contact Get and click the Next button.
14. Add a tag and click the Insert button.
15. Click the Apply button.
16. Save and preview the project.
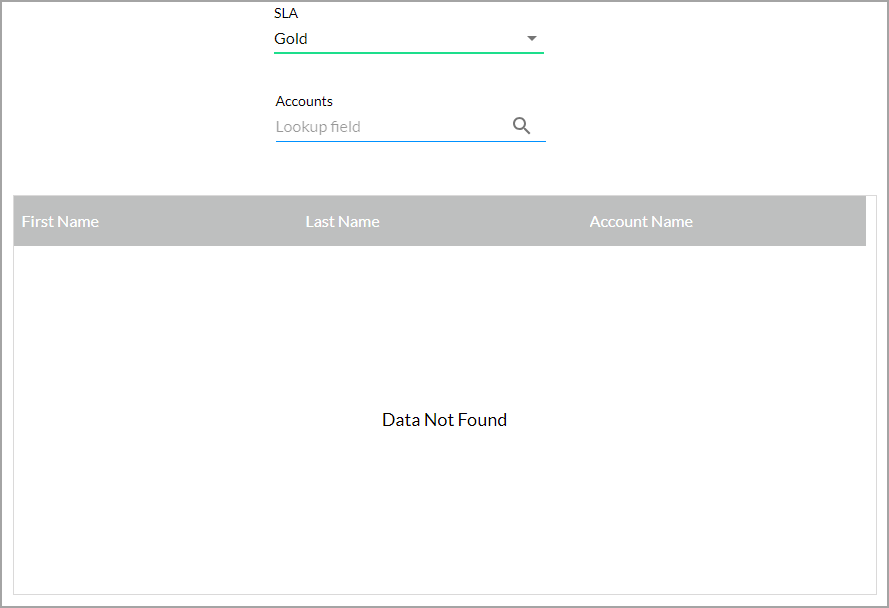
17. Use the drop-down list to select the Gold SLA. The power table is empty as the Get hasn’t been triggered yet.
18. Click the search icon and search for an account on the modal.
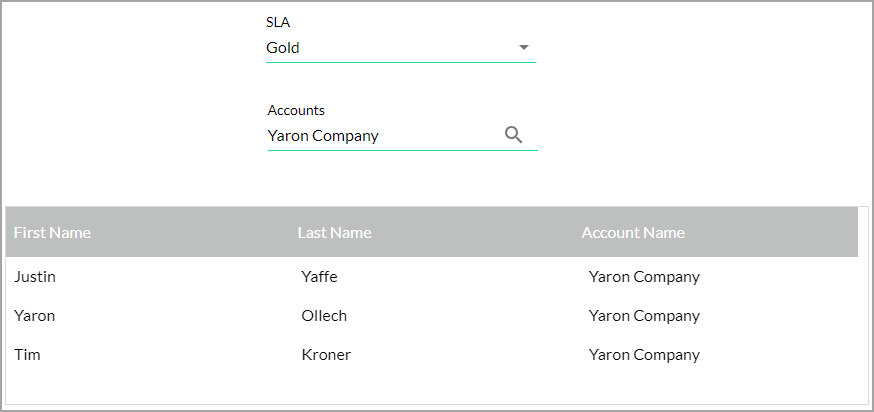
19. Select the account and click the Apply button.

You will see the contacts linked to the account.
1. Open the Pages drop-down list and click the Kebab icon next to the Home page.
2. Click the Configure Actions button.
3. Select the Every Time option and delete the Salesforce Action.
4. Click the Apply button.
5. Select the power table and click the Gear icon to open the Settings screen.
6. Under Conditions, click the Configure Conditions button.
7. Double-click the Conditions node.
8. Configure the conditions as follows:
- Power Table/Value is not empty
- Power Table/Value Changed
10. Add a tag and click the Save button.
11. Click the + icon next to the Condition node.
12. Select the Salesforce Action option and click the Next button.
13. Use the drop-down list to select the Contact Get and click the Next button.
14. Add a tag and click the Insert button.
15. Click the Apply button.
16. Save and preview the project.
17. Use the drop-down list to select the Gold SLA. The power table is empty as the Get hasn’t been triggered yet.
18. Click the search icon and search for an account on the modal.
19. Select the account and click the Apply button.
You will see the contacts linked to the account.
07 Other Interactivity Options
You can allow users to add new records.
1. Select the lookup element and click the Gear icon to open the Settings screen.
2. Under Interactivity, scroll down and select the All Add Record checkbox.
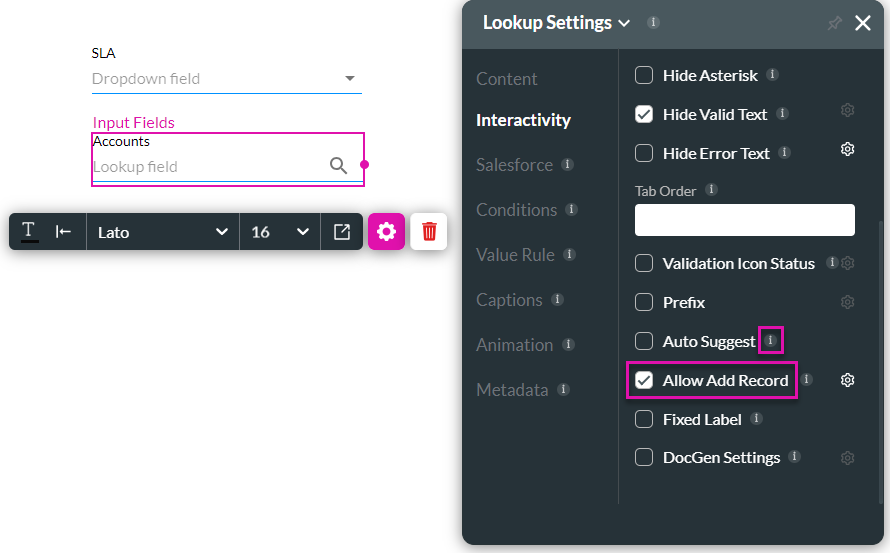
For more information on the other options, click the i icon.
1. Select the lookup element and click the Gear icon to open the Settings screen.
2. Under Interactivity, scroll down and select the All Add Record checkbox.
For more information on the other options, click the i icon.