Column Settings (8 min)
Completion requirements
01 Getting Started
This tutorial will cover columns in Power Tables, including:
- A general overview
- How to hide and show columns
- Filtering columns
- Formatting field types
- Enabling wrap text functionality
- Adding prefixes and suffixes
- Column title tooltips
02 Column Overview
Insert a power table into your project.
1. Click on the power table gear icon. The power table settings window opens.
2. Select the Columns tab. Each column of the table is displayed.
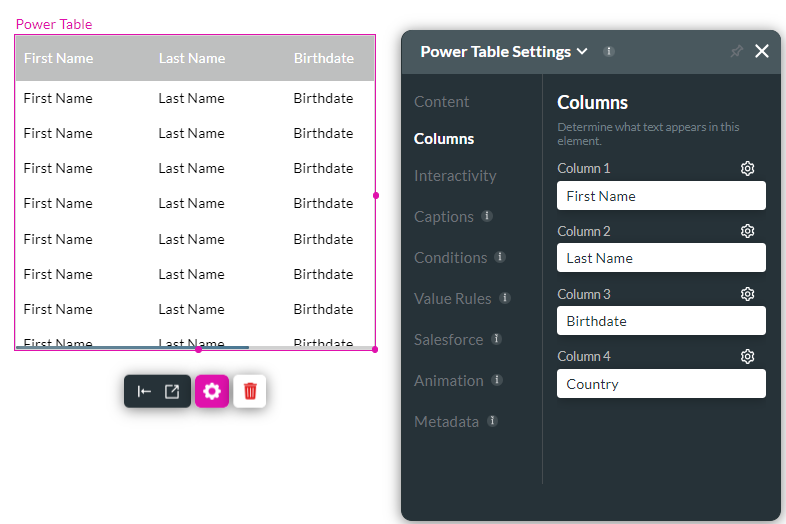
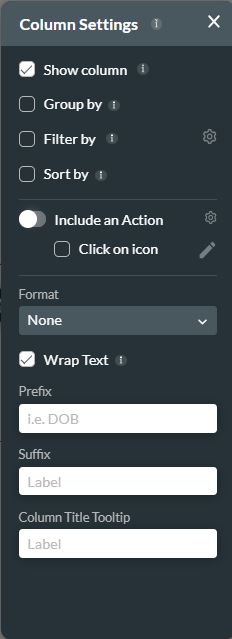
3. Click on the column gear icon. The Column Settings window is displayed. You can configure column settings using this menu…
... Or…
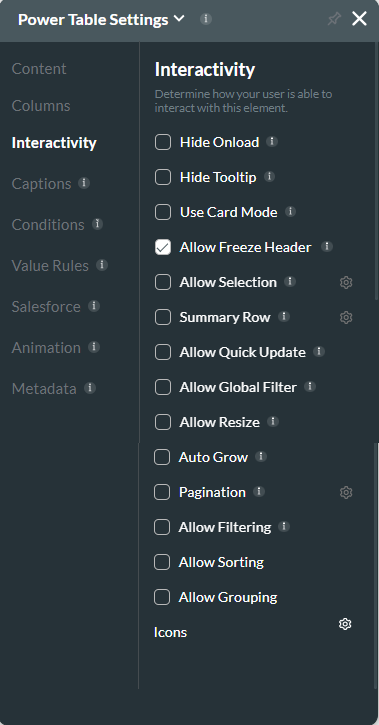
4. Navigate to the power table settings menu and select the Interactivity tab. You can configure several column settings, such as filtering, sorting, and grouping.
When setting up actions for the columns, you can use the Edit Mapping button in the Content tab or the Column Settings menu.
1. Click on the power table gear icon. The power table settings window opens.
2. Select the Columns tab. Each column of the table is displayed.
3. Click on the column gear icon. The Column Settings window is displayed. You can configure column settings using this menu…
... Or…
4. Navigate to the power table settings menu and select the Interactivity tab. You can configure several column settings, such as filtering, sorting, and grouping.
When setting up actions for the columns, you can use the Edit Mapping button in the Content tab or the Column Settings menu.
03 Show and Hide Columns
You can choose to show or hide a column in your table. This is useful if you want to bring data into your table but not display that value to users.
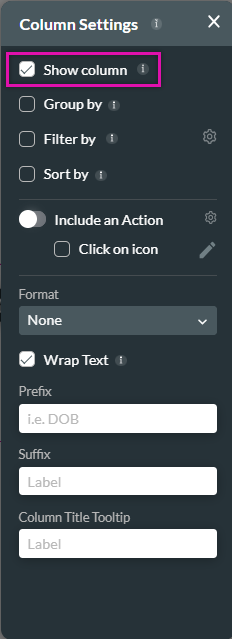
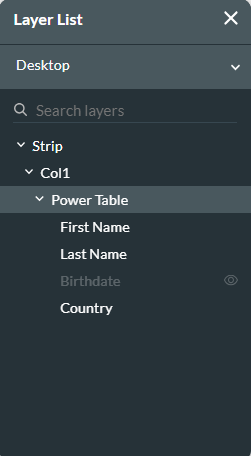
1. Disable the show column function to hide a column. The table will automatically resize and hide the column. You can still see the hidden column in the layer list menu and can unhide the column by clicking the eye icon and using the value in the hidden column, for example, in conditions
1. Disable the show column function to hide a column. The table will automatically resize and hide the column. You can still see the hidden column in the layer list menu and can unhide the column by clicking the eye icon and using the value in the hidden column, for example, in conditions
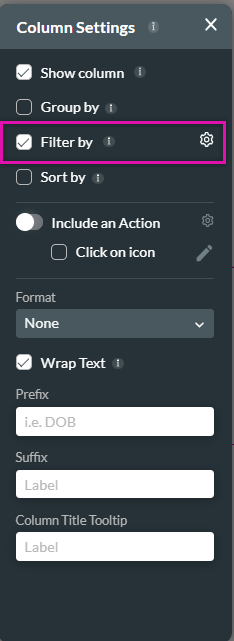
04 Filtering Columns
1. Enable the Filter by function and click the gear icon. The configure filter screen opens.
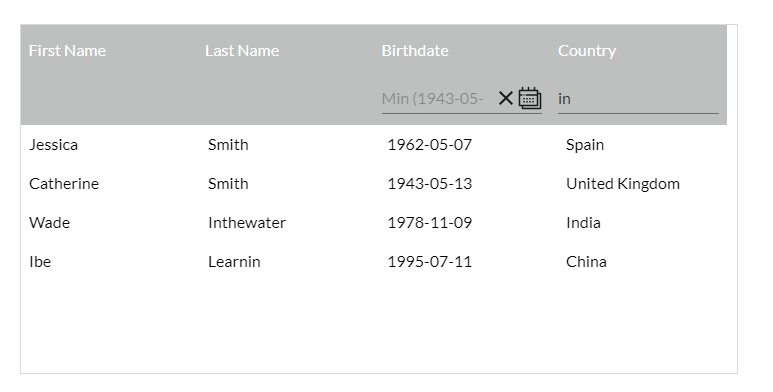
2. Use the UI control dropdown to configure the filter format. For example, use the date range UI control for a birthdate column. This makes searching for a date easier. Click Apply.

Save and Preview.
The same filtering concept was applied to the country column. The UI Control selected is a Text Field. The user can choose from a date range according to the birthdates pulled from Salesforce or manually type in the text to filter the country.
You can create a picklist depending on the data pulled from Salesforce. For example, users can use a dropdown to select a country instead of manually inputting text.
3. Navigate back to the Configure Filter window. Use the UI Control dropdown and choose Select.
4. Ensure it is set to Equal (Contain will also work). Click Apply.
Save and preview. Users can now click a dropdown to select a country to filter the column by.

2. Use the UI control dropdown to configure the filter format. For example, use the date range UI control for a birthdate column. This makes searching for a date easier. Click Apply.
Save and Preview.
The same filtering concept was applied to the country column. The UI Control selected is a Text Field. The user can choose from a date range according to the birthdates pulled from Salesforce or manually type in the text to filter the country.
You can create a picklist depending on the data pulled from Salesforce. For example, users can use a dropdown to select a country instead of manually inputting text.
3. Navigate back to the Configure Filter window. Use the UI Control dropdown and choose Select.
4. Ensure it is set to Equal (Contain will also work). Click Apply.
Save and preview. Users can now click a dropdown to select a country to filter the column by.
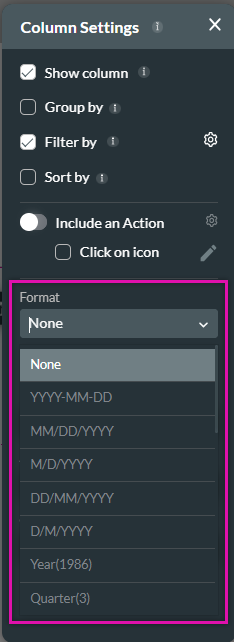
05 Formatting Columns
Use the Format dropdown to choose a format for your column. The options depend on the type of data for the column. For example, you could choose date formatting for the birthdate column.
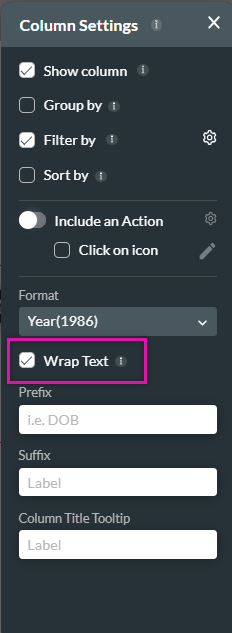
06 Wrap Text
The wrap text functionality is enabled by default. You can turn it off if you do not want your text to wrap.
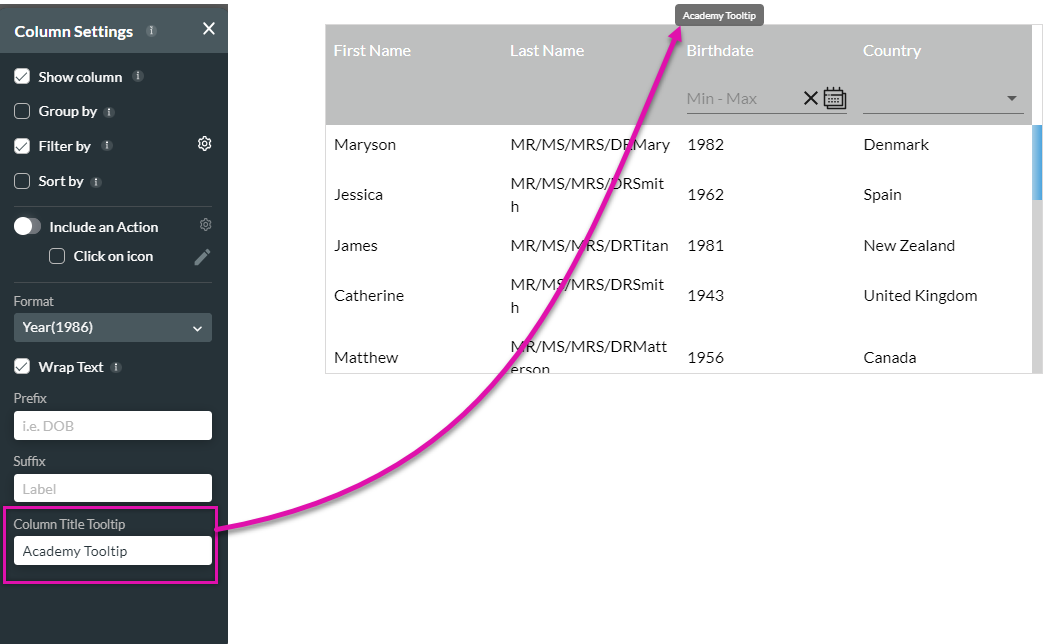
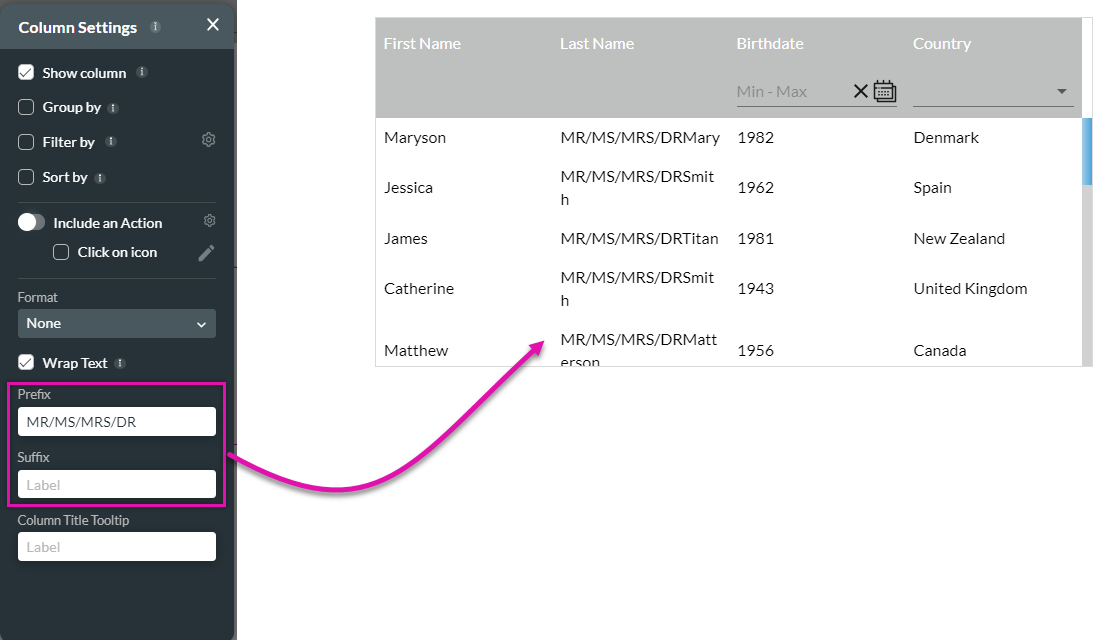
07 Prefix and Suffix
Add text before and after a field to add meaning to a column—for example, titles before surnames.
08 Tooltip
Insert a tooltip to display to users when they hover over a column.