Drawer (11 min)
Completion requirements
01 Getting Started
This tutorial covers Drawers.
02 Adding Drawers to the Canvas
Open the element menu.
1. You can search for the Drawer element in the search field.
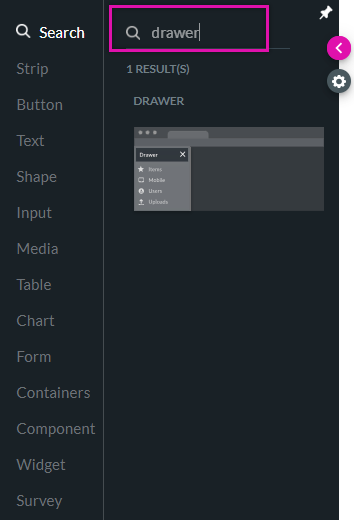
or
2. Click on the Containers tab and select the drawer option.
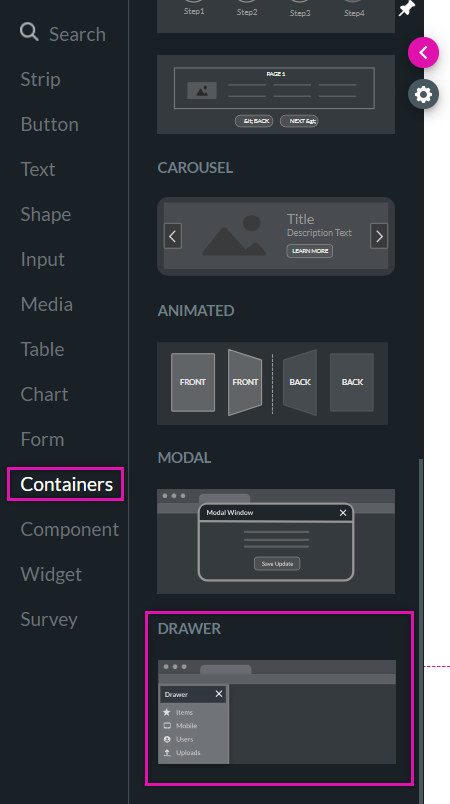
1. You can search for the Drawer element in the search field.

or
2. Click on the Containers tab and select the drawer option.

03 Layer List
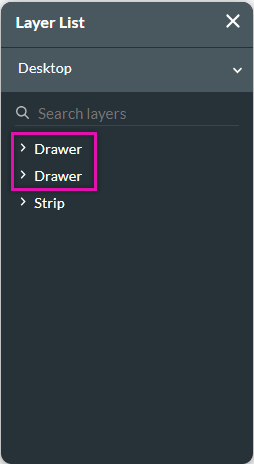
Use the layer list to navigate between drawers easily.

04 Drawer Settings
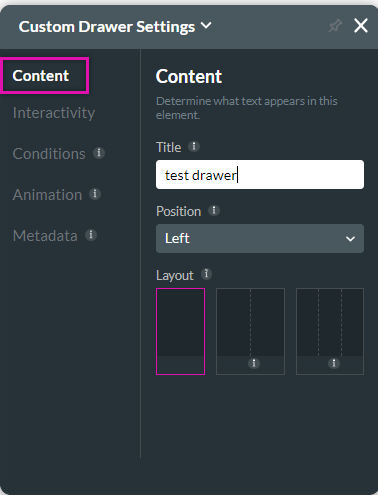
1. Click on the drawer gear icon. The Custom Drawer Settings menu opens.
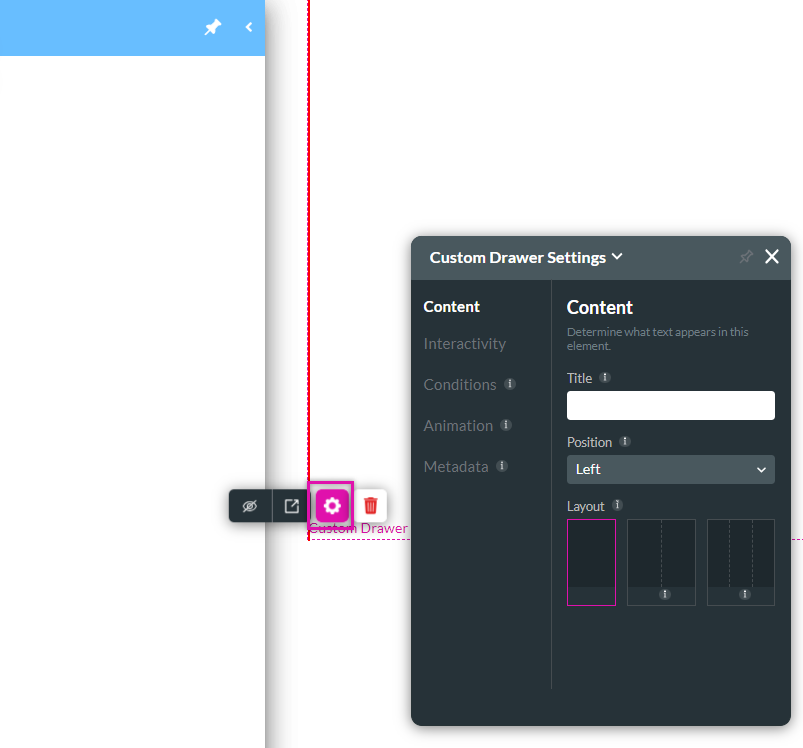
Use the content tab to edit the drawer's title, change its position, and choose a layout.
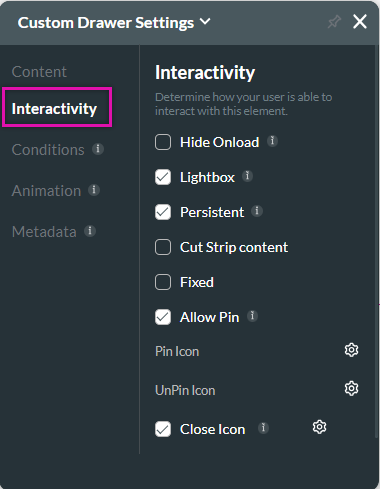
Use the interactivity tab to determine how users can interact with the element.

Use the content tab to edit the drawer's title, change its position, and choose a layout.

Use the interactivity tab to determine how users can interact with the element.
- Hide Onload ensures the element does not display while the page is loading.
- With the lightbox feature, when the drawer is displayed, the main screen is greyed out, and any click on the grey area closes the drawer.
- Enable the Persistent feature to keep the drawer open by default.
- Cut Strip Content to limit the strip content that is displayed.
- Enable the Allow Pin feature to let users pin the drawer to display continuously until it is unpinned.
- You can update the Pin and Unpin icons.
- Enable the Close function to allow users to close the drawer manually. You can also choose to update the icon.

05 Styling Menu
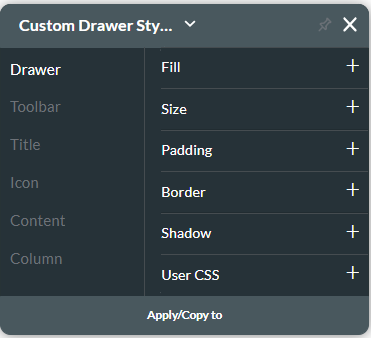
You can control all aspects of the Drawer styling. For example, adding spacing between drawer elements.

06 How to Toggle the Drawer
The drawer will only display through an action flow. We have used a button as an example.
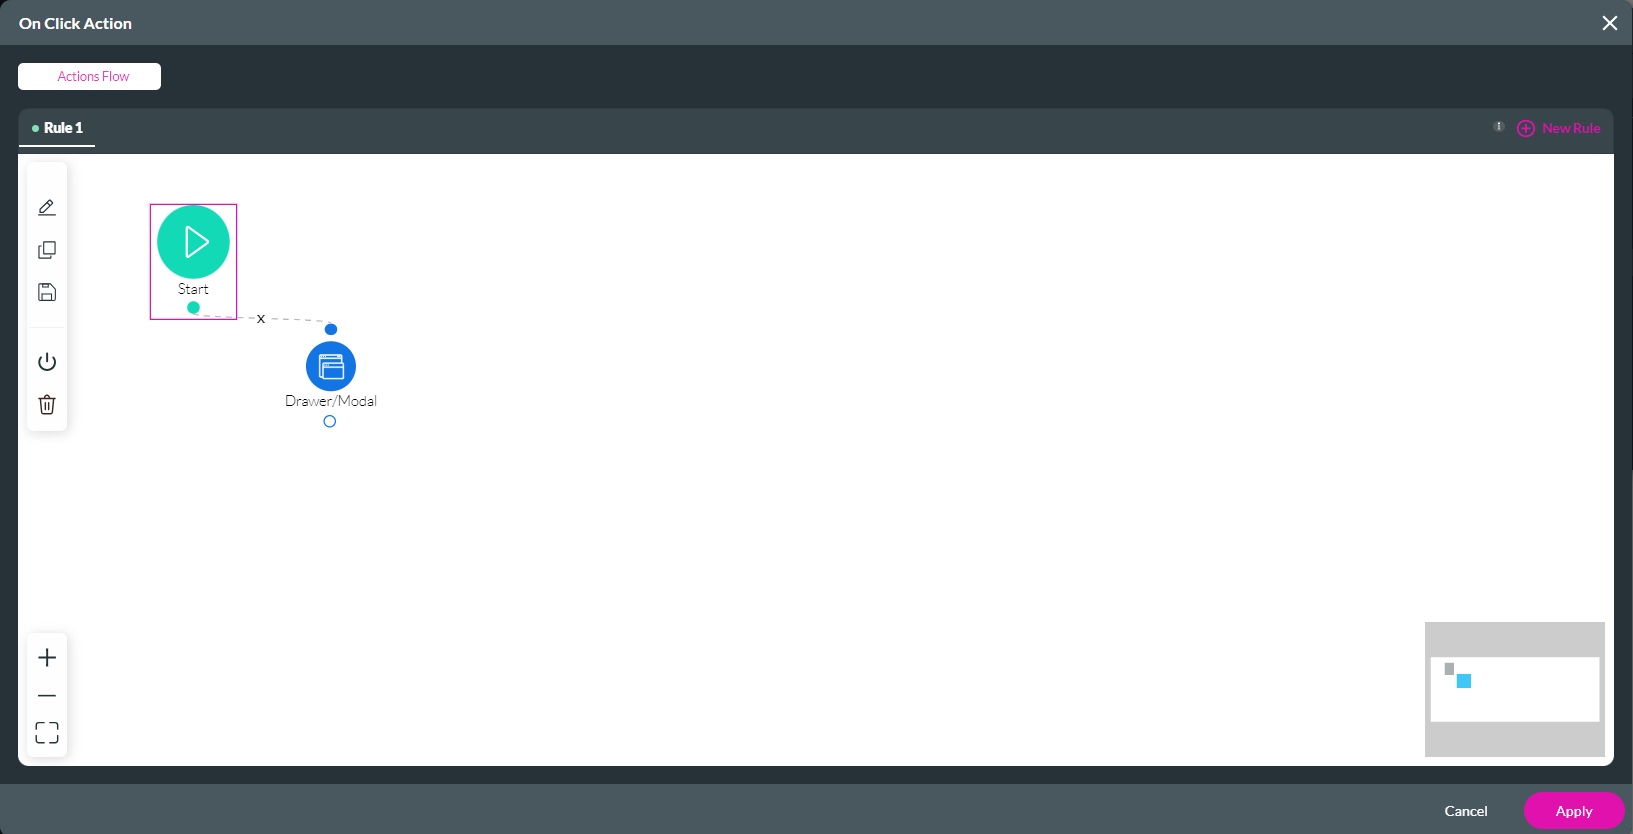
1. Click on the button link icon. The On Click Action Window opens.

2. Click the Start + icon. The Add Node screen opens.
3. Select Drawer/Modal and click Next.
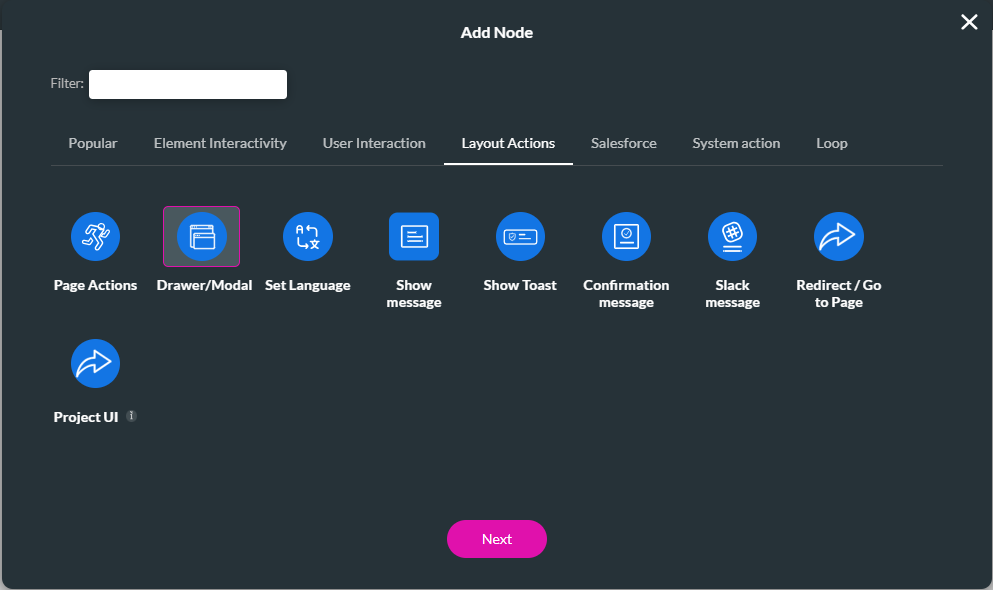
4. Ensure the Enable toggle switch is on, use the drop-down to select the drawer to which you want to apply the action, and select the Toggle radio button. Click Next.
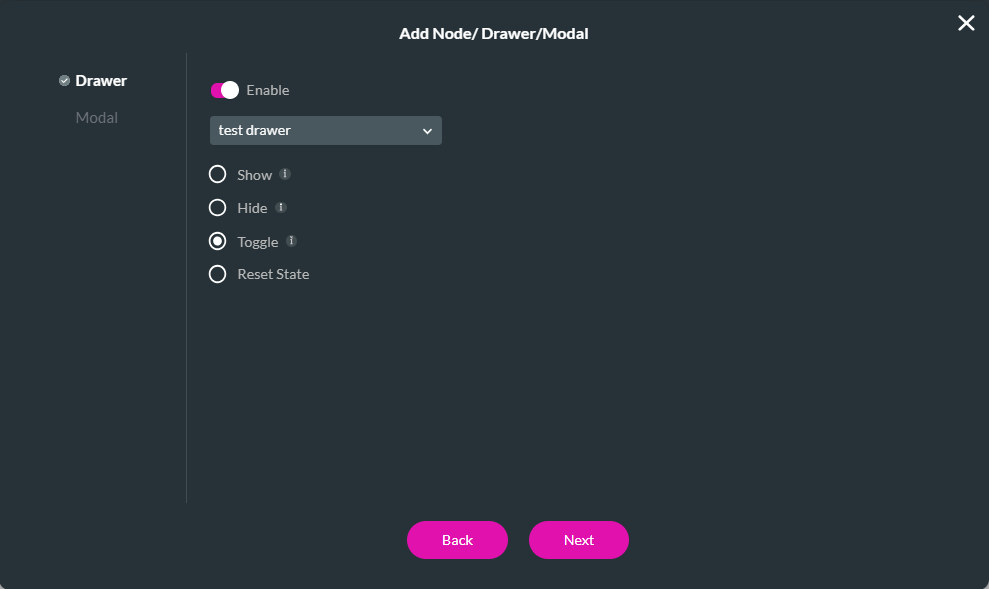
5. Add a Tag and click Insert.
The node is added.
6. Click Apply.
Save and Preview. When the button is clicked, the drawer opens. To close the drawer, click the arrow. You can also pin the drawer in place. Due to the enabled lightbox feature, the home page is greyed out.
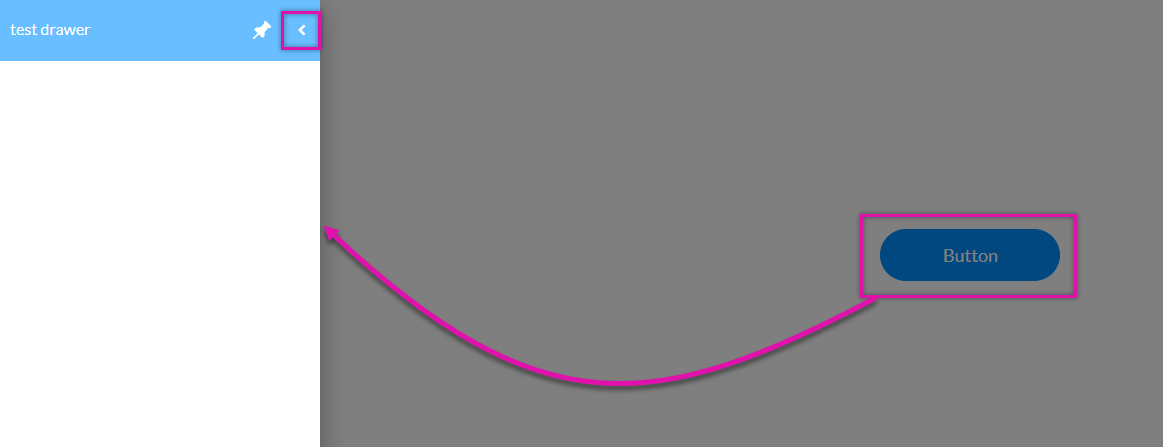
1. Click on the button link icon. The On Click Action Window opens.

2. Click the Start + icon. The Add Node screen opens.
3. Select Drawer/Modal and click Next.

4. Ensure the Enable toggle switch is on, use the drop-down to select the drawer to which you want to apply the action, and select the Toggle radio button. Click Next.

5. Add a Tag and click Insert.
The node is added.
6. Click Apply.

Save and Preview. When the button is clicked, the drawer opens. To close the drawer, click the arrow. You can also pin the drawer in place. Due to the enabled lightbox feature, the home page is greyed out.

07 Hide and Reset the Drawer
You can configure the drawer to reset any input each time it is displayed.
1. Click the link icon for the button inside the drawer. The On Click Action screen opens.

2. Click the Start + icon. The Add Node screen opens.
3. Select Drawer/Modal and click Next.

4. Ensure the Enable toggle switch is on, use the drop-down to select the drawer to which you want to apply the action, and select the Hide radio button. Click Next.
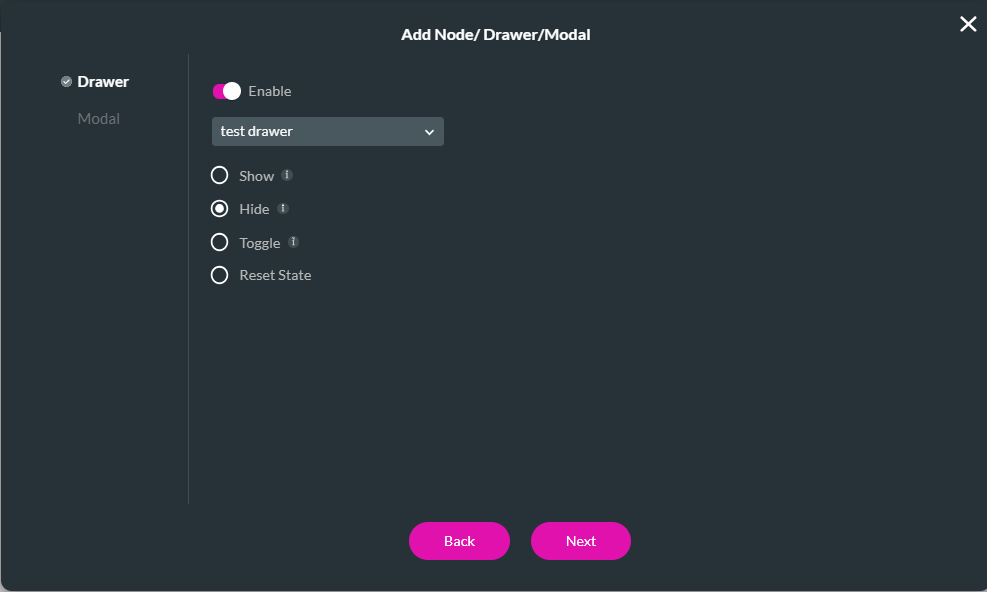
5. Add a Tag and click Insert.
The node is added.
6. Click the hide Drawer/Modal + icon.
7. Select Drawer/Modal and click Next.

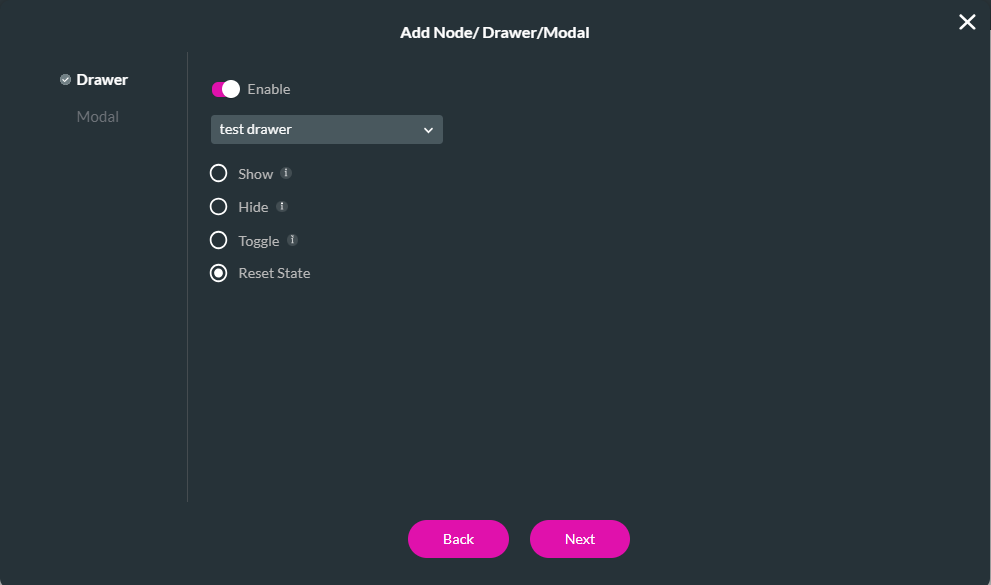
8. Ensure the Enable toggle switch is on. Use the drop-down menu to select the drawer to which you want to apply the action, and select the Reset State radio button. Click Next.
9. Add a Tag and click Insert.
The node is added.
10. Click Apply.
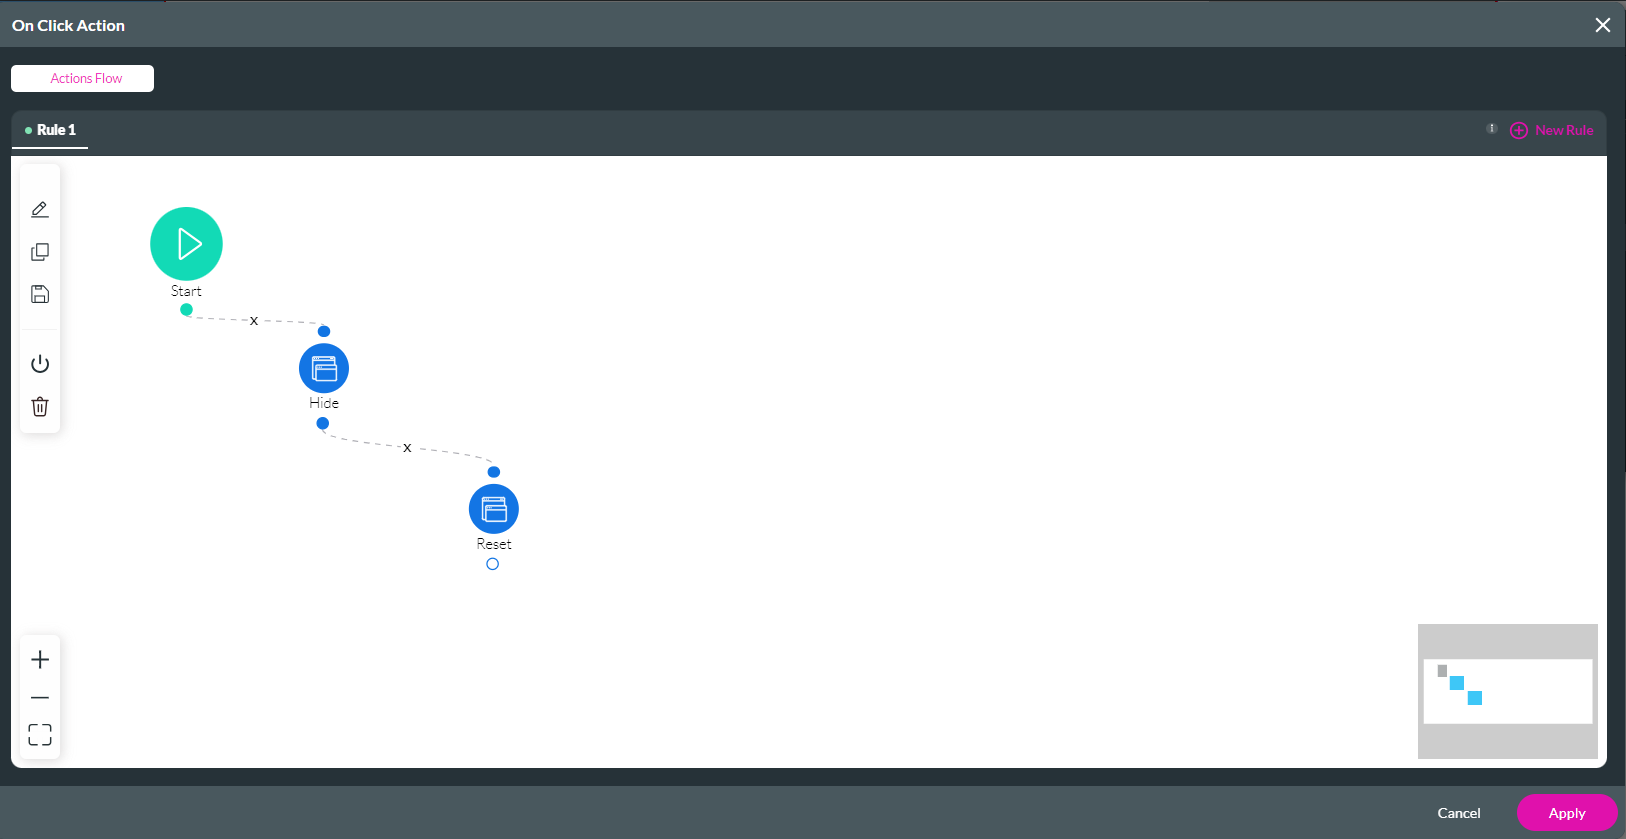
Save and preview. To display the drawer, click the page button, enter the input text, and click the drawer button. The drawer closes.

Click the page button again; the text you inserted has been removed.

1. Click the link icon for the button inside the drawer. The On Click Action screen opens.

2. Click the Start + icon. The Add Node screen opens.
3. Select Drawer/Modal and click Next.

4. Ensure the Enable toggle switch is on, use the drop-down to select the drawer to which you want to apply the action, and select the Hide radio button. Click Next.

5. Add a Tag and click Insert.
The node is added.
6. Click the hide Drawer/Modal + icon.
7. Select Drawer/Modal and click Next.

8. Ensure the Enable toggle switch is on. Use the drop-down menu to select the drawer to which you want to apply the action, and select the Reset State radio button. Click Next.

9. Add a Tag and click Insert.
The node is added.
10. Click Apply.

Save and preview. To display the drawer, click the page button, enter the input text, and click the drawer button. The drawer closes.

Click the page button again; the text you inserted has been removed.
